Landmark Lighting D20R2 06 99 Users Manual The Monitor For MVS 2.0 System Administrator's Guide
2015-02-09
: Landmark-Lighting Landmark-Lighting-D20R2-06-99-Users-Manual-570117 landmark-lighting-d20r2-06-99-users-manual-570117 landmark-lighting pdf
Open the PDF directly: View PDF ![]() .
.
Page Count: 120 [warning: Documents this large are best viewed by clicking the View PDF Link!]
- Main Menu
- Title Page
- Copyright Page
- Contents
- Using this Guide
- Chapter 1: Installation Verification Procedure
- Chapter 2: Security Definitions
- How Product Security Works
- Tracing Security Problems
- Using External Security
- Using User Exit Security
- Using Internal Security
- Security Definitions Menu
- User Profiles Directory
- User Definition
- Secured Functions Directory
- Function Code Table
- Profiles/Resources Directory
- Detail Profile Definition
- Function Access Level Table
- Chapter 3: Landmark Product Communication
- Chapter 4: Support and Maintenance
- Appendix: TMON for MVS Sample Library
- Index
D20R2-06/99
System
Administrator’s
Guide
Version 2.0
...a component of the PerformanceWorks for MVS and OS/390 solution suite
Features include the NaviGate communications interface
The Monitor for MVS Version 2.0 – a component of the PerformanceWorks for MVS and OS/390
solution suite. Features include the NaviGate communications interface.
System Administrator’s Guide
This manual applies to The Monitor for MVS (TMON for MVS), a proprietary software product of
Landmark Systems Corporation. In North America, Landmark markets and supports TMON for MVS.
Internationally, TMON for MVS is marketed and supported by a network of software marketing firms.
The information contained herein is subject to change. Address comments to:
Landmark Systems Corporation
12700 Sunrise Valley Drive
Reston, Virginia 20191-5804
1-800-775-LMRK (1-800-775-5675)
1-703-464-1300
Edition Date ........... June 1999
D20R2-06/99
Landmark Systems Corporation, the Landmark logo, NaviGate, NaviGraph, NaviPlex,
PerformanceWorks, Pinnacle, and The Monitor are registered trademarks of Landmark Systems
Corporation.
UNIX is a registered trademark in the United States and other countries licensed exclusively through
X/Open Company, Ltd. All other product and brand names mentioned are trademarks or registered
trademarks of their respective holders.
For definitive information with respect to CICS data areas (including control blocks), you should refer
to the appropriate IBM publication as identified in the CICS Library Guide (GC33-0356).
© 1988, 1999 by Landmark Systems Corporation
All rights reserved
This licensed work is confidential and proprietary and the property of Landmark Systems Corpora-
tion. Reproduction, disclosure, or use without the specific written authorization of Landmark Sys-
tems Corporation is strictly prohibited.

Contents
Using this Guide . . . . . . . . . . . . . . . . . . . . . . . . . . . . . iii
Organization of this Guide . . . . . . . . . . . . . . . . . . . . . . . . iii
Notational Conventions . . . . . . . . . . . . . . . . . . . . . . . . . . iii
Related Documentation . . . . . . . . . . . . . . . . . . . . . . . . . . iv
Comments . . . . . . . . . . . . . . . . . . . . . . . . . . . . . . . . . . vi
Chapter 1: Installation Verification Procedure . . . . . . . . . . . . 1-1
IVP Checklist . . . . . . . . . . . . . . . . . . . . . . . . . . . . . . . 1-1
IVP Steps . . . . . . . . . . . . . . . . . . . . . . . . . . . . . . . . . . 1-1
Chapter 2: Security Definitions . . . . . . . . . . . . . . . . . . . . 2-1
How Product Security Works . . . . . . . . . . . . . . . . . . . . . . 2-2
Tracing Security Problems . . . . . . . . . . . . . . . . . . . . . . . . 2-4
Using External Security . . . . . . . . . . . . . . . . . . . . . . . . . 2-4
Using User Exit Security . . . . . . . . . . . . . . . . . . . . . . . . . 2-8
Using Internal Security . . . . . . . . . . . . . . . . . . . . . . . . . . 2-9
Security Definitions Menu . . . . . . . . . . . . . . . . . . . . . . . 2-14
User Profiles Directory . . . . . . . . . . . . . . . . . . . . . . . . . 2-16
User Definition . . . . . . . . . . . . . . . . . . . . . . . . . . . . . 2-18
Secured Functions Directory . . . . . . . . . . . . . . . . . . . . . . 2-21
Function Code Table . . . . . . . . . . . . . . . . . . . . . . . . . . 2-24
Profiles/Resources Directory . . . . . . . . . . . . . . . . . . . . . 2-33
Detail Profile Definition . . . . . . . . . . . . . . . . . . . . . . . . 2-36
Function Access Level Table . . . . . . . . . . . . . . . . . . . . . . 2-41
Chapter 3: Landmark Product Communication . . . . . . . . . . . 3-1
Access Methods . . . . . . . . . . . . . . . . . . . . . . . . . . . . . . 3-1
Setting Up Landmark Product Communication . . . . . . . . . . . 3-3
Using Explicit Pass-Through . . . . . . . . . . . . . . . . . . . . . 3-10
Using Implicit Pass-Through . . . . . . . . . . . . . . . . . . . . . 3-12
Using NaviGate . . . . . . . . . . . . . . . . . . . . . . . . . . . . . 3-13
Remote Sessions Directory . . . . . . . . . . . . . . . . . . . . . . . 3-18
Remote Session Definition . . . . . . . . . . . . . . . . . . . . . . . 3-21
Remote Sessions Logon . . . . . . . . . . . . . . . . . . . . . . . . 3-24
Chapter 4: Support and Maintenance . . . . . . . . . . . . . . . . 4-1
Customer Service Satisfaction Guarantee . . . . . . . . . . . . . . . 4-1
Year 2000 Compliance Warranty . . . . . . . . . . . . . . . . . . . . 4-2
Product Support . . . . . . . . . . . . . . . . . . . . . . . . . . . . . . 4-2
Product Maintenance . . . . . . . . . . . . . . . . . . . . . . . . . . . 4-8
Configuration Changes and Disaster Recovery . . . . . . . . . . . 4-10
Appendix: TMON for MVS Sample Library . . . . . . . . . . . . . . A-1
Index
The Monitor for MVS 2.0 i
System Administrator’s Guide

Contents
ii

Using this Guide
The Monitor for MVS System Administrator’s Guide includes
information on the TMON for MVS installation verification
procedure as well as support and maintenance procedures. It also
includes information on security, the TMON for MVS Performance
Database, NaviGate, and the distributed sample library.
The audience for this guide includes both technicians and
managers in systems, programming, capacity planning, operations,
and security. A basic understanding of MVS is assumed.
This section provides an overview of the guide, the conventions
used to document product use, and a list of related documentation.
It also describes how to submit comments to Landmark.
Organization of this Guide
This guide is organized into the following chapters and appendix.
Chapter 1: Installation Verification Procedure
Provides a detailed TMON for MVS installation verification
procedure to help ensure all installation steps, documented in
PerformanceWorks for MVS and OS/390 Installation Guide, are
successfully completed.
Chapter 2: Security Definitions
Provides information on using Landmark’s security facilities to
secure TMON for MVS functions.
Chapter 3: Landmark Product Communication
Explains how to use Landmark product communication to define a
network between products and monitor address spaces anywhere
in the network.
Chapter 4: Support and Maintenance
Describes the procedures, including standard maintenance, that
help Customer Services efficiently assist you with TMON for MVS.
Please read this chapter before contacting Customer Services or
your international representative.
Appendix: TMON for MVS Sample Library
Describes the members of the TMON for MVS sample library.
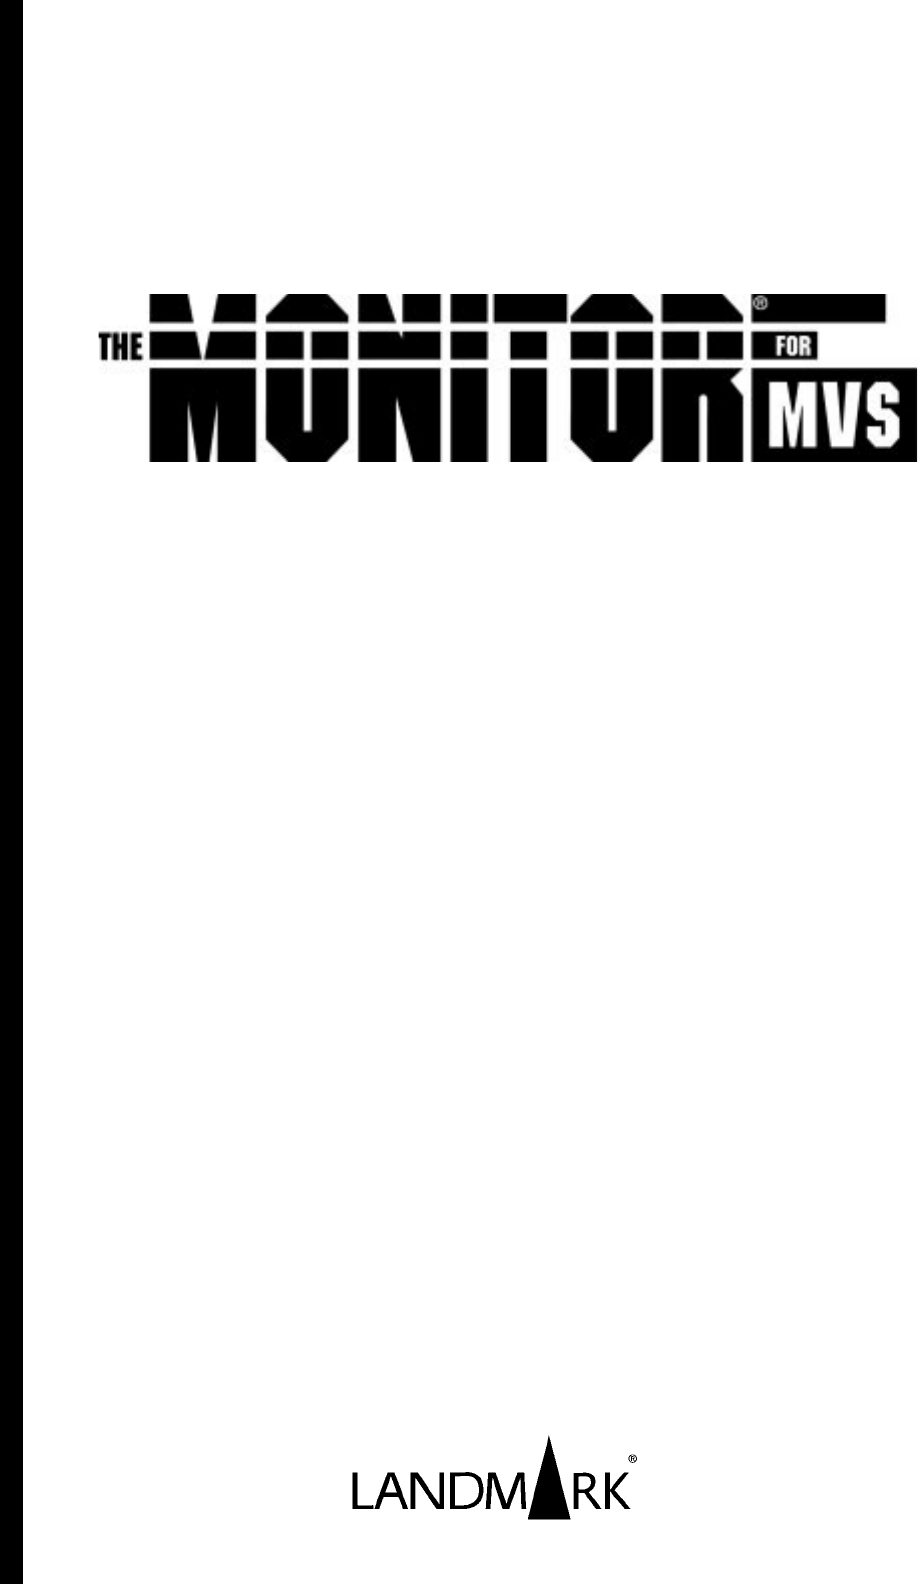
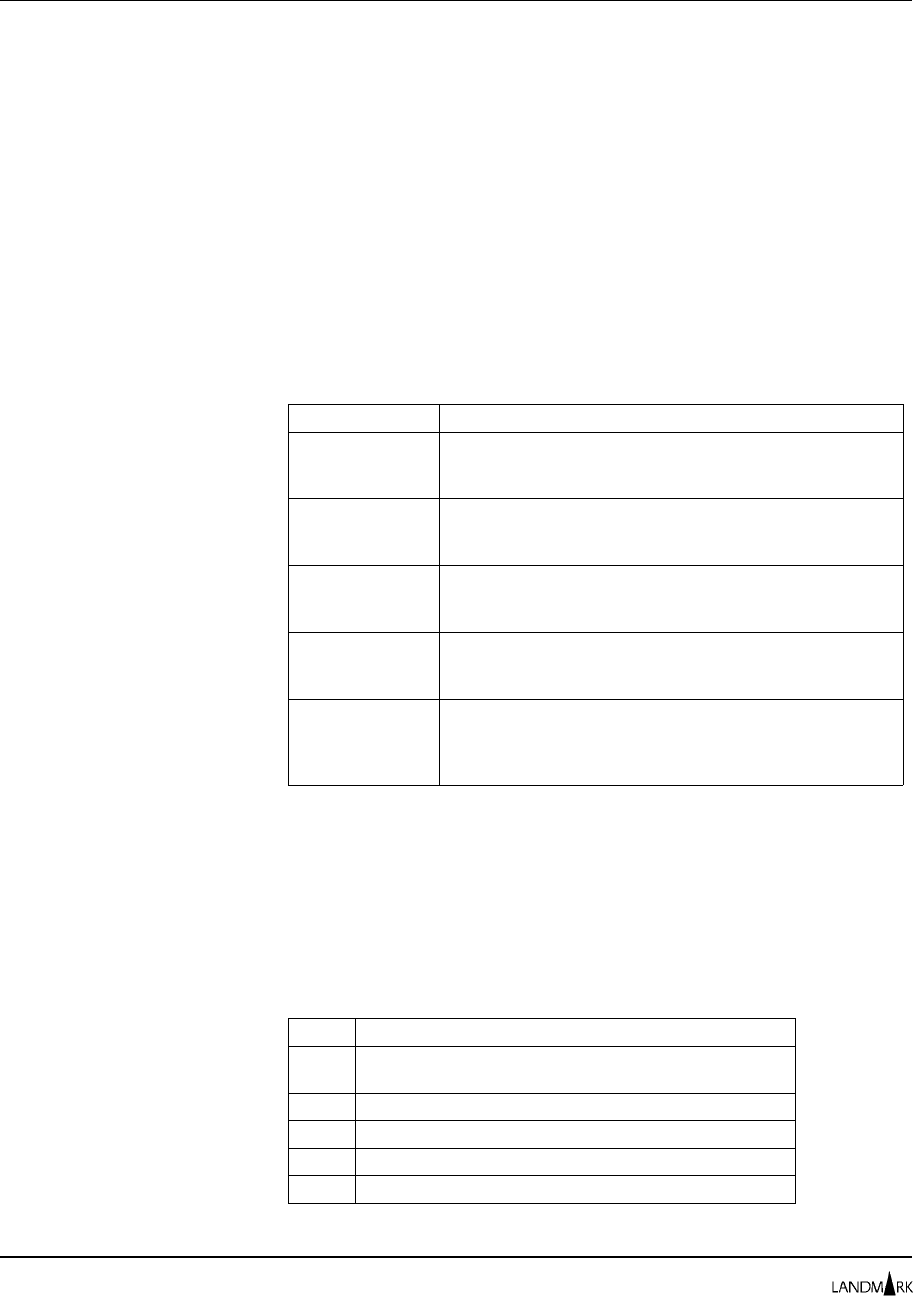
Notational Conventions
The following notational conventions are used in this guide.
Notation Description
b A b with a slash through it indicates a blank.
... An ellipsis indicates that the previous parameter or
command can be repeated.
The Monitor for MVS 2.0 iii
System Administrator’s Guide
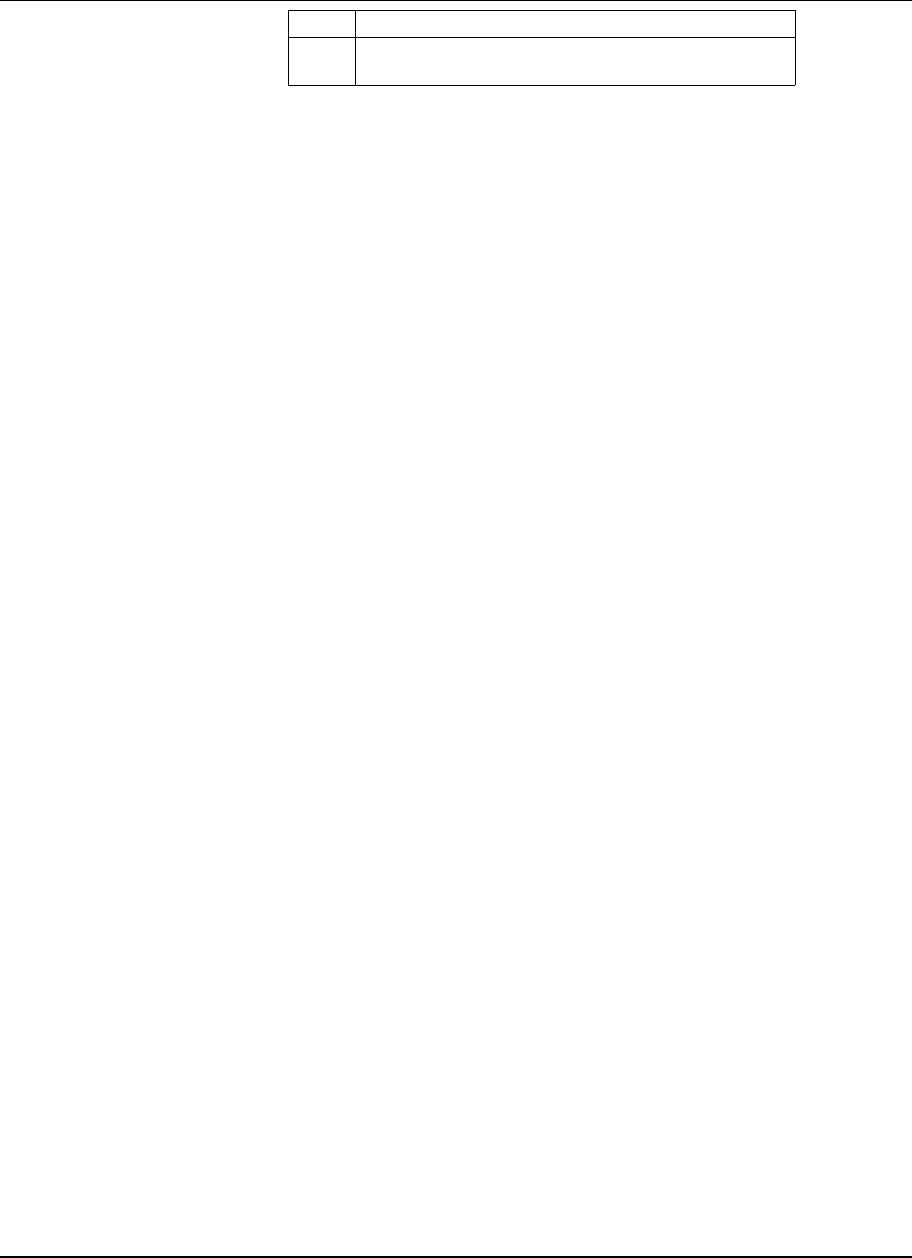
Notation Description
’ = , ( ) + - * / These special characters punctuate commands and
command options. The characters must be entered
exactly as shown.
{ } Braces surround required command parameters.
[ ] Brackets surround command options.
| Vertical bars separate command options. Choose one
option from the list.
➥An arrow identifies a cursor-selectable field or line.
A compass identifies a field that has a built-in connection
to another Landmark MVS product in the same processor
complex. If the other product is active and defined to your
system, cursor-select the field to pass-through to it.
DD When used in a display format, “DD” indicates the day in a
date, from “01” through “31”.
hh When used in a display format, “hh” indicates hundredths
of a second.
HH When used in a display format, “HH” indicates the hour of
a day, from “00” through “23”.
lowercase Lowercase characters in command format show
information you must supply.
Mixed Case Mixed-case characters in command format show
abbreviations for commands. Only the uppercase letters
must be entered.
MM When used in a display format, “MM” indicates minutes or
months. If used in a time field, it represents the minutes
of the hour, from “01” through “59”. If used in a date field,
it represents the month in the year, from “01” through “12”.
n When used in a display format, “n” indicates an integer.
The number of n’s displayed represents the number of
digits in the integer.
SS When used in a display format, “SS” indicates the seconds
of a time field, from “00” through “59”.
t When used in a display format, “t” indicates tenths,
thousandths, or ten thousandths of a second.
YY When used in a display format, “YY” indicates the year.
underlined text Default values are underlined.
UPPERCASE Uppercase characters identify commands or control
statements. These characters must be entered exactly as
shown.
Related Documentation
To order additional copies of
TMON for MVS
documentation, see the order
form in The Monitor for
MVS Release Guide.
The PerformanceWorks for MVS and OS/390 Online Documentation
Library CD-ROM provides all the TMON for MVS documentation
in BookManager READ and Adobe Acrobat Reader formats. It also
provides a copy of Adobe Acrobat Reader.
In addition to this guide, the TMON for MVS documentation
library includes:
Related Documentation Using this Guide
iv

•The Monitor for MVS Release Guide, which familiarizes TMON
for MVS users with the features in the product.
•PerformanceWorks for MVS and OS/390 Installation Guide, which
includes everything you need to know to install
PerformanceWorks for MVS and OS/390. It describes the
installation procedures designed to enable you to get
PerformanceWorks up and running as quickly and smoothly as
possible. It also addresses a number of the facilities and special
interfaces available to you with the installation of
PerformanceWorks.
•The Monitor for MVS Reference Manual, which provides an
overview of TMON for MVS as well as complete information
for online product use.
•The Monitor for MVS Report Writer, which contains two
sections:
–Report Writer Reference Manual provides an overview of
Report Writer capabilities and general usage guidelines
that apply to all Landmark performance monitors. Report
Writer JCL and control statements also are provided in this
section.
–The Monitor for MVS Report Writer Supplement provides
product-specific information, such as data elements,
sample reports, and explanations of product databases and
record types.
The appendixes contain Report Writer messages and codes as well
as tips for using the Report Writer.
•The Monitor for MVS Messages and Codes, which includes error
messages and abnormal termination codes for all TMON for
MVS batch and online processing.
•Landmark File Services User’s Guide, which describes all LFS
components, functions, and commands. It also includes a
product appendix describing the LFS file structure and
SAMPLIB members supplied when you install TMON for MVS.
•Electronic Customer Service System User’s Guide, which describes
Landmark’s Electronic Customer Service system (ECS) that you
can use to access product maintenance 24 hours a day. It
describes hardware and software requirements, registration
procedures, and how to access ECS through the Internet and
Telnet. It also tells you how to access information in a product
conference and download that information from ECS.
Instructions for uploading information to Landmark Customer
Services using a file transfer protocol also are provided.
Using this Guide Related Documentation
The Monitor for MVS 2.0 v
System Administrator’s Guide

Comments
If you find an error or have any suggestions on how this
publication can better meet your needs, either send an e-mail to
Customer Services at its@landmark.com or call them at
1-800-775-LMRK (5675). When reporting a documentation error,
include the name of the publication, chapter number, section name,
and a detailed description of the error.
Comments Using this Guide
vi

Chapter 1: Installation Verification Procedure
After you have successfully installed TMON for MVS, as described
in PerformanceWorks for MVS and OS/390 Installation Guide, follow
the installation verification procedure (IVP) documented in this
chapter to ensure the base TMON for MVS product is properly
installed and functioning in your environment.
IVP Checklist
The following checklist indicates the TMON for MVS components
you will verify during the IVP. Call Customer Services or your
international representative if you have any problems.
1. Verify the System Selection Menu.
2. Verify the Activity Monitor.
3. Verify the Exception Monitor.
4. Verify the Graphic Monitor.
5. Verify Collection Analysis.
6. Verify Supertrace.
7. Verify Utilities.
8. Verify the Delay Monitor.
9. Verify Remote Sessions.
10. Verify the TMON for CICS NaviGate connection.
11. Verify the TMON for DB2 NaviGate connection.
IVP Steps
This section includes step-by-step instructions to execute the IVP.
Complete the steps in the order they appear. These steps can be
run during one TMON for MVS session.
1. Verify the System Selection Menu.
The System Selection Menu is the first screen displayed after you
log onto TMON for MVS and enter your user ID and password.
a. Cursor-select a TMON for MVS system to display the
Primary Menu.
b. To choose an option from the Primary Menu, complete one of
the following steps.
The Monitor for MVS 2.0 1-1
System Administrator’s Guide

◊Enter the option number in the SELECTION field.
◊Cursor-select the option number.
◊Enter =n, where “n” is the option number.
2. Verify the Activity Monitor.
a. Select Option 1, Activity Monitor, from the Primary Menu to
display the Activity Monitor Menu.
b. Select Option 1, System Activity, to display the System
Activity Monitor Menu.
c. Select Option 1, CPU Activity Display, to display the CPU
Activity Display screen. It presents statistics describing the
mix of work and I/O activity currently executing. The
execution status of the workload on the system and
performance statistics for each processor in the physical
configuration are also displayed.
d. Press END or the PF3 key to return to the System Activity
Monitor Menu.
e. Select Option 8, Expanded Storage Activity, to display the
Expanded Storage Activity screen. Press ENTER to display
statistics. This screen shows how your expanded storage is
being used. It measures both allocation and activity to and
from expanded storage.
f. Press END or the PF3 key twice to return to the Activity
Monitor Menu.
g. Select Option 2, Workload Monitor, to display the Workload
Monitor Menu.
h. Select Option 1, Workload Service Activity, to display the
Workload Service Activity screen. It provides an overview
of resource consumption and response time information for
each workload defined to TMON for MVS.
i. Press END or the PF3 key twice to return to the Activity
Monitor Menu.
j. Select Option 3, Job Execution Monitor, to display the Job
Execution Monitor screen. It displays systemwide
statistics, the current status, and resource use of all jobs
shown.
k. Cursor-select a job name to display the Job Detail Selection
Menu.
l. Press END or the PF3 key twice to return to the Activity
Monitor Menu.
m. Select Option 4, Virtual Storage Monitor, to display the
Virtual Storage Monitor Menu.
n. Select Option 4, Common Storage Monitor, to display the
Common Storage Monitor Menu.
IVP Steps Chapter 1: Installation Verification Procedure
1-2

o. Select Option 5, Common Storage Summary, to display the
Common Storage Summary screen. It shows information
about the allocation and use of common storage areas.
p. Press END or the PF3 key three times to return to the Activity
Monitor Menu.
q. Select Option 5, Performance Parameters, to display the
Performance Parameters Menu.
r. Select Option 2, Logical Swap Constants, to display the
Logical Swap Constants screen. It shows the thresholds
and measurements that SRM uses to control logical
swapping.
s. Press END or the PF3 key twice to return to the Activity
Monitor Menu.
t. Select Option 6, I/O Monitor, to display the I/O Monitor
Menu.
u. Select Option 4, LCU Activity Monitor, to display the LCU
Activity Monitor screen. It provides an overall view of I/O
activity on your system by LCU.
v. Enter MAINMENU or = on the command line to return to the
Primary Menu.
3. Verify the Exception Monitor.
a. Select Option 2, Exception Monitor, from the Primary Menu
to display the Exception Monitor Menu.
b. Select Option 5, Threshold Recommendation Utility, to
display the Threshold Recommendation Utility screen. You
can use this screen to analyze your site’s performance data
to determine suggested threshold values that correspond to
the percentiles you specified for each exception severity
level.
c. Enter MAINMENU or = on the command line to return to the
Primary Menu.
4. Verify the Graphic Monitor.
a. Select Option 3, Graphic Monitor, from the Primary Menu to
display the Graphic Monitor screen. It provides a snapshot
of the activity on your system.
b. Cursor-select the CPU BUSY field to display the CPU Activity
Display screen.
c. Enter MAINMENU or = on the command line to return to the
Primary Menu.
5. Verify Collection Analysis.
a. Select Option 4, Collection Analysis, from the Primary Menu
to display the Collection Analysis Graphic Review screen.
It shows resource consumption and TSO first period
response time.
Chapter 1: Installation Verification Procedure IVP Steps
The Monitor for MVS 2.0 1-3
System Administrator’s Guide

b. Cursor-select the CPU BUSY field to display the CPU History
Activity Menu.
c. Enter MAINMENU or = on the command line to return to the
Primary Menu.
6. Verify Supertrace.
a. Select Option 5, Supertrace, from the Primary Menu to
display the Supertrace Menu.
b. Select Option 4, System Memory Profile, to display the
System Memory Profile screen. It shows information on
storage usage by address space during the last interval.
c. Enter MAINMENU or = on the command line to return to the
Primary Menu.
7. Verify Utilities.
a. Select Option 6, Utilities, from the Primary Menu to display
the Utilities Menu.
b. Select Option 1, Systems Services, to display the Systems
Services Menu.
c. Select Option 1, APF Utility, to display the APF Utility screen.
It shows the data set name and volume serial number of
every currently authorized library in the APF list.
d. Enter MAINMENU or = on the command line to return to the
Primary Menu.
8. Verify the Delay Monitor.
a. Select Option 7, Delay Monitor, from the Primary Menu to
display the Delay Monitor Menu.
b. Select Option 1, Delay Analysis Summary, to display the
Delay Analysis Summary screen. It shows a breakdown of
delay activity by job.
c. Enter MAINMENU or = on the command line to return to the
Primary Menu.
9. Verify Remote Sessions.
a. Select Option S, System Administration, from the Primary
Menu to display the System Administration Menu.
b. Select Option 1, Remote Sessions, to display the Remote
Sessions Directory screen. It lists all Landmark products
defined in your network.
Review each entry. If no changes are required, skip Steps c and
d.
c. If the VTAM definition shipped in the TMON for MVS
.INSTLIB has been modified by your site, enter the prefix
characters of VTAM SLU names in the SLU APPLID
PREFIX field. (The shipped TMON for MVS default is
IVP Steps Chapter 1: Installation Verification Procedure
1-4

“TMV”). Your site-specified SLU APPLID PREFIX remains
on the screen.
d. If the applids defining other Landmark PerformanceWorks
MVS products have been modified at your site, select the
appropriate line, overtype the applid, and cursor-select
ADD. You will receive the following message.
LMRK00904I RECORD WAS SUCCESSFULLY ADDED
If any other message is received, refer to The Monitor for MVS
Messages and Codes to determine the reason for the message
and the corrective action.
Repeat Step d for each entry that requires modification.
e. Enter =A.1 on the command line to display the Remote
Sessions Logon screen. You can use this screen to access an
applid of another Landmark product.
f. Cursor-select any line that reflects a status of “ACTIVE”. You
should be transferred to the selected Landmark
PerformanceWorks MVS product.
g. Press the PF3 key or enter LOGOFF on the command line to
return to the TMON for MVS Remote Sessions Logon
screen.
10. Verify the TMON for CICS NaviGate connection.
a. Enter =1.3 on the command line to display the Job Execution
Monitor screen.
b. Tab twice to position the cursor at the DISPLAY field, and
enter C. The display of active tasks is reduced to show only
CICS tasks.
c. Cursor-select any CICS task to display the Job Detail Selection
Menu.
d. Select Option 11, NaviGate to CICS/DB2 Monitor, to display
the TMON for CICS Primary Menu.
e. Select Option 4, MVS Contention Monitor, to display the MVS
Contention Monitor Menu.
f. Select Option 1, Active Job Summary, to display the TMON
for MVS Job Execution Monitor screen.
g. Press the PF3 key to display the TMON for CICS MVS
Contention Monitor Menu.
h. Select Option 2, Detailed Analysis, to display the TMON for
MVS Job Delay Analysis screen.
i. Press the PF3 key to display the TMON for CICS MVS
Contention Monitor Menu.
j. Enter =7 on the command line to display the TMON for CICS
File/DB Analysis Menu.
Chapter 1: Installation Verification Procedure IVP Steps
The Monitor for MVS 2.0 1-5
System Administrator’s Guide

k. Select Option 1, File/DB Activity, to display the TMON for
CICS File/DB Activity Selection Menu.
l. Tab to the SUMMARIZE BY field, overtype the “1” with a “2”
and press ENTER. The TMON for CICS File/DB Activity
screen is displayed.
m. Cursor-select any active volume listed in the VOLSER
column to display the Device Detail Selection Menu. The
following message appears on the screen.
TMVS18879I - I/O PROFILE SUCCESSFULLY STARTED
Press ENTER.
Wait approximately two minutes before proceeding to the next
step unless the following message appears on the screen.
TMVS09701I I/O PROFILE COMPLETED. TYPE =5.1 TO ACCESS PROFILE MENU
n. Enter =5.1 on the command line to display the TMON for
MVS Profile Status/Selection screen.
o. Cursor-select the completed I/O profile to display the I/O
Profile screen.
p. Enter KEEP on the command line. The following message
appears on the screen.
TMVS14002I - TRACE DATA IS NOW KEPT
q. Enter MAINMENU or = on the command line to display the
TMON for MVS Primary Menu.
r. Enter LOGOFF on the command line and press ENTER to
return to the TMON for CICS File/DB Activity Display
screen.
s. Enter LOGOFF on the command line and press ENTER to
return to the TMON for MVS Job Execution Monitor screen.
At this point, all connections to TMON for CICS should have been
terminated automatically with the reverse-video name of the
“current” monitor (bottom center of border) removed.
11. Verify the TMON for DB2 NaviGate connection.
a. Enter =1.3 on the command line to display the Job Execution
Monitor screen.
b. Tab twice to position the cursor at the DISPLAY field, and
enter D. The display of active tasks is reduced to show
only DB2 tasks.
c. Cursor-select any DB2 task to display the Job Detail Selection
Menu.
d. Select Option 11, NaviGate to CICS/DB2 Monitor, to display
the TMON for DB2 Primary Menu.
IVP Steps Chapter 1: Installation Verification Procedure
1-6

e. Select Option 4, Active Job Summary, to display the TMON
for MVS Job Execution Monitor screen.
f. Press the PF3 key to display the TMON for MVS Primary
Menu.
g. Press the PF3 key to display the TMON for DB2 Primary
Menu.
h. Press the PF3 key to display the TMON for MVS Job
Execution Monitor screen.
At this point, all connections to TMON for DB2 should have been
terminated automatically with the reverse-video name of the
“current” monitor (bottom center of border) removed.
i. Enter LOGOFF on the command line to log off of TMON for
MVS.
Chapter 1: Installation Verification Procedure IVP Steps
The Monitor for MVS 2.0 1-7
System Administrator’s Guide

Chapter 1: Installation Verification Procedure
1-8
Chapter 2: Security Definitions
You can secure access to your Landmark PerformanceWorks MVS
product and its individual functions using three different methods:
External Security, User Exit Security, and Internal Security. You
also can choose not to secure product functions at all. Use the
Security Definitions Menu to select the particular type of security
you want.
External Security controls product usage through IBM’s system
authorization facility (SAF), which transfers control to security
products such as RACF, CA-ACF2, and CA-TOP SECRET.
User Exit Security lets you create your own security system through
user exits.
Internal Security controls product usage through screens described
in this chapter. Please note that while Internal Security provides
complete protection of all secured functions, it does not produce an
audit trail. If your site requires an audit trail, use External Security
to protect access to secured functions.
Landmark PerformanceWorks MVS products check security in the
following two areas.
•User logon security controls the ability to log onto the product.
•Function security protects various product functions. Only
specific functions of Landmark PerformanceWorks MVS
products are secured, as defined on the Secured Functions
Directory screen. A complete list of secured functions is
provided later in this chapter.
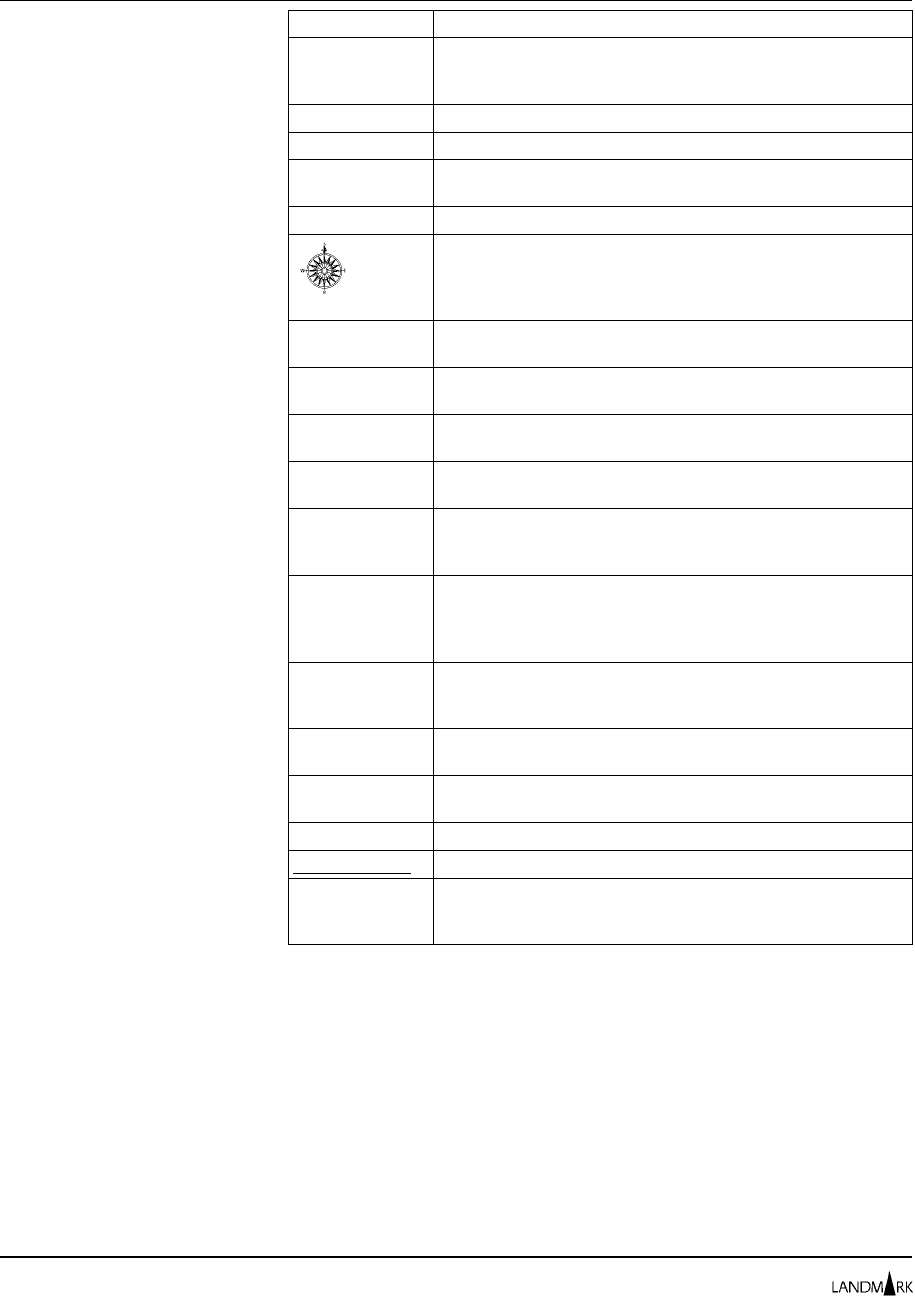
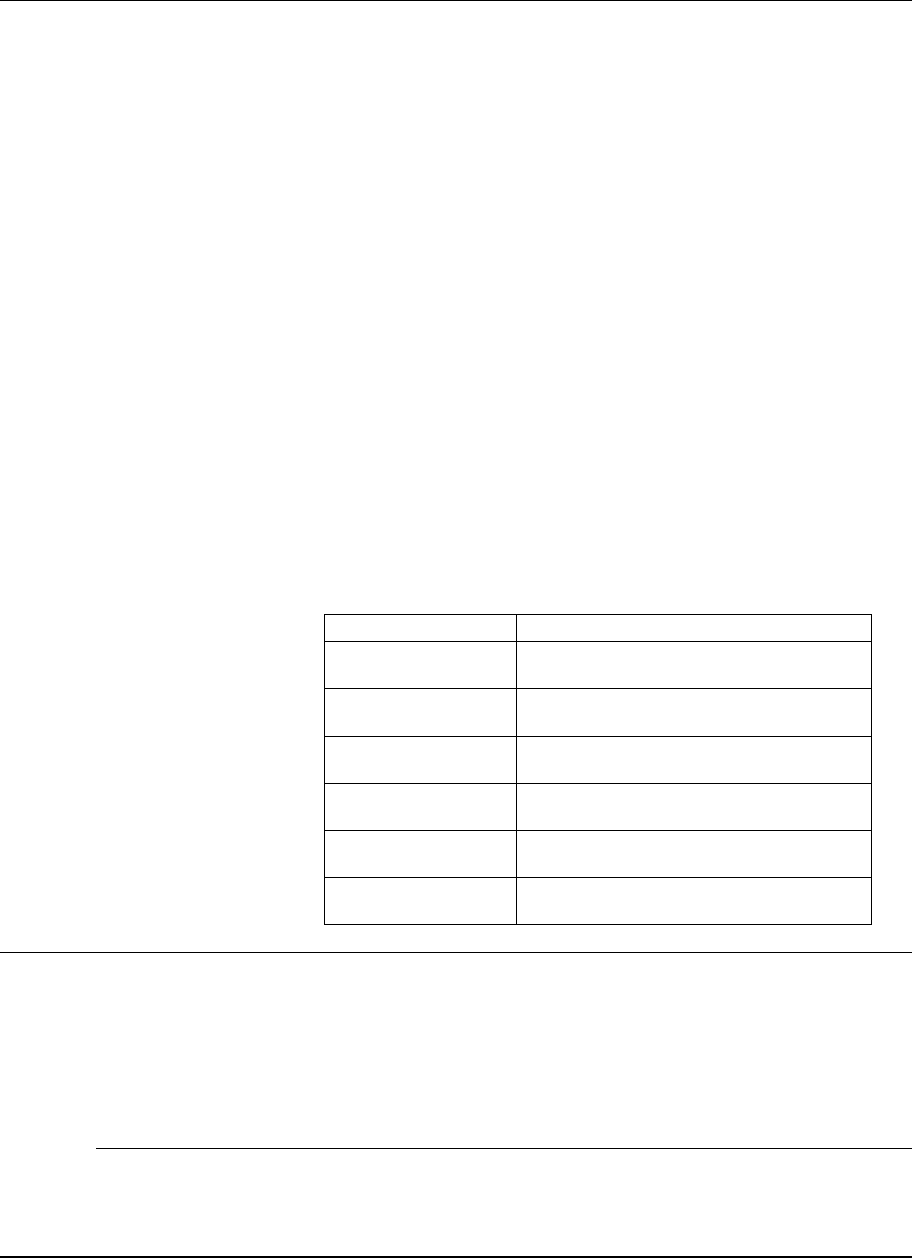
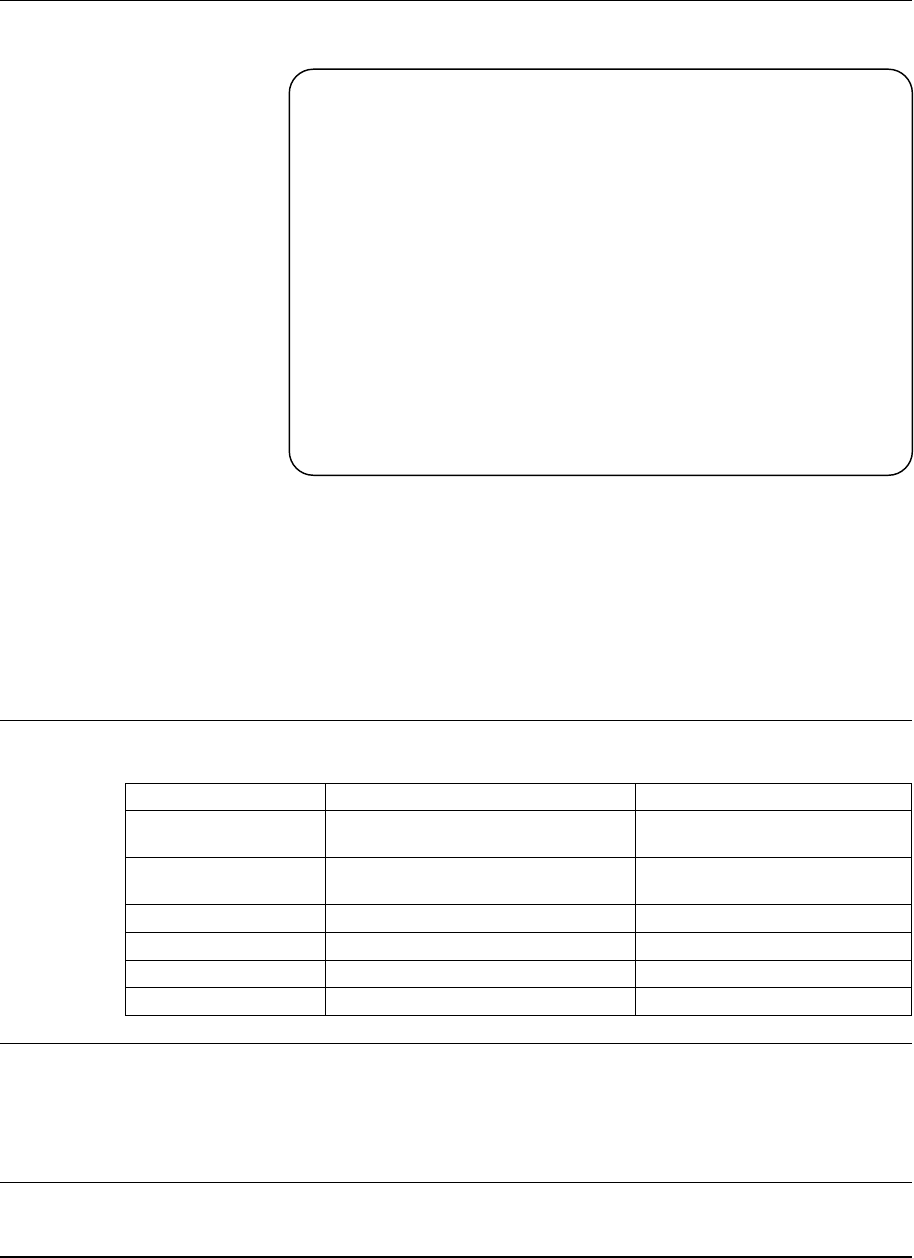
Landmark PerformanceWorks MVS products support certain
combinations of Internal, External, User Exit, and no security for
user logon and function security. For example, you might use
External Security to control user logon access and Internal Security
to control access to functions. The following table identifies the
valid security combinations.
User Logon Security
Type Function Security Type
Internal External User Exit None
External Yes Yes Yes Yes
User Exit Yes No Yes Yes
Internal Yes No Yes Yes
None No No No Yes
Key: Yes = a valid combination No = an invalid combination
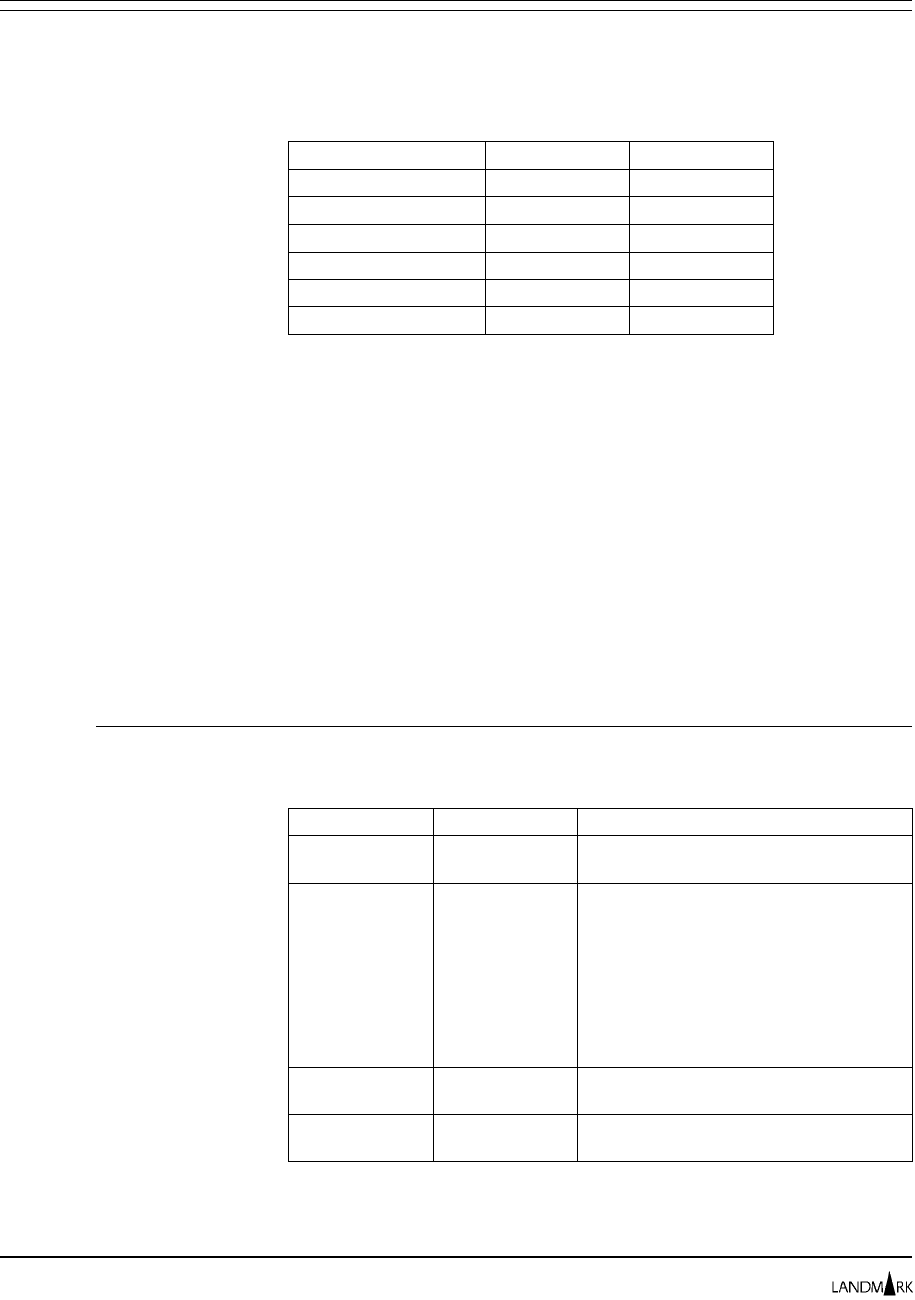
Resolving accidental access
problems caused by security If, while defining your system security, you find you cannot access
your system because of the security you have established, you
must restore the primary control record (the C record) in the
control file. Use the sample JCL provided in the appropriate
member of your product sample library to do the restore. The
The Monitor for MVS 2.0 2-1
System Administrator’s Guide
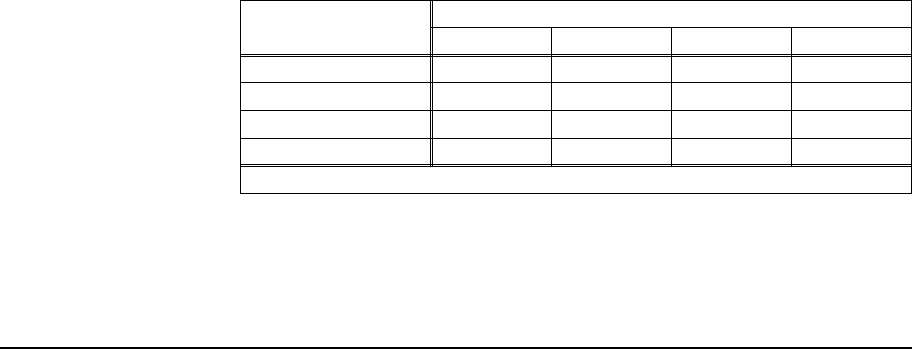
following table identifies the sample library member you should
use for each Landmark PerformanceWorks MVS product.
Member Sample Library
TCECRS TMON for CICS/ESA
TMON8CRS TMON for CICS/MVS
TDBCRS TMON for DB2
TDCCRS TMON for DBCTL
TMQCRS TMON for MQSeries
TMVRSTOR TMON for MVS
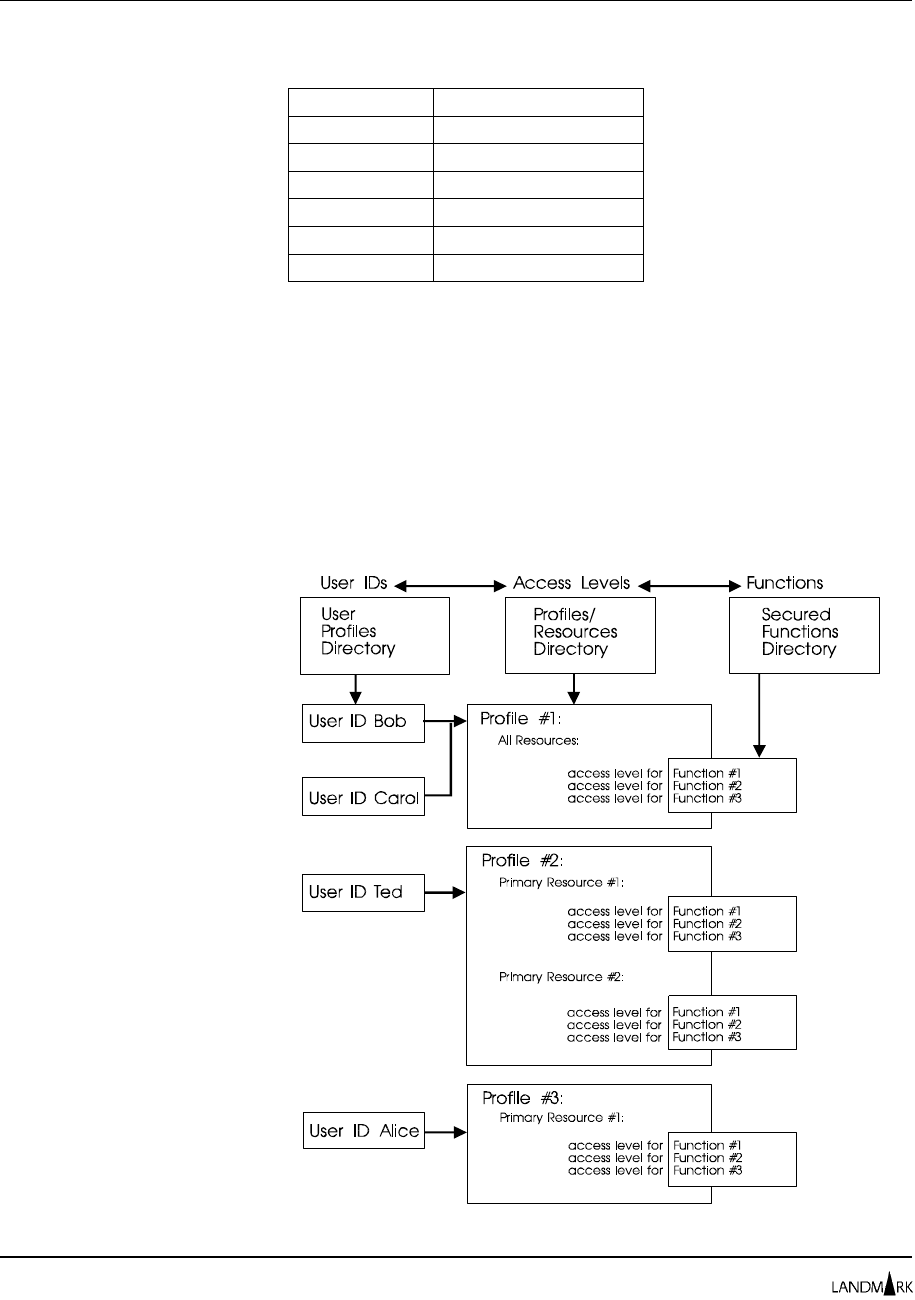
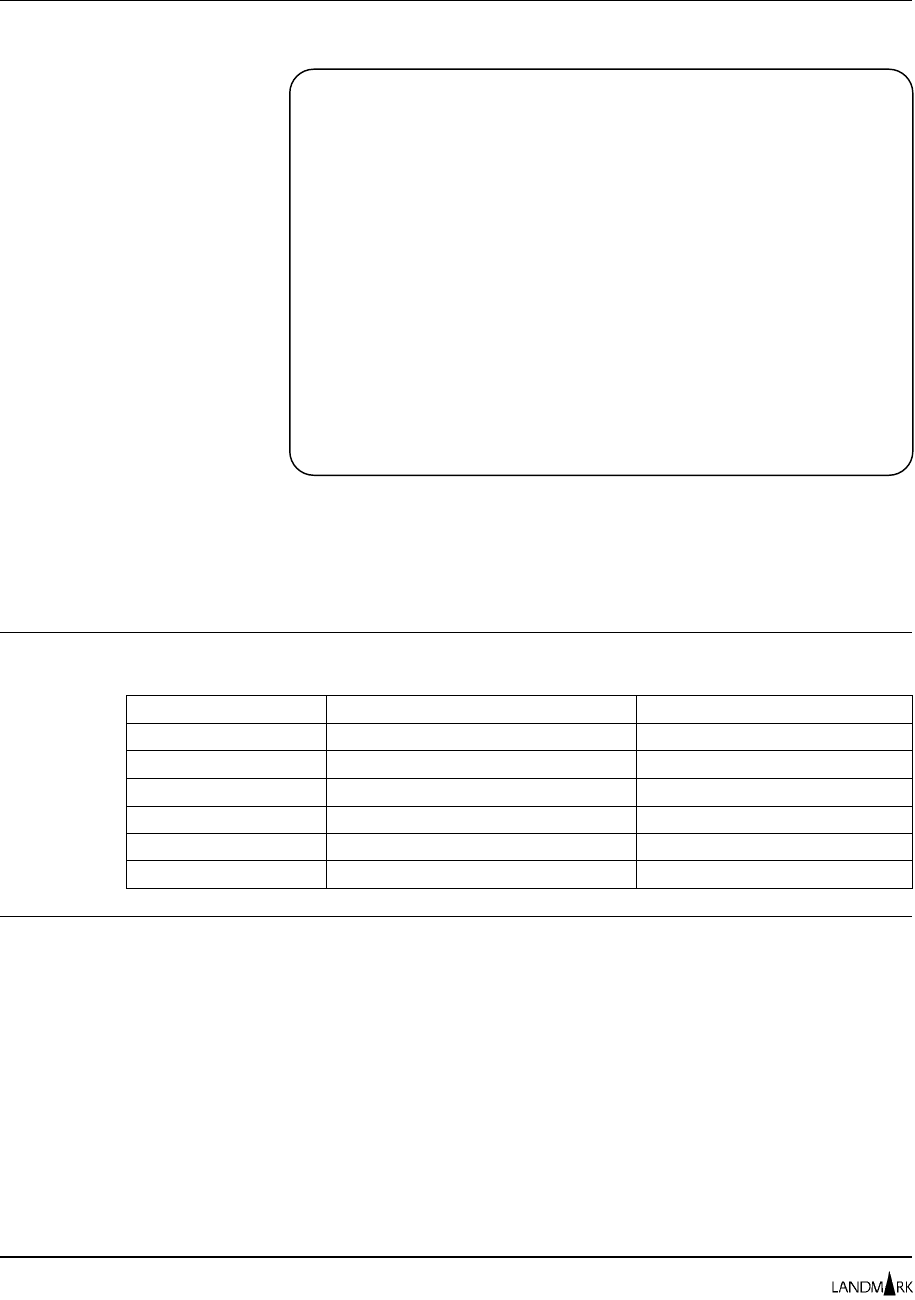
How Product Security Works
This section describes how product security components interact.
Figure 2-1 depicts the interaction of the security components.
Users are authorized to use product functions through access levels
specified in profiles. Profiles explicitly assign an access
(authorization) level for each secured function and supply values
for any required primary resources.
Figure 2-1. Security components
How Product Security Works Chapter 2: Security Definitions
2-2

When a user tries to use a secured function, a security
authorization call is made to verify that the user has the necessary
security clearance. The following information is used in the
security check:
•User ID
•Password (for a sign-on attempt only)
•Function ID
•Access, or authorization, level (NONE, READ, UPDT, CNTL, or
ALTR) of the user ID for the function. Access levels are
described in “Detail Profile Definition,” later in this chapter.
Some Landmark product functions require a primary resource or
both a primary and a secondary resource. These functions are
generically referred to as resource functions. Functions that do not
require resources are called system functions.
•TMON for CICS primary resources are job names; secondary
resources are not used.
•TMON for DB2 primary resources are DB2 subsystem names;
secondary resources are DB2 plan names.
•TMON for DBCTL primary resources are DBCTL subsystem
names; secondary resources are not used. (The primary
resource needed to access a DBCTL subsystem is the DBCTL
subsystem name; thereafter, it is the object name.)
•TMON for MQSeries primary resources are queue manager and
object names; secondary resources are not used. (The primary
resource needed to access a queue manager is the queue
manager name; thereafter, it is the object name.)
•TMON for MVS primary resources are job names or volume
serial numbers; secondary resources are not used.
Primary and secondary resources qualify the security authorization
check. For functions specifying a primary resource, a security
check is made for the function with the specific primary resource.
(For TMON for DB2, if a secondary resource is specified, the
security check is made for the function with both the primary and
secondary resources.) The user is restricted to using the function
only for the resource(s) specified.
TMON for CICS example Suppose you want to restrict the job names displayed on the Job
Selection List screen for a given user. In the following example,
only jobs with job names starting with “DEV” and “TEST” are
displayed on the Job Selection List screen for user ID SAMPLE.
User ID: SAMPLE
Password: Not needed for this security check
Function ID: JOBLIST
Chapter 2: Security Definitions How Product Security Works
The Monitor for MVS 2.0 2-3
System Administrator’s Guide

Access level: READ
Primary resource: DEV* and TEST*
Secondary resource: None
Tracing Security Problems
Regardless of which type of security you choose to implement
(External, Internal, or User Exit), you may need to trace security
processing and resolve a security problem. Landmark provides a
trace facility for Landmark security processing. To start the
security trace during product initialization, add the
TRACE=SECURITY parameter to the appropriate data set specified
in your startup JCL, which is identified by the following ddnames:
•TMONPRMS (for TMON for CICS/ESA and TMON for
CICS/MVS)
•TMDBPRMS (for TMON for DB2)
•TDBCPRMS (for TMON for DBCTL)
•TMQSPRMS (for TMON for MQSeries)
•TMVSPRMS (for TMON for MVS)
Adding this parameter activates a security trace for Internal
Security for the product. Each time a security check is made, the
check is traced. Read about the data set in your product
installation completion instructions in PerformanceWorks for MVS
and OS/390 Installation Guide.
To activate the trace facility when the product is already executing,
enter $TRACEON on the command line. To deactivate the trace
facility once you have started it, enter $TRACEOFF on the
command line.
Using External Security
External Security links to and uses security definitions specified by
external security products that use IBM’s system authorization
facility (SAF), such as RACF, CA-ACF2, and CA-TOP SECRET.
This discussion of External Security provides general instructions
for defining RACF security for your Landmark PerformanceWorks
MVS product. CA-ACF2 instructions are given in member
ACF2DOC in the Strategic Services sample library. CA-TOP
SECRET instructions are given in member TSDOC in the Strategic
Services sample library. If you do not have RACF, CA-ACF2, or
CA-TOP SECRET installed, you must set up corresponding
definitions using the security product you do have installed.
If you use External Security to control user logon access, you can
use any of the security types (internal, external, user exit, or none)
to control access to product functions. If, however, you choose to
Tracing Security Problems Chapter 2: Security Definitions
2-4

use External Security for access to product functions, you also must
use External Security for logon access.
If you want to use External Security for logon and Internal or User
Exit Security for functions, you can bypass the RACF, CA-TOP
SECRET, and CA-ACF2 instructions we supply. Read “External
Security Simplified Sign-On,” later in this section.
Considerations when
switching to External Security If you switch from Internal Security for product functions to
External Security without defining anything to your external
security product, you will not be able to access your system. If this
happens, you must restore the primary control record (the C
record) in the control file. Use the sample JCL given in the
appropriate member of your product sample library to do the
restore. Refer to the table provided earlier in this chapter for the
member you should use for your Landmark PerformanceWorks MVS
product.
RACF Security To define RACF security for your product’s user logon and
functions, complete the following steps. Refer to your RACF
documentation for complete information on RACF processing.
1. Add $LMRKTMR to the RACF class descriptor table.
Add the resource class, $LMRKTMR, to the RACF class descriptor
table (CDT). Then reassemble the table (see member
$RACFCDT in the Strategic Services sample library).
2. Add $LMRKTMR to the RACF router table.
Add two entries for the $LMRKTMR resource class to the RACF
router table, as shown in member $RACFRTB in the Strategic
Services sample library. Then reassemble the table.
To reduce the amount of time the product spends reading the
RACF data set, we recommend you place the router table
entries directly in the RACLIST.
3. Activate $LMRKTMR in RACF.
Enter the following RACF command to activate the $LMRKTMR
resource class in RACF.
SETROPTS CLASSACT($LMRKTMR)
4. Define your product user IDs to RACF.
If you have not already done so, define your product user IDs to
RACF.
Note When RACF passwords are changed, they immediately affect
product security.
5. Define a RACF general resource for product logon.
Use the following model to define a RACF general resource for
user logon access:
Chapter 2: Security Definitions Using External Security
The Monitor for MVS 2.0 2-5
System Administrator’s Guide

applid.SIGNON UACC(NONE)
where “applid” is the product application ID defined during
installation and “SIGNON” is the function name that controls
user access and logon to the product. Review the function code
table, later in this chapter, for more information about product
functions. The default user access level should be NONE (no
access to the product), as shown in the UACC parameter in the
model. Logon access to the product is then controlled through
RACF access lists.
6. Define a RACF general resource for each product function.
To control access to the product functions, use the following model
to define a RACF general resource for each product function:
applid.function[.res1[.res2]] UACC(NONE)
where “applid” is the product application ID defined during
installation, “function” is the function name, “res1” is the
primary resource specification (if any) for this security
definition, “res2” is the secondary resource specification (if
any) for this security definition, and the UACC parameter
specifies the access level for the function. You can specify
asterisks (*) as pattern matching characters for “res1” and
“res2.” The default user access level should be NONE (no
access to product functions), as shown in the UACC parameter
in the model.
You can find descriptions of all product functions, their applicable
resources, and their valid access levels in the function code and
the function access level tables, later in this chapter.
You can find $RACFGDF, a supplied CLIST program, in the
Strategic Services sample library. The CLIST creates a sample
set of RACF general resource definitions for product functions
and resources.
Once general resources are defined for all product functions, access
to them is controlled through RACF access lists.
7. Activate External Security for user logon access and access to
functions.
Enter X in both the USER LOGON and FACILITIES fields of the
Security Definitions Menu.
With Internal
Security for
Functions
If you are using RACF to secure user logon access, you can use
Internal Security or User Exit Security to control access to product
functions. If you choose to do this, skip Steps 6 and 7 and perform
the following steps instead. You also can use the External Security
simplified sign-on feature described later in this section.
8. Define Internal Security profiles for your site.
Use the supplied profiles or create your own. Read “Using Internal
Security,” later in this chapter, for further information.
Using External Security Chapter 2: Security Definitions
2-6
9. Identify the profile that should be used by each product user ID.
You can use two methods to identify the profile that should be
used for each user ID.
a. For each product user ID defined to RACF, specify the
following RACF installation data in RACF:
LMRK(profile)
where “profile” is the name of an Internal Security profile.
b. Define each RACF-defined user ID to Internal Security using
the Internal Security screens provided with your Landmark
PerformanceWorks MVS product. Read “Using Internal
Security,” later in this chapter, for more information.
If you do not identify a profile for a user ID, your Landmark
PerformanceWorks MVS product uses the $DEFAULT profile,
which is distributed with each product.
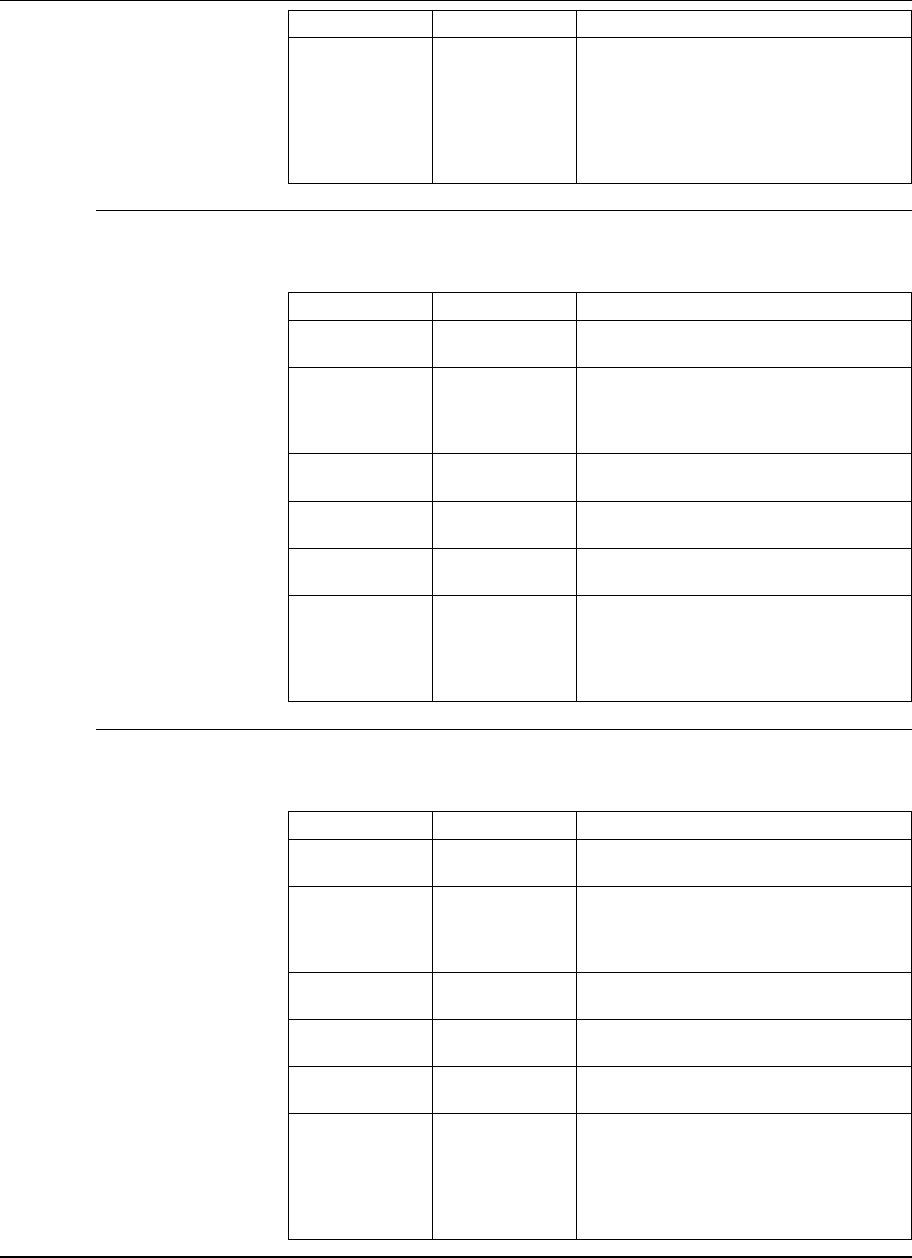
10. Activate External Security for user logon access and Internal
Security for access to functions.
Enter X in the USER LOGON field and an I in the FACILITIES field
of the Security Definitions Menu. The following table indicates
how to access this menu from within each Landmark
PerformanceWorks MVS product.
Product To Gain Access to Menu:
TMON for CICS/ESA Enter
=10.1.7
on the command line of any
TMON for CICS/ESA screen.
TMON for CICS/MVS Enter
=10.1.9
on the command line of any
TMON for CICS/MVS screen.
TMON for DB2 Enter
=8.1
on the command line of any
TMON for DB2 screen.
TMON for DBCTL Enter
=9.1
on the command line of any
TMON for DBCTL screen.
TMON for MQSeries Enter
=8.1
on the command line of any
TMON for MQSeries screen.
TMON for MVS Enter
=S.2
on the command line of any
TMON for MVS screen.
External Security
Simplified Sign-On If you want to use External Security for user logon access to your
Landmark PerformanceWorks MVS product, but use either Internal
Security or User Exit Security to control user access to product
functions, you can use the External Security simplified sign-on
feature. This feature lets you skip most of the RACF, CA-ACF2,
and CA-TOP SECRET instructions for setting up external user
logon security.
Implementation Perform these procedures only after you have consulted with the
data center security personnel at your site. Complete the following
steps to implement the External Security simplified sign-on feature.
Chapter 2: Security Definitions Using External Security
The Monitor for MVS 2.0 2-7
System Administrator’s Guide

1. Ensure that IBM’s system authorization facility (SAF) is active.
SAF always is active if you are using RACF, but you may need to
perform a manual step to activate SAF with other software
packages. For example, to activate SAF in CA-ACF2, the SAF
bit needs to be turned on in the CA-ACF2 global system
options.
2. Define product user IDs to your external security product.
If you have not already done so, define product user IDs to your
security product. Refer to the security product documentation
for complete instructions.
3. Verify the logon access level of the $DEFAULT profile.
If you want to restrict access to a Landmark product to certain user
IDs, ensure that the Landmark-supplied $DEFAULT profile has
an access setting of NONE for the SIGNON function. Read
about product secured functions (including the SIGNON
function) in the function code table, later in this chapter. When
a user logs on, the system checks the user’s profile to see if
SIGNON access is defined. If it is, the logon attempt is
successful. If no profile can be found for the user, the Internal
Security $DEFAULT profile is used.
4. Activate the External Security simplified sign-on feature for
user logon access.
Enter S at the USER LOGON prompt on the Security Definitions
Menu. Note that you cannot enter S at the FACILITIES prompt.
The External Security simplified sign-on feature is valid only
for control of user logon.
Once you have activated the simplified sign-on feature, all users
already defined to your external security package with valid user
IDs and passwords can log onto the product. If you want to allow
only a subset of these users to log on, you can control user logon
further using profiles and the SIGNON function (as described in
Step 3).
Using User Exit Security
You can create your own security system through user exits.
Member $USRXIT of the Strategic Services sample library contains
a sample security user exit and sample JCL with which to assemble
and link the exit.
To implement User Exit Security, follow these steps:
1. Create the user exit.
Landmark PerformanceWorks MVS products point register 1 to
storage containing the information mapped in member
$USRPRMS of the Strategic Services sample library. Your user
exit should pass a return code in register 15. If the return code
is zero (0), access to the function is granted. If the return code
is a nonzero number, access to the function is denied.
Using User Exit Security Chapter 2: Security Definitions
2-8

2. Specify the program name of your user exit in the USEREXIT
startup parameter.
This parameter can be included in a data set or member that is
identified by the:
–TMONPRMS DD statement in TMON for CICS/ESA and
TMON for CICS/MVS startup JCL
–TMDBPRMS DD statement in TMON for DB2 startup JCL
–TDBCPRMS DD statement in TMON for DBCTL
–TMQSPRMS DD statement in TMON for MQSeries startup
JCL
–TMVSPRMS DD statement in TMON for MVS startup JCL.
TMON for DB2 example //TMDBPRMS DD *
USEREXIT=name
If you specify a USEREXIT program name that the product cannot
find when it starts up, an S806 abend occurs.
3. Stop and restart the product.
Shut down and restart the product.
4. Activate User Exit Security.
Depending on whether you are using User Exit Security to control
user logon access or access to functions, enter U in either the
USER LOGON field or the FACILITIES field, or both. Check
the user logon/function security type table at the beginning of
this chapter to be sure you are using valid combinations of
security types for these two fields. If no user exit program has
been specified in the USEREXIT startup parameter, an error
occurs indicating you have selected an invalid security
combination.
Using Internal Security
You can use the Internal Security system supplied with your
Landmark PerformanceWorks MVS product to secure user logon
access and access to product functions. If you use Internal Security
to secure logon access, you cannot use External Security to secure
product functions. If you use Internal Security to secure access to
functions, you must secure logon access. You can use any of the
methods described in this chapter to secure logon access.
Internal Security is defined through the screens described in the
rest of this chapter.
Do you require audit trails? While Internal Security provides complete protection of all secured
functions, it does not produce an audit trail. If your site requires
an audit trail, use External Security to protect access to secured
functions.
Chapter 2: Security Definitions Using Internal Security
The Monitor for MVS 2.0 2-9
System Administrator’s Guide
Supplied User IDs and
Profiles Internal Security is distributed with a predefined master user ID
and password for each Landmark PerformanceWorks MVS product.
The following table lists the master user ID and password provided
for each product.
Product User ID Password
TMON for CICS/ESA TMONCICS TMONCICS
TMON for CICS/MVS TMONCICS TMONCICS
TMON for DB2 TMONDB2 TMONDB2
TMON for DBCTL TMONDBC TMONDBC
TMON for MQSeries TMONMQ TMONMQ
TMON for MVS TMONMVS TMONMVS
If you specify that user logon security should use Internal Security
(by setting the USER LOGON field on the Security Definitions
Menu to I), the master user ID can access product Internal Security
screens.
Internal Security for each product also is distributed with a
predefined set of generic authorization profiles and user IDs. Each
of the profiles begins with the dollar sign character ($) and can be
used as a template for definition of site-specific profiles.
Change the supplied
passwords. If you choose to use Internal Security, once you have installed the
Landmark PerformanceWorks MVS product, change the password
for the master user ID and these other product-supplied user IDs.
When passwords are changed, they immediately affect product
security.
TMON for CICS The following table lists the supplied user IDs and profiles for
TMON for CICS/ESA and TMON for CICS/MVS.
User ID Profile ID Description
APPROG $DEFAULT User ID and default profile ID for an
applications programmer.
AUTOSTRT $AUTOSTR User ID and default profile ID for an
automatically started terminal. Read
“Chapter 13: Cross System Monitor
Administration” in
The Monitor for CICS
Reference Manual
for a description of
Performance Monitor automatic starts.
Do not modify this user ID and profile
ID. If you do, Performance Monitor
automatic starting will not work.
SYSADMN $SYSADMN User ID and default profile ID for a
system administrator.
SYSPROG $SYSPROG User ID and default profile ID for a
systems programmer.
Using Internal Security Chapter 2: Security Definitions
2-10
User ID Profile ID Description
TMONCICS $MASTER Master user ID and default profile ID.
This profile grants user ID TMONCICS
the ability to do everything in TMON for
CICS/ESA. Do not change or delete
this user ID and profile. This ensures
that you always can update your
Internal Security definitions.
TMON for DB2 The following table lists the supplied user IDs and profiles for
TMON for DB2.
User ID Profile ID Description
APPPROG $DEFAULT User ID and default profile ID for an
applications programmer.
AUTOSTRT $AUTOSTR User ID and default profile ID for an
automatically started terminal. Do not
modify this user and profile ID. If you
do, autostart capabilities are disabled.
DBADM $DBADM User ID and default profile ID for a
database administrator.
SYSADM $SYSADM User ID and default profile ID for the
TMON for DB2 system administrator.
SYSPROG $SYSPROG User ID and default profile ID for a DB2
systems programmer.
TMONDB2 $MASTER Master user ID and default profile ID.
This profile grants user ID TMONDB2
the ability to do everything in TMON for
DB2. This ensures that you always can
update your Internal Security definitions.
TMON for DBCTL The following table lists the supplied user IDs and profiles for
TMON for DBCTL.
User ID Profile ID Description
APPPROG $DEFAULT User ID and default profile ID for an
applications programmer.
AUTOSTRT $AUTOSTR User ID and default profile ID for an
automatically started terminal. Do not
modify this user and profile ID. If you
do, autostart capabilities are disabled.
DBADM $DBADM User ID and default profile ID for a
database administrator.
SYSADM $SYSADM User ID and default profile ID for the
TMON for DBCTL system administrator.
SYSPROG $SYSPROG User ID and default profile ID for a
DBCTL systems programmer.
TMONDBC $MASTER Master user ID and default profile ID.
This profile grants user ID TMONDBC
the ability to do everything in TMON for
DBCTL. This ensures that you always
can update your Internal Security
definitions.
Chapter 2: Security Definitions Using Internal Security
The Monitor for MVS 2.0 2-11
System Administrator’s Guide
TMON for
MQSeries The following table lists the supplied user IDs and profiles for
TMON for MQSeries.
User ID Profile ID Description
APPPROG $DEFAULT User ID and default profile ID for an
applications programmer.
MQADM $MQADMIN User ID and default profile ID for an
MQSeries administrator.
SYSADM $SYSADM User ID and default profile ID for the
TMON for MQSeries system
administrator.
SYSPROG $SYSPROG User ID and default profile ID for an
MQSeries systems programmer.
TMONMQ $MASTER Master user ID and default profile ID.
This profile grants user ID TMONMQ the
ability to do everything in TMON for
MQSeries.
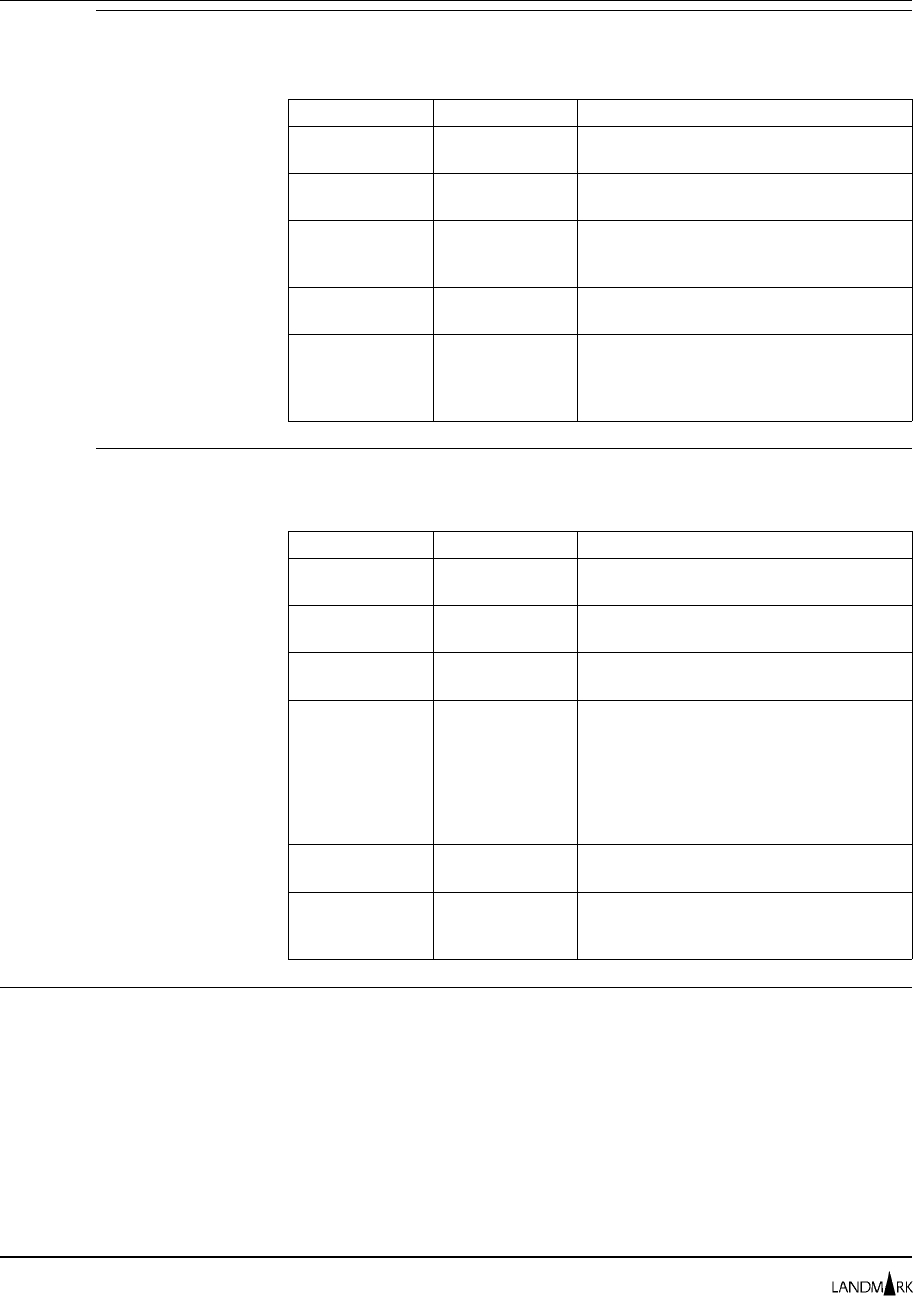
TMON for MVS The following table lists the supplied user IDs and profiles for
TMON for MVS.
User ID Profile ID Description
$DEFAULT $DEFAULT User ID and default profile ID for an
applications programmer.
$SYSADMN $SYSADMN User ID and default profile ID for a
system administrator.
$SYSPROG $SYSPROG User ID and default profile ID for a
systems programmer.
$UPERMAN $UPERMAN Master user ID and default profile ID.
This profile grants user ID $UPERMAN
the ability to do everything in TMON for
MVS. This ensures that you always can
update your Internal Security definitions,
do not change or delete this user and
profile ID (except the user ID password).
$SECURITY $SECURITY User ID and default profile ID for the
security administrator.
$DBADMIN $DBADMIN User ID and default profile ID for the
TMON for MVS control file data
administrator.
Implementing Internal
Security To activate Internal Security at your site, follow these steps:
1. Define Internal Security profiles for your site.
Use the supplied profiles or create your own. Read
“Profiles/Resources Directory” and “Detail Profile Definition,”
later in this chapter, for further information on adding,
updating, and deleting profiles.
Using Internal Security Chapter 2: Security Definitions
2-12

2. Define your product users to Internal Security.
Use the supplied user IDs or add your own. Read “User Profiles
Directory” and “User Definition,” later in this chapter, for
further information on adding, updating, and deleting user IDs.
3. Activate Internal Security.
Depending on whether you are using Internal Security for user
logon access or access to functions, enter I in either the USER
LOGON or the FACILITIES fields (or both) of the Security
Definitions Menu. Check the user logon/function security type
table at the beginning of this chapter to be sure you are using
valid combinations of security types for these two fields.
All the parameters on the Internal Security screens are stored in
records in the product control file. To update the control file once
you have modified the parameters on a screen, you must
cursor-select the ADD, UPDATE, or DELETE field. Cursor-select
the ADD field to add a record to the control file, the UPDATE field
to update a record, and the DELETE field to delete a record. If you
do not cursor-select one of these fields, no modifications are made to
the control file. Read the description of each screen to fully
determine how and when to use the ADD, UPDATE, and DELETE
fields.
Chapter 2: Security Definitions Using Internal Security
The Monitor for MVS 2.0 2-13
System Administrator’s Guide
Security Definitions Menu
The Security Definitions Menu lets you specify the type of security
you want to use for logon access to your Landmark
PerformanceWorks MVS product. You also can select product
Internal Security services from this screen.
Accessing this Screen To access this screen, complete one of the following paths.
Product Action Displays
TMON for CICS/ESA On the command line, enter
=10.1.7
. Security Definitions Menu
TMON for CICS/MVS On the command line, enter
=10.1.9
. Security Definitions Menu
TMON for DB2 On the command line, enter
=8.1
. Security Definitions Menu
TMON for DBCTL On the command line, enter
=M.1
. Security Definitions Menu
TMON for MQSeries On the command line, enter
=8.1
. Security Definitions Menu
TMON for MVS On the command line, enter
=S.2
. Security Definitions Menu
Options 1 USER PROFILES DIRECTORY
Displays all authorized user IDs for your product and their profile
assignments. Use this option to add, change, or delete user
definitions. These include user ID passwords and profile settings.
2 SECURED FUNCTIONS DIRECTORY
Displays the functions that are secured in your product.
3 PROFILES/RESOURCES DIRECTORY
Displays all currently defined Internal Security profiles and their
qualifying resources for your product. Use this option to add,
change, or delete profile definitions and their associated resources.
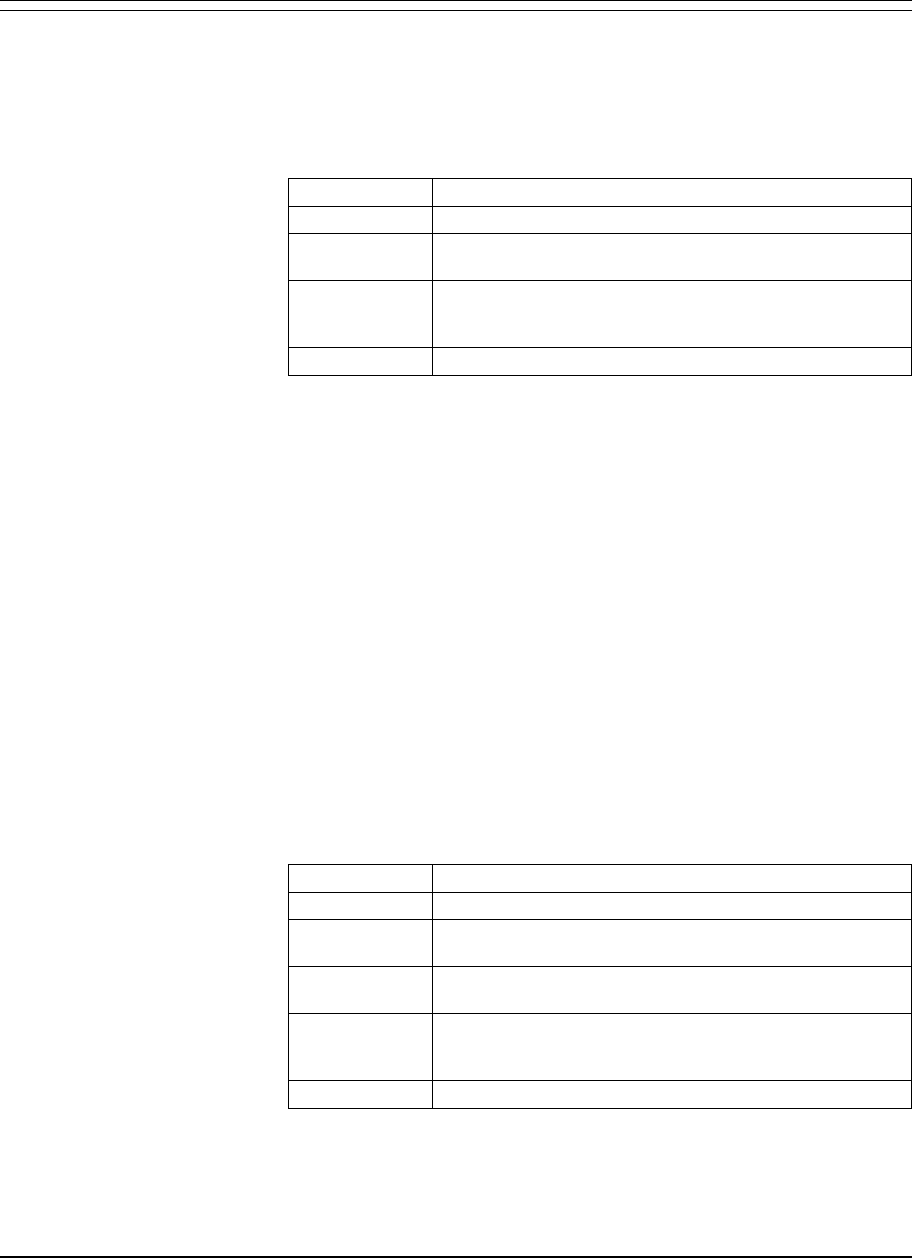
JOBNAME: THE MONITOR FOR MVS DATE:
SYSID : VERSION: 2.0 TIME:
SECURITY DEFINITIONS MENU
CYCLE MMSS SELECTION
MAXIMUM USERS: 127 CURRENT USERS: 012
1 USER PROFILES DIRECTORY
2 SECURED FUNCTIONS DIRECTORY
3 PROFILES/RESOURCES DIRECTORY
SECURITY METHOD ACTIVE: (I,X,S,U,N)
USER LOGON: N
FACILITIES: N
HELP INFORMATION = PF1 PF KEY ASSIGNMENTS = PA1
Security Definitions Menu Chapter 2: Security Definitions
2-14
Fields CURRENT USERS
Displays the current number of users of this product system.
FACILITIES
Specifies the security type used to protect product functions.
Specify one of the options in the following table.
Value Description
ISpecify
I
to use Internal Security. This is the default.
NSpecify
N
if you do not want product functions to be
secured. No security checking is performed.
USpecify
U
to use User Exit Security. To use this option,
USEREXIT= also must be coded on the input parameters
for the product.
XSpecify
X
to use External Security.
Note that you cannot specify S as an access method for function
security. It only pertains to the USER LOGON field.
MAXIMUM USERS
Displays the maximum number of users that can access this
product system at any given time. You can change this maximum
using the MAXUSER command. Read Chapter 2 in your product
reference manual for more information on this command.
SECURITY METHOD ACTIVE
Lists the valid security types you can specify for product functions
(in the FACILITIES field) and user logon access (in the USER
LOGON field). “S” is valid only for the USER LOGON field. See
the FACILITIES and USER LOGON fields for a description of each
value, and check the user logon/function security type table at the
beginning of this chapter for valid combinations of security types.
USER LOGON
Displays the security type used to verify user logon access to the
product. Specify one of the options in the following table.
Value Description
ISpecify
I
to use Internal Security. This is the default.
NSpecify
N
if you do not want user logon access to be
secured. No security checking is performed.
SSpecify
S
if you want to use the External Security
simplified sign-on feature.
USpecify
U
to use User Exit Security. To use this option,
USEREXIT= also must be coded on the input parameters
for the product.
XSpecify
X
to use External Security.
Chapter 2: Security Definitions Security Definitions Menu
The Monitor for MVS 2.0 2-15
System Administrator’s Guide
User Profiles Directory
The User Profiles Directory screen lists every current user ID
defined to the Landmark PerformanceWorks MVS product and its
associated Internal Security profile ID and user name.
Accessing this Screen To access this screen, complete one of the following paths.
Product Action Displays
TMON for CICS/ESA On the command line, enter
=10.1.7.1
.User Profiles Directory
TMON for CICS/MVS On the command line, enter
=10.1.9.1
.User Profiles Directory
TMON for DB2 On the command line, enter
=8.1.1
. User Profiles Directory
TMON for DBCTL On the command line, enter
=M.1.1
. User Profiles Directory
TMON for MQSeries On the command line, enter
=8.1.1
. User Profiles Directory
TMON for MVS On the command line, enter
=S.2.1
. User Profiles Directory
Primary Commands Use the DOWN and UP commands to scroll through this screen. To
learn about the various ways to scroll using these commands and
for syntax and descriptions of all commands, see Chapter 2 in your
product reference manual.
Fields ➥PROFILE ID
Displays the 1- to 8-character profile identifier for the product
currently assigned to the user ID.
Cursor-select this field to add, update, or delete a profile definition
in the control file. Once you have cursor-selected a profile, the
Profiles/Resources Directory screen is displayed.
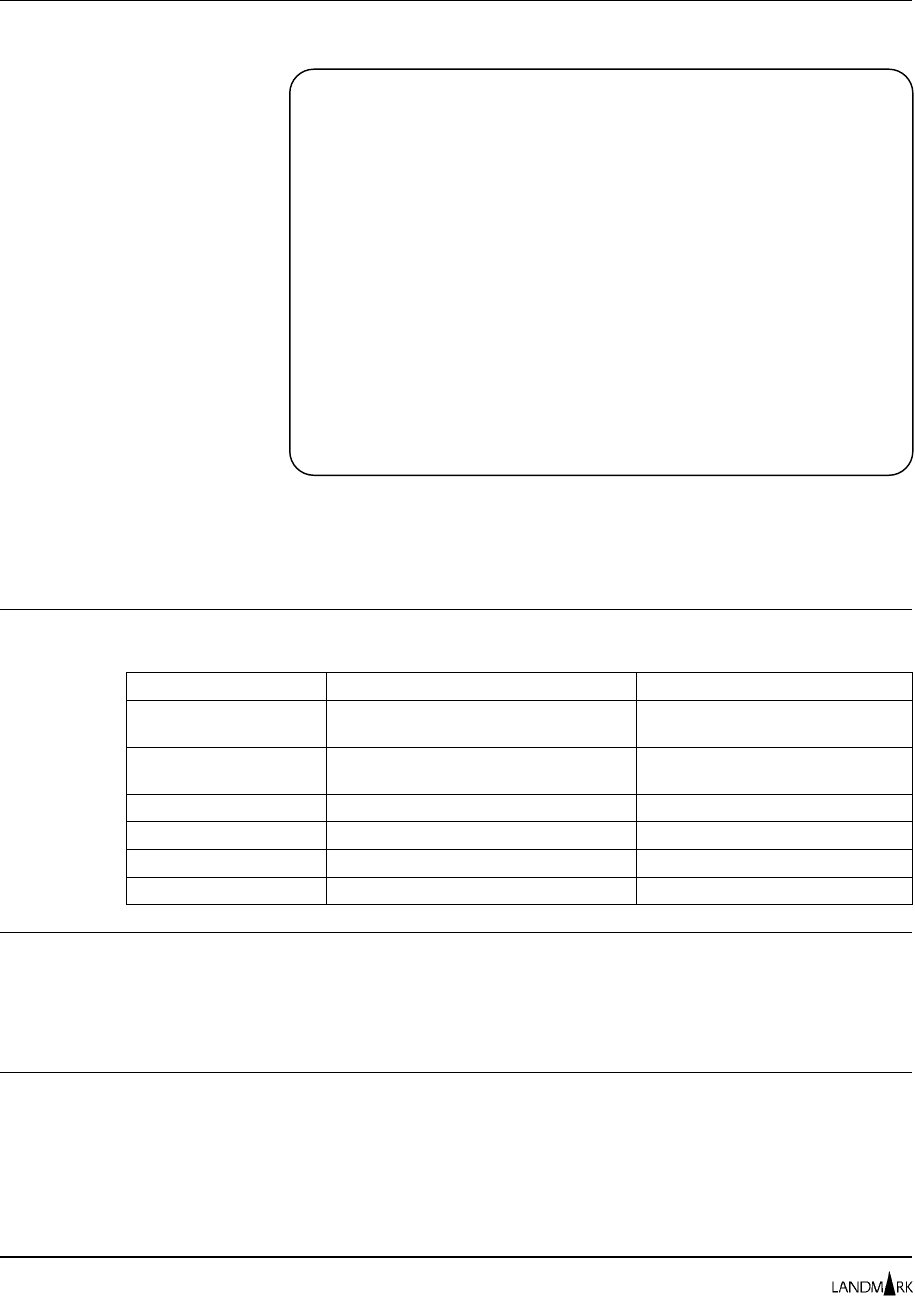
JOBNAME: THE MONITOR FOR MVS DATE:
SYSID : VERSION: 2.0 TIME:
USER PROFILES DIRECTORY
COMMAND:
TO "CHANGE" OR "DELETE" : CURSOR SELECT USER ID OR PROFILE ID.
TO "ADD" : CURSOR SELECT ANY USER ID OR PROFILE ID.
USER ID PROFILE ID USER NAME
DVDAT $SYSYUN1 MASTER USER
SECURITY $SECURTY SECURITY ADMINISTRATOR
SYSADM $SYSADM MVS SYSTEM ADMINISTRATOR
SYSPROG $SYSPROG SYSTEMS PROGRAMMER
TMONCICS $MASTER MASTER
TMONDB2 $MASTER MASTER
TMONMVS $MASTER MASTER
HELP INFORMATION = PF1 PF KEY ASSIGNMENTS = PA1
User Profiles Directory Chapter 2: Security Definitions
2-16

➥USER ID
Displays the 1- to 8-character user ID for the product.
Cursor-select this field to add, update, or delete a user definition in
the control file. Once you have cursor-selected a user ID, the User
Definition screen is displayed.
USER NAME
Shows the complete name of the user to whom the specified user
ID and its associated profile ID are assigned. The name can be up
to 34 characters long and is used only for documentation and
identification.
Chapter 2: Security Definitions User Profiles Directory
The Monitor for MVS 2.0 2-17
System Administrator’s Guide
User Definition
The User Definition screen lets you update the product user
definitions in the control file.
You can add a new user definition to the list, update the detailed
information that makes up a user definition, or delete an existing
user definition. The detailed information consists of the user ID,
password, user full name, and profile name defined for the specific
user.
Accessing this Screen To access this screen, complete one of the following paths.
Product Action Displays
TMON for CICS/ESA On the command line, enter
=10.1.7.1
.User Profiles Directory
Cursor-select a user ID. User Definition
TMON for CICS/MVS On the command line, enter
=10.1.9.1
.User Profiles Directory
Cursor-select a user ID. User Definition
TMON for DB2 On the command line, enter
=8.1.1
. User Profiles Directory
Cursor-select a user ID. User Definition
TMON for DBCTL On the command line, enter
=M.1.1
. User Profiles Directory
Cursor-select a user ID. User Definition
TMON for MQSeries On the command line, enter
=8.1.1
. User Profiles Directory
Cursor-select a user ID. User Definition
TMON for MVS On the command line, enter
=S.2.1
. User Profiles Directory
Cursor-select a user ID. User Definition
JOBNAME: THE MONITOR FOR MVS DATE:
SYSID : VERSION: 2.0 TIME:
USER DEFINITION
COMMAND:
OVERTYPE FIELDS TO "ADD" OR "UPDATE"
USERID: TMONMVS
PASSWORD: TMONMVS
USER FULL NAME: MASTER USER
PROFILE NAME: $MASTER <= CURSOR SELECT FOR FURTHER DETAIL
============================================================================
CURSOR SELECT ONE OF THE FOLLOWING: _ADD _UPDATE _DELETE
HELP INFORMATION = PF1 PF KEY ASSIGNMENTS = PA1
User Definition Chapter 2: Security Definitions
2-18

Primary Commands Enter the following commands on the command line.
ADD Adds user definitions to the control file.
Type over the appropriate fields
(PASSWORD, PROFILE, USER FULL
NAME, or USERID) to identify the new
user or profile ID; then enter this command
(or cursor-select the ADD field).
DELETE Deletes user definitions from the control
file. You also can cursor-select the DELETE
field to perform this function.
UPDATE Updates user definitions in the control file.
Type over the information you want to
change; then enter this command (or
cursor-select the UPDATE field).
For syntax and descriptions of all commands, see Chapter 2 in your
product reference manual.
Fields ➥ADD
Adds a definition to the control file. Type over the appropriate
fields (PASSWORD, PROFILE, USER FULL NAME, or USERID) to
identify the new user or profile ID; then cursor-select this field to
add the definition to the control file. You also can use the ADD
command to perform this function.
➥DELETE
Deletes a user definition from the control file.
Cursor-select this field to delete the definition. You also can use
the DELETE command to perform this function.
PASSWORD
Shows the 1- to 8-character password associated with the user ID.
When passwords are changed, they immediately affect product
security.
➥PROFILE NAME
Displays the 1- to 8-character profile identifier for the product
associated with the user ID.
Cursor-select this field if you need information about a named
profile or if you want to update profile definitions. The
Profiles/Resources Directory screen, described later in this chapter,
is displayed.
➥ UPDATE
Updates a user definition in the control file. Type over the
information you want to change; then cursor-select this field to
update the definition in the control file. You also can use the
UPDATE command to perform this function.
Chapter 2: Security Definitions User Definition
The Monitor for MVS 2.0 2-19
System Administrator’s Guide

USER FULL NAME
Displays the complete name of the user to whom the specified user
ID and its associated profile ID are assigned. The name can be up
to 34 characters long.
USERID
Displays a 1- to 8-character user ID for the product.
User Definition Chapter 2: Security Definitions
2-20
Secured Functions Directory
The Secured Functions Directory screen lets you display the
functions that can be secured in the product. You can review each
function, the class to which the function belongs, and the text
description of the function. You also can see which functions are
resource functions (type R) and which are system functions (type S).
All functions are described in the function code table, later in this
chapter. You cannot update any of these functions.
Accessing this Screen To access this screen, complete one of the following paths.
Product Action Displays
TMON for CICS/ESA On the command line, enter
=10.1.7.2
.Secured Functions Directory
TMON for CICS/MVS On the command line, enter
=10.1.9.2
.Secured Functions Directory
TMON for DB2 On the command line, enter
=8.1.2
. Secured Functions Directory
TMON for DBCTL On the command line, enter
=M.1.2
. Secured Functions Directory
TMON for MQSeries On the command line, enter
=8.1.2
. Secured Functions Directory
TMON for MVS On the command line, enter
=S.2.2
. Secured Functions Directory
Primary Commands Use the DOWN and UP commands to scroll through this screen. To
learn about the various ways to scroll using these commands and
for syntax and descriptions of all commands, see Chapter 2 in your
product reference manual.
Fields CLASS
Displays the SAF/RACF class.
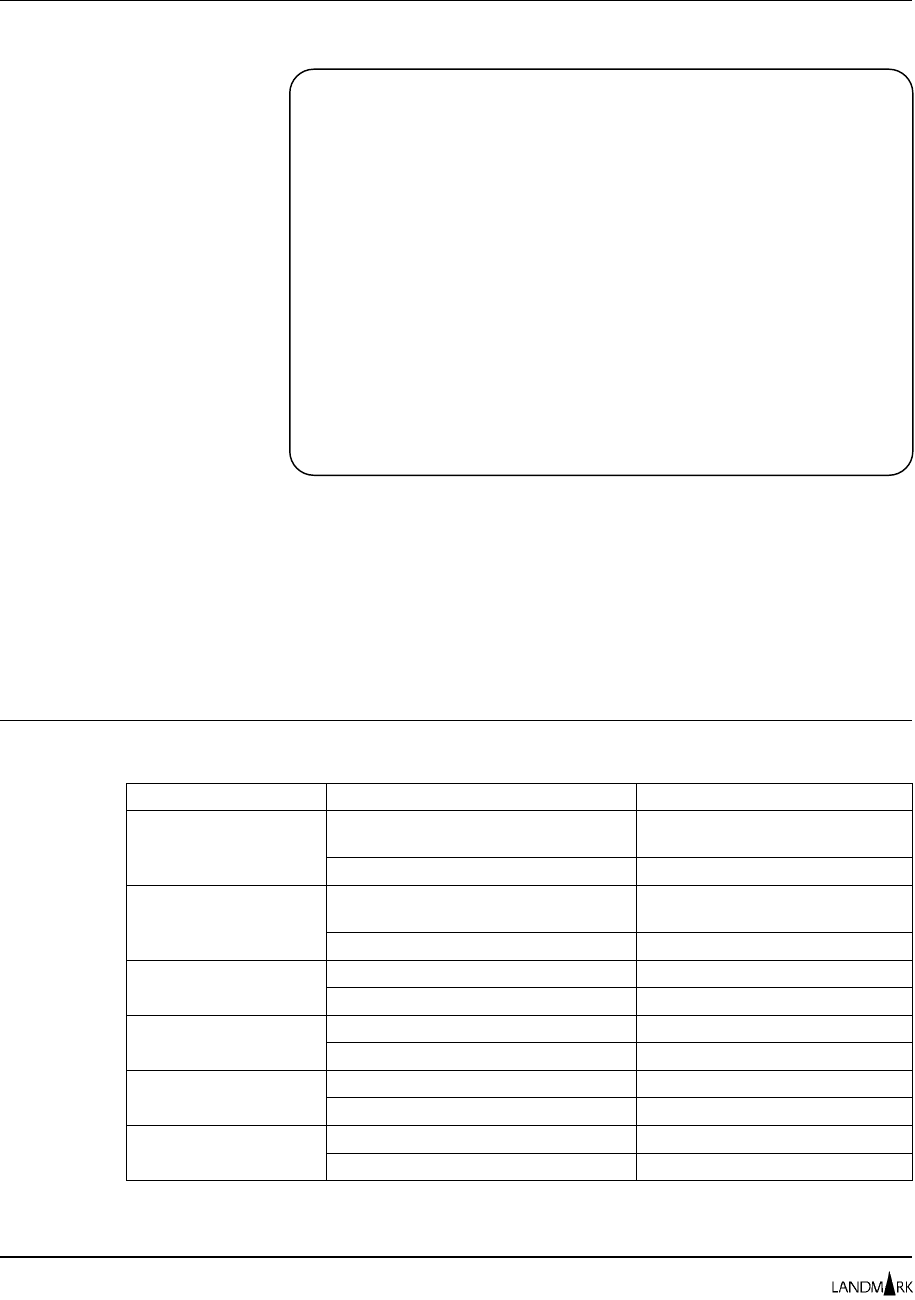
JOBNAME: THE MONITOR FOR MVS DATE:
SYSID : VERSION: 2.0 TIME:
SECURED FUNCTIONS DIRECTORY
COMMAND:
TYPE VALUES: S-SYSTEM FUNCTION(NO RESOURCE) / R-RESOURCE FUNCTION
PRIMARY/SECONDARY RESOURCE: J-JOBID,N-NETID,V-VOL,D-DSN,T-TRANID,M-MODULE
FUNCTION CODE CLASS TYPE PRIMARY SECONDARY DESCRIPTION
ADVFUNCS 203 $LMRKTMR S ADVANCED FUNCTIONS
CCWTRACE 142 $LMRKTMR R V CCW I/O PROFILE
CNTLFILE 238 $LMRKTMR S CONTROL FILE DIRECTORY
CONSOLE 230 $LMRKTMR S MVS MASTER CONSOLE DISPLAY
CSMON 099 $LMRKTMR S COMMON STORAGE MONITOR
CSMONDET 097 $LMRKTMR S COMMON STORAGE MONITOR DETAIL
CSMONOPT 098 $LMRKTMR S COMMON STORAGE MONITOR OPTIONS
DATADCTS 222 $LMRKTMR S DATA DICTIONARY SELECTION
DLYGRP 071 $LMRKTMR S DELAY MONITOR GROUP DEFINITION
DLYGRPG 072 $LMRKTMR S DELAY MONITOR GLOBAL RECORDS
DLYGRPU 073 $LMRKTMR R J DELAY MONITOR USER RECORDS
DLYMNDET 074 $LMRKTMR R J DELAY MONITOR DETAIL ANALYSIS
DLYMON 070 $LMRKTMR S DELAY MONITOR MAIN MENU
HELP INFORMATION = PF1 PF KEY ASSIGNMENTS = PA1
Chapter 2: Security Definitions Secured Functions Directory
The Monitor for MVS 2.0 2-21
System Administrator’s Guide
CODE
Shows the 3-digit internal identifier of the function.
DESCRIPTION
Displays the 1- to 30-character text description of the function.
FUNCTION
Displays the 1- to 8-character name of the facility within the
product. All functions are listed in the function code table, later in
this chapter.
PRIMARY
Shows the primary resource type for which a function can be
secured. In addition to checking a user ID’s access level for a given
function, Landmark PerformanceWorks MVS products can limit a
user ID’s use of a function to a selected resource, as shown in the
following table.
Value Description
TMON for CICS Primary resources are job names. You can limit the job
names displayed on the Job Selection List screen for a
given user ID using the JOBLIST function.
TMON for DB2 Primary resources are DB2 subsystem names. You can
limit the DB2 subsystems monitored by a given user ID
using the DB2AUTH function.
TMON for DBCTL Primary resources are DBCTL subsystem names. You
can limit the DBCTL subsystems monitored by a given
user ID using the DBCAUTH function.
TMON for
MQSeries Primary resources are MQSeries object names. You
can limit the queue managers monitored by a given user
ID using the QMGRAUTH function.
TMON for MVS Primary resources are job names or volume serial
numbers. You can limit the ability to display I/O trace
data to specific volumes (based on volume serial
number) using the CCWTRACE function.
This field is blank if the TYPE field contains “S” (system function).
If the value in the TYPE field is “R” (resource function), this field
may contain a value.
PRIMARY/SECONDARY RESOURCE
Displays the abbreviations used for the PRIMARY and
SECONDARY fields shown in the directory. The following table
lists valid values.
Value Description
D The function can be secured by data set name. (For
TMON for MQSeries, this is by object name.)
J The function can be secured by job name.
M The function can be secured by module name.
N The function can be secured by network ID.
T The function can be secured by transaction ID.
Secured Functions Directory Chapter 2: Security Definitions
2-22
Value Description
V The function can be secured by tape or DASD
volume.
Note Only J types currently are used by TMON for CICS. Only J and T
types currently are used by TMON for DB2, TMON for DBCTL,
and TMON for MVS. Only D types currently are used by TMON
for MQSeries.
SECONDARY
Shows the secondary resource type for which a function can be
secured.
TMON for DB2 secondary resources are DB2 plan or package
names. Secondary resources qualify security within the limits of
the primary resource. You can restrict the user plans that can be
reviewed by DB2 subsystem name and plan name within DB2
subsystem using the PLANSUMM function.
TMON for CICS, TMON for DBCTL, TMON for MQSeries, and
TMON for MVS do not use secondary resources for any of their
functions.
TYPE
Displays the function type. Valid function types are “R” and “S”
and are explained under the TYPE VALUES field.
TYPE VALUES
Displays the abbreviations used for the TYPE field shown in the
directory. Valid values are “R” (the function is a resource function
and uses a primary resource) and “S” (the function is a system
function and uses no resources); “R” is the default.
Chapter 2: Security Definitions Secured Functions Directory
The Monitor for MVS 2.0 2-23
System Administrator’s Guide
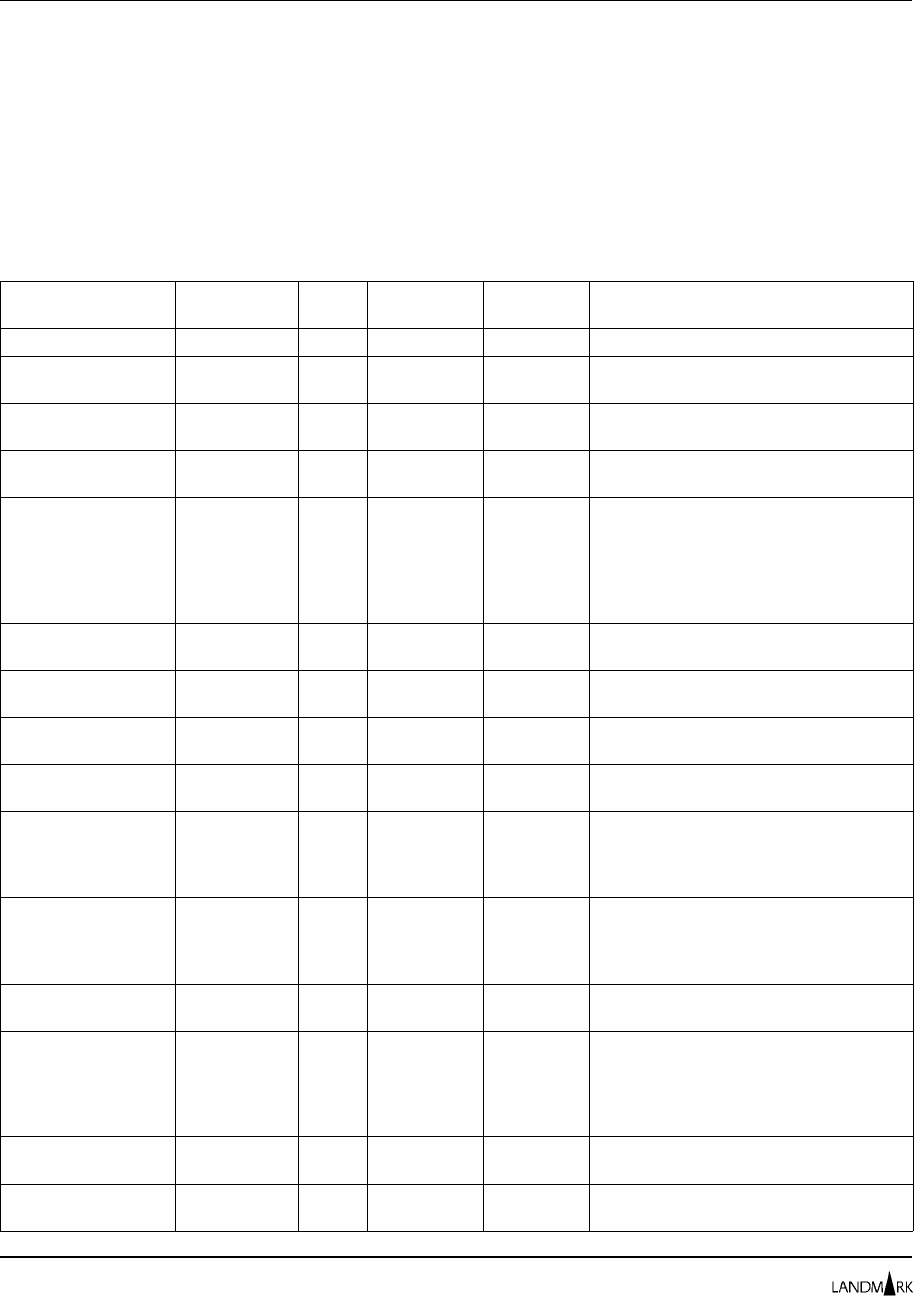
Function Code Table
The following table describes every product secured function for
Landmark PerformanceWorks MVS products. It is sorted by function
(the second column). You cannot change these functions; they are
predefined by each product.
Note TMON for CICS, TMON for DBCTL, TMON for MQSeries, and
TMON for MVS do not use secondary resources. Thus, the
Secondary Resource column in the table below applies only to
TMON for DB2 (and in very few instances).
Product Function Code Primary
Resource Secondary
Resource Description
TMON for CICS ACTIVMON 102 none Controls access to the Activity Monitor.
TMON for DB2 ACTVLOG 053 DB2
subsystem Controls the ability to display the DB2
Active Log Data Set Statistics screen.
TMON for DB2
TMON for DBCTL ACTVMON 030
030 none
none Controls access to Current Thread
Activity screens.
TMON for DB2 ACTVMON 030 none Controls access to Current Thread
Activity screens.
TMON for CICS
TMON for DB2
TMON for DBCTL
TMON for MQSeries
TMON for MVS
ADVFUNCS 203
180
180
203
203
none
none
none
none
none
Controls access to advanced functions
on the Advanced Functions menu in
TMON for DB2, TMON for DBCTL,
TMON for MQSeries, and TMON for
MVS; TMON for CICS/ESA does not
support this function.
TMON for DB2 CANCEL 031 DB2
subsystem Controls the ability to cancel DB2
threads.
TMON for DBCTL CBLKS 184 none Controls the ability to display control
block data.
TMON for MVS CCWTRACE 142 volume Controls the ability to display I/O trace
data.
TMON for MQSeries CHANAUTH 124 MQSeries
object Controls the ability to display channel
data.
TMON for CICS CICSSTAT 113 none Controls use of CICS address space
altering commands (for example,
BRINGIN, DONTSWAP, and FREEZE)
on the Job Selection List screen.
TMON for CICS
TMON for MQSeries
TMON for MVS
CNTLFILE 238
238
238
none
none
none
Controls access to a function that is
not supported in TMON for CICS,
TMON for MQSeries, or TMON for
MVS.
TMON for CICS
TMON for DBCTL COLLANAL 107
107 none
none Controls access to Collection Analysis.
TMON for CICS
TMON for DB2
TMON for DBCTL
TMON for MQSeries
TMON for MVS
CONSOLE 230
230
230
230
230
none
none
none
none
none
Controls access to the Console
Summary Display screen.
TMON for MVS CSMON 099 none Controls access to the Common
Storage Monitor screens.
TMON for MVS CSMONDET 097 none Controls access to the Common
Storage Detail screen.
Function Code Table Chapter 2: Security Definitions
2-24

Product Function Code Primary
Resource Secondary
Resource Description
TMON for MVS CSMONOPT 098 none Controls access to the Common
Storage Monitor Options screen.
TMON for DB2 CSTGSDSP 195 none Controls access to the Database
Common Storage Summary screen.
TMON for CICS
TMON for DB2
TMON for DBCTL
TMON for MQSeries
TMON for MVS
DATADCTS 222
222
222
222
222
none
none
none
none
none
Controls access to data dictionary
screens.
TMON for DB2 DB2AUTH 010 DB2
subsystem Controls the ability to monitor a
specific DB2 subsystem.
TMON for DB2 DB2CMD 032 DB2
subsystem Controls the ability to issue DB2
commands. Currently, the only time a
DB2 command can be issued is when
the Current Thread Activity CANCEL
command is used on a DDF thread.
This command will generate the DB2
-CANCEL DDF THREAD command.
TMON for DB2 DB2CONN 033 DB2
subsystem Controls the ability to use the CON,
DIS, and QUI commands outside of
the DB2 Monitoring Options screen.
TMON for DB2 DB2OPTS 170 Controls access to the DB2 Monitoring
Options screen.
TMON for DBCTL DBCAUTH 010 none Controls the ability to monitor a
specific DBCTL subsystem.
TMON for DBCTL DBCCONN 033 none Controls DBCTL connect.
TMON for DBCTL DBCOPTS 170 none Controls access to the DBCTL
Monitoring Options screen.
TMON for MVS DLYGRP 071 none Controls access to the Workload Delay
Definition List screen.
TMON for MVS DLYGRPG 072 none Controls access to global definitions
on the Workload Delay Definition List
screen.
TMON for MVS DLYGRPU 073 job name Controls access to user definitions on
the Workload Delay Definition List
screen.
TMON for MVS DLYMNDET 074 job name Controls access to the Delay Monitor
Detail screen.
TMON for MVS DLYMON 070 none Controls access to the Delay Monitor
Menu.
TMON for MQSeries DPAUTH 190 none Controls access to the Dead Letter
Queue (DLQ) Processor.
TMON for DB2 DSNZPDSP 182 none Controls access to the DB2
DSNZPARM/DSNHDECP Display
screen.
TMON for DB2 EDMSTAT 054 DB2
subsystem Controls access to EDM pool statistics.
TMON for DB2
TMON for MQSeries EXCPDEF 072
130 none
none Controls the ability to define, activate,
and deactivate exceptions.
Chapter 2: Security Definitions Function Code Table
The Monitor for MVS 2.0 2-25
System Administrator’s Guide
Product Function Code Primary
Resource Secondary
Resource Description
TMON for MQSeries
TMON for MVS EXCPTDEF 154
130 none
none For TMON for MQSeries, controls the
ability to add and update exceptions.
For TMON for MVS, controls access to
the Exception Definition Menu.
TMON for DB2
TMON for DBCTL EXCPVIEW 073
073 none
none Controls the ability to view the
Exception Monitor screens.
TMON for DB2 EXPLAIN 210 DB2
subsystem Controls access to the DB2 EXPLAIN
Utility.
TMON for CICS FLDBANAL 108 none Controls access to Resource Analysis.
TMON for MVS GDCOPTS 079 none Controls access to data collection
options.
TMON for CICS
TMON for DB2
TMON for DBCTL
TMON for MQSeries
TMON for MVS
HELPMENU 235
235
235
235
235
none
none
none
none
none
Controls access to the Help Definitions
Menu.
TMON for DB2 HISTANL 140 none Controls access to History Analysis
functions.
TMON for CICS
TMON for DB2
TMON for DBCTL
TMON for MQSeries
TMON for MVS
HLPFLDIR 236
236
236
236
236
none
none
none
none
none
Controls access to the Field-Level
Help Directory screen.
TMON for CICS
TMON for DB2
TMON for DBCTL
TMON for MQSeries
TMON for MVS
HLPFLDTL 237
237
237
237
237
none
none
none
none
none
Controls access to the Field-Level and
Message-Level Help Detail screens.
TMON for CICS
TMON for DB2
TMON for DBCTL
TMON for MQSeries
TMON for MVS
HLPMSDIR 253
253
253
253
253
none
none
none
none
none
Controls access to the Message-Level
Help Directory screen.
TMON for CICS
TMON for DB2
TMON for DBCTL
TMON for MQSeries
TMON for MVS
HLPSLDIR 205
205
205
205
205
none
none
none
none
none
Controls access to the Screen-Level
Help Directory screen.
TMON for CICS
TMON for DB2
TMON for DBCTL
TMON for MQSeries
TMON for MVS
HLPSLDTL 206
206
206
206
206
none
none
none
none
none
Controls access to the Screen-Level
Help Detail screen.
TMON for MVS IODVHIST 140 none Controls access to the Device Activity
History Screen.
TMON for MVS IOMON 143 none Controls access to the I/O Monitor
Menu options.
TMON for MVS IOPSTART 141 none Controls the ability to start I/O profiles.
TMON for DBCTL ITASKANL 181 none Controls the ability to access the
ITASK Analysis screens.
TMON for CICS JOBLIST 101 job name Controls access to the Job Selection
List screen.
Function Code Table Chapter 2: Security Definitions
2-26
Product Function Code Primary
Resource Secondary
Resource Description
TMON for DB2
TMON for DBCTL
TMON for MQSeries
JOBSUMM 196
196
196
none
none
none
Controls access to the Active Job
Summary screen.
TMON for CICS
TMON for MQSeries
TMON for MVS
LOGOSCRN 004
004
004
none
none
none
Controls access to the sign-on screen;
TMON for CICS/ESA does not support
this function.
TMON for MVS MDFPRSM 176 none Controls access to the Domain and
LPAR Summary screens.
TMON for DBCTL MODSTOR 182 none Controls the ability to modify DBCTL
storage.
TMON for DB2
TMON for MQSeries MONCNTL 160
160 none
none Controls access to Monitor Controls.
TMON for DB2
TMON for DBCTL
TMON for MQSeries
MONINIT 163
163
163
none
none
none
Controls the ability to access Monitor
Initialization options.
TMON for MQSeries MSGAUTH 125 MQSeries
object Controls access to message functions.
TMON for CICS MVSCONTN 105 none Controls access to the MVS
Contention Monitor.
TMON for MQSeries NAMLAUTH 159 MQSeries
object Controls command functions for
namelists.
TMON for DB2 ONLINANL 090 none Controls access to Online Analysis.
TMON for CICS
TMON for DB2
TMON for DBCTL
TMON for MQSeries
TMON for MVS
OPENMAIN 217
217
217
217
217
none
none
none
none
none
Controls access to storage in another
address space (OPENMAIN=asid);
TMON for DB2 does not support this
function.
TMON for CICS PASSTHRU 110 none Controls access to Pass-Through
Sessions.
TMON for CICS PERFORM 103 none Controls access to the Performance
Monitor.
TMON for CICS
TMON for DB2
TMON for DBCTL
TMON for MQSeries
TMON for MVS
PFKDEF 250
250
250
250
250
none
none
none
none
none
Controls access to the Function Key
Definitions screen.
TMON for DB2
TMON for DBCTL PFKEYS 233
233 none
none Controls the ability to update function
key assignments.
TMON for DB2 PGSETDSP 101 DB2
subsystem Controls access to the Page Set
Activity Summary screen.
TMON for DB2 PLANSUMM 212 DB2
subsystem DB2 plan
name Controls access to user plans and
packages.
TMON for CICS PROBALRT 104 none Controls access to the Problem/Alert
Monitor.
TMON for MQSeries PROCAUTH 122 MQSeries
object Controls access to process group
functions.
TMON for DBCTL PRODPSWD 202 none Controls product password entry.
TMON for CICS PRODPSWG 201 none Controls access to a function that
TMON for CICS/ESA does not support.
Chapter 2: Security Definitions Function Code Table
The Monitor for MVS 2.0 2-27
System Administrator’s Guide
Product Function Code Primary
Resource Secondary
Resource Description
TMON for CICS
TMON for DB2
TMON for DBCTL
TMON for MQSeries
TMON for MVS
PROFDTL 246
246
246
246
246
none
none
none
none
none
Controls access to the Detail Profile
Definition screen.
TMON for MQSeries
TMON for MVS PRTAUTOF 093
093 none
none Controls the ability to use the
PRINTOFF command.
TMON for MQSeries
TMON for MVS PRTAUTON 092
092 none
none Controls the ability to use the
PRINTON command.
TMON for MQSeries
TMON for MVS PRTCLOSE 091
091 none
none Controls the ability to use the
CLOSEPRINT command.
TMON for MQSeries
TMON for MVS PRTCMD 090
090 none
none Controls the ability to use the PRINT
command.
TMON for MQSeries
TMON for MVS PRTDFDSN 081
081 none
none Controls access to the Define Print
Screen Dataset screen.
TMON for MQSeries
TMON for MVS PRTDFSYS 082
082 none
none Controls access to the Define Print
Screen SYSOUT screen.
TMON for MQSeries
TMON for MVS PRTDFVTM 083
083 none
none Controls access to a function not
supported by TMON for MQSeries or
TMON for MVS.
TMON for MQSeries
TMON for MVS PRTMENU 080
080 none
none Controls access to the Print Screen
Definition Menu.
TMON for MQSeries
TMON for MVS PRTSTART 095
095 none
none Controls the ability to use the
STARTPRINT command.
TMON for MQSeries
TMON for MVS PRTSTOP 094
094 none
none Controls the ability to use the
STOPPRINT command.
TMON for DBCTL PSBACTRK 065 none Controls access to PSB tracking
functions.
TMON for MQSeries QAUTH 121 MQSeries
object Controls access to queue functions.
TMON for MQSeries QMGRAUTH 120 MQSeries
object Controls access to queue manager
functions.
TMON for MQSeries QMGREVNT 135 none Controls access to the Queue
Manager Events screen.
TMON for MQSeries QMGROPTS 170 none Controls the ability to update the
queue manager monitoring options.
TMON for MQSeries QMGRSEC 157 MQSeries
object Controls command functions for queue
manager security.
TMON for DB2
TMON for DBCTL RESRCDSP 190
190 none
none Controls access to the DB2 and
DBCTL Resource Usage screens.
TMON for CICS
TMON for DB2
TMON for DBCTL
TMON for MQSeries
TMON for MVS
RMTPTDEF 209
209
209
209
209
none
none
none
none
none
Controls access to the Remote
Sessions Directory and Remote
Session Definition screens.
TMON for CICS
TMON for DB2
TMON for DBCTL
TMON for MQSeries
TMON for MVS
RMTPTSEL 207
207
207
207
207
none
none
none
none
none
For TMON for CICS, controls access
to Pass Through to Other Landmark
Products. For TMON for DB2, TMON
for DBCTL, TMON for MQSeries, and
TMON for MVS, controls access to the
Remote Sessions Logon screen.
Function Code Table Chapter 2: Security Definitions
2-28

Product Function Code Primary
Resource Secondary
Resource Description
TMON for DBCTL RSR 055 none Controls access to remote site
recovery functions.
TMON for DB2 SAVESQL 216 none Controls the ability to export SQL data
from the DB2 EXPLAIN Utility to a
sequential or partitioned data set.
TMON for CICS
TMON for DB2
TMON for DBCTL
TMON for MQSeries
TMON for MVS
SECFUNCS 243
243
243
243
243
none
none
none
none
none
Controls access to the Secured
Functions Directory screen.
TMON for CICS
TMON for DB2
TMON for DBCTL
TMON for MQSeries
TMON for MVS
SECFUNDF 245
245
245
245
245
none
none
none
none
none
Controls access to the Secured
Function Definition screen.
TMON for CICS
TMON for DB2
TMON for DBCTL
TMON for MQSeries
TMON for MVS
SECURITY 240
240
240
240
240
none
none
none
none
none
Controls access to security definitions.
TMON for DB2
TMON for DBCTL SELUSRID 006
006 none
none In TMON for DB2, controls the ability
to activate a set created by a user with
a different user ID or to update the
user ID assigned to a set. In TMON
for DBCTL, controls access to the
USERID= option.
TMON for DB2 SETAUTH 012 none Controls the ability to update or delete
sets that do not match the signed on
user ID.
TMON for DB2 SHDWFRSH 044 DB2
subsystem Controls the ability to issue the
SHADOWREFRESH command.
TMON for DB2
TMON for DBCTL
TMON for MQSeries
TMON for MVS
SHIFTDEF 175
175
175
177
none
none
none
none
Controls access to shift definitions.
TMON for CICS
TMON for DB2
TMON for DBCTL
TMON for MQSeries
TMON for MVS
SHUTDOWN 003
002
002
003
003
none
none
none
none
none
Controls use of the SHUTDOWN
command.
TMON for CICS
TMON for DB2
TMON for DBCTL
TMON for MQSeries
TMON for MVS
SIGNON 001
001
001
001
001
none
none
none
none
none
Controls the ability to log onto the
product.
TMON for DB2 SQLCCPA 041 DB2
subsystem Controls the ability to access the SQL
Capture Collection Profile Summary
screen and start/stop dynamic SQL
Capture profiles from the Current
Thread Summary (Short and Long)
screens.
TMON for DB2 SQLCGDF 042 DB2
subsystem Controls the ability to access the SQL
Capture Collection Controls screen.
Chapter 2: Security Definitions Function Code Table
The Monitor for MVS 2.0 2-29
System Administrator’s Guide
Product Function Code Primary
Resource Secondary
Resource Description
TMON for DB2 SQLTEXT 040 DB2
subsystem DB2 plan
name Controls access to the Current Thread
SQL Text Detail screen only if the
thread is executing a specified plan
within a specified DB2 subsystem.
TMON for MQSeries STGCAUTH 123 job name Controls access to storage class
functions.
TMON for DBCTL STGPOOLS 210 none Controls access to storage class
functions.
TMON for CICS STORANAL 106 none Controls access to the Storage
Analysis menu.
TMON for CICS
TMON for MVS STORTCBS 221
221 none
none Controls access to the Address Space
TCB Map screen.
TMON for CICS
TMON for MVS STORTIOT 220
220 none
none Controls access to the TIOT Display
screen.
TMON for CICS
TMON for DB2
TMON for DBCTL
TMON for MQSeries
TMON for MVS
STRGALTR 211
211
211
211
211
none
none
none
none
none
Controls the ability to alter storage.
TMON for CICS
TMON for DB2
TMON for DBCTL
TMON for MQSeries
TMON for MVS
STRGDSPY 137
137
137
137
137
none
none
none
none
none
Controls the ability to display storage
in any format.
TMON for CICS
TMON for DB2
TMON for DBCTL
TMON for MQSeries
TMON for MVS
STRGNPRV 115
115
115
115
115
none
none
none
none
none
Controls the ability to alter and display
nonprivate storage.
TMON for CICS
TMON for DB2
TMON for DBCTL
TMON for MQSeries
TMON for MVS
STRGPRV 116
116
116
116
116
none
none
none
job name
job name
Controls the ability to alter and display
private storage.
TMON for DB2 STUNLOAD 118 none Controls the ability to unload trace
data to a sequential data set in SMF
format.
TMON for DB2 SUPERTDM 111 DB2
subsystem Controls the ability to view collected
trace data.
TMON for CICS
TMON for DB2 SUPERTRC 109
110 none
none Controls access to Supertrace.
TMON for DB2 SUPERTSD 112 DB2
subsystem Controls the ability to start Supertraces.
TMON for MVS SVCDUPD 180 none Controls the ability to customize the
description of an SVC table.
TMON for MVS SYSADM 178 none Controls access to the System
Administration menu.
TMON for CICS SYSADMIN 111 none Controls access to System
Administration screens.
TMON for CICS TASKCANC 118 none Controls the ability to cancel a task
when using the Activity Monitor.
Function Code Table Chapter 2: Security Definitions
2-30

Product Function Code Primary
Resource Secondary
Resource Description
TMON for MQSeries THRDAUTH 156 job name Controls command functions for
threads.
TMON for CICS
TMON for DB2
TMON for DBCTL
TMON for MQSeries
TMON for MVS
USERCMDS 208
208
208
208
208
none
none
none
none
none
Controls access to the User Command
Definitions screen.
TMON for CICS
TMON for DB2
TMON for DBCTL
TMON for MQSeries
TMON for MVS
USERDEF 242
242
242
242
242
none
none
none
none
none
Controls access to the User Definition
screen.
TMON for CICS
TMON for DB2
TMON for DBCTL
TMON for MQSeries
TMON for MVS
USERDIR 241
241
241
241
241
none
none
none
none
none
Controls access to the User Profiles
Directory screen.
TMON for CICS
TMON for DB2
TMON for DBCTL
TMON for MQSeries
TMON for MVS
USERPROF 244
244
244
244
244
none
none
none
none
none
Controls access to the
Profiles/Resources Directory screen.
TMON for MVS UTILAPFL 155 none Controls access to the APF Utility
screen.
TMON for MVS UTILASMB 169 none Controls access to the ASM Control
Blocks screen.
TMON for MVS UTILDASD 153 none Controls access to the DASD and
Tape Services Menu.
TMON for MVS UTILDDSL 158 none Controls access to the System Dump
Data Set Display screen
(SYS.DUMPnn data sets).
TMON for MVS UTILDSNI 175 none Controls access to the Data Set
Information Display screen.
TMON for MVS UTILDSNU 174 none Controls access to the Data Set Name
Utility.
TMON for MVS UTILFSPC 159 none Controls access to the FSPACE Utility.
TMON for MVS UTILIOSB 170 none Controls access to the IOS Control
Blocks screen.
TMON for MVS UTILJOBB 171 none Controls access to the Job Control
Blocks screen.
TMON for MVS UTILJOBS 154 none Controls access to the Job-Related
Services Menu.
TMON for MVS UTILJPGN 165 job name Controls access to the Performance
Group Utility.
TMON for MVS UTILJTRM 164 job name Controls access to the Job
Termination Utility and the TCB KILL
function of the CDE Detail Display
screen.
TMON for MVS UTILLNKL 157 none Controls access to the LNKLST Utility.
TMON for MVS UTILLPAL 156 none Controls access to the LPA/Nucleus
Utility screen.
TMON for MVS UTILMENU 150 none Controls access to the Utilities Menu.
Chapter 2: Security Definitions Function Code Table
The Monitor for MVS 2.0 2-31
System Administrator’s Guide
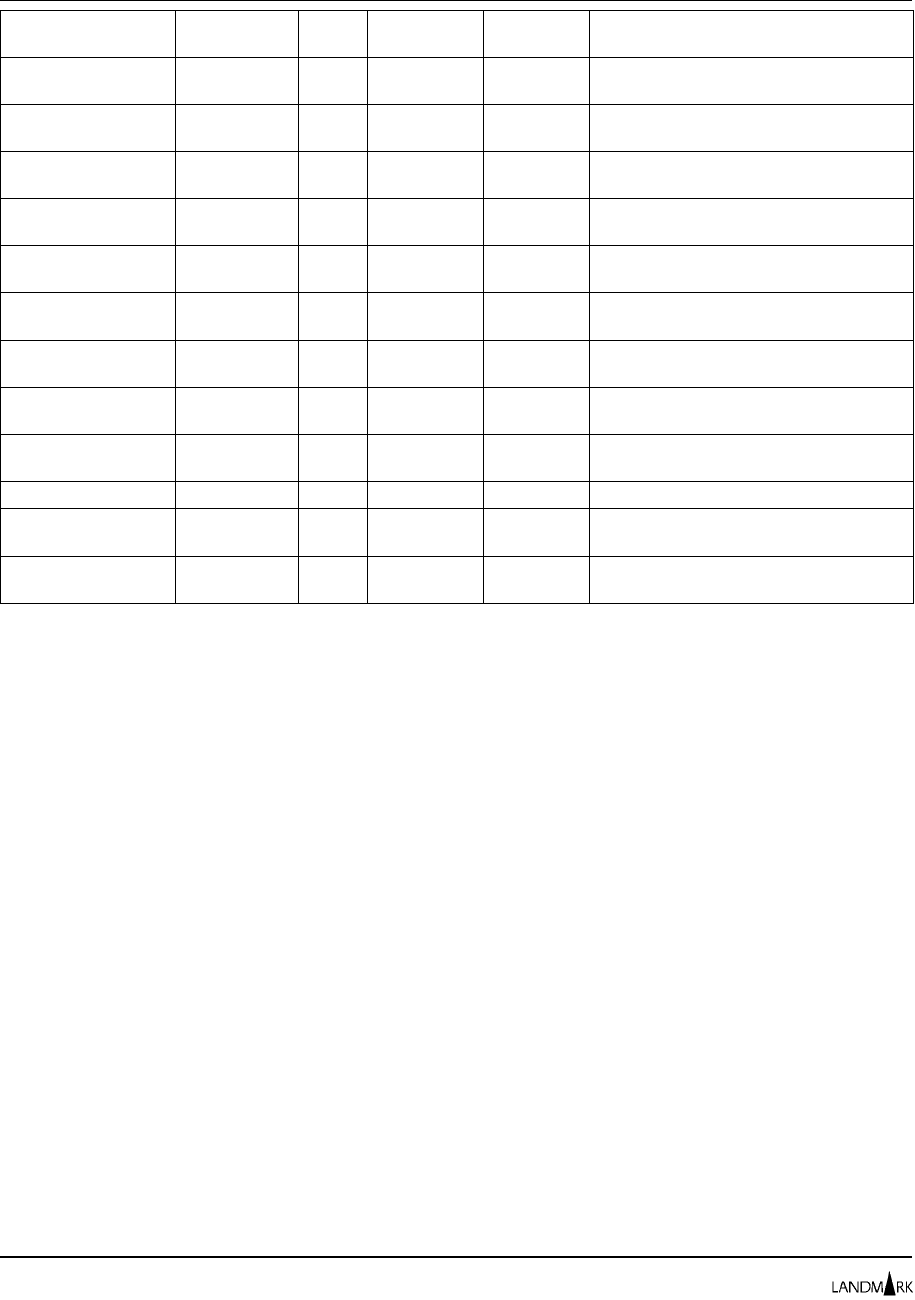
Product Function Code Primary
Resource Secondary
Resource Description
TMON for DB2
TMON for DBCTL UTILMON 051
051 none
none Controls access to the Current System
Statistics menu.
TMON for MVS UTILMSTG 152 none Controls access to the MVS Storage
Displays Menu.
TMON for MVS UTILMVSB 166 none Controls display of the MVS Control
Blocks screen.
TMON for MVS UTILSRMB 167 none Controls access to the SRM Control
Blocks screen.
TMON for MVS UTILSSVC 151 none Controls access to the Systems
Services Menu.
TMON for MVS UTILSWAP 163 none Controls access to the Swap Status
Utility.
TMON for MVS UTILVMNT 162 none Controls access to the Volume Mount
Utility.
TMON for MVS UTILVOLU 173 none Controls access to the Volume Use
Utility.
TMON for MVS UTILVSMB 168 none Controls access to the VSM Control
Blocks screen.
TMON for MVS WKLDDEF 179 none Controls access to workload definitions.
TMON for DB2 WRKBENCH 095 none Controls entry into the Analytic
Workbench.
TMON for MVS XCFMON 096 none Controls access to the XCF Activity
Selection Menu options.
Function Code Table Chapter 2: Security Definitions
2-32
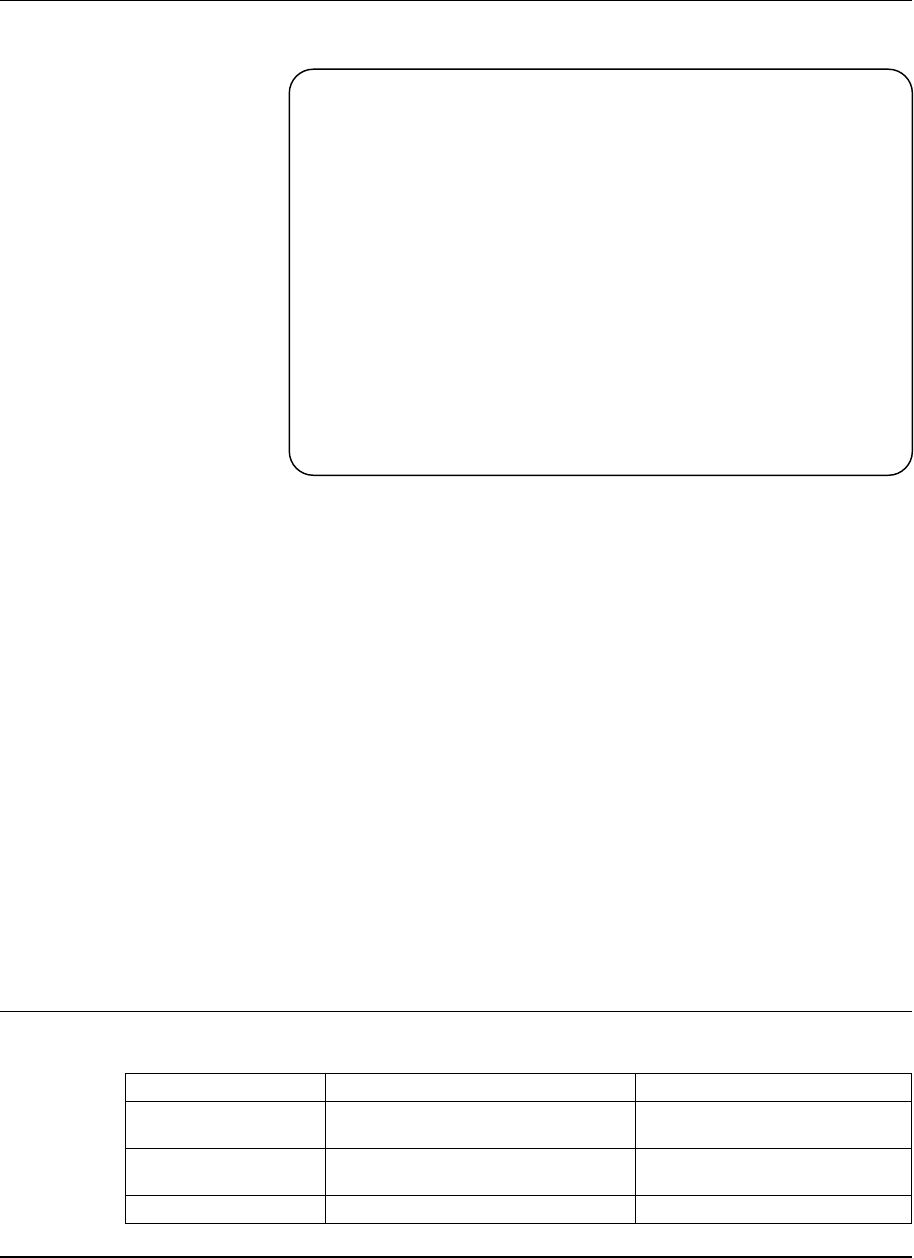
Profiles/Resources Directory
The Profiles/Resources Directory screen lists security profile
definitions in the control file.
Security definitions for resource functions (functions that can be
limited by primary and secondary resources) may vary depending
upon the access levels set for those functions with the individual
resource.
TMON for MVS example You might use a profile to let users use the Performance Group
Utility for job names beginning with the letters “DB”, but restrict
users from using the Performance Group Utility for job names
beginning with the letters “DV”.
The security definitions given with the first resource listed are used
to secure system functions (functions that do not use resources).
Resources always are sorted, displayed, and used alphabetically.
For example, if a profile called SAMPLE displays two primary
resources, DEV* and TEST*, the DEV* resource is listed first, and its
security definitions for system functions are used first. The
security definitions of system functions for the TEST* resource are
ignored.
Accessing this Screen To access this screen, complete one of the following paths.
Product Action Displays
TMON for CICS/ESA On the command line, enter
=10.1.7.3
.Profiles/Resources Directory
TMON for CICS/MVS On the command line, enter
=10.1.9.3
.Profiles/Resources Directory
TMON for DB2 On the command line, enter
=8.1.3
. Profiles/Resources Directory
JOBNAME: THE MONITOR FOR MVS DATE:
SYSID : VERSION: 2.0 TIME:
PROFILES/RESOURCES DIRECTORY
COMMAND:
TO "CHANGE" OR "DELETE" : CURSOR SELECT USER ID OR PROFILE ID.
TO "ADD" : CURSOR SELECT ANY USER ID OR PROFILE ID.
PROFILE ID PRIMARY RESOURCE SECONDARY RESOURCE
$DBADMIN * *
$DEFAULT * *
$SECURTY * *
$SYSADMN * *
$SYSPROG * *
$SYSYUNG * *
$SYSYUN1 * *
HELP INFORMATION = PF1 PF KEY ASSIGNMENTS = PA1
Chapter 2: Security Definitions Profiles/Resources Directory
The Monitor for MVS 2.0 2-33
System Administrator’s Guide
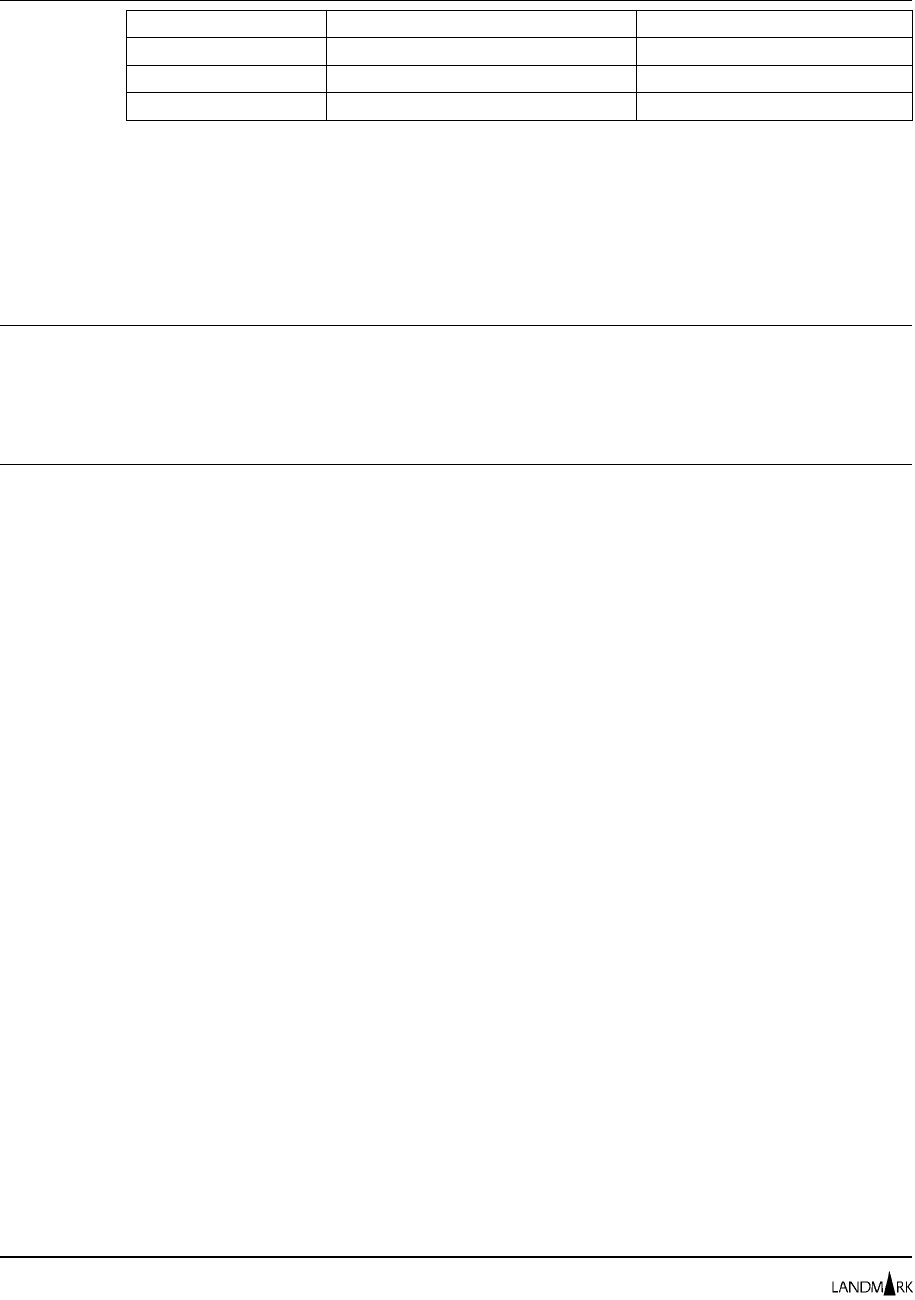
Product Action Displays
TMON for DBCTL On the command line, enter
=M.1.3
. Profiles/Resources Directory
TMON for MQSeries On the command line, enter
=8.1.3
. Profiles/Resources Directory
TMON for MVS On the command line, enter
=S.2.3
. Profiles/Resources Directory
If you access the Profile/Resources Directory screen as the third
option of the Security Definitions Menu, it displays resource
information for all existing security profile definitions in the
control file. If you access the screen from the User Definition or
User Profiles Directory screen, it displays only the resources for the
specific profile you selected.
Primary Commands Use the DOWN and UP commands to scroll through this screen. To
learn about the various ways to scroll using these commands and
for syntax and descriptions of all commands, see Chapter 2 in your
product reference manual.
Fields PRIMARY RESOURCE
Shows the name of the principal resource for the profile definition.
In addition to checking a user ID’s access level for a given function,
Landmark PerformanceWorks MVS products can limit a user ID’s
use of a function to a selected resource.
•TMON for CICS primary resources are job names.
•TMON for DB2 primary resources are DB2 subsystem names.
•TMON for DBCTL primary resources are DBCTL subsystem
names.
•TMON for MQSeries primary resources are MQSeries object
names.
•TMON for MVS primary resources are job names or volume
serial numbers.
An asterisk (*) in the field shows that pattern matching is being
used. For example, PROD* identifies all primary resources
beginning with the letters “PROD.” If you specify an asterisk
alone, all values of the primary resource are used.
➥PROFILE ID
Displays the 1- to 8-character profile ID for the product.
Cursor-select this field to add, update, or delete profile definitions.
The Detail Profile Definition screen is displayed.
SECONDARY RESOURCE
Shows the name of the secondary resource for the profile definition.
Profiles/Resources Directory Chapter 2: Security Definitions
2-34

TMON for CICS, TMON for
DBCTL, TMON for
MQSeries, and TMON for
MVS do not use secondary
resources.
TMON for DB2 secondary resources are DB2 plan or package
names. Secondary resources qualify security within the limits of
the primary resource. For example, you can restrict the user plans
that can be reviewed by DB2 subsystem name and by plan name
within DB2 subsystem using the PLANSUMM function. If you
restrict TMON for DB2 by secondary resources, you must first
specify a primary and secondary resource pair in the profile using
an asterisk (*) for the secondary resource. You then can specify a
second primary and secondary resource pair in the profile using
the transaction ID for the secondary resource. This step is
necessary because TMON for DB2 security needs to know what
default security to use for DB2 subsystem names that match the
primary resource but DB2 plan or package names that do not
match the secondary resource.
An asterisk (*) in the field shows that pattern matching is being
used. For example, PROD* identifies all secondary resources
beginning with the letters “PROD.” If you specify an asterisk
alone, all values of the secondary resource are used.
Chapter 2: Security Definitions Profiles/Resources Directory
The Monitor for MVS 2.0 2-35
System Administrator’s Guide

Detail Profile Definition
The Detail Profile Definition screen lists detailed information for a
selected security profile. The detail profile definition consists of the
profile ID, the qualifying resources, function descriptions, function
names and codes, and access levels.
Changes to a profile take effect
the next time a user logs onto
the product and invokes the
profile.
If a profile lists multiple resources, the security definitions given
with the first resource listed are used to secure system functions for
the profile (functions that do not use primary or secondary
resources). If other primary resources are listed for this profile on
the Profiles/Resources Directory screen, the security definitions for
their system functions are ignored.
Caution We recommend that you do not change the default security profiles
shipped with your Landmark PerformanceWorks MVS product. The
control file PDS member containing these profiles (V@RECS) may
be changed in the next release. When this member is copied into
your VSAM control file, all your changes to the default profiles will
be overlaid.
Accessing this Screen To access this screen, complete one of the following paths.
Product Action Displays
TMON for CICS/ESA On the command line, enter
=10.1.7.3
.Profiles/Resources Directory
Cursor-select a profile definition. Detail Profile Definition
TMON for CICS/MVS On the command line, enter
=10.1.9.3
.Profiles/Resources Directory
Cursor-select a profile definition. Detail Profile Definition
TMON for DB2 On the command line, enter
=8.1.3
. Profiles/Resources Directory
Cursor-select a profile definition. Detail Profile Definition
JOBNAME: THE MONITOR FOR MVS DATE:
SYSID : VERSION: 2.0 TIME:
DETAIL PROFILE DEFINITION
COMMAND:
PROFILE: $DEFAULT PRIMARY RESOURCE: * SECONDARY RESOURCE: *
CURSOR SELECT ONE OF THE FOLLOWING: _ADD _UPDATE _DELETE
<-LO--ACCESS LEVELS--HI->
DESCRIPTION FUNCTION CODE NONE READ UPDT CNTL ALTR
USER ACCESS AND SIGNON SIGNON 001 X
SHUTDOWN COMMAND SHUTDOWN 003 X
LOGO SCREEN CONTROL LOGOSCRN 004 X
DELAY MONITOR MAIN MENU DLYMON 070 X
DELAY MONITOR GROUP DEFINITION DLYGRP 071 X
DELAY MONITOR GLOBAL RECORDS DLYGRPG 072 X
DELAY MONITOR USER RECORDS DLYGRPU 073 X
DELAY MONITOR DETAIL ANALYSIS DLYMNDET 074 X
DATA COLLECTION OPTIONS GDCOPTS 079 X
PRINT SCREEN MENU PRTMENU 080 X
PRINT SCREEN DEFINE DSN OUTPUT PRTDFDSN 081 X
PRINT SCREEN DEFINE SYSOUT OUT PRTDFSYS 082 X
HELP INFORMATION = PF1 PF KEY ASSIGNMENTS = PA1
Detail Profile Definition Chapter 2: Security Definitions
2-36
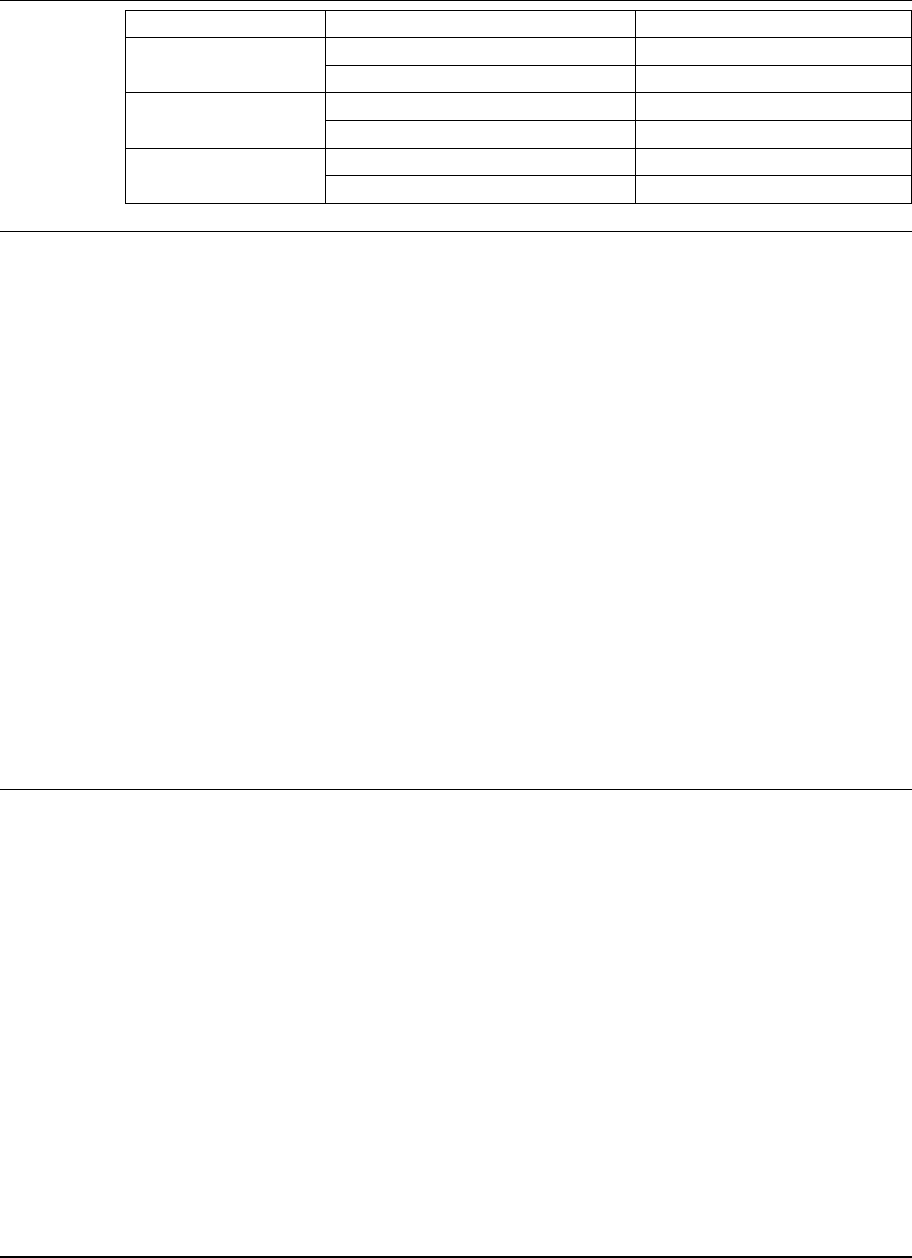
Product Action Displays
TMON for DBCTL On the command line, enter
=M.1.3
. Profiles/Resources Directory
Cursor-select a profile definition. Detail Profile Definition
TMON for MQSeries On the command line, enter
=8.1.3
. Profiles/Resources Directory
Cursor-select a profile definition. Detail Profile Definition
TMON for MVS On the command line, enter
=S.2.3
. Profiles/Resources Directory
Cursor-select a profile definition. Detail Profile Definition
Primary Commands Enter the following commands on the command line.
ADD Adds a profile definition to the control file.
Type over the appropriate fields
(LO-ACCESS LEVELS-HI, PRIMARY
RESOURCE, PROFILE, and SECONDARY
RESOURCE) to identify the profile
definition; then enter this command (or
cursor-select the ADD field).
DELETE Deletes a profile definition from the control
file. You also can cursor-select the DELETE
field to perform this function.
UPDATE Updates a profile definition in the control
file. Type over the information you want to
change; then enter this command (or
cursor-select the UPDATE field).
Use the DOWN and UP commands to scroll through this screen. To
learn about the various ways to scroll using these commands and
for syntax and descriptions of all commands, see Chapter 2 in your
product reference manual.
Fields ➥ADD
Adds a profile definition to the control file. Type over the
appropriate fields (LO-ACCESS LEVELS-HI, PRIMARY
RESOURCE, PROFILE, and SECONDARY RESOURCE) to identify
the profile definition; then cursor-select this field to add the
definition to the control file. You also can use the ADD command
to perform this function.
CODE
Shows the 3-digit internal function ID. You cannot modify this
field.
➥ DELETE
Deletes a profile definition from the control file.
Cursor-select this field to delete the definition. You also can use
the DELETE command to perform this function.
Chapter 2: Security Definitions Detail Profile Definition
The Monitor for MVS 2.0 2-37
System Administrator’s Guide
DESCRIPTION
Displays the 1- to 30-character description of the function. You
cannot change this field.
FUNCTION
Displays the 1- to 8-character name of the facility within the
product. You cannot change this field.
LO-ACCESS LEVELS-HI
Displays the level of access assigned this profile for each secured
function. Enter X under the access level appropriate for the
function and the profile. Access levels vary in meaning depending
on the function. Review the function access level table, later in this
chapter, to identify the minimum access level required for a specific
function and a description of the other access levels for that
function (if more than one access level applies). The following
table describes the five access levels, in order of increasing security
level.
Access Level Description
NONE The lowest security access level. An X (the default) in this
field denies the user access to the function.
READ Defines READ access authorization. This is the fourth
highest level of secured access.
UPDT Defines UPDATE access authorization. This is the third
highest level of secured access. Users with UPDT access
also have READ access to the function.
CNTL Defines CONTROL access authorization. This is the
second highest level of secured access. Users with CNTL
access also have READ and UPDT access to the function.
ALTR Defines ALTER access authorization. This is the highest
level of secured access. Users with ALTR access have
total access, including READ, UPDT, and CNTL access to
the function.
PRIMARY RESOURCE
Shows the name of the principal resource for this profile definition.
User IDs using this profile definition are in effect only for the
resource specified here.
•TMON for CICS primary resources are job names.
•TMON for DB2 primary resources are DB2 subsystem names.
•TMON for DBCTL primary resources are DBCTL subsystem
names.
•TMON for MQSeries primary resources are MQSeries object
names.
•TMON for MVS primary resources are job names or volume
serial numbers.
You can use an asterisk (*) to activate pattern matching for this
field. For example, PROD* identifies all primary resources
Detail Profile Definition Chapter 2: Security Definitions
2-38

beginning with the characters “PROD.” If you specify an asterisk
alone, all values of the primary resource are used.
If you want to specify more primary resources than this screen
allows (even after using pattern matching), add other definitions
for the profile using the other primary resources. Only the access
levels specified for the first profile/resource definition are used in
security for system functions (functions that do not use resources),
but all of the different primary resources in the other definitions are
included in the security for resource functions.
TMON for MQSeries example You can use the QMGRAUTH function to limit the queue managers
monitored by a given user ID. In this example, access levels are
defined for system functions based on the settings in the
$EXAMPLE profile with CSQ* resource. The access levels defined
for system functions in the $EXAMPLE profile with the CSQ*
resource are ignored. They are ignored because the CSQ* resource
is defined before the OTH* resource and, consequently, is
encountered first by Internal Security.
Profile ID Primary Resource
$EXAMPLE CSQ*
OTH*
PROFILE
Displays the 1- to 8-character product profile ID you selected on
the Profiles/Resources Directory screen. Change this ID if you
want to add a new profile definition.
SECONDARY RESOURCE
Shows the name of the auxiliary resource for this profile definition.
TMON for CICS, TMON for
DBCTL, TMON for
MQSeries, and TMON for
MVS do not use secondary
resources.
TMON for DB2 secondary resources are DB2 plan or package
names. If you restrict TMON for DB2 by secondary resources, you
must first specify a primary and secondary resource pair in the
profile using an asterisk (*) for the secondary resource. You then
can specify a second primary and secondary resource pair in the
profile using the transaction ID for the secondary resource. This
step is necessary because TMON for DB2 security needs to know
what default security to use for DB2 subsystem names that match
the primary resource but DB2 plan or package names that do not
match the secondary resource.
An asterisk (*) in the field shows that pattern matching is being
used. For example, PROD* identifies all secondary resources
beginning with the letters “PROD.” If you specify an asterisk
alone, all values of the secondary resource are used.
If you want to specify more secondary resources than this screen
allows (even after using pattern matching), add other definitions
for the profile using the same primary resource and other
secondary resources. Only the access levels specified for the first
profile/primary resource/secondary resource definition are used in
security for system functions, but all of the defined secondary
Chapter 2: Security Definitions Detail Profile Definition
The Monitor for MVS 2.0 2-39
System Administrator’s Guide

resources are included in the security for resource functions. For
example, you can restrict the user plans that can be reviewed by
DB2 subsystem name and plan name within DB2 subsystem using
the PLANSUMM function.
➥ UPDATE
Updates a profile definition in the control file. Type over the
information you want to change; then cursor-select this field to
update the definition in the control file. You also can use the
UPDATE command to perform this function.
Detail Profile Definition Chapter 2: Security Definitions
2-40
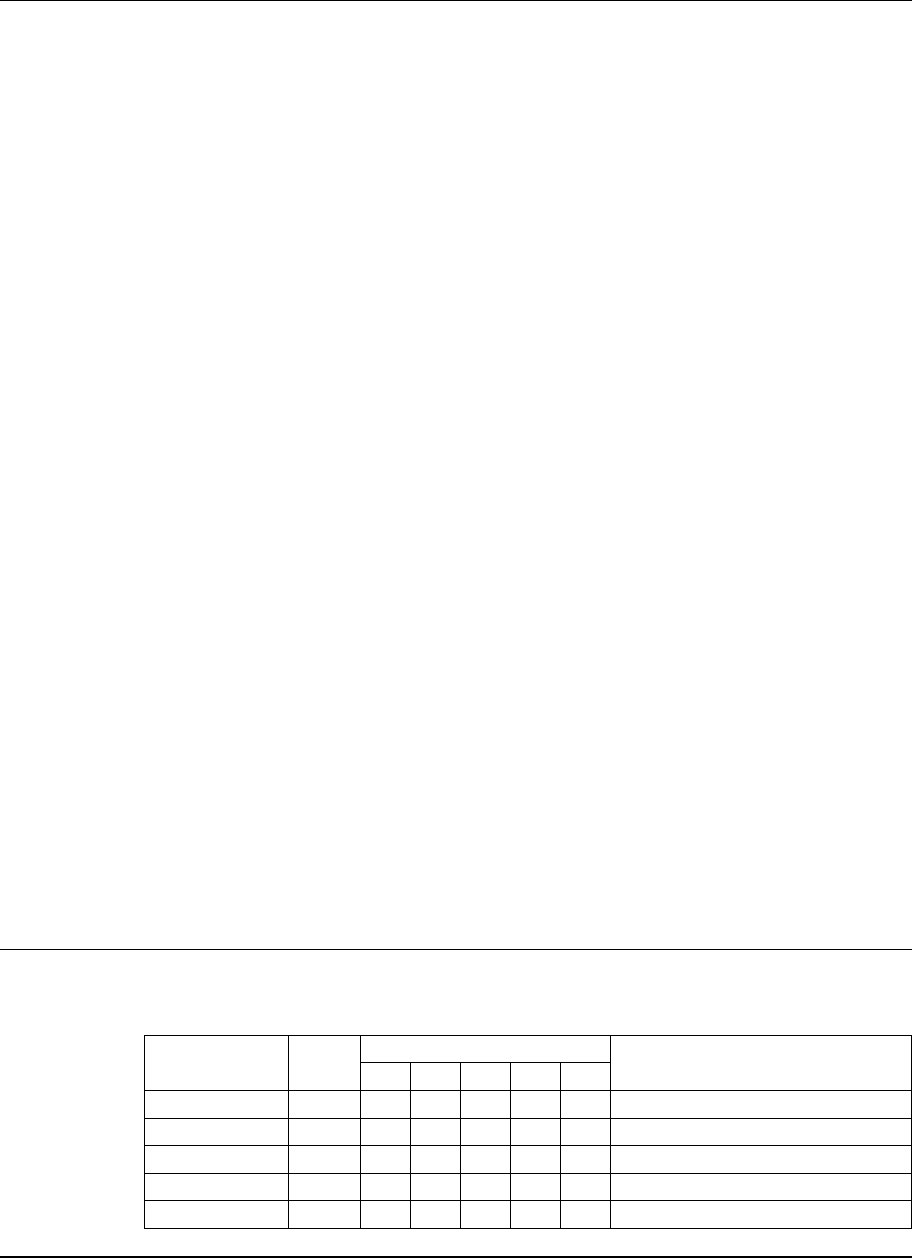
Function Access Level Table
This section shows the minimum access level required to use each
product function within your Landmark PerformanceWorks MVS
product.
If more than one access level is indicated for a function (in other
words, if more than one access level column has an X in it), the
various access levels provide access to different aspects of the
function. Read the description in the Notes column to determine
which access level you need.
If READ access is the only access level shown for a function, the
function has only two levels of authorization: access or no access.
In other words, the READ, UPDT, CNTL, and ALTR access levels
all provide access to the function with no distinction between
them; the NONE access level restricts use of the function. For
example, the READ, UPDT, CNTL, and ALTR access levels all have
the same meaning for the HELPMENU function: They allow access
to the Help Definitions Menu.
Likewise, if a function shows a blank in an access level column,
that access level has the same meaning as the previous access
column with an X in it. For example, the CNTL and ALTR access
levels for the CONSOLE function have the same meaning as the
UPDT function: They allow access to view the console displays,
and they allow commands to be entered on the displays. The
READ access level of the CONSOLE function, however, only allows
access to view the console displays.
To deny access to any function, specify an access level of NONE (or
“N”). The following abbreviations are used in the table:
AALTR access authorization
CCNTL access authorization
NNo security
RREAD access authorization
UUPDT access authorization
TMON for CICS The following table shows the minimum access level required to use
each product function for TMON for CICS.
Function Code Minimum Level Required Notes
NRUCA
ACTIVMON 102 X
ADVFUNCS 180 X
CICSSTAT 113 X
CNTLFILE 238 X
COLLANAL 107 X
Chapter 2: Security Definitions Function Access Level Table
The Monitor for MVS 2.0 2-41
System Administrator’s Guide
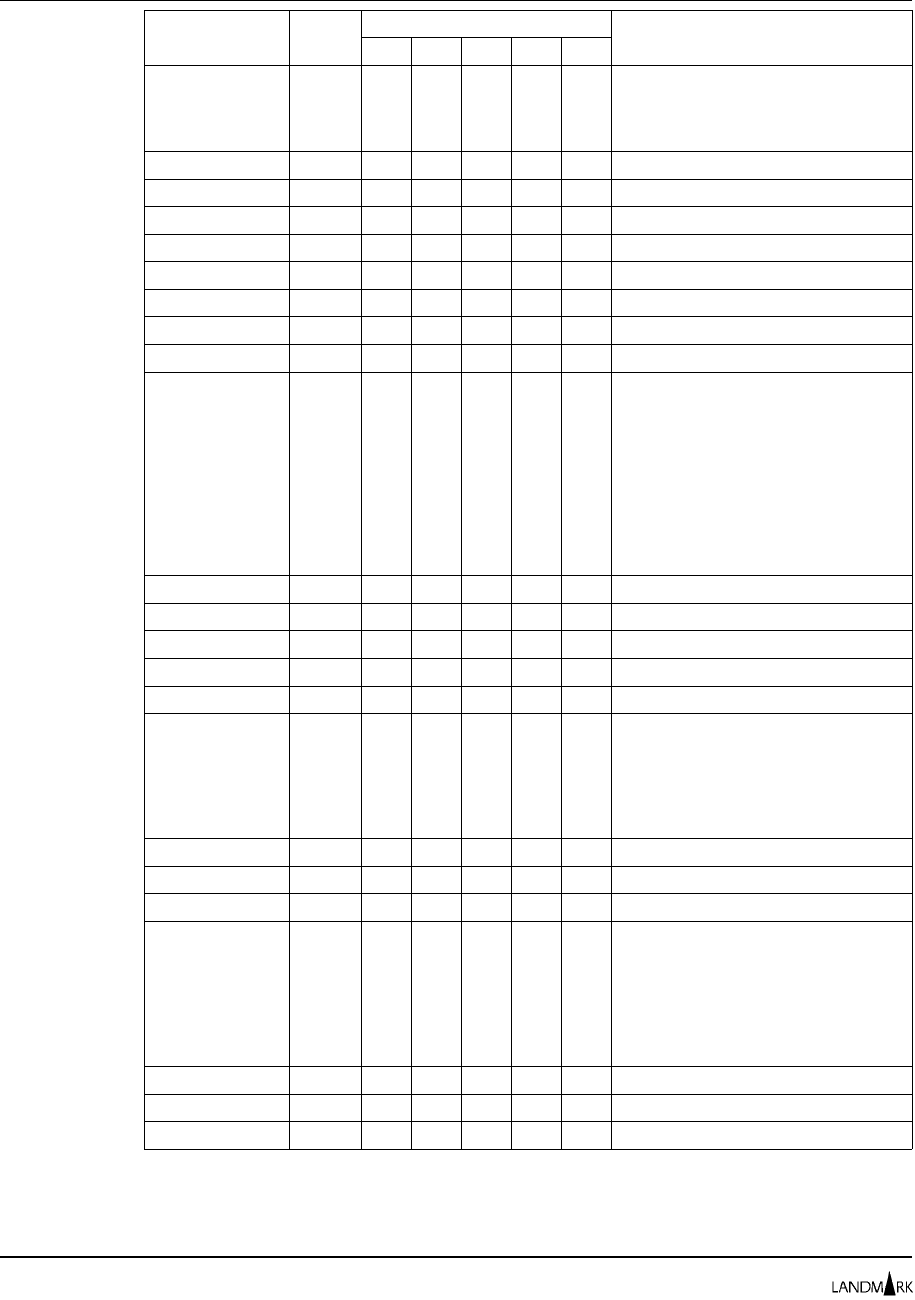
Function Code Minimum Level Required Notes
NRUCA
CONSOLE 230 X X READ (or higher) lets users view
console displays. UPDT (or higher)
is required to enter commands on
console displays.
DATADCTS 222 X
FLDBANAL 108 X
HELPMENU 235 X
HLPFLDIR 236 X
HLPFLDTL 237 X
HLPMSDIR 253 X
HLPSLDIR 205 X
HLPSLDTL 206 X
JOBLIST 101 X X Because the JOBLIST function uses
the JOBNAME field as a resource
ID, you may have NONE, READ, or
UPDT access by job name. READ
(or higher) lets users select the job
from the Job Selection List screen.
Functions that are capable of
changing the state of the CICS
region (such as starting Supertrace)
may require UPDT access.
LOGOSCRN 004 X
MVSCONTN 105 X
OPENMAIN 217 X
PASSTHRU 110 X
PERFORM 103 X
PFKDEF 250 X X X READ (or higher) lets users view
function key settings. UPDT (or
higher) lets users change function
key settings for their user ID. ALTR
lets users change function key
settings for any user ID.
PROBALRT 104 X
PRODPSWG 201 X
PROFDTL 246 X
RMTPTDEF 209 X X X READ (or higher) lets users view
the remote session definitions.
UPDT (or higher) lets users change
remote session definitions and the
SLU session ID prefix. ALTR lets
users add and delete remote
session definitions.
RMTPTSEL 207 X
SECFUNCS 243 X
SECFUNDF 245 X
Function Access Level Table Chapter 2: Security Definitions
2-42
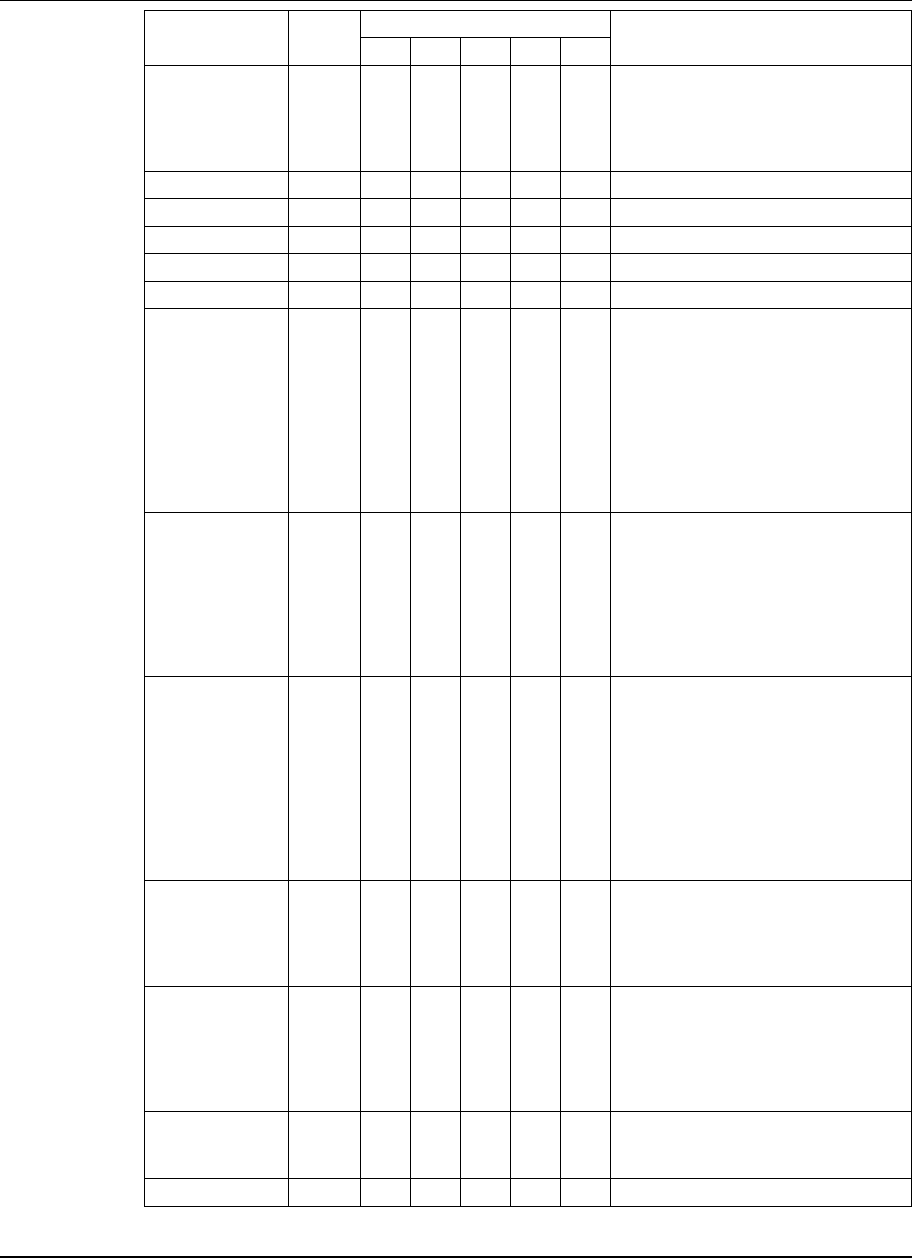
Function Code Minimum Level Required Notes
NRUCA
SECURITY 240 X X READ (or higher) lets users access
the Security Definitions Menu.
UPDT (or higher) is required to
change the type of logon and
function security used.
SHUTDOWN 003 X
SIGNON 001 X
STORANAL 106 X
STORTCBS 221 X
STORTIOT 220 X
STRGALTR 211 X Works with the STRGNPRV and
STRGPRV functions. To alter
private storage, READ access must
be specified for STRGALTR and
UPDT must be specified for
STRGPRV. To alter nonprivate
storage, READ access must be
specified for STRGALTR and UPDT
must be specified for both
STRGPRV and STRGNPRV.
STRGDSPY 137 X Works with the STRGNPRV and
STRGPRV functions. To display
private storage, READ access must
be specified for both STRGDSPY
and STRGPRV. To display
nonprivate storage, READ access
must be specified for both
STRGDSPY and STRGNPRV.
STRGNPRV 115 X X Works with the STRGDSPY,
STRGALTR, and STRGPRV
functions. To alter nonprivate
storage, you must be authorized to
alter private and nonprivate
storage. See the above notes for
the STRGDSPY and STRGALTR
functions for the authorization
required to display and alter
nonprivate storage.
STRGPRV 116 X X Works with the STRGDSPY and
STRGALTR functions. See the
above notes on these functions for
the authorization required to display
and alter private storage.
SUPERTRC 109 X X READ (or higher) lets users view
Supertrace data. To start
Supertrace collection for the
selected job(s), UPDT (or higher)
must be specified for the JOBLIST
function.
SYSADMIN 111 X X UPDT (or higher) is required to
update data collection options in the
System Administration option.
TASKCANC 118 X
Chapter 2: Security Definitions Function Access Level Table
The Monitor for MVS 2.0 2-43
System Administrator’s Guide
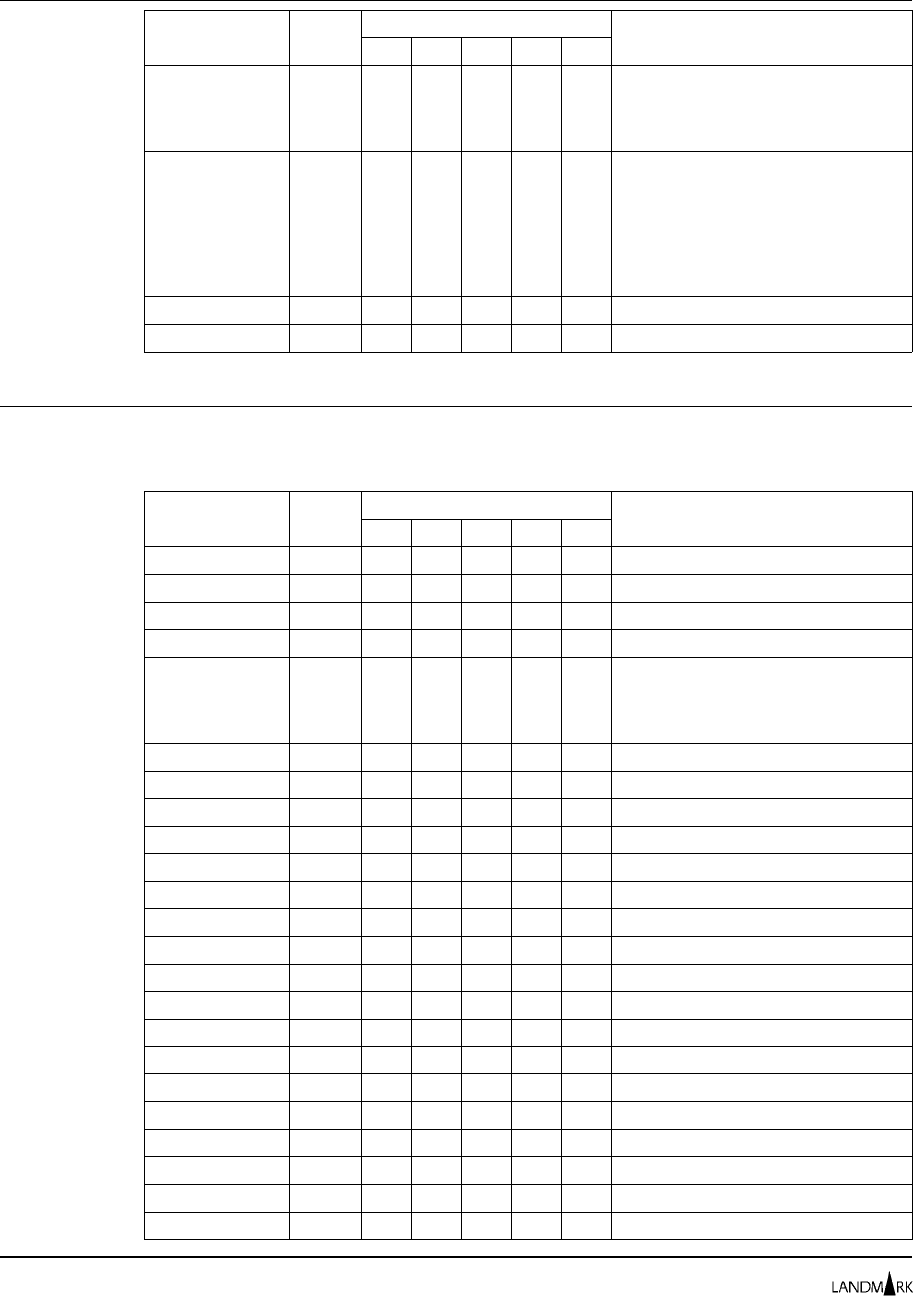
Function Code Minimum Level Required Notes
NRUCA
USERCMDS 208 X X READ (or higher) lets users view
user command definitions. UPDT
(or higher) lets users add and
modify user command definitions.
USERDEF 242 X X X READ (or higher) lets users view
their own user ID definitions and
passwords. UPDT (or higher) lets
users review and update their own
user ID definitions and passwords.
ALTR lets users review and update
any user ID definition and password.
USERDIR 241 X
USERPROF 244 X
TMON for DB2 The following table shows the minimum access level required to use
each product function for TMON for DB2.
Function Code Minimum Level Required Notes
NRUCA
ACTVLOG 053 X
ACTVMON 030 X
ADVFUNCS 180 X
CANCEL 031 X
CONSOLE 230 X X READ (or higher) lets users view
console displays. UPDT (or higher)
is required to enter commands on
console displays.
CSTGSDSP 195 X
DATADCTS 222 X
DB2AUTH 010 X
DB2CMD 032 X
DB2CONN 033 X
DB2OPTS 170 X
DSNZPDSP 182 X
EDMSTAT 054 X
EXCPDEF 072 X
EXCPVIEW 073 X
EXPLAIN 210 X
HELPMENU 235 X
HISTANL 140 X
HLPFLDIR 236 X
HLPFLDTL 237 X
HLPMSDIR 253 X
HLPSLDIR 205 X
HLPSLDTL 206 X
Function Access Level Table Chapter 2: Security Definitions
2-44

Function Code Minimum Level Required Notes
NRUCA
JOBSUMM 196 X
MONCNTL 160 X
MONINIT 163 X
ONLINANL 090 X
OPENMAIN 217 X
PFKDEF 250 X X X READ (or higher) lets users view
function key settings. UPDT (or
higher) lets users change function
key settings for their user ID. ALTR
lets users change function key
settings for any user ID.
PFKEYS 233 X
PGSETDSP 101 X
PLANSUMM 212 X
PROFDTL 246 X
RESRCDSP 190 X
RMTPTDEF 209 X X X READ (or higher) lets users view
the remote session definitions.
UPDT (or higher) lets users change
remote session definitions and the
SLU session ID prefix. ALTR lets
users add and delete remote
session definitions.
RMTPTSEL 207 X
SAVESQL 216 X
SECFUNCS 243 X
SECFUNDF 245 X
SECURITY 240 X X READ (or higher) lets users access
the Security Definitions Menu.
UPDT (or higher) is required to
change the type of logon and
function security used.
SELUSRID 006 X
SETAUTH 012 X
SHDWFRSH 044 X
SHIFTDEF 175 X
SHUTDOWN 002 X
SIGNON 001 X
SQLCCPA 041 X
SQLCGDF 042 X
SQLTEXT 040 X
Chapter 2: Security Definitions Function Access Level Table
The Monitor for MVS 2.0 2-45
System Administrator’s Guide
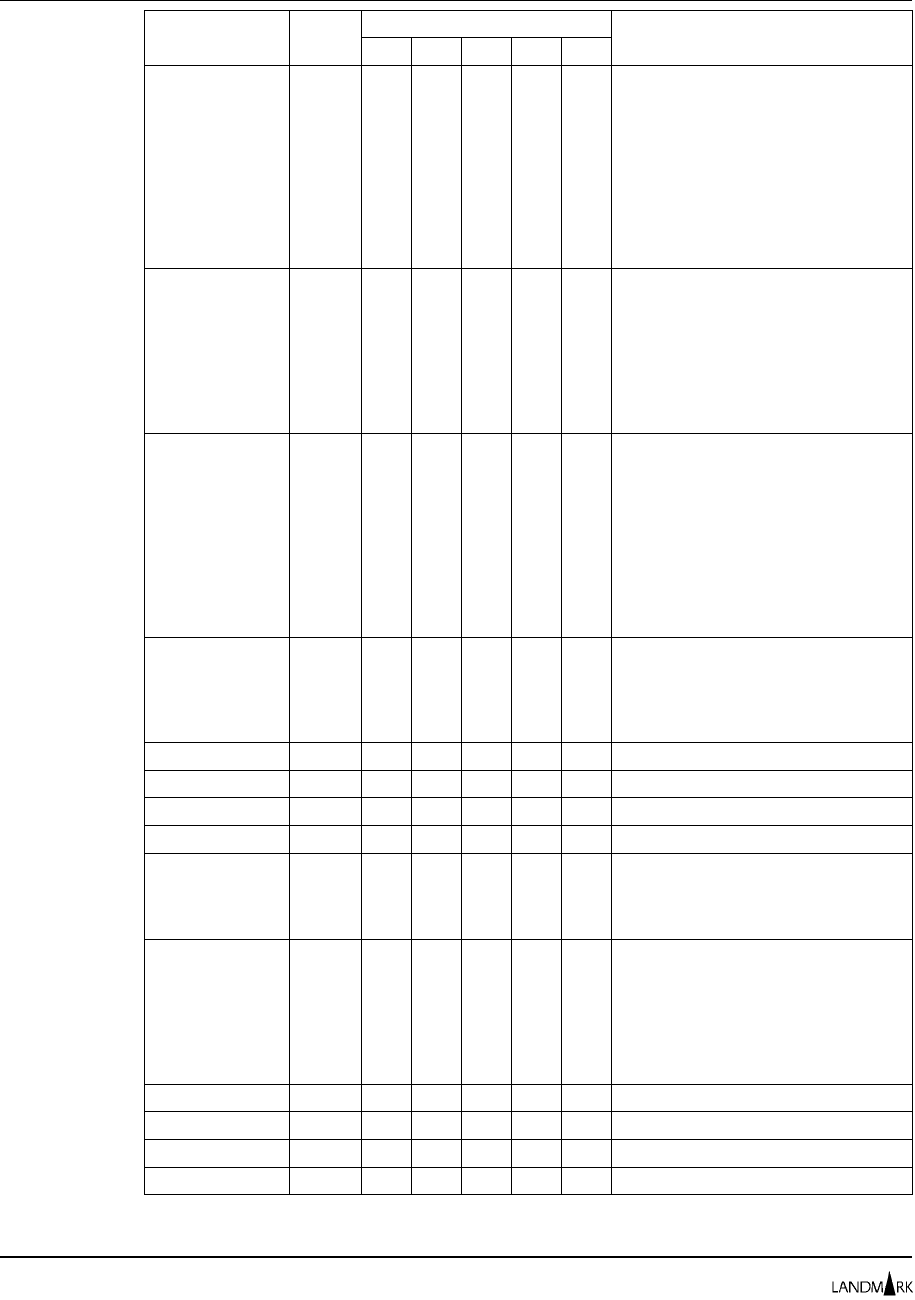
Function Code Minimum Level Required Notes
NRUCA
STRGALTR 211 X Works with the STRGNPRV and
STRGPRV functions. To alter
private storage, READ access must
be specified for STRGALTR and
UPDT must be specified for
STRGPRV. To alter nonprivate
storage, READ access must be
specified for STRGALTR and UPDT
must be specified for both
STRGPRV and STRGNPRV.
STRGDSPY 137 X Works with the STRGNPRV and
STRGPRV functions. To display
private storage, READ access must
be specified for both STRGDSPY
and STRGPRV. To display
nonprivate storage, READ access
must be specified for both
STRGDSPY and STRGNPRV.
STRGNPRV 115 X X Works with the STRGDSPY,
STRGALTR, and STRGPRV
functions. To alter nonprivate
storage, you must be authorized to
alter private and nonprivate
storage. See the above notes for
the STRGDSPY and STRGALTR
functions for the authorization
required to display and alter
nonprivate storage.
STRGPRV 116 X X Works with the STRGDSPY and
STRGALTR functions. See the
above notes on these functions for
the authorization required to display
and alter private storage.
STUNLOAD 118 X
SUPERTDM 111 X
SUPERTRC 110 X
SUPERTSD 112 X
USERCMDS 208 X X READ (or higher) lets users view
user command definitions. UPDT
(or higher) lets users add and
modify user command definitions.
USERDEF 242 X X X READ (or higher) lets users view
their own user ID definitions and
passwords. UPDT (or higher) lets
users review and update their own
user ID definitions and passwords.
ALTR lets users review and update
any user ID definition and password.
USERDIR 241 X
USERPROF 244 X
UTILMON 051 X
WRKBENCH 095 X
Function Access Level Table Chapter 2: Security Definitions
2-46
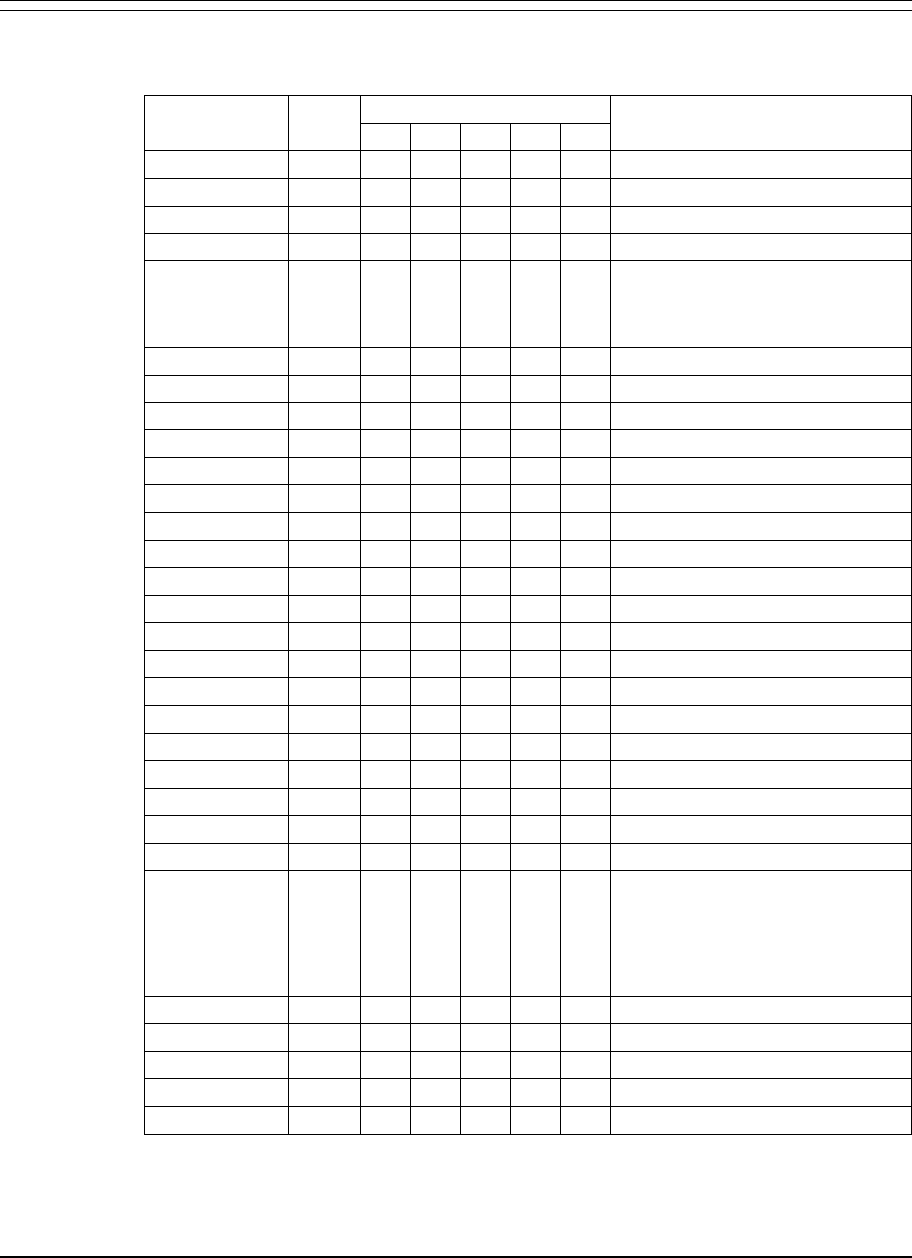
TMON for DBCTL The following table shows the minimum access level required to use
each product function for TMON for DBCTL.
Function Code Minimum Level Required Notes
NRUCA
ACTVMON 030 X
ADVFUNCS 180 X
CBLKS 184 X
COLLANAL 107 X
CONSOLE 230 X X READ (or higher) lets users view
console displays. UPDT (or higher)
is required to enter commands on
console displays.
DATADCTS 222 X
DBADMIN 110 X
DBCAUTH 010 X
DBCCONN 033 X
DBCOPTS 170 X
EXCPDEF 072 X
EXCPVIEW 073 X
HELPMENU 235 X
HLPFLDIR 236 X
HLPFLDTL 237 X
HLPMSDIR 253 X
HLPSLDIR 205 X
HLPSLDTL 206 X
ITASKANL 181 X
JOBSUMM 196 X
MODSTOR 182 X
MONCNTL 160 X
MONINIT 163 X
OPENMAIN 217 X
PFKDEF 250 X X X READ (or higher) lets users view
function key settings. UPDT (or
higher) lets users change function
key settings for their user ID. ALTR
lets users change function key
settings for any user ID.
PFKEYS 233 X
PRODPSWD 202 X
PROFDTL 246 X
PSBACTRK 065 X
RESRCDESP 190 X
Chapter 2: Security Definitions Function Access Level Table
The Monitor for MVS 2.0 2-47
System Administrator’s Guide
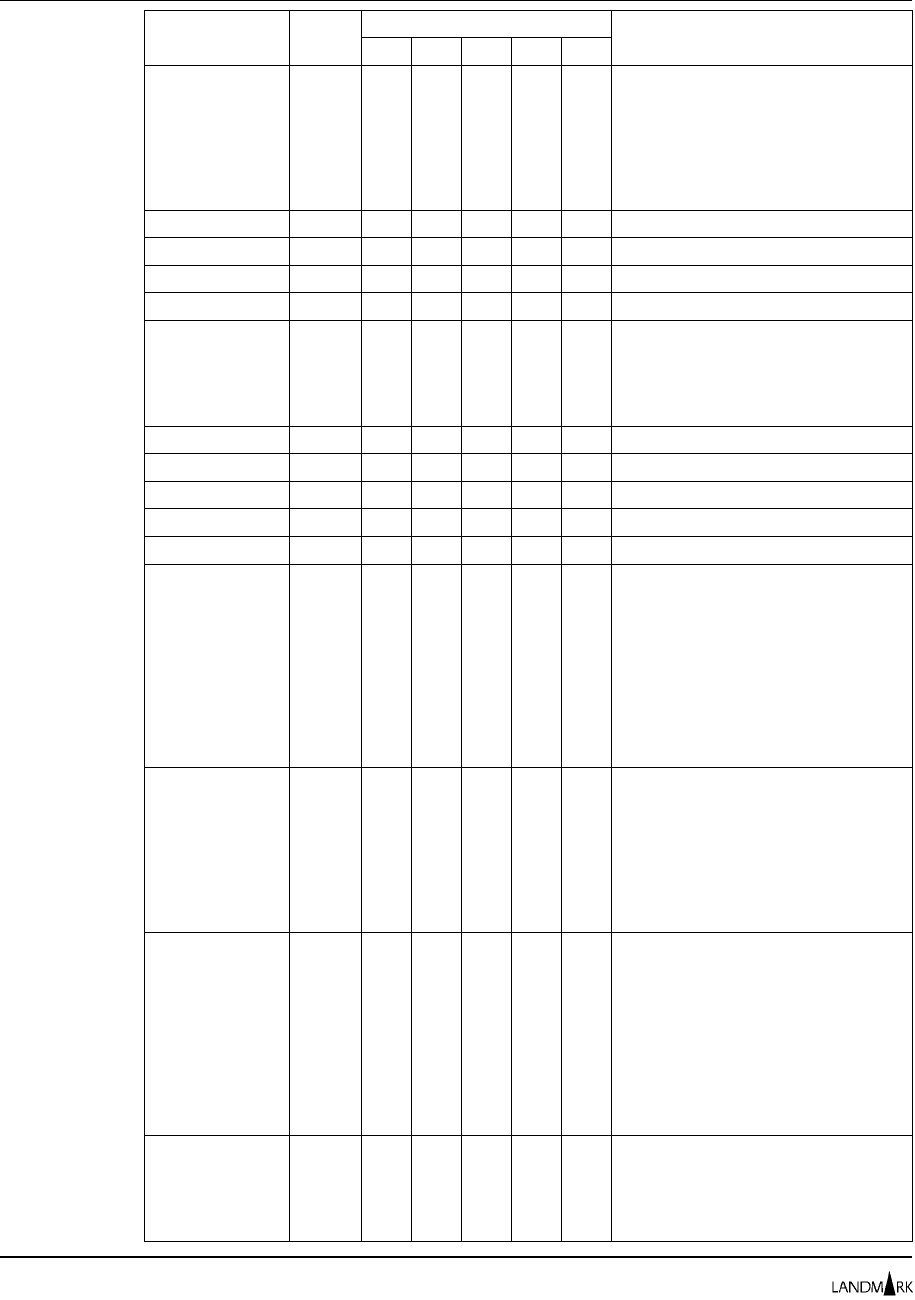
Function Code Minimum Level Required Notes
NRUCA
RMTPTDEF 209 X X X READ (or higher) lets users view
the remote session definitions.
UPDT (or higher) lets users change
remote session definitions and the
SLU session ID prefix. ALTR lets
users add and delete remote
session definitions.
RMTPTSEL 207 X
RSR 055 X
SECFUNCS 243 X
SECFUNDF 245 X
SECURITY 240 X X READ (or higher) lets users access
the Security Definitions Menu.
UPDT (or higher) is required to
change the type of logon and
function security used.
SELUSRID 006 X
SHIFTDEF 175 X
SHUTDOWN 002 X
SIGNON 001 X
STGPOOLS 210 X
STRGALTR 211 X Works with the STRGNPRV and
STRGPRV functions. To alter
private storage, READ access must
be specified for STRGALTR and
UPDT must be specified for
STRGPRV. To alter nonprivate
storage, READ access must be
specified for STRGALTR and UPDT
must be specified for both
STRGPRV and STRGNPRV.
STRGDSPY 218 X Works with the STRGNPRV and
STRGPRV functions. To display
private storage, READ access must
be specified for both STRGDSPY
and STRGPRV. To display
nonprivate storage, READ access
must be specified for both
STRGDSPY and STRGNPRV.
STRGNPRV 115 X X Works with the STRGDSPY,
STRGALTR, and STRGPRV
functions. To alter nonprivate
storage, you must be authorized to
alter private and nonprivate
storage. See the above notes for
the STRGDSPY and STRGALTR
functions for the authorization
required to display and alter
nonprivate storage.
STRGPRV 116 X X Works with the STRGDSPY and
STRGALTR functions. See the
above notes on these functions for
the authorization required to display
and alter private storage.
Function Access Level Table Chapter 2: Security Definitions
2-48
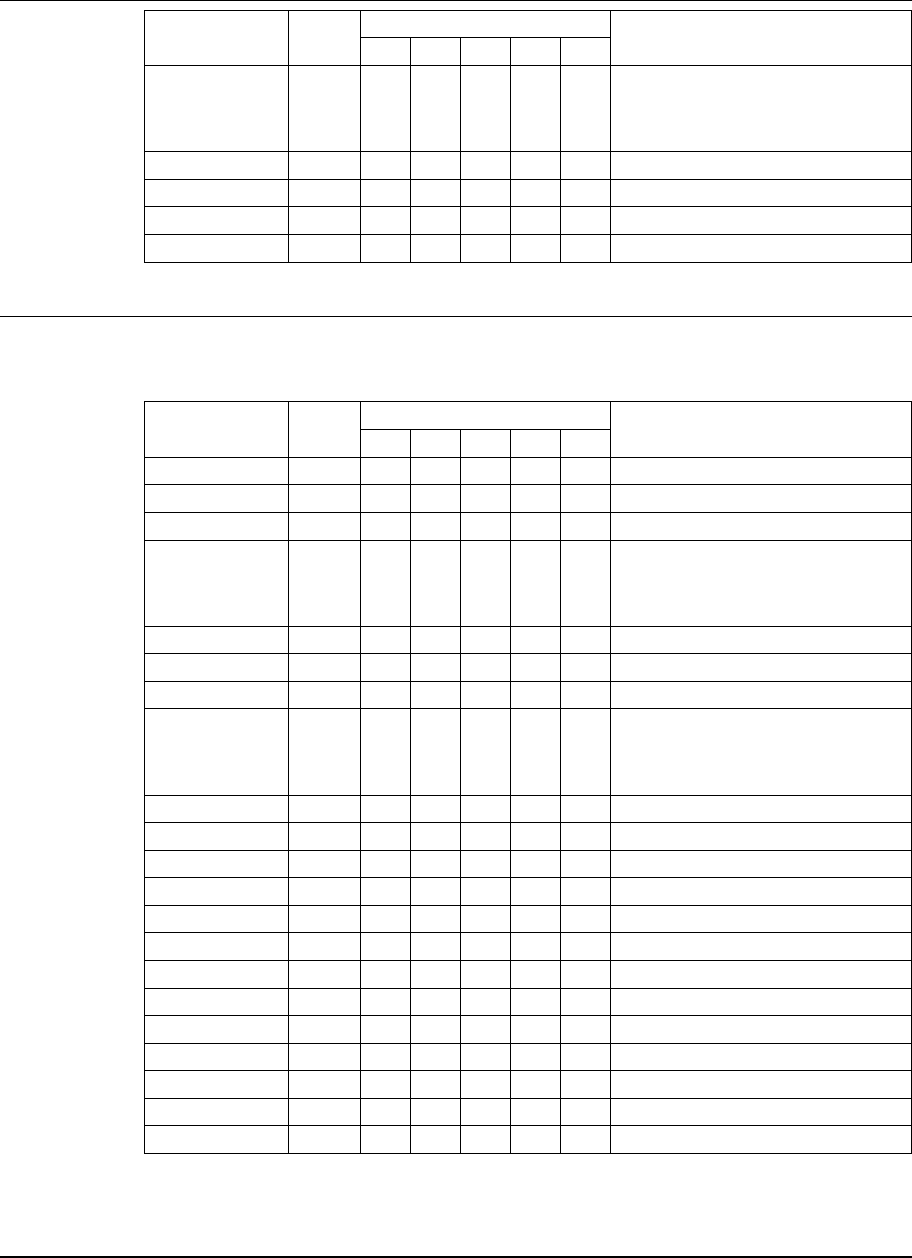
Function Code Minimum Level Required Notes
NRUCA
USERCMDS 208 X X READ (or higher) lets users view
user command definitions. UPDT
(or higher) lets users add and
modify user command definitions.
USERDEF 242 X
USERDIR 241 X
USERPROF 244 X
UTILMON 051 X X
TMON for MQSeries The following table shows the minimum access level required to use
each product function for TMON for MQSeries.
Function Code Minimum Level Required Notes
NRUCA
ADVFUNCS 203 X
CHANAUTH 124 X
CNTLFILE 238 X
CONSOLE 230 X X READ (or higher) lets users view
console displays. UPDT (or higher)
is required to enter commands on
console displays.
DATADCTS 222 X
DPAUTH 190 X
EXCPDEF 130 X
EXCPTDEF 154 X X READ (or higher) lets users view
exception definitions. UPDT (or
higher) is required to update
exception definitions.
HELPMENU 235 X
HLPFLDIR 236 X
HLPFLDTL 237 X
HLPMSDIR 253 X
HLPSLDIR 205 X
HLPSLDTL 206 X
JOBSUMM 196 X
LOGOSCRN 004 X
MONCNTL 160 X
MONINIT 163 X
MSGAUTH 125 X
NAMLAUTH 159 X
OPENMAIN 217 X
Chapter 2: Security Definitions Function Access Level Table
The Monitor for MVS 2.0 2-49
System Administrator’s Guide
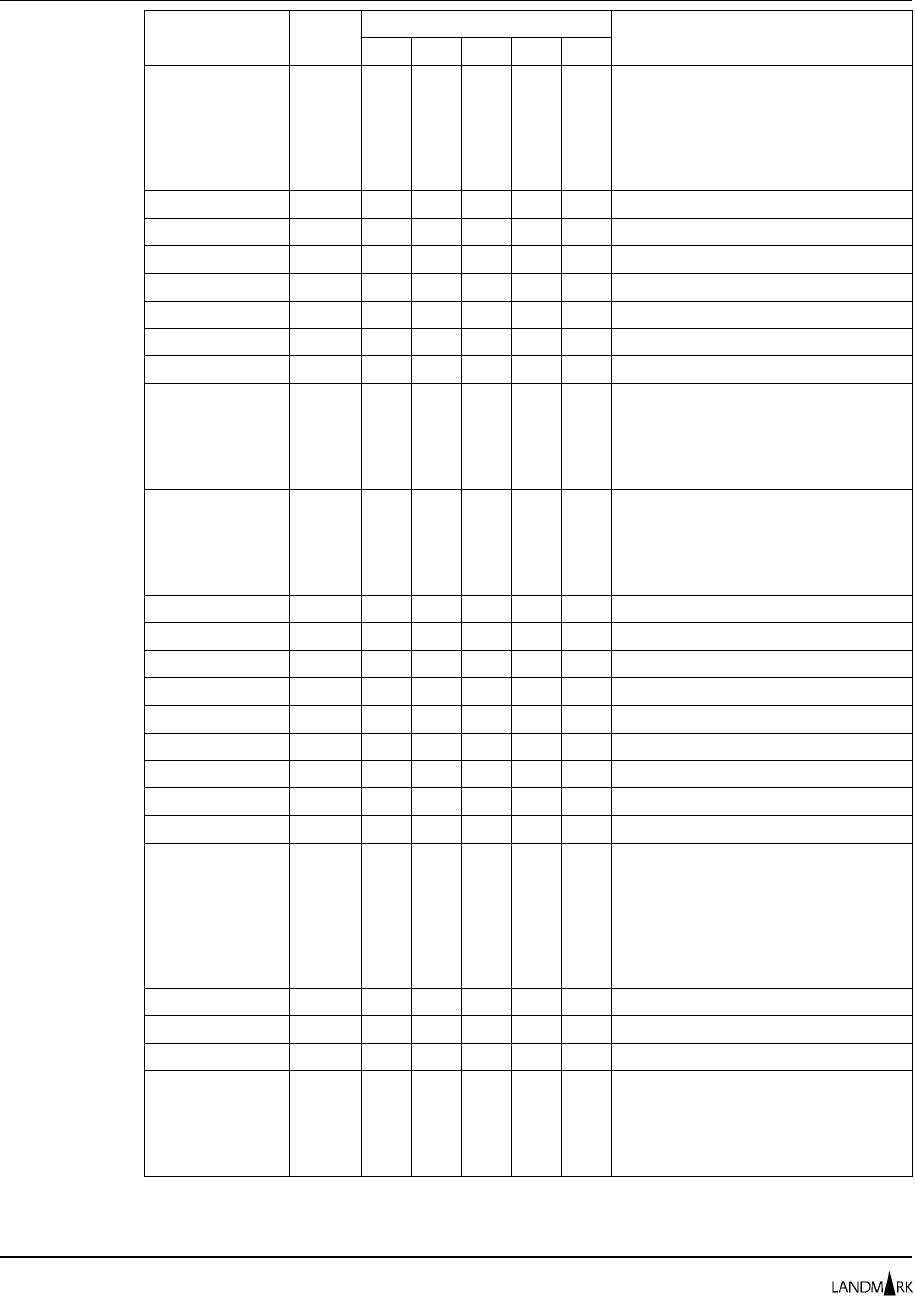
Function Code Minimum Level Required Notes
NRUCA
PFKDEF 250 X X X READ (or higher) lets users view
function key settings. UPDT (or
higher) lets users change function
key settings for their user ID. ALTR
lets users change function key
settings for any user ID.
PROCAUTH 122 X
PRODPSWD 202 X
PROFDTL 246 X
PRTAUTOF 093 X
PRTAUTON 092 X
PRTCLOSE 091 X
PRTCMD 090 X
PRTDFDSN 081 X X READ (or higher) lets users view
print screen data set name
definitions. UPDT (or higher) is
required to update print screen
SYSOUT definitions.
PRTDFSYS 082 X X READ (or higher) lets users view
print screen data set name
definitions. UPDT (or higher) is
required to update print screen
SYSOUT definitions.
PRTDFVTM 083 X
PRTMENU 080 X
PRTSTART 095 X
PRTSTOP 094 X
QAUTH 121 X
QMGRAUTH 120 X
QMGREVNT 135 X
QMGROPTS 170 X
QMGRSEC 157 X
RMTPTDEF 209 X X X READ (or higher) lets users view
the remote session definitions.
UPDT (or higher) lets users change
remote session definitions and the
SLU session ID prefix. ALTR lets
users add and delete remote
session definitions.
RMTPTSEL 207 X
SECFUNCS 243 X
SECFUNDF 245 X
SECURITY 240 X X READ (or higher) lets users access
the Security Definitions Menu.
UPDT (or higher) is required to
change the type of logon and
function security used.
Function Access Level Table Chapter 2: Security Definitions
2-50
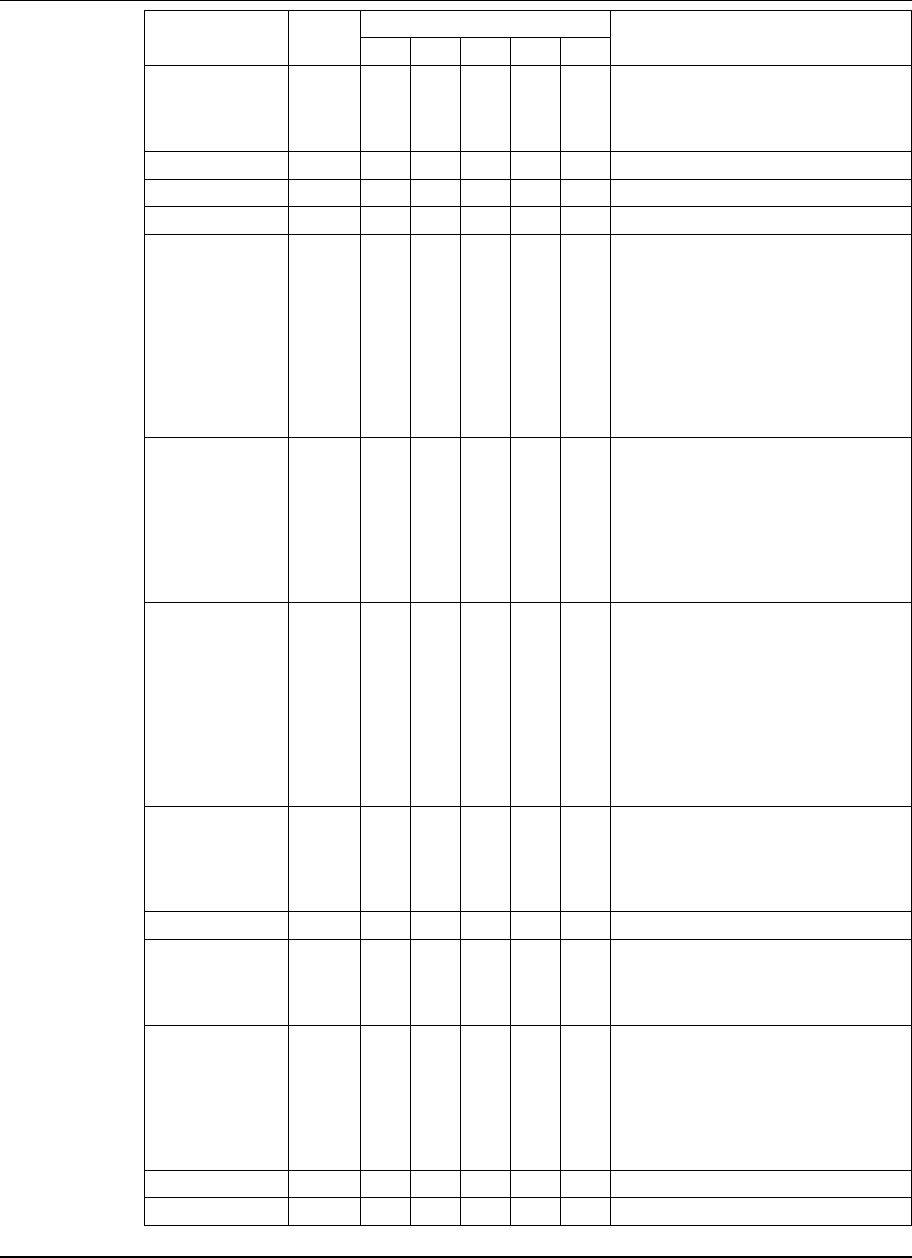
Function Code Minimum Level Required Notes
NRUCA
SHIFTDEF 175 X X READ (or higher) lets users view
the Shift Definition Facility. UPDT
(or higher) is required to update
shift definitions.
SHUTDOWN 003 X
SIGNON 001 X
STGCAUTH 123 X
STRGALTR 211 X Works with the STRGNPRV and
STRGPRV functions. To alter
private storage, READ access must
be specified for STRGALTR and
UPDT must be specified for
STRGPRV. To alter nonprivate
storage, READ access must be
specified for STRGALTR and UPDT
must be specified for both
STRGPRV and STRGNPRV.
STRGDSPY 137 X Works with the STRGNPRV and
STRGPRV functions. To display
private storage, READ access must
be specified for both STRGDSPY
and STRGPRV. To display
nonprivate storage, READ access
must be specified for both
STRGDSPY and STRGNPRV.
STRGNPRV 115 X X Works with the STRGDSPY,
STRGALTR, and STRGPRV
functions. To alter nonprivate
storage, you must be authorized to
alter private and nonprivate
storage. See the above notes for
the STRGDSPY and STRGALTR
functions for the authorization
required to display and alter
nonprivate storage.
STRGPRV 116 X X Works with the STRGDSPY and
STRGALTR functions. See the
above notes on these functions for
the authorization required to display
and alter private storage.
THRDAUTH 156 X
USERCMDS 208 X X READ (or higher) lets users view
user command definitions. UPDT
(or higher) lets users add and
modify user command definitions.
USERDEF 242 X X X READ (or higher) lets users view
their own user ID definitions and
passwords. UPDT (or higher) lets
users review and update their own
user ID definitions and passwords.
ALTR lets users review and update
any user ID definition and password.
USERDIR 241 X
USERPROF 244 X
Chapter 2: Security Definitions Function Access Level Table
The Monitor for MVS 2.0 2-51
System Administrator’s Guide
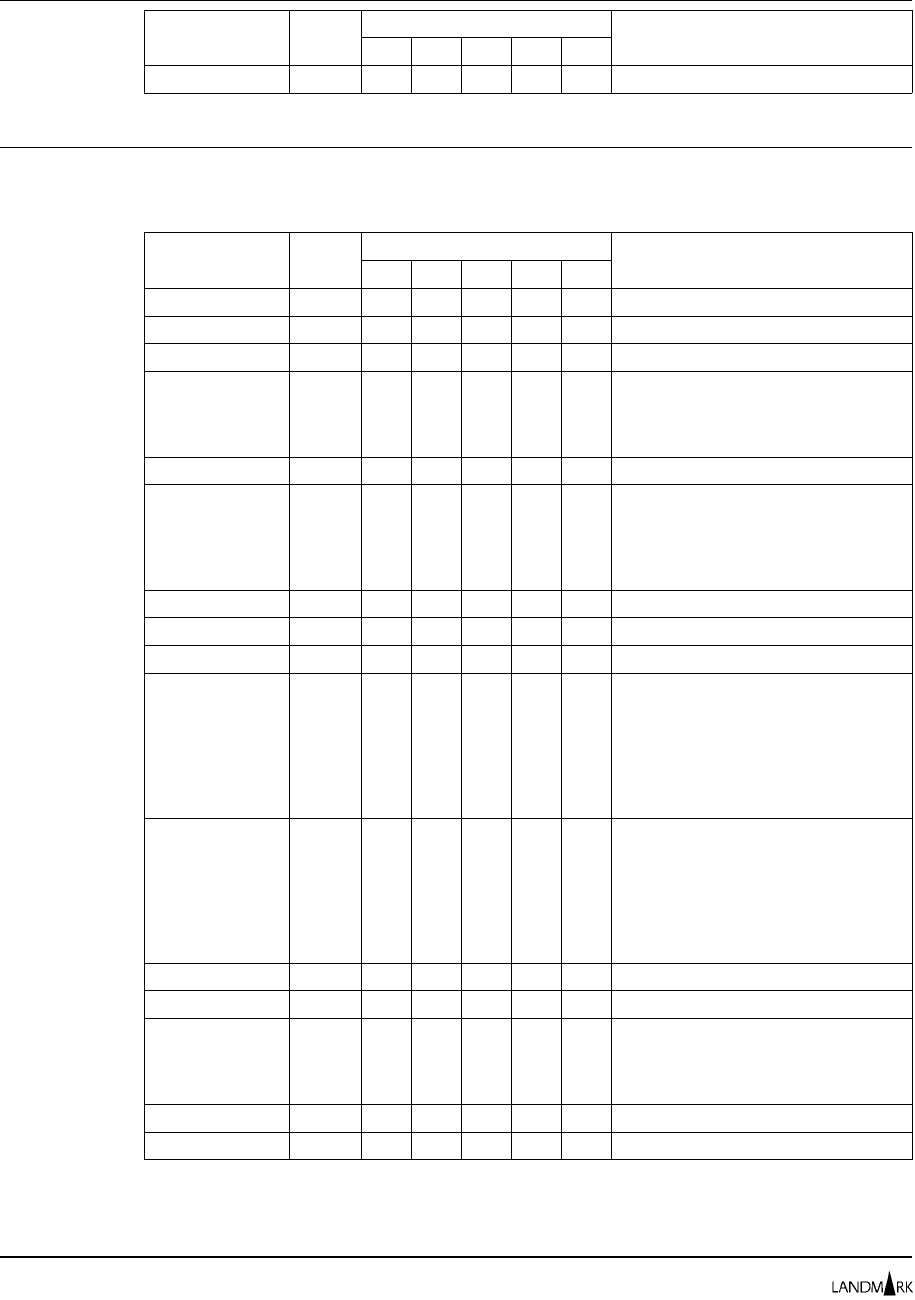
Function Code Minimum Level Required Notes
NRUCA
UTILMENU 150 X
TMON for MVS The following table shows the minimum access level required to use
each product function for TMON for MVS.
Function Code Minimum Level Required Notes
NRUCA
ADVFUNCS 203 X
CCWTRACE 142 X
CNTLFILE 238 X
CONSOLE 230 X X READ (or higher) lets users view
console displays. UPDT (or higher)
is required to enter commands on
console displays.
CSMON 099 X
CSMONDET 097 X X READ (or higher) lets users view
the Common Monitor Storage Detail
screen. UPDT (or higher) is
required to free storage for a
specified job name.
CSMONOPT 098 X
DATADCTS 222 X
DLYGRP 071 X
DLYGRPG 072 X X X READ (or higher) lets users view
global workload delay definitions.
UPDT (or higher) lets users modify
an existing global workload delay
definition. ALTR lets users add or
delete a global workload delay
definition.
DLYGRPU 073 X X X READ (or higher) lets users view
user workload delay definitions.
UPDT (or higher) lets users modify
an existing user workload delay
definition. ALTR lets users add or
delete a user workload delay
definition.
DLYMNDET 074 X
DLYMON 070 X
EXCPTDEF 130 X X READ (or higher) lets users view
exception definitions. UPDT (or
higher) is required to update
exception definitions.
GDCOPTS 079 X
HELPMENU 235 X
Function Access Level Table Chapter 2: Security Definitions
2-52
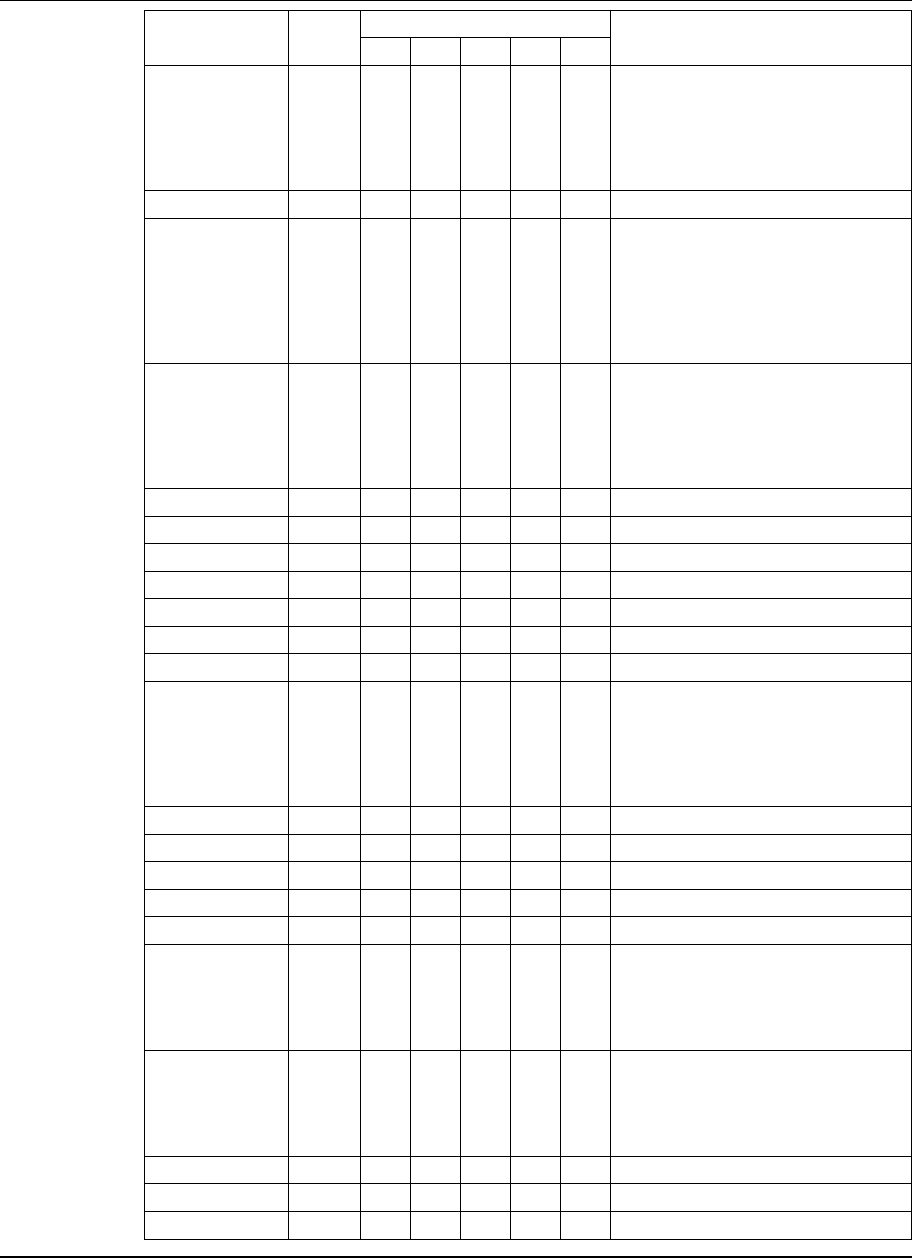
Function Code Minimum Level Required Notes
NRUCA
HLPFLDIR 236 X X READ (or higher) lets users view
the Field-Level Help Directory
screen. UPDT (or higher) is
required to change the ACTIVE
VERSION field on the Field-Level
Help Directory screen.
HLPFLDTL 237 X
HLPMSDIR 253 X X READ (or higher) lets users view
the Message-Level Help Directory
screen. UPDT (or higher) is
required to change the ACTIVE
VERSION field on the
Message-Level Help Directory
screen.
HLPSLDIR 205 X X READ (or higher) lets users view
the Screen-Level Help Directory
screen. UPDT (or higher) is
required to change the ACTIVE
VERSION field on the Screen-Level
Help Directory screen.
HLPSLDTL 206 X
IODVHIST 140 X
IOMON 143 X
IOPSTART 141 X
LOGOSCRN 004 X
MDFPRSM 176 X
OPENMAIN 217 X
PFKDEF 250 X X X READ (or higher) lets users view
function key settings. UPDT (or
higher) lets users change function
key settings for their user ID. ALTR
lets users change function key
settings for any user ID.
PROFDTL 246 X
PRTAUTOF 093 X
PRTAUTON 092 X
PRTCLOSE 091 X
PRTCMD 090 X
PRTDFDSN 081 X X READ (or higher) lets users view
print screen data set name
definitions. UPDT (or higher) is
required to update print screen data
set name definitions.
PRTDFSYS 082 X X READ (or higher) lets users view
print screen SYSOUT definitions.
UPDT (or higher) is required to
update print screen SYSOUT
definitions.
PRTDFVTM 083 X
PRTMENU 080 X
PRTSTART 095 X
Chapter 2: Security Definitions Function Access Level Table
The Monitor for MVS 2.0 2-53
System Administrator’s Guide
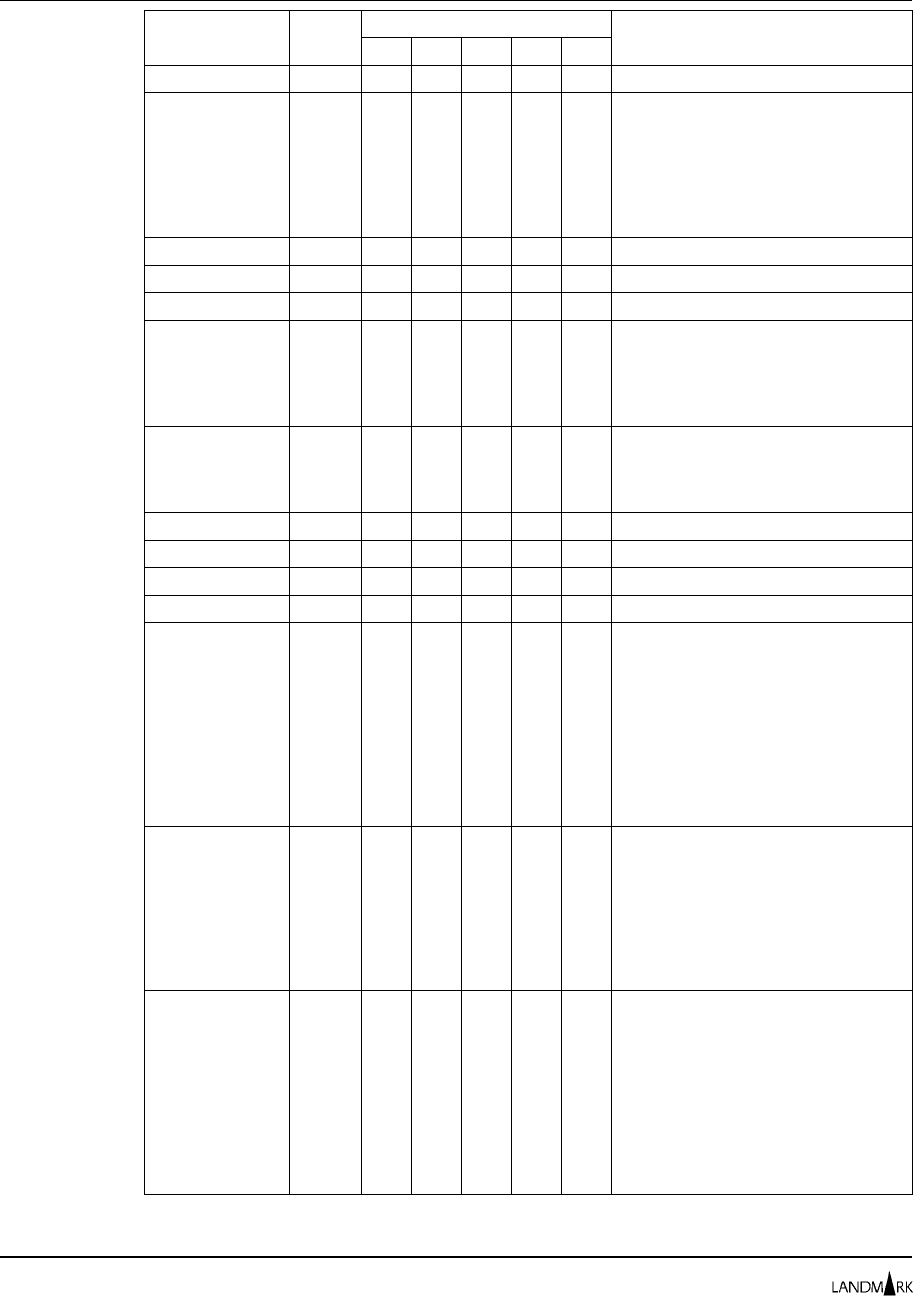
Function Code Minimum Level Required Notes
NRUCA
PRTSTOP 094 X
RMTPTDEF 209 X X X READ (or higher) lets users view
the remote session definitions.
UPDT (or higher) lets users change
remote session definitions and the
SLU session ID prefix. ALTR lets
users add and delete remote
session definitions.
RMTPTSEL 207 X
SECFUNCS 243 X
SECFUNDF 245 X
SECURITY 240 X X READ (or higher) lets users access
the Security Definitions Menu.
UPDT (or higher) is required to
change the type of logon and
function security used.
SHIFTDEF 177 X X READ (or higher) lets users view
the Shift Definition Facility. UPDT
(or higher) is required to update
shift definitions.
SHUTDOWN 003 X
SIGNON 001 X
STORTCBS 221 X
STORTIOT 220 X
STRGALTR 211 X Works with the STRGNPRV and
STRGPRV functions. To alter
private storage, READ access must
be specified for STRGALTR and
UPDT must be specified for
STRGPRV. To alter nonprivate
storage, READ access must be
specified for STRGALTR and UPDT
must be specified for both
STRGPRV and STRGNPRV.
STRGDSPY 137 X Works with the STRGNPRV and
STRGPRV functions. To display
private storage, READ access must
be specified for both STRGDSPY
and STRGPRV. To display
nonprivate storage, READ access
must be specified for both
STRGDSPY and STRGNPRV.
STRGNPRV 115 X X Works with the STRGDSPY,
STRGALTR, and STRGPRV
functions. To alter nonprivate
storage, you must be authorized to
alter private and nonprivate
storage. See the above notes for
the STRGDSPY and STRGALTR
functions for the authorization
required to display and alter
nonprivate storage.
Function Access Level Table Chapter 2: Security Definitions
2-54

Function Code Minimum Level Required Notes
NRUCA
STRGPRV 116 X X Works with the STRGDSPY and
STRGALTR functions. See the
above notes on these functions for
the authorization required to display
and alter private storage.
SVCDUPD 180 X
SYSADM 178 X
USERCMDS 208 X X READ (or higher) lets users view
user command definitions. UPDT
(or higher) lets users add and
modify user command definitions.
USERDEF 242 X X X READ (or higher) lets users view
their own user ID definitions and
passwords. UPDT (or higher) lets
users review and update their own
user ID definitions and passwords.
ALTR lets users review and update
any user ID definition and password.
USERDIR 241 X
USERPROF 244 X
UTILAPFL 155 X X READ (or higher) lets users browse
the APF list. UPDT (or higher) is
required to add, modify, and delete
modules in the APF list.
UTILASMB 169 X
UTILDASD 153 X
UTILDDSL 158 X
UTILDSNI 175 X
UTILDSNU 174 X
UTILFSPC 159 X
UTILIOSB 170 X
UTILJOBB 171 X
UTILJOBS 154 X
UTILJPGN 165 X
UTILJTRM 164 XXXXREAD (or higher) lets users access
a utility. UPDT (or higher) is
required to cancel a job. CNTL (or
higher) is required to force a job.
ALTR is required to kill a job.
UTILLNKL 157 X X READ lets users browse the
LNKLST Utility screen. UPDT (or
higher) is required to add, modify,
or delete the LNKLST.
UTILLPAL 156 X X READ (or higher) lets users browse
the LPA/Nucleus Utility screen.
UPDT (or higher) is required to
make modifications.
UTILMENU 150 X
UTILMSTG 152 X
UTILMVSB 166 X
Chapter 2: Security Definitions Function Access Level Table
The Monitor for MVS 2.0 2-55
System Administrator’s Guide
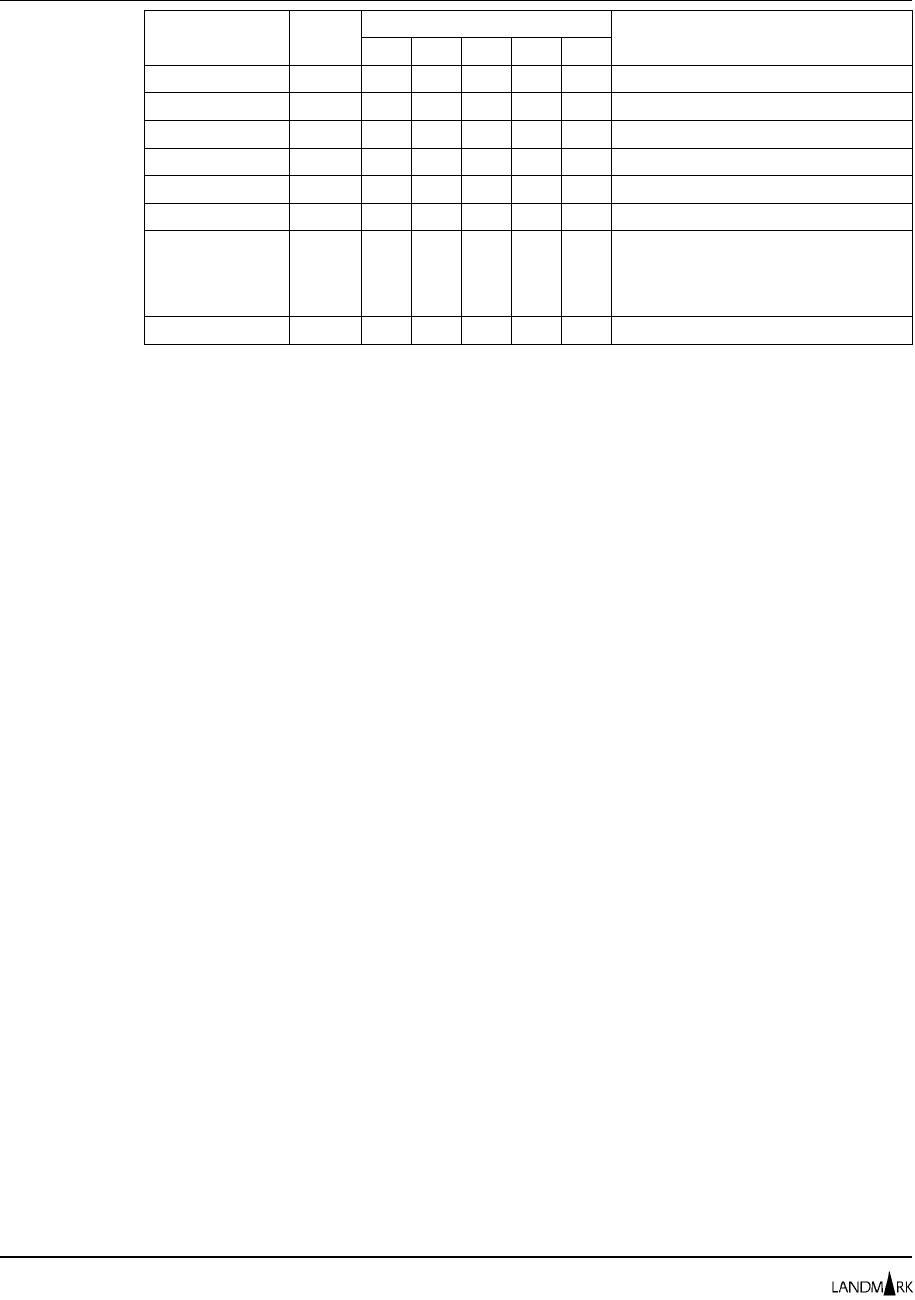
Function Code Minimum Level Required Notes
NRUCA
UTILSRMB 167 X
UTILSSVC 151 X
UTILSWAP 163 X
UTILVMNT 162 X
UTILVOLU 173 X
UTILVSMB 168 X
WKLDDEF 179 X X READ (or higher) lets users view
workload definitions. UPDT (or
higher) is required to update and
activate definitions.
XCFMON 096 X
Function Access Level Table Chapter 2: Security Definitions
2-56

Chapter 3: Landmark Product Communication
A performance problem in any address space in your network can
affect performance throughout the system. The ability to monitor
the complete system enables you to locate and solve system
problems quickly and easily. You can use Landmark product
communication to define a network between products and monitor
address spaces anywhere in the network.
The following PerformanceWorks MVS products support Landmark
product communication.
•TMON for CICS/ESA
•TMON for CICS/MVS
•TMON for DB2
•TMON for DBCTL
•TMON for MQSeries
•TMON for MVS
A product you want to access that exists in the same processor
complex is called a local product. Its VTAM applid is a local applid.
A product you want to access that exists in a different processor
complex is called a remote product. Its VTAM applid is a remote
applid. These terms are used throughout this chapter.
Access Methods
Landmark product communication consists of three types of
interproduct communication: explicit pass-through, implicit
pass-through, and NaviGate.
Explicit and Implicit
Pass-Through You can access another product anywhere in the network,
regardless of which processor complex it resides in, using one of
the pass-through connections.
Explicit pass-through is product-to-product communication initiated
by the user. It can occur between products in the same or different
processor complexes.
Implicit pass-through is product-to-product communication initiated
automatically by the system. It occurs only between address
spaces of the same product and can occur between products in the
same or in different processor complexes.
•TMON for CICS has implicit pass-through connections to other
TMON for CICS products on any processor complex.
•TMON for DB2 has implicit pass-through connections to other
TMON for DB2 products on any processor complex.
The Monitor for MVS 2.0 3-1
System Administrator’s Guide
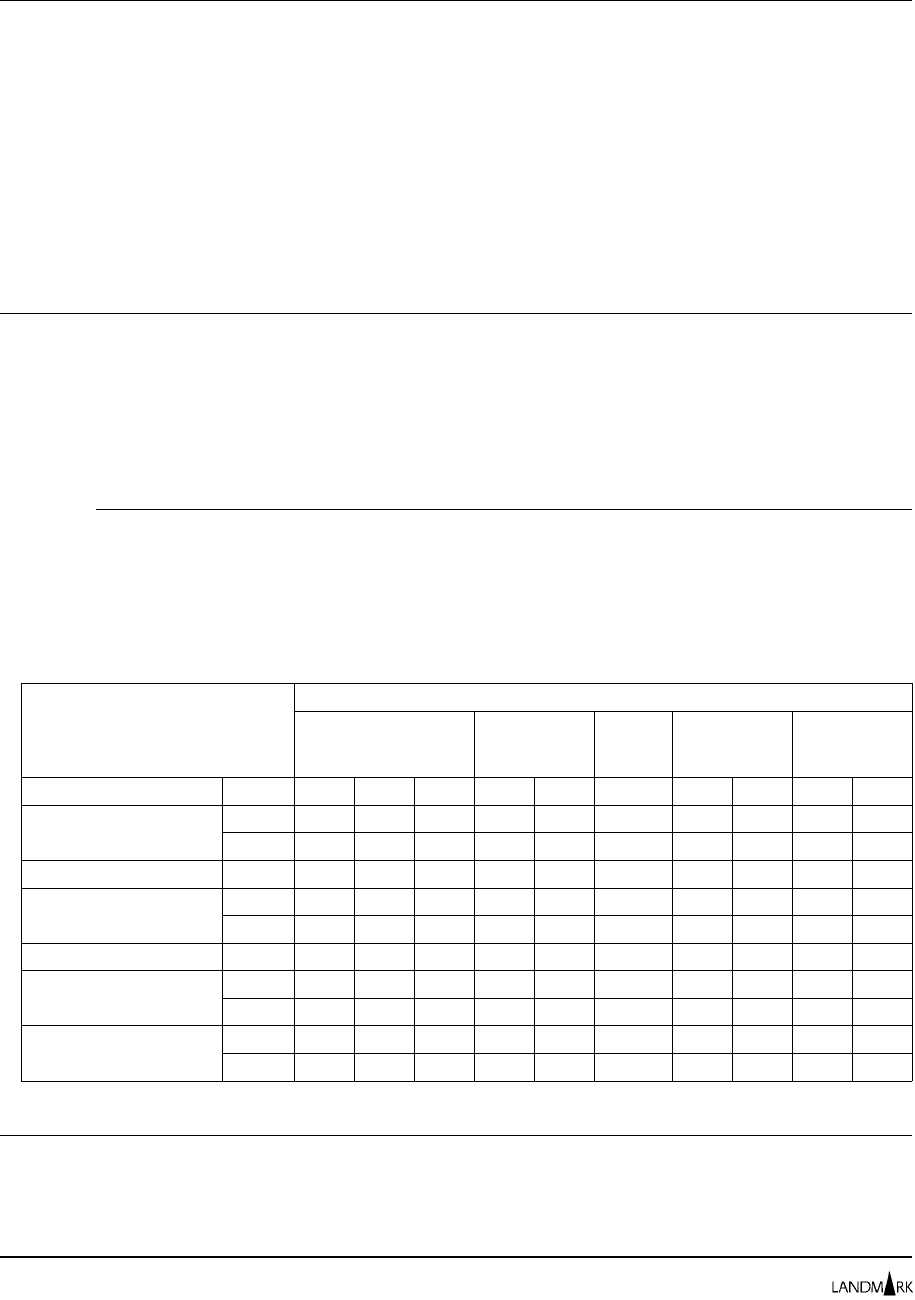
•TMON for DBCTL has implicit pass-through connections to
other TMON for DBCTL products on any processor complex.
•TMON for MQSeries has implicit pass-through connections to
other TMON for MQSeries products on any processor complex.
•TMON for MVS has implicit pass-through connections to other
TMON for MVS products on any processor complex.
Each of these products also has explicit connections to any other
Landmark PerformanceWorks MVS product on any processor
complex.
NaviGate You can access another product in the same processor complex
through one of many connection points using NaviGate. NaviGate
is smart product-to-product communication initiated automatically
by the system when you cursor-select a field that has a built-in
connection to another product in the same processor complex.
These connections help you diagnose problems by automatically
transferring you to useful screens in other products.
Connections The following table shows which Landmark PerformanceWorks MVS
product releases have NaviGate connections to each other. A check
(✔) indicates that a NaviGate connection exists; a blank indicates
that no connection exists. A complete list of NaviGate connection
points for each Landmark PerformanceWorks MVS product can be
found in “Using NaviGate,” later in this chapter.
Connections From:
To:
TMON for CICS TMON for
DB2
TMON
for
DBCTL TMON for
MQSeries TMON for
MVS
Product Rel 8.3 1.5 2.0 3.1 3.2 1.0 1.0 1.1 1.3 2.0
TMON for CICS/ESA 1.5 ✔✔ ✔✔
2.0 ✔✔ ✔ ✔✔✔
TMON for CICS/MVS 8.3 ✔✔ ✔✔
TMON for DB2 3.1 ✔✔✔✔✔ ✔✔
3.2 ✔✔✔✔✔ ✔✔
TMON for DBCTL 1.0 ✔✔
TMON for MQSeries 1.0 ✔✔
1.1 ✔✔
TMON for MVS 1.3 ✔✔✔✔✔
2.0 ✔✔✔✔✔
Error Messages You may receive error messages from a Landmark
PerformanceWorks MVS product you are trying to access using
Landmark product communication. Usually this happens when an
error occurs during the attempt to access the product. For help
Access Methods Chapter 3: Landmark Product Communication
3-2

with these messages, refer to the messages and codes manual for
the appropriate product.
Setting Up Landmark Product Communication
Before you can use Landmark product communication with any of
the Landmark PerformanceWorks MVS products, you must complete
these steps. (Each step is described in more detail following the
checklist.)
Step 1. Verify that all local VTAM applids are installed.
Step 2. Identify all product session applids to be defined.
Step 3. Set up cross-domain communications to support remote applids.
Step 4. Verify cross-domain communications.
Step 5. Define additional SLUs to VTAM on the local processor complex.
Step 6. Set up network requirements for non-SNA terminals.
Step 7. Identify the applid of the primary session of each product.
Step 8. Adjust the local SLU session ID prefix and all the session
definitions.
Step 9. Check the security definitions on all systems.
Step 10. Verify that the correct product releases are installed.
Step 1 Verify that all local VTAM applids are installed.
For each CPU in your system, verify that all local VTAM applids
are defined and that the appropriate products are installed. Local
applids are the applids of products installed on the same CPU.
Local applids should be defined during product installation. Refer
to PerformanceWorks for MVS and OS/390 Installation Guide to verify
that this occurred.
Step 2 Identify all product session applids to be defined.
Identify all product session applids (local and remote) to be
defined to the local processor complex. Use a table in the form
shown below to list all the product applids you want to be able to
access from the products in your local processor complex.
For example, you might need the following two remote applids:
TMDBCHI (a TMON for DB2 applid on VTAM2 in Chicago) and
TMONPGH (a TMON for CICS applid on VTAM3 in Pittsburgh).
Chapter 3: Landmark Product Communication Setting Up Landmark Product Communication
The Monitor for MVS 2.0 3-3
System Administrator’s Guide

Product Applid System
Step 3 Set up cross-domain communications to support remote applids.
Set up cross-domain communications to support each of the remote
applids listed in Step 2. Use adjacent system services control point
(SSCP) tables, dynamic cross-domain resource (CDRSC)
definitions, or hard-coded CDRSC definitions. For complete
information on customizing VTAM, read IBM’s VTAM Installation
& Resource Definition.
You can use the CDRM definition in SYS1.VTAMLST to set up
dynamic CDRSC definitions. The CDRDYN=YES and
CDRSC=OPT parameters in the definition must be set up on the
local processor complex and all the remote processor complexes. In
addition, you must define each of the remote applids to the local
VTAM applid. The example below shows the definitions for
remote applids TMONCHI, TMONBOS, TMONNYC, and
TMONPGH. VTAM2 and VTAM3 are sample CDRM definition
names for VTAM applids running on remote processor complexes.
These definitions would be created in SYS1.VTAMLST on VTAM1.
VTAM2 CDRM CDRDYN=YES,CDRSC=OPT
TMONCHI CDRSC CDRM=VTAM2,ISTATUS=ACTIVE
TMONBOS CDRSC CDRM=VTAM2,ISTATUS=ACTIVE
TMONNYC CDRSC CDRM=VTAM2,ISTATUS=ACTIVE
VTAM3 CDRM CDRDYN=YES,CDRSC=OPT
TMONPGH CDRSC CDRM=VTAM3,ISTATUS=ACTIVE
Step 4 Verify cross-domain communications.
Using the remote applids in the list you created in Step 2, verify
cross-domain communications by trying to log onto each of the
remote product sessions from your local VTAM logon screen.
Step 5 Define additional SLUs to VTAM on the local processor complex.
If you did not do this during product installation, define additional
secondary logical units (SLUs) to VTAM on the local processor
complex using VTAM VBUILD and APPL macros. Create a
separate SYS1.VTAMLST member to store these SLU definitions.
For complete information on customizing VTAM, read IBM’s
VTAM Installation & Resource Definition.
To determine how many SLUs to define, use the following formula:
Setting Up Landmark Product Communication Chapter 3: Landmark Product Communication
3-4

number−remote−users × number−remote−sessions = total−SLUs
You should define a minimum of 10 SLUs. A maximum of 999
SLUs can be defined.
For TMON for CICS, you need to define one applid for:
•Each group of CICS jobs on the Job Selection List screen from a
remote TMON for CICS
•Each pass-through session you expect to need
•Each remote TMON for CICS displayed by the Performance
Monitor
•Each Activity Monitor display of a transaction using
intersystem communication (ISC)
•Each concurrent attempt to cancel an interval control element
(ICE) or automatic initiate descriptor (AID) in CICS.
Note The number of SLUs you define should match the setting in the
SLUCOUNT startup parameter, which controls the number of
SLUs the Landmark PerformanceWorks MVS product attempts to
access at a given time.
You can specify the SLUCOUNT parameter in the startup
parameter member of your product. If you do not specify it, the
number of SLUs defaults to 123.
The following table indicates the SLUCOUNT startup parameter
for each Landmark PerformanceWorks MVS product.
Product Description
TMON for CICS/ESA Specify the SLUCOUNT startup
parameter in member TCEPARM of the
data set identified by ddname
TMONPRMS in the TMON for CICS/ESA
startup JCL.
TMON for CICS/MVS Specify the SLUCOUNT startup
parameter in member TMON8PRM of the
data set identified by ddname
TMONPRMS in the TMON for CICS/MVS
startup JCL.
TMON for DB2 Specify the SLUCOUNT startup
parameter in member TDBPARM of the
data set identified by ddname
TMDBPRMS in the TMON for DB2 startup
JCL.
TMON for DBCTL Specify the SLUCOUNT startup
parameter in member TDBCPRMS of the
data set identified by ddname
TDBCPRMS in the TMON for DBCTL
startup JCL.
Chapter 3: Landmark Product Communication Setting Up Landmark Product Communication
The Monitor for MVS 2.0 3-5
System Administrator’s Guide
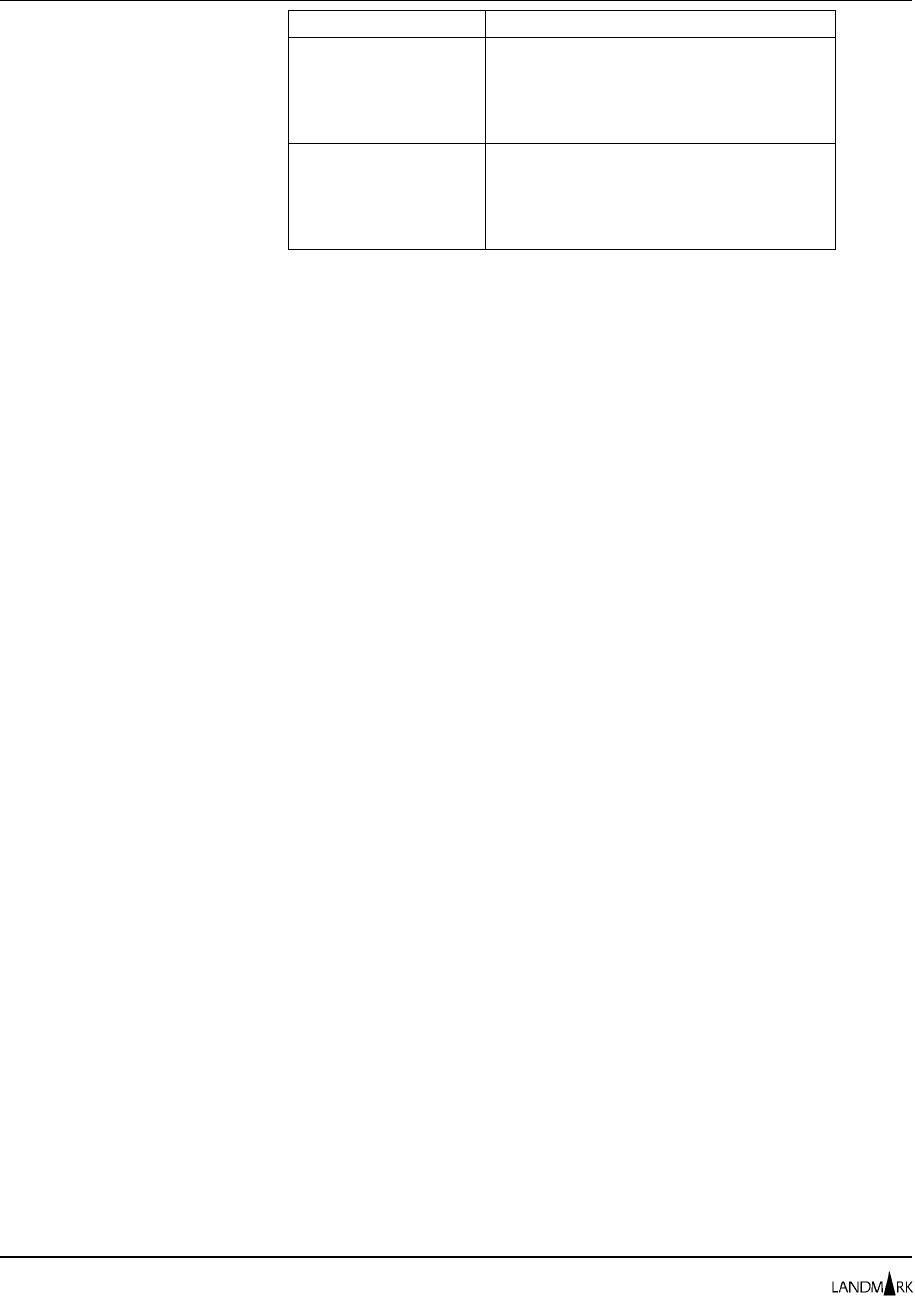
Product Description
TMON for MQSeries Specify the SLUCOUNT startup
parameter in member TMQSPARM of the
data set identified by ddname
TMQSPRMS in the TMON for MQSeries
startup JCL.
TMON for MVS Specify the SLUCOUNT startup
parameter in member TMVSPARM of the
data set identified by ddname
TMVSPRMS in the TMON for MVS startup
JCL.
Use the following template when coding your SLU definitions. A
sample of an SLU definition can be found in member TCEVTAM
(TMON for CICS/ESA), TMON8VTM (TMON for CICS/MVS),
TMDBVTAM (TMON for DB2), TDBCVTAM (TMON for DBCTL),
TMQSVTAM (TMON for MQSeries), or TMONAPPL (TMON for
MVS) in the sample JCL library.
label VBUILD TYPE=APPL
sluidnnn APPL AUTH=(ACQ,PASS,VPACE),VPACING=5,EAS=1,
DLOGMOD=SLUTYPE2,MODTAB=LMRKMTB
sluidnnn APPL AUTH=(ACQ,PASS,VPACE),VPACING=5,EAS=1,
DLOGMOD=SLUTYPE2,MODTAB=LMRKMTB
sluidnnn APPL AUTH=(ACQ,PASS,VPACE),VPACING=5,EAS=1,
DLOGMOD=SLUTYPE2,MODTAB=LMRKMTB
“label” indicates the SYS1.VTAMLST member name used to store
the SLU definitions and “sluidnnn” indicates the name of the SLU
you are defining. The “sluid” part of the name is the SLU session
ID prefix and must be a constant string from one to five characters
long. The “nnn” part must be a number starting with 001 and
sequentially increment with each APPL macro.
For example, if you use TMON as a session ID prefix and define the
following SLUs to VTAM, only TMON001, TMON002, and
TMON003 are used. TMON006 is not used because TMON004 and
TMON005 are missing.
TMON001 APPL AUTH=(ACQ,PASS,VPACE),VPACING=5,EAS=1,
DLOGMOD=SLUTYPE2,MODTAB=LMRKMTB
TMON002 APPL AUTH=(ACQ,PASS,VPACE),VPACING=5,EAS=1,
DLOGMOD=SLUTYPE2,MMODTAB=LMRKMTB
TMON003 APPL AUTH=(ACQ,PASS,VPACE),VPACING=5,EAS=1,
DLOGMOD=SLUTYPE2,MODTAB=LMRKMTB
TMON006 APPL AUTH=(ACQ,PASS,VPACE),VPACING=5,EAS=1,
DLOGMOD=SLUTYPE2,MODTAB=LMRKMTB
You must use different SLU prefixes on different processor
complexes and for different products running in the same
processor complex.
Setting Up Landmark Product Communication Chapter 3: Landmark Product Communication
3-6

VTAM Logon
Mode Table
Considerations
The DLOGMOD parameter of the APPL macro specifies the name
of the entry in the VTAM logon mode table that contains the
parameters used in a session. If you have SNA type-2 logical units
and your logon mode table is working, continue to use it. If you
have problems, however, create your own logon mode table with
the following entry. The following sample of a logon mode table
can be found in member LMRKMTB in the Strategic Services
sample JCL library.
LMRKMTB MODETAB
MODEENT LOGMODE=SLUTYPE2,FMPROF=X’03’,TSPROF=X’03’,
PRIPROT=X’B1’,SECPROT=X’90’,COMPROT=X’3080’,
RUSIZES=X’87C7’,PSERVIC=X’028000000000185018507F00
MODEEND
END
In this entry, the name defined by the LOGMODE operand
(SLUTYPE2 in the sample LMRKMTB above) can be any
8-character name. The FMPROF, TSPROF, PRIPROT, SECPROT,
and COMPROT operand settings are fixed by the SNA architecture
to support SNA type-2 logical units. The RUSIZES operand
specifies the maximum length of data that the primary logical unit
(PLU) and the secondary logical unit (SLU) can send. These first
two hexadecimal digits define the size for the SLU; the second two
hexadecimal digits define the size for the PLU. The actual sizes
designated by a setting of RUSIZES=X’87C7’ are 1024 bytes for the
SLU (’87’ = 8 times 2 to the seventh power) and 1536 bytes for the
PLU (’C7’ = 12 times 2 to the seventh power).
Finally, the PSERVIC operand defines the presentation services for
the logical unit. The PSERVIC setting must be as shown above for
the SLU sessions to properly function as SNA type-2 logical units.
The values are defined in the section on BIND command session
parameters in IBM’s 3174 Subsystem Control Unit Functional
Description.
If you decide to use the sample logon mode table, LMRKMTB, you
must assemble it to some library that you have concatenated to
SYS1.VTAMLIB in your VTAM startup procedure.
If you define your own logon mode table or use LMRKMTB, you
must supply the name of the logon mode table by adding the
MODTAB option to your APPL macro. You also must change
“dlogmod” in your SLU definitions to reflect the correct
LOGMODE entry. The following example shows two SLU
definitions in member SAMPLE. TMDB001 uses IBM default
parameters provided by SNX32702; TMDB002 uses the parameters
specified by the SLUTYPE2 entry in LMRKMTB.
SAMPLE VBUILD TYPE=APPL
TMDB001 APPL AUTH=(ACQ,PASS,VPACE),VPACING=5,EAS=1,DLOGMOD=SNX32702
TMDB002 APPL AUTH=(ACQ,PASS,VPACE),MODTAB=LMRKMTB,VPACING=5,EAS=1,
DLOGMOD=SLUTYPE2
Chapter 3: Landmark Product Communication Setting Up Landmark Product Communication
The Monitor for MVS 2.0 3-7
System Administrator’s Guide
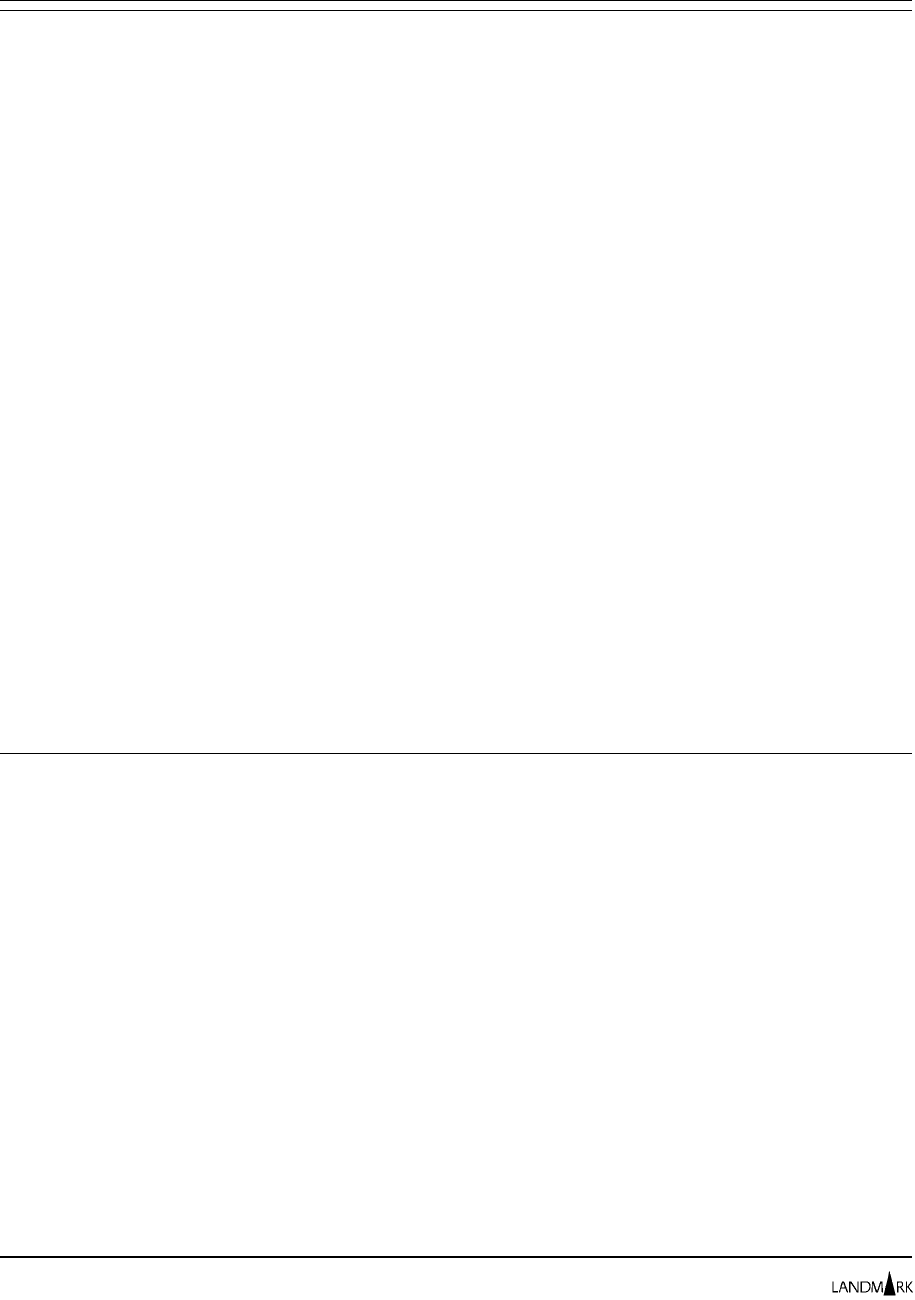
Step 6 Set up network requirements for non-SNA terminals.
This section primarily applies if you intend to log onto the
Landmark PerformanceWorks MVS product from a non-SNA
terminal that either is remote or will be in cross-domain session
with the product. It also may apply to SNA sessions if the
outbound RUSIZE in the BIND is very large or is not specified. If
none of these conditions apply to your use of the product, you can
skip this section.
Landmark PerformanceWorks MVS products sometimes transmit
very large outbound data streams, especially if the terminal is a
color terminal with a large screen (a 3270 model 3, 4, or 5). Since
non-SNA terminals do not support chaining, the entire screen must
be sent in one transmission. In some networks, the large size of
these transmissions can be a problem for the network.
To support the largest possible transmission, the MAXDATA
parameter on any Network Control Program (NCP) between the
terminal and the host in which the product is running should be set
to at least 14,000 bytes. MAXDATA is the maximum message size
the NCP will accept. Most screens are much smaller than 14,000,
but this is a safe value for MAXDATA that no product screen
should ever exceed. If none of your terminals use color, you may
be able to run with a smaller value.
MAXDATA should not exceed
the product of MAXBFRU
and UNITSZ.
If you change MAXDATA, be aware that its value is constrained by
the values of the MAXBFRU parameter (the number of host buffers
VTAM uses to communicate with NCP) and the UNITSZ parameter
(the size of each host buffer). The MAXDATA value should not
exceed the product of MAXBFRU and UNITSZ.
Step 7 Identify the applid of the primary session of each product.
Identify the applid of the primary session for each product using
Landmark product communication on your system. Primary
sessions are the product sessions accessed when you enter the JUMP
command to explicitly access another product. Each unique
Landmark PerformanceWorks MVS product on your system should
have at least one primary session. More than one primary session
can be defined for each. When more than one primary session is
defined and a JUMP command is issued, the first primary session
found active is used to satisfy the JUMP request.
Primary sessions are actually defined on the Remote Session
Definition screen in Step 8, but you should know what the applid
of the primary session is for each product before you start Step 8. If
an address space is not the primary session, it is called a secondary
session.
If no primary session is active when the JUMP command is issued,
the first secondary session found active is used to satisfy the JUMP
request.
Setting Up Landmark Product Communication Chapter 3: Landmark Product Communication
3-8
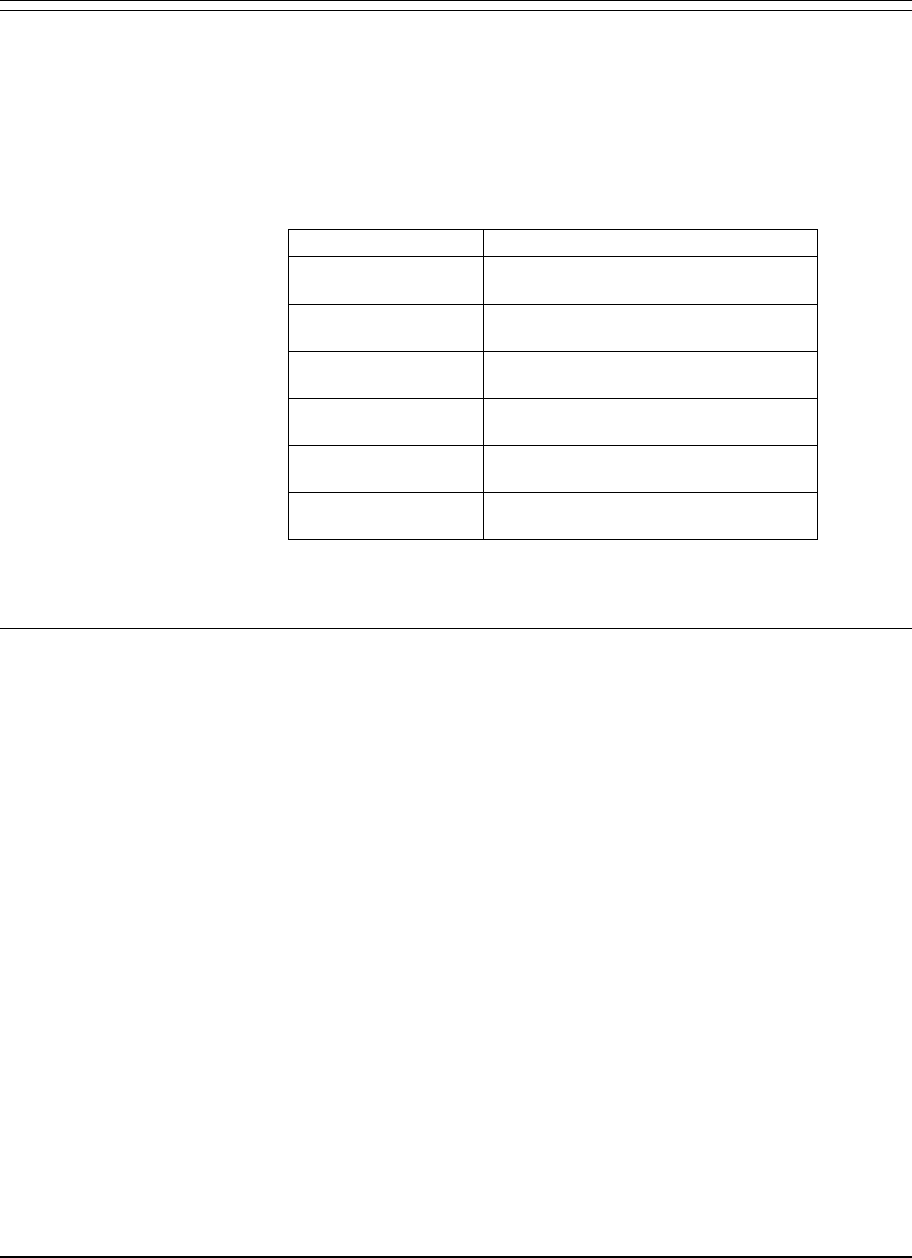
Step 8 Adjust the local SLU session ID prefix and all the session
definitions.
Use the Remote Sessions Directory and Remote Session Definition
screens to adjust the local SLU session ID prefix and all the session
definitions of Landmark PerformanceWorks MVS products in the
network that you want to be able to access. The following table
indicates how to access these screens from each Landmark product.
Product To Gain Access:
TMON for CICS/ESA Enter
=10.6
on the command line of any
TMON for CICS/ESA screen.
TMON for CICS/MVS Enter
=10.8
on the command line of any
TMON for CICS/MVS screen.
TMON for DB2 Enter
=9.5.1
on the command line of
any TMON for DB2 screen.
TMON for DBCTL Enter
=9.7
on the command line of any
TMON for DBCTL screen.
TMON for MQSeries Enter
=9.5
on the command line of any
TMON for MQSeries screen.
TMON for MVS Enter
=S.1
on the command line of any
TMON for MVS screen.
All remote sessions screens are described at the end of this chapter.
Step 9 Check the security definitions on all systems.
You should use the same security method (External Security,
Internal Security, or User Exit Security) for all Landmark product
systems that support Landmark product communication. If you
choose to mix security methods, you must ensure that the user IDs
and passwords are identical in all product systems. Security must
be activated in each product, regardless of the method you choose.
When explicit pass-through, implicit pass-through, or NaviGate
communication occurs, a logon to the other product occurs. If a
user ID is not authorized to use a product it has tried to access
using implicit pass-through or NaviGate, the product connection
does not occur. If a user ID is not authorized to use a product it has
tried to log onto using explicit pass-through, the product logon
screen is displayed. Users then can select an alternate user ID and
password for explicit pass-through.
If you choose to use Internal Security for all Landmark products,
ensure that the user IDs and passwords you want to use Landmark
product communication are identical for all product sessions.
If you choose to use External Security for all Landmark products,
ensure that all user IDs that you want to use Landmark product
communication have access to the appropriate resource rules for
your external security package.
Chapter 3: Landmark Product Communication Setting Up Landmark Product Communication
The Monitor for MVS 2.0 3-9
System Administrator’s Guide

For all security types, verify that the user IDs you want to use
Landmark product communication are authorized to use functions
in the Landmark product communication network. Read the
chapter on Landmark product communication in each product’s
documentation to identify that product’s connection points and the
functions it accesses by linking to other products.
Step 10 Verify that the correct product releases are installed.
Verify that you have the correct releases of all products installed.
Otherwise, Landmark product communication will not operate
correctly.
Using Explicit Pass-Through
Explicit pass-through is product-to-product communication
initiated by the user. This communication method lets you:
•Access products in your network for online monitoring and
analysis
•Access a specific product applid
•Quickly log onto another product without having to log off of
the base product
•Quickly sign onto a CICS address space without having to sign
off of TMON for CICS (applies only to TMON for CICS/ESA
and TMON for CICS/MVS).
Explicit pass-through can occur between products in the same or
different processor complexes.
Methods of Explicit
Access You can explicitly access another Landmark product in one of three
ways. You can:
•Issue the JUMP command.
•Issue the REMOTE command.
•Cursor-select an applid on the Remote Sessions Logon screen,
described later in this chapter. (For TMON for CICS, you must
access this screen through the Pass-Through Sessions menu. If
you are using TMON for CICS documentation, the menu is
described later in this chapter.)
If you try to access a product that is not active, an error message is
displayed.
TMON for CICS users With TMON for CICS, you also can pass-through to CICS and
execute transactions that help you determine the cause of a system
problem. You do this using the Pass-Through Session to CICS
screen, described later in this chapter, if you are using TMON for
CICS documentation.
Using Explicit Pass-Through Chapter 3: Landmark Product Communication
3-10
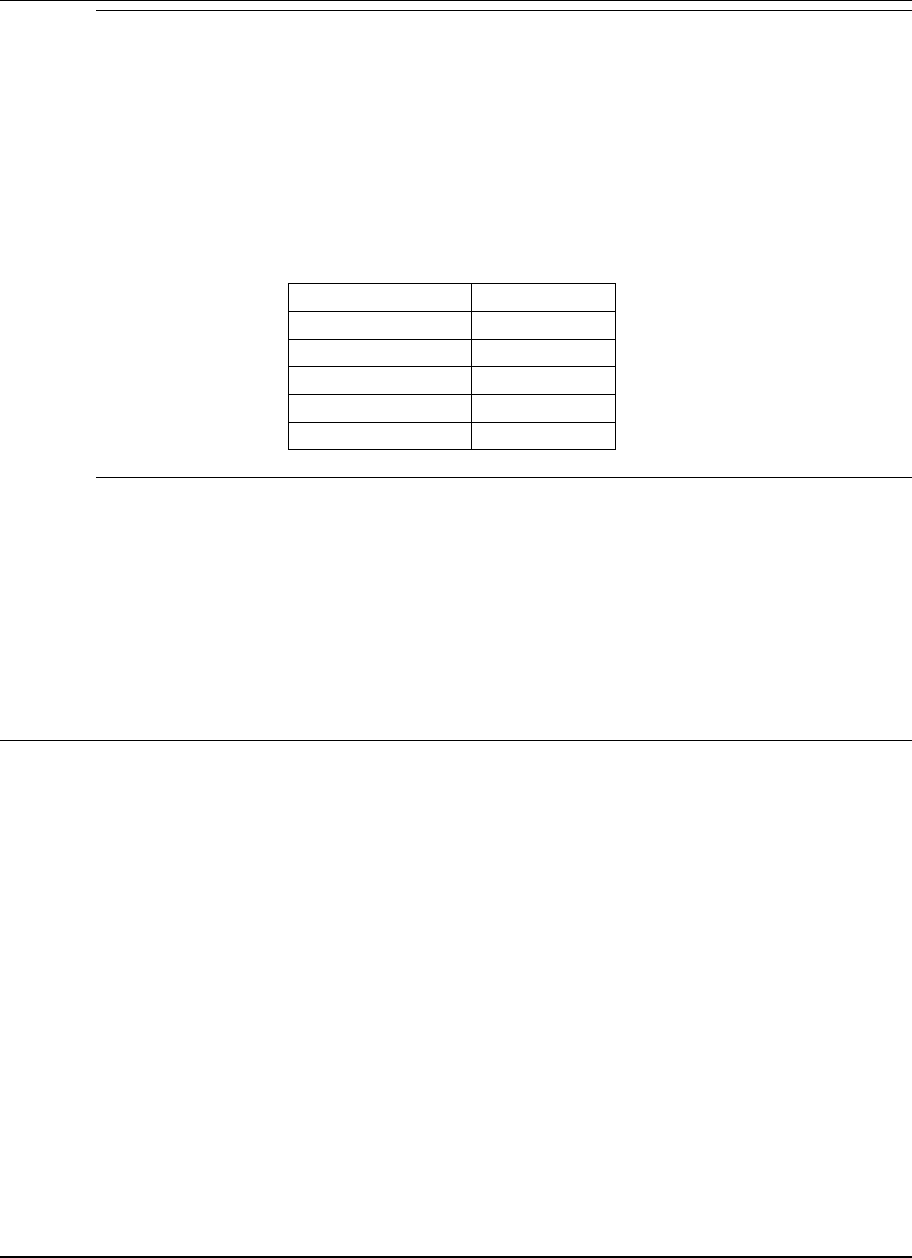
JUMP Command Use the JUMP command to access the primary applid of a
Landmark product. You identified primary applids in Step 7 and
defined them in Step 8 of “Setting Up Landmark Product
Communication,” earlier in this chapter.
The syntax of the JUMP command is:
JUMP=code
where “code” is one of the following product identifiers.
Product Identifier
TMON for CICS TMONCICS
TMON for DB2 TMONDB2
TMON for DBCTL TMONDBC
TMON for MQSeries TMONMQ
TMON for MVS TMONMVS
REMOTE
Command Use the REMOTE command to access a specific applid of a
Landmark product. The syntax of the REMOTE command is:
REMOTE=applid
where “applid” is the applid of the product you want to access.
TMON for CICS/ESA example For example, if you want to access TMON for CICS/ESA applid
TCECHI, enter REMOTE=TCECHI.
Usage Notes A product accessed explicitly operates in exactly the same manner
as if you log onto it directly. The only difference is that explicit
access automatically logs you onto the product and skips the
product logon screen. You can perform all the product functions
on the explicitly accessed product that your user ID can perform
when you log onto the product directly. Any security limitations
set up for your user ID when you access the product directly are
active when you access the product explicitly. If your user ID is not
authorized to use the explicitly accessed product, the product
session’s logon screen is displayed. You then can select an
alternate user ID and password to complete explicit pass-through.
You may receive error messages from a Landmark product you are
trying to access explicitly. Usually this happens when an error
occurs during the access attempt. For help with these messages,
refer to the messages and codes manual for the appropriate
product.
When you log off of a product you accessed explicitly from one of
the Landmark PerformanceWorks MVS products, you return to the
same Landmark product. For example, when you log off of a
Chapter 3: Landmark Product Communication Using Explicit Pass-Through
The Monitor for MVS 2.0 3-11
System Administrator’s Guide

product you accessed explicitly from TMON for DBCTL, you return
to TMON for DBCTL.
Using Implicit Pass-Through
Implicit access is product-to-product communication initiated
automatically by the system. It occurs only between address spaces
of the same product (for example, TMON for CICS to TMON for
CICS) and can occur between products in the same or different
processor complexes. It does not occur between different products
(for example, TMON for CICS to TMON for MVS).
Implicit access is initiated differently for Landmark
PerformanceWorks MVS products. The following table indicates
how to initiate implicit access for each product.
Product Implicit Access
TMON for CICS Initiated by selecting a remote CICS address space
from the Job Selection List screen and a Primary
Selection Menu option other than PERFORMANCE
MONITOR, PASS-THROUGH SESSIONS, or SYSTEM
ADMINISTRATION. This allows you to monitor the
performance of another CICS address space. To
ensure that a remote CICS address space appears on
the Job Selection List screen, the following conditions
must be met: The remote Cross System Monitor
applid must be defined on the Remote Sessions
Directory and CICS Job Definitions screens, and
JOBSCAN CONTROL=N must be specified on the
CICS Job Definitions screen.
TMON for DB2 Initiated by selecting a remote DB2 subsystem on the
DB2 Subsystem Selection screen and a Primary Menu
option other than MONITOR CONTROLS or
ADVANCED FUNCTIONS. You also can invoke
implicit access in TMON for DB2 when you
cursor-select a data field associated with a remote
DB2 subsystem from the DB2 Subsystem Selection
screen.
TMON for DBCTL Initiated by selecting a remote DBCTL subsystem on
the DBCTL Subsystem Selection screen and a Primary
Menu option other than MONITOR CONTROLS or
ADVANCED FUNCTIONS. You also can invoke
implicit access in TMON for DBCTL when you
cursor-select a data field associated with a remote
DBCTL subsystem from the DBCTL Subsystem
Selection screen.
TMON for MQSeries Initiated by selecting a queue manager being
monitored by a TMON for MQSeries running on
another MVS image and a Primary Menu option other
than MONITOR CONTROLS or ADVANCED
FUNCTIONS.
TMON for MVS Initiated in only one instance: when you select an MVS
system on another processor complex on the System
Selection Menu.
Using Implicit Pass-Through Chapter 3: Landmark Product Communication
3-12
Usage Notes Any security limitations set up for your user ID when you access
the product directly are active when you access the product
implicitly. If your user ID is not authorized to use the product,
implicit access does not occur. If you are to be able to access other
Landmark PerformanceWorks MVS systems remotely, their security
systems must be the same.
You may receive error messages from a Landmark product you are
trying to access implicitly. Usually this happens when an error
occurs during the access attempt. For help with these messages,
refer to the messages and codes manual for the appropriate
product.
When you log off of a product you accessed implicitly from one of
the Landmark PerformanceWorks MVS products, you return to the
same Landmark product. For example, when you log off of a
product you accessed implicitly from TMON for MQSeries, you
return to TMON for MQSeries.
Using NaviGate
NaviGate is product-to-product communication initiated
automatically by the system when you cursor-select a field that has
a built-in connection to another product. These connections help
you diagnose problems by automatically transferring you to useful
screens in other products.
A compass symbol to the left of a field name indicates that you can
cursor-select that field to access another Landmark product.
NaviGate connections occur between products in the same
processor complex. When you invoke a NaviGate connection in a
processor complex, the other product you access also exists in the
same processor complex. If you implicitly or explicitly access a
product in a different (remote) processor complex and then invoke
a NaviGate connection, the NaviGate connection is made in the
remote processor complex.
If you try to invoke a NaviGate connection for a product that is not
active, the connection attempt fails. The screen is refreshed, but no
message is issued.
TMON for CICS/ESA The following table shows where the NaviGate connections to
other Landmark PerformanceWorks MVS products occur in TMON
for CICS/ESA.
From this screen: Cursor-select: To access this screen:
CICS DBCTL Summary CONNECTION STATUS field TMON for DBCTL Current System
Statistics
Chapter 3: Landmark Product Communication Using NaviGate
The Monitor for MVS 2.0 3-13
System Administrator’s Guide
From this screen: Cursor-select: To access this screen:
CICS MQSeries Summary MQ_SERIES QMGR NAME
field (available for only CICS
Transaction Server 1.1 and
above)
TMON for MQSeries Connection
Summary
CICS Storage Summary REGION-SIZE field TMON for MVS Private Storage
Detail Transaction Data LOC UOW field TMON for DBCTL PSB Detail
UOW field TMON for DB2 Online Analysis
Thread Summary
FCT/VSAM Statistics (when summarized
by file/DB on the File/DB Activity
Selection Menu)
device ID in the VOLUME field TMON for MVS Device Detail
Selection Menu
File/DB Activity Display (when
summarized by file/DB on the File/DB
Activity Selection Menu)
DL/I file in the FILE ID field TMON for DBCTL Database
Management Block Statistics
File/DB Activity Display (when
summarized by VOLSER on the File/DB
Activity Selection Menu)
volume serial number of a
volume in the VOLSER field TMON for MVS Device Detail
Selection Menu
MVS Contention Monitor Menu Option 1
(ACTIVE JOB SUMMARY) TMON for MVS Job Execution
Monitor
MVS Contention Monitor Menu Option 2
(DETAILED ANALYSIS) TMON for MVS Job Delay Analysis
System Control Blocks CSAM field TMON for MVS Common Storage
Summary
System Control Blocks CSAP field TMON for MVS CSA Subpool Detail
System Control Blocks SQA field TMON for MVS SQA Subpool Detail
System Control Blocks VSSM field TMON for MVS Virtual Storage
Static Map
Task Details DB2 field TMON for DB2 Current Thread
Detail
DBCTL field TMON for DBCTL Thread Detail
MQS field TMON for MQSeries Thread
Summary
TMON for CICS/MVS The following table shows where the NaviGate connections to
other Landmark PerformanceWorks MVS products occur in TMON
for CICS/MVS.
From this screen: Cursor-select: To access this screen:
Current Task Execution DB2 THREAD field TMON for DB2 Activity Monitor
Thread Detail
FCT/VSAM Statistics (when summarized
by file/DB on the File/DB Activity
Selection Menu)
device ID in the VOLUME field TMON for MVS Device Detail
Selection Menu
File/DB Activity Display (when
summarized by VOLSER on the File/DB
Activity Selection Menu)
volume serial number in the
VOLSER field TMON for MVS Device Detail
Selection Menu
MVS Contention Monitor Menu Option 1
(ACTIVE JOB SUMMARY) TMON for MVS Job Execution
Monitor
MVS Contention Monitor Menu Option 2
(DETAILED ANALYSIS) TMON for MVS Job Delay Analysis
Using NaviGate Chapter 3: Landmark Product Communication
3-14
From this screen: Cursor-select: To access this screen:
Sequential File Statistics (when
summarized by file/DB on the File/DB
Activity Selection Menu)
file number in the FILE# field TMON for MVS Device Detail
Selection Menu
TMON for DB2 The following table shows where the NaviGate connections to
other Landmark PerformanceWorks MVS products occur in TMON
for DB2.
From this screen: Cursor-select: To access this screen:
Active Log Data Set Statistics VOLSER field TMON for MVS Device Detail
Selection Menu
Current Thread Connection Summary CONN ID field TMON for CICS Performance
Graphs Target Selection
Current Thread Detail CICS TKN field TMON for CICS/ESA Active Tasks
Current Thread Summary (Long or Short) CONN ID field TMON for CICS/ESA Active Tasks
or TMON for CICS/MVS Combined
Task List
DB2 Resource Usage - Allocated Data
Sets VOLSER field TMON for MVS Device Detail
Selection Menu
DBRM/Package List Summary package in the
DBRM/PACKAGE field that
resides in a DB2 subsystem
monitored by a different TMON
for DB2 address space
DB2 EXPLAIN Utility for the remote
TMON for DB2
Online Analysis Thread Detail CICS TKN field TMON for CICS/ESA Detail
Transaction Data or TMON for
CICS/MVS Full Statistics Page 1
Page Set Detail Data Set Listing VOLSER field TMON for MVS Device Detail
Selection Menu
Primary Menu Option 4
(ACTIVE JOB SUMMARY) TMON for MVS Job Execution
Monitor
SYSIBM.SYSLOCATIONS DB2 location in the #DB2
LOCATIONS field that is not the
local DB2 system
DB2 EXPLAIN Utility for the remote
TMON for DB2
TMON for DBCTL The following table shows where the NaviGate connections to
other Landmark PerformanceWorks MVS products occur in TMON
for DBCTL.
From this screen: Cursor-select: To access this screen:
BMP Thread Detail JOB NAME field TMON for MVS Job Execution
Monitor
Current Thread Connection Summary CONN_ID field TMON for CICS/ESA Active Tasks
NBR THDS field TMON for CICS/ESA CICS DBCTL
Summary
Current Thread Summary (Long or Short) CONN-ID field TMON for CICS/ESA Active Tasks
Data Set Information Display VOL field TMON for MVS Device Detail
Selection Menu
Chapter 3: Landmark Product Communication Using NaviGate
The Monitor for MVS 2.0 3-15
System Administrator’s Guide
From this screen: Cursor-select: To access this screen:
Primary Menu Option 4
(ACTIVE JOB SUMMARY) TMON for MVS Job Execution
Monitor
PSB Detail CICS TKN field TMON for CICS/ESA Detail
Transaction Data
Thread Detail RECVRY TOKEN field TMON for CICS/ESA Task Details
VSAM Data Set Information VOLUME field TMON for MVS Device Detail
Selection Menu
TMON for MQSeries The following table shows where the NaviGate connections to
other Landmark PerformanceWorks MVS products occur in TMON
for MQSeries.
From this screen: Cursor-select: To access this screen:
Active Log Data Set Statistics VOLSER field TMON for MVS Device Detail
Selection Menu
Primary Menu Option 5
(ACTIVE JOB SUMMARY) TMON for MVS Job Execution
Monitor
Thread Detail CORRELATION field TMON for CICS/ESA Task Details
TMON for MVS The following table shows where the NaviGate connections to
other Landmark PerformanceWorks MVS products occur in TMON
for MVS.
From this screen: Cursor-select: To access this screen:
Job Detail Selection Menu Option 11 (after
cursor-selecting a CICS job
name on the Job Execution
Monitor screen)
TMON for CICS Primary Selection
Menu
Option 11 (after
cursor-selecting a DB2 job
name on the Job Execution
Monitor screen)
TMON for DB2 Primary Menu
Usage Notes When you connect to a second Landmark PerformanceWorks MVS
product using NaviGate, you are transferred to a specific screen in
the second product. This screen is called a connection screen.
Ordinarily, you can use this screen exactly as if you had accessed it
by logging onto the second product directly. The only exception is
that when you enter the END command (or press the appropriate
function key), you are transferred back to the initial product. In
other words, you can enter commands and options that place you
further (or deeper) into the second product, but you cannot access
screens that would ordinarily be displayed earlier in the product
than the connection screen.
Any security limitations set up for your user ID when you access
the product directly are active when you access a second product
using NaviGate. If your user ID is not authorized to use the second
product, the NaviGate connection does not occur.
Using NaviGate Chapter 3: Landmark Product Communication
3-16

You may receive error messages from a Landmark product you are
trying to access using NaviGate. Usually this happens when an
error occurs during the access attempt. For help with these
messages, refer to the messages and codes manual for the
appropriate product.
When you log off of a product you accessed using a NaviGate
connection from one of the Landmark PerformanceWorks MVS
products, you return to the same Landmark product. For example,
when you log off of a product you accessed using a NaviGate
connection from TMON for DB2, you return to TMON for DB2.
Accessing All
Screens If you want to access a screen ordinarily displayed earlier in the
product than the connection screen, enter the STAY command on
the command line of the second product.
The syntax of the STAY command is:
STAY
Once you have entered the STAY command, you can access any
screen in the product. Of course, any security limitations set up for
your user ID are still in effect.
Chapter 3: Landmark Product Communication Using NaviGate
The Monitor for MVS 2.0 3-17
System Administrator’s Guide
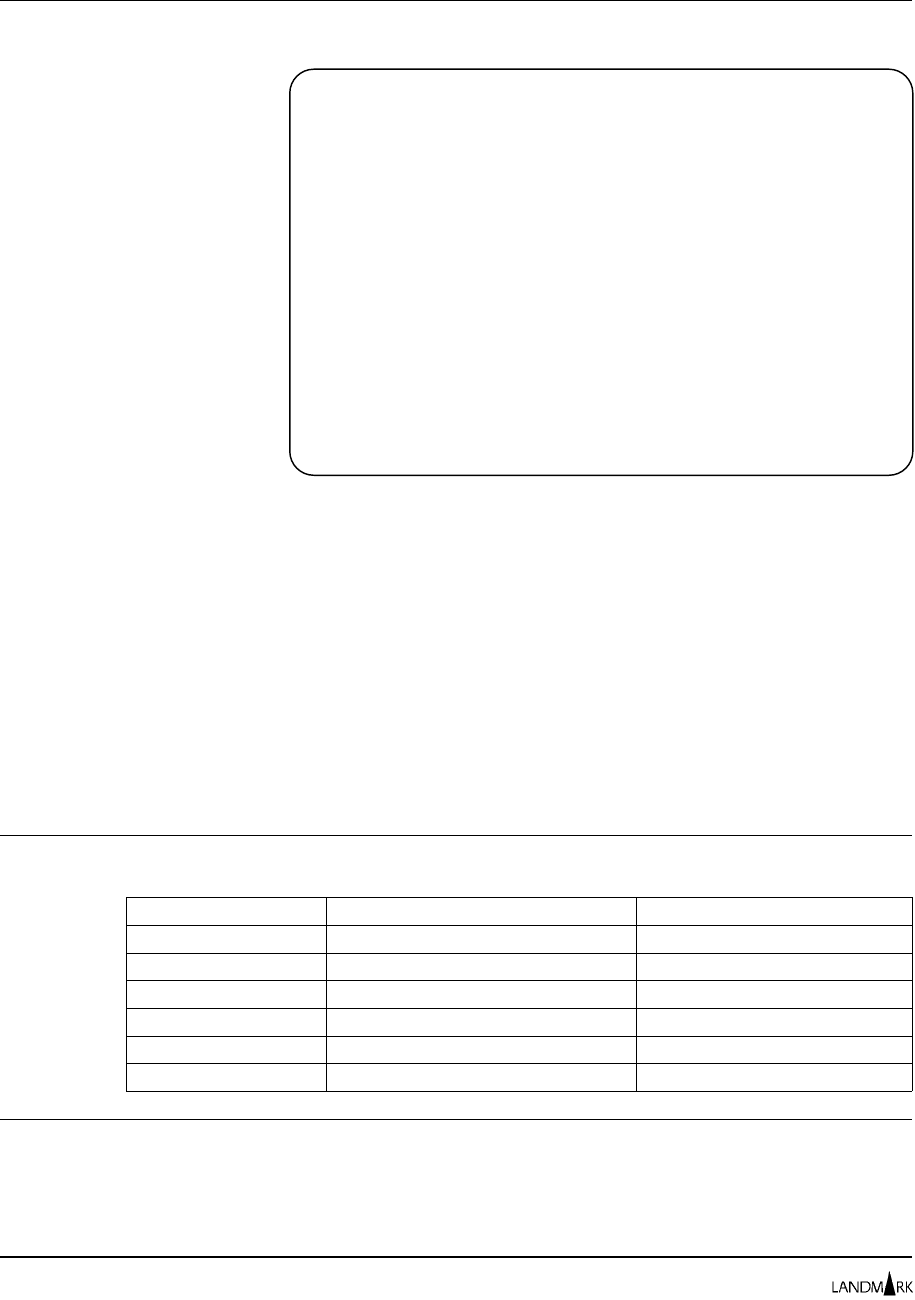
Remote Sessions Directory
The Remote Sessions Directory screen lists all Landmark
PerformanceWorks MVS products defined in your network and the
current SLU session ID prefix. You can update the prefix on this
screen. If you do, the prefix setting is saved in the control file. If
you prefer to update the prefix temporarily (rather than in the
control file), use the SLUPREFIX startup parameter instead. For
more information on the SLUPREFIX startup parameter, refer to
your Landmark product’s installation completion instructions in
PerformanceWorks for MVS and OS/390 Installation Guide.
If you want to add, update, or delete product sessions in the list,
you must cursor-select a session. All session definitions are stored
in your product’s control file.
Accessing this Screen To access this screen, complete one of the following paths.
Product Action Displays
TMON for CICS/ESA On the command line, enter
=10.1.6
. Remote Sessions Directory
TMON for CICS/MVS On the command line, enter
=10.1.8
. Remote Sessions Directory
TMON for DB2 On the command line, enter
=9.5.1
. Remote Sessions Directory
TMON for DBCTL On the command line, enter
=9.7.1.
Remote Sessions Directory
TMON for MQSeries On the command line, enter
=9.5.1
. Remote Sessions Directory
TMON for MVS On the command line, enter
=S.1
. Remote Sessions Directory
Primary Commands Use the DOWN and UP commands to scroll through this screen. To
learn about the various ways to scroll using these commands and
for syntax and descriptions of all commands, see Chapter 2 in your
product reference manual.
JOBNAME: THE MONITOR FOR MVS DATE:
SYSID : VERSION: 2.0 TIME:
REMOTE SESSIONS DIRECTORY
COMMAND:
SLU APPLID PREFIX TMVSP <-- OVERTYPE TO CHANGE PREFIX
APPLID PRODUCT STATUS VER DESCRIPTION
_ TMDBCHI TMONDB2 INACT 03.1 THE MONITOR FOR DB2 IN CHICAGO
_ TMVSCHI TMONMVS ACTIVE 02.0 THE MONITOR FOR MVS IN CHICAGO
_ TMON2CHI TMONCICS ACTIVE 02.0 THE MONITOR FOR CICS IN CHICAGO
_ TMDBNYC TMONDB2 ACTIVE 03.2 THE MONITOR FOR DB2 IN NEW YORK
_ TMVSNYC TMONMVS ACTIVE 02.0 THE MONITOR FOR MVS IN NEW YORK
_ TMON8NYC TMONCICS ACTIVE 08.3 THE MONITOR FOR CICS IN NEW YORK
_ TMDBPGH TMONDB2 ACTIVE 03.2 THE MONITOR FOR DB2 IN PITTSBURGH
_ TMVSPGH TMONMVS ACTIVE 02.0 THE MONITOR FOR MVS IN PITTSBURGH
_ TMON8PGH TMONCICS INACT 08.3 THE MONITOR FOR CICS IN PITTSBURGH
_ TMON2NYC TMONCICS INACT 02.0 THE MONITOR FOR CICS/ESA IN NY V2.0
_ TMDBSF TMONDB2 ACTIVE 03.1 THE MONITOR FOR DB2 IN SAN FRANCISCO
_ TMVSSF TMONMVS ACTIVE 01.3 THE MONITOR FOR DB2 IN SAN FRANCISCO
_ TMON2SF TMONCICS INACT 02.0 THE MONITOR FOR CICS/ESA IN SAN FRANCISCO
HELP INFORMATION = PF1 PF KEY ASSIGNMENTS = PA1
Remote Sessions Directory Chapter 3: Landmark Product Communication
3-18
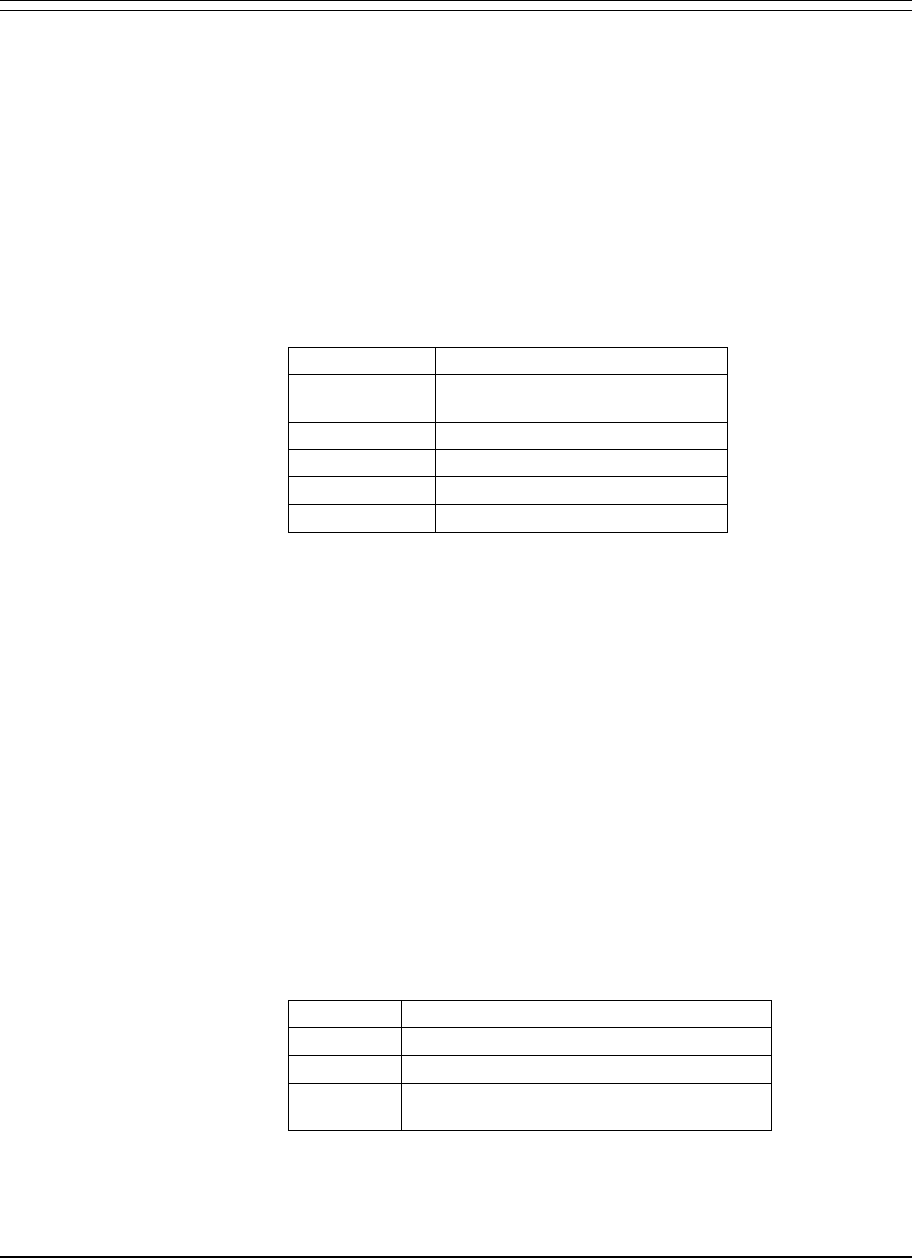
Fields ➥APPLID
Displays the applid of a Landmark product defined in the control
file. All applids defined in the control file are shown.
Cursor-select an applid if you want to update or delete it or if you
want to use it as a template for a new applid. The Remote Session
Definition screen is displayed.
DESCRIPTION
Displays a brief description of the session definition.
PRODUCT
Displays the product for this session definition. The following
table lists valid identifiers.
Identifier Product
TMONCICS TMON for CICS (CICS/ESA) and
TMON for CICS (CICS/MVS)
TMONDB2 TMON for DB2
TMONDBC TMON for DBCTL
TMONMQ TMON for MQSeries
TMONMVS TMON for MVS
SLU APPLID PREFIX
Shows the SLU session ID prefix, which is used to create the SLUs
that are used to access Landmark products. The session ID prefix
may be up to five characters long and must be unique across all
products in your network. To change the SLU session ID prefix,
tab to this field, change it, and press ENTER. When you change the
SLU session ID prefix on this screen, the change is saved in the
product control file. To change the session ID temporarily, use the
SLUPREFIX startup parameter. For more information, refer to the
installation completion instructions for your Landmark product in
PerformanceWorks for MVS and OS/390 Installation Guide.
You must use different SLU prefixes on different processor
complexes and for different products running in the same
processor complex.
STATUS
Indicates the status of the Landmark product. The following table
lists valid status indicators.
Status Description
ACTIVE The product is active.
INACT The product is not active.
UNKNWN The status of the product cannot be
determined.
VERDisplays the version of the Landmark product. The value in the
VER field is always zero unless both of the following conditions are
met.
Chapter 3: Landmark Product Communication Remote Sessions Directory
The Monitor for MVS 2.0 3-19
System Administrator’s Guide

•The product session is active and can perform Landmark
NaviGate functions (in other words, its modification level is
correct).
•At least one Landmark product communication link has been
made to the product session.
Remote Sessions Directory Chapter 3: Landmark Product Communication
3-20
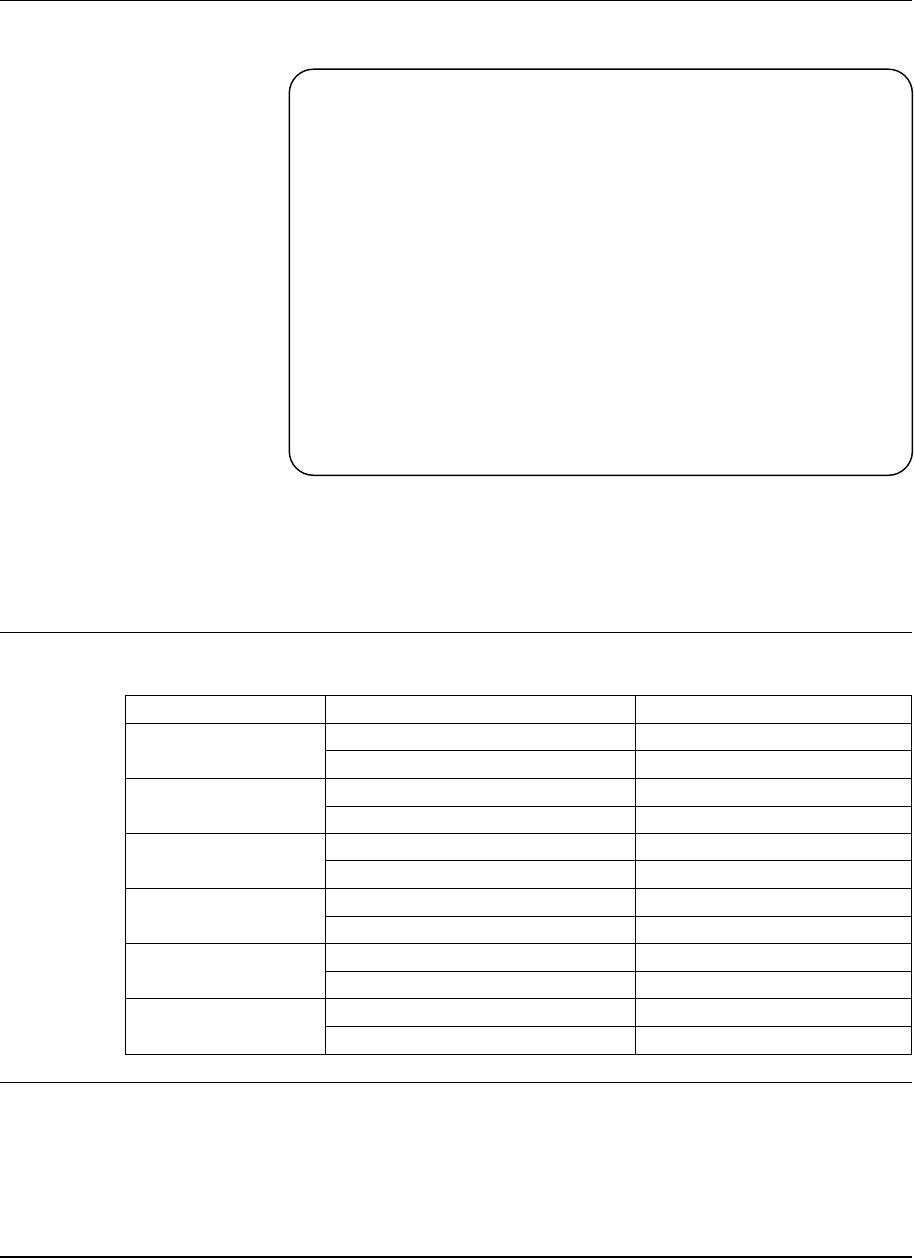
Remote Session Definition
The Remote Session Definition screen lets you update or define
your session definitions. You can add a new definition, or update
or delete an existing one. This information includes the product
ID, the applid, and the description of the session.
Accessing this Screen To access this screen, complete one of the following paths.
Product Action Displays
TMON for CICS/ESA On the command line, enter
=10.1.6
. Remote Sessions Directory
Cursor-select an applid. Remote Session Definition
TMON for CICS/MVS On the command line, enter
=10.1.8
. Remote Sessions Directory
Cursor-select an applid. Remote Session Definition
TMON for DB2 On the command line, enter
=9.5.1
. Remote Sessions Directory
Cursor-select an applid. Remote Session Definition
TMON for DBCTL On the command line, enter
=9.7.1
. Remote Sessions Directory
Cursor-select an applid. Remote Session Definition
TMON for MQSeries On the command line, enter
=9.5.1
. Remote Sessions Directory
Cursor-select an applid. Remote Session Definition
TMON for MVS On the command line, enter
=S.1
. Remote Sessions Directory
Cursor-select an applid. Remote Session Definition
Primary Commands Enter the following commands on the command line.
ADD Adds a remote session definition to the
control file. Type the appropriate
information in the APPLID, DESCRIPTION,
and PRODUCT fields to identify the new
JOBNAME: THE MONITOR FOR MVS DATE:
SYSID : VERSION: 2.0 TIME:
REMOTE SESSION DEFINITION
COMMAND:
OVERTYPE FIELDS TO "ADD" OR "UPDATE"
PRODUCT -------> TMONMVS
APPLID --------> TMVSPGH
DESCRIPTION ---> TMON FOR MVS IN PITTSBURGH
PRIMARY TMP ---> N Y = DEFAULT TMP FOR "JUMP="
N = SECONDARY TMP
============================================================================
CURSOR SELECT ONE OF THE FOLLOWING: _ADD _UPDATE _DELETE
HELP INFORMATION = PF1 PF KEY ASSIGNMENTS = PA1
Chapter 3: Landmark Product Communication Remote Session Definition
The Monitor for MVS 2.0 3-21
System Administrator’s Guide
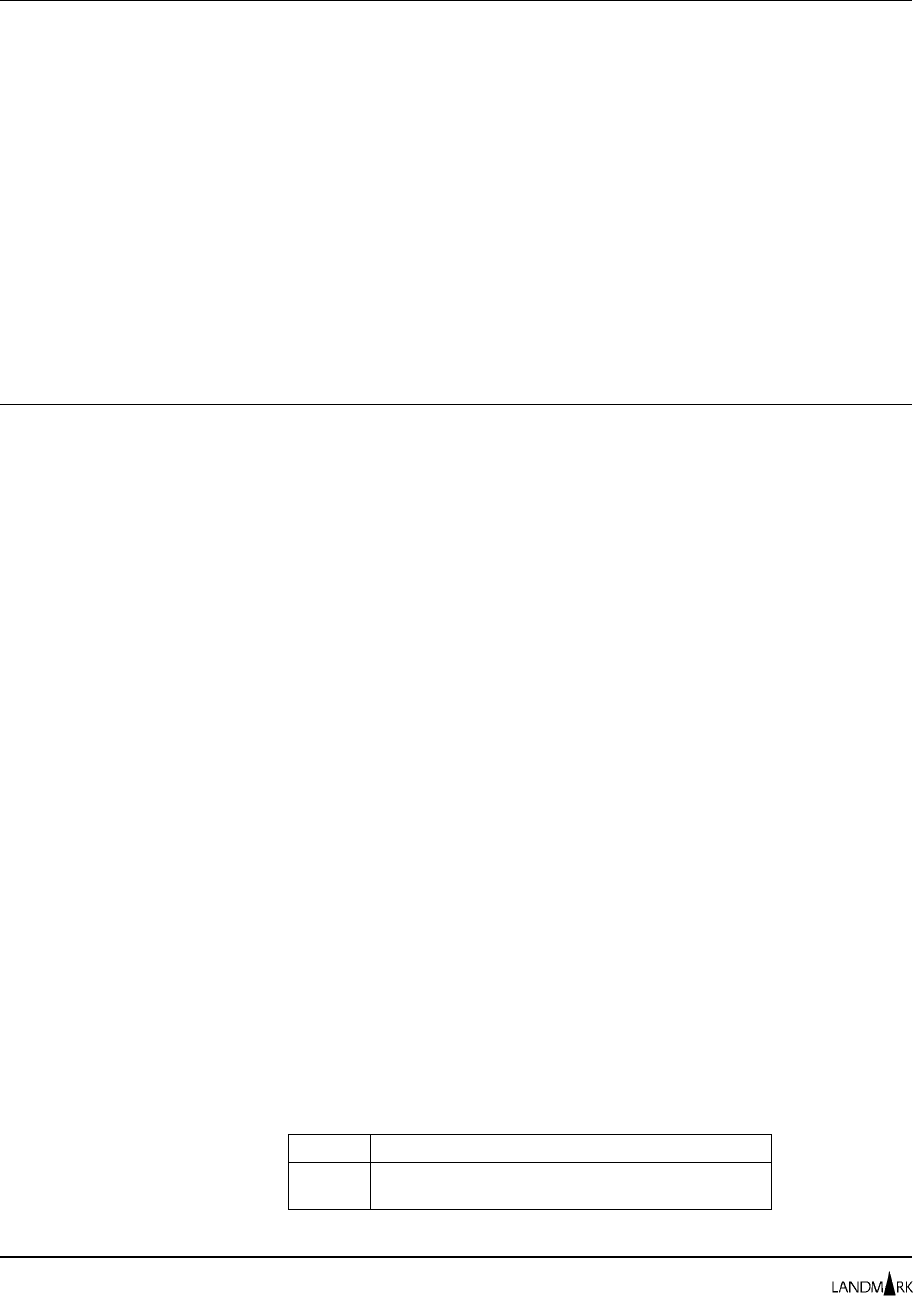
product session; then enter this command
(or cursor-select the ADD field).
DELETE Deletes a remote session definition from the
control file. You also can cursor-select the
DELETE field to perform this function.
UPDATE Updates a remote session definition in the
control file. Type over the information you
want to change; then enter this command
(or cursor-select the UPDATE field).
Use the DOWN and UP commands to scroll through this screen. To
learn about the various ways to scroll using these commands and
for syntax and descriptions of all commands, see Chapter 2 in your
product reference manual.
Fields ➥ADD
Use this field as part of the procedure to add session definitions to
the control file. Type appropriate information in the APPLID,
DESCRIPTION, and PRODUCT fields to identify the new product
session; then cursor-select this field to add the definition to the
control file. You also can use the ADD command to perform this
function.
APPLID
Shows the 1- to 8-character applid of a Landmark product.
➥DELETE
Cursor-select this field to delete the session definition from the
control file. Your product, however, must be re-cycled before you
see the effects of the DELETE function. You also can use the
DELETE command to perform this function.
DESCRIPTION
Displays a description of the product session. You can specify a
maximum of 36 characters in the description.
PRIMARY TMP
Specifies whether this product session is the primary session for
the Landmark product. Primary sessions are the product sessions
accessed when you enter the JUMP command to explicitly access
another Landmark product. More than one primary session can be
defined for each unique Landmark product on your system. When
more than one primary session is defined and a JUMP command is
issued, the first primary session found active is used to satisfy the
JUMP request.
The following table lists valid values.
Value Description
N Indicates that the product session is not the
primary session
Remote Session Definition Chapter 3: Landmark Product Communication
3-22
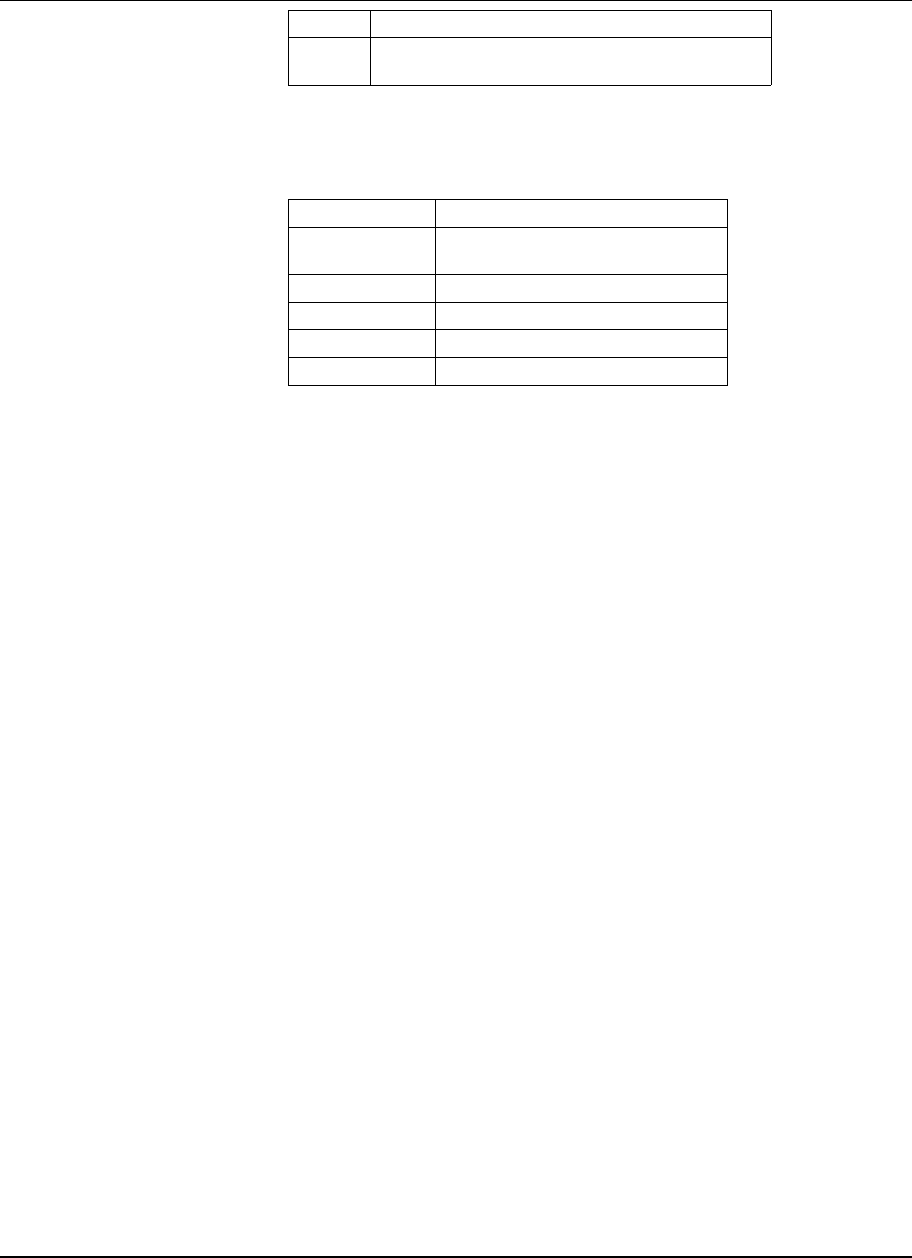
Value Description
Y Indicates that the product session is the primary
session
PRODUCT
Shows the product for this session definition. The following table
lists valid identifiers.
Identifier Product
TMONCICS TMON for CICS (CICS/ESA) and
TMON for CICS (CICS/MVS)
TMONDB2 TMON for DB2
TMONDBC TMON for DBCTL
TMONMQ TMON for MQSeries
TMONMVS TMON for MVS
➥UPDATE
Use this field as part of the procedure to update session definitions
in the control file. Type over the information you want to change;
then cursor-select this field to update the session definition on the
control file. You also can use the UPDATE command to perform
this function.
Chapter 3: Landmark Product Communication Remote Session Definition
The Monitor for MVS 2.0 3-23
System Administrator’s Guide
Remote Sessions Logon
Use the Remote Sessions Logon screen to access an applid of
another Landmark PerformanceWorks MVS product. The status of
the product you want to access must be active.
Accessing this Screen To access this screen, complete one of the following paths.
Product Action Displays
TMON for CICS/ESA On the command line, enter
=9.2
. Remote Sessions Logon
TMON for CICS/MVS On the command line, enter
=9.2
Remote Sessions Logon
TMON for DB2 On the command line, enter
=9.5.2
. Remote Sessions Logon
TMON for DBCTL On the command line, enter
=9.7.2.
Remote Sessions Logon
TMON for MQSeries On the command line, enter
=9.5.2
. Remote Sessions Logon
TMON for MVS On the command line, enter
=A.1
. Remote Sessions Logon
Primary Commands Use the DOWN and UP commands to scroll through this screen. To
learn about the various ways to scroll using these commands and
for syntax and descriptions of all commands, see Chapter 2 in your
product reference manual.
Fields ➥APPLID
Displays the applid of a product defined in the control file. All
applids defined in the control file are shown.
Cursor-select an applid to access the associated product. The first
screen of the selected product is displayed.
JOBNAME: THE MONITOR FOR MVS DATE:
SYSID : VERSION: 2.0 TIME:
REMOTE SESSIONS LOGON
COMMAND:
APPLID PRODUCT STATUS VER DESCRIPTION
_ TMDBCHI TMONDB2 INACT 03.1 THE MONITOR FOR DB2 IN CHICAGO
_ TMVSCHI TMONMVS ACTIVE 02.0 THE MONITOR FOR MVS IN CHICAGO
_ TMON2CHI TMONCICS ACTIVE 02.0 THE MONITOR FOR CICS IN CHICAGO
_ TMDBNYC TMONDB2 ACTIVE 03.2 THE MONITOR FOR DB2 IN NEW YORK
_ TMVSNYC TMONMVS ACTIVE 02.0 THE MONITOR FOR MVS IN NEW YORK
_ TMON8NYC TMONCICS ACTIVE 08.3 THE MONITOR FOR CICS IN NEW YORK
_ TMDBPGH TMONDB2 ACTIVE 03.2 THE MONITOR FOR DB2 IN PITTSBURGH
_ TMVSPGH TMONMVS ACTIVE 02.0 THE MONITOR FOR MVS IN PITTSBURGH
_ TMON8PGH TMONCICS INACT 08.3 THE MONITOR FOR CICS IN PITTSBURGH
_ TMON2NYC TMONCICS INACT 02.0 THE MONITOR FOR CICS/ESA IN NY V2.0
_ TMDBSF TMONDB2 ACTIVE 03.1 THE MONITOR FOR DB2 IN SAN FRANCISCO
_ TMVSSF TMONMVS ACTIVE 01.3 THE MONITOR FOR DB2 IN SAN FRANCISCO
_ TMON2SF TMONCICS INACT 02.0 THE MONITOR FOR CICS/ESA IN SAN FRANCISCO
HELP INFORMATION = PF1 PF KEY ASSIGNMENTS = PA1
Remote Sessions Logon Chapter 3: Landmark Product Communication
3-24
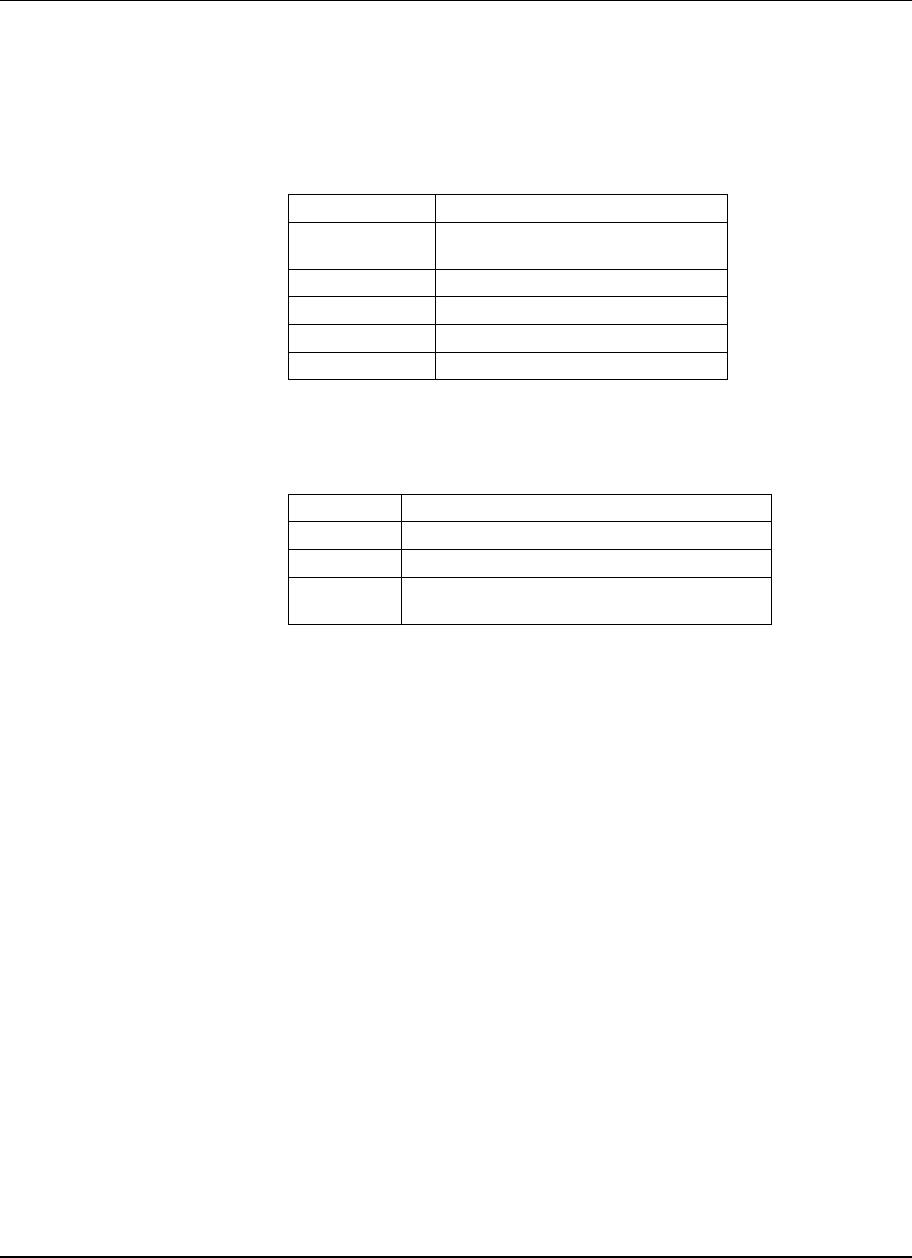
DESCRIPTION
Displays a brief description of the product with the applid shown
in the corresponding APPLID field.
PRODUCT
Displays the product for this session definition. The following
table lists valid identifiers.
Identifier Product
TMONCICS TMON for CICS (CICS/ESA) and
TMON for CICS (CICS/MVS)
TMONDB2 TMON for DB2
TMONDBC TMON for DBCTL
TMONMQ TMON for MQSeries
TMONMVS TMON for MVS
STATUS
Indicates the status of the Landmark product. The following table
lists valid status indicators.
Status Description
ACTIVE The product is active.
INACT The product is not active.
UNKNWN The status of the product cannot be
determined.
VERShows the version of the Landmark product. The value in the VER
field is always zero unless both of the following conditions are met.
•The product session is active and can perform Landmark
NaviGate functions (in other words, its modification level is
correct).
•At least one Landmark product communication link has been
made to the product session.
Chapter 3: Landmark Product Communication Remote Sessions Logon
The Monitor for MVS 2.0 3-25
System Administrator’s Guide

Chapter 3: Landmark Product Communication
3-26

Chapter 4: Support and Maintenance
The goal of Landmark’s Customer Services team is to help you
solve any problems or answer any questions that arise as you use
Landmark products or documentation.
This chapter discusses:
•Our Customer Service Satisfaction Guarantee
•Year 2000 compliance warranty
•Requesting and receiving support
•Product support policy
•How Landmark distributes product maintenance
•Electronic Customer Service system
•Proactive maintenance policy
•Hiper fix policy
•Submitting an enhancement request
•Configuration changes and disaster recovery.
Customer Service Satisfaction Guarantee
Landmark Systems Corporation is committed to providing
responsive, quality service to any customer who purchases
maintenance from us. We are committed to delivering on this
promise and, therefore, make the following guarantee:
If, in any month, the customer is not satisfied with the service received for
a Landmark product, we will give them credit for double that product’s
monthly maintenance fee.
This guarantee commences with the general availability (GA) of
any new Landmark product or the new release of any existing
Landmark product.
The following guidelines apply if you wish to invoke this
guarantee.
•We must receive a letter signed by your department manager
on your company letterhead. This letter must describe the
situation and explain the reasons for the dissatisfaction.
•Your company’s maintenance payments must be current.
Credit will be implemented as described in the following table.
The Monitor for MVS 2.0 4-1
System Administrator’s Guide
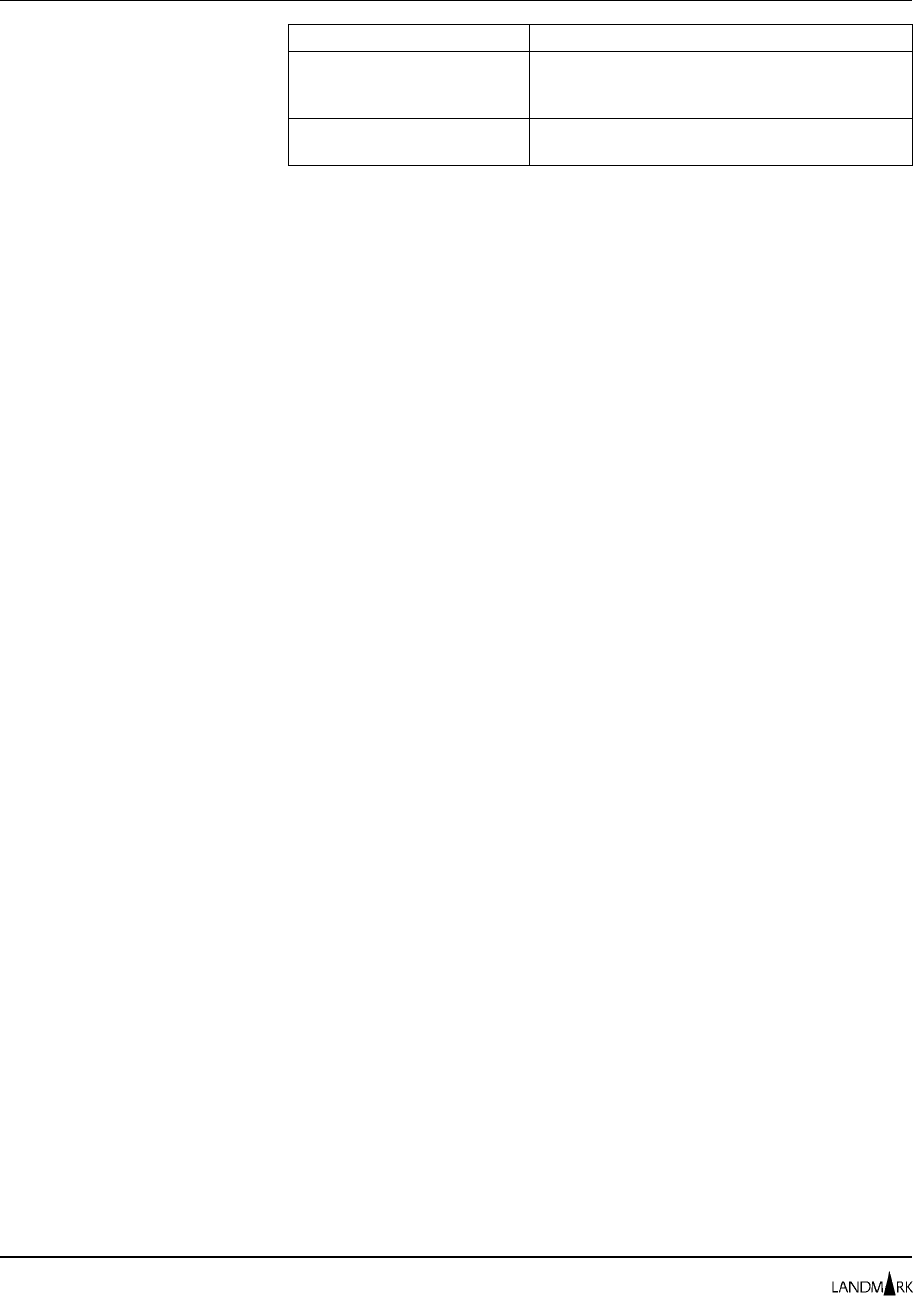
Your License Agreement Our Credit Policy
Permanent License or
Lease/Purchase You will receive a credit for two month’s
maintenance on your next annual
maintenance invoice.
Rental You will receive a credit for one month’s rental
upon renewal.
Year 2000 Compliance Warranty
Landmark Systems Corporation warrants that its licensed
programs are Year 2000 compliant. Year 2000 compliant means that
the licensed program, individually and in combination, shall:
•Process the date and date-related data, including but not
limited to, calculating, comparing, and sequencing
•Manipulate the date and date-related data with dates prior to,
through, and beyond January 1, 2000
•Be transparent to the user
•Correctly transition into the Year 2000 with the correct system
date without human intervention, including leap year
calculations
•Provide correct results when moving forward or backward in
time across the Year 2000.
Notwithstanding the above, it is understood that, based on IBM’s
plan to withdraw programming support for CICS/MVS 2.x and
below, VSE/ESA 1.3 and below, and CICS/VSE 2.2 and below,
Landmark has no plans to modify TMON for CICS/MVS, TMON
for VSE, or TMON for CICS/VSE, respectively, to support Year
2000 on those platforms. Landmark reserves the right to modify
these plans based on changes in IBM’s plans and Landmark’s own
business requirements.
You will have the right to perform tests that are reasonably
necessary to determine compliance with the Year 2000 compliant
warranty stated here. You may, at no additional cost, make a test
copy of the licensed programs for which you are licensed and test
such copy(s) on any platform that Landmark has indicated is
suitable for the licensed program.
Product Support
This section discusses:
•What to do before contacting Landmark
•How to request support
•Our process for providing support.
Year 2000 Compliance Warranty Chapter 4: Support and Maintenance
4-2
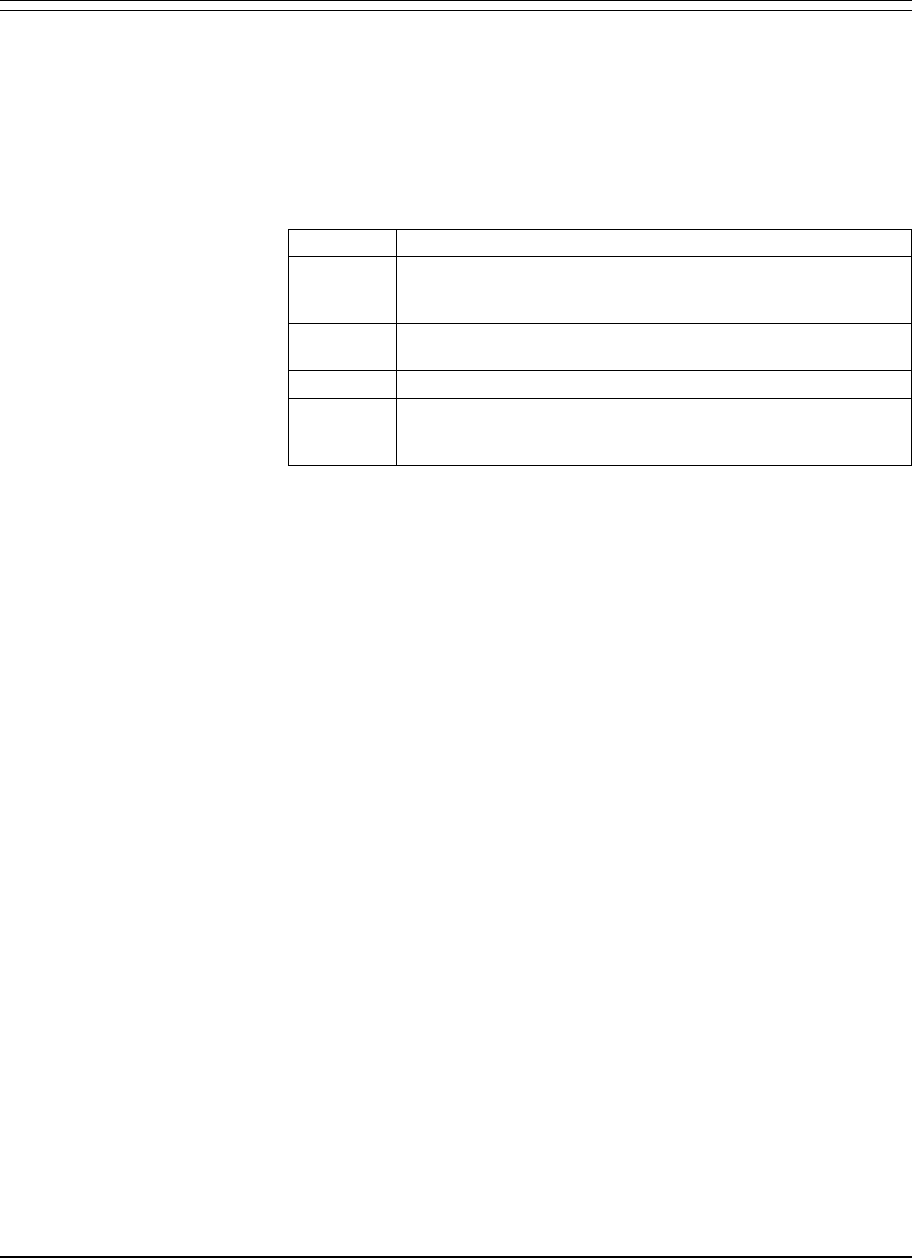
Before Contacting
Landmark You should define your problem, assign it a severity level
according to the guidelines in this section, and gather any
appropriate supporting documentation before you contact
Landmark for product support. When defining your problem, be
prepared to describe it as completely as possible and outline the
sequence of events that preceded it.
Use the following criteria to assign the problem a severity level.
Level Description
SEV1 The system fails or the product is not operational when in a
business-critical application. This is the highest priority level
for a problem.
SEV2 A serious problem affects, but does not prohibit, software
operation.
SEV3 A problem affects software operation but does not prevent it.
SEV4 You have a usage question, encounter a documentation error,
or have an enhancement request. Read about submitting an
enhancement request later in this chapter.
Collect the following supporting documentation:
•All the messages you receive, including the message numbers
and text. If you receive messages from IBM or other vendors’
products, please read any available documentation related to
the messages and follow any instructions provided therein
before contacting Landmark.
•A description of your operating environment, including:
–The version number and Performance Series for MVS or
PerformanceWorks tape identifier of the relevant Landmark
product
–The version number of the operating system
–The version number of other related program products,
such as VTAM, MVS, CICS, AIX, Solaris, Sybase, Oracle,
and SunOS
–A list of all hardware components and their configuration
–A list of any installed software changes.
•All output related to the problem, for example:
–Dumps and traces
–Screen prints, particularly the Error Diagnostic Screen
(described in the next section)
–Samples of JCL, control statements, and incorrect output
(mainframe products)
–JES2 or OPTION LOG output (mainframe products)
–Samples of scripts and incorrect output (distributed
products).
Chapter 4: Support and Maintenance Product Support
The Monitor for MVS 2.0 4-3
System Administrator’s Guide
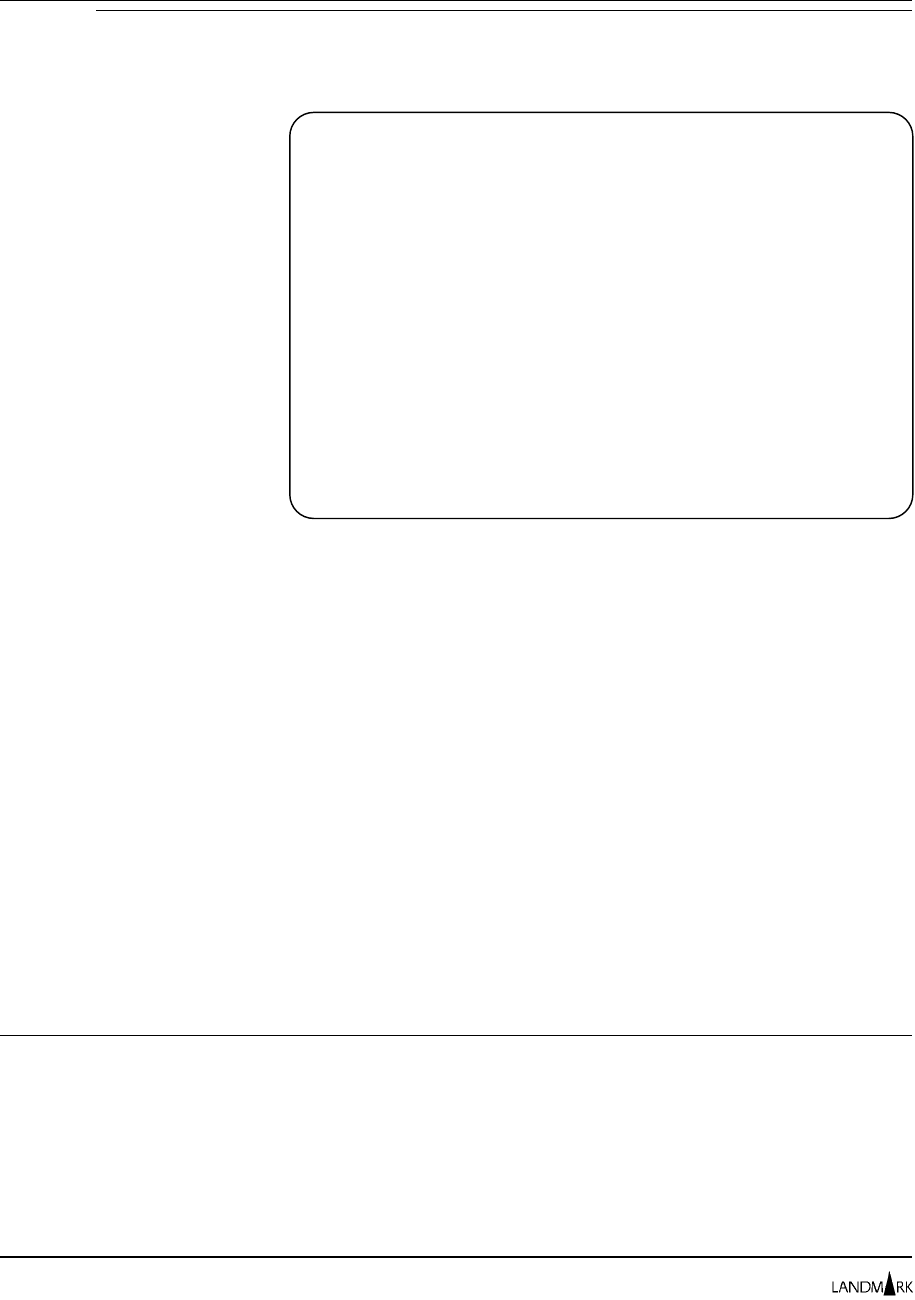
Error Diagnostic
Screen The Error Diagnostic Screen enables you to recover from an
internal error. It also provides us with the information we need to
diagnose the problem.
The screen displays several fields you can cursor-select to recover
from the error, terminate your session, or obtain information to
help resolve the problem. Either a user or a system abend code is
displayed in the ABEND CODE field. If the code begins with an
“S,” it is a system abend code.
The only way to exit this screen is to select one of the cleanup or
terminate fields at the bottom. If the problem is not a recurring
one, you should cursor-select CLEAN UP AND CONTINUE and
attempt to continue your session. If you cannot continue, cursor-
select TERMINATE THIS SESSION.
Print the screen before you make your selection and contact
Customer Services or your local Landmark representative. If you
call Customer Services, a technician may ask you to cursor-select
the VIEW PWA STORAGE CHAINS? field to obtain information for
debugging the problem. If the technician needs additional
information, you may be asked to cursor-select one of the cleanup
or terminate options at the bottom of the screen to obtain a
diagnostic snap or system dump.
Requesting Support Once you have gathered the supporting documentation for your
problem, you are ready to contact us for support. Which technician
you contact to obtain support varies, depending on where you
licensed your Landmark product and the level of support you
purchased.
•If you licensed this product outside of the U.S. or Canada,
report any problems or concerns directly to your local
Landmark representative.
ERROR DIAGNOSTIC SCREEN
COMMAND:
AN ERROR HAS BEEN ENCOUNTERED IN PROGRAM $PGMCTL !!!
ANY MESSAGE INFORMATION ABOVE MAY BE RESIDUAL.
SELECT AN OPTION BELOW TO CONTINUE OR TERMINATE.
ABEND CODE 00C7 PRIMARY ASID: 00C3 SEC: 00C3
FAILING MODULE ADDRESS 0007D8D0 OFFSET: 00000628
DATA AT FAILURE POINT: 0007DEF2 E1324F0E 07740600 89000005
_VIEW PWA STORAGE CHAINS?
TMA 04FD7010 PGM $CBDSEX PSW 078D0000 8007DEF8 PWA 001B75E8 GCA 00018000
0-7 001B7802 0001A020 0001A020 001B75E8 04FD8140 001B75E8 04FD7010 0007D8D0
8-15 0007E8D0 001B75E8 001C37F0 00162020 00018000 04FD8000 04FD7010 00000000
_CLEAN UP AND CONTINUE _TERMINATE THIS SESSION
_CLEAN UP WITH DIAGNOSTIC SNAP _TERMINATE WITH DIAGNOSTIC SNAP
_CLEAN UP WITH SYSTEM DUMP _TERMINATE WITH SYSTEM DUMP
HELP INFORMATION = PF1 PF KEY ASSIGNMENTS = PA1
Product Support Chapter 4: Support and Maintenance
4-4

•If you licensed this product through an authorized reseller,
report any problems or concerns directly to the reseller.
•If you licensed this product directly from Landmark in the U.S.
or Canada, contact Landmark Customer Services at one of the
following numbers:
–In the United States, the U.S. Virgin Islands, and Canada,
1-800-775-LMRK (or 1-800-775-5675)
–1-703-464-1300
Standard operating hours are Monday through Friday from 8 a.m.
to 6 p.m. eastern standard time (EST). However, we provide
support for critical (SEV1) problems 24 hours a day, 365 days a
year. So, if you experience a SEV1 problem outside of standard
business hours, use the same telephone numbers.
If you have a password, you can request customer support through
the Internet at www.support@landmark.com. You also can
send an e-mail message to its@landmark.com or fax your
request to Customer Services at (703) 464-4901 or
1-800-257-8251.
Response Policy Landmark Customer Services’ response policy varies depending on
the severity assigned to the problem.
SEV1 Problems We provide support for SEV1 problems 24 hours a day, 365 days a
year. When you contact us, a technician starts working on your
problem immediately. If all technicians are busy, we will respond
to you within two hours. If you contact us after normal business
hours, you can leave a message and a technician will return the call
within two hours.
Non-SEV1
Problems If your problem is not a SEV1 problem, a technician starts working
on your problem immediately. If all technicians are busy, we will
provide you with an activity number and respond within four
hours. If you call after normal business hours, leave a message,
and a technician will call back the next business day.
No Response If a Landmark technician attempts to contact you five or more
times, leaving messages when you are not in, and you do not
return Landmark’s call within 48 business hours, your activity is
closed. In addition, if a Landmark technician has requested
supporting documentation for the problem or is waiting for
confirmation of a problem resolution from you, and you do not
contact Customer Services within two weeks, your activity is
closed automatically.
Receiving Support Every time you contact Landmark Customer Services to report a
new problem or request information, a technical assistant:
•Asks for your site number and the version number of the
product on which you are reporting.
Chapter 4: Support and Maintenance Product Support
The Monitor for MVS 2.0 4-5
System Administrator’s Guide

•Assigns an activity number to the problem. Be sure you record
the activity number and use it during follow-up
communication to ensure efficient handling of your problem.
During subsequent communication, we use your activity
number to route the communication appropriately. If you need
to forward supporting documentation to Landmark, mark the
activity number on both the contents and the outside of the
package to make sure the appropriate team member receives it.
•Asks you to provide a brief description of the problem.
A Customer Services technician asks you to describe the problem
and supply any other information that may assist in resolving it. If
the problem already has been reported and a fix is available, the
technician can mail a module replacement to you or assist you with
downloading it from the Electronic Customer Service system (ECS),
described later in this chapter. If the fix is part of a service
upgrade, the technician can order the upgrade for you.
If the problem you describe indicates a software malfunction that
does not have a fix, the technician may ask you for additional
information, including the supporting documentation discussed
earlier in this chapter.
Submitting
Documentation
to Landmark
When a problem requires further investigation, we may ask you to
send your supporting documentation to Landmark. You can either
send it via FTP to ftp.landmark.com (the quickest method) or
use the following procedures to mail it.
1. For dumps, raw data, traces, or other large-volume printouts,
send tapes (3480 cartridges are preferred), with a description of
how you created the tape, the data set name, the record and
block sizes, and the number of files. Note that Landmark
internal software interprets unformatted SVC or console
dumps. Please do not send printed (JES offload) or formatted
dumps.
For job logs, screen prints, small snap dumps, and other small
printouts, send the original listings.
2. Include a short note that describes the documentation you are
sending and whether you want Landmark to return it.
3. Label each document and the outside of the package with the
assigned activity number.
4. Send the package to:
Attention: CUSTOMER SERVICES
ACTIVITY NUMBER:
Landmark Systems Corporation
12700 Sunrise Valley Drive
Reston, Virginia 20191-5804
Product Support Chapter 4: Support and Maintenance
4-6

Note If a Landmark technician requests your supporting documentation
and does not receive it within two weeks, your activity is closed
automatically.
Changing the
Priority of an
Activity
If the impact of a reported problem becomes more severe, you can
escalate the priority of an activity in one of two ways:
•Although Landmark strictly follows its severity level
definitions when assigning a severity level to a problem, you
can request that your problem be given a higher priority, based
on how important resolution of the problem is to your
business. The technician documents this in the activity record
and notifies the appropriate manager. Increasing the priority
of a problem does not necessarily increase its severity level.
•Contact the following levels of management to either escalate
the priority of your activity or express any concerns you may
have: service manager, Director of Customer Services, Vice
President of Development and Customer Services, or President
of Landmark Systems Corporation. After reviewing the details
of your situation, the problem can be assigned a higher priority,
as appropriate. We use an activity’s priority to schedule
resources to resolve the problem.
If a problem becomes less severe, contact Customer Services with
the activity number and request that they assign the activity a
lower priority or close it.
Product Support
Policy Landmark fully supports the current release and one previous
release of each of its products. Landmark cannot, however,
support all releases of its products indefinitely.
Sunset Support
Policy Once Landmark announces the general availability (GA) of a
product release, it provides support for the previous release for a
minimum of six months. Landmark supports older releases of its
products for as long as practical, but not indefinitely.
Announcements regarding our support plans for various product
releases are made in our quarterly online newsletter, The Landmark
Monitor. Once programming support for a product release is
withdrawn, Landmark no longer supplies fixes for problems nor
accepts enhancement requests for that release.
When a vendor announces the end of support for system software
or a hardware configuration on which Landmark products rely,
Landmark will make a similar announcement to customers
regarding the support plans for its products. Landmark’s support
for problems affected by system software release levels will
terminate when the vendor no longer supports their hardware or
software.
Chapter 4: Support and Maintenance Product Support
The Monitor for MVS 2.0 4-7
System Administrator’s Guide

Premium Sunset
Support Policy Supporting sunsetted releases is a costly practice and is impossible
for Landmark to do when the operating system or subsystem
Landmark products require to provide support are no longer
supported by their respective vendors.
Between the time Landmark sunsets a product and the time it
becomes impossible to support the release, you can request a price
for premium sunset maintenance. These additional maintenance
fees are used to cover our additional support costs, such as
maintaining old systems, and to allow more time to resolve
requests for service.
Premium sunset support contracts must be for a specified period of
time (a minimum of six months). The money-back guarantee will
not be valid if we find that we do not have the resources needed to
find solutions to problems.
Product Maintenance
This section discusses:
•How Landmark distributes maintenance
•Electronic Customer Service system
•Proactive maintenance policy
•Hiper policy
•How to submit a product enhancement request.
How Landmark
Distributes
Maintenance
We distribute our products in object code format. We do not
provide source-based code to anyone outside of Landmark. Source
code and the methodologies of data extraction are considered
proprietary information. To protect your investment and support
contractual requirements, source is archived.
We distribute maintence for our mainframe products
(PerformanceWorks for MVS and OS/390 and PerformanceWorks for
VSE) and distributed products (PerformanceWorks for Distributed
Products) as described in the following sections.
Mainframe
Products Periodically, Landmark publishes a base Performance Series for
MVS, PerformanceWorks for MVS and OS/390, or PerformanceWorks
for VSE tape for all Landmark MVS or VSE products. For MVS
products, all installation and maintenance is performed using
SMP/E. For VSE products, we provide a single tape in unloaded
format.
Landmark also publishes MVS and VSE cumulative maintenance
(CUM) tapes periodically containing all known maintenance for the
products. The availability of all of these base and CUM tapes
ensures that you can obtain the most up-to-date release of any
Landmark MVS or VSE product.
Product Maintenance Chapter 4: Support and Maintenance
4-8
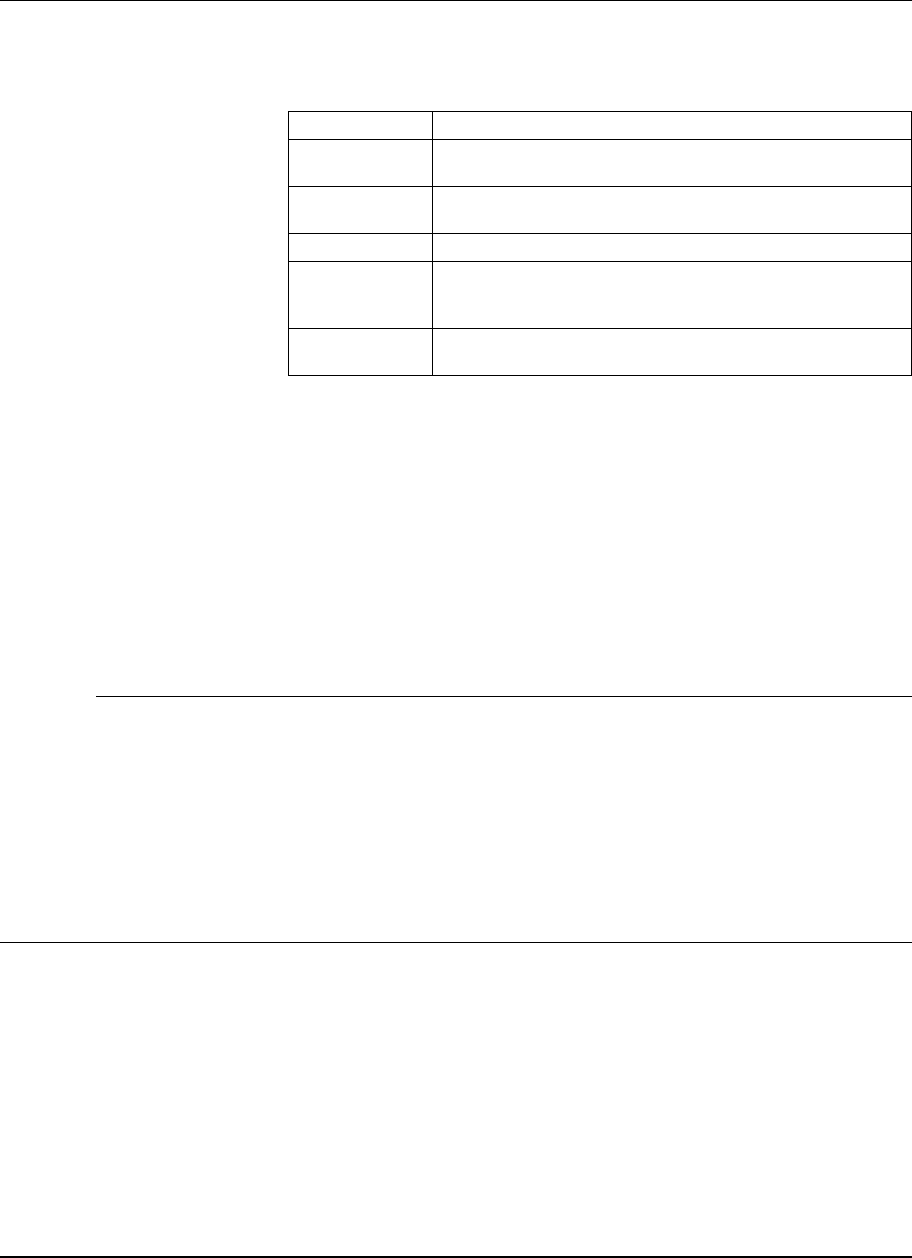
Landmark assigns to each tape an identifier that indicates the level
of service applied. These identifiers appear on the physical tape in
either ETyyvn or PSyyvn format, as described in the following table.
Identifier Part Description
ET An
early test
tape that is created only for Alpha and Beta
products.
PS A
base tape
containing products that are generally
available.
yy The 2-digit year in which the tape was created.
v The version number of Performance Series for MVS,
PerformanceWorks
for MVS and OS/390, or
PerformanceWorks
for VSE.
n An incremental tape number that changes each time a
tape is produced.
For example, “PS9734” is the fourth base tape for PerformanceWorks
Version 3 in 1997.
When a new release or product version becomes available,
Landmark notifies our customers in The Landmark Monitor, our
online quarterly Customer Services newsletter. To access a copy of
the newsletter, use your Internet browser to go to
www.landmark.com.
For complete information on installing base tapes and for applying
maintenance from CUM tapes, read the appropriate installation
guide for your Performance Series or PerformanceWorks product.
Distributed
Products We deliver distributed products on CD-ROM. Users under current
maintenance contracts can contact Landmark Customer Services
for support by calling 1-800-775-5675 or sending an email message
to its@landmark.com. In addition, Customer Services
periodically releases maintenance CD-ROMs and makes them
available to users under current maintenance contract.
For complete information on installing distributed products, read
the appropriate installation guide.
Electronic Customer
Service System (ECS)
Note The Landmark ECS is currently available for direct access only to
customers in the U.S. and Canada. Other customers receive the
benefits of ECS through their local Landmark representative.
Using Landmark’s ECS, you can access product fixes 24 hours a
day, as soon as Landmark Maintenance publishes them. You also
can obtain information on product-specific issues, including
discussions of important product topics, sample programs, and
other areas of interest to Landmark customers. For complete
information on the Landmark ECS, read Electronic Customer Service
Chapter 4: Support and Maintenance Product Maintenance
The Monitor for MVS 2.0 4-9
System Administrator’s Guide
System User’s Guide, which is included in every product’s
documentation set.
Proactive
Maintenance Policy If you do not want to wait until you have a problem, you have the
option of receiving product maintenance automatically. Landmark
will proactively ship new maintenance to you on a CUM tape as
soon as it is published. To receive this service, call Customer
Services at 1-800-775-5675, fax your request to 1-800-257-8251, or
send an e-mail message to its@landmark.com.
Hiper Fix Policy When Landmark identifies a hiper problem in a product and has
developed a fix for it, we distribute notification of the problem and
the fix to all customers of that product who have current
maintenance contracts. A hiper problem is a high impact or
pervasive problem that Landmark Development has determined
can disable your operating system, subsystem, TMON product, or
critical business application. We recommend that you apply this
fix as soon as possible.
Submitting an
Enhancement Request You can make product enhancement requests by submitting to
Landmark Customer Services a detailed written description of the
enhancement on your company letterhead. Your enhancement
request must be signed by your department manager. Once
Landmark receives the request, we assign it an activity number and
notify you. Enhancements are considered only for current,
supported releases (read the section on our product support policy
in “Product Support,” earlier in this chapter).
The request is then reviewed by the product team, which
determines whether the enhancement is accepted or not. You are
sent a letter notifying you of your request’s status. If the
enhancement request is accepted, it is placed in a pool of accepted
requests. This pool is reviewed by the product team when future
releases are being planned.
Acceptance of a request does not guarantee an enhancement’s
implementation in a specific product release. Acceptance is only an
indicator that we believe the suggestion has merit and is consistent
with the established direction of the product. When your
enhancement is incorporated into the product, you are notified by
letter of the product release that contains it.
Configuration Changes and Disaster Recovery
Landmark uses software-enabled passwords that are based on the
processor on which the Landmark product is running. If you plan
to move the product from one system to another or are forced to
move (for example, in a disaster recovery situation), you must call
to get a new product-enabling password.
Configuration Changes and Disaster Recovery Chapter 4: Support and Maintenance
4-10

New or Replacement
Processors Landmark requires written notification when new CPUs are
installed and new CPU serial IDs are assigned. We should receive
notification on company letterhead, describing the change to occur,
when it will occur, and the new CPU identification information.
Customers outside the U.S. and Canada should notify their local
Landmark representative.
Disaster Recovery If you are forced to move to a disaster recovery site, you are fully
supported. If you are planning to test your disaster recovery
procedures, contact us during the planning phase to give us the
CPU identification you will be using.
•If you licensed your product directly from Landmark,
temporary passwords are available 24 hours a day, 365 days a
year following normal after-hours support procedures for
Severity 1 problems.
•If you licensed your product outside the U.S. or Canada,
contact your local Landmark representative for support.
Chapter 4: Support and Maintenance Configuration Changes and Disaster Recovery
The Monitor for MVS 2.0 4-11
System Administrator’s Guide

Chapter 4: Support and Maintenance
4-12

Appendix: TMON for MVS Sample Library
This appendix lists the members in the TMON for MVS 2.0 sample
library, in alphabetical order. A brief description of each member is
provided. For a list of members in the Strategic Services sample
library, see “Appendix C: Strategic Services Sample Library” in
PerformanceWorks for MVS and OS/390 Installation Guide.
Contents Description
CODEFMT Macro used to build an entry to the CODETABL CSECT for use by
TMON for MVS
TMVACF2D Documentation for CA-ACF2 security use with TMON for MVS
TMVACF2R Job stream used for CA-ACF2 definitions
TMVAPPL TMON for MVS sample VTAM definition
TMVBKUP Job stream to create a backup copy of the control record
TMVRPR01 Job stream to create a backup copy of the Landmark File Services
files
TMVRSTOR Job stream to restore control record
TMVRWE01 Exception Summary report
TMVRWE02 Exception Detail report
TMVRWJCL Sample JCL to execute the TMON for MVS Report Writer
TMVRWN01 Enqueue Summary report
TMVRWN02 Detail Enqueue by Major/Minor report
TMVRWP01 Demand and Total Paging Rates report
TMVRWP02 Common Storage Area Data report
TMVRWP03 Link Pack Area Data report
TMVRWP04 Private Area Data report
TMVRWP05 Page/Swap Data Set Allocation report
TMVRWP06 Logical Swap Activity report
TMVRWP07 UIC Distribution report
TMVRWP08 V:R Ratio vs. Paging Activity report
TMVRWP09 ESTORE Summary report
TMVRWP10 Logical Swap Effectiveness report
TMVRWS01 CPU Busy and Average Tasks report
TMVRWS02 System Summary report
TMVRWS03 System SRM Summary report
TMVRWS04 Average TSO Users and First Period Response report
The Monitor for MVS 2.0 A-1
System Administrator’s Guide
Contents Description
TMVRWS05 Maximum and Average Batch Users
TMVRWS06 System reports
TMVRWSEL Dummy select member
TMVSASWG SAS workload manager goal mode reports for monitoring velocity
and response time
TMVSASWK SAS workload manager compatibility mode report for monitoring
velocity and response time
TMVSCNTL Job stream to copy select key ranges from one control file to
another
TMVSRMIS Diagnostic program
TMVTSDOC Documentation for CA-Top Secret security use with TMON for MVS
TMVWGTXT Descriptions of the SAS workload manager goal mode reports in
member TMVSASWG
TMVWKTXT Description of the SAS workload manager compatibility mode
report in member TMVSASWK
TMVXPAND Sample decompression routine
Appendix: TMON for MVS Sample Library
A-2

Index
Numbers and Special
Characters
$DEFAULT profile, 2-7 to 2-8
$LMRKTMR resource class, 2-5
$RACFCDT member, 2-5
$RACFRTB member, 2-5
$TRACEOFF command, 2-4
$TRACEON command, 2-4
$USRPRMS member, 2-8
A
Access levels, 2-38, 2-41
Access methods, 2-15
ACF2DOC member, 2-4
ACTIVE status, 3-19, 3-25
Activity Monitor installation verification, 1-2
Activity number, 4-6
ACTIVMON function, 2-24
ACTVLOG function, 2-24
ACTVMON function, 2-24
ADD command, 2-19, 2-37, 3-21
ADD field, 2-19, 2-37, 3-22
Address of Landmark, 4-6
ADVFUNCS function, 2-24
ALTR access level, 2-38
APPL macro, 3-4, 3-7
Application IDs
identifying, 3-3
local, 3-1, 3-3
remote, 3-1
APPLID field, 3-19, 3-22, 3-24
Applids
see Application IDs
Authorized resellers, calling, 4-5
B
Base tape, 4-8
C
C record, 2-1, 2-5
CA-ACF2 security, 2-1, 2-4
CA-TOP SECRET security, 2-1, 2-4
Calling for support, 4-4
Calling Landmark Customer Services, 4-5
CANCEL function, 2-24
CCWTRACE function, 2-24
CDRDYN parameter, 3-4
CDRM definition, 3-4
CDRSC definitions and parameters, 3-4
CDT
see Class descriptor table (CDT)
CHANAUTH function, 2-24
Changing problem priority, 4-7
CICSSTAT function, 2-24
Class descriptor table (CDT), 2-5
CLASS field, 2-21
CLOSEPRINT command, 2-28
CNTL access level, 2-38
CNTLFILE function, 2-24
CODE field, 2-22, 2-37
CODEFMT member, A-1
COLLANAL function, 2-24
Collection Analysis installation verification, 1-3
Commands
ADD, 3-21
DELETE, 3-22
UPDATE, 3-22
COMPROT operand, 3-7
Connection screen, 3-16
CONSOLE function, 2-24
Contacting Landmark for support, 4-3
Control file
C record, 2-1, 2-5
Internal Security specifications, 2-13
product session definitions, 3-18
profile definitions, 2-33
remote session definitions, 3-22
user definitions, 2-18
Cross-domain resource definitions, 3-4
CSMON function, 2-24
CSMONDET function, 2-24
CSMONOPT function, 2-25
CSTGSDSP function, 2-25
Cumulative maintenance tape, 4-8
CURRENT USERS field, 2-15
Customer Service Satisfaction Guarantee, 4-1
D
D function type, 2-22
DATADCTS function, 2-25
DB2AUTH function, 2-25
DB2CONN function, 2-25
DB2OPTS function, 2-25
DBCAUTH function, 2-25
Ddnames
TDBCPRMS, 3-5
TMDBPRMS, 3-5
TMONPRMS, 3-5
The Monitor for MVS 2.0 Index-1
System Administrator’s Guide

TMQSPRMS, 3-6
TMVSPRMS, 3-6
Delay Monitor installation verification, 1-4
DELETE command, 2-19, 2-37, 3-22
DELETE field, 2-19, 2-37
session definition, 3-22
DESCRIPTION field, 2-22, 2-38
product, 3-25
product session, 3-22
session definition, 3-19
Detail Profile Definition screen, 2-36 to 2-40
Directories
Profiles/Resources, 2-33 to 2-35
Remote Sessions, 3-18 to 3-20
Secured Functions, 2-21 to 2-23
User Profiles, 2-16 to 2-17
Distributed sample library, A-1
DLYGRP function, 2-25
DLYGRPG function, 2-25
DLYGRPU function, 2-25
DLYMNDET function, 2-25
DLYMON function, 2-25
Documentation
ordering more copies, iv
related manuals, iv to v
submitting comments, vi
DPAUTH function, 2-25
DSNZPDSP function, 2-25
E
ECS
see Electronic Customer Service system (ECS)
EDMSTAT function, 2-25
Electronic Customer Service system (ECS), 4-9
Enhancement requests, 4-10
Error Diagnostic Screen, 4-4
ET tapes, 4-9
Exception Monitor installation verification, 1-3
EXCPDEF function, 2-25
EXCPTDEF function, 2-26
EXCPVIEW function, 2-26
EXPLAIN function, 2-26
Explicit pass-through
accessing products, 3-10
defined, 3-1
description, 3-10 to 3-11
in Landmark PerformanceWorks MVS products, 3-1
JUMP command, 3-11
REMOTE command, 3-11
using, 3-11
see also Landmark product communication
External Security
$DEFAULT profile, 2-7
activating, 2-6 to 2-7
description, 2-4 to 2-7
implementing CA-ACF2 security, 2-4
implementing CA-TOP SECRET security, 2-4
implementing RACF security, 2-5
switching from Internal Security, 2-5
valid combinations with other methods, 2-15
F
FACILITIES field, 2-15
FLDBANAL function, 2-26
FMPROF operand, 3-7
Function access level table, 2-41 to 2-56
Function codes, 2-24 to 2-32
FUNCTION field, 2-22, 2-38
Function IDs, 2-24 to 2-32, 2-37
Function names, 2-24 to 2-32
Function security
defining access levels of functions, 2-21
function codes and names, 2-24 to 2-32
general resource definitions, 2-5
implementing in RACF, 2-5
implementing with Internal Security, 2-36
listing product functions, 2-21
required resources, 2-24 to 2-32
specifying security type, 2-15
using Internal Security with RACF user logon
security, 2-7
Functions
defining security access levels, 2-36
resource, 2-3, 2-34
resources required, 2-24 to 2-32
system, 2-3
viewing in Internal Security, 2-21, 2-36
G
GDCOPTS function, 2-26
General resource definitions, 2-5
Graphic Monitor installation verification, 1-3
Guarantee, customer service satisfaction, 4-1
H
HELPMENU function, 2-26
HISTANL function, 2-26
HLPFLDIR function, 2-26
HLPFLDTL function, 2-26
HLPMSDIR function, 2-26
HLPSLDIR function, 2-26
HLPSLDTL function, 2-26
Index
Index-2

I
I access method, 2-15
Implicit pass-through
defined, 3-1
description, 3-12
using, 3-12
valid product releases, 3-1
see also Landmark product communication
INACT status, 3-19, 3-25
Installation
sample library members, A-1
verification procedure checklist, 1-1
see also PerformanceWorks for MVS and OS/390
Installation Guide
Installation verification procedure (IVP)
Activity Monitor, 1-2
checklist, 1-1
Collection Analysis, 1-3
Delay Monitor, 1-4
Exception Monitor, 1-3
Graphic Monitor, 1-3
Remote Sessions, 1-4
Supertrace, 1-4
System Selection Menu, 1-1
TMON for CICS NaviGate connection, 1-5
TMON for DB2 Navigate connection, 1-6
Utilities, 1-4
Integrated PTF service, 4-8
Internal Security
access levels, 2-38
activating, 2-13, 2-15
assigning profiles to user IDs, 2-16
defining passwords for user IDs, 2-18 to 2-19
defining profiles, 2-36
defining user IDs, 2-18
description, 2-9 to 2-13
for functions with RACF user logon security, 2-7
Internal Security user ID and profile table, 2-10 to
2-12
listing profiles and resources, 2-33
setting function access levels, 2-36
steps to implement, 2-13
supplied user IDs and profiles, 2-10
switching to External Security, 2-5
valid combinations with other methods, 2-1, 2-15
viewing product functions, 2-21, 2-36
IODVHIST function, 2-26
IOMON function, 2-26
IOPSTART function, 2-26
IVP
see Installation verification procedure (IVP)
J
J function type, 2-22
JOBLIST function, 2-26
JOBSUMM function, 2-27
JUMP command, 3-11
L
Landmark
address, 4-6
product support policy, 4-7
Landmark Customer Services
contact procedures, 4-5
phone numbers, 4-5
response policy, 4-5
Landmark product communication
access methods, 3-1
adjusting SLU session ID prefix, 3-9
correct product releases, 3-10
defining product sessions, 3-9
description, 3-1 to 3-26
error messages, 3-3
explicit pass-through, 3-1, 3-10 to 3-11
identifying primary sessions, 3-8
implicit pass-through, 3-1, 3-12
NaviGate, 3-1, 3-13 to 3-17
non-SNA terminal network requirements, 3-8
product identifiers, 3-19, 3-23, 3-25
security considerations, 3-9
setting up, 3-3
LMRKMTB member, 3-7
LO-ACCESS LEVELS-HI field, 2-38
Local applids
defined, 3-1
verifying installation of, 3-3
Local Landmark representatives, calling, 4-4
Local products, 3-1
LOGMODE operand, 3-7
Logon mode table, 3-7
LOGOSCRN function, 2-27
M
M function type, 2-22
Maintenance, 4-8 to 4-9
Manual
audience, iii
ordering, iv
submitting comments, vi
Master user IDs, 2-10
MAXBFRU parameter, 3-8
MAXDATA parameter, 3-8
Maximum number of users, 2-15
MAXIMUM USERS field, 2-15
Index
The Monitor for MVS 2.0 Index-3
System Administrator’s Guide

MAXUSER command, 2-15
MDFPRSM function, 2-27
Members
LMRKMTB, 3-7
TCEVTAM, 3-5 to 3-6
TDBCPRMS, 3-5
TDBCVTAM, 3-6
TDBPARM, 3-5
TMDBVTAM, 3-6
TMON8VTM, 3-5 to 3-6
TMONAPPL, 3-6
TMQSPARM, 3-6
TMQSVTAM, 3-6
TMVSPARM, 3-6
MODSTOR function, 2-27
MODTAB option, 3-7
MONCNTL function, 2-27
MONINIT function, 2-27
MSGAUTH function, 2-27
MVSCONTN function, 2-27
N
N access method, 2-15
N function type, 2-22
NAMLAUTH function, 2-27
NaviGate
accessing all screens, 3-17
available product connections, 3-2
connection screen, 3-16
definition, 3-2
description, 3-13 to 3-17
STAY command, 3-17
using, 3-16
see also Landmark product communication
NaviGate connections
from TMON for CICS/ESA, 3-13
from TMON for CICS/MVS, 3-14
from TMON for DB2, 3-15
from TMON for DBCTL, 3-15
from TMON for MQSeries, 3-16
from TMON for MVS, 3-16
TMON for CICS installation verification, 1-5
TMON for DB2 installation verification, 1-6
Network requirements for non-SNA terminals, 3-8
NONE access level, 2-38
Notational conventions, iii
Number of current users, 2-15
O
ONLINANL function, 2-27
OPENMAIN function, 2-27
P
PASSTHRU function, 2-27
PASSWORD field, 2-19
Passwords for user IDs, 2-19
PERFORM function, 2-27
PFKDEF function, 2-27
PFKEYS function, 2-27
PGSETDSP function, 2-27
Phone numbers, Landmark Customer Services, 4-5
PLANSUMM function, 2-27
Policies
hiper, 4-10
premium sunset support policy, 4-8
proactive maintenance, 4-10
product support, 4-7
response, 4-5
PRIMARY field, 2-22
PRIMARY RESOURCE field, 2-34, 2-38
Primary resources
defined, 2-3
identified by function, 2-22
in profile definitions, 2-34, 2-38
Primary sessions
defining, 3-22
identifying, 3-8
PRIMARY TMP field, 3-22
PRIMARY/SECONDARY RESOURCE field, 2-22
PRINT command, 2-28
PRINTOFF command, 2-28
PRINTON command, 2-28
PRIPROT operand, 3-7
PROBALRT function, 2-27
Problem severity levels
changing, 4-7
defined, 4-3
PROCAUTH function, 2-27
PRODPSWG function, 2-27
Product
maintenance, 4-8 to 4-9
support policy, 4-7
PRODUCT field, 3-19, 3-23, 3-25
Product identifiers, 3-19, 3-23, 3-25
Product sessions
adding session definitions, 3-22
defining, 3-9
deleting sessions definitions, 3-22
updating session definitions, 3-23
PROFDTL function, 2-28
PROFILE field, 2-39
PROFILE ID field, 2-16, 2-34
PROFILE NAME field, 2-19
Profiles
defining to Internal Security, 2-14, 2-36
description, 2-2
identifying to RACF, 2-6
Index
Index-4

listing in Internal Security, 2-33
multiple resources, 2-33, 2-36
specifying ID, 2-36
viewing user IDs associated with, 2-17
PROFILES/RESOURCES DIRECTORY option, 2-14
Profiles/Resources Directory screen, 2-33 to 2-35
PRTAUTOF function, 2-28
PRTAUTON function, 2-28
PRTCLOSE function, 2-28
PRTCMD function, 2-28
PRTDFDSN function, 2-28
PRTDFSYS function, 2-28
PRTDFVTM function, 2-28
PRTMENU function, 2-28
PRTSTART function, 2-28
PRTSTOP function, 2-28
PS tapes, 4-9
PSERVIC operand, 3-7
PTF service, 4-8
Q
QAUTH function, 2-28
QMGRAUTH function, 2-28
QMGREVNT function, 2-28
QMGROPTS function, 2-28
QMGRSEC function, 2-28
R
RACF security
$DEFAULT profile, 2-7
$RACFCDT member, 2-5
$RACFRTB member, 2-5
access lists, 2-5
activating, 2-6 to 2-7
class descriptor table, 2-5
external, 2-1
for functions, 2-5
for user logon, 2-5
general resource definitions, 2-5
identifying internal security profiles, 2-7
router table, 2-5
sample function general resource definitions, 2-6
steps to implement, 2-5
RACFGDF member, 2-6
READ access level, 2-38
Receiving support, contact procedures, 4-5
Remote applids
defined, 3-1
setting up and verifying cross-domain
communications, 3-4
REMOTE command, 3-11
Remote products, 3-1
Remote Session Definition screen, 3-21 to 3-23
Remote Sessions Directory screen, 3-18 to 3-20
Remote Sessions installation verification, 1-4
Remote Sessions Logon screen, 3-24 to 3-25
Resource functions
defined, 2-3
in security definitions, 2-33
Response policy, 4-5
RESRCDSP function, 2-28
RMTPTDEF function, 2-28
RMTPTSEL function, 2-28
Router table, 2-5
RUSIZES operand, 3-7
S
S access method, 2-15
Sample library, A-1 to A-2
SAVESQL function, 2-29
SECFUNCS function, 2-29
SECFUNDF function, 2-29
SECONDARY field, 2-23
Secondary logical units (SLUs)
adjusting session ID prefix, 3-9
defining, 3-4
names, 3-6
session ID prefix, 3-6
SECONDARY RESOURCE field, 2-34, 2-39
Secondary resources
defined, 2-3
identified by function, 2-23
in profile definitions, 2-34, 2-39
Secondary sessions, 3-8
SECPROT operand, 3-7
SECURED FUNCTIONS DIRECTORY option, 2-14
Secured Functions Directory screen, 2-21 to 2-23
Security
access levels, 2-4, 2-38, 2-41
access methods, 2-15
CA-ACF2, 2-1
CA-TOP SECRET, 2-1
check, 2-3
checking definitions for product sessions, 3-9
defining, 2-1 to 2-56
description, 2-1 to 2-56
diagram, 2-2 to 2-3
facility or function, 2-1
methods, 2-1
primary resources, 2-3
profiles, 2-2
RACF, 2-1, 2-4 to 2-5
restoring distributed version, 2-1, 2-5
secondary resources, 2-3
specifying security types, 2-14
trace facility, 2-4
user logon, 2-1
Index
The Monitor for MVS 2.0 Index-5
System Administrator’s Guide

valid type combinations, 2-1
see also External, Internal, and User Exit Security
Security Definitions Menu screen, 2-14 to 2-15
SECURITY function, 2-29
SECURITY METHOD ACTIVE field, 2-15
SELUSRID function, 2-29
SETAUTH function, 2-29
SEV1 severity level, 4-3
SEV2 severity level, 4-3
SEV3 severity level, 4-3
SEV4 severity level, 4-3
Severity 1 problems, 4-3
Severity 2 problems, 4-3
Severity 3 problems, 4-3
Severity 4 problems, 4-3
Severity levels
changing, 4-7
defined, 4-3
SHADOWREFRESH command, 2-29
SHDWFRSH function, 2-29
SHIFTDEF function, 2-29
SHUTDOWN function, 2-29
SIGNON function, 2-29
SLU APPLID PREFIX field, 3-19
SLUCOUNT startup parameter, 3-5
SLUs
see Secondary logical units (SLUs)
SNA type-2 logical units, 3-7
SQLCCPA function, 2-29
SQLCGDF function, 2-29
SQLTEXT function, 2-30
SSCP tables, 3-4
STARTPRINT command, 2-28
Startup parameters, SLUCOUNT, 3-5
STATUS field, 3-19, 3-25
STAY command, 3-17
STGCAUTH function, 2-30
STOPPRINT command, 2-28
STORANAL function, 2-30
STORTCBS function, 2-30
STORTIOT function, 2-30
STRGALTR function, 2-30
STRGDSPY function, 2-30
STRGNPRV function, 2-30
STRGPRV function, 2-30
STUNLOAD function, 2-30
Submitting
documentation to Landmark, 4-6
enhancement requests, 4-10
Sunset support policy, 4-7
SUPERTDM function, 2-30
Supertrace installation verification, 1-4
SUPERTRC function, 2-30
SUPERTSD function, 2-30
Support and maintenance, 4-1 to 4-12
SVCDUPD function, 2-30
SYS1.VTAMLST data set, 3-4
SYSADM function, 2-30
SYSADMIN function, 2-30
System functions
defined, 2-3
in security definitions, 2-33
System Selection Menu installation verification, 1-1
System Services Control Point (SSCP) tables, 3-4
T
T function type, 2-22
Tables
function access level, 2-41 to 2-56
function code table, 2-24 to 2-32
Internal Security user ID and profile, 2-10
RACF class descriptor, 2-5
RACF router, 2-5
user logon/function security type, 2-1
TASKCANC function, 2-30
TCEPARM ddname, 3-5
TCEVTAM member, 3-5 to 3-6
TDBCPRMS DD statement, 2-9
TDBCPRMS ddname, 3-5
TDBCPRMS member, 3-5
TDBCVTAM member, 3-6
TDBPARM member, 3-5
Terminal (non-SNA) network requirements, 3-8
THRDAUTH function, 2-31
TMDBPRMS DD statement, 2-9
TMDBPRMS ddname, 3-5
TMDBVTAM member, 3-6
TMON for MVS
installation verification procedure, 1-1 to 1-8
ordering additional documentation, iv
sample library, A-1 to A-2
submitting comments, vi
TMON8PRM ddname, 3-5
TMON8VTM member, 3-5 to 3-6
TMONAPPL member, 3-6
TMONCICS product identifier, 3-19, 3-23, 3-25
TMONDB2 product identifier, 3-19, 3-23, 3-25
TMONDBC product identifier, 3-19, 3-23, 3-25
TMONMQ product identifier, 3-19, 3-23, 3-25
TMONMVS product identifier, 3-19, 3-23, 3-25
TMONPRMS DD statement, 2-9
TMQSPARM member, 3-6
TMQSPRMS DD statement, 2-9
TMQSPRMS ddname, 3-6
TMQSVTAM member, 3-6
TMVSAMP members, A-1
TMVSPARM member, 3-6
TMVSPRMS DD statement, 2-9
TMVSPRMS ddname, 3-6
Trace facility, 2-4
Index
Index-6

TSDOC member, 2-4
TSPROF operand, 3-7
TYPE field, 2-23
TYPE VALUES field, 2-23
U
U access method, 2-15
UACC parameter, 2-6
UNITSZ parameter, 3-8
UNKNWN status, 3-19, 3-25
UPDATE command, 2-19, 2-37, 2-40, 3-22
UPDATE field, 2-19, 2-40, 3-23
UPDT access level, 2-38
User Definition screen, 2-18 to 2-20
User Exit Security
activating, 2-8, 2-13
description, 2-8
steps to implement, 2-8
user exits, 2-8
valid combinations with other methods, 2-15
USER FULL NAME field, 2-20
USER ID field, 2-17
User IDs
assigning profiles, 2-18
defining to Internal Security, 2-10 to 2-12, 2-18
listing in Internal Security, 2-16
specifying passwords in Internal Security, 2-18
USER LOGON field, 2-15
User logon security
description, 2-1
general resource definitions, 2-5
implementing in RACF, 2-5
implementing with Internal Security, 2-9 to 2-13
listing user IDs and profiles, 2-16
specifying security type, 2-15
USER NAME field, 2-17
USER PROFILES DIRECTORY option, 2-14
User Profiles Directory screen, 2-16 to 2-17
USERCMDS function, 2-31
USERDEF function, 2-31
USERDIR function, 2-31
USEREXIT parameter, 2-9
USERID field, 2-20
USERPROF function, 2-31
UTILAPFL function, 2-31
UTILASMB function, 2-31
UTILDASD function, 2-31
UTILDDSL function, 2-31
UTILDSNI function, 2-31
UTILDSNU function, 2-31
UTILFSPC function, 2-31
UTILIOSB function, 2-31
Utilities installation verification, 1-4
UTILJOBB function, 2-31
UTILJOBS function, 2-31
UTILJPGN function, 2-31
UTILJTRM function, 2-31
UTILLNKL function, 2-31
UTILLPAL function, 2-31
UTILMENU function, 2-31
UTILMON function, 2-32
UTILMSTG function, 2-32
UTILMVSB function, 2-32
UTILSRMB function, 2-32
UTILSSVC function, 2-32
UTILSWAP function, 2-32
UTILVMNT function, 2-32
UTILVOLU function, 2-32
UTILVSMB function, 2-32
V
V function type, 2-23
VBUILD macro, 3-4
VER field, 3-19, 3-25
VTAM
application IDs, 3-1, 3-3
cross-domain communications, 3-4
logon mode table, 3-7
secondary logical units (SLUs), 3-4
SNA type-2 logical units, 3-7
W
WKLDDEF function, 2-32
WRKBENCH function, 2-32
X
X access method, 2-15
XCFMON function, 2-32
Y
Year 2000 compliance, 4-2
Index
The Monitor for MVS 2.0 Index-7
System Administrator’s Guide

Index
Index-8
