Lenbrook N150AWSMP Amplified Wireless Streaming Music Player User Manual N150 Owner s manual 1 Nov 2012 English
Lenbrook Industries Limited Amplified Wireless Streaming Music Player N150 Owner s manual 1 Nov 2012 English
Lenbrook >
User Manual


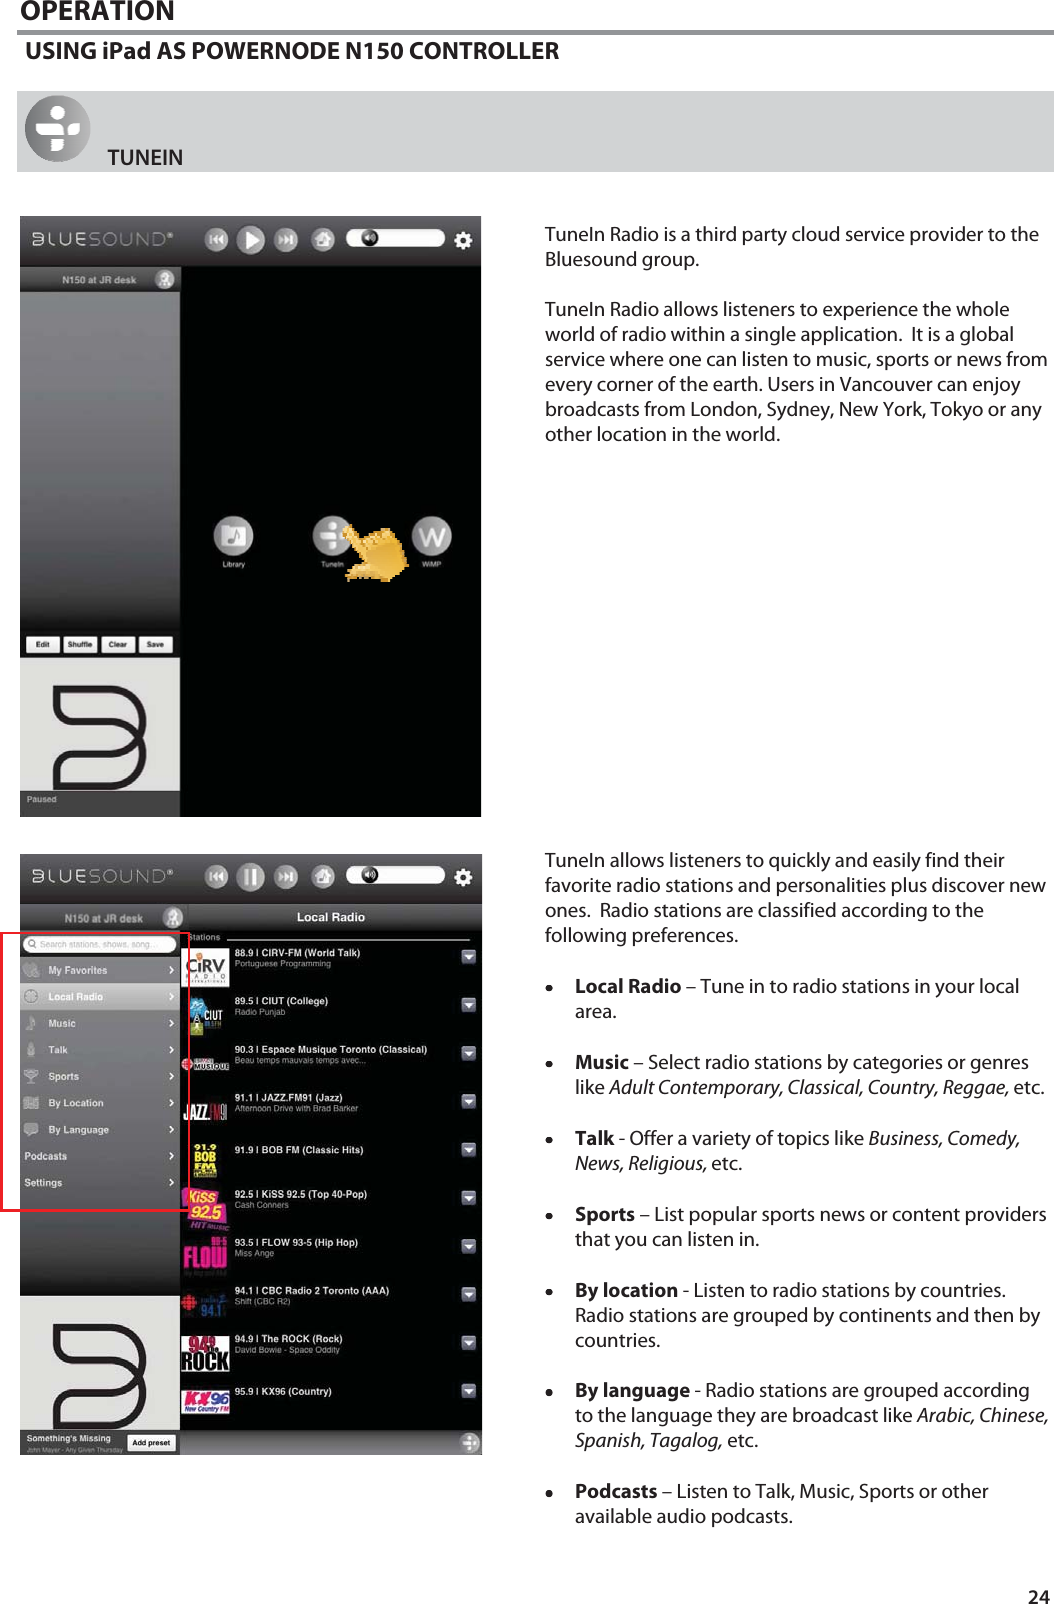
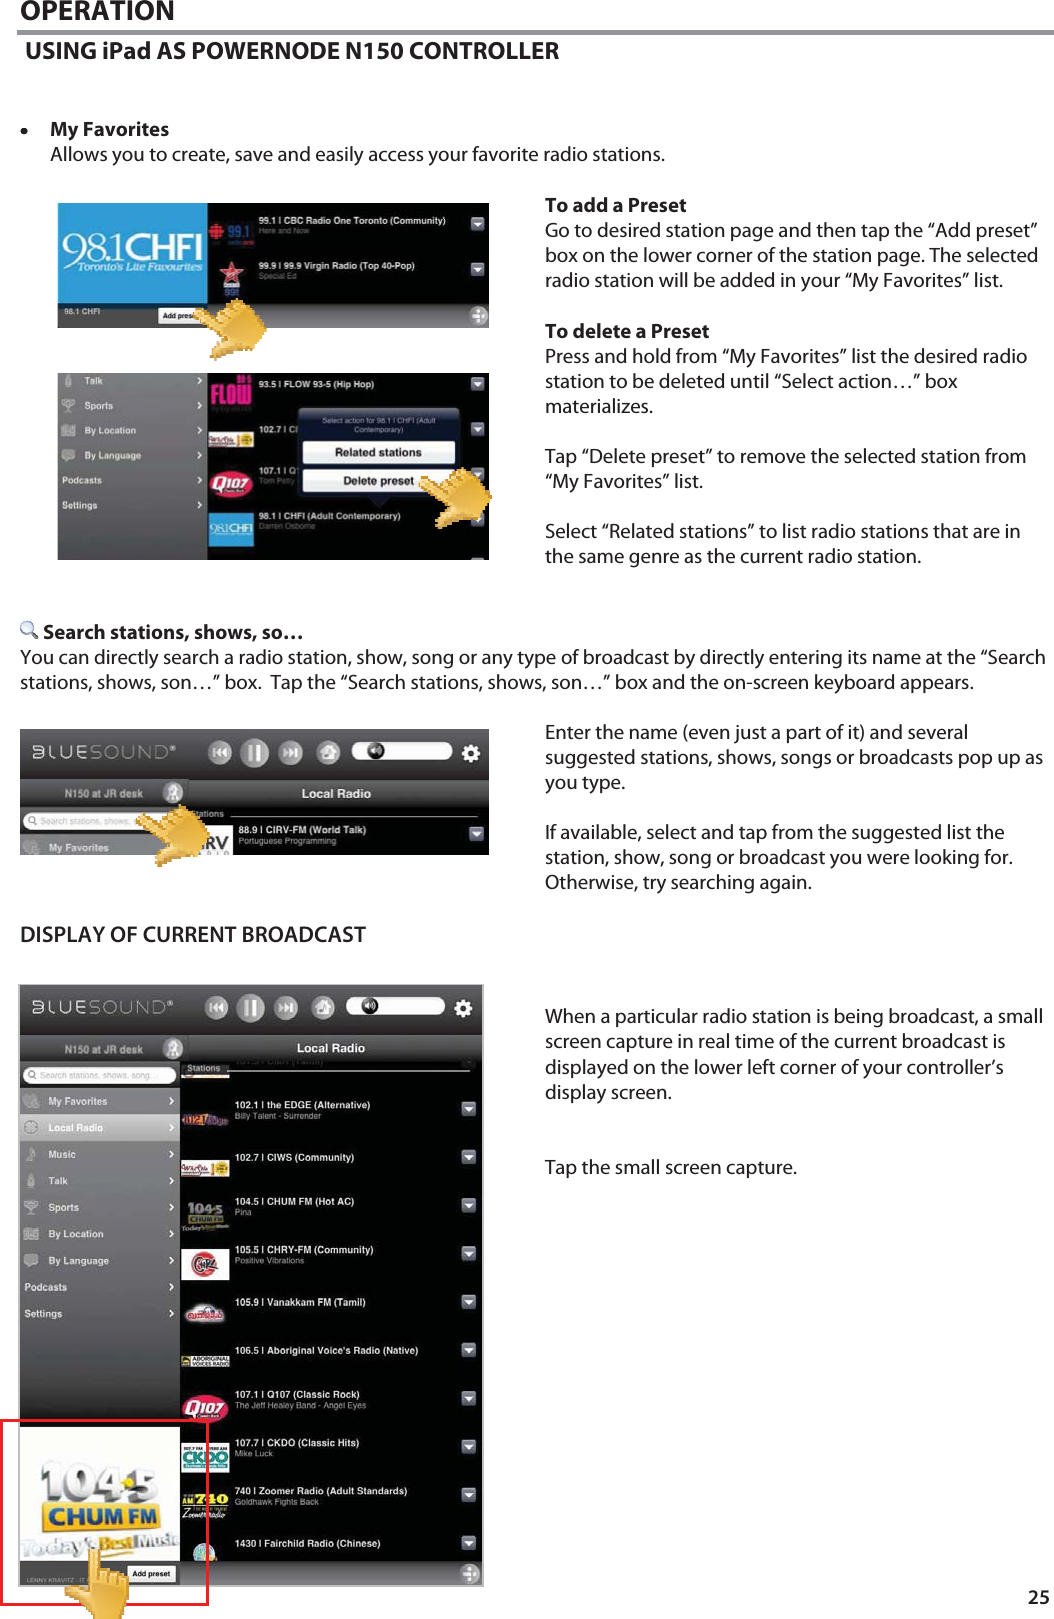
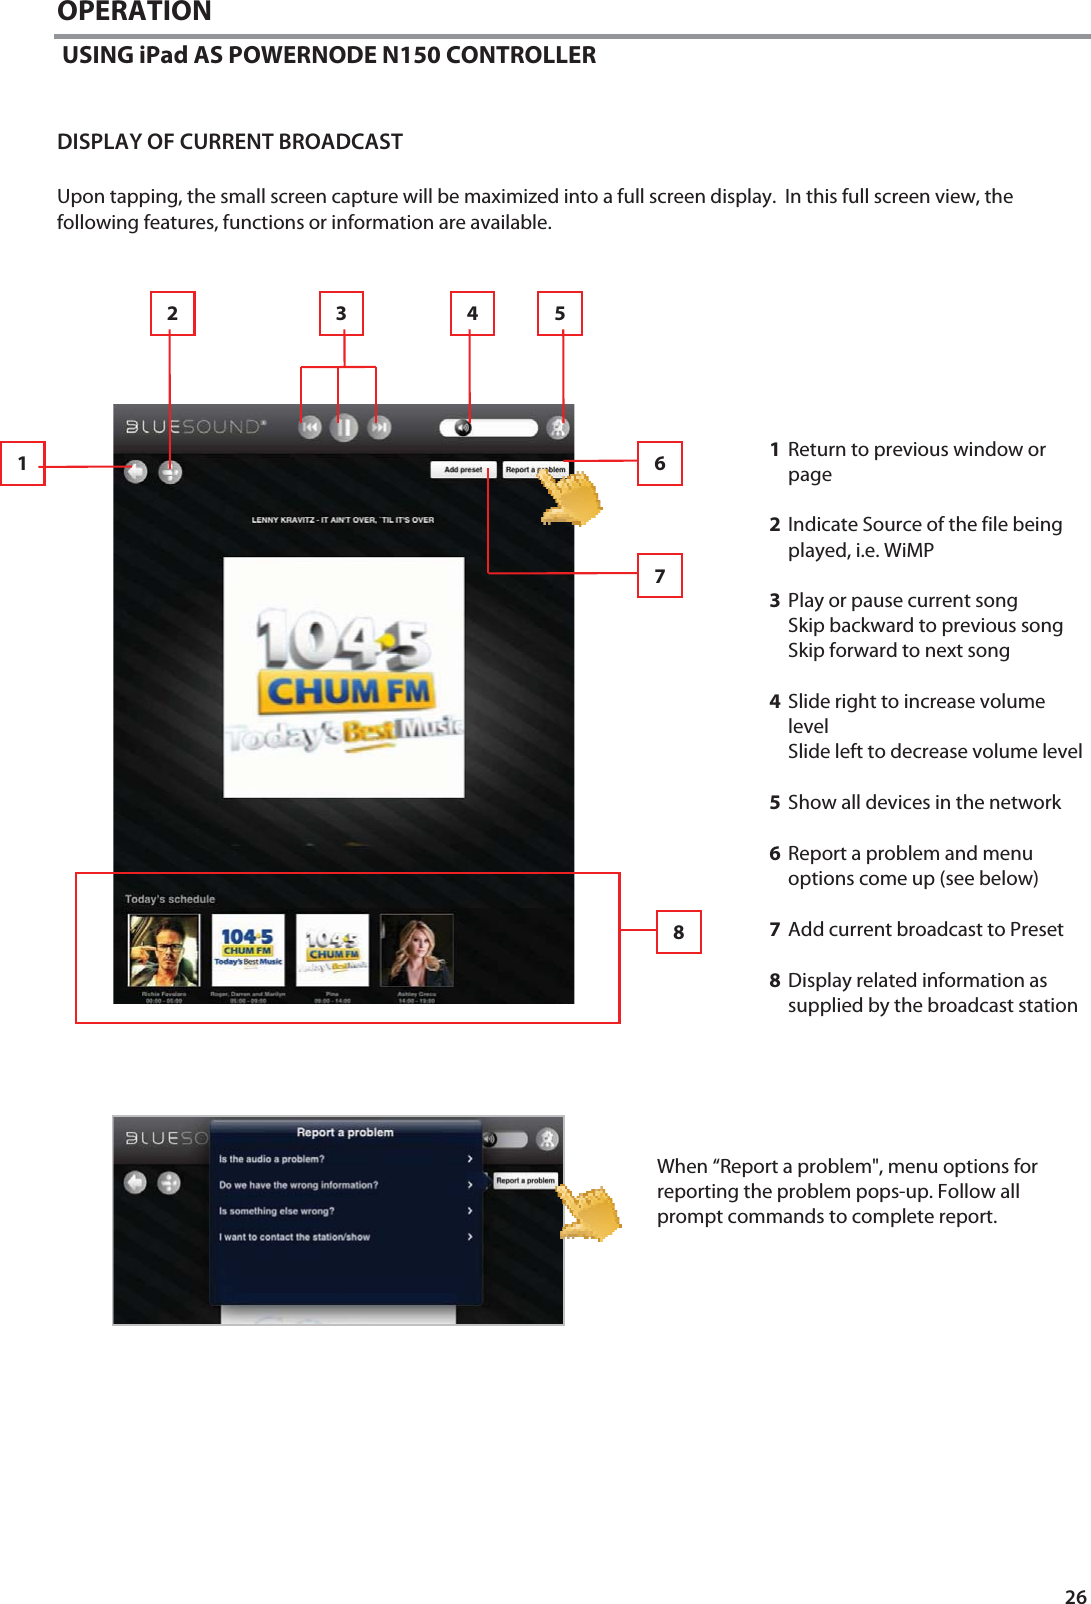
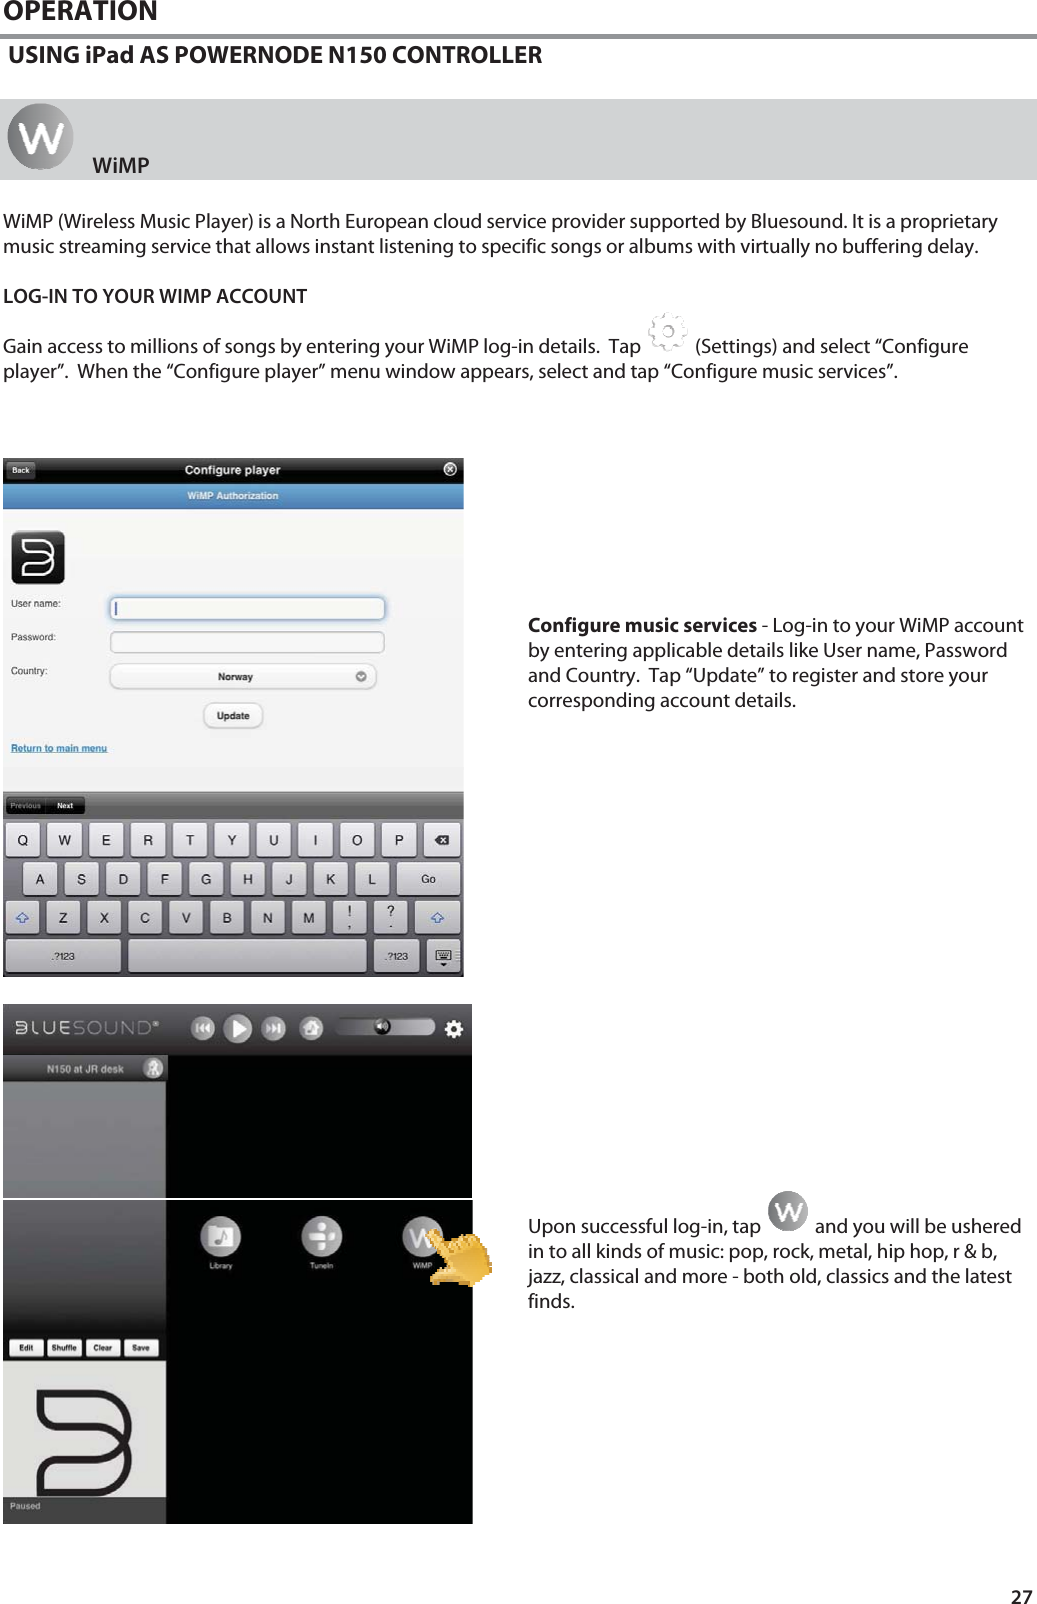
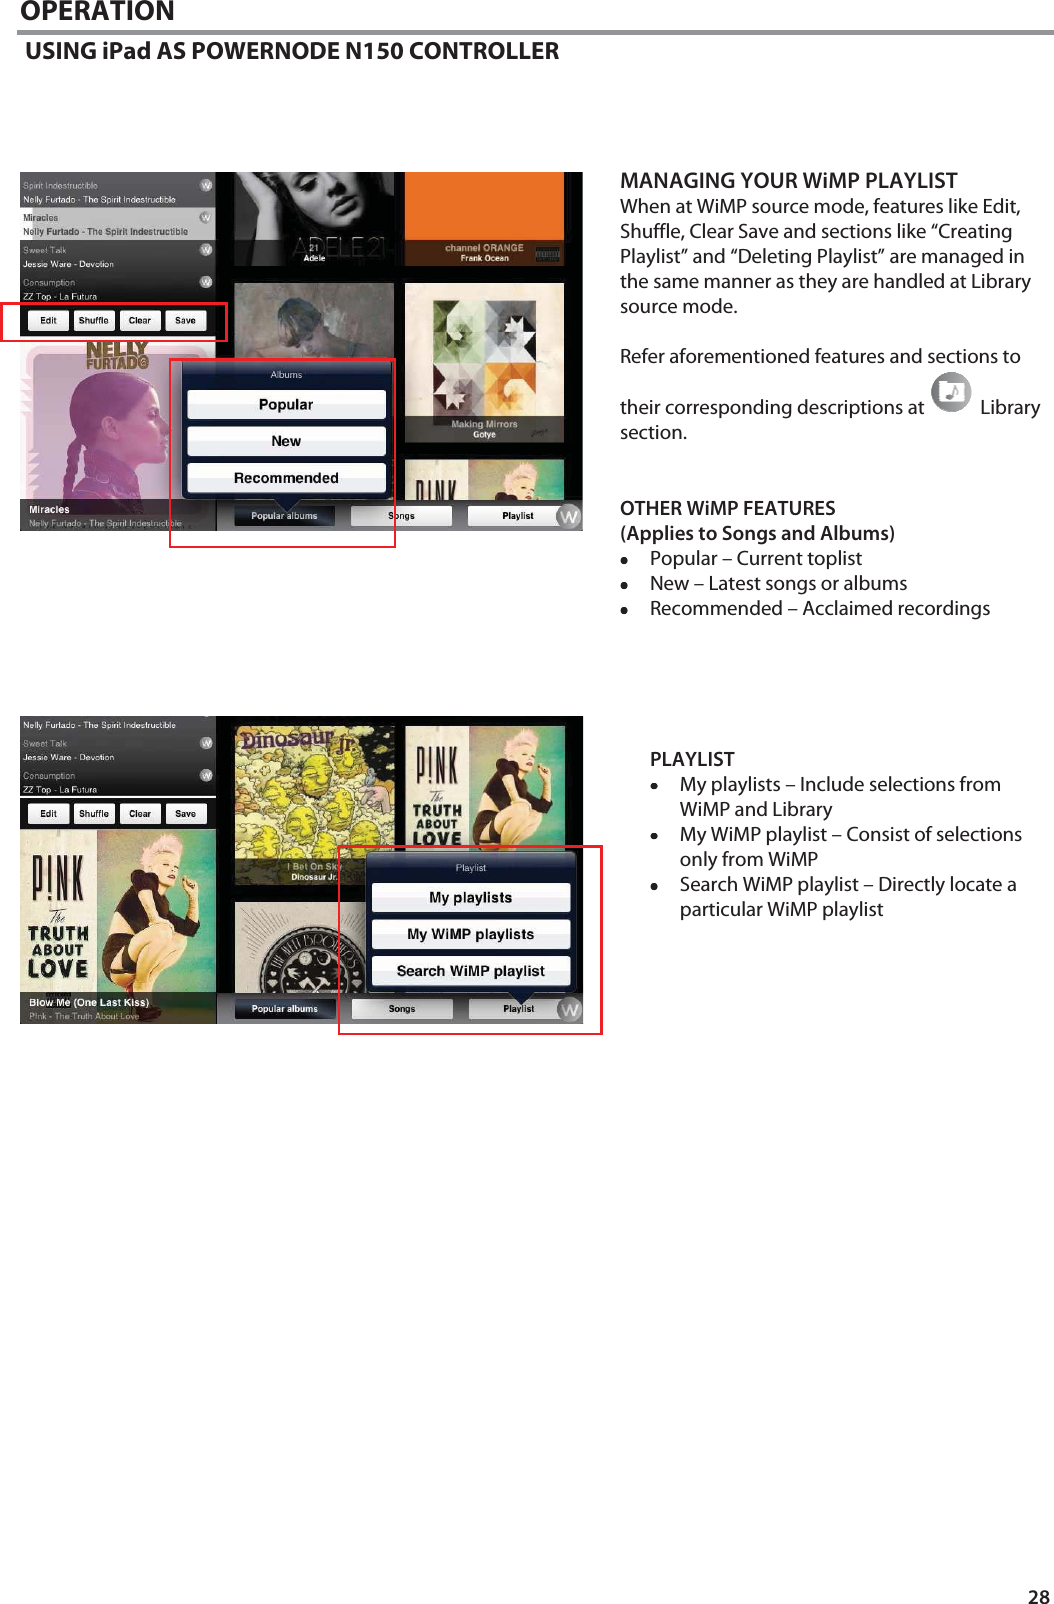
![19 OPERATION USING iPad AS POWERNODE N150 CONTROLLER LIBRARY Selecting allows you to listen to your personal music collection stored on your network, ripped to your Bluesound Vault V500 (optional) or contained in a USB mass storage device connected to the USB (Type A) input of the POWERNODE N150. Upon selection of , your music catalogue will appear on-screen. The category buttons (located at the bottom portion) allows your music to be sorted in several ways as follows ••••Artist ••••Album ••••Song Tap an alphabet letter on the right side for quick redirection to the corresponding list of artists, albums or songs that starts with the selected letter. ••••New - List albums in the order they were encoded with the latest item at the top of the list. This is an easy way to locate ripped CD’s or purchases that were recently downloaded. ••••Playlist - Show favorite songs that were grouped together and saved for easy access. Several playlists can be created like your Favorite playlist, Contemporary playlist, Oldies playlists, etc. ••••Info – Open on Last.fm a small browser showing related information (like biography, albums) about the current artist being played back. If no information about the artist is available, the browser will display “[unknown]”. Search … You can search a song by directly entering it at the “Search…” box. Tap the “Search…” box and the on-screen keyboard appears. Enter the song’s name (even just a part of it) and several relevant songs, albums or artists pop up as you type. If available, select and tap from the suggested list the song you were looking for. Otherwise, try searching again.](https://usermanual.wiki/Lenbrook/N150AWSMP/User-Guide-1868214-Page-19.png)