Lenovo (English) Ideacentre AIO 730S User Guide 24IKB All In One (ideacenter) Type F0DX Ug V1.0 En 20180329
Instruction 7B84B2E1Ac214812B2F1B80C99Ecccbb instruction_7b84b2e1ac214812b2f1b80c99ecccbb instruction_7b84b2e1ac214812b2f1b80c99ecccbb instruction upload idei74 3:
Instruction 2Deb1329D04D4Ebe993Bba57395E3Fe6 instruction_2deb1329d04d4ebe993bba57395e3fe6 instruction_2deb1329d04d4ebe993bba57395e3fe6 instruction upload idei74 3:
2018-04-03
User Manual: Lenovo (English) ideacentre AIO 730S User Guide AIO 730S-24IKB All-in-One (ideacenter) - Type F0DX F0DX
Open the PDF directly: View PDF ![]() .
.
Page Count: 6

AIO 730S
User Guide
Machine Type (MT): F0DX, F0DY
Energy Star MT: F0DX, F0DY
2
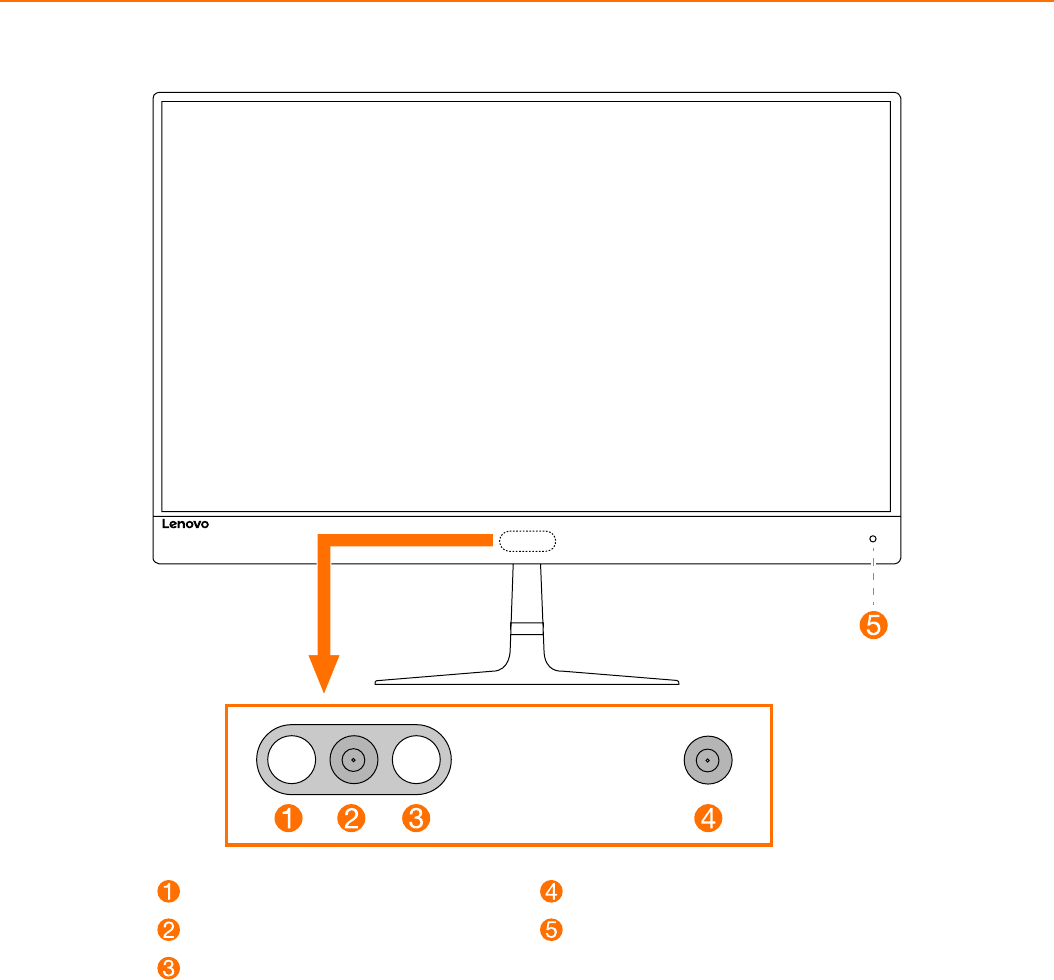
Front view of the computer
ATTENTION: Be sure not to block any air vents on the computer. Blocked air vents may cause thermal
problems.
ATTENTION: If your computer is equipped with an infrared (IR) remote control, do not put the USB IR
receiver on the same plane as the screen.
Infrared LEDs
Built-in camera
Infrared LEDs
Built-in camera
Power indicator
or
3
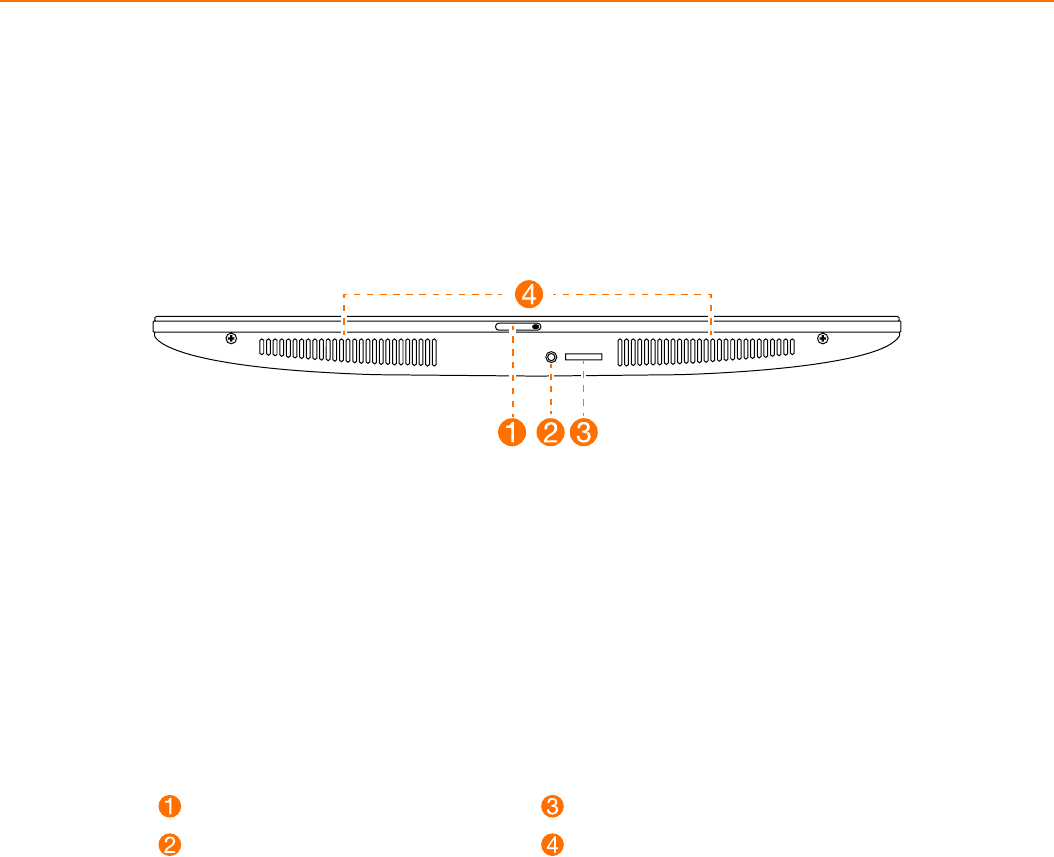
Bottom view of the computer
Camera sliding cover
Combo audio jack*
Memory card reader
Air vents
NOTES:
• Thecomboaudiojackdoesnotsupportconventionalmicrophones.
• Differentindustrystandardsmayleadtotherecordingfunctionnotbeingsupportedifthird-party
headphones or headsets are connected.
* Combo audio jack: Used to connect headsets.
4
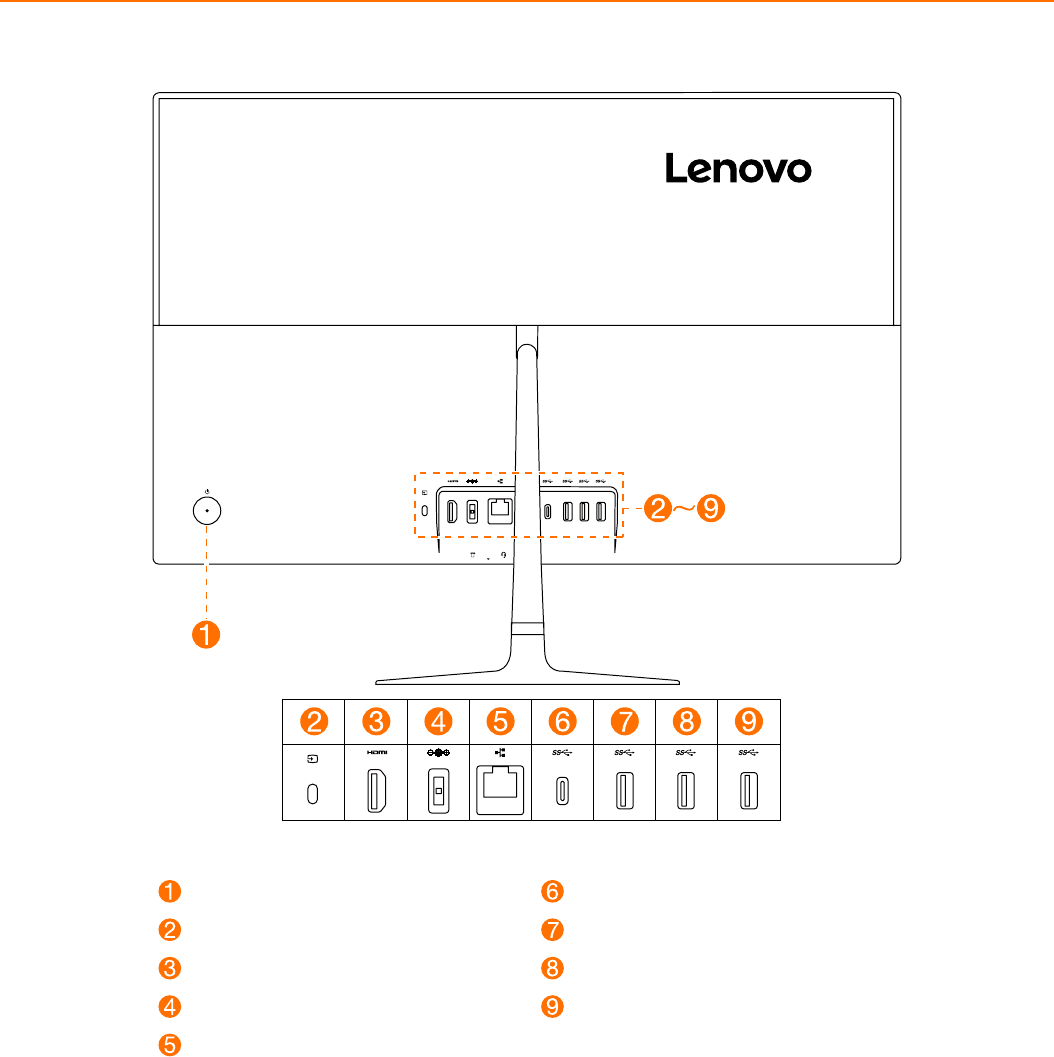
Rear view of the computer
Power button
HDMITM in/out switch
HDMITM 1.4 in/out connector
Power connector
Ethernet connector
USB 3.1 Gen 1 Type-C connector
USB 3.0 connector
USB 3.0 connector
USB 3.0 connector
5
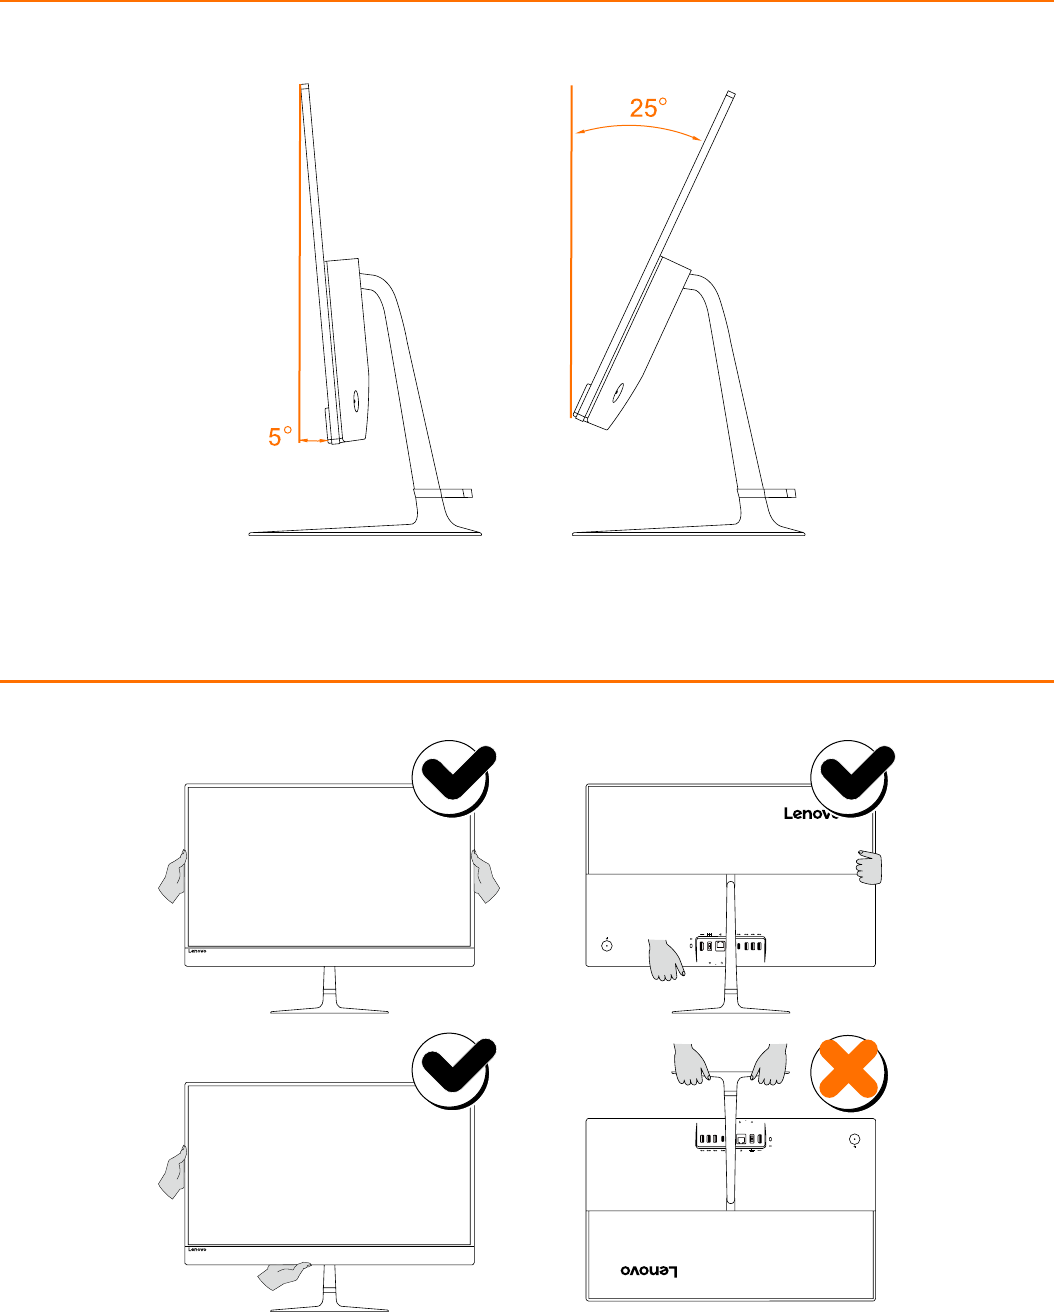
Adjusting the computer stand
Carrying the computer

6
Safety information for replacing CRUs
Do not open your computer or attempt any repairs before reading the “Important safety information” in the
Safety, Warranty, Environment, Recycling Information Guide and Important Product Information Guide that was
included with your computer.
If you no longer have this copy of the Safety, Warranty, Environment, Recycling Information Guide and Important
Product Information Guide, you can obtain one online from the website at http://www.lenovo.com/UserManuals.
Pre-disassembly instructions
Before proceeding with the disassembly procedure, make sure that you do the following:
1. Turn off the power to the system and all peripherals.
2. Unplug all power and signal cables from the computer.
3. Place the system on a flat, stable surface.
The CRUs for your computer include: keyboard, mouse, adapter or power cord.
