LibreStream Technologies MCD2500 Rugged Mobile Collaboration Device User Manual Librestream Onsight 1000 2000
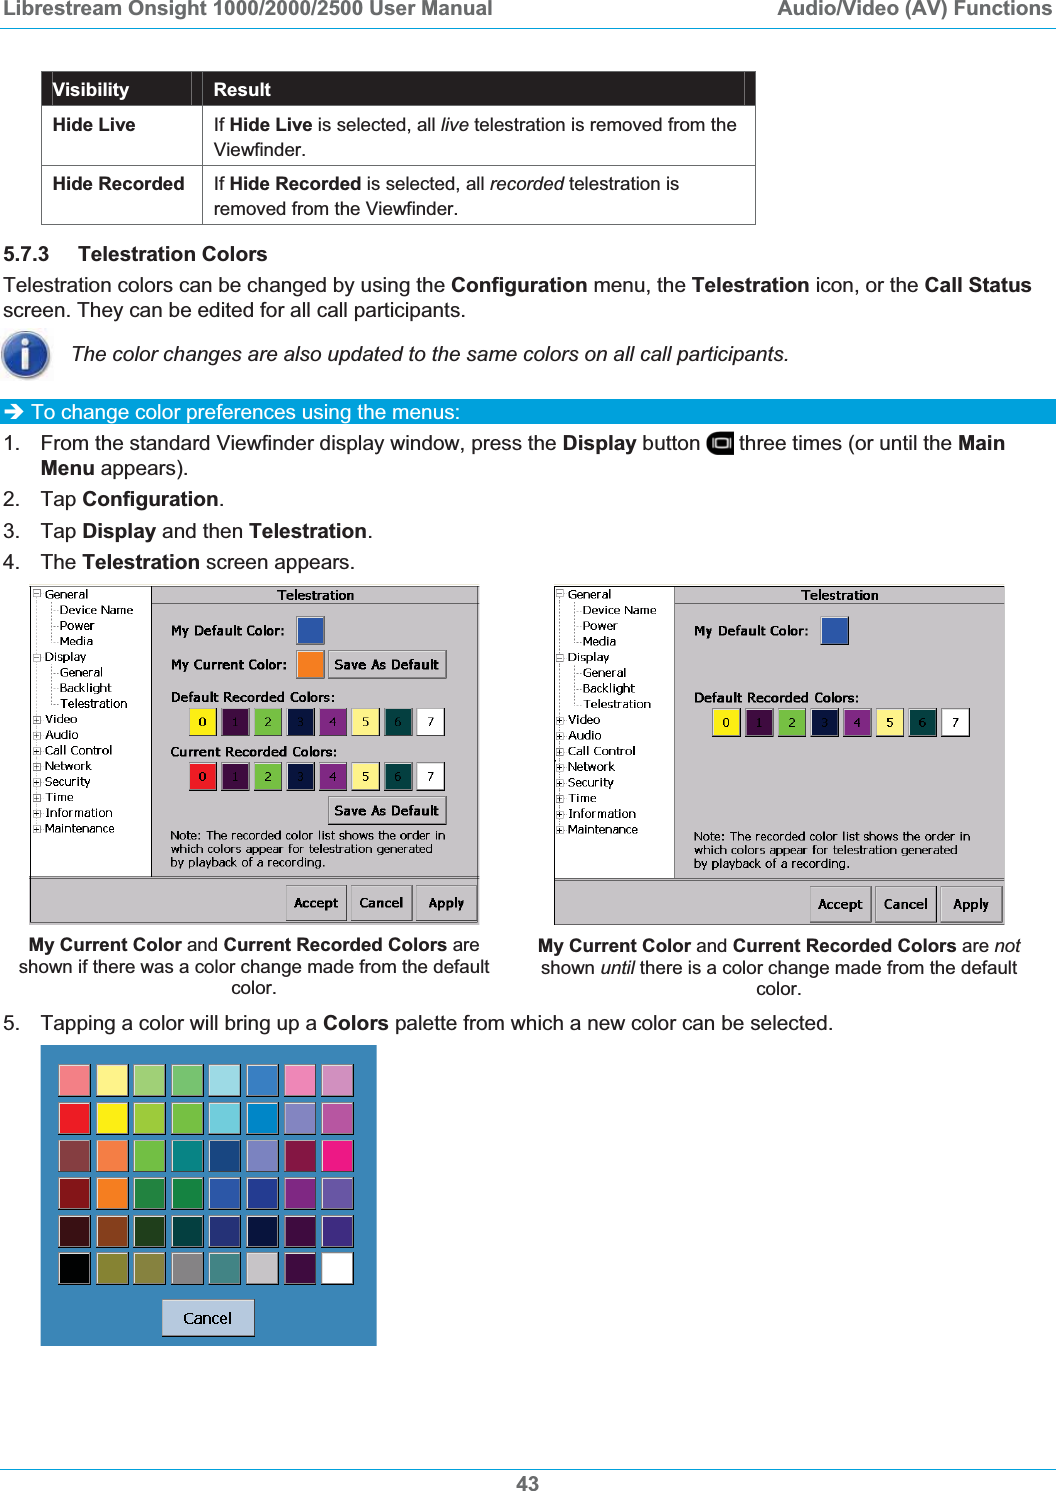
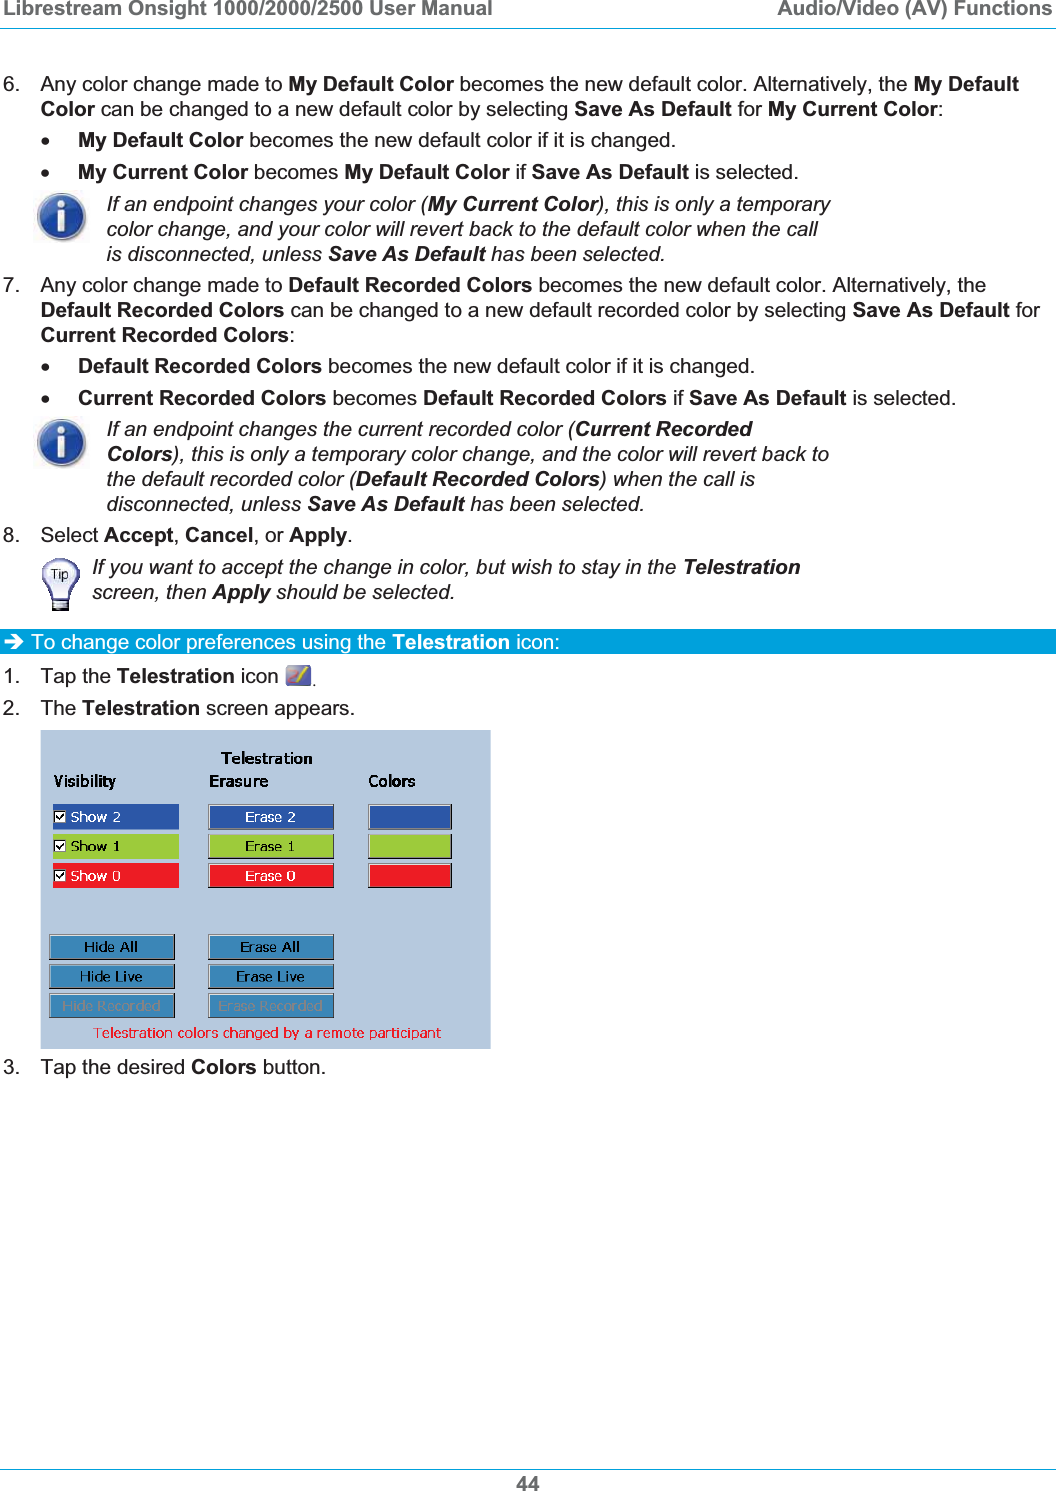
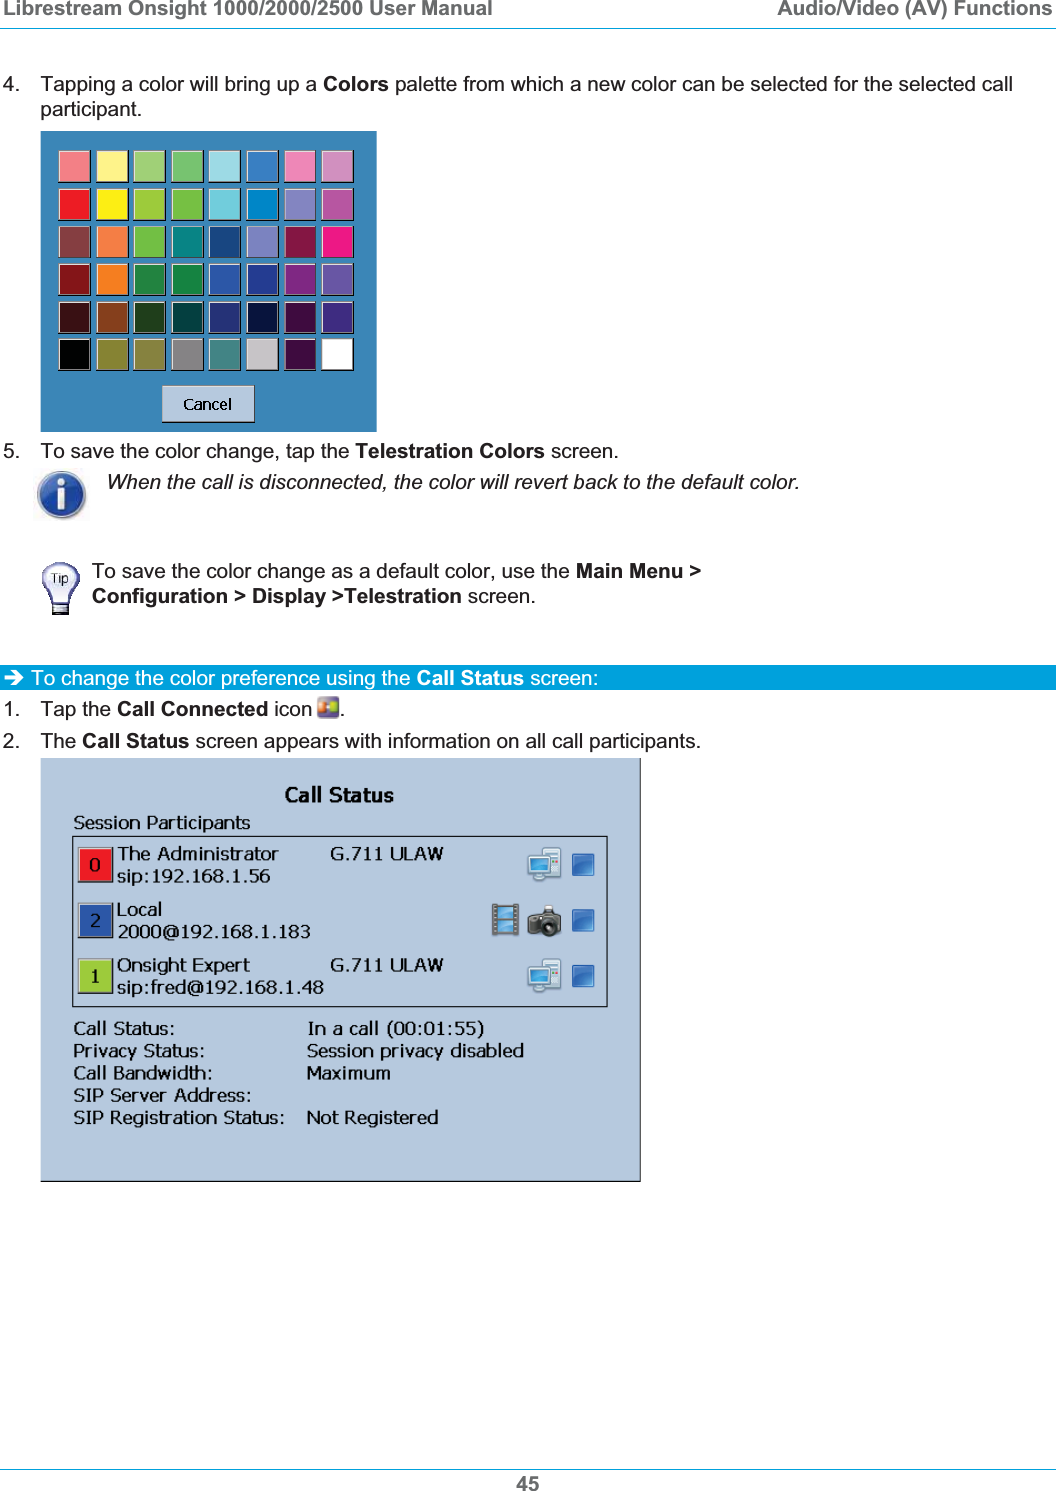
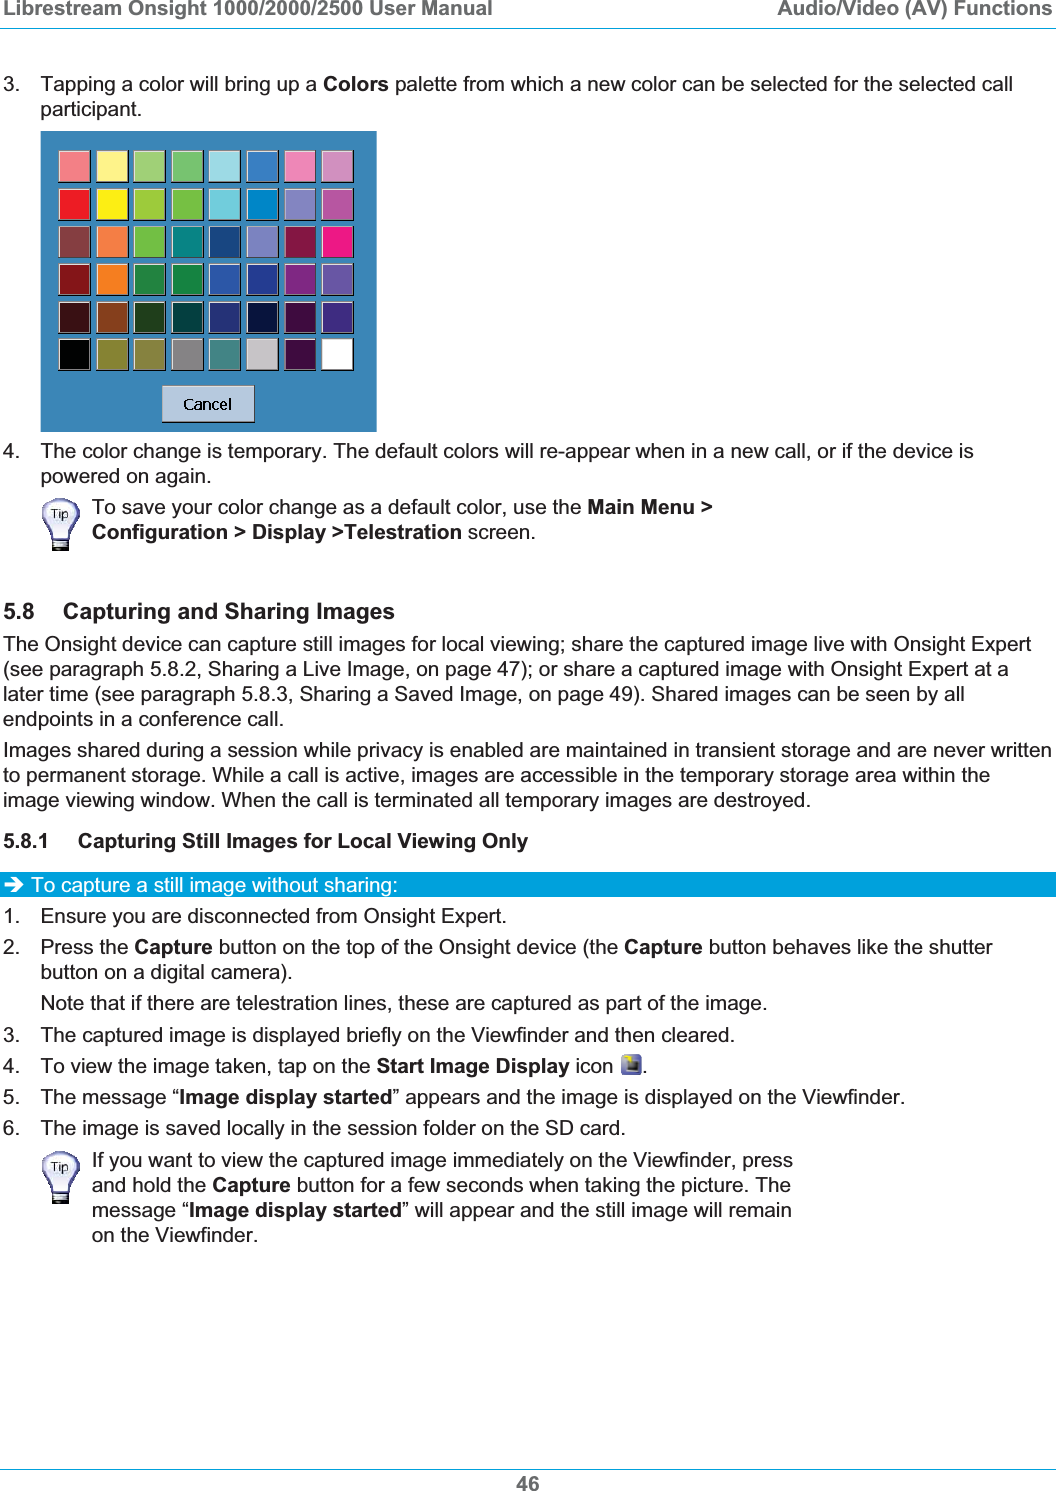
LibreStream Technologies Inc. Rugged Mobile Collaboration Device Librestream Onsight 1000 2000
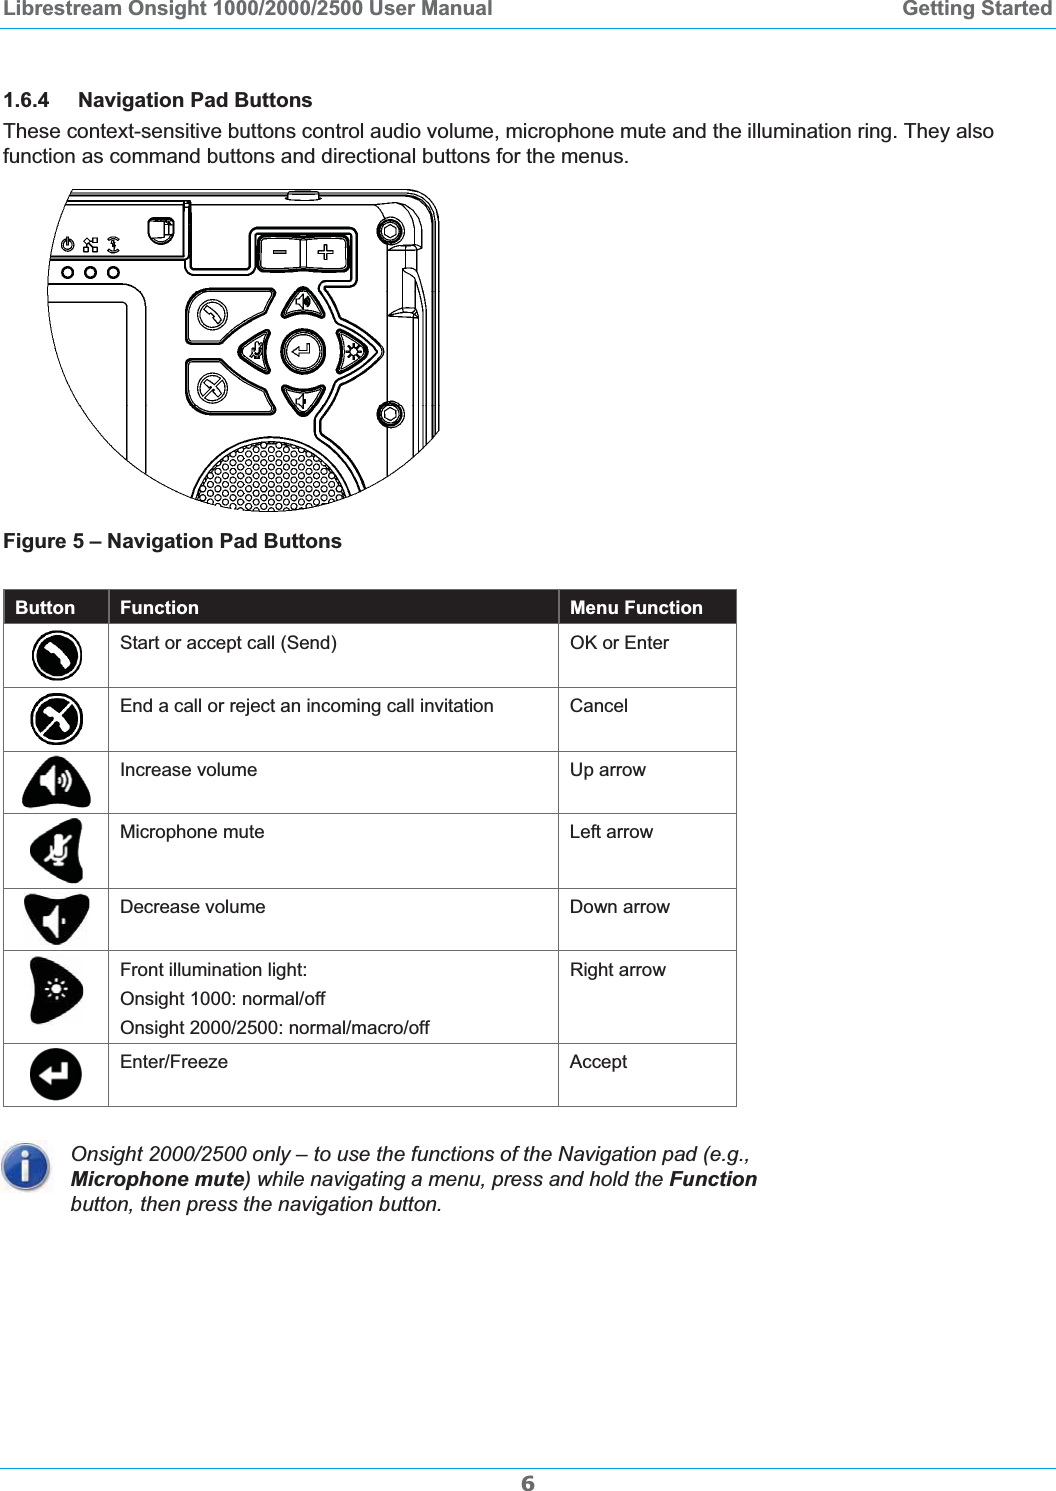
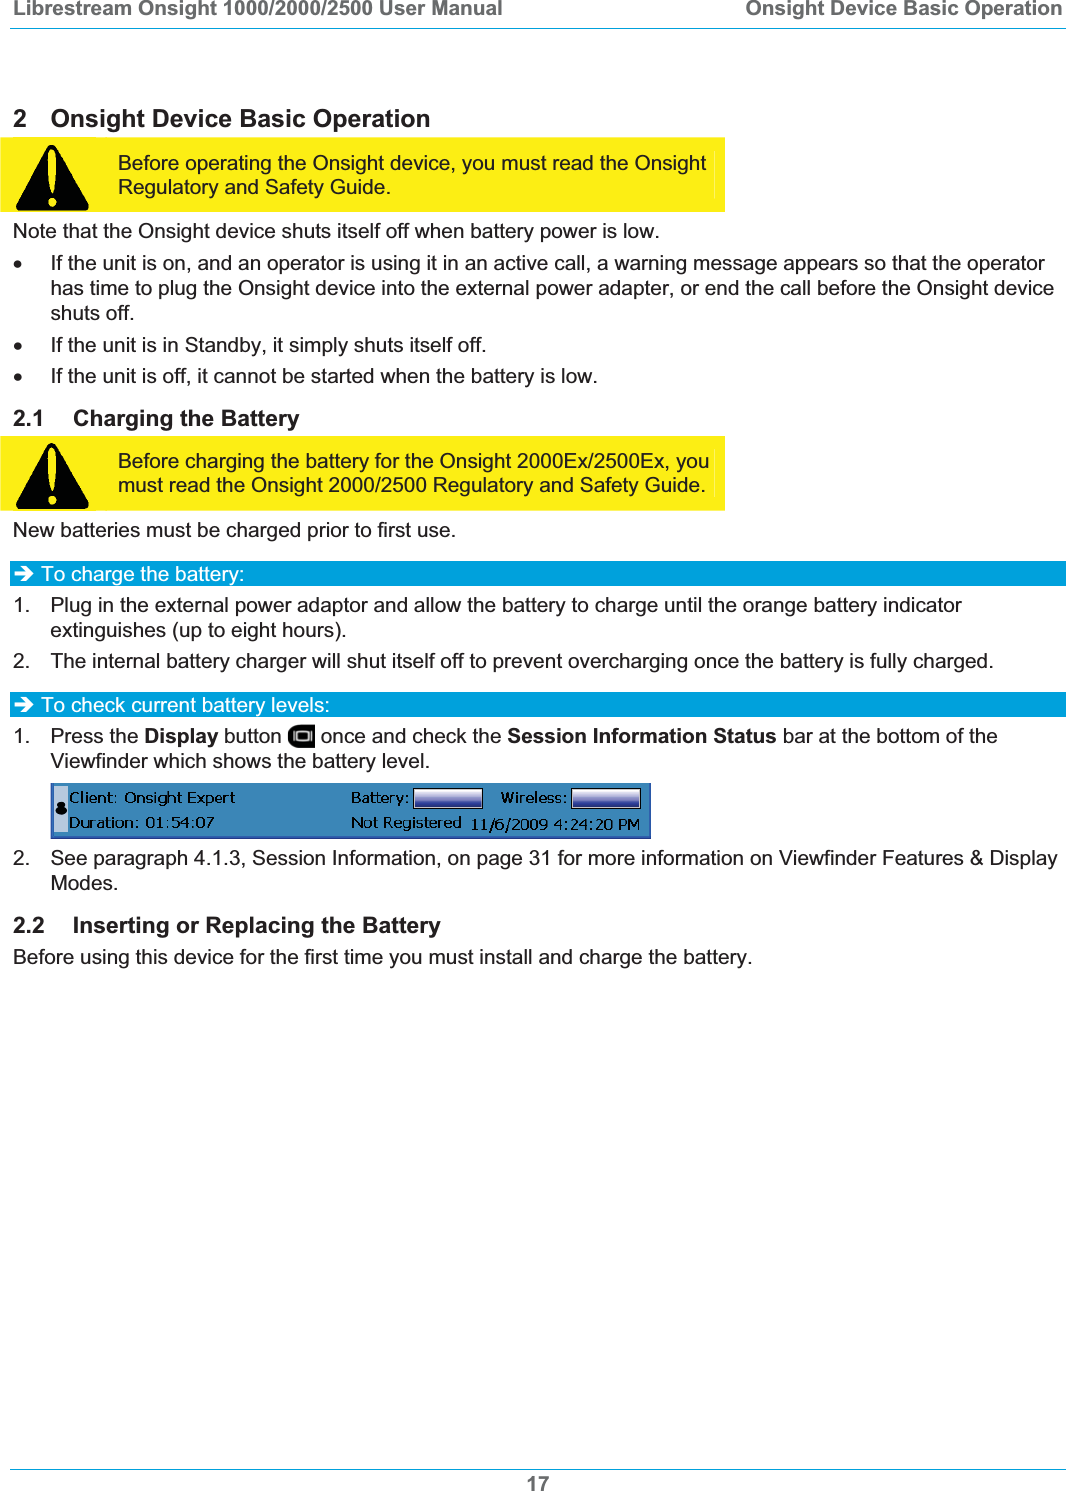
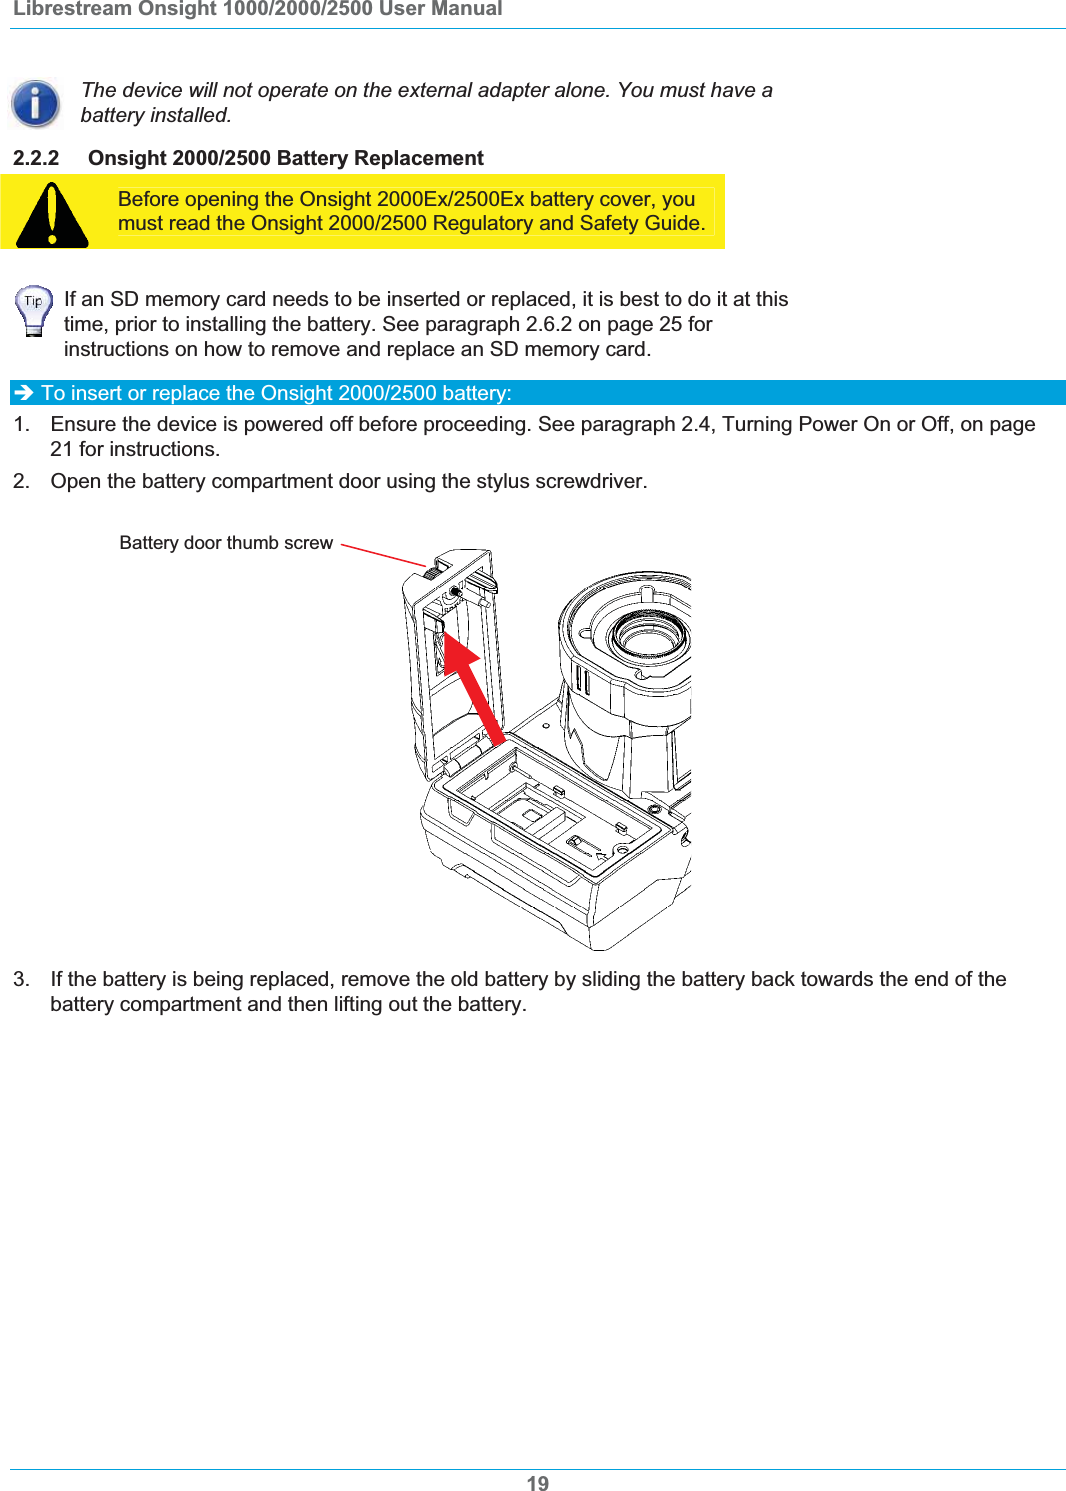
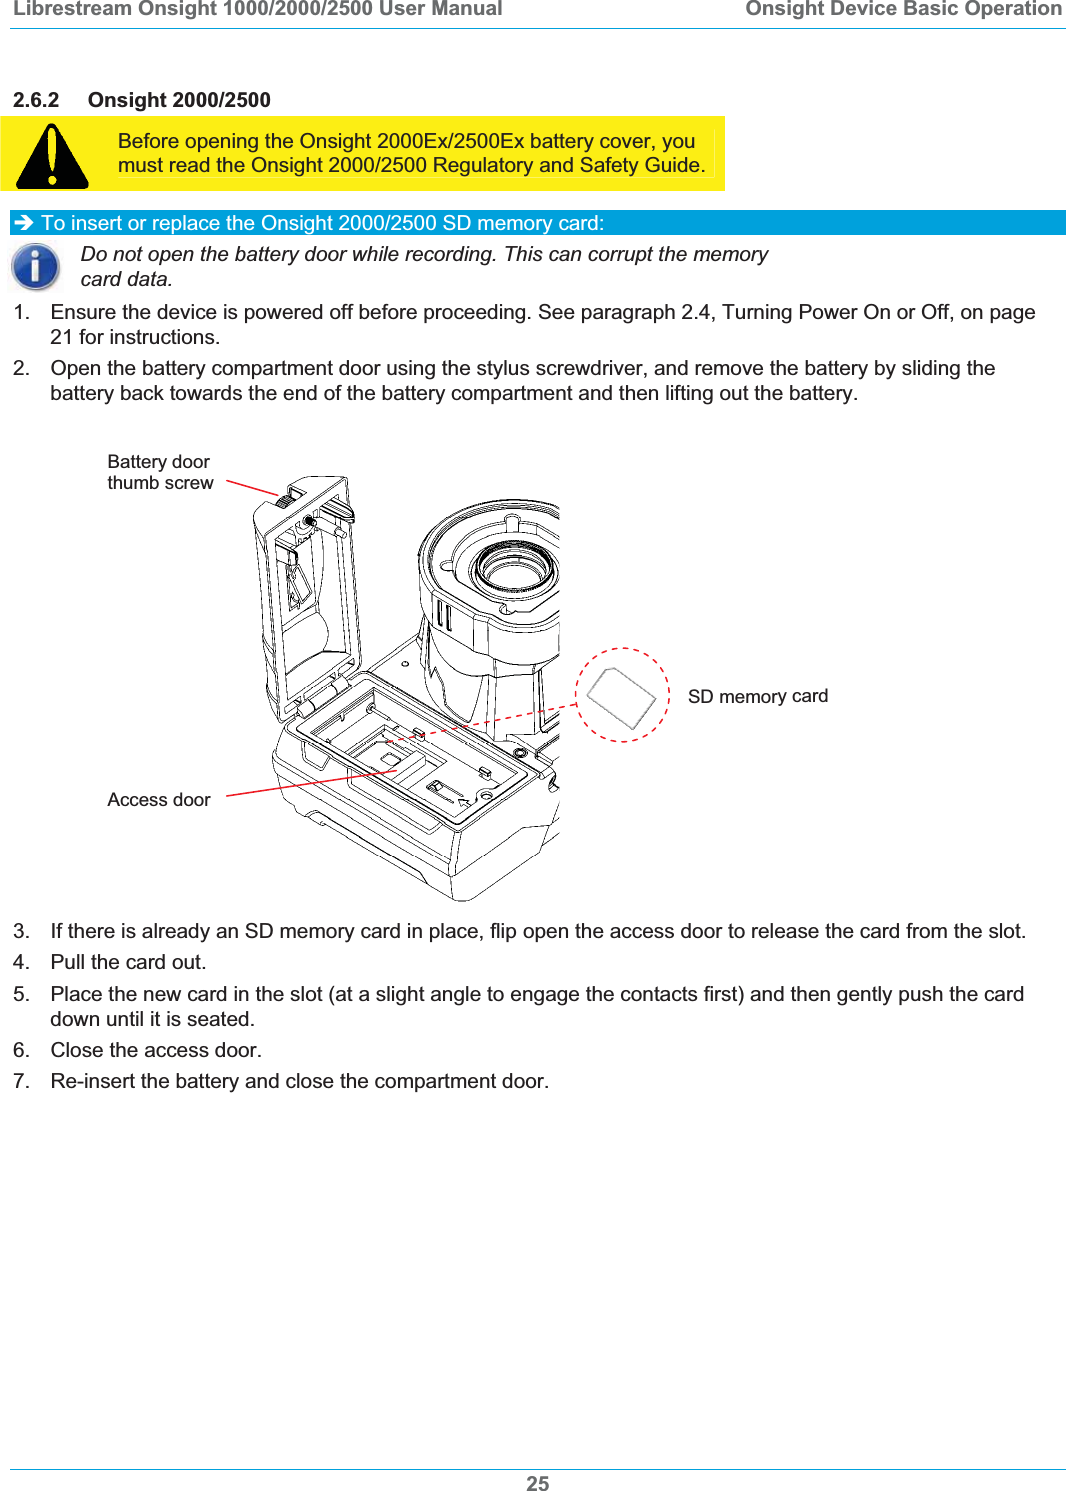
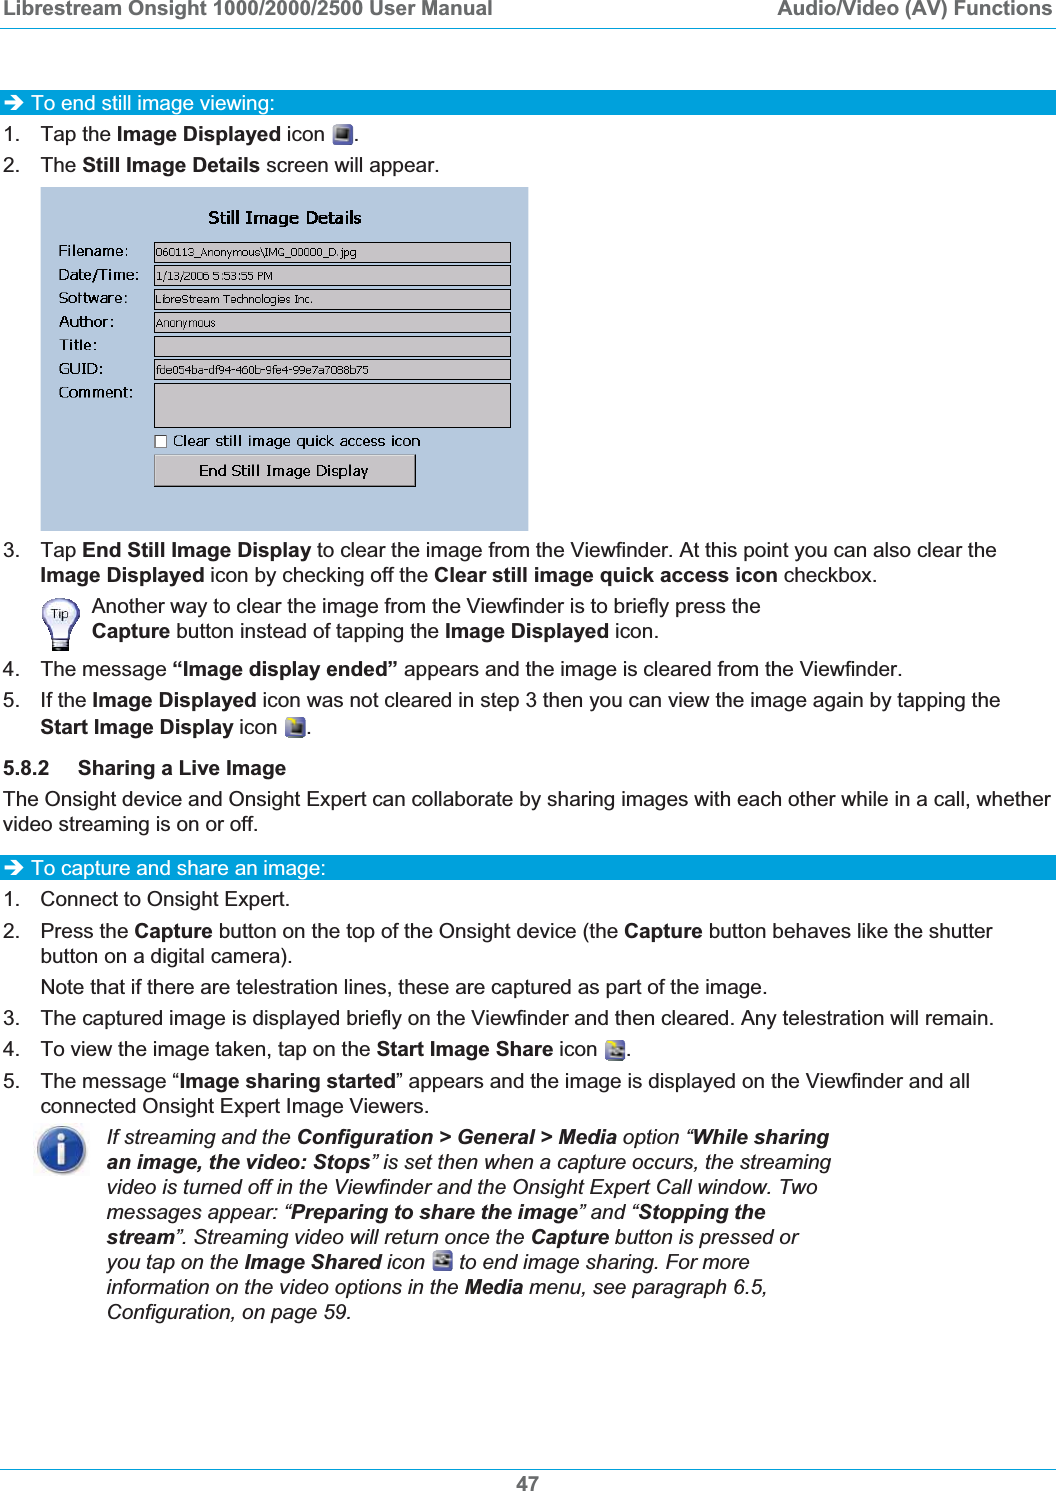
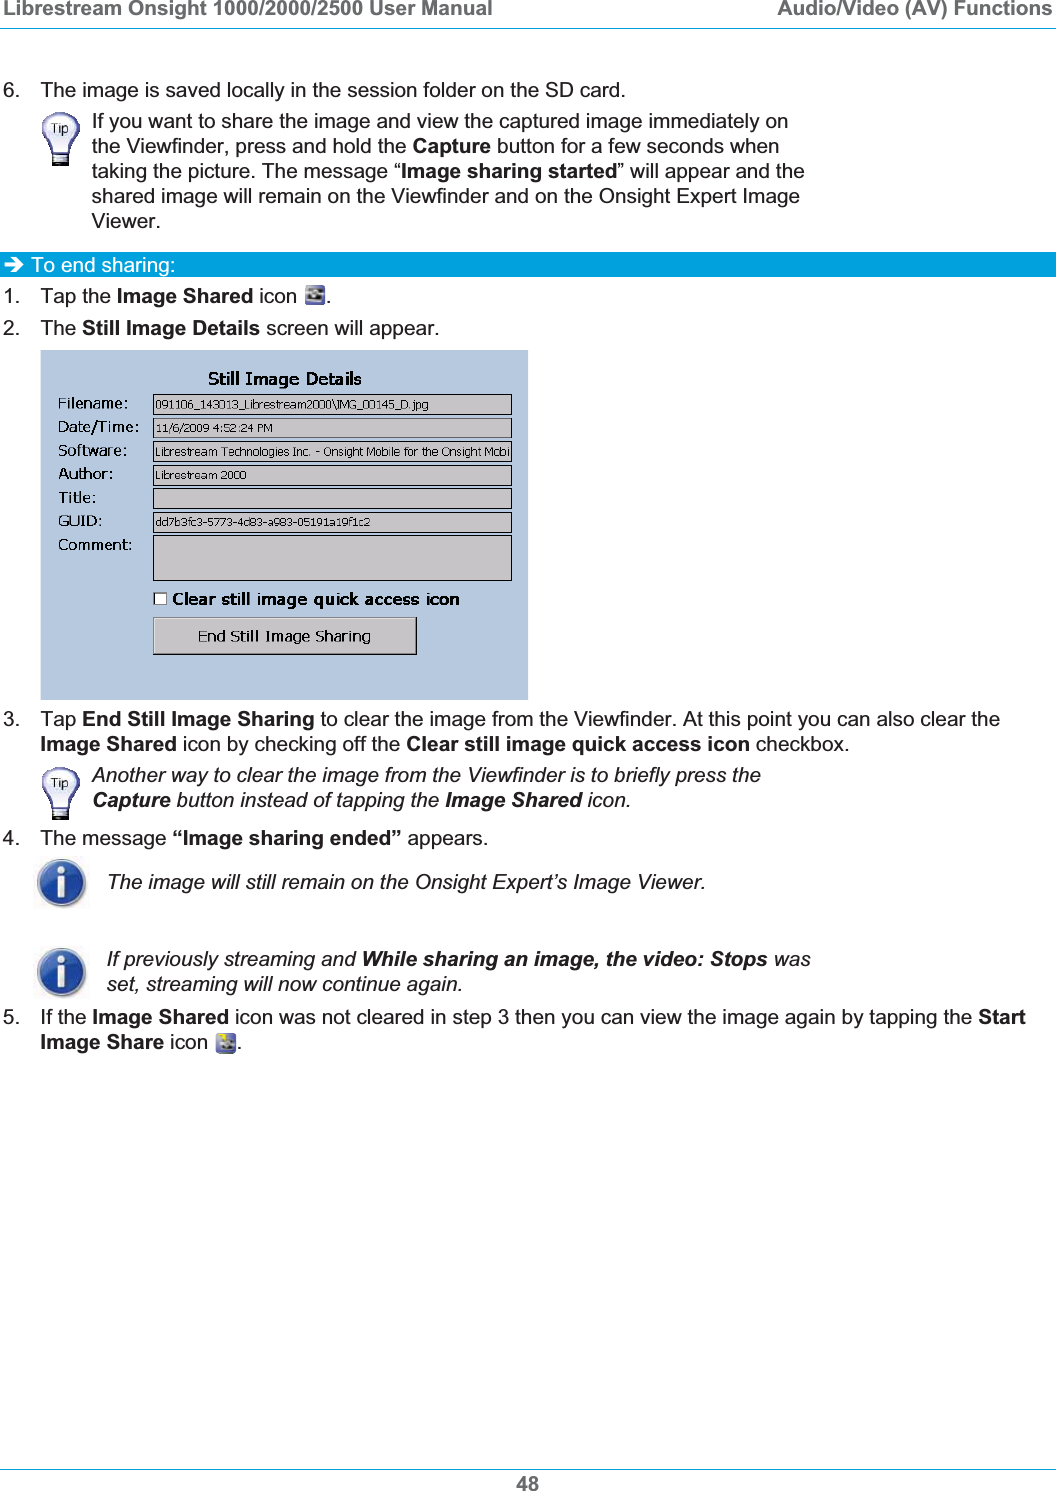
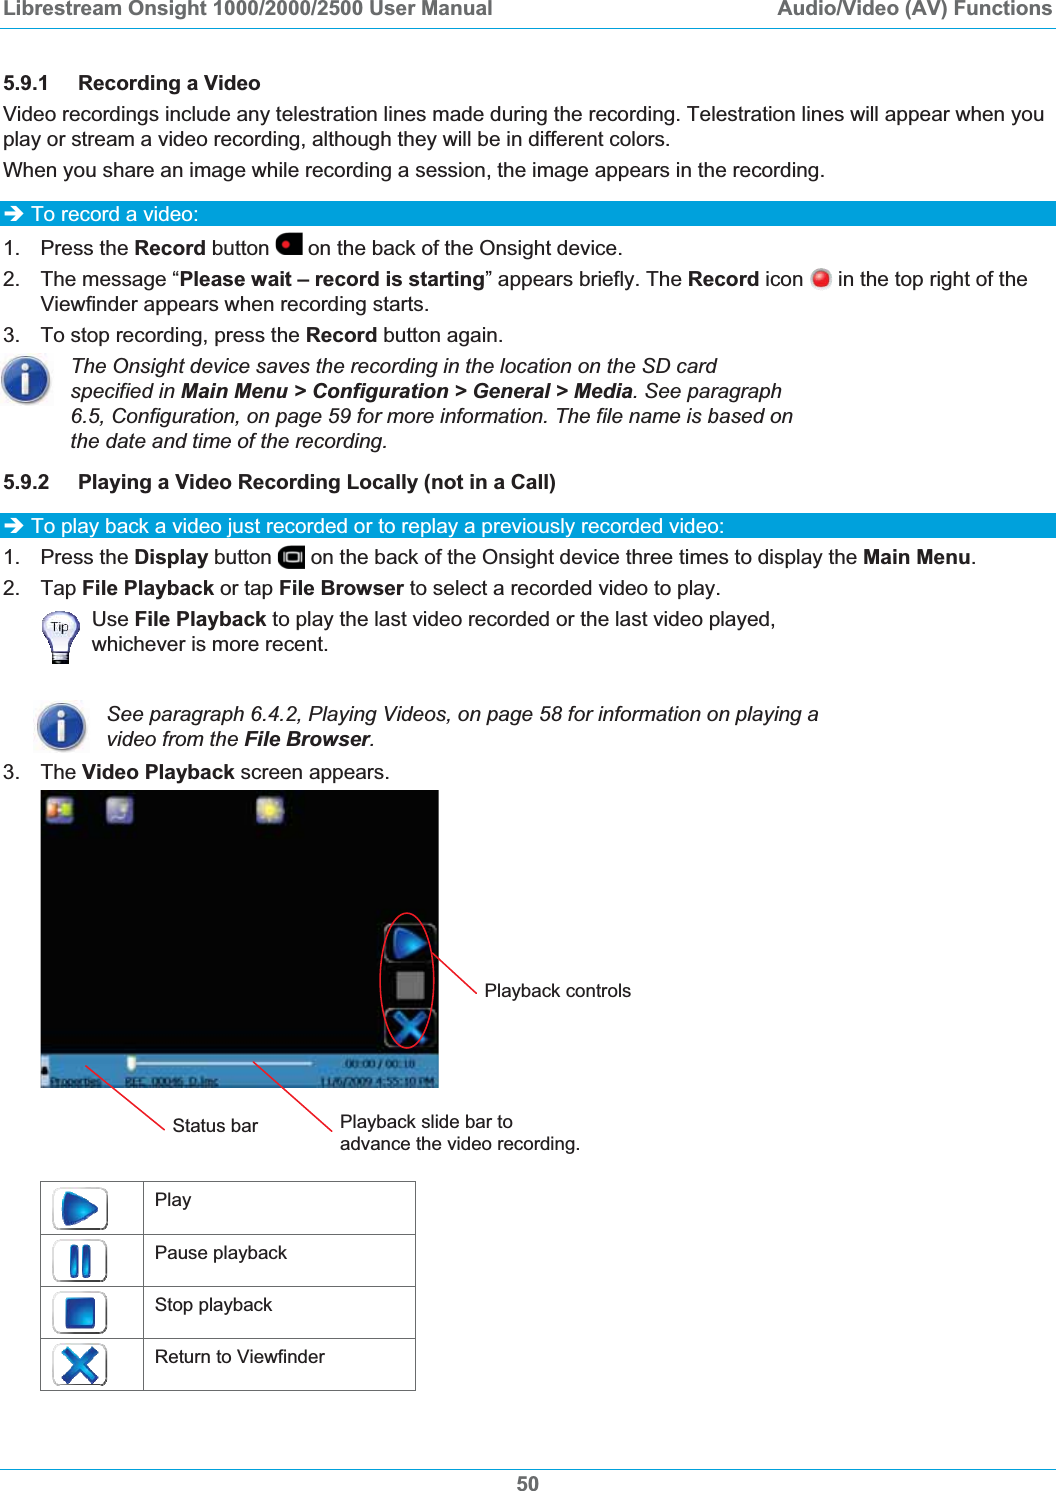
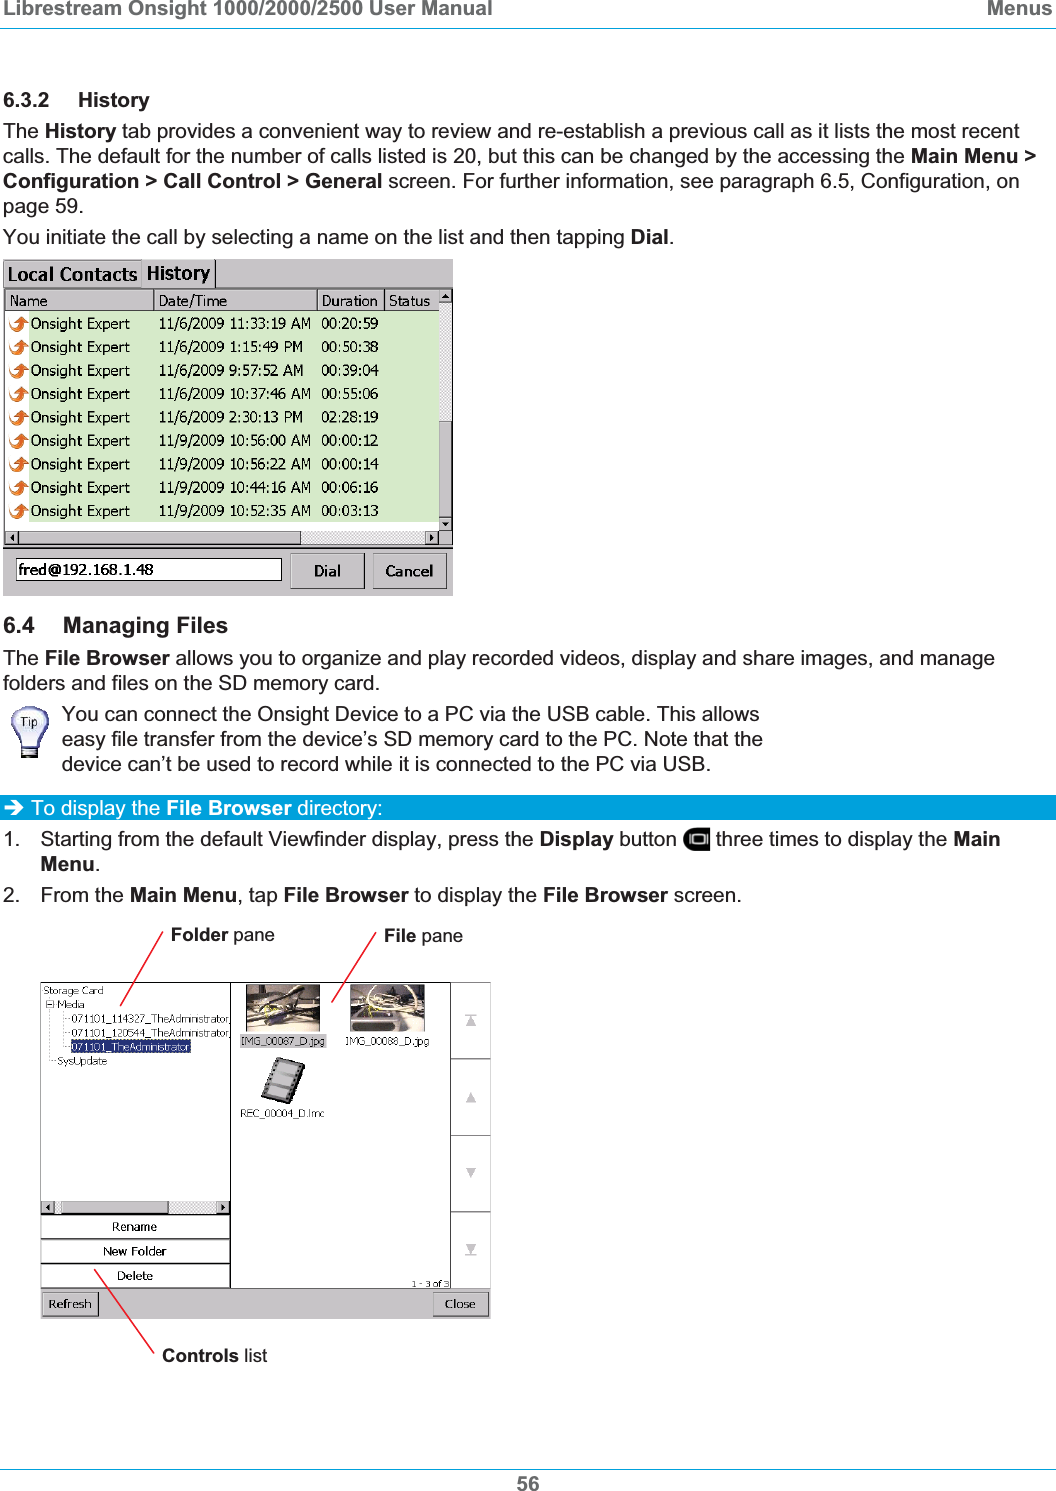
Contents
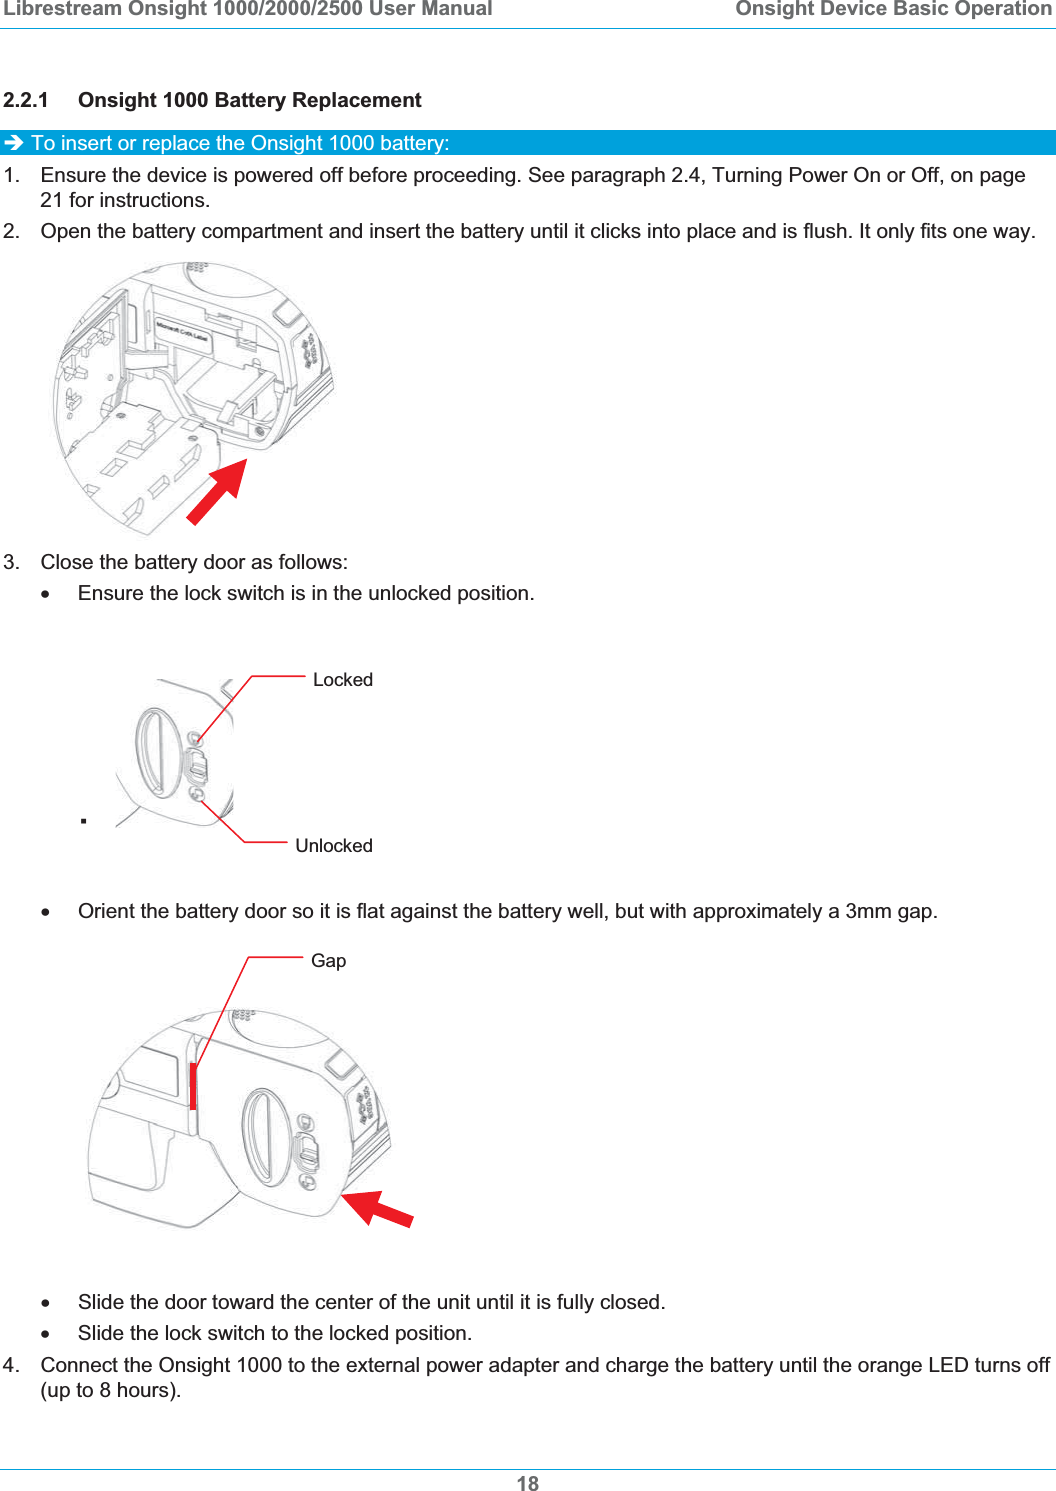
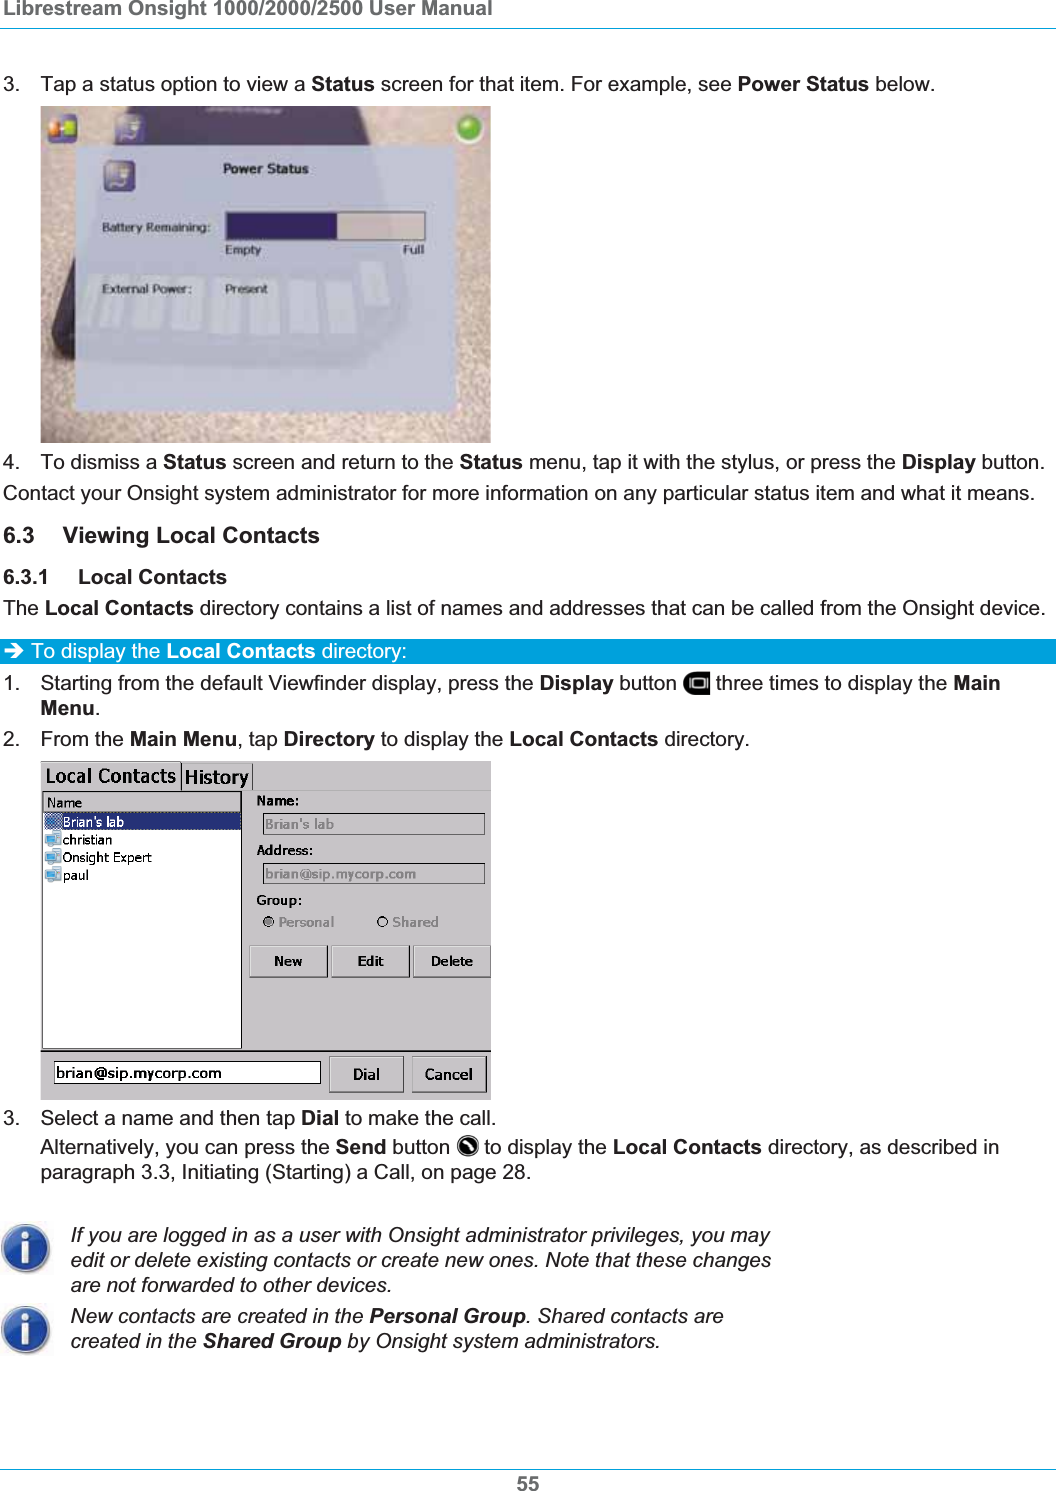
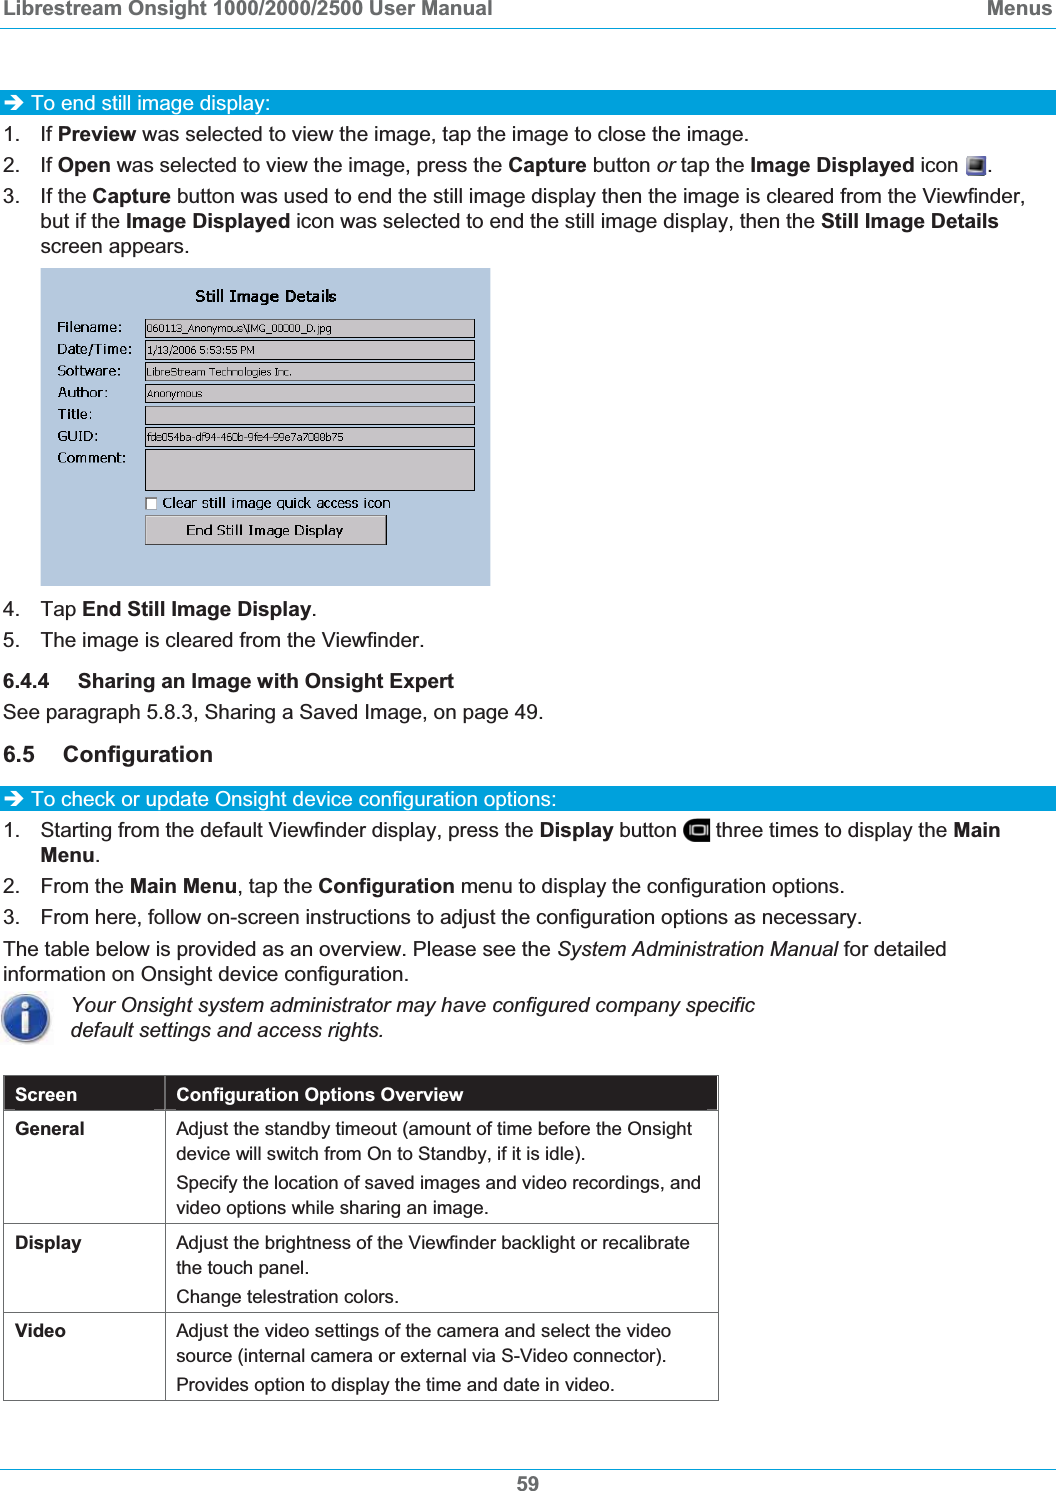
- 1. User Manual Notices
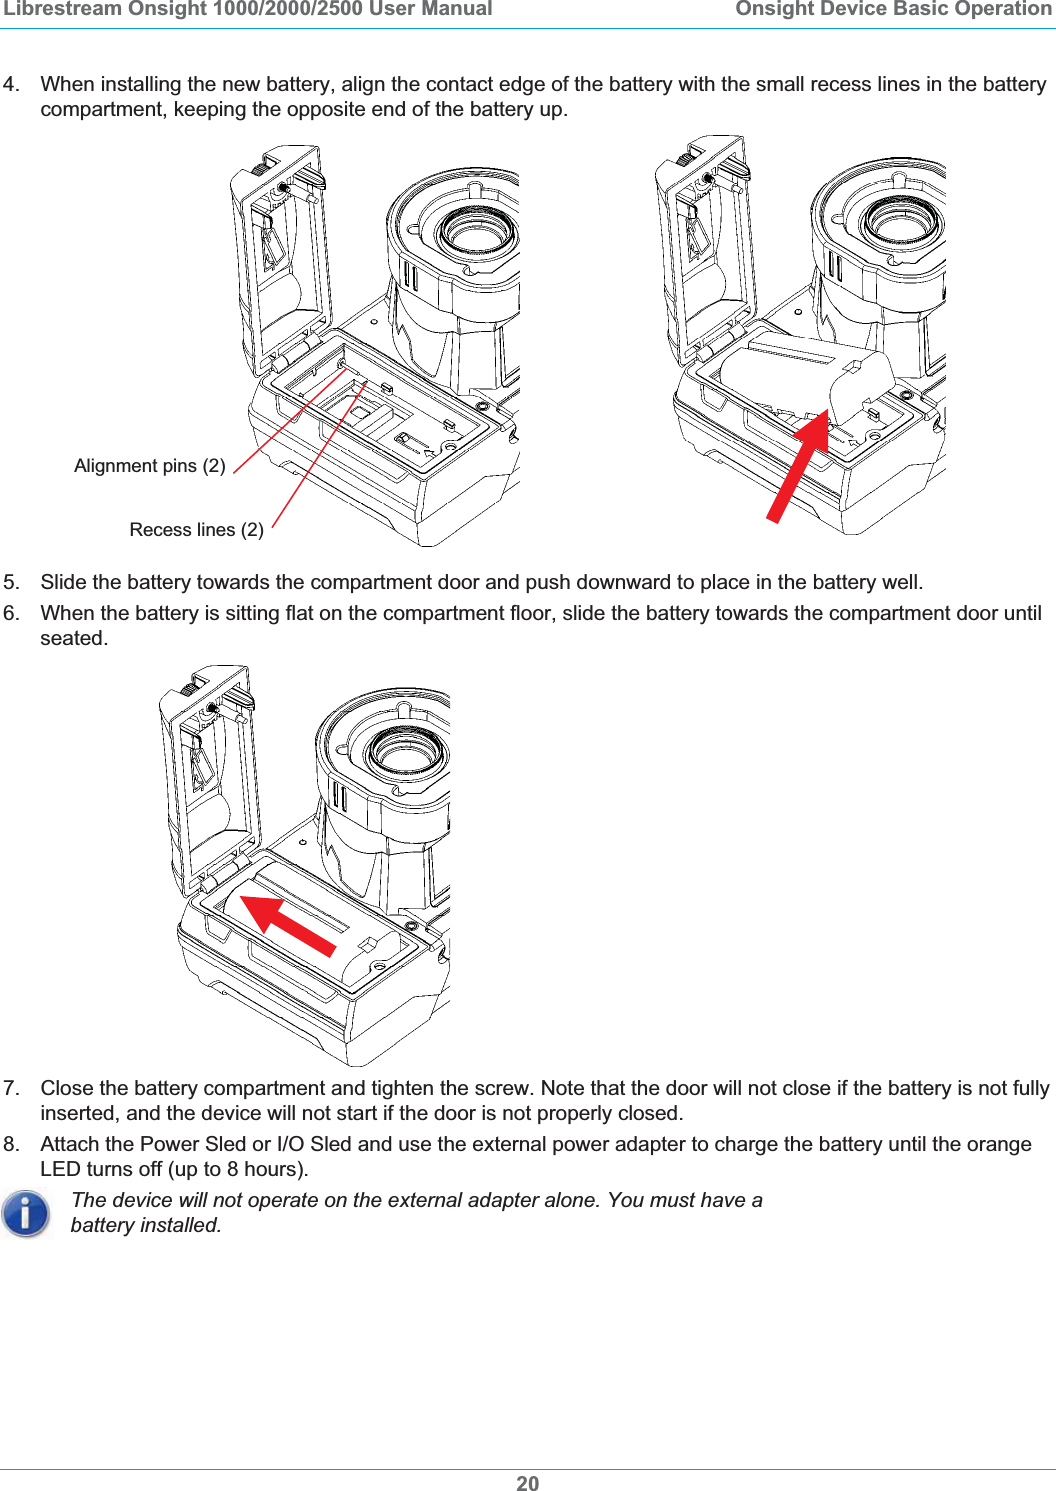
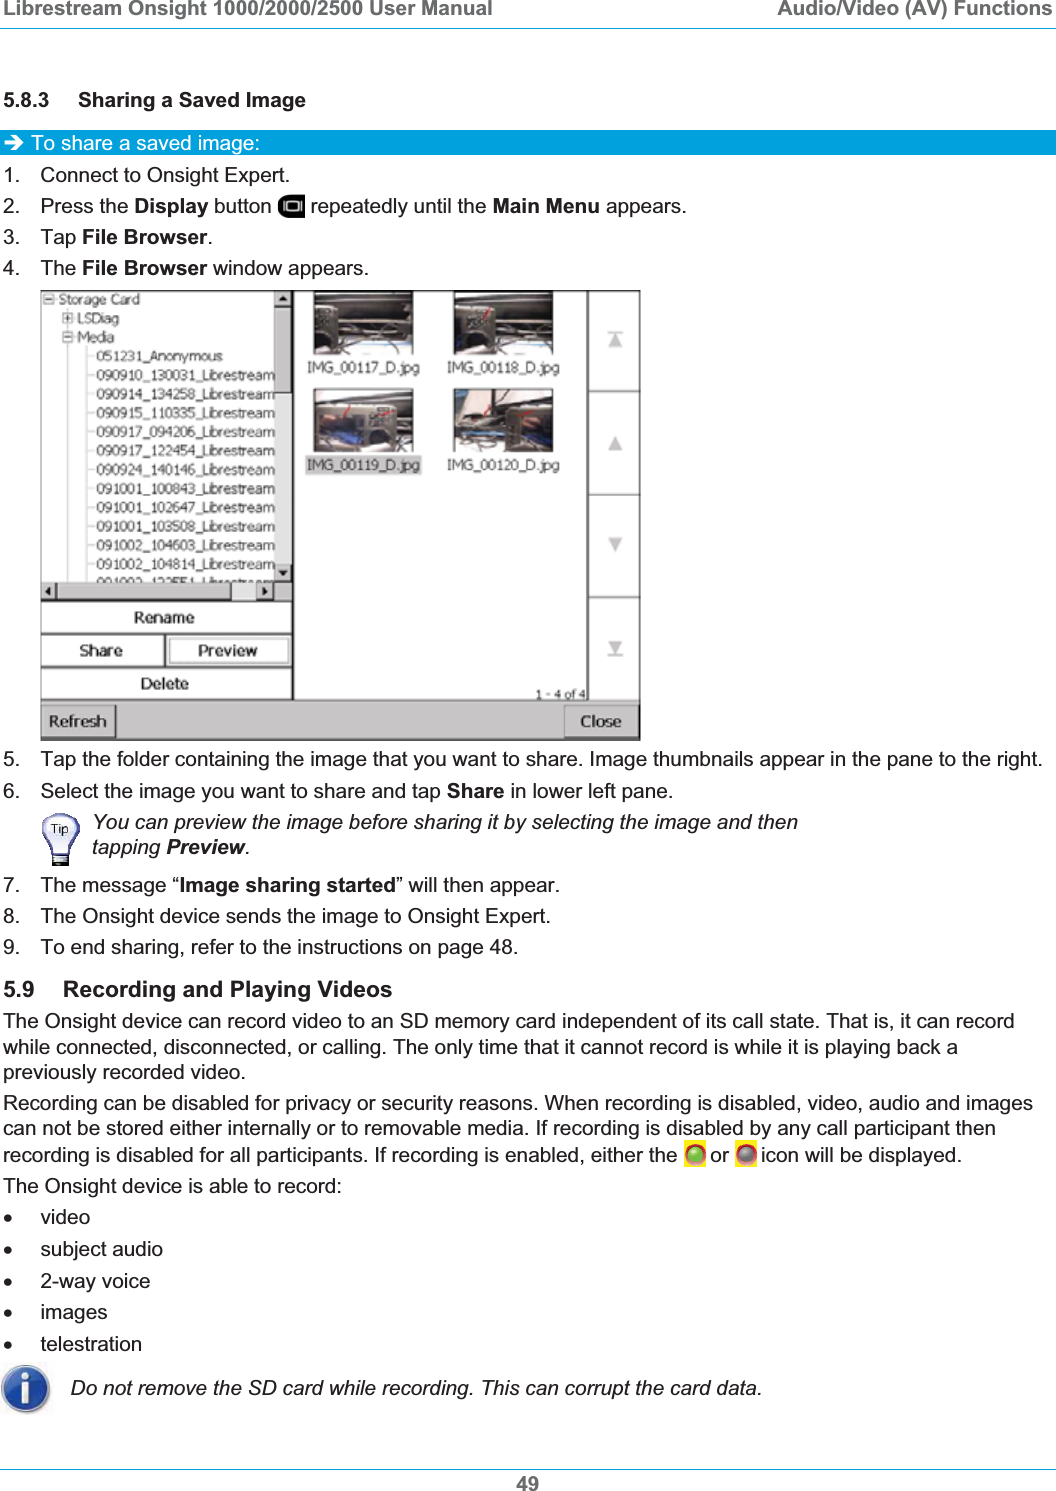
- 2. User Manual
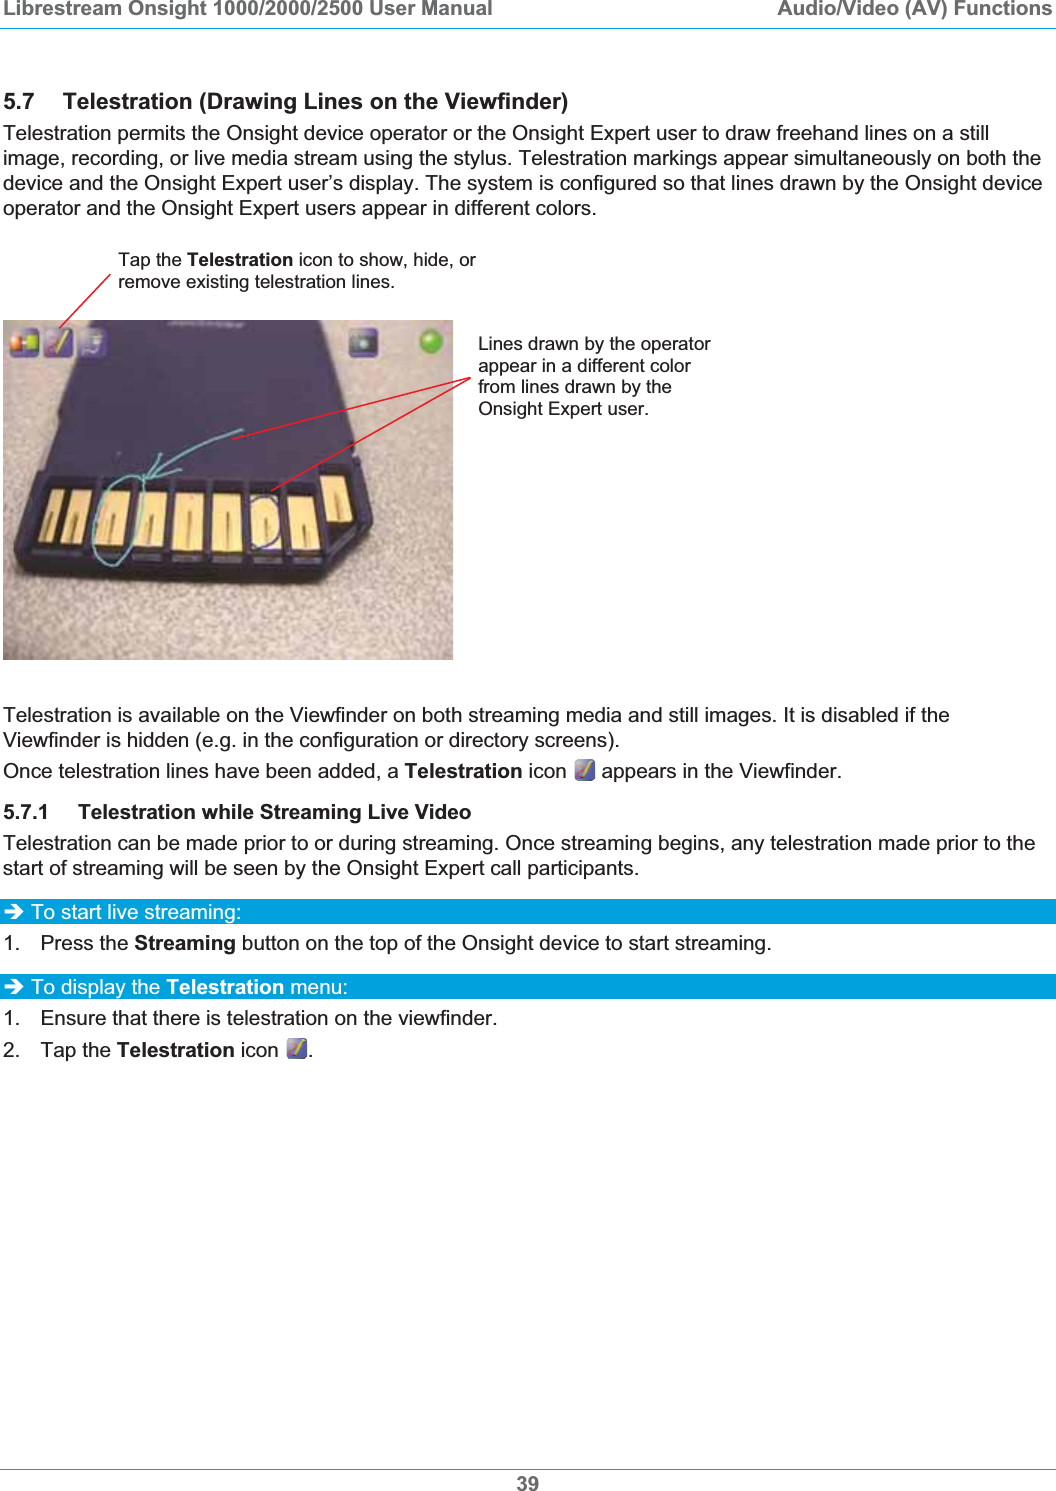
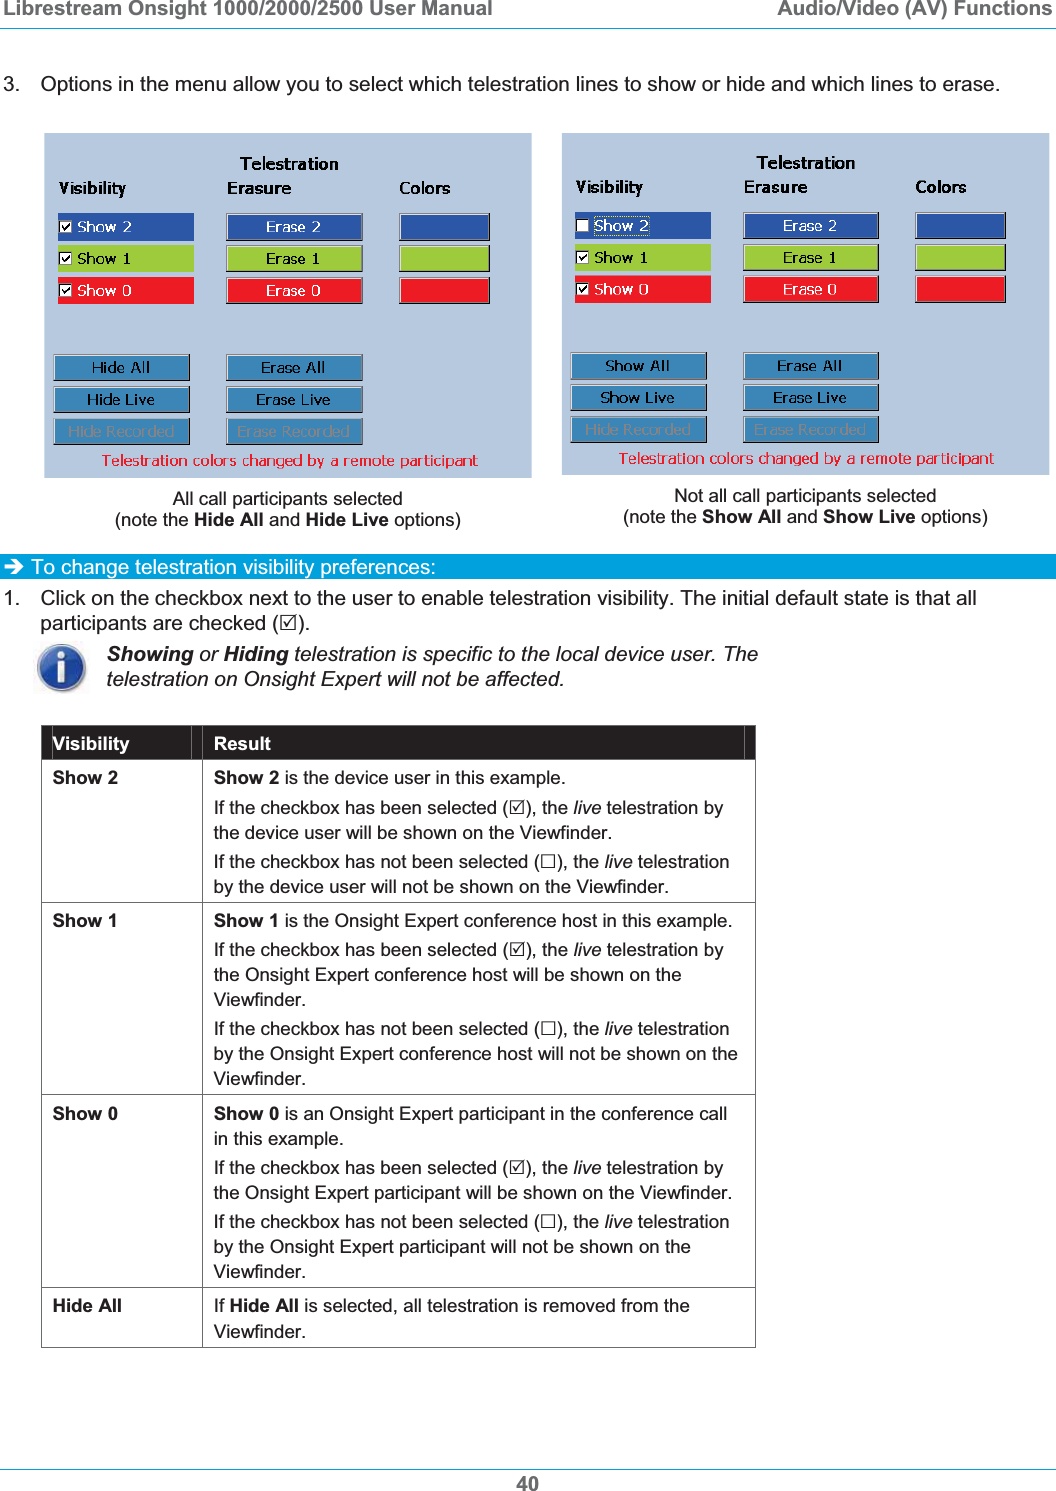
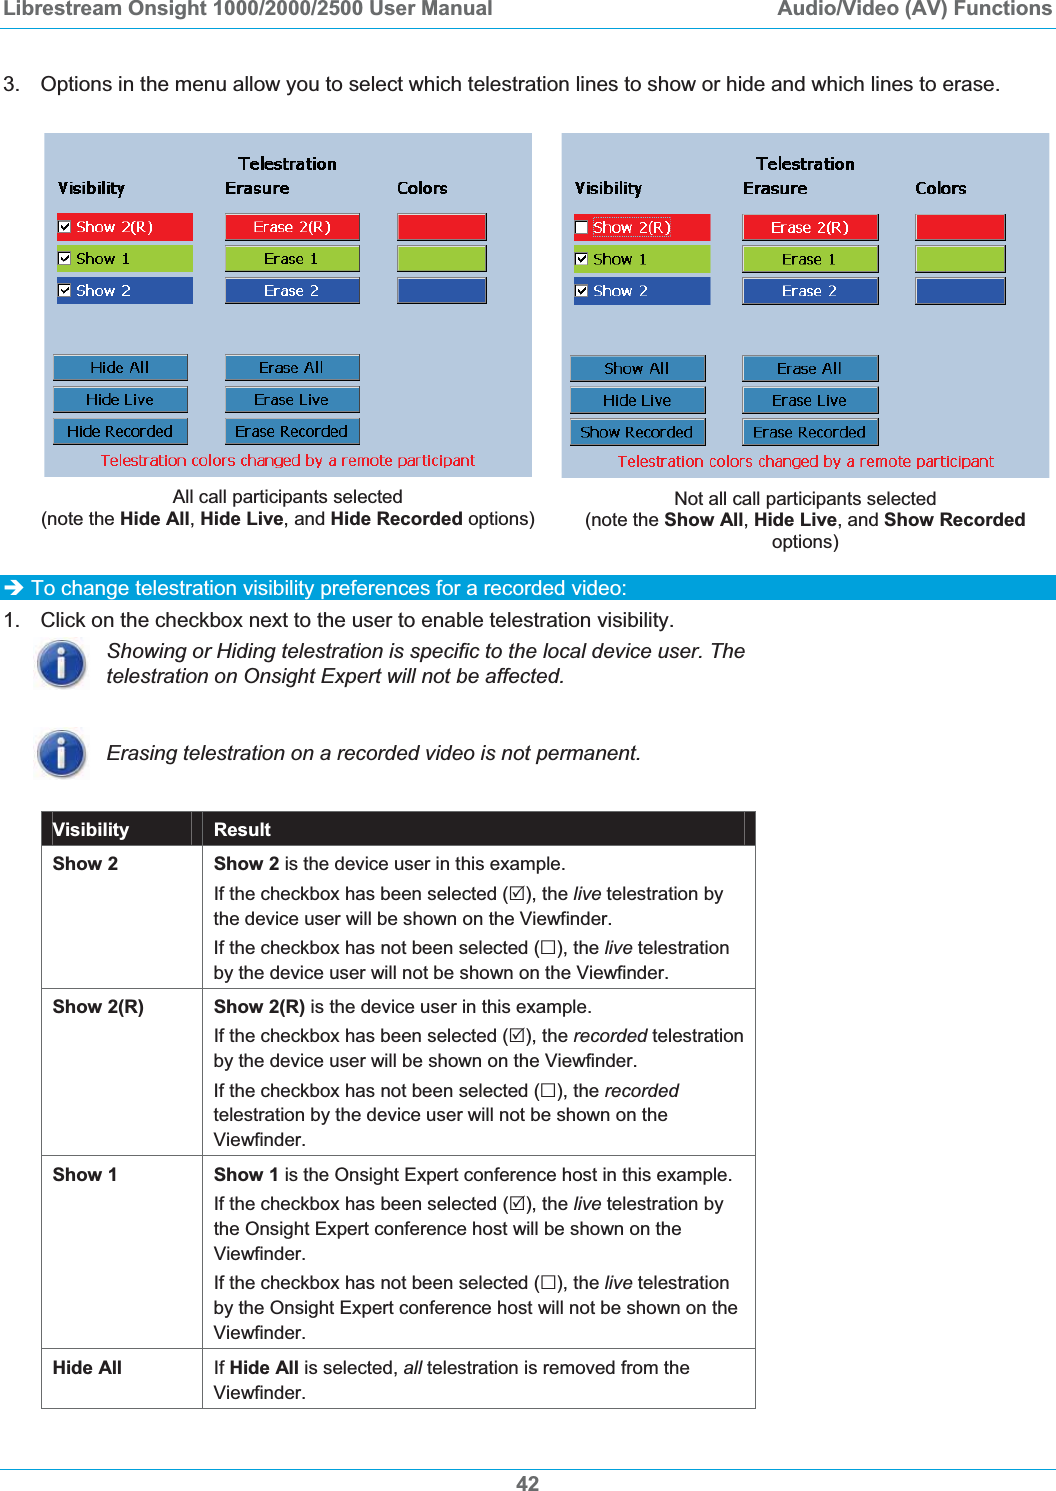
User Manual