Logitech 201938 io2 Digital Pen with Bluetooth User Manual
Logitech Inc io2 Digital Pen with Bluetooth Users Manual
UserManual.wiki
>
Logitech
>
201938 User Manual
Users Manual
Navigation menu
Upload a User Manual
Namespaces
Wiki Guide
HTML
PDF
Info
Views
User Manual
Discussion / Help
Navigation

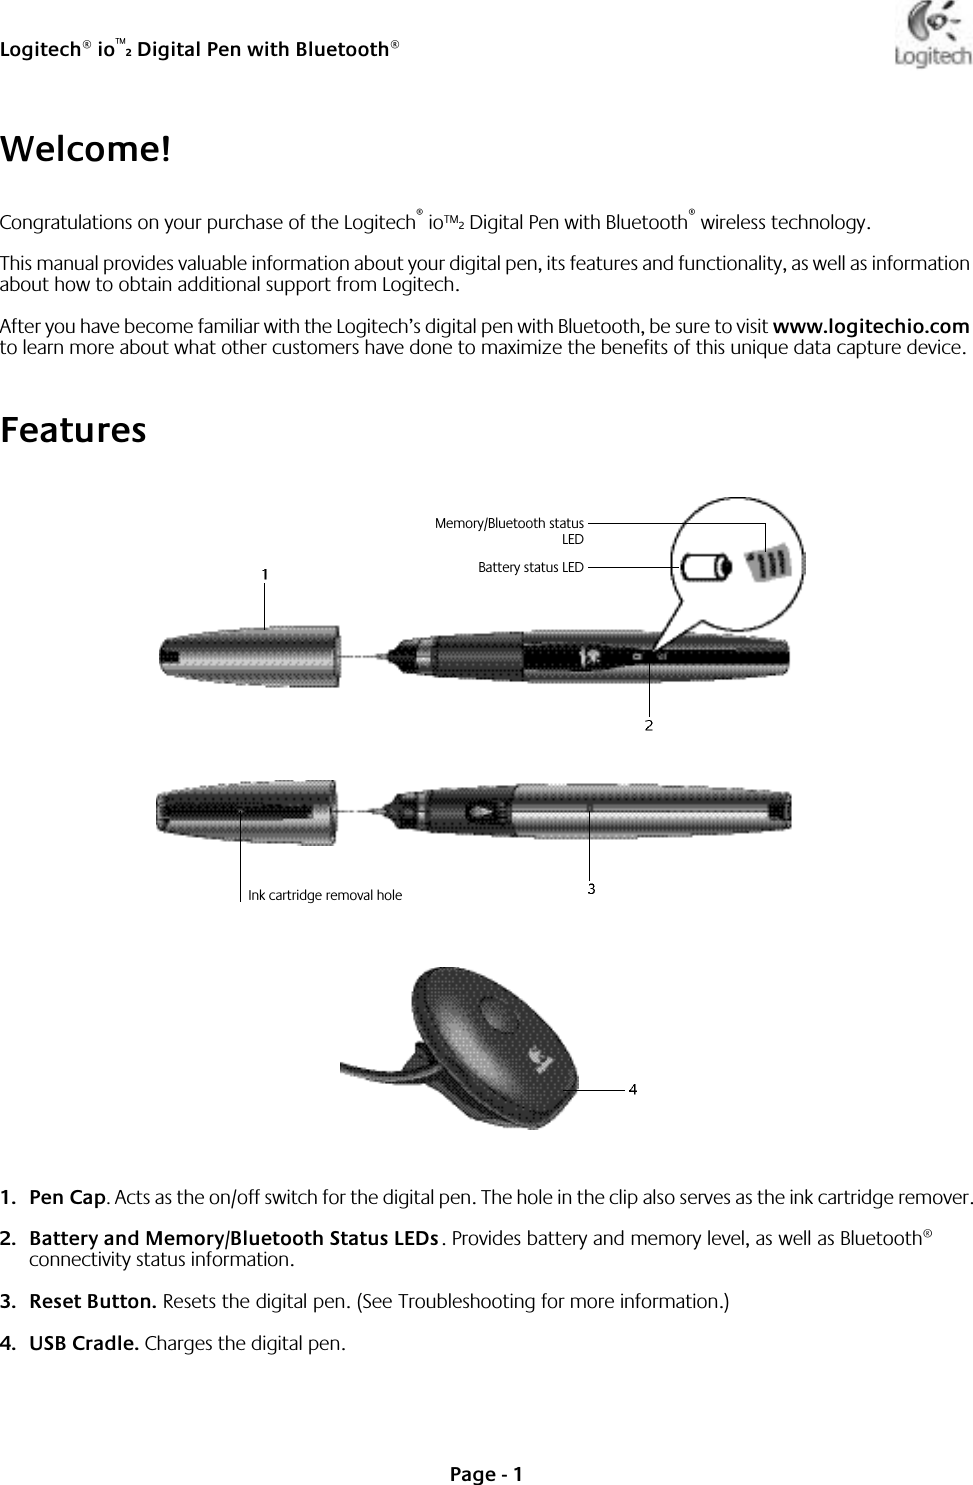
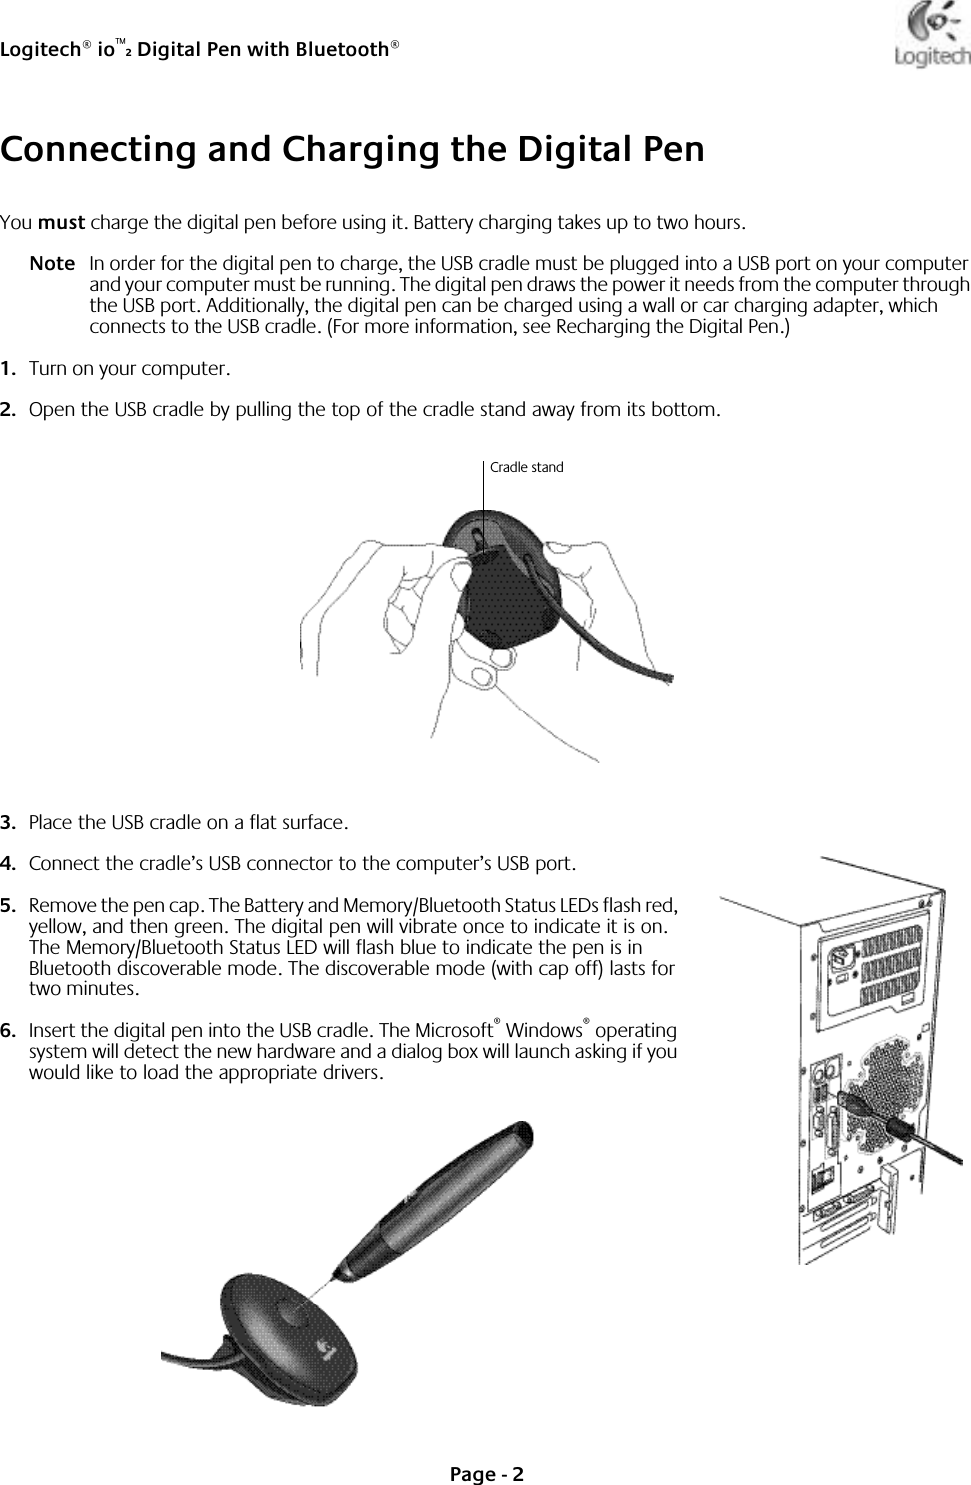
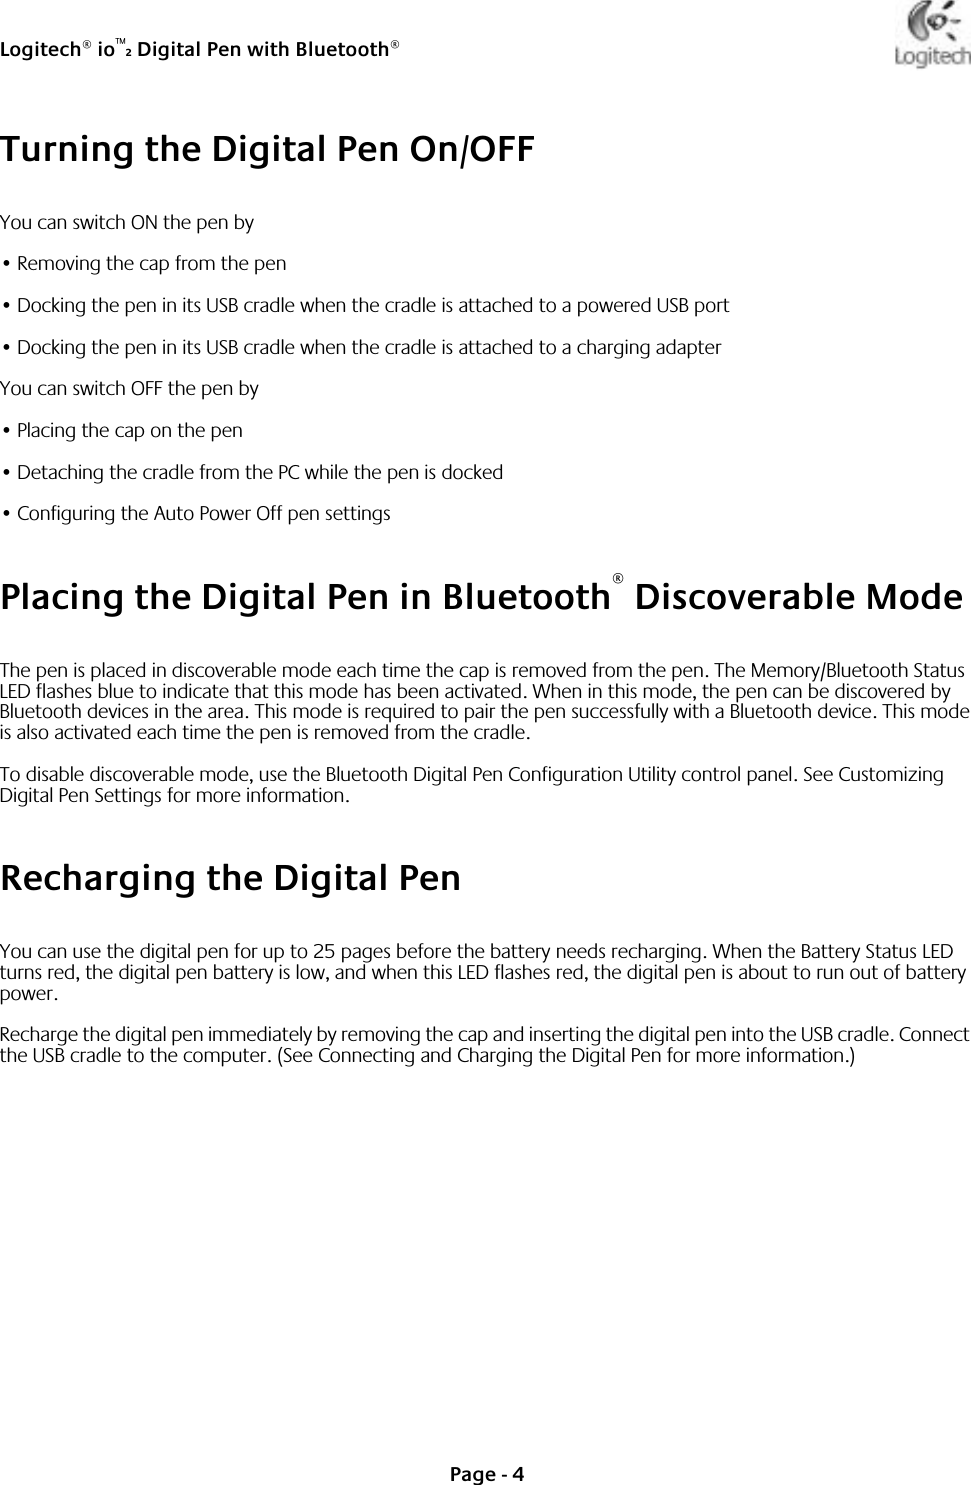
![Logitech® io™2 Digital Pen with Bluetooth®Page - 6Customizing Digital Pen SettingsA PC-based Bluetooth Digital Pen Configuration Utility software is available to support pen configuration and setup including ISP settings, power management, and customizable Bluetooth passkey management. The utility communicates with the pen through a connected mobile USB cradle. The utility is part of the Logitech io2 Digital Pen with Bluetooth Business Kit, which can be downloaded from the io for Business Solutions area of the Logitech.com website. Visit www.logitechio.com/iobusiness for more information.Bluetooth® Compatibility and FunctionalityThe Logitech io2 Digital Pen with Bluetooth wireless technology is compliant* with Bluetooth specifications 1.1 and 1.2. Note *Interoperability between the Logitech io2 Digital Pen with Bluetooth and products with Bluetooth wireless technology (BT 1.1 / 1.2 specifications) is not guaranteed. This functionality should be validated by the application developer or integrator before final mobile device selection is made. Bluetooth® SpecificationsBluetooth® ProfilesBluetooth profiles include dial-up networking, object push profile, and serial port profile.Dial-up NetworkingThe Dial-up Networking profile is used to get a network connection via a mobile phone. The digital pen will act as a data terminal and the phone as a gateway.Object Push ProfileThe Object Push Profile is used to send objects such as Anoto PGC files to compatible phones and PCs.Bluetooth Compatibility Bi-directional, Bluetooth 1.1 / 1.2, Class 2Bluetooth Range 3 Meters [Typical]Bluetooth Passkey 4 Digit [Customizable]Bluetooth Security Mode Level 3: Authentication and Link EncryptionBluetooth Interface Profiles Bluetooth Dial-up Networking Profile (DUN)Bluetooth Object Push Profile (OPP)Bluetooth Serial Port Profile (SPP)](https://usermanual.wiki/Logitech/201938/User-Guide-564705-Page-9.png)