Long Range Solutions BUTLERXP Short range paging system transmitter User Manual Layout 1
Long Range Systems, LLC Short range paging system transmitter Layout 1
Users Manual
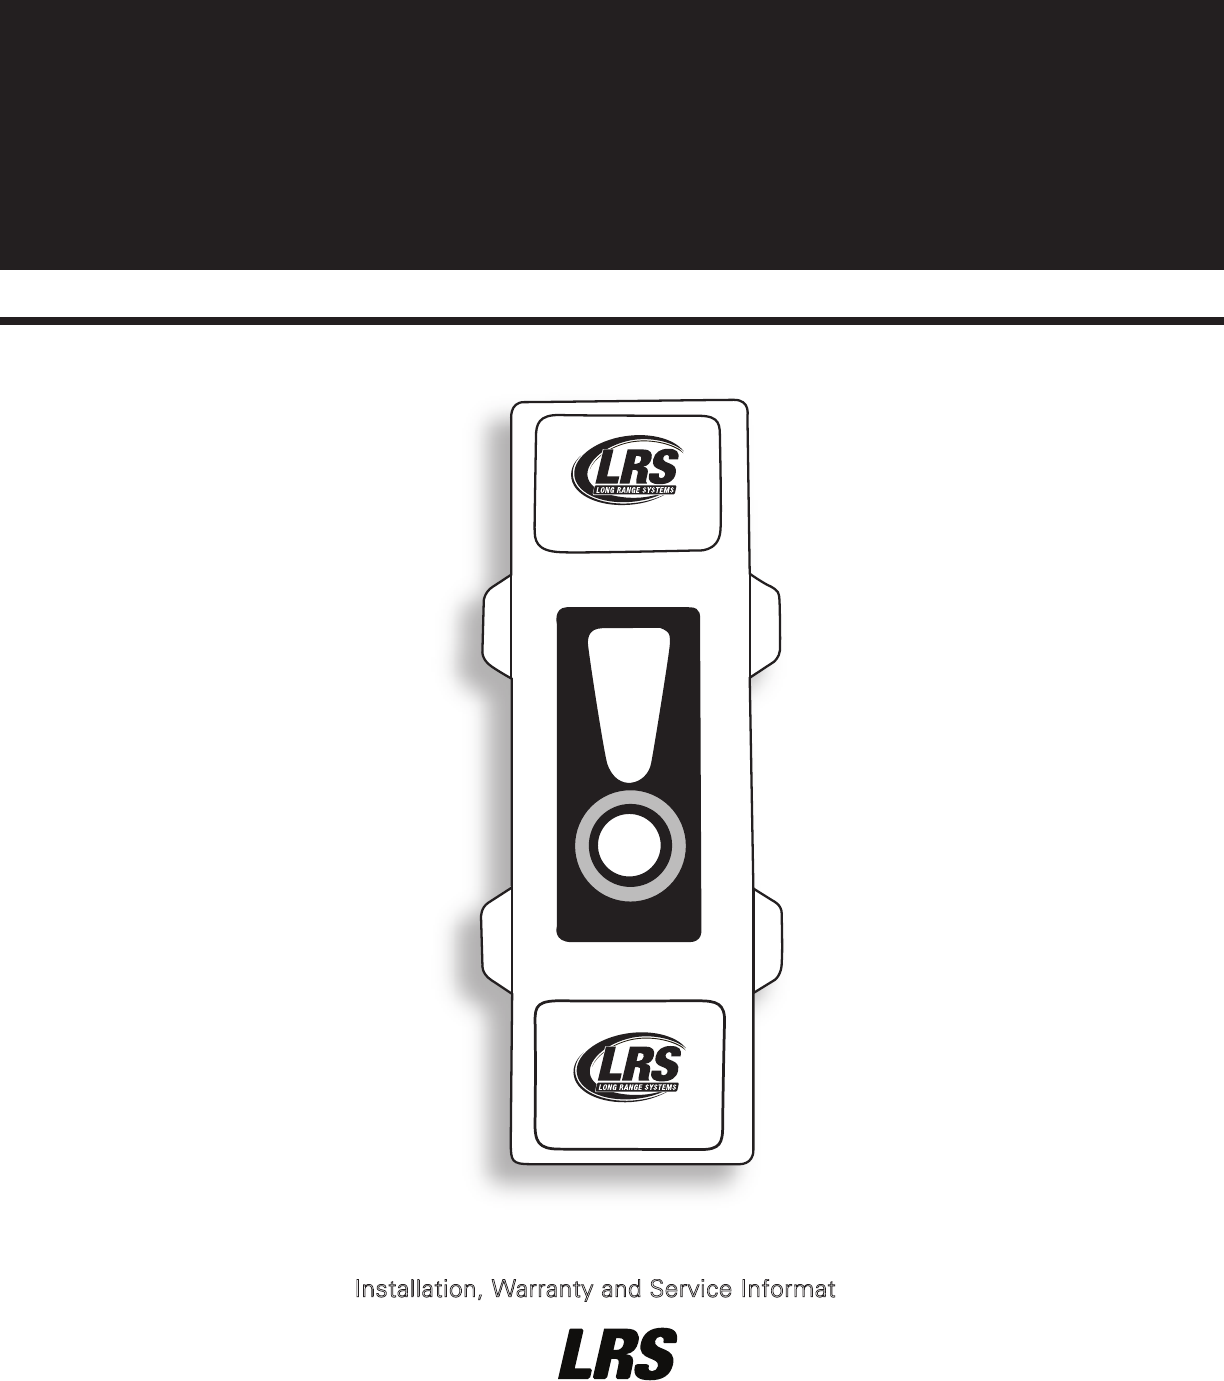
Installation, Warranty and Service Information
Long Range Systems, Inc.
4550 Excel Parkway, Suite 200
Addison, TX 75001
800.437.4996 •www.pager.net
SERVICE
www.pager.net
www.pager.net
Butler XP
P R O G R A M M I N G G U I D E

Table Of Contents
Launch Butler XP Application . . . . . . . . . . . . . . . . . . . . . . . . . . . . . . . .4
Read Butler . . . . . . . . . . . . . . . . . . . . . . . . . . . . . . . . . . . . . . . . . . . . . .5
Configuring a Button Butler . . . . . . . . . . . . . . . . . . . . . . . . . . . . . . . . .5
Button Setup . . . . . . . . . . . . . . . . . . . . . . . . . . . . . . . . . . . . . . . . . . . . . . . . .5
System ID . . . . . . . . . . . . . . . . . . . . . . . . . . . . . . . . . . . . . . . . . . . . . . . . . . . .6
Group Paging Enable . . . . . . . . . . . . . . . . . . . . . . . . . . . . . . . . . . . . . . . . . .6
Beep Enable . . . . . . . . . . . . . . . . . . . . . . . . . . . . . . . . . . . . . . . . . . . . . . . . . .7
Secondary Paging . . . . . . . . . . . . . . . . . . . . . . . . . . . . . . . . . . . . . . . . . . . . .7
Cancel Message . . . . . . . . . . . . . . . . . . . . . . . . . . . . . . . . . . . . . . . . . . . . . .8
Low Battery Page . . . . . . . . . . . . . . . . . . . . . . . . . . . . . . . . . . . . . . . . . . . . .8
Repaging . . . . . . . . . . . . . . . . . . . . . . . . . . . . . . . . . . . . . . . . . . . . . . . . . . . .9
Stop Re-Paging . . . . . . . . . . . . . . . . . . . . . . . . . . . . . . . . . . . . . . . . . . . . . . .9
Save a Configuration . . . . . . . . . . . . . . . . . . . . . . . . . . . . . . . . . . . . . .10
Load an Existing Configuration . . . . . . . . . . . . . . . . . . . . . . . . . . . . . .10
Programming Pagers . . . . . . . . . . . . . . . . . . . . . . . . . . . . . . . . . . . . . .11
Group Pagers . . . . . . . . . . . . . . . . . . . . . . . . . . . . . . . . . . . . . . . . . . . . . . . .12
Troubleshooting . . . . . . . . . . . . . . . . . . . . . . . . . . . . . . . . . . . . . . . . .13
Warranty . . . . . . . . . . . . . . . . . . . . . . . . . . . . . . . . . . . . . . . . . . . . . . .14
Long Range Systems 1Butler XP Program Guide
Launch Butler XP Application
Auto Run
1. Insert the CD into the PC drive, program will Auto-run.
2. Follow the Installation Wizard.
3. Once installation is complete, click on the Windows Start menu.
4. Select All Programs.
5. Select Beach Butler.
6. Select Butler Configurations Utility.
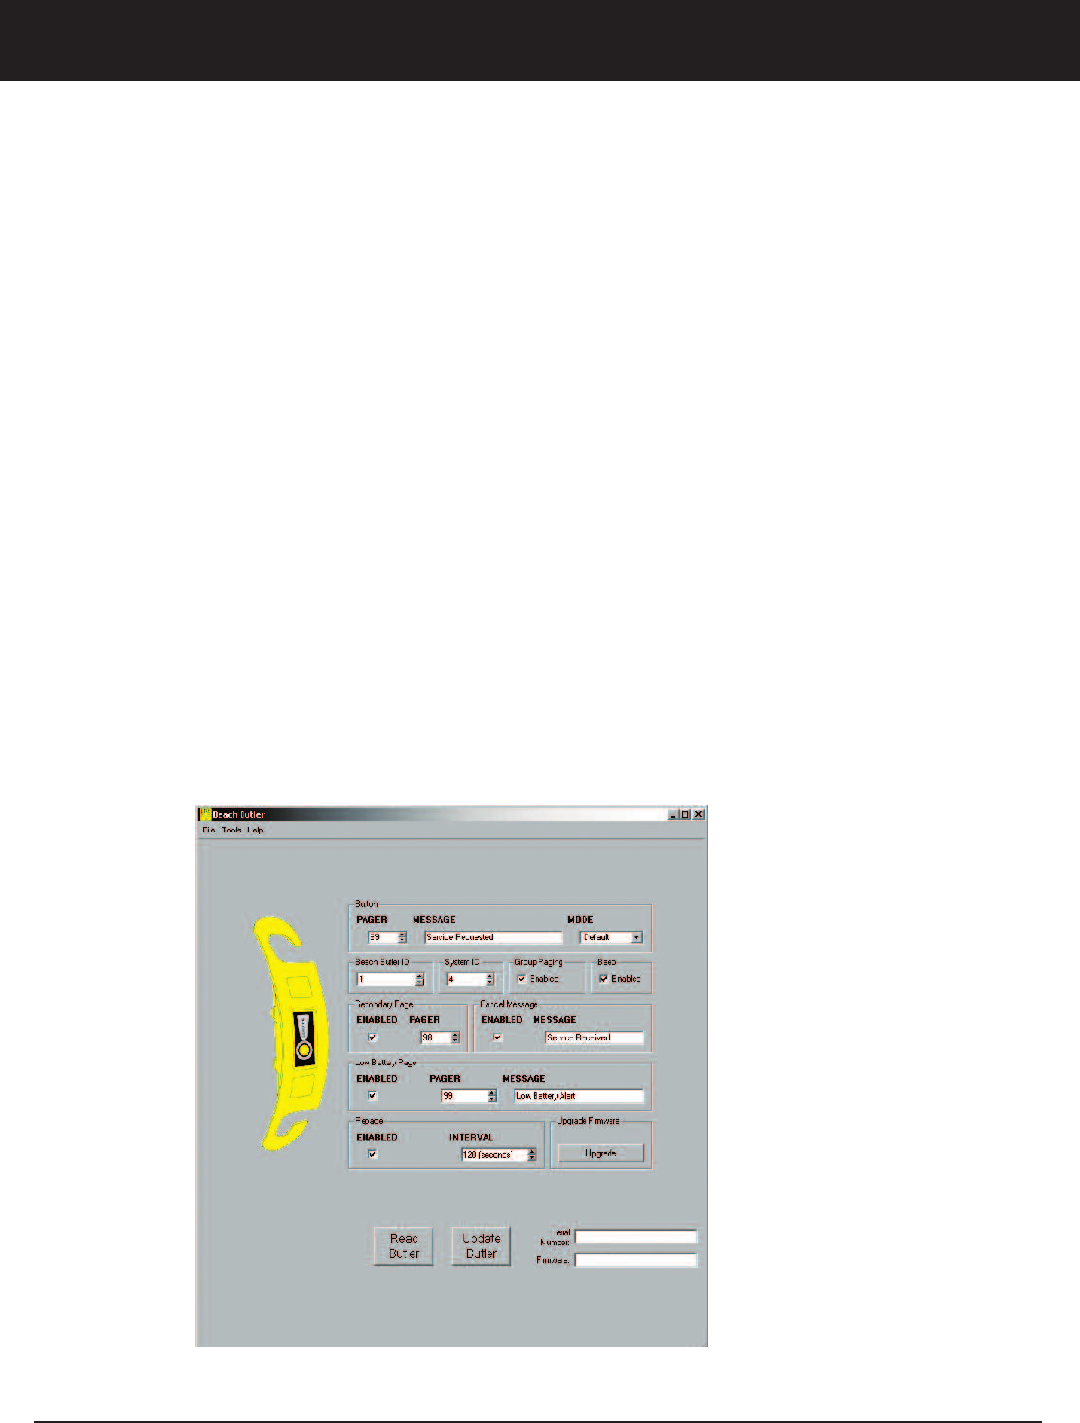
7. The Butler XP configurations screen will display.
Manual Install
1. In the event the program does not automatically run on the PC:
2. Insert the CD into the PC drive.
3. Use Windows Explorer to explore the CD drive.
4. Run the Setup program
5. Proceed with the installation wizard
6. Once installation is complete, click on the Windows Start menu.
7. Select All Programs.
8. Select Beach Butler.
9. Select Butler Configurations Utility.
10. The Butler XP configurations screen will display.
Long Range Systems 2Butler XP Program Guide
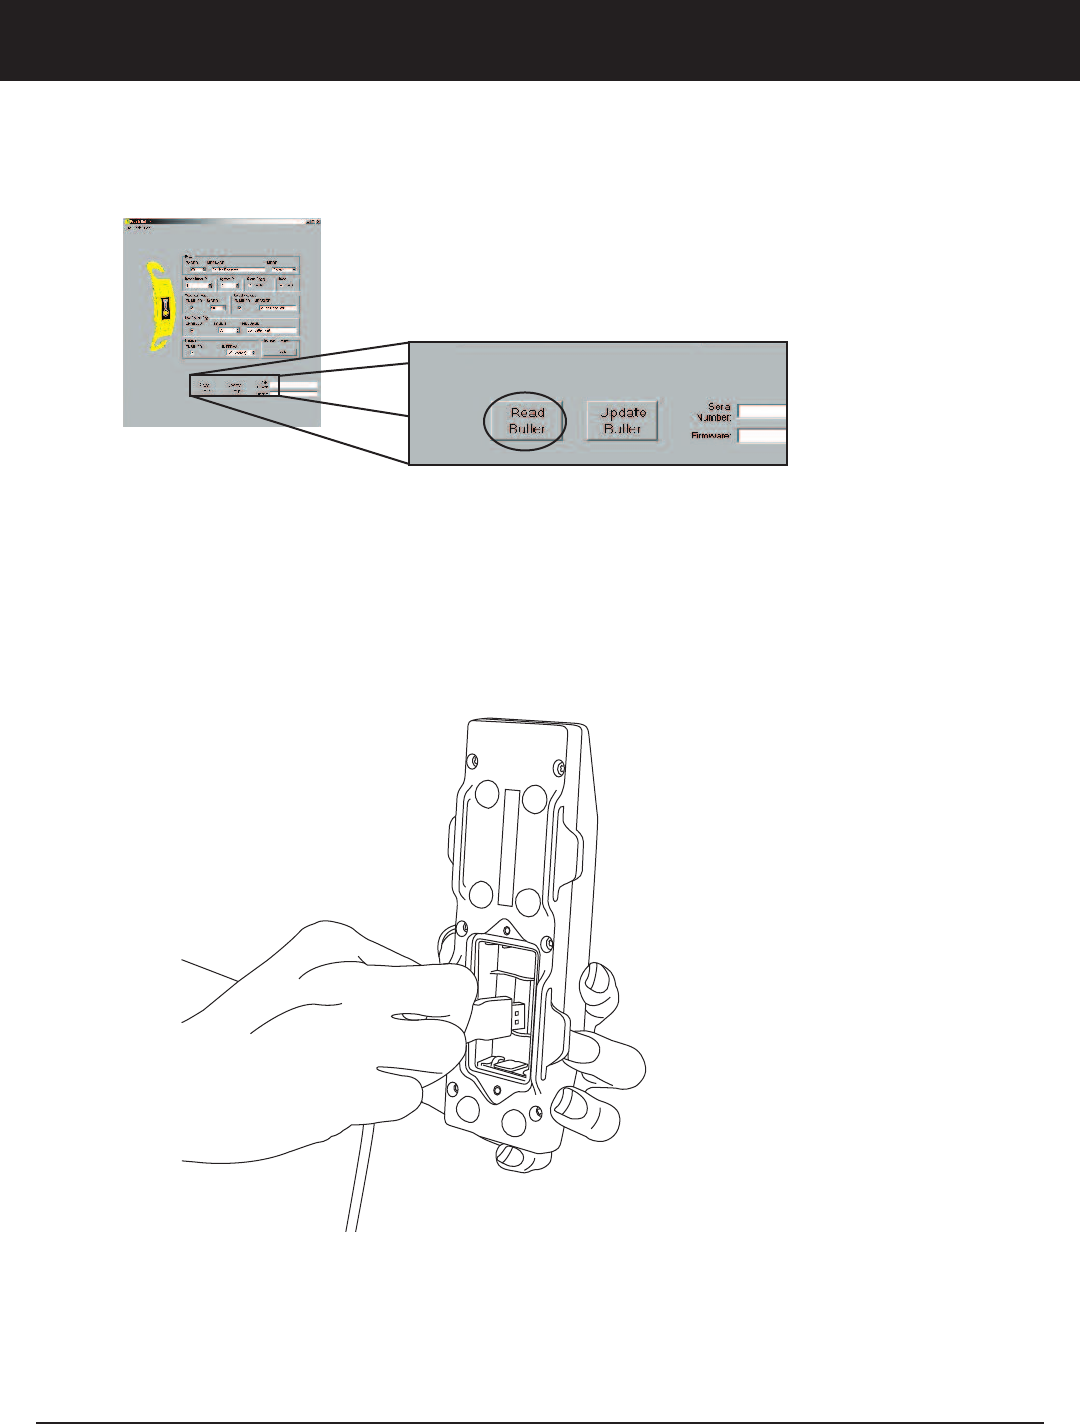
Read Butler
This feature reads the current configuration settings of the Butler. Unit Serial Number and current Firmware
Version will display in the bottom right.
1. Connect one end of the USB cable to the PC.
2. Connect the other end of the USB cable to the Butler XP. The USB connection is located in the
Butler XP’s battery compartment. (Batteries are not required for programming).
3. Press the Read Butler button.
Long Range Systems 3Butler XP Program Guide
Configuring a Button Butler
Note: The Butler XP must be connected to the PC using the USB cable before configuration. .
• A configuration can be modified from a previously saved file, or manually created on screen.
• For any changes to take affect press the Update
• The Update Butler button must be pressed for changes to be applied.
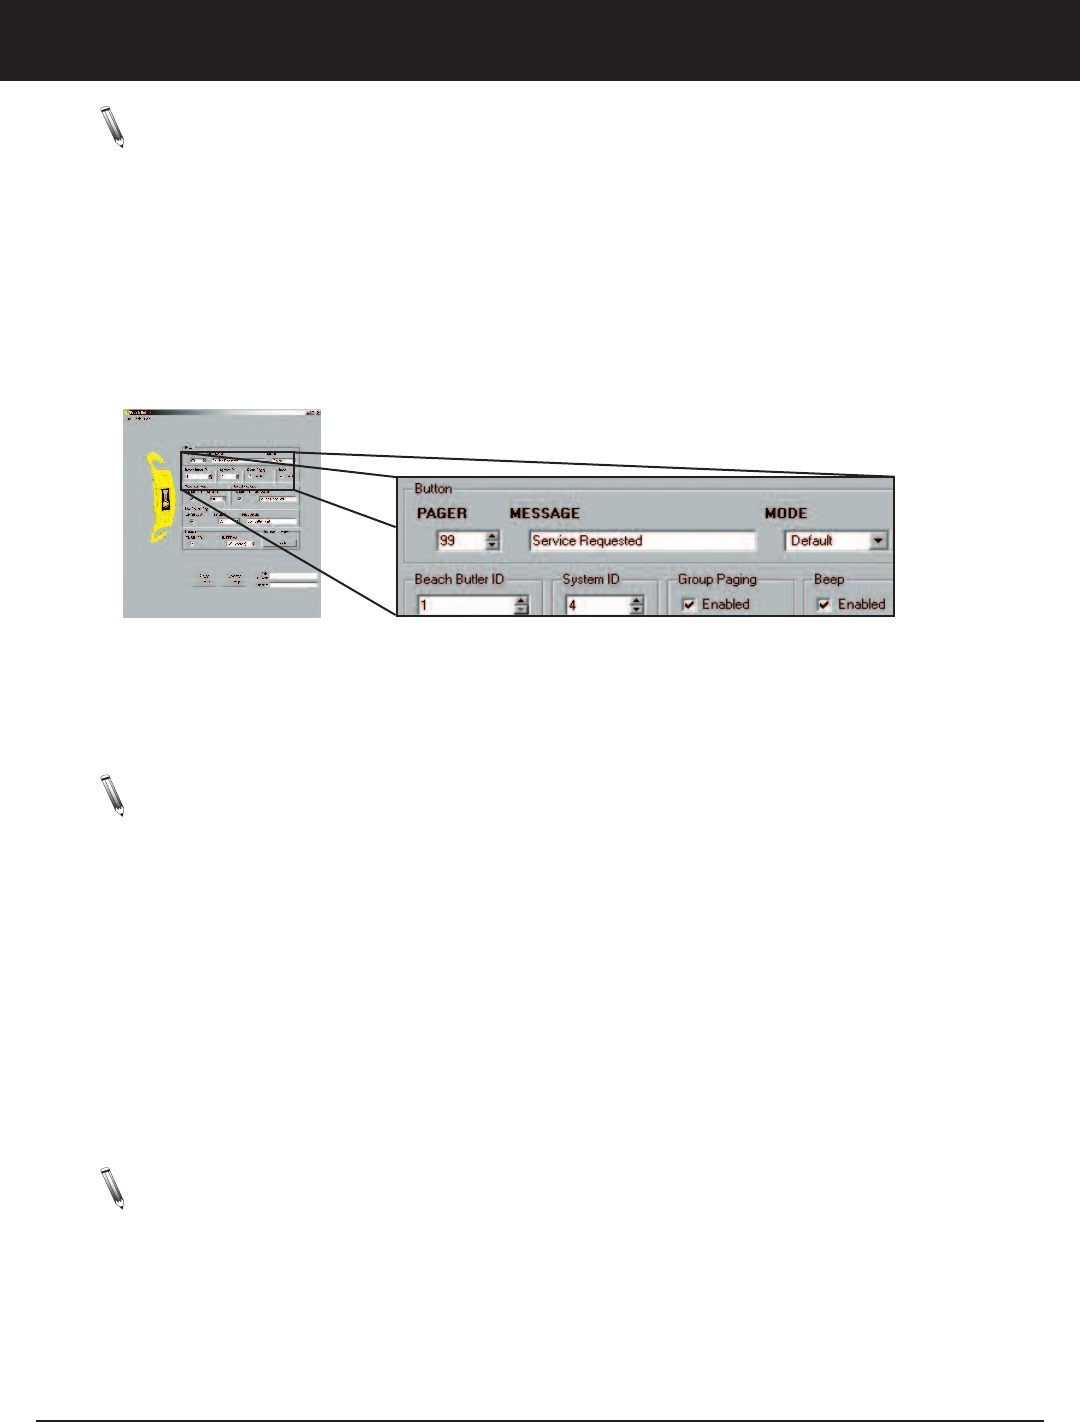
Button Setup
The Button section is used to set the message sent to the pager when the “Service” button on the Butler XP
is pressed.
To set a Message:
1. Under PAGER, enter the pager number that the “Service” button will page.
2. Under MESSAGE, enter the message to be sent to the pager.
3. From the MODE drop down box, select an alert mode.
Note: Firmware versions prior to 1.11 will only support “Mode” set to DEFAULT
Butler ID
The Butler ID is used to identify which Butler unit the service request came from.
Example: If the Butler ID is “5”, and the message is set to “Service”, then the pager message will dis-
play “Service 5”.
To set the Butler ID:
1. Enter the Butler ID number 1 to 9999.
System ID
Note: The System ID should be changed ONLY when interference occurs because of other LRS systems in nearby areas.
Default System ID is 0.
In the event that more than one LRS system is in close geographical proximity, the system ID can be changed
to avoid interference. If the System ID is changed, the System IDs of all pagers also need to be changed (up-
dated) to the same System ID. (See Programming Pagers pg. 11)
Long Range Systems 4Butler XP Program Guide
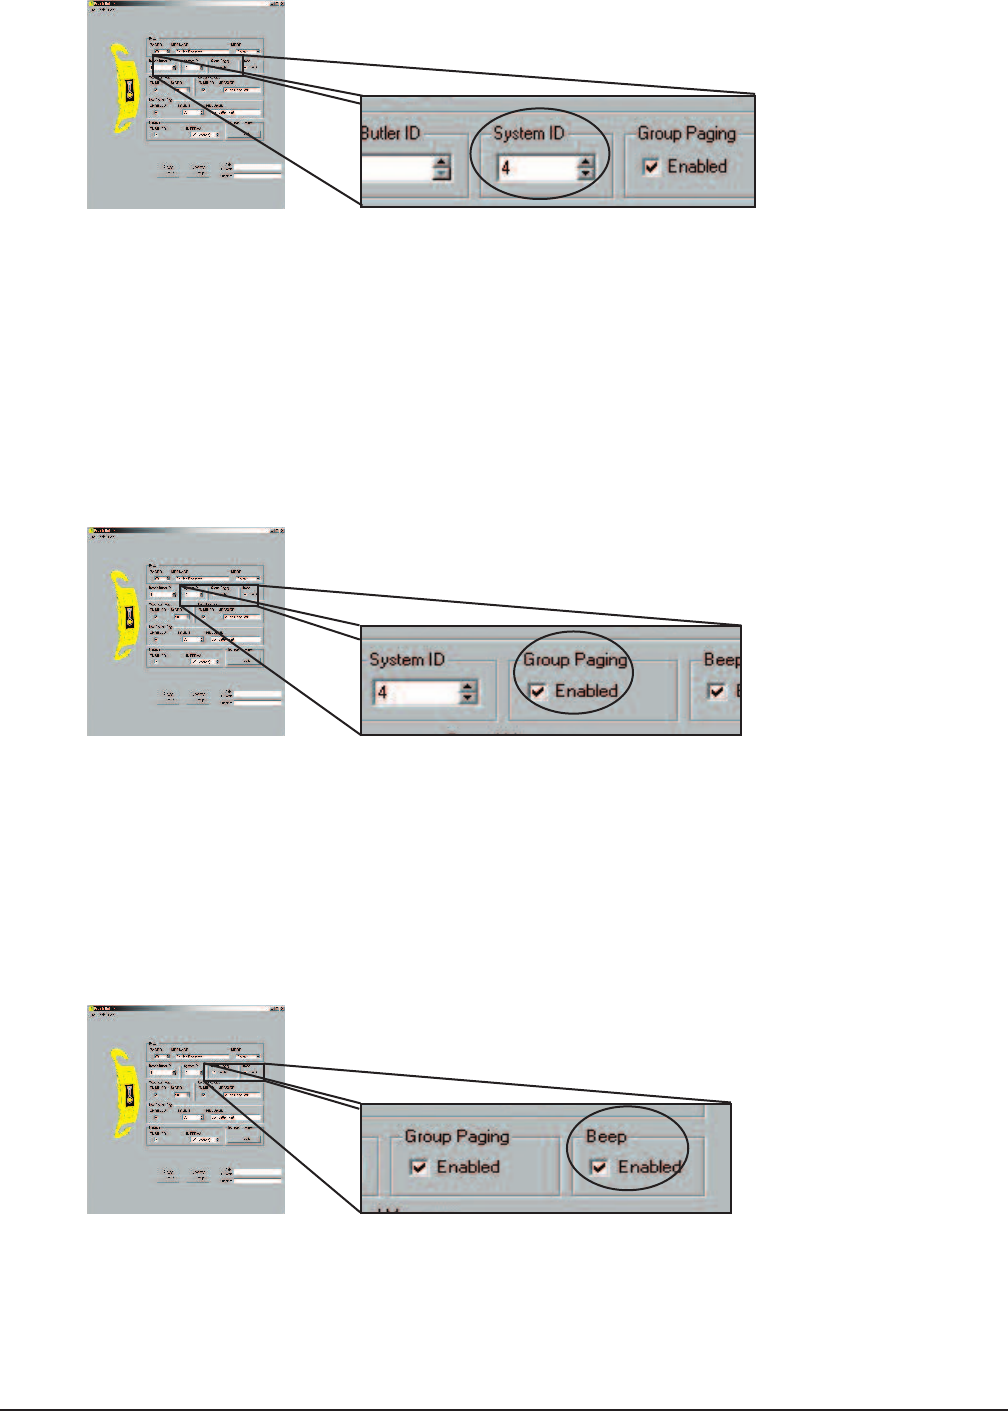
To set System ID:
1. From the System ID drop down box, select the ID number to use.
2. Click the Update Butler button to save the settings.
3. Reprogram pagers used with the system (refer to Programming Pagers on pg. 10).
Group Paging Enable
Group Paging allows you to page 2 or more pagers at the same time. You must program the pagers in the
same group. (See Programming Pagers on pg. 13)
To enable Group Paging:
When group paging is enabled, pager numbers 1-99 will be used to page a “group”. (See p. 10 to con-
figure Group Paging settings)
Beep Enable
This feature will enable or disable the Butler from beeping when the “Service” button is pressed, and when
the USB connection is made.
To set Beep:
Under Beep, click on the Enabled check box to enable or disable (a check mark indicates beep is en-
abled).
Long Range Systems 5Butler XP Program Guide
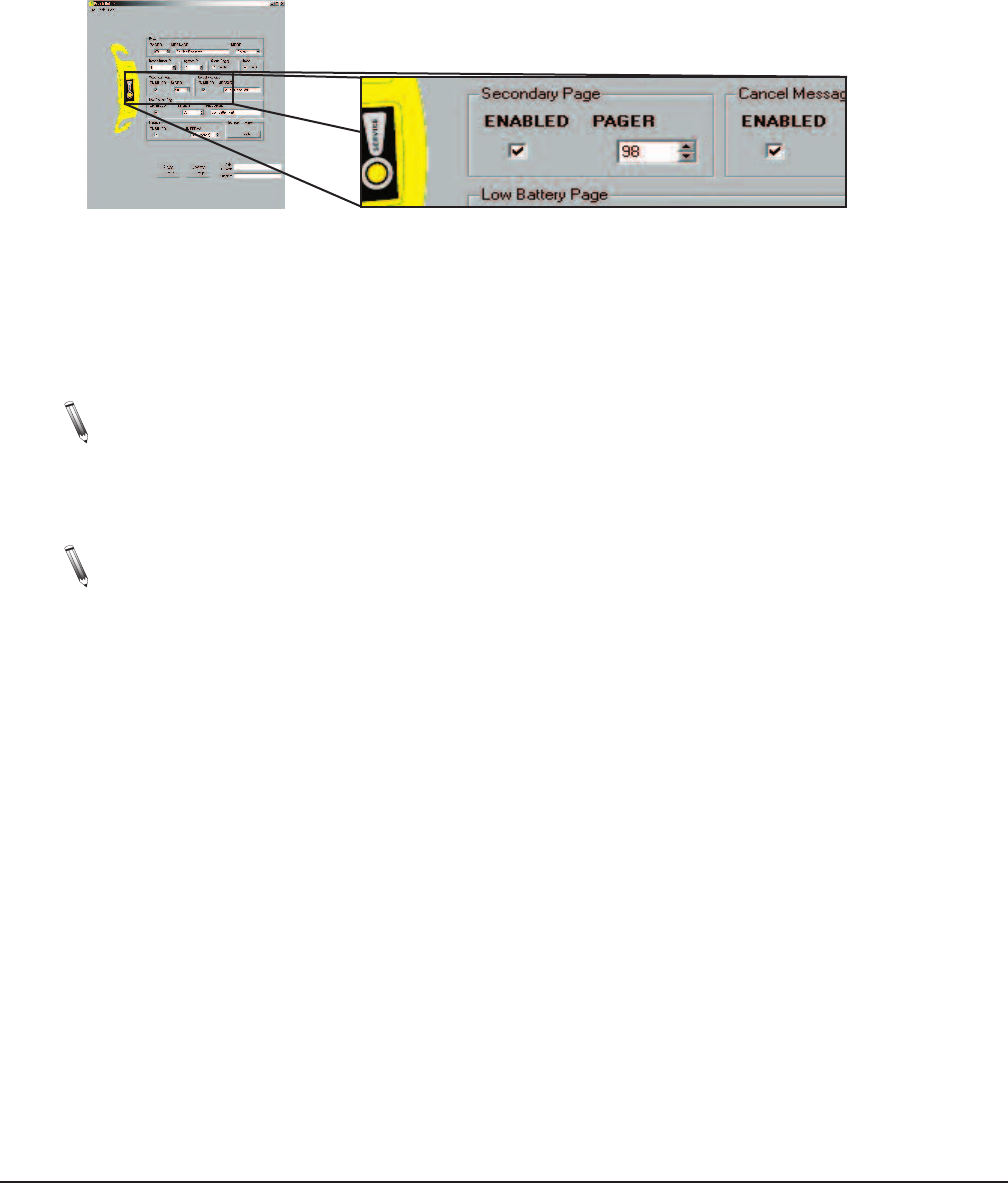
Secondary Paging
The Secondary Paging feature, when enabled, will send a message to a second pager after the third repage
cycle. This feature is useful if you want a backup person to respond to a customer’s request if the first per-
son does not.
Example: Set Message to “Aisle”, and Butler ID to “15”. During repage, the main pager will display
“Aisle 15”. After the third repage, the secondary pager will display “Aisle 15”.
To set Seconday Paging:
1. Enable and set Repaging (see p. 8).
2. Under Secondary Page, click on the Enabled check box to enable or disable (a check mark indicates
secondary page is enabled).
3. From the PAGER drop down box, select the pager number that will receive the secondary page.
Note: If the Repage (p. 8) feature is enabled, the transmitter will repage the main pager at pre-set intervals until
the page is cleared. (See Stop Re-paging, p. 8 for instructions on clearing the page).
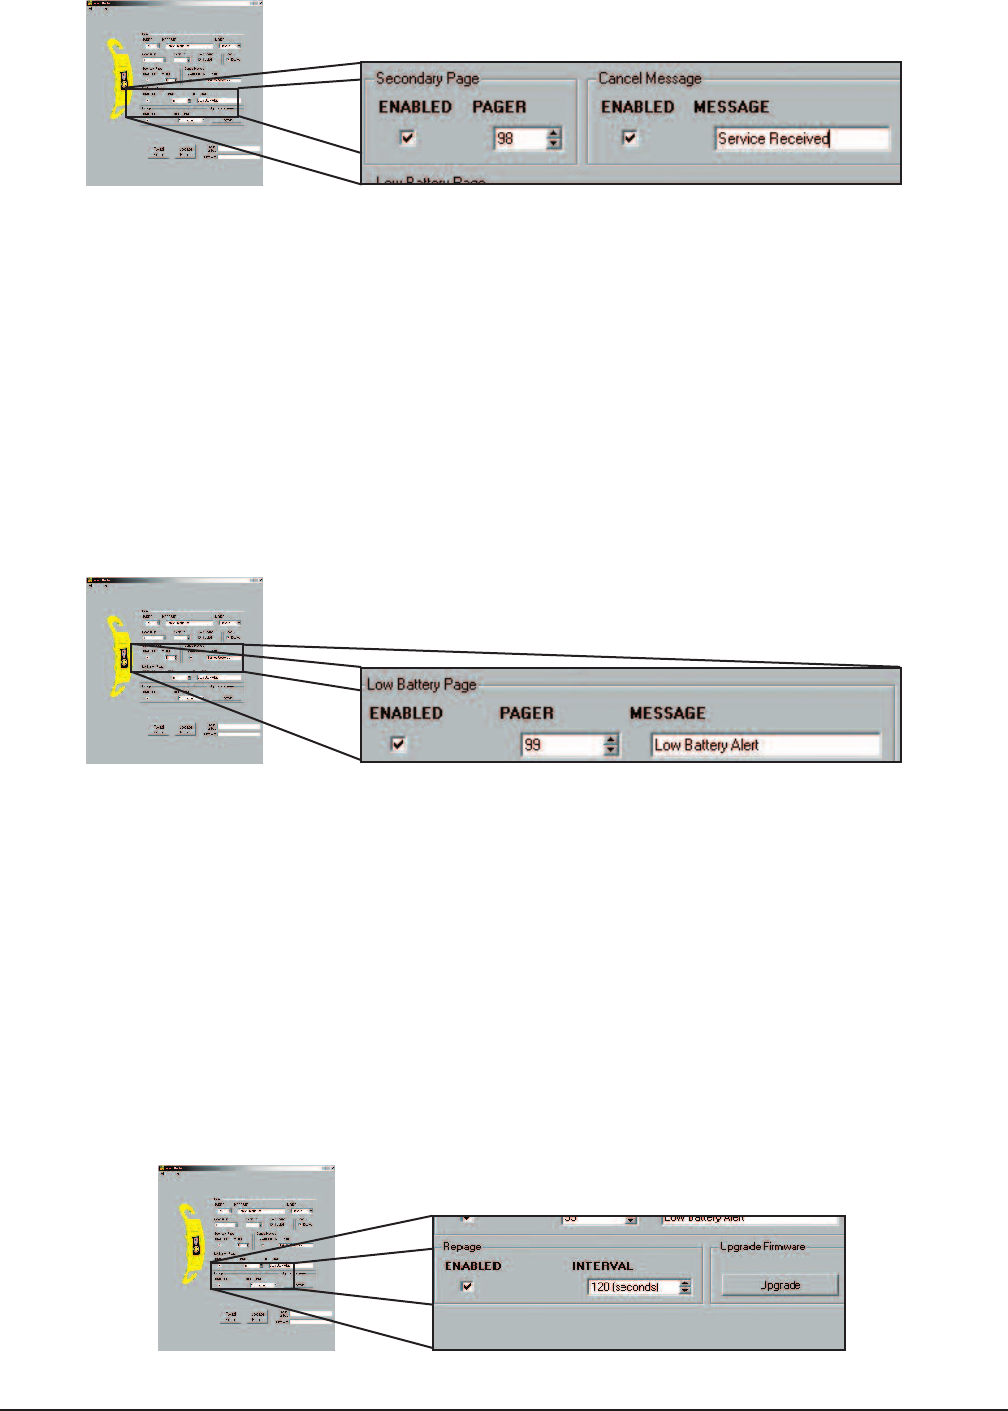
Cancel Message
Note: Secondary Paging must be enabled (see p. 7).
This feature will enable or disable sending a preset cancel message to pagers when a magnet resets the But-
ton Butler.
Example:
IF: 1. Butler ID is set to “15”
2. Cancel message is set to “Cancel”
3. Butler is set to send message “Aisle” to the main pager
4. “Service” button on Butler is pressed
5. Pager displays “Aisle 15”
6. The pager magnet is held over the “Service” button and repaging is stopped (see p. 11)
THEN: The secondary pager will display “Cancel Aisle 15”.
If the page is stopped/canceled after the Secondary Pager goes off, the Secondary Pager will receive “Can-
cel Aisle 15”. This is useful if using more than one pager, so the second person is notified.
Long Range Systems 6Butler XP Program Guide
Long Range Systems 7Butler XP Program Guide
To set Cancel Message:
1. Click on the Enabled check box to enable or disable (a check mark indicates input is enabled.)
2. Enter a message.
Low Battery Page
This sends a message to the pager to add new batteries.
1. Under Low Battery Page, click on the Enabled check box to enable or disable (a check mark indi-
cates low battery page is enabled).
2. Enter the pager number this will alert.
3. Enter a message. Once set, the function automatically alerts the selected pager when the batter-
ies get low.
Example:
IF: Butler XP with ID of 5 has low batteries
THEN: Pager will display “Low Battery 5”
Repaging
This feature will enable or disable the re-paging feature. When the “Service” button is pressed, the Butler
transmitter will resend the message to the pager (at pre-set time intervals) until the page is cleared.
To set Re-paging:
1. Click on Enabled box to enable or disable (a check mark indicates input is enabled).
2. Enter a Repage time. Must be 10 seconds or more.
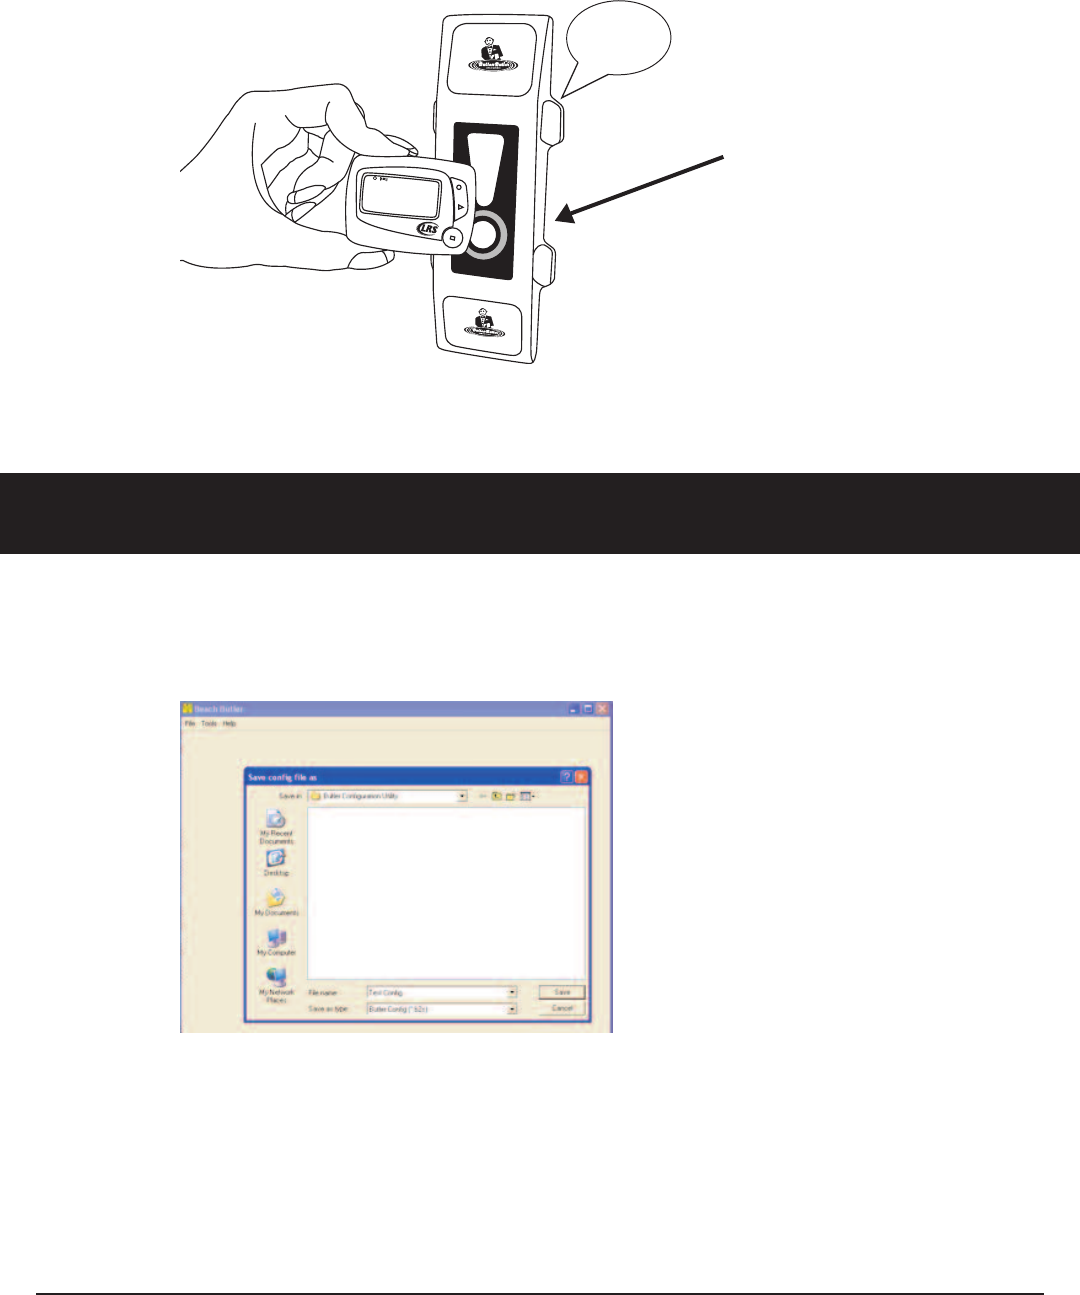
Stop Re-paging
To stop repaging, hold the pager magnet over the Service button for 1 second. User will hear a beep to in-
dicate repaging has ended.
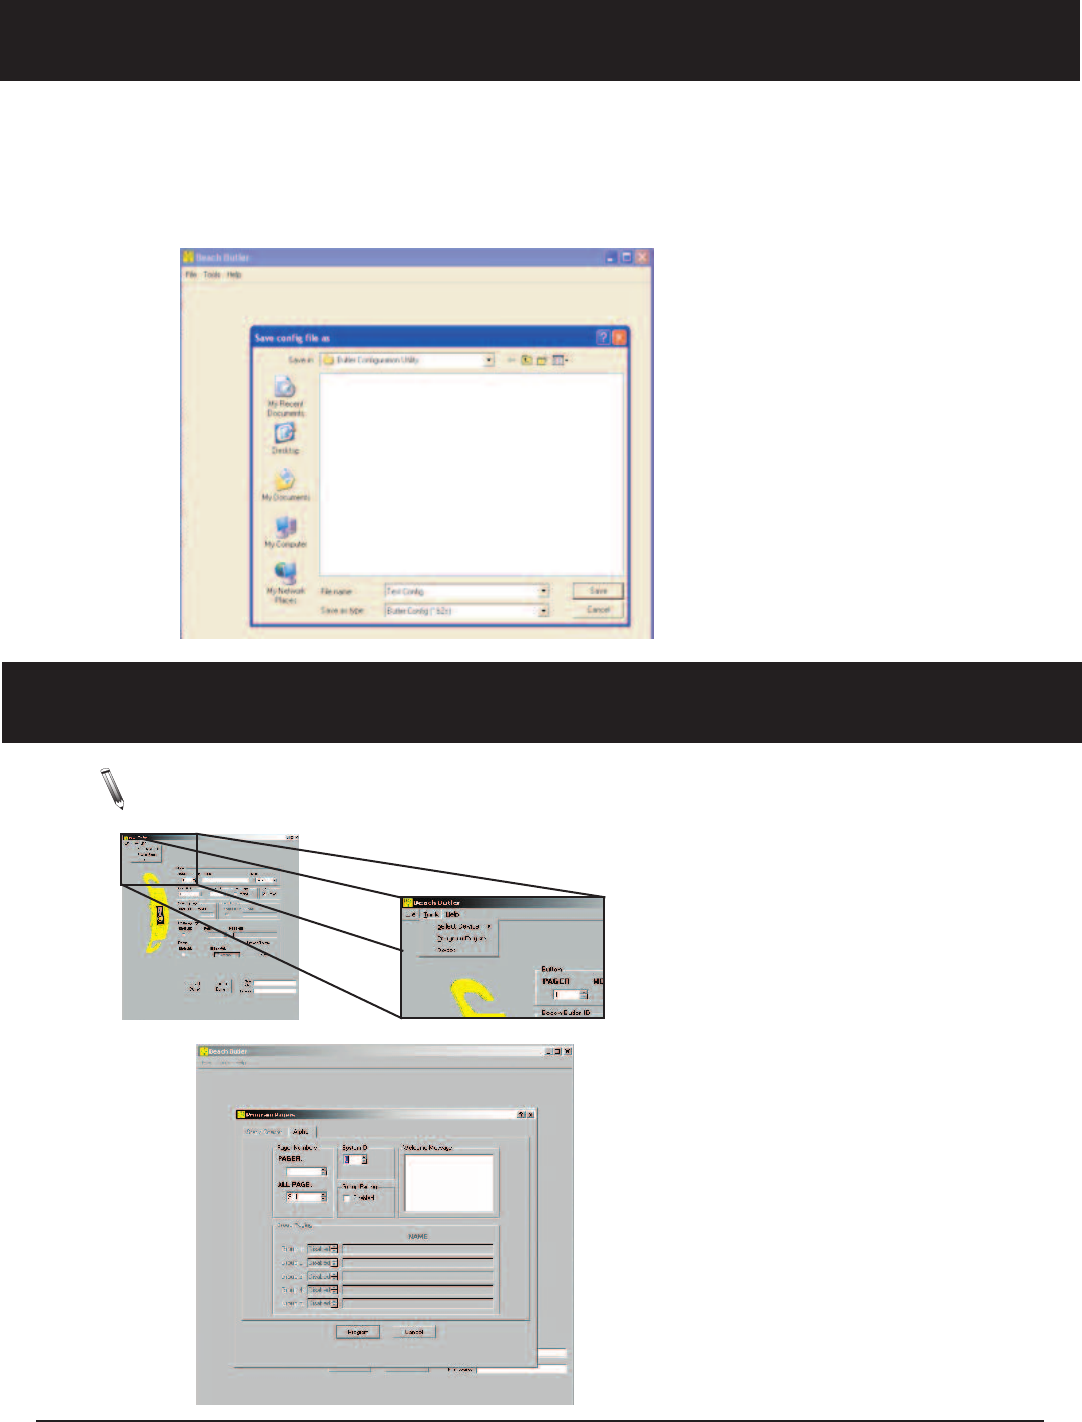
Save a Configuration
This feature allows the user to store a read or modified configuration from Button Butlers. File will save to
a .b2c extension. To save a Configuration:
1. Select File, Save Configuration.
2. Enter file name, select destination, and Save.
Responded
www.pager.net
www.buttonbutler. com
www.buttonbutler. com
SERVICE
“BEEP”
Long Range Systems 8Butler XP Program Guide
Hold magnet
over circled area
to stop repaging.
Load an Existing Configuration
This feature allows the user to load a preset configuration to Button Butlers. To Load:
1. Select File, Load Configuration.
2. Select configuration file and Open.
3. Press Update Unit (USB cable must be attached to the Button Butler).
Programming Pagers
Note: Before programming a pager, make sure the pager is turned OFF.
The Button Butler does not operate with Star Pagers.
Long Range Systems 9Butler XP Program Guide

Programming Individual Alpha Pagers
1. Select from the menu Tools, then Program Pagers.
2. Select the Alpha tab.
3. Set the System ID. Recommended System ID = 0.
Note: Must match System ID of Button Butler
4. Set the Pager Number and the All Page number. (All Page is typically 911)
5. Remove the battery from the pager.
6. Replace the battery and wait for the screen display to go blank (after about 10 seconds).
7. Press Program to program the pager. A message box will appear to indicate programming.
8. The pager will beep four times to indicate it is being programmed. Programming is complete
when the pager stops beeping.
9. Repeat steps 3-6 to program any additional pagers.
Group Paging
1. To enable, click “Enabled” under Group Paging
Note: If Group Paging is enabled:
• 1-99 are reserved for group numbers.
• A pager number can belong to a maximum of 5 groups.
• Assigning pager numbers must start at 100 instead of 1.
• User may also enter optional Group Names.
Example:
If: Group 1 = 27, and Group Name = Sales
Then: When you select “27” (under PAGER) in the Button section of the Button Butler configuration
screen, then when the “Service “ button is pushed, all the pager numbers in the Sales group #27
will be paged at the same time.
To program pagers into groups:
1. Select Tools from the menu.
2. Select Program Pagers.
3. Select the Alpha tab.
4. Check the Group Paging enabled check box.
5. Under the Group Paging section, enter your group settings.
6. Set the System ID. Recommended System ID = 0.
Note: Must match System ID of Button Butler
7. Set the Pager Number
Note: Be sure that pager numbering begins at 100
8. Set the All Page number. (All Page is typically 911)
9. Confirm all settings before continuing.
10. Remove the battery from the pager.
Long Range Systems 10 Butler XP Program Guide

11. Replace the battery and wait for the screen display to go blank (wait about 10 seconds).
12. Press Program to program the pager. A message box will appear to indicate programming.
13. The pager will beep four times to indicate it is being programmed. Programming is complete
when the pager stops beeping.
14. Repeat steps 4-6 to program any additional pagers.
Troubleshooting
In order for your Button Butler to alert a pager, the Button Butler must be programmed on the same System
ID as the pager, and the pager number must be programmed into the Button Butler.
To verify the pager’s System ID:
1. Remove the battery from the pager
2. Reinsert the battery and read the display.
Example: If Pager Number = 1, Page All = 911, System ID = 0
The display will read:
• C1: [0]1 Pager Number (1)
• C2: [0]911 Page All (911)
• C3: [0]0 System ID (0)
To verify the Button Butler’s System ID:
1. Plug one end of the USB to the PC and the other end to the Button Butler.
2. Open the Butler Configurations Utility.
3. Click the Read Butler button.
4. The current system ID will be displayed under System ID
Long Range Systems 11 Butler XP Program Guide

WARRANTY
Long Range Systems Inc warrants this product against any defects that are due to faulty material or work-
manship for a two-year period after the original date of consumer purchase. The warranty does not include
damage to the product resulting from accident, misuse, improper electrical connection, or failure to charge
the product within 30 days of receipt. Rechargeable pagers are required to stay on charge while not in use.
Rechargeable pagers that are left off of charge for longer than 30 days will have a negative impact on the life
of the batteries requiring them to be replaced thus voiding the warranty. If this product should become de-
fective within the warranty period, we will repair or replace it with an equivalent product, free of charge.
LRS will return your product via UPS ground shipping. All warranty claims must be initiated through our cus-
tomer service department.
No return or replacement can be received without prior authorization and the proper
RMA Number posted to the outside of the shipping container. To receive an RMA# call an LRS office:
Germany: +49 (0) 531 2354725
Brazil: (11) 4152 8416
USA: 214.553.5308
Office Locations:
LRS Germany: Peterskamp 41, 38108 Braunschweig, Germany
LRS Brasil: Av. Dr. Yojiro Takaoka, 4384, 7o andar, Sala 704, Alphaville – CEP 06541-038, Brasil
U.S. Headquarters: Long Range Systems, Inc., 4550 Excel Pkwy, Suite 200, Addison, TX 75001
Copyright © 2014, Long Range Systems, Inc. All Rights Reserved
This document contains proprietary information of Long Range Systems, Inc. (LRS) and is intended for use
only by it’s employees or customers. None of the material contained herein may be copied, reproduced, re-
published, downloaded, displayed, posted, or transmitted in any form or by any means, including but not lim-
ited to, electronic, mechanical, photocopying, recording, or otherwise without the prior written permission
of LRS. Additional copies of this manual may be obtained by contacting LRS.
Screen displays, keyboard layouts, hardware descriptions, or software are proprietary to LRS and are sub-
ject to copyright and other intellectual property rights of LRS and shall be treated in accordance with the
previous paragraph.
All attempts have been made to make the information in this document complete and accurate. LRS is not
responsible for any direct or indirect damages or loss of business resulting from inaccuracies or omissions.
Specifications and other information contained within this document are subject to change without notice.
Long Range Systems 12 Butler XP Program Guide

FCC STATEMENT
NOTE: This equipment generates, uses and can radiate radio frequency energy and, if not installed and used
in accordance with the instructions, may cause harmful interference to radio communications. However,
there is no guarantee that interference will not occur in a particular installation. If this equipment does cause
harmful interference to radio or television reception, which can be determined by turning the equipment off
and on, the user is encouraged to try to correct the interference by one or more of the following measures:
- Reorient or relocate the receiving antenna.
- Increase the separation between the equipment and receiver.
- Connect the equipment into an outlet on a circuit different from that to which the receiver is
connected.
- Consult the dealer or an experienced radio/TV technician for help.
RF Warning Statement:
This device must be operated in a stationary table top, wall or pole mount configuration. It should not be held
or carried while in operation. The user is cautioned to observe a minimum separation distance of at least 20
centimeters (8 inches) from the body of the user or nearby persons while transmitting out the device.
Long Range Systems 13 Butler XP Program Guide
XU-0031 042514