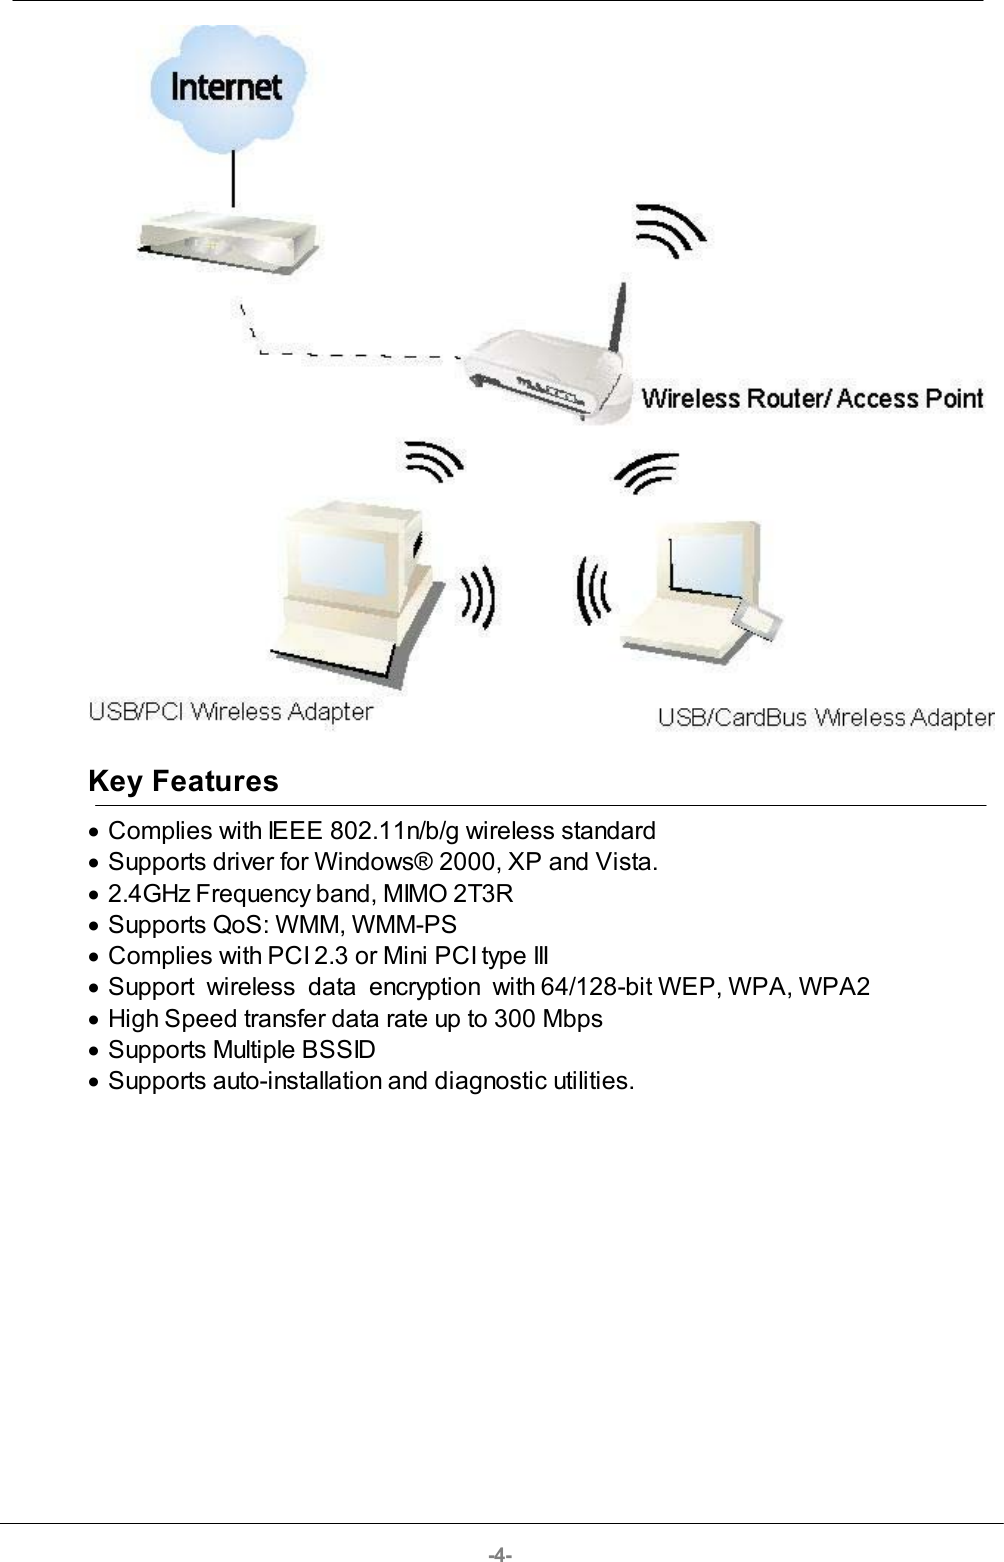
Loopcomm Technology LP-7635 Wireless PCI Card User Manual User Manual
Loopcomm Technology,.Inc. Wireless PCI Card User Manual
UserManual.wiki
>
Loopcomm Technology
>
LP 7635 User Manual
User Manual
Navigation menu
Upload a User Manual
Namespaces
Wiki Guide
HTML
PDF
Info
Views
User Manual
Discussion / Help
Navigation

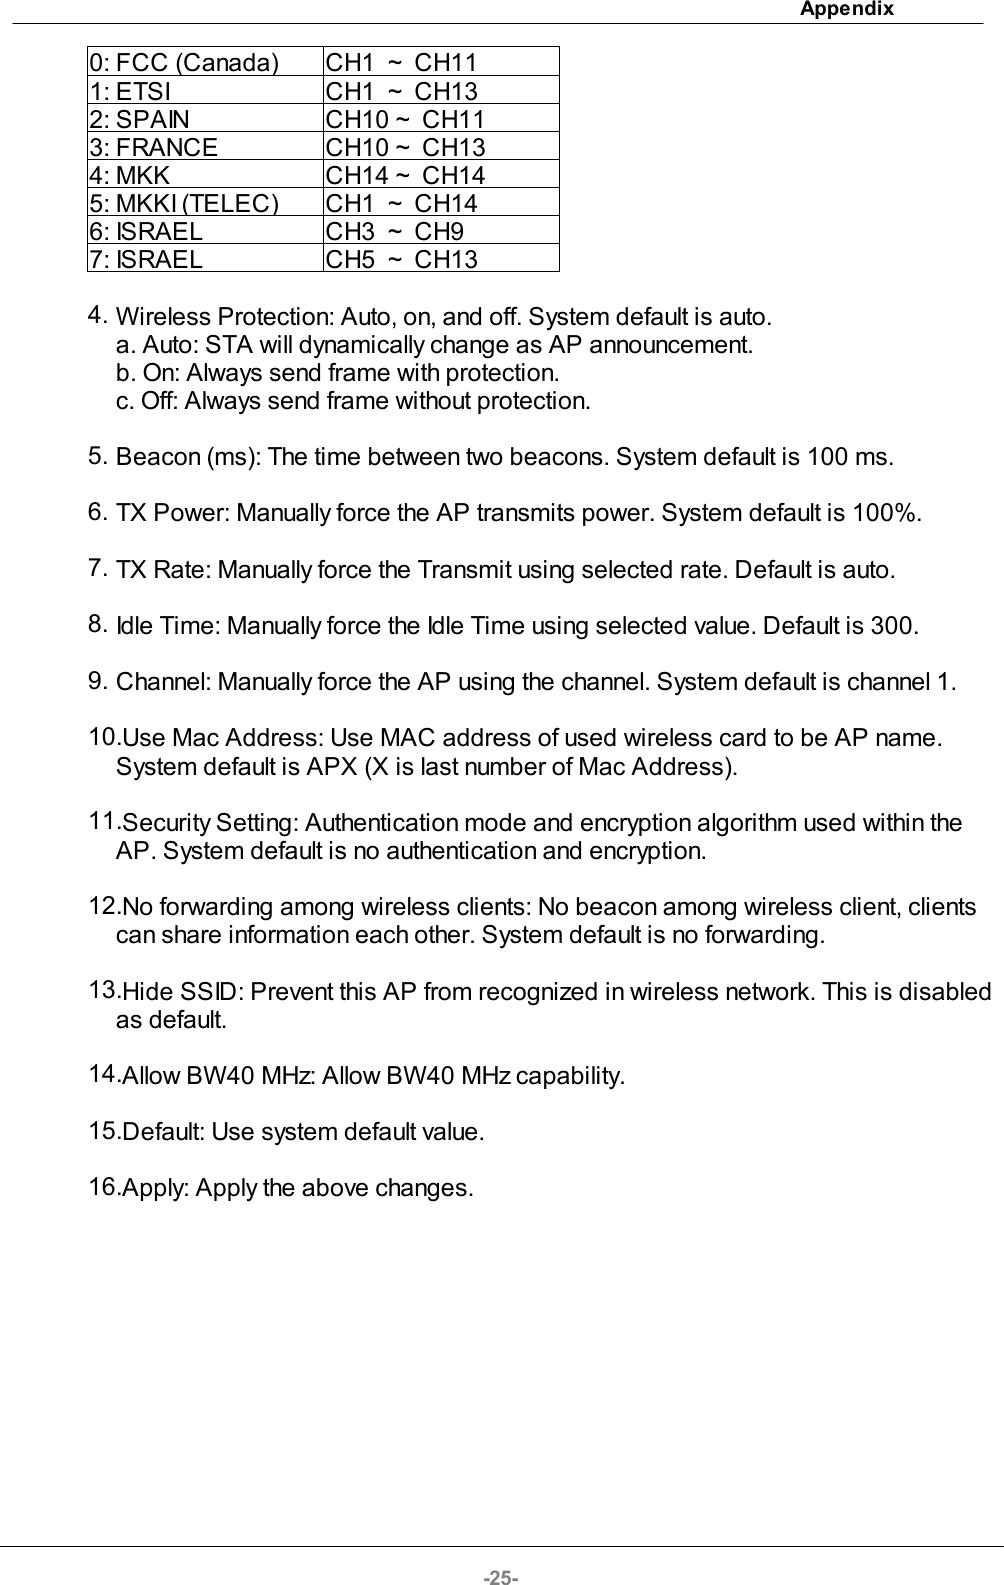
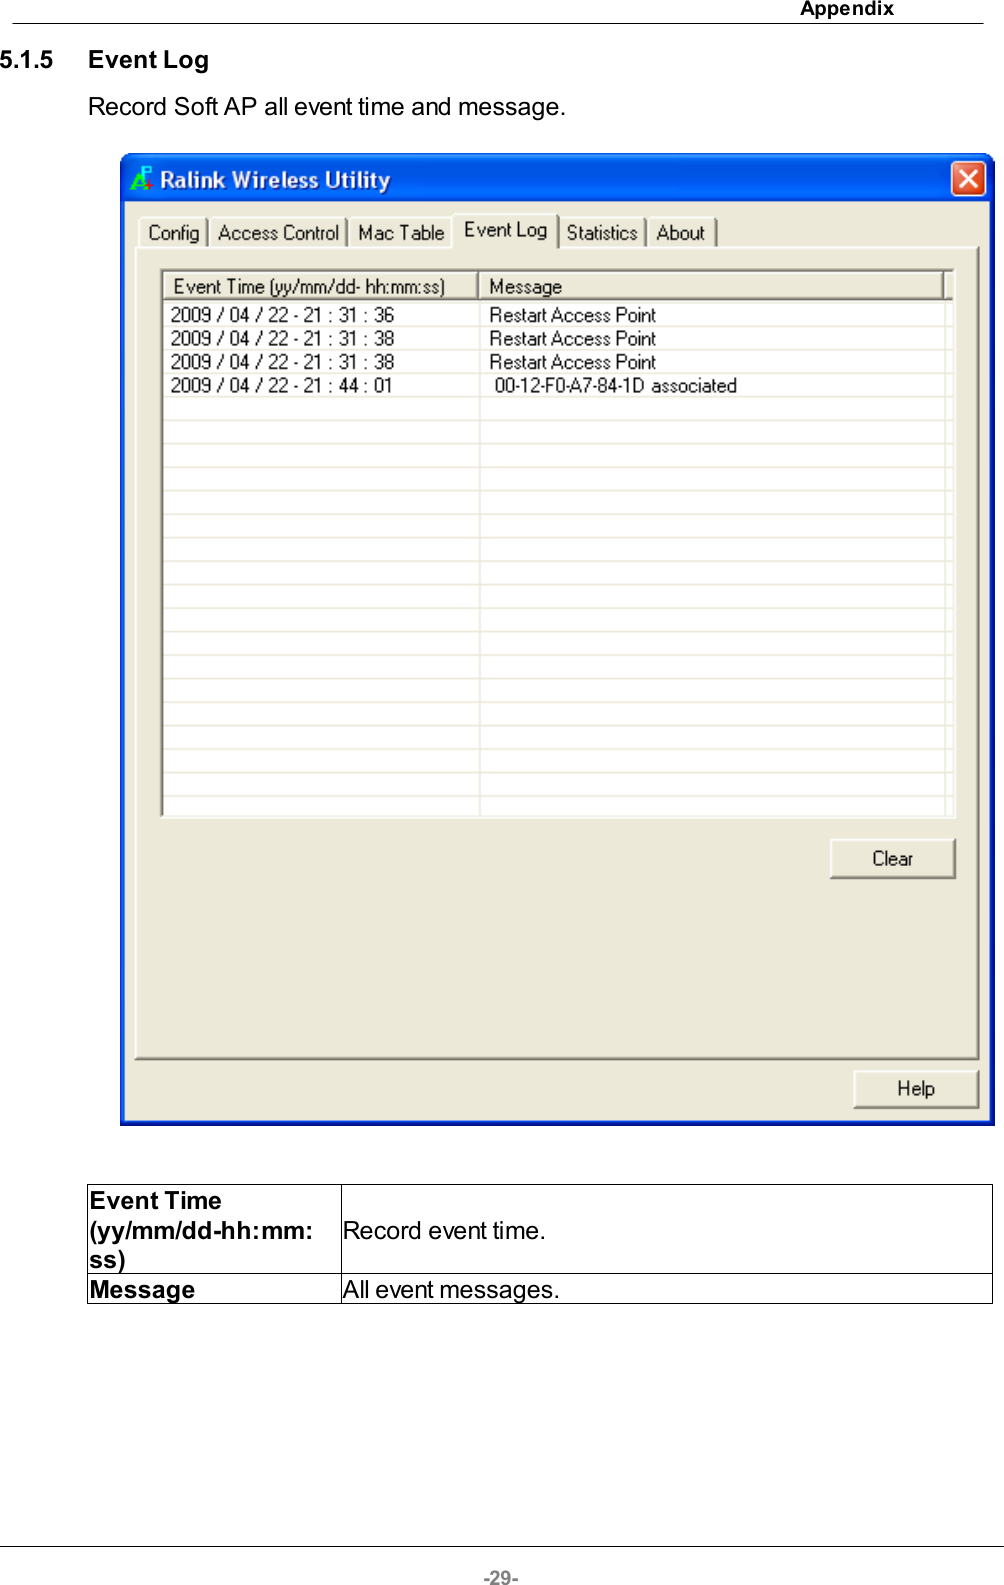
![-24-5.1.1 ConfigThis page provides overall configuration to this adapter. Please find the followingitems for identification to each field.1. SSID: AP name of user type. User also can select [Use Mac Address] to displayit.2. Wireless Mode: Select wireless mode. 802.11 b/g mix, 802.11b only, 802.11gonly, 802.11 b/g/n mix mode are supported. When wireless card is 802.11n,system default is 802.11 b/g/n mix; Otherwise system default is 802.11 b/g mix(802.11 b/g/n mix selection item only exists for b/g/n adapter).3. Country Region Code: eight countries to choose. Country channel list:ClassificationRange](https://usermanual.wiki/Loopcomm-Technology/LP-7635/User-Guide-1214857-Page-24.png)