Lorex Technology WL2004 2.4 GHz Video Baby Monitor (Monitor Unit) User Manual LW2004 MANUAL EN R1
Lorex Technology Inc. 2.4 GHz Video Baby Monitor (Monitor Unit) LW2004 MANUAL EN R1
UserManual.wiki
>
Lorex Technology
>
WL2004 User Manual
Users Manual
Navigation menu
Upload a User Manual
Namespaces
Wiki Guide
HTML
PDF
Info
Views
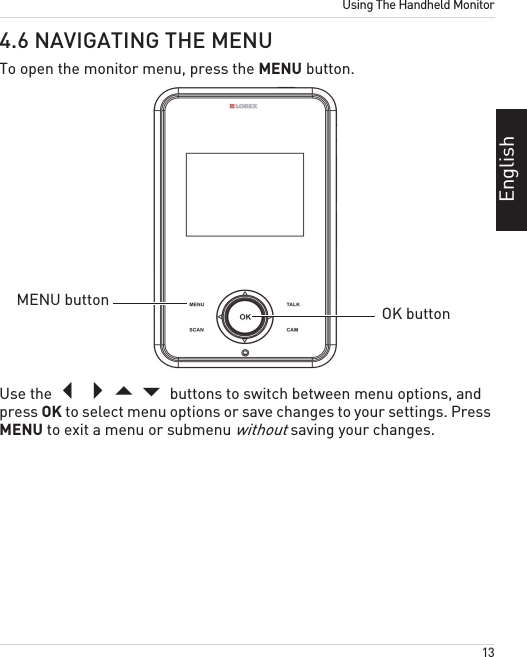
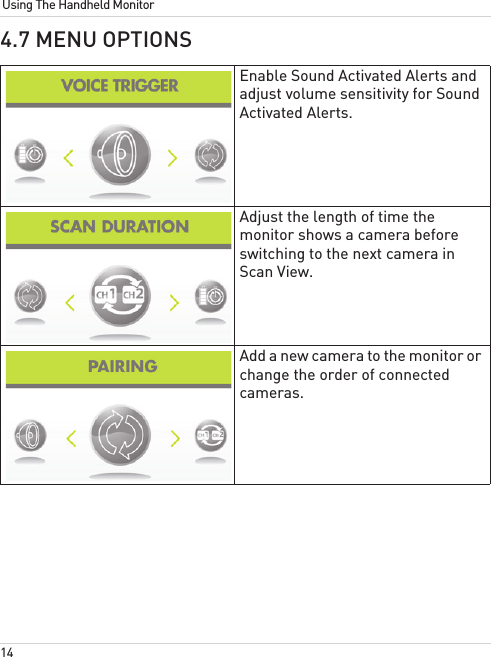
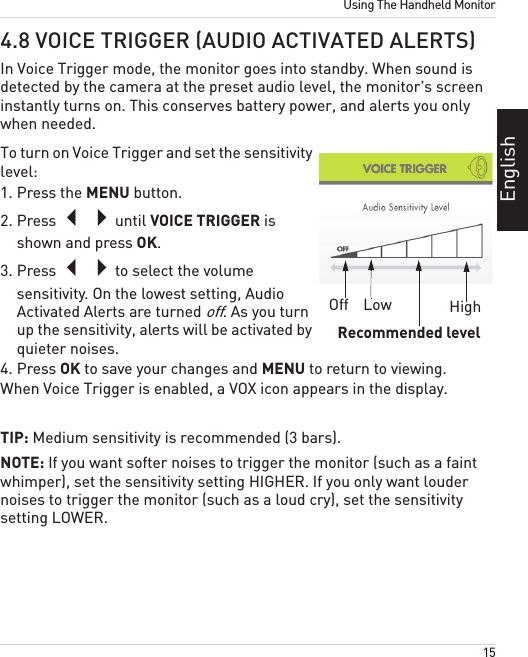
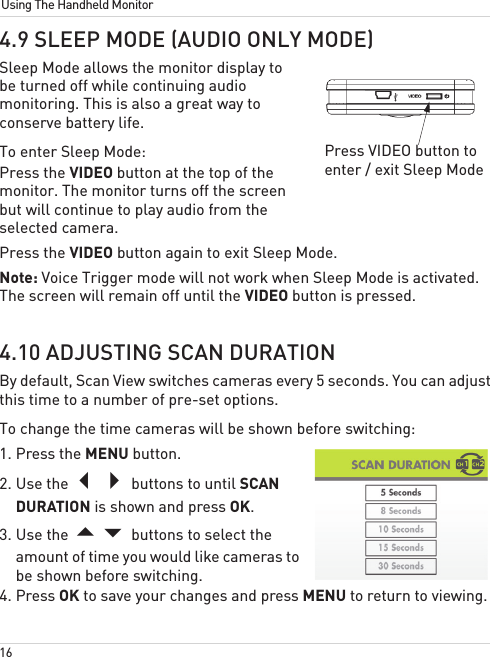
User Manual
Discussion / Help
Navigation