Lorex Security And Surveillance Cameras With Touch Monitor Quick Start Guide LH300_Touchscreen_QSG_EN_V3
2014-07-19
: Lorex Lorex-Security-And-Surveillance-Cameras-With-Touch-Monitor-Quick-Start-Guide lorex-security-and-surveillance-cameras-with-touch-monitor-quick-start-guide lorex pdf
Open the PDF directly: View PDF ![]() .
.
Page Count: 2
1
Edge Touch Screen Monitor Setup
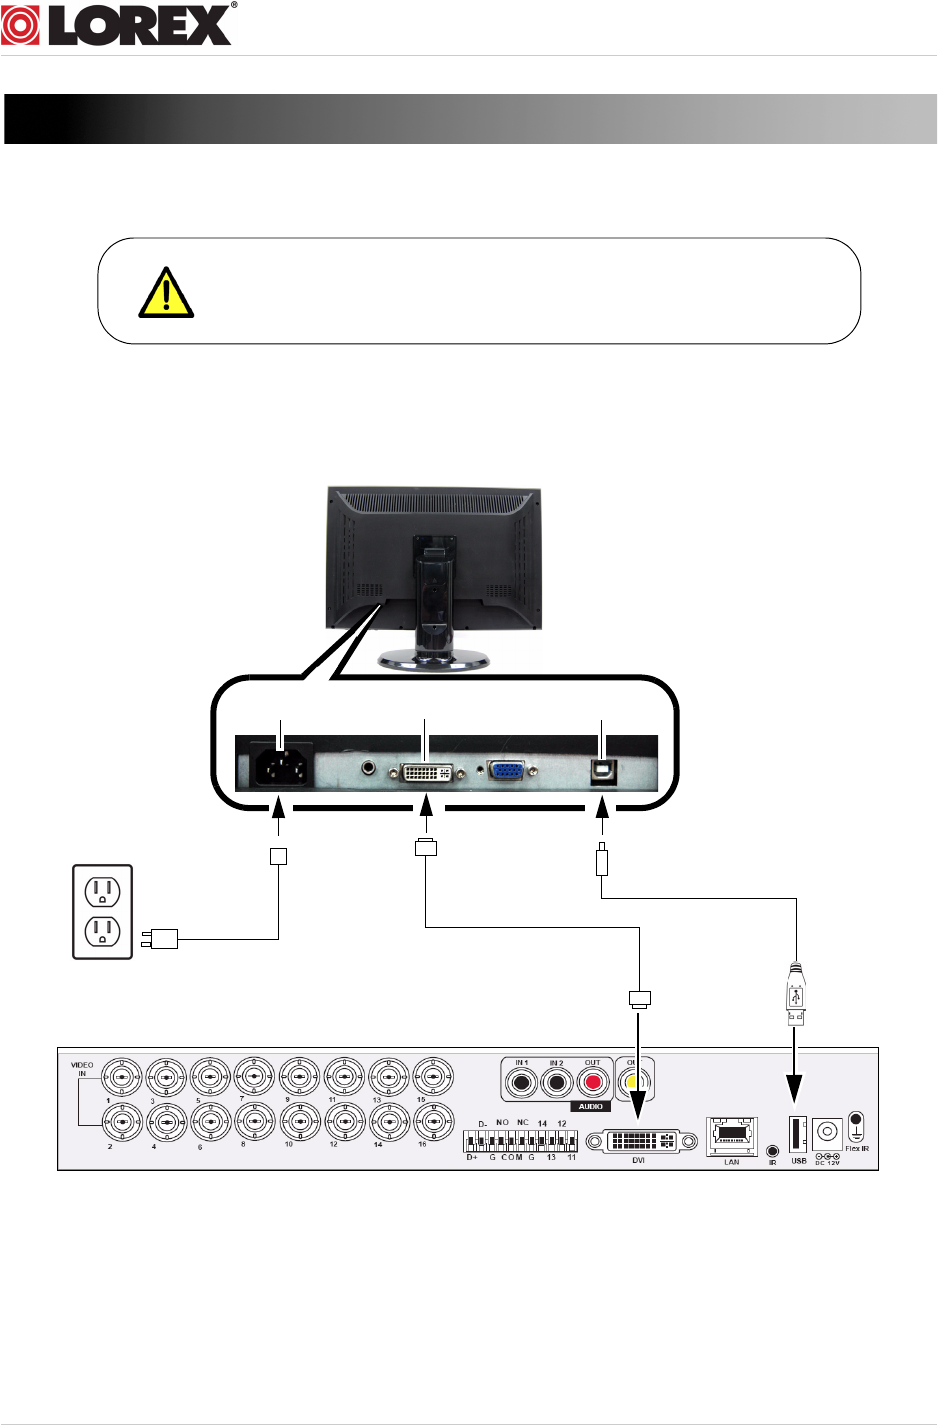
Step 1 of 3: Connect the cables
The USB cable must be connected to the monitor’s USB port
and the DVR’s USB port to enable the touch screen function.
DVI Port USB Port
Power Port
AC power cord DVI cable
16 channel configuration shown above. 8 will have the respective number of video inputs
USB cable
AC Power Cord: Provides power to the touch screen monitor.
DVI Cable: Transmits video from the DVR to the touch screen monitor.
USB Cable: Enables the DVR to recognize touch gestures on the monitor.
www.lorextechnology.com
2
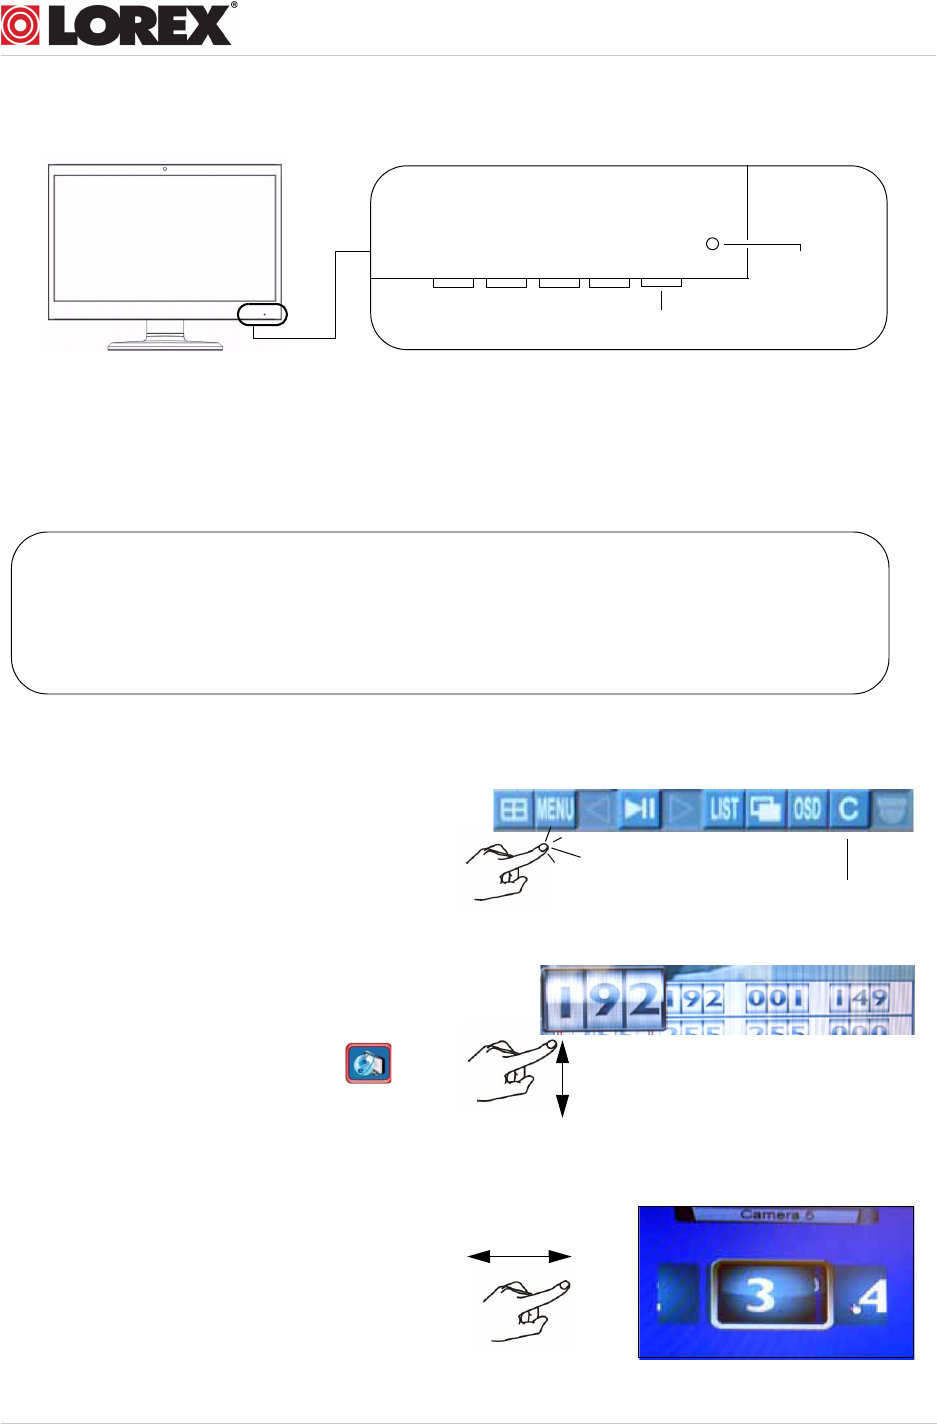
Step 2 of 3: Power on the Monitor
• Press the power button to turn the monitor on.
Step 3 of 3: Test the touch screen gestures: Tap, Scroll, Slide
Power LED
Power Button
Before you start:
1. Turn on your Edge DVR.
2. Make sure your monitor is turned on by pressing the Power Button.
3. Wait for the DVR to boot into the main viewing mode.
Tap
Tap an icon (i.e. Menu icon) in the
system tool bar to open a menu.
Scroll
Swipe your finger to scroll through
menus, or to adjust individual values. For
example, navigate to Menu>LAN ( ).
Then, swipe your finger over the numbers
to adjust the IP values.
Slide
Slide your finger on a desired channel to
open the channel slider. Slide your finger left
or right to select the desired channel
number. Release your finger from the screen
to confirm the selection.
Tap C to exit a menu
www.lorextechnology.com
