MAG Technology Co U5013 Color Monitor User Manual EV500 u5 p65
MAG Technology Co Ltd Color Monitor EV500 u5 p65
UserManual.wiki
>
MAG Technology Co
>
U5013 User Manual
USER MANUAL
Navigation menu
Upload a User Manual
Namespaces
Wiki Guide
HTML
PDF
Info
Views
User Manual
Discussion / Help
Navigation
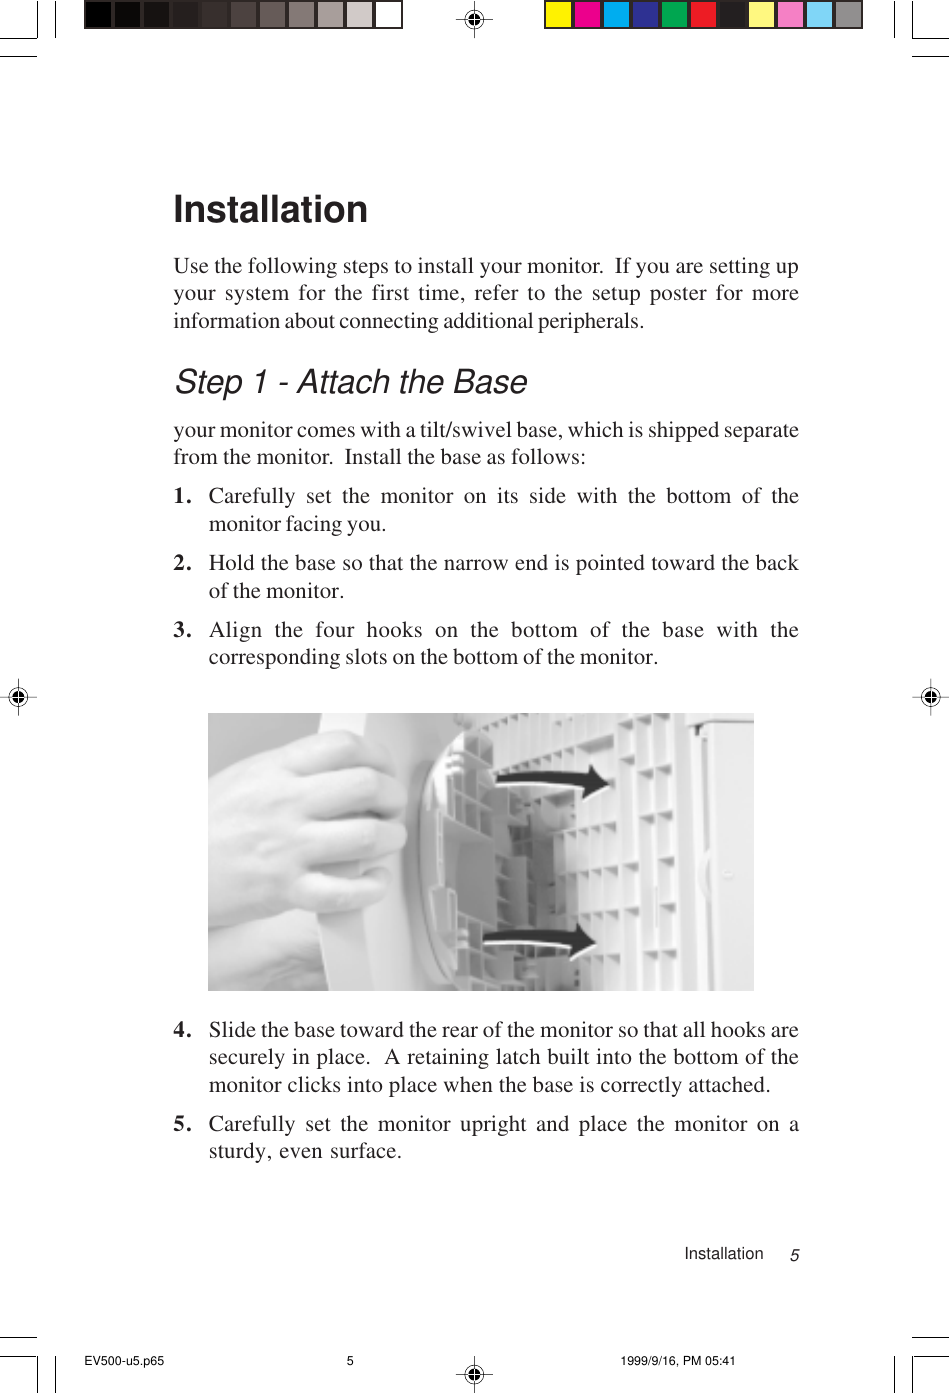
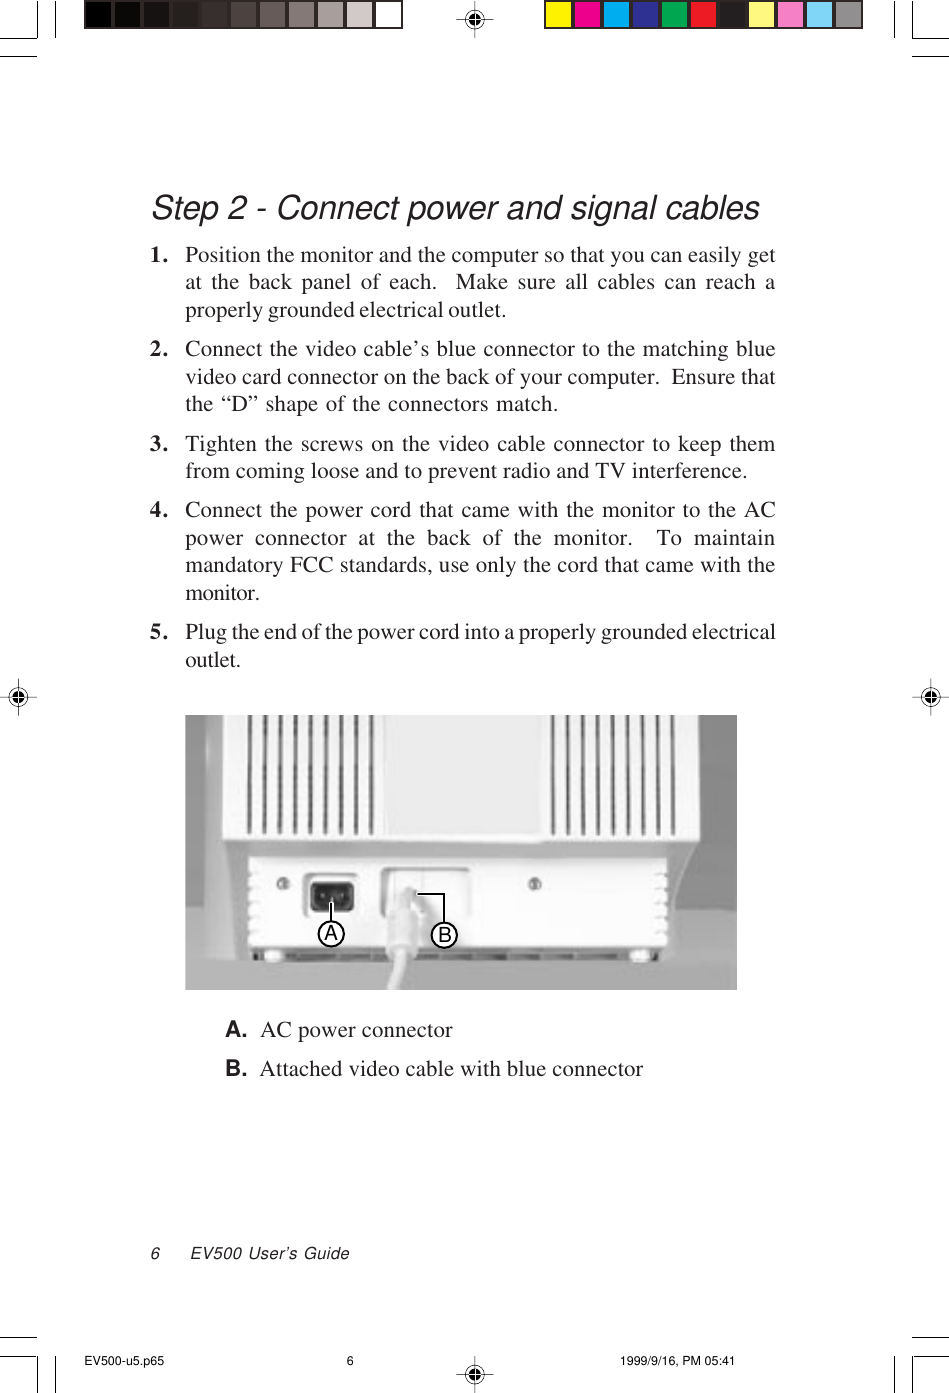

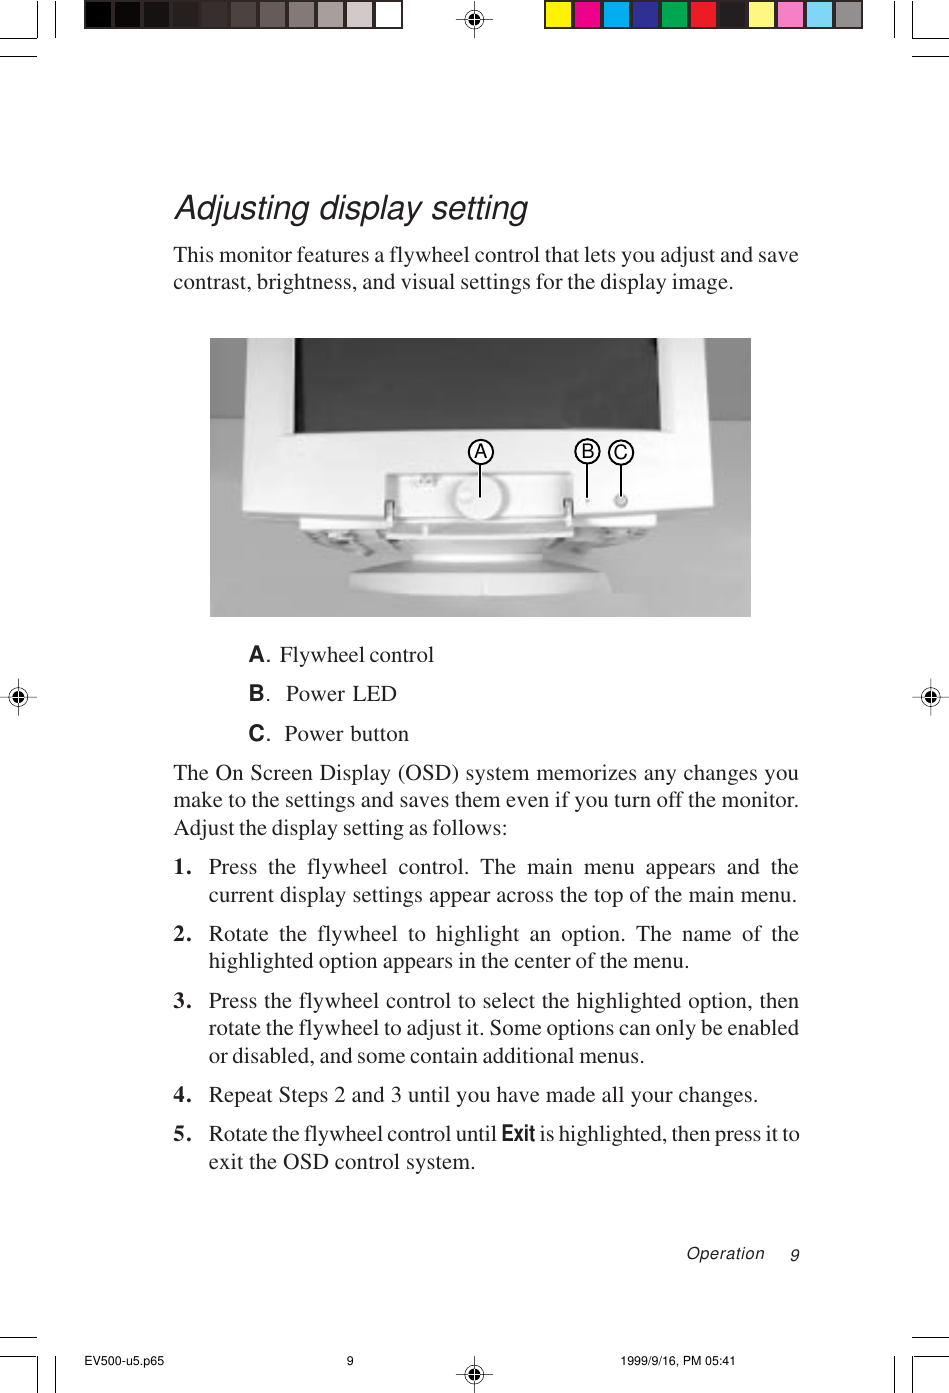

![20 EV500 User’s GuidePower Supply NoticeInstall only a UL LISTED/CSA LABELED power supply cord meeting the followingspecifications:Plug TypeNema-Plug 5-15PCord TypeSVT or SJT, minimum 3 x 18 AWGLengthMaximum 15 feetRatingMinimum 7A, 125VEuropean Users:This Information Technology Equipment has been tested andfound to comply with the following European directives:[i] EMC Directive 89/336/EEC amending directive 91/31/EEC95/263/EE & 93/68/EEC as per-EN 50081-1: 1992 according toEN 55022: 1995 Class B, EN 61000-3-2: 1995 or EN 60555-2:1986EN 61000-3-3: 1995-EN50082-1: 1992 according toEN61000-4-2: 1995 or IEC 801-2: 1984, ENV 50140: 1994 or IEC 801-3: 1984EN 61000-4-4: 1998 or IEC 801-4: 1988[ii] Low Voltage Directive (Safety) 73/23/EEC as per EN 60950: 1992Japanese Users:This equipment is in the Class 2 category (InformationTechnology Equipment to be used in a residential area or anadjacent area thereto) and conforms to the standards set by theVoluntary Control Council for Interference by InformationTechnology Equipment aimed at preventing radio interference in such residential area.When used near a radio or TV receiver, it may become the cause of radio interference.Read instructions for correct handling.EV500-u5.p65 1999/9/16, PM 05:4120](https://usermanual.wiki/MAG-Technology-Co/U5013/User-Guide-66083-Page-20.png)