MD Consumer Electric MC-RTW1505D Induction Cooktop User Manual 170214118GZU TAPMC RTW1505D
Guangdong MD Consumer Electric Manufacturing Co., Ltd Induction Cooktop 170214118GZU TAPMC RTW1505D
170214118GZU_TAPMC-RTW1505D_User Manual
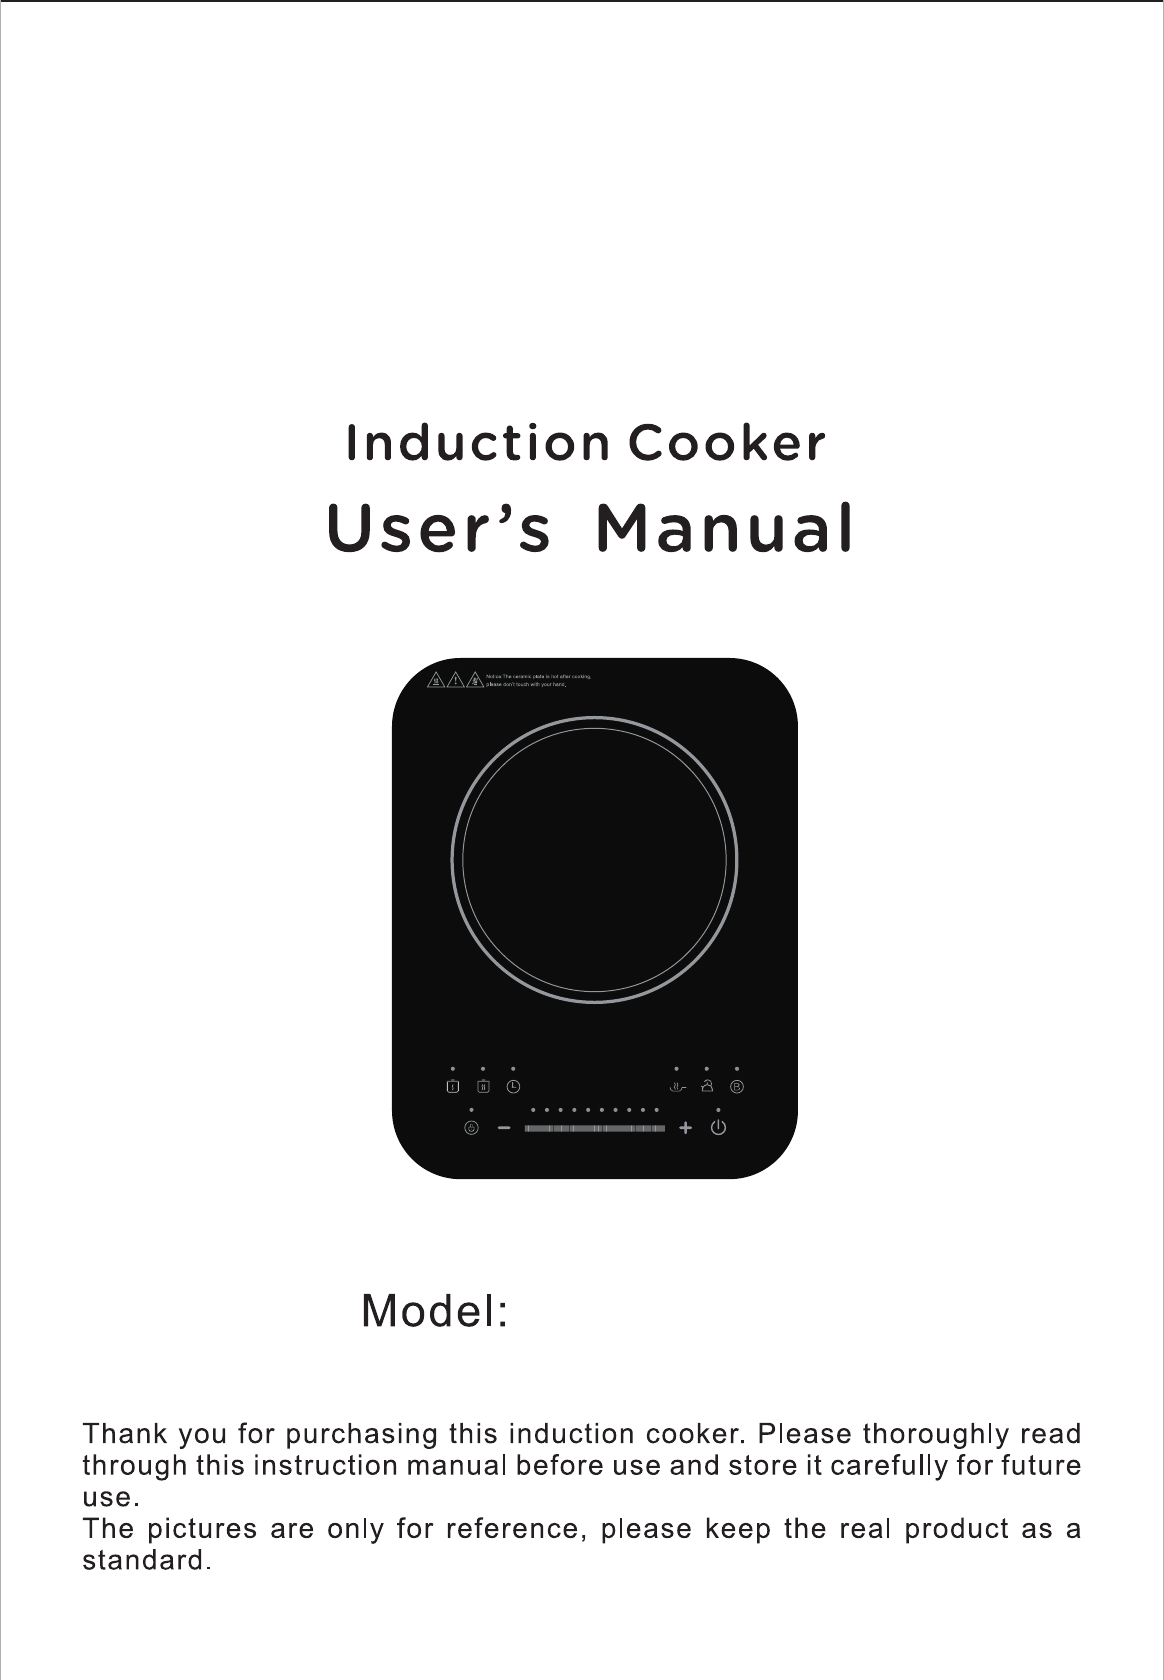
MC-RTW1505D

1
TABLE OF CONTENTS……………………………………………………………………………………………….
1) INFORMATION FOR THE USER.........................................................................................1
a) Safety recommendations......................................................................................................1
b) Technical data......................................................................................................................5
c) Protecting the environment..................................................................................................5
2) APPLIANCE PRESENTATION ................................................................................................6
a) Induction cooker description ...............................................................................................6
b) Before the first use...............................................................................................................7
c) Suitable and unsuitable pots and containers ........................................................................7
d) Safety pack...........................................................................................................................7
3) USING YOUR APPLIANCE .....................................................................................................8
a) Use of the control panel .......................................................................................................8
b) Starting your appliance ........................................................................................................8
c) Power function.....................................................................................................................8
d) Using the different functions ...............................................................................................9
e) Switch off the appliance ......................................................................................................10
4) CLEANING AND MAINTENANCE........................................................................................10
a) Cleaning the induction cooker .............................................................................................10
b) Troubleshooting...................................................................................................................10
5) WARRANTY ..............................................................................................................................11
a) Warranty ..............................................................................................................................11
b) Special declaration...............................................................................................................11

2
1) INFORMATION FOR THE USER
a) Safety recommendations
When using electrical appliances, basic safety precautions
should always be followed including the following:
2. Do not touch hot surfaces.
3. To protect against electrical shock do not immerse cord,
plugs, or in water or other liquid.
4. Close supervision is necessary when any appliance is used
by or near children.
5. Unplug from outlet when not in use and before cleaning.
Allow to cool before putting on or taking off parts.
6. Do not operate any appliance with a damaged cord or plug
or after the appliance malfunctions or has been damaged
in anymanner. Return appliance to the nearest authorized
service facility for examination, repair , or adjustment.
7. The use of accessory attachments not recommended by
the appliance manufacture may cause injuries.
8. Do not use outdoors .household use only.
9. Do not let cord hang over edge of table or counter, or touch
surfaces.
10. Do not place on or near a hot gas or electric burner, or in a
heated oven.
11. Extreme caution must be used when moving an appliance
containing hot oil or other hot liquids.
12. $OZD\VDWWDFKSOXJWRDSSOLDQFH¿UVWWKHQSOXJFRUGLQWR
the wal outlet. To disconnect, turn any control to “off”, then
remove plug from wall outlet.
13. Do not use appliance for other than intended use.
14. This appliance has a polarized plug (one blade is wider
than the other). $VDVDIHW\IHDWXUHWKLVSOXJZLOO¿WLQD
polarized outlet only one way,IWKHSOXJGRHVQRW¿WIXOO\
LQWKHRXWOHWUHYHUVHWKHSOXJ,ILWVWLOOGRHVQRW¿WFRQWDFW
DTXDOL¿HGHOHFWULFLDQ'RQRWDWWHPSWWRGHIHDWWKLVVDIHW\
1. Read all instructions.
3
19. Operation is subject to the following two conditions: (1) This
device may not cause harmful interference, and (2) this
device must accept any interference received,including
interference that may cause undesired operation.
&$87,21&KDQJHVRUPRGL¿FDWLRQVQRWH[SUHVVO\DSSURYHG
by the party responsible for compliance could void the user's
authority to operate the product.
NOTE:This equipment generates, uses and can radiate radio
frequency energy and, if not installed and used in
accordance with the instructions, may cause harmful
interference to radiocommunications. However , there is no
guarantee that interference will not occur in a particular
installation. If thisequipment does cause harmful interference
to radio or television reception, which can be determined by
turning theequipment
off and on, the user is encouraged to
try to correct the interference by one or more of the following
measures:
Reorient or relocate the receiving antenna.
Increase the separation between the equipment and receiver.
16. Do Not Cook on Broken Cook-T op – If cook-top should
break, cleaning solutions and spillovers may penetrate the
broken cook-top and create a risk of electric shock.
17. Clean Cook-T op with Caution – If a wet sponge or cloth is
used to wipe spills on a hot cooking area, be careful to
avoid steam burn, some cleaners can produce noxious
hfumes if applied to a ot surface.
18. Do not place metallic objects such as knives, forks, spoons
and lids on the Table Stove since they can get hot.
Simple measures that can be taken by the user to correct
interference.
Carefully clean the cooking surface - if you wipe with a wet
sponge or cloth should be careful vapor heat cooking area
feature.
15. Do not open lid when in use.
4
20. This appliance has a polarized plug (one blade is wider than
the other). To reduce the risk of electric shock, this plug is
LQWHQGHGWR¿WLQWRDSRODUL]HGRXWOHWRQO\RQHZD\. If the
SOXJGRHVQRW¿WIXOO\LQWRWKHRXWOHWUHYHUVHWKHSOXJ,ILW
VWLOOGRHVQRW¿WFRQWDFWDTXDOL¿HGHOHFWULFLDQ'RQRW
attempt to modify the plug in any way..
burns, and some cleaning materials may produce toxic gases.
3. If this equipment does cause harmful interference to radio or
television reception, which can be determined by turning the
equipment off and on, the user is encouraged to try to correct
the interference by one or more of the following measures:
-- Reorient or relocate the receiving antenna.
-- Connect the equipment into an outlet on a circuit different
from that to which the receiver is connected.
– Consult the dealer or an experien
for help.
ced radio/TV technician
-- Increase the separation between the equipment and
receiver.
This device complies with Part 18 of the FCC Rules.
FCC STATEMENT;
NOTE:
1.This equipment has been tested and found to comply with the
limits for a Consumer ISM equipment, pursuant to Part 18 of
the FCC Rules. These limits are designed to provide reasonable
protection against harmful interference in a residential
installation. This equipment generates, uses and can radiate
radio frequency energy and, if not installed and used in
accordance with the instructions, may cause harmful
interference to radio communications. However, there is no
guarantee that interference will not occur in a particular
installation.
2.Please note that changes or modifications of this product is not
expressly approved by the party responsible for compliance
could void the user's authority to operate the equipment.

5
b) Technical data
Model Applied
voltage/Frequency Rated
power Netweight Dimensions
120V~ 50/60Hz
MC-RTW1505D
1500W 3.2Kg H64.5xL296xP380mm
6
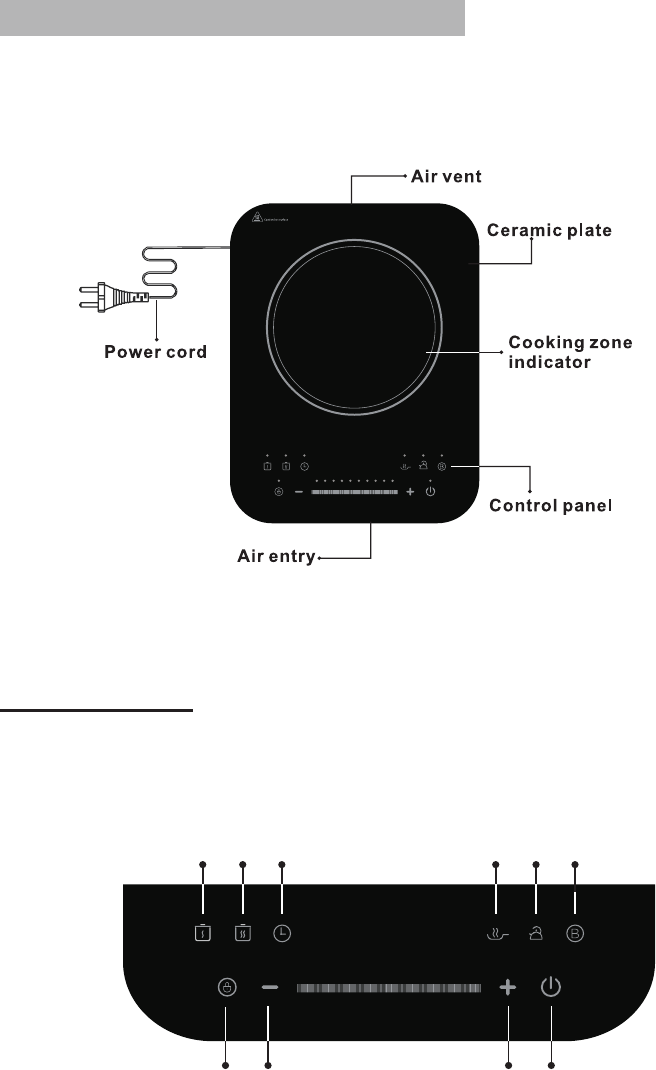
2) APPLIANCE PRESENTATION
a) Induction cooker description
Control panel :
1. Keep warm
mode
2. Simmer mode
3. Timer
4. Fry mode
5. Boil mode
6. B
oost mode
7. On/Standby
8. Power regulating control +
9. Power regulating control -
10. Child lock
1 2 3 4 5 6
8 71 0 9

7
b) Before the first use
-When unpacking your unit, make sure that you carefully remove all of the packaging
materials.
-Before using the appliance for the first time, be sure that it is placed horizontally at least
10 cm away from all sides of the wall, curtains, etc.
-Use an individual socket with more than 12.5A capacity. Never use a universal socket
or share a socket with other appliances. If the use of a multiple socket is
indispensable assure that those elements respect the limit power. The appliance must
be place on a flat, firm and dry surface. Never move the appliance when it is in process.
-When using the appliance you can hear a noise due to high frequency electromagnetic
wave. This is normal and non dangerous.
c) Suitable and unsuitable pots and containers
It’s necessary to use suitable pots and containers. Pan test with a magnet: if the magnet "sticks"
to the base of the pan, then it is suitable for use with induction cooking. You can also refer to
the following description:
Iron oil frying pan Stainless steal pot Iron pan Iron kettle
Enamel stainless steal kettle Enamel cooking ustensil Iron plate
Requirement for pot materials: containing magnetic induction materials. All the test and
authentication of thus product is based on the 430 cookware (bottom diameter 180+/-
10mm).The other cookware can not guarantee the best results and performance.
Shape requirement: you can use pots with a diameter (on the higher part) from 14.5 to 18 cm.
d) Safety pack
-Over-temperature protection. If the temperature inside the induction cooker body is
too high, the appliance will stop heating.
-Over current or voltage abnormality protection. When voltage is abnormal or
current changes abruptly, the induction cooker will stop. Once the issues are solved, the
induction cooker will work again normally.
-Container detection system. If a pot is moved during process, the unit will stop
heating immediately. The appliance will emit a sound and afte 10 seconds it will
automatically return to standby mode.
-Automatic shutdown protection . When the time selected is reached, the induction
cooker will shut off automatically until the user triggers the timer again.
8
-Control Lock (10). This pad allows locking all the control panel to simplify the cleaning
but also to preserve and safe children from all risks.
3) USING YOUR APPLIANCE
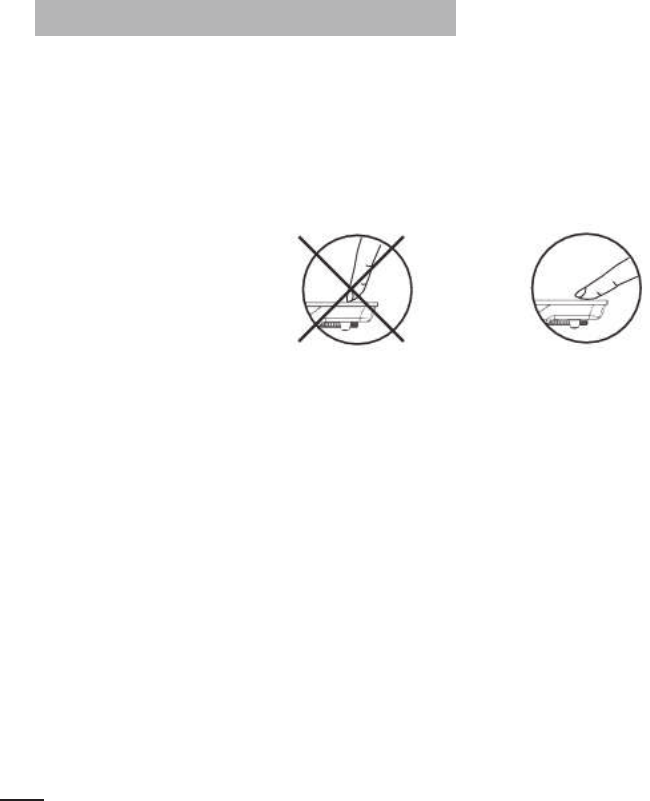
a) Use of the control panel
-The sensitive pads work with a sense of touch. It is not necessary to put pressure on.
-Use the base of your finger and not the tip as indicated on the images below
-Slide your finger on the slider to increase or decrease the power.
-You will hear a beep each time an action will be registered.
-The control panel must be clean, dry and not be covered by an object or a cloth; even a
thin layer of water can create dysfunction.
b) Starting your appliance
After the power supply is connected, the buzzer sounds and the screen show "L" blinking,
indicating that the hotplate is in a state of standby. So that the appliance is ready to be
programmed, press on On/standby (7). After pressing this button, the induction cooker enters
standby mode. You can now use it.
Never put an empty container on the ceramic plate before switching on the
appliance.
Note:
Under the standby mode, if no function button is pressed for about 10 seconds, the induction
cooker will switch off automatically.
Under the working mode, if there is no proper pot on the ceramic plate, the induction cooker will
switch off automatically after 60 seconds.
c) Power function
In order to select the power intensity you can:
-Either press the + (8) or – (9) buttons
-Or select it thanks to the slider, by swiping your finger from left to right on the button.
To guide you, lights appear above each temperature level.

d) Using the different functions
Timer
To use the timer, press the timer button (3). The digital screen will indicate « 0 : 00 ».
Press on the +/- pads to adjust the cooking time. Each pressure increases or decreases the
time of 1 minute. If you maintain the button longer, the time will increase or decrease by
by increments of 10 minutes. The timer can be set from 1 minute to 180 minutes. Once
the time is set, the digital screen will flicker during 5 seconds before heating. To cancel
the timer function, press again on the timer button Only Warm and Simmer button can
use timer button.
(3).
Keep warm mode
When the appliance is in operation, press on the Keep warm button (1) if you want to keep
warm your preparation. The appliance will set automatically on the lowest power and will
stop after 120 minutes. To set again the power, press directly on the +/- buttons.
Simmer mode
To use this mode, press on the Simmer button (2). A lamp lights up. The simmer cooker
entering the simmer state, the default power level shall be level 2. Under this mode, the
power cannot be adjusted. When press “+” or “-“ or slider again, the induction cooker
entering the power state.
Fry mode
To use this mode, press on the Fry button (4). A lamp lights up. The default power level
shall be level 10. When press “+” or “-“ or slider again, the induction cooker entering the
power state.
Boil mode
Boil mode is for boiling water. To use it, press on the Boil button (5). A lamp lights up. The
default power level shall be level 10. In this mode, the default working time is 30 minutes.
Note: It is recommended to put water that occupies 30% to 80% of the pot capacity when
boiling water.
Boost mode
The boost button (6) allows obtaining directly the highest power level. By pressing again the
boost button (6) the appliance will go back to the power of origin.
Child lock mode
To lock the control pads during cooking, press on Child lock button (10).The indicator «Loc
» will appear on the screen. In this case, only the On/Standby button (7) can be used to
9
10
switch off the appliance. To unlock the control panel, press again on “lock” button during 3
seconds.
e) Switch off the appliance
After use, the electric hob is hot, the buzzer rings and the indicator « H » flashes on the
screen. To switch off the appliance, press on the On/Standby button (7), then unplug the
socket.
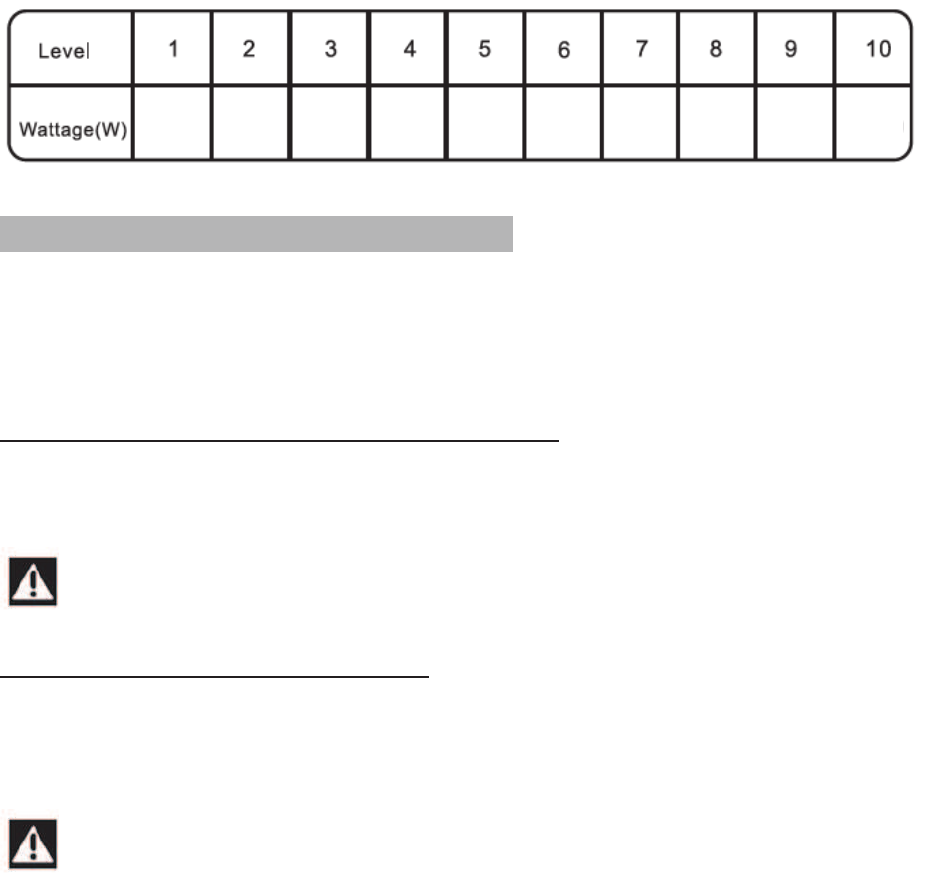
Please, refer below table for wattage:
4) CLEANING AND MAINTENANCE
a) Cleaning the induction cooker
Switch off and unplug the appliance. Let it cool down before cleaning.
Regarding the glass-ceramic and the control panel:
Light dirt: clean with a soft wet cloth.
Oily dirt: clean with a soft wet cloth dipped with little toothpaste or neutral
detergent until the removal of residuals.
Note: during the cleaning, never clean the surface of the induction cooker with a
rigid brush.
Regarding the air entry and the air vent
After a long time of use, some dust or other dirt may be accumulated at the air entry or air
vent. Use a flexible brush or a detergent to clean it. The body of the appliance can be
cleaned with caution with a dry cloth.
Note: never immerse the induction cooker in the water and do not maintain it with
a steam cleaner.
120 300 400 600 800 900 1000 1100 1300 1500

11
b) Troubleshooting
Here are the recommended inspections of common failures:
kcehcotstnioPsmelborP
After the plug in the socket, the indicator
(1) and the screen do not light up.
-
Make sure that the plug is inserted
tightly. - Make sure that the switch,
socket, fuse and power line are in good
condition.
The butt
on (1) lights up but heating does
not start.
-
Make sure that the containers are
suitable for induction cooker.
- Sent it to service facility to repair
Heating stops suddenly during operation.
-
Let the appliance cool down
- Let air entry and air vent
free - Set again the timing
-
Refer to failure codes
E3, E6
After a moment, temperature inside the
cooker returns to normal. The unit can
restore its work once the « on/off » button
is pressed.
E7, E8 After adjusting the voltage, the unit
restores its work.
Failure
codes
E1, E2, E4, E5, EB Send it to service facility to repair.
12