MEMOREX TV/VCR Or DVD Combo Manual L0407427
User Manual: MEMOREX MEMOREX TV/VCR or DVD Combo Manual MEMOREX TV/VCR or DVD Combo Owner's Manual, MEMOREX TV/VCR or DVD Combo installation guides
Open the PDF directly: View PDF ![]() .
.
Page Count: 72
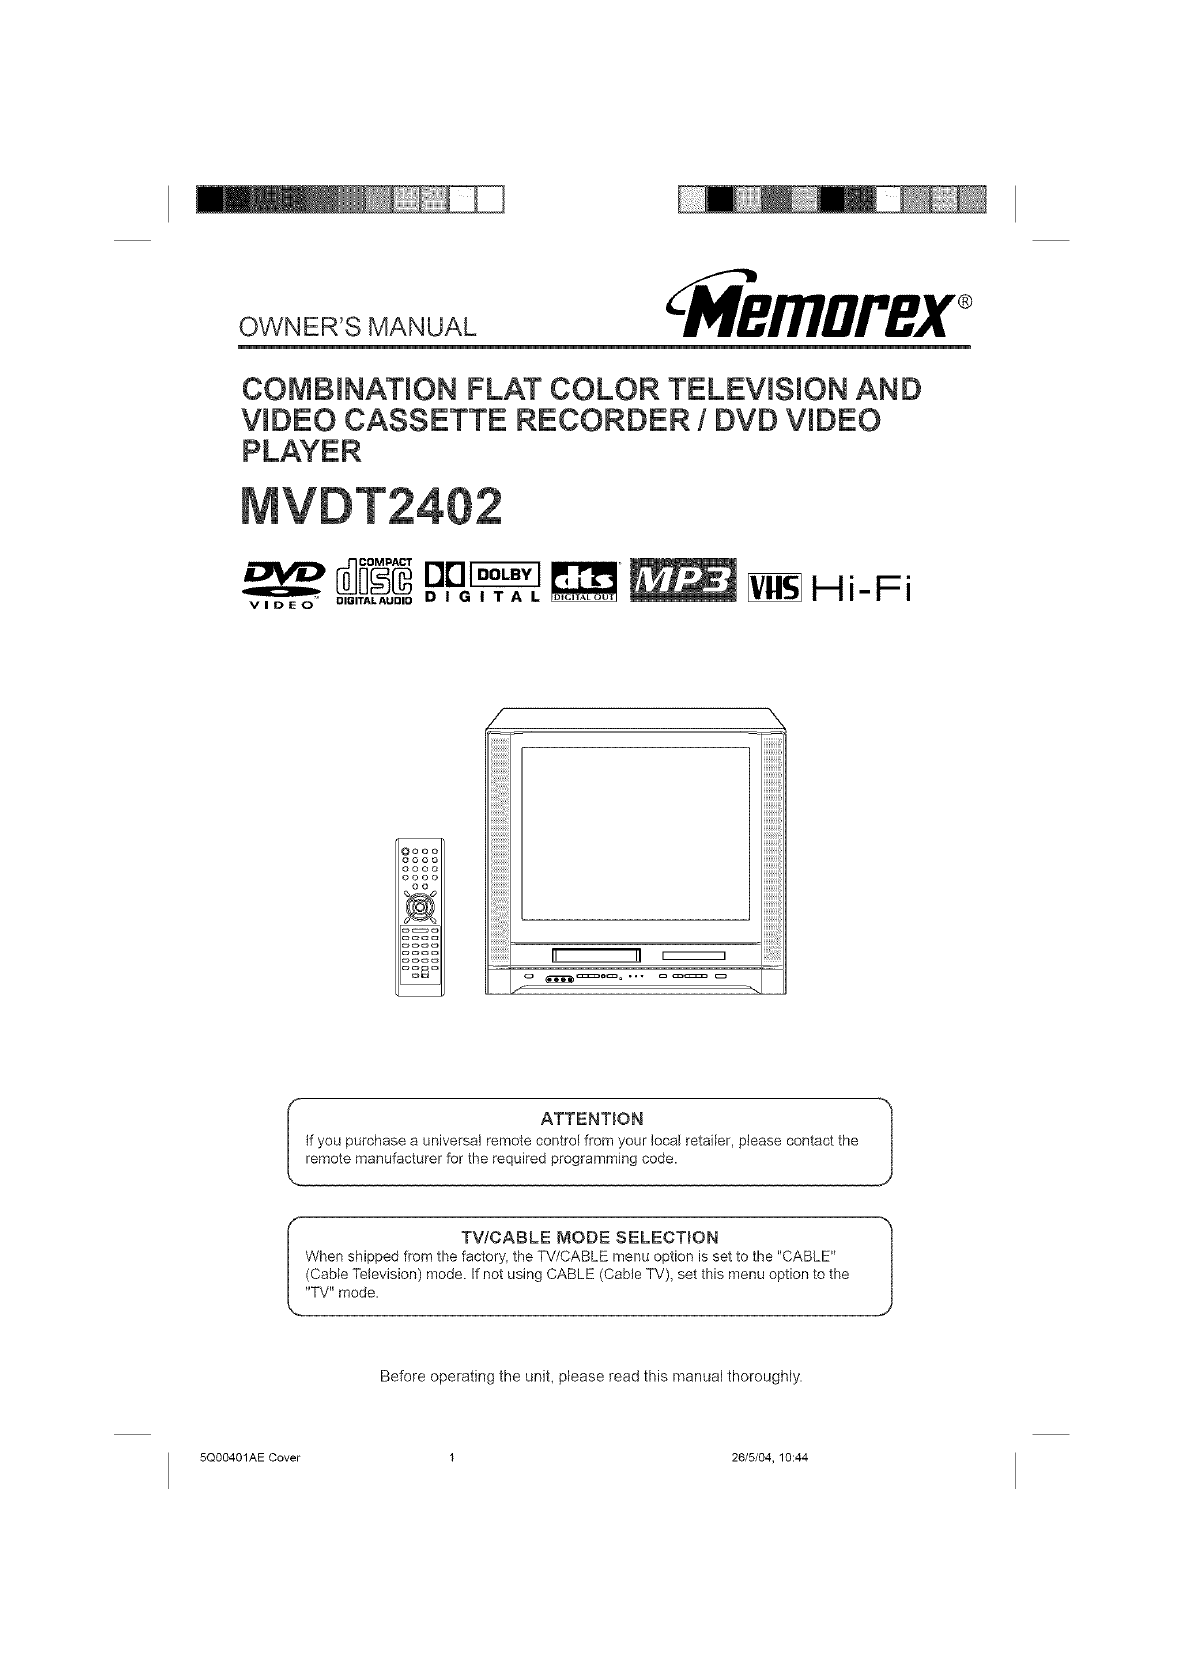
OWNER'S MANUAL CM'MBmDI,BX®
COMBiNATiON FLAT COLOR TELEViSiON AND
VIDEO CASSETTE RECORDER /DVD VIDEO
uor -
DIQITALAUDID D I G I T A L Hi-Fi
Oooo
oooo
oooo
oooo
oo
i+i+i+i+i+i+i+i+i+i+II II _ !i!i!i!iiiii!!ii+ii!
f%
ATTENTION
tf you purchase a universal remote control from your local retailer, please contact the
remote manufacturer for the required programming code.
TV/CABLE MODEE SELECTION
When shipped from the factory, the TV/CABLE menu option is set to the "CABLE"
(Cable Television) mode. If not using CABLE (Cable TV)+set this menu option to the
"TV" mode.
Before operating the unit, please read this manual thoroughly
5Q00401AE Cover 1 26/5/04, 10:44

,_ CAUTION
CAUTION: TO REDUCE THE RiSK OF ELECTRIC
SHOCK, DO NOT REMOVE COVER
(OR BACK). NO USER-SERVICEABLE
PARTS INSIDE. REFER SERVICING TO
QUALIFIED SERVICE PERSONNEL
WARNING:
NOTE:
WARNING:
CAUTION:
/k
The lightning flesh with arrowhead
symbol, within an equilateral triangle is
intended to alert the user to the
presence of uninsuleted dangerous
vokage within the product's
enclosure that may be of sufficient mag-
nitude to constitute e riskof electric shock
The exclamation point within an
equilateral triangle is intended to alert
the user to the presence of important
operating and maintenance (servicing)
instructions in the literature accompa-
nying the appliance
TO PREVENT FIRE OR SHOCK HAZARD, DO NOT EXPOSE THIS APPLIANCE TO RAIN OR
MOISTURE.
Please keep atl packaging material for at least 90 days in case you need to return this product to
your place of purchase or Memorex.
This equipment has been tested and found to comply with the limits for a Class B digital device_
pursuant to Part 15 of the FCC Rules. These limits are designed to provide reasonable protection
against harmful interference in a residential installation This equipment generates, uses and can
radiate radio frequency energy and_ if not installed and used in accordance with the instructions,
may cause harmful interference to radio communications.
However, there is no guarantee that interference will not occur in a particular installation. If this
equipment does cause harmful interference to radio or television reception, which can be
determined by turning the equipment off and on, the user is encouraged to try to correct the
interference by one or more of the following measures:
- Reorient or relocate the receiving antenna.
- increase the separation between the equipment and receiver.
- Connect the equipment into an outlet on a circuit different from that to which the receiver is
connected.
- Consult the dealer or an experienced radio/TV technician for help.
Changes or modifications not expressly approved by the partly responsible for compliance with
the FCC Rules could void the user's authority to operate this equipment.
CAUTION:
THIS DiGiTAL VIDEO PLAYER EMPLOYS A LASER SYSTEM
TO ENSURE PROPER USE OF THIS PRODUCT, PLEASE
READ THIS OWNER'S MANUAL CAREFULLY' AND RETAIN
FOR FUTURE REFERENCE. SHOULD THE UNIT REQUIRE
MAINTENANCE, CONTACT AN AUTHORIZED SERVICE LO-
CATION-SEE SERVICE PROCEDURE
USE OF CONTROLS, ADJUSTMENTS OR THE PERFORM-
ANCE OF PROCEDURES OTHER THAN THOSE SPECiFiED
HEREIN MAY RESU_ IN HAZARDOUS RADIATION EXPO-
SURE
TO PREVENT DIRECT EXPOSURE TO LASER BEAM, DO NOT
TRY TO OPEN THE ENCLOSURE VISIBLE LASER RADIA-
TION MAY BE PRESENTWHEN THE ENCLOSURE IS OPENED
DO NOT STARE INTO BEAM
Location of the required Marking
The rating sheet and the safety caution
are on the rear of the unit.
CERTIFICATION: COMPLIES WITH
FDA RADIATION PERFORMANCE
STANDARDS, 21 CFR SUBCHAPTER J
2
5Q00401AE(02-05) 2 26/5/04.10:44
IMPORTANT SAFEGUARDS
1. READ iNSTRUCTIONS
All the safety and operating instructions should be read before the unit is operated.
2. RETAIN iNSTRUCTiONS
The safety and operating instructions should be retained for future reference
3. HEED WARNINGS
All warnings on the unit and in the operating instructions should be adhered to
4. FOLLOW INSTRUCTmONS
All operating and use instructions should be followed
5, CLEANING
Unplug this unit from the wall outlet before cleaning. Do not use liquid cleaners or aerosol cleaners.
Use a damp cloth for cleaning the exterior cabinet only
6. ATTACHMENTS
The manufacturer of this unit does not make any recommendations for attachments, as they may cause
hazards.
7. WATER AND MOISTURE
Do not use this unit near water. For example, near a bathtub, washbowl, kitchen sink, laundry tub, in a wet
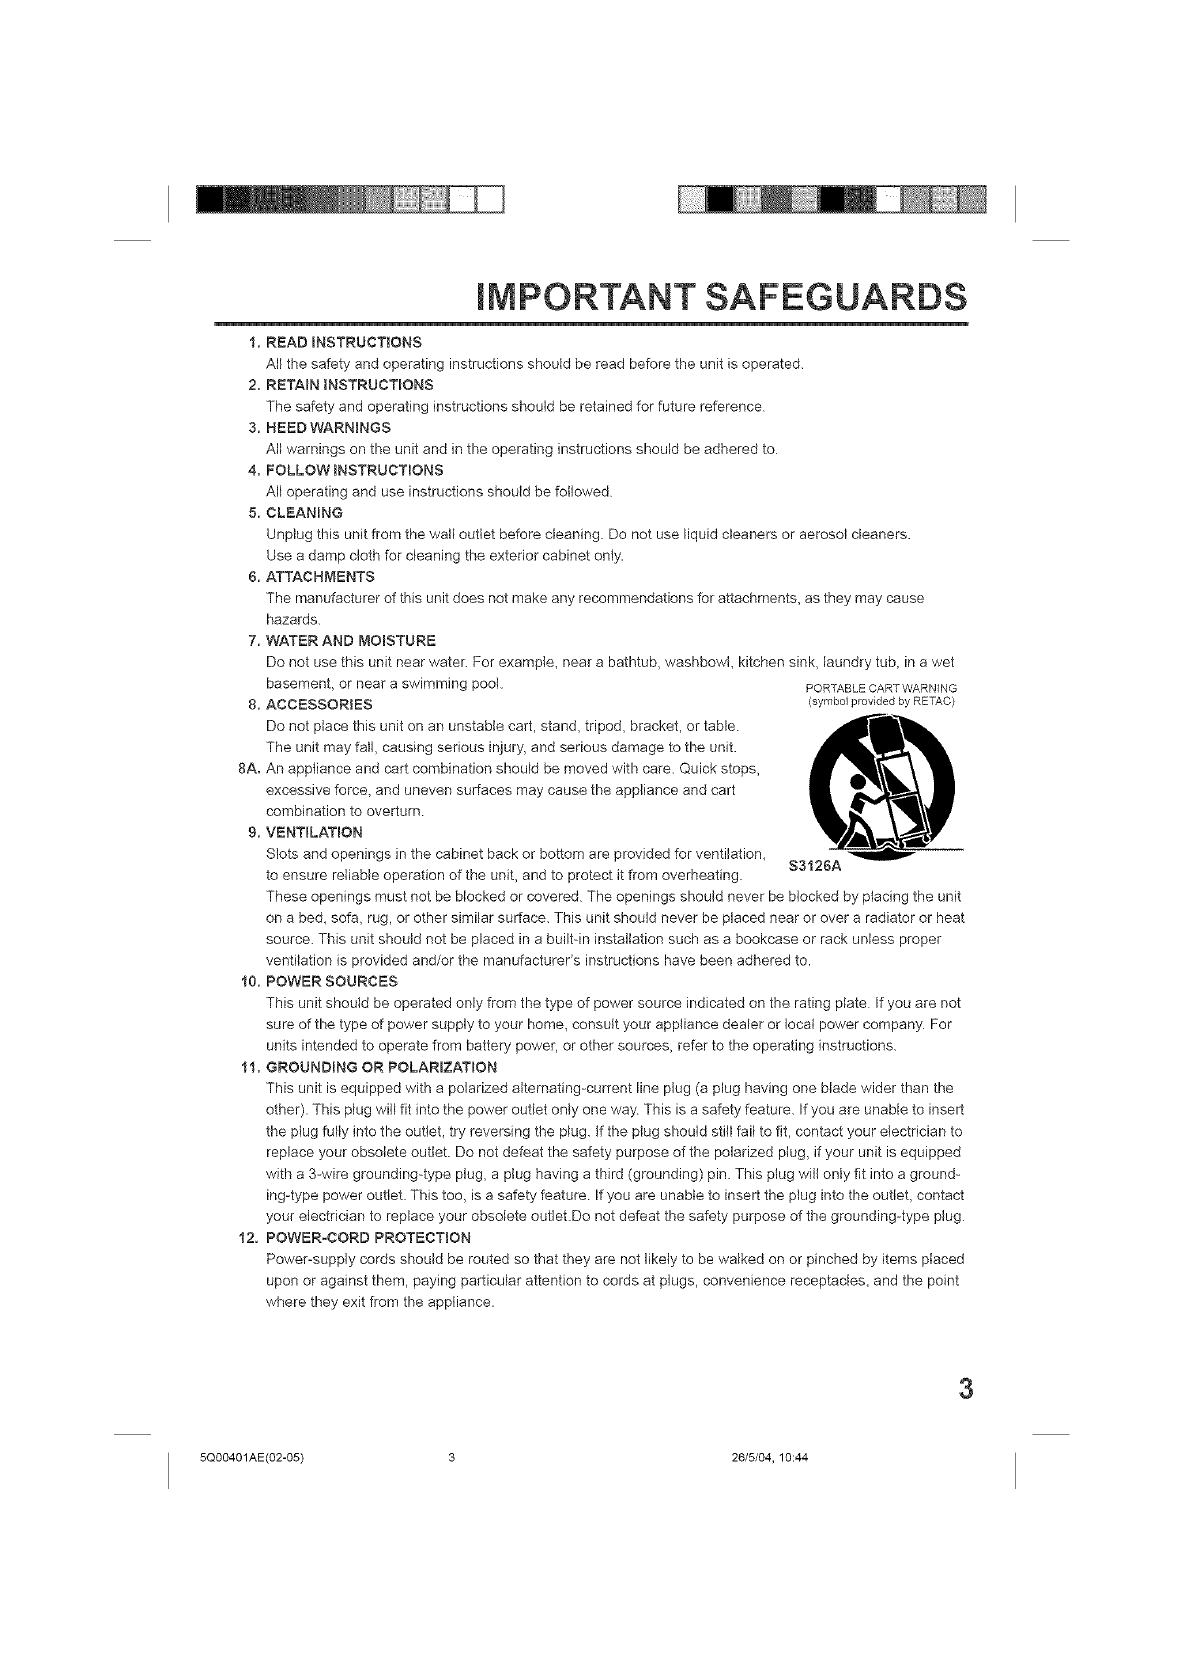
basement, or near a swimming pool. PORTABLECARTWARNING
8. ACCESSORIES (symbolprovidedby RETAC)
Do not place this unit on an unstable cart, stand, tripod, bracket, or table. ,_E'-I'_,
e'5)
The unit may fall, causing serious injury, and serious damage to the unit.
8A. An appliance and cart combination should be moved with care. Quick stops,
excessive force_ and uneven surfaces may cause the appliance and cart
combination to overturn
9. VENTiLATiON
Slots and openings in the cabinet back or bottom are provided for ventilation_ S3126A
to ensure reliable operation of the unit, and to protect it from overheating.
These openings must not be blocked or covered The openings should never be blocked by placing the unit
on a bed, sofa, rug, or other similar surface. This unit should never be placed near or over a radiator or heat
source. This unit should not be placed in a built-in installation such as a bookcase or rack unless proper
ventilation is provided and/or the manufacturer's instructions have been adhered to.
10. POWER SOURCES
This unit should be operated only from the type of power source indicated on the rating plate If you are not
sure of the type of power supply to your home, consult your appliance dealer or local power company For
units intended to operate from battery power, or other sources, refer to the operating instructions.
11. GROUNDING OR POLARIZATION
This unit is equipped with a polarized alternating-current line plug (a plug having one blade wider than the
other). This plug will fit into the power outlet only one way This is a safety feature. If you are unable to insert
the plug fully into the outlet, try reversing the plug. If the plug should still fail to fit, contact your electrician to
replace your obsolete outlet. Do not defeat the safety purpose of the polarized plug, if your unit is equipped
with a 3-wire grounding-type plug, a plug having a third (grounding) pin. This plug will only fit into a ground-
ing-type power outlet. This too, is a safety feature If you are unable to insert the plug into the outlet, contact
your electrician to replace your obsolete outlet.Do not defeat the safety purpose of the grounding-type plug
12, POWER-CORD PROTECTION
PoweFsupply cords should be routed so that they are not likely to be walked on or pinched by items placed
upon or against them, paying particular attention to cords at plugs, convenience receptacles, and the point
where they exit from the appliance.
5Q00401AE(02-05) 3 26/5/04, 10:44
IMPORTANT SAFEGUARDS
13. LIGHTNING
To protect your unit from a lightning storm, or when it is left unattended and unused for long periods of time,
unplug it from the wall outlet and disconnect the antenna or cable system This will prevent damage to the
unit due to lightning and power line surges,
14. POWER LINES
An outside antenna system should not be located in the vicinity of overhead power lines or other electric
light or power circuits, or where it can fall into such power lines or circuits. When installing an outside
antenna system, extreme care should be taken to keep from touching such power lines or circuits, as
contact with them might be fatal.
15. OVERLOADING
Do not overload wall outlets and extension cords, as this can result in a risk of fire or electric shock
16. OBJECT AND LIQUID ENTRY
Do not push objects through any openings in this unit, as they may touch dangerous voltage points or short
out parts that could result in fire or electric shock Never spill or spray any type of liquid into the unit
17. OUTDOOR ANTENNA GROUNDING
If an outside antenna or cable system is connected to the unit, be sure the antenna or cable system is
grounded to provide some protection against voltage surges and built-up static charges, Section 810 of the
National Electrical Code_ ANSI/NFPA 70, provides information with respect to proper grounding of the mast
and supporting structure_ grounding of the lead-in wire to an antenna discharge unit, size of grounding
conductors, location of antenna discharge unit, connection to grounding electrodes, and requirements for
the grounding electrode.
18, SERVICING
Do not attempt to service this unit yourself as opening or removing covers may expose you to dangerous
voltage or other hazards. Refer all servicing to qualified service personnel
19. DAMAGE REQUIRING SERVICE
Unplug this unit from the wall outlet and refer servicing to qualified service personnel under the following
conditions:
a When the power-supply cord or plug is damaged.
b If liquid has been spilled, or objects have fallen into the unit,
c. If the unit has been exposed to rain or water.
d If the unit does not operate normally by following the operating instructions. Adjust only those
controls that are covered by the operating instructions, as an improper adjustment of other controls
may result in damage and will often require extensive work by a qualified technician to restore the
unit to its normal operation
e If the unit has been dropped or the cabinet has been damaged
f. When the unit exhibits a distinct change in performance, this indicates a need for service
20. REPLACEMENT PARTS
When replacement parts are required_ be sure the service technician uses replacement parts specified by
the manufacturer or those that have the same characteristics as the original part,
Unauthorized substitutions may result in fire, electric shock or other hazards.
21. SAFETY CHECK
Upon completion of any service or repairs to this unit, ask the service technician to perform safety checks to
determine that the unit is in proper operating condition
22. HEAT
The product should be situated away from heat sources such as radiators, heat registers, stoves, or other
products (including amplifiers) that produce heat
23. DISC TRAY
Keep your fingers well clear of the disc tray as it is closing, tt may cause serious personal injury.
24. CONNECTING
When you connect the product to other equipment, turn off the power and unplug all of the equipment from
the wail outlet Failure to do so may cause an electric shock and serious personal injury. Read the owner's
manual of the other equipment carefully and follow the instructions when making any connections
4
5Q00401AE(02-05) 4 26/5/04.10:44
IMPORTANT SAFEGUARDS /PowerSource
25. LASER BEAM
Do not look into the opening of the disc tray or ventilation opening of the product to see the source of the
laser beam. It may cause sight damage
2& DISC
Do not use a cracked, deformed, or repaired disc These discs are easily broken and may cause serious
personal injury and product malfunction.
27. NOTE TO CABLE TV SYSTEM iNSTALLER
This reminder is provided to call the CABLE TV system installer's attention to Article 820-40 of the NEC that
provides guidelines for proper grounding and, in particular, specifies that the cable ground shatl be con-
nected to the grounding system of the building, as dose to the point of cable entry as practical.
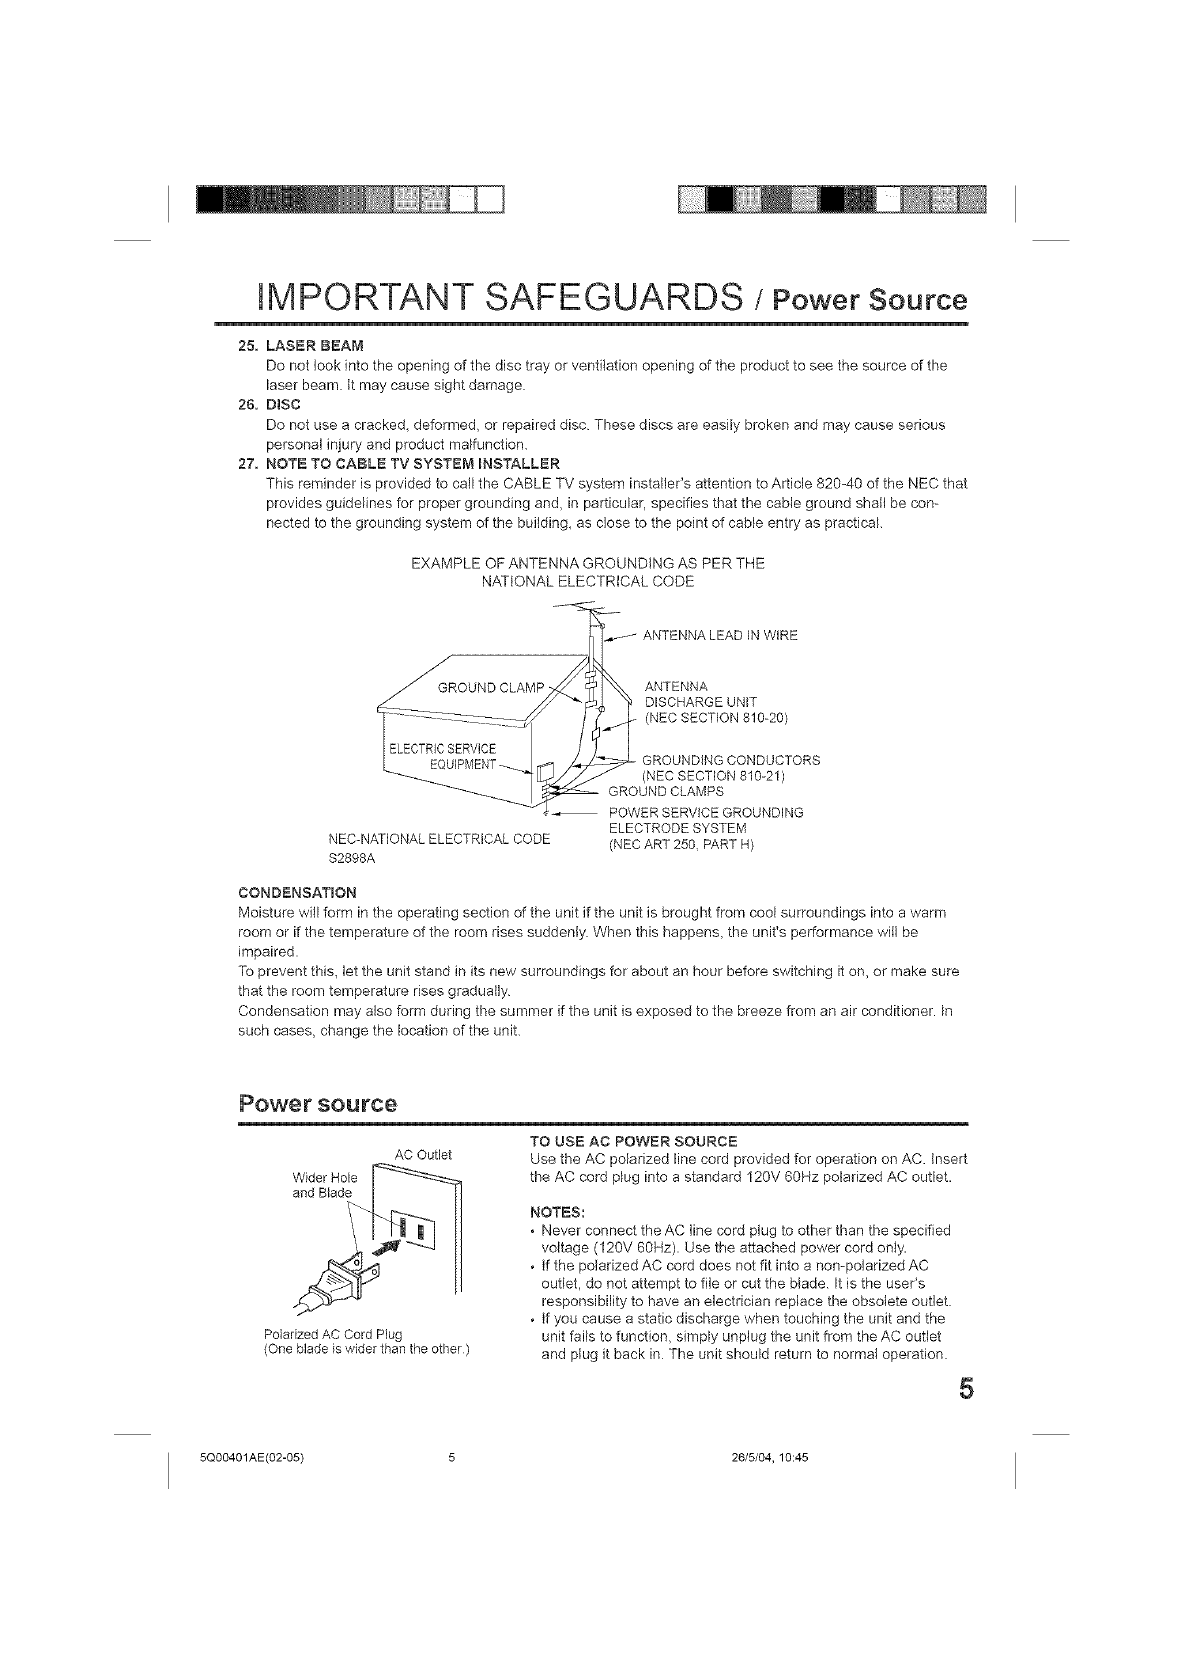
EXAMPLE OF ANTENNA GROUNDING AS PER THE
NATIONAL ELECTRICAL CODE
ANTENNA LEAD IN WiRE
ANTENNA
DISCHARGE UNF
(NEC SECTION 810-20)
NEC-NATIONAL ELECTRICAL CODE
$2898A
GROUNDING CONDUCTORS
(NEC SECTION 810-21 )
GROUND CLAMPS
POWER SERVICE GROUNDING
ELECTRODE SYSTEM
(NEC ART 250 PART H)
CONDENSATION
Moisture will form in the operating section of the unit if the unit is brought from cool surroundings into a warm
room or if the temperature of the room rises suddenly When this happens, the unit's performance will be
impaired.
To prevent this, let the unit stand in its new surroundings for about an hour before switching it on, or make sure
that the room temperature rises gradually.
Condensation may also form during the summer if the unit is exposed to the breeze from an air conditioner. In
such cases, change the location of the unit.
Powe rsou roe
AC Outlet
Polarized AC Cord Plug
(One blade is wider than the other)
TO USE AC POWER SOURCE
Use the AC polarized line cord provided for operation on AC. insert
the AC cord plug into a standard 120V 60Hz polarized AC outlet.
NOTES:
• Never connect the AC line cord plug to other than the specified
voltage (120V 60Hz). Use the attached power cord only.
• tf the polarized AC cord does not fit into a non-polarized AC
outlet, do not attempt to file or cut the blade. It is the useCs
responsibility to have an electrician replace the obsolete outlet
• tf you cause a static discharge when touching the unit and the
unit fails to function, simply unplug the unit from the AC outlet
and plug it back in The unit should return to normal operation.
5
5Q00401AE(02-05) 5 26/5/04, 10:45
Features
Color TV with DVD/CD PlayerfVideo Cassette Recorder
, Color TV with DVDtCD p_ayer with Video Cassette Recorder -Unique space saving design combines a color TV a DVD/CD
player end a Hi-Fi Video cassette recorder. The DVD disc has much more capacity, but is the same size as the audio CD disc
Picture quality is higher than Super VHS Audio quality is higher than audio CD The DVD PLAYER can play back audio CDs
, High Quality Picture - More than 400 fines (VCR mode: 220 lines) of Horizontal Resolution
TV Section
, On-Screen 3 Language Display oYou can select one of 3 languages, English, Spanish or French for on-screen program-
ming
, Closed Caption Decoder With Full Text Mode oDisplays text captions or furl screen text on the screen for hearing
impaired viewers
, Picture Adjustments Using The Remote Control -The On-Screen display allows precise remote control adjustment of
BRIGHTNESS, CONTRAST, COLOR, TINT and SHARPNESS
, Programmable TV Sleep Timer - Operable from the remote control, the TV can be programmed up to 120 minutes to turn
off autornaticafly
, V-Chip oThe V-Chip function can read the rating of a TV program or movie content if the program is encoded with this
information V-Chip wifl allow you to set a restriction ]eve].
, Surround Sound - The surround sound feature expands the audio listening field wider and deeper to create exceptional
sound quality from the TV's speakers
, Stable Sound -The stable sound feature limits the highest volume level to prevent extreme changes in volume when the
signal source is changed
VCR Section
, Stereo/SAP Reception - This VCR is designed to receive stereo end second audio program (SAP) broadcasts where
available
,4 Video Heads oProvides optima] picture quality for special effects playback
,19pro HEAD -For superior picture quality even in SLP mode, 19micron width technology helps to avoid crossta]k and boost
SLP picture quality to near SP levels With precision technology, ghosts and color beats are virtually eliminated
, Hi-Fi Stereo Sound oWith a frequency response of 20 to 20,000 Hz and a dynamic range of better than 9OdB, this VCR
provides a level of excellence that rivals compact discs
, One-touch Timer Recording (OTR} - Simply by pressing the REC/OTR button, the VCR can be programmed for up to 6
hours of recording with an immediate start
DVD Section
,Compatible with a wide range of DVD audio outputs
Digital Audio Jack:
• When a component with a builtJn Dolby Digital decoder is connected, Do]by Digital sound can produce the effect of being
in a movie theater or a concert hall.
• Surround standard different from Do]by Digital This format is already in use in many theaters By connecting this unit to a
DTS decoder or an At/amplifier with a bai]tdn DTS decoder, the DTS audio of DVD discs recorded in this format can be
enjoyed However, audio will not be output from the analog audio output jacks
• The MPEG audio of DVD discs recorded in this format can be enjoyed
• The Linear PCM sound of a 48 kHz/16 bit through 96 kHz/24 bit exceeds audio CD sound
, Multi-Language - Since this DVD matches with 136 language-subtitles/-soundtracks, you can enjoy seMcting a favorite one
(You can not select the language that is not recorded on the disc)
, Multi-Angle oPictures of Sports or a Live Concert are recorded with many cameras. When you play such a disc, you can
change the angles during playback (If a Multi-Angle is not recorded on the disc you can not change the angle)
, Repeat Playback oYou can repeat chapter, track, title sides or material between two selected points
, Memory/Random Playback - You can play back tracks, titles or chapters in programmed or random-selected sequences
, Zoom - You can zoom in on the selected subject on the screen during playback
, Video Aspect Ratio oYou can change the aspect ratio of the screen for your monitor/television on a suitable disc
, Parental Control - You can limit the playback of scenes or sounds of adult DVD discs which have e parental level rating
*This product incorporates copyright protection technology that is protected by method claims of certain US. patents and
other intellectual property rights owned by Macrovision Corporation and other rights owners Use of this copyright protection
technology must be authorized by Macrovision Corporation and is intended for home and other limitedviewing uses only
unless otherwise authorized by Macrovision Corporation. Reverse engineering or disassembly is prohibited
* Manufactured under license from Dolby Laboratories "Dolby" end the double-D symbol are trademarks of Dolby Laboratories
* "DTS" and "DTS Digital Out" are trademarks of Digital Theater Systems, Inc
* Unauthorized recording of copyrighted television programs, films, video cassettes and other materials may infringe the
rights of copyright owners and be contrary to copyright laws
6
5Q00401AE(06-11 ) 6 26/5/04.10:45
Contents
i Before using your unit i
IMPORTANT SAFEGUARDS .......................... 3
Power source ................................................... 5
Features ........................................................... 6
Contents ........................................................... 7
Parts and functions .......................................... 8
Remote controt ................................................. 9
Antenna connections ..................................... 11
Cable TV connections .................................... 12
Connections to other equipment .................... 13
Setting the language ...................................... 15
Auto ctock setting ........................................... 16
Manual clock setting ....................................... 18
iTVoperation 1
TV operation ................................................... 19
Closed caption ............................................... 21
Memorizing channels ..................................... 22
Setting the V-Chip .......................................... 24
Setting the on timer ........................................ 27
Setting the off timer ........................................ 28
Picture controi adjustment .............................. 29
Adjusting the picture preference .................... 30
Sound control adjustment .............................. 31
Setting the surround sound/
Setting the stabte sound ................................. 32
Stereo recording and playback/
Second Audio Program (SAP) ........................ 33
[ Tape ptaybaek operation ]
Loading and Unloading a cassette tape ......... 34
Cassette tape playback .................................. 35
Special playback ............................................ 36
ZERO RETURN function/
Video index search system ............................ 37
[Reeording ]
Recording a TV program ................................ 38
One-touch Timer Recording (OTR) ................ 40
Timer recording .............................................. 41
Duplicating a video tape ................................. 43
Disc playback operation ]
Disc ................................................................ 44
Preparation/Status disptay of disc .................. 45
Setting setup language .................................. 46
Playback procedure ........................................ 47
Special ptayback ............................................ 48
MP3/WMA/JPEG playback ............................. 49
Setting the JPEG interval ............................... 51
Setting the setect files .................................... 52
Zooming/Locating desired scene ................... 53
Repeat playback ............................................. 54
Program playback/Random playback (CD) .... 55
Changing soundtrack language/Subtitles ....... 56
Changing angles/Title selection/DVD menu ... 57
I Advanced funetio----nof DVD section i
Setting the aspect ratio of TV screen/
Setting on screen disptay ............................... 58
Dynamic Range Control ................................. 59
Parental control setting .................................. 60
Changing the parental level ........................... 61
Temporary disabling of rating by DVD disc ..... 62
Setting menu language .................................. 63
Setting the subtitle language .......................... 64
Setting the audio soundtrack language .......... 65
oformat on ]
Language code list ......................................... 66
Reception disturbances .................................. 67
Problems and troubleshooting ....................... 68
Video head cleaning ....................................... 69
Specifications ................................................. 70
Warranty ........................................................ 71
7
5Q00401AE(06-11) 7 26/5/04, 10:45
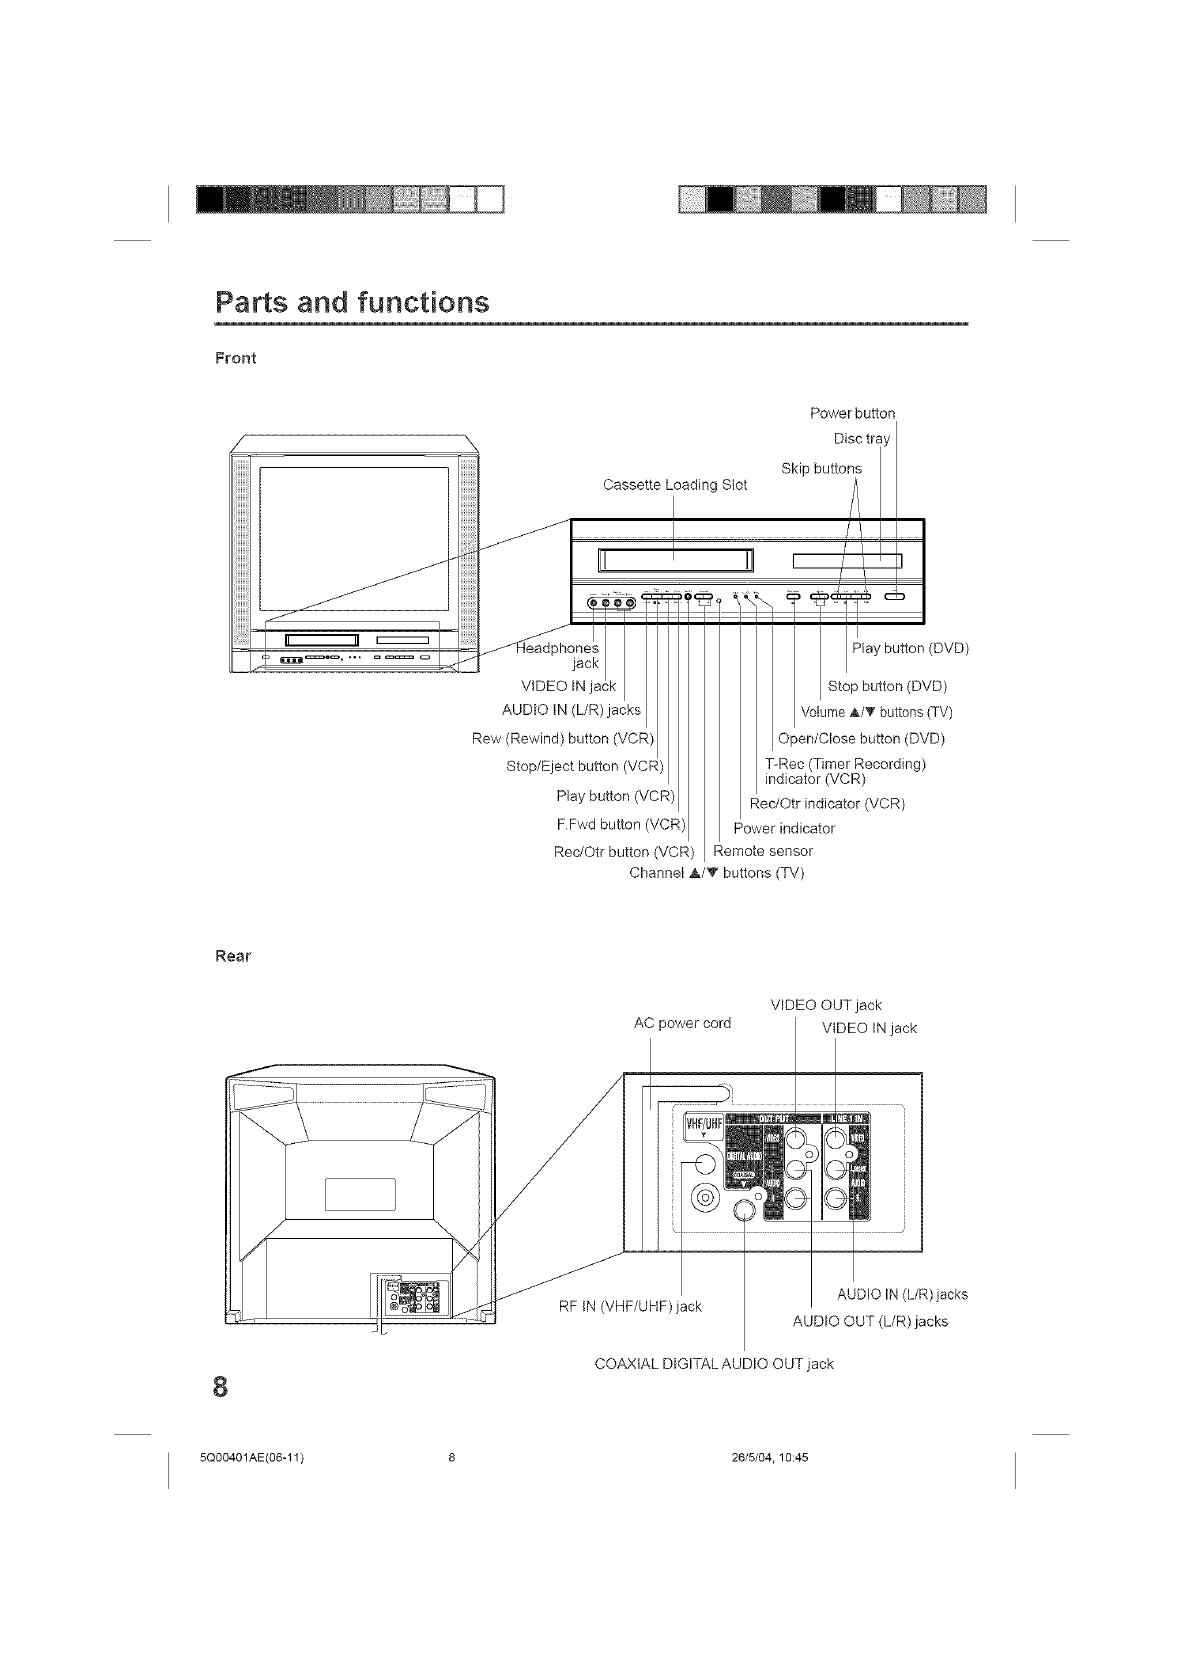
Parts and functions
Front
Cassette Loading Slot
Power button
Disc tra,
Skip buttons
AUDIO IN (L/R)jacks
Rew (Rewind) button (VCF
Stop/Eject button (VCF
Play button (VCR)
FFwd button (VCF
Rec/Otr button (VCR)
_lay button (DVD)
Stop button (DVD)
Vo ume & T buttons TV
Open/Close button (DVD)
T-Rec (Timer Recording)
indicator (VCR)
RedOtr indicator (VCR)
Power indicator
Remote sensor
Channel &/V buttons (TV)
Rest
VIDEO OUT jack
AC power cord VIDEO IN jack
8
RF IN (VHF/UHF)jack AUDIO IN (L/R) jacks
AUDIO OUT (L/R) jacks
COAXIAL DIGITAL AUDIO OUT jack
5Q00401AE(06-11 ) 8 26/5/04.10:45
Remote control
Page
POWER Power on/off 10,15,16,19,45,47
TV/ Press to operate TV
VCR Press to operate VCR
DVD Press to operate DVD 19,40,45~47,53,59
CH +/- Select channel 20,38,40
0-9 Number buttons 10,19,23,38,40
Input setting 49,50,53,55
Enter a password 24,26,60~62
VOL +/- Adjust volume of TV 19,20
MUTE Switch off the sound 20
DISPLAY/CALL Display TV/VCR or DVD operation status
16,20,25,36,37,39,41,45
JUMP Locating desired scene 53
QUICK VIEW Switch between present/last channel 20
•/•/•/It" Arrow buttons
ENTER Enter information in the menu
Select option in the menu
SETUP/TV MENU Display menu of setup
CANCEL Delete Timer program 42
Cancel input data in the setting mode
24,26,29,31,53,55,60,61
REW/SEARCH Rewind/Review playback 35,36,48
PL/_Y Playback 35,36,47~50,54,55,57,62
F.FWD/SEARCH Fast Forward/Forward search playback 35,36,48
INDEX +/- Search for the INDEX mark of a tape 37
SKIP +/- Skip chapter to forward or reverse direction 48,50
STOP Stop 35,37~40,47,49,50
PAUSE/STILL StHI picture/Recording pause on/off 36,39,43,48
REC/OTR Recording 38,40,43
TIMER REC Set the unit to start recording at a preset time 41,42
TV MONITOR Temporarily view a TV channel select on the
VCR wNle in the playback mode 36
SLOW Slow-motion playback 36,48
SLEEP Sleep timer 20
CLOSED CAPTION Switch between closed captioning options 21
AUDIO SELECT Switches sound between mono and stereo 33
Change sound track language of DVD 56
CM SKIP Skip the unwanted short material of a tape 36
TOP MENU Select title of a DVD disc 50,67
ATR Digital AUTO TRACKING 36
SUBTITLE Set Subtitle of a DVD disc 56
ZERO RETURN Stop the tape when the counter reaches 00:90:00 37
ANGLE Change playback angle of a DVD disc 57
COUNTER RESET Reset the counter to 00:00:00 37
MENU Select menu of a DVD disc 50,57
TRACKING + Manual tracking button in playback mode 36
ZOOM Zoom (for DVD playback) 53
INPUT SELECT Switch the connected TV to external mode 14,43
RETURN Remove DVD set up mena 46,51,52,58~65
SPEED Sets the tape speed for recording 38,40,43
REPEAT A-B Repeat playback between A and B (DVD/CD) 54
PROGRAM Confirm the timer program 28,42
PLAY MODE Select playback mode 54,55
TRACKING - Manual tracking button in playback mode 36
EJECT Eject a cassette tape 34,41
OPEN/CLOSE Open or C_ose the tray 47,49,50,62 9
5Q00401AE(06-11) 9 26/5/04, 10:45
Remote control (continued)
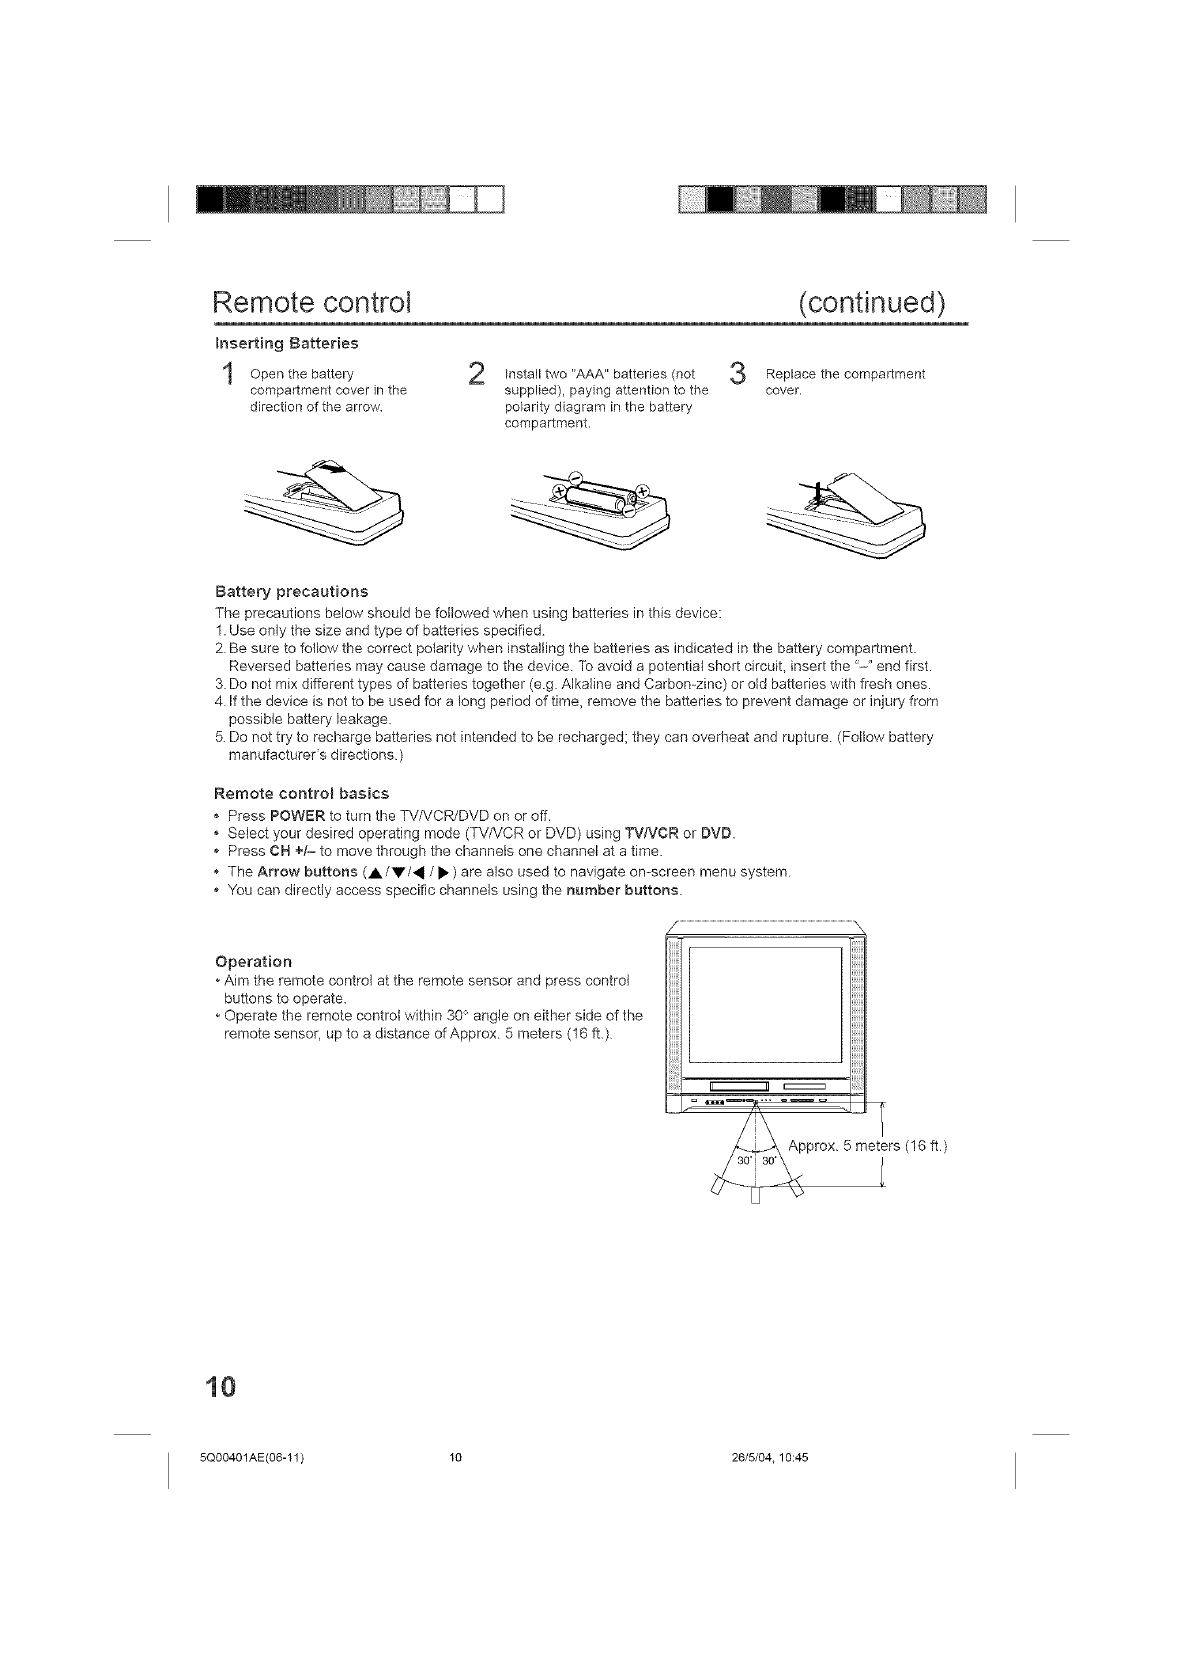
Inserting Batteries
Open the battery Install two "AAA" batteries (not 3Replace the compartment
compartment cover in the supplied), paying attention to the cover.
direction of the arrow polarity diagram in the battery
compartment.
Battery precautions
The precautions below should be followed when using batteries in this device:
1. Use only the size and type of batteries specified.
2 Be sure to follow the correct polarity when installing the batteries as indicated in the battery compartment.
Reversed batteries may cause damage to the device. To avoid a potential short circuit, insert the '-" end first.
3. Do not mix different types of batteries together (e.g. Alkaline and Carbon-zinc) or old batteries with fresh ones.
4 If the device is not to be used for a long period of time, remove the batteries to prevent damage or injury from
possible battery leakage.
5. Do not try to recharge batteries not intended to be recharged; they can overheat and rupture (Follow battery
manufacturer's directions)
Remote control basics
• Press POWER to turn the TV/VCR/DVD on or off.
• Select your desired operating mode (TV/VCR or DVD) using "PTNCR or BVB.
Press CH +/- to move through the channels one channel at a time.
• The Arrow buttons (A/V/_ /• ) are also used to navigate on-screen menu system
You can directly access specific channels using the number buttons.
Operation
• Aim the remote control at the remote sensor and press control
buttons to operate.
Operate the remote control within 30 ° angle on either side of the
remote sensor, up to a distance of Approx 5 meters (16 fh) ...............................................................................
Approx. 5 meters (16 ft)
10
5Q00401AE(06-11 ) 10 26/5/04.10:45
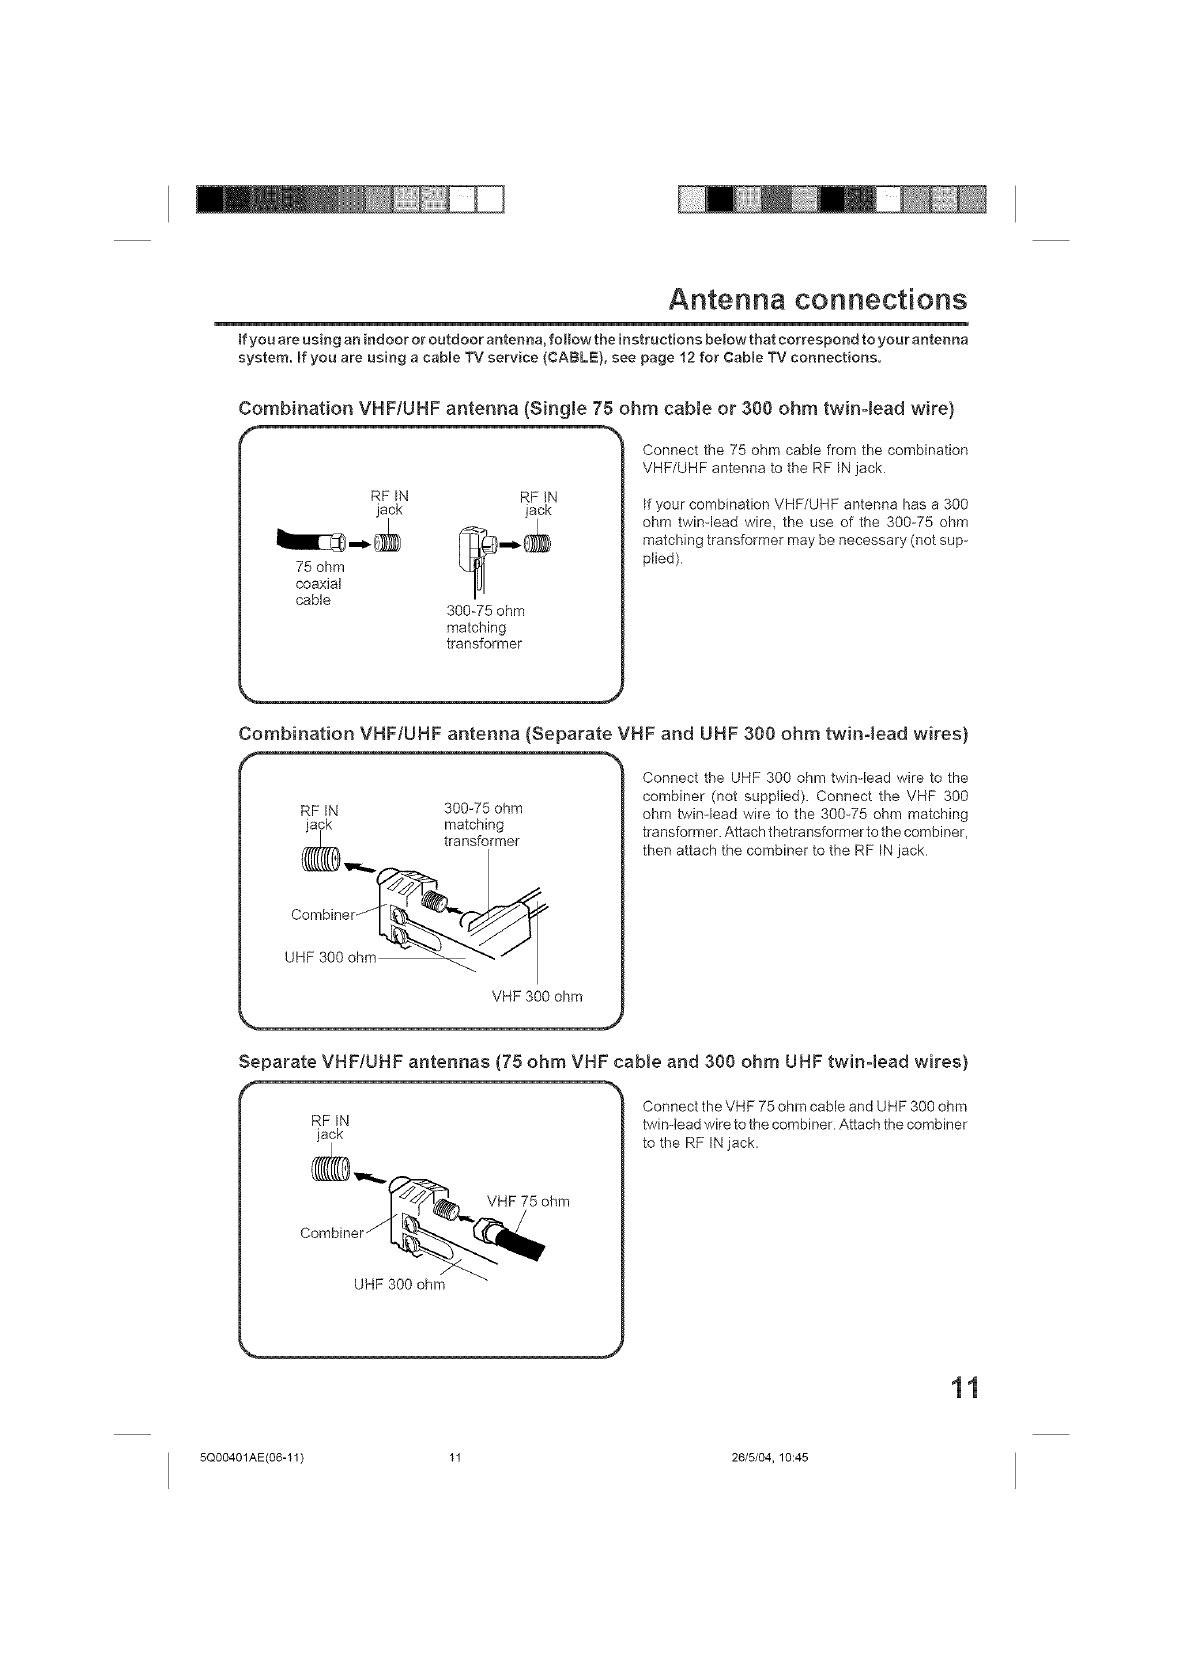
Antenna connections
tf you are using an indoor or outdoor antenna, foHowthe instructions belowthat correspond to your antenna
system. If you are using acable TV service (CABLE), see page 12 for Cable "IV connections.
Combination VHF/UHF antenna (Single 75 ohm cabte or 300 ohm twinqead wire)
f
connect the 75 ohm cable from the combination
VHF/UHF antenna to the RF IN jack
RF _N
jack
75 ohm
coaxial
cable
RF IN
jack
300-75 ohm
matching
transformer
If your combination VHF/UHF antenna has a 300
ohm twin-lead wire, the use of the 300-75 ohm
matching transformer may be necessary (not sup-
plied)
Combination VHF/UHF antenna (Separate VHF and UHF 300 ohm twin4ead wires)
RF IN 300-75 ohm
jack matching
(_ _,,,,,. transformer
VHF 300 ohm
Connect the UHF 300 ohm twin-lead wire to the
combiner (not supplied). Connect the VHF 300
ohm twin-lead wire to the 300-75 ohm matching
transformer. Attach thetransformer to the combiner,
then attach the combiner to the RF IN jack
,,,#
Separate VHF/UHF antennas (75 ohm VHF came and 300 ohm UHF twinqead wires)
RF _N
jack
UHF 300 ohm
Connect the VHF 75 ohm cable and UHF 300 ohm
twin-lead wire to the combiner Attach the combiner
to the RF IN jack.
5Q00401 AE(06-11) 11 26/5/04, 10:45
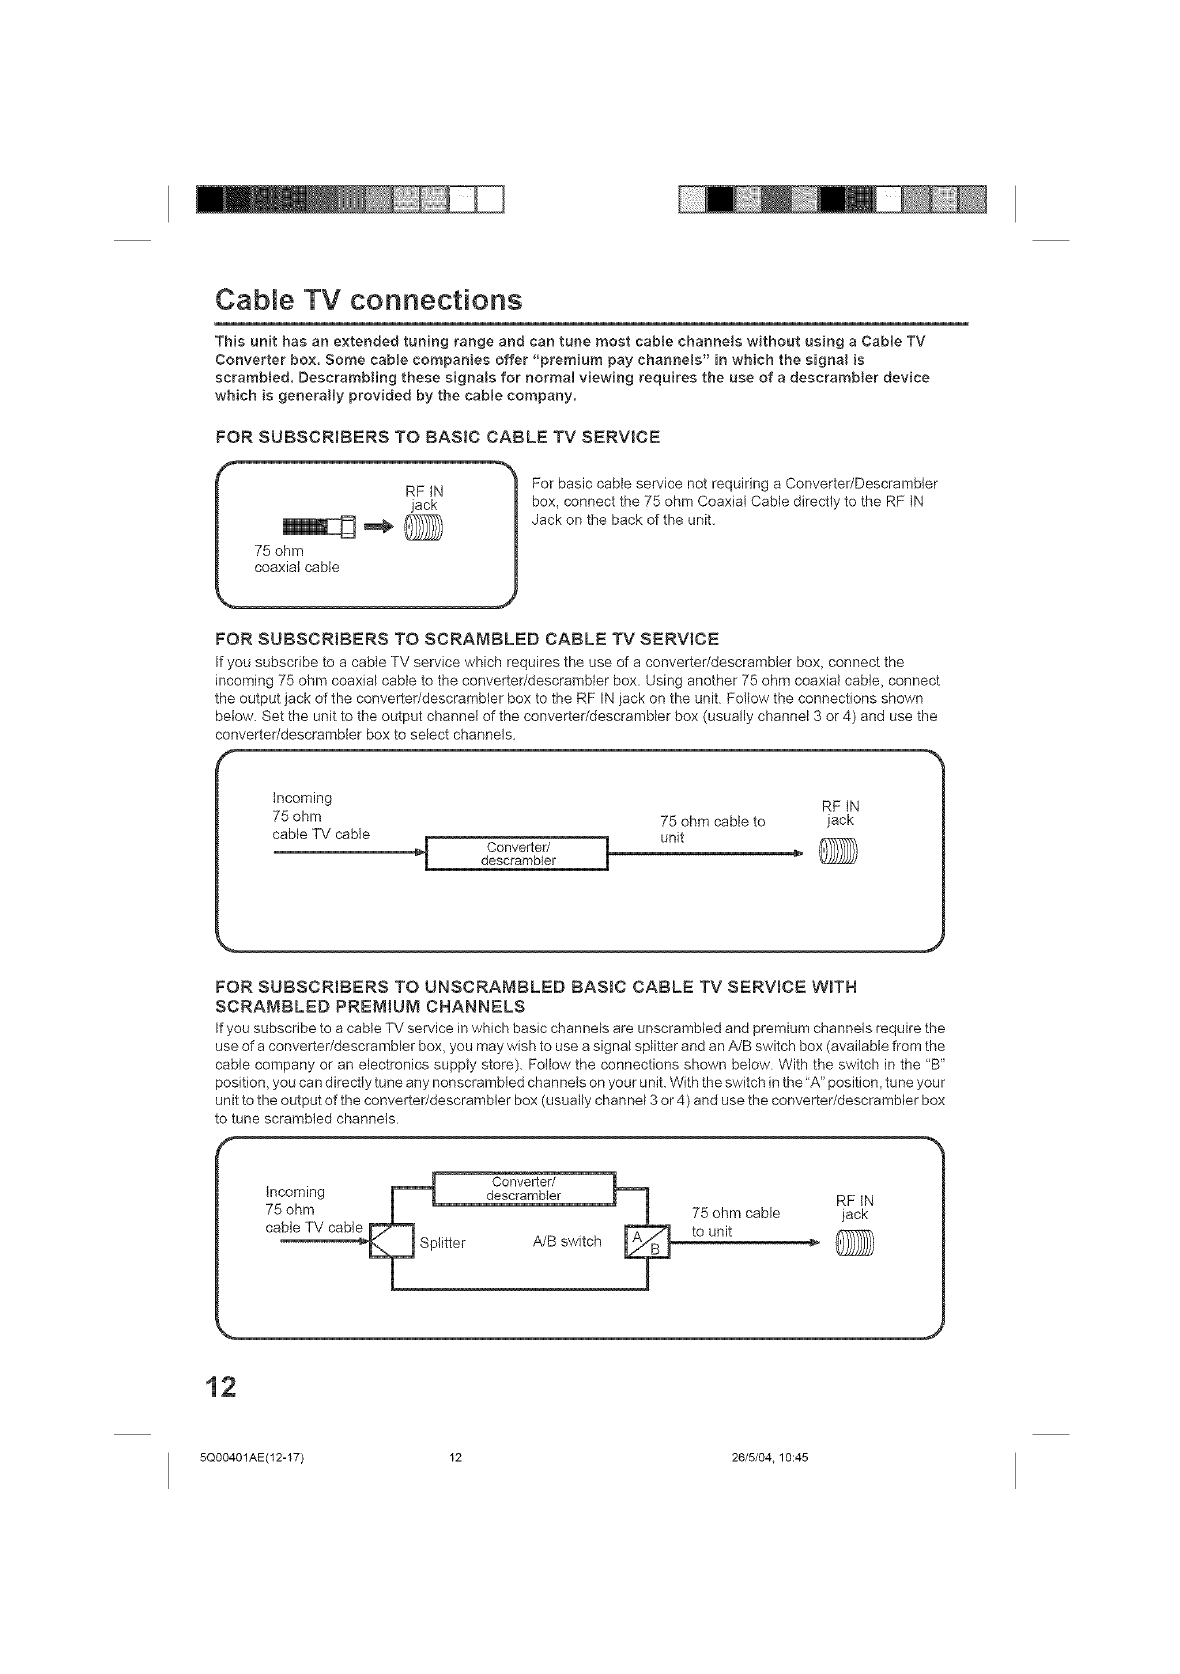
Cable TV connections
This unit has an extended tuning range and can tune most cabJe ehanneJs without using a Cable TV
Converter box, Some cable companies offer "premium pay channels" in which the signal is
serambJed, DescrambHng these signals for normaO viewing requires the use of a descrambJer device
which is generally provided by the cable company.
FOR SUBSCRIBERS TO BASIC CABLE TV SERVICE
For basic cable service not requiring a Converter/Descrambler
box_ connect the 75 ohm Coaxial Cable directly to the RF IN
Jack on the back of the unit.
FOR SUBSCRIBERS TO SCRAMBLED CABLE TV SERVICE
If you subscribe to a cable TV service which requires the use of a converter/descrambler box, connect the
incoming 75 ohm coaxial cable to the converter/descrambler box. Using another 75 ohm coaxial cable, connect
the output jack of the converter/descrambler box to the RF IN jack on the unit Follow the connections shown
below. Set the unit to the output channel of the converter/descrambler box (usually channel 3 or 4) and use the
converteddescrambler box to select channels.
f
incoming RF IN
75 ohm 75 ohm cable to jack
cable TV cable unit
Converter/ i _' _)descrambler
FOR SUBSCRmBERS TO UNSCRAMBLED BAS_C CABLE TV SERVICE WroTH
SCRAMBLED PREMmUM CHANNELS
If you subscribe to a cable TV service in which basic channe}s are unscrambled and premium channels require the
use of a converteddescrambler box, you may wish to use a signal splitter and an AJB switch box (available from the
cable company or an electronics supply store). Follow the connections shown below With the switch in the "B"
position, you can directly tune any nonscrambIed channels on your unit. With the switch in the"A" position_ tune your
unit to the output of the converter/descrambler box (usually channel 3 or4) and use the converter/descrambler box
to tune scrambled channels
Converter/
Incoming descrambler RF IN
75 ohm 75 ohm cable jack
cable TV cable to unit
Splitter A/B switch ._
12
5Q00401AE(12-17) 12 26/5/04.10:45
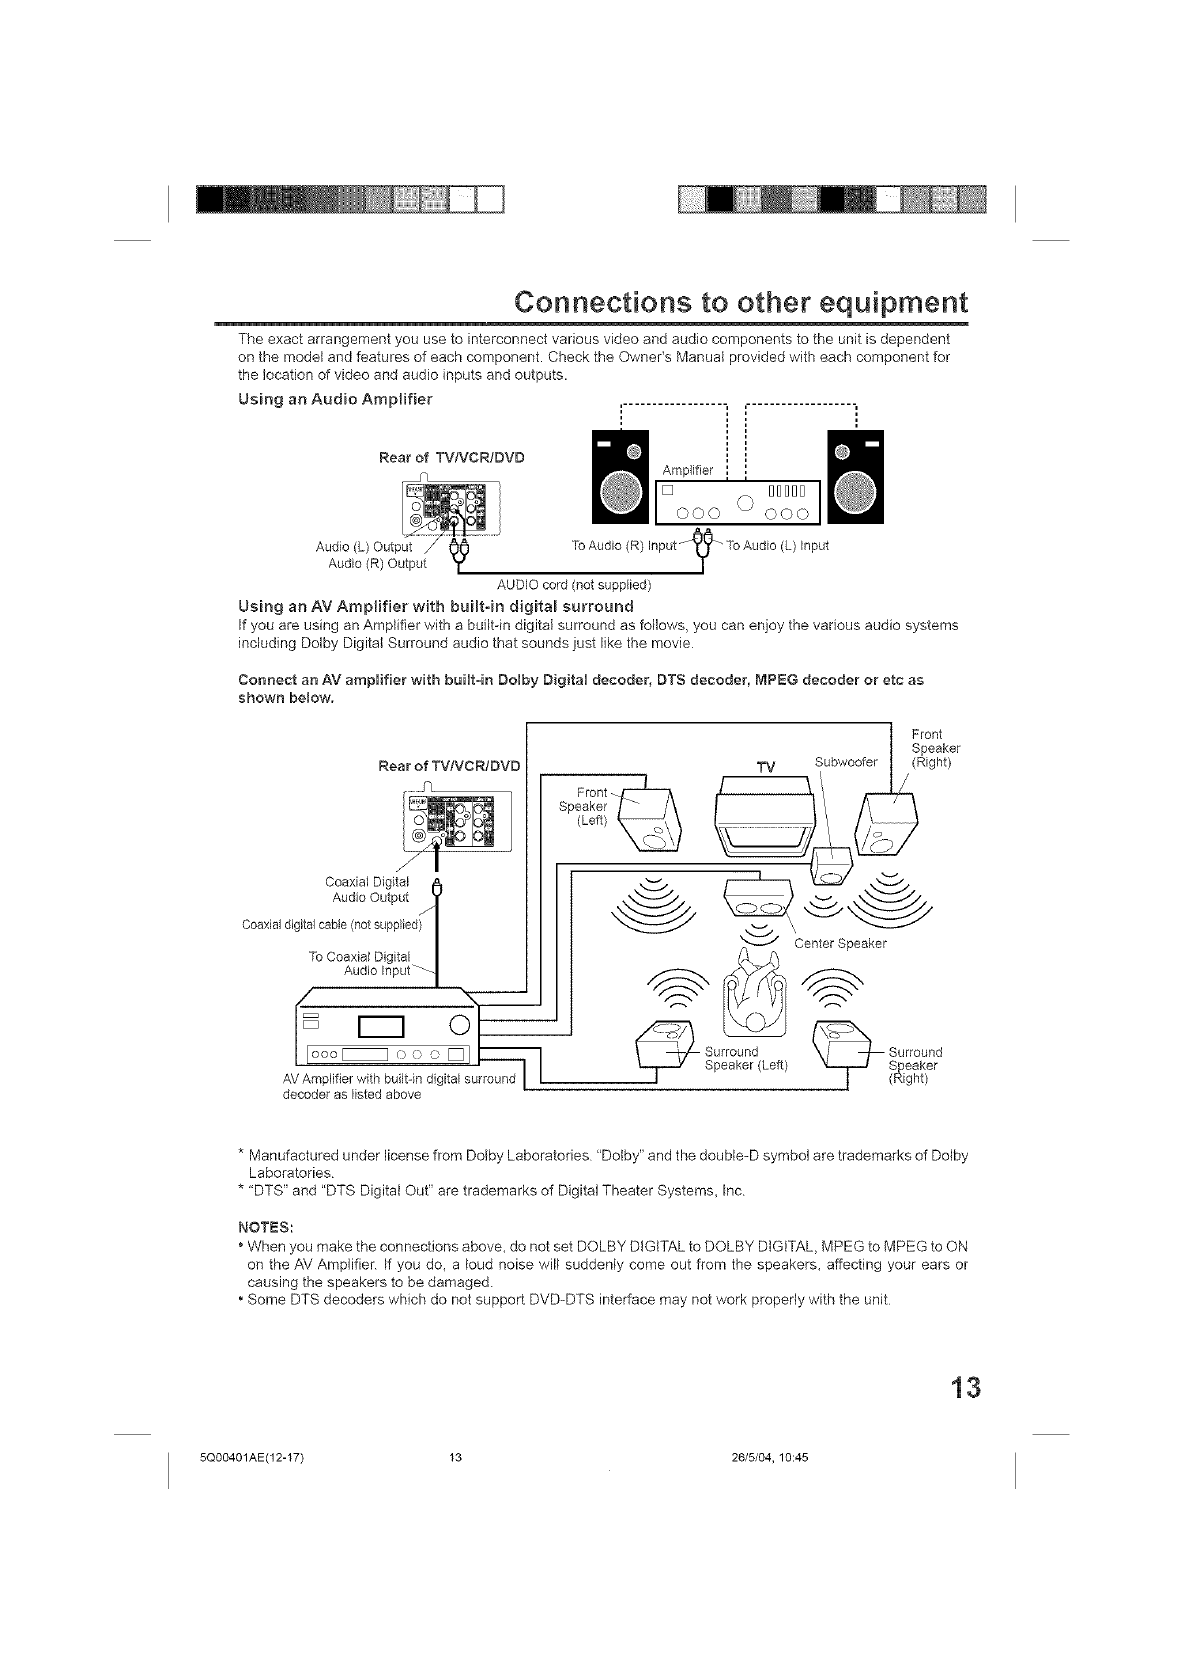
Connections to other equipment
The exact arrangement you use to interconnect various video and audio components to the unit is dependent
on the model and features of each component. Check the Owner's Manual )rovided with each component for
the location of video and audio inputs and outputs.
Using an Audio Amplifier ', ',
Rear of TVNCR/DVD
Amplifier ,
[] DDDDD Iooo O ooo
To Audio (R) Input _10_" To Audio (L) Input
/
AUDIO cord (not supplied)
Using an AV Amplifier w{th built-in digital surround
If you are using an Amplifier with a built-in digital surround as follows, you can enjoy the various audio systems
including Dolby Digital Surround audio that sounds just like the movie
Connect an AV amplifier with built-in Dolby Digital decoder, DTS decoder, MPEO decoder or etc as
shown below,
Rear of TVtVCR!DVD
Coaxial Digital
Audio Output ._"
Coaxial digital cable (notsupplied) I
/
To Coaxial Digital|
Audio Input H
oo_o00_
AV Amplifier with built-in digital suffound I I
decoder as listed above
Front
Speaker /-/\
(Leff)_
i fftker
TV Subwoofer I (Right)
1--
_Center S_
_ Surround _ Surround
Speaker (Left) "¢i-r--J S_qeaker
1 (Right)
* Manufactured under license from Dolby Laboratories "Dotby" and the doubte-D symbol are trademarks of Dolby
Laboratories
* "DTS" and "DTS Digital Out" are trademarks of Digital Theater Systems, Inc
NOTES:
*When you make the connections above, do not set DOLBY DIGITAL to DOLBY DIGITAL, MPEG to MPEG to ON
on the A\! Amplifier. If you do, a loud noise will suddenly come out from the speakers, affecting your ears or
causing the speakers to be damaged.
, Some DTS decoders which do not support DVD-DTS interface may not work property with the unit
13
5Q00401AE(12-17) 13 26/5/04, 10:45
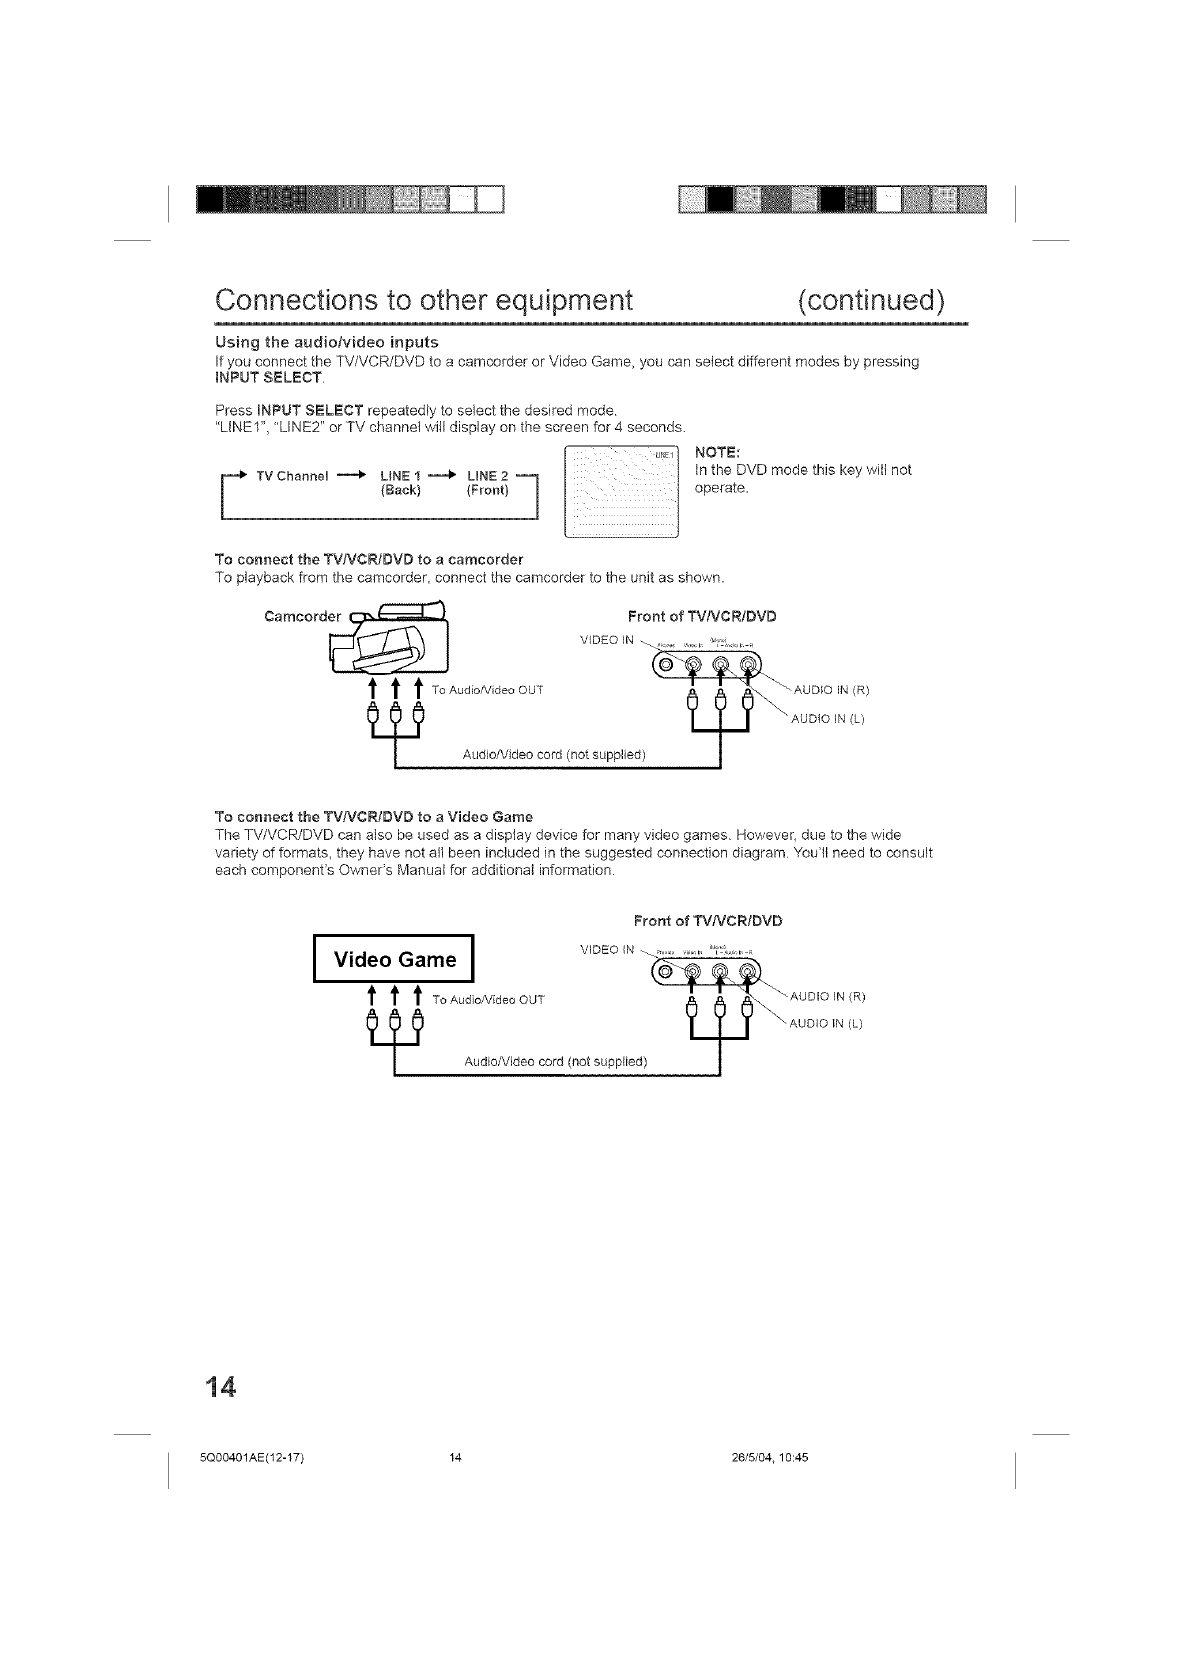
Connections to other equipment (continued)
Using the audiotvideo inputs
If you connect the TV/VCR/DVD to a camcorder or Video Game, you can select different modes by pressing
iNPUT SELECT
Press _NPUT SELECT repeatedly to select the desired mode
"LINE1", "LINE2" or TV channel will display on the screen for 4 seconds.
F _ in the DVD mode this
(Back) (Front) j operate.
To connect the TVNCRIDVD to a camcorder
To playback from the camcorder, connect the camcorder to the unit as shown.
key will not
To connect the TVfVCR!DVD to a Video Game
The TV/VCR/DVD can also be used as a display device for many video games. However, due to the wide
variety of formats, they have not all been included in the suggested connection diagram You'll need to consult
each component's Owner's Manual for additional information
IFront of TVNCR/DVD
v,.eo a=eI v, ,o,N
t t t ToAo_io/vidooOOT _, _, A'_\*°°'°'"
/ AudioMdeo cord (not supplied) 1
(R)
(L)
5Q00401AE(12-17) 14 26/5/04.10:45
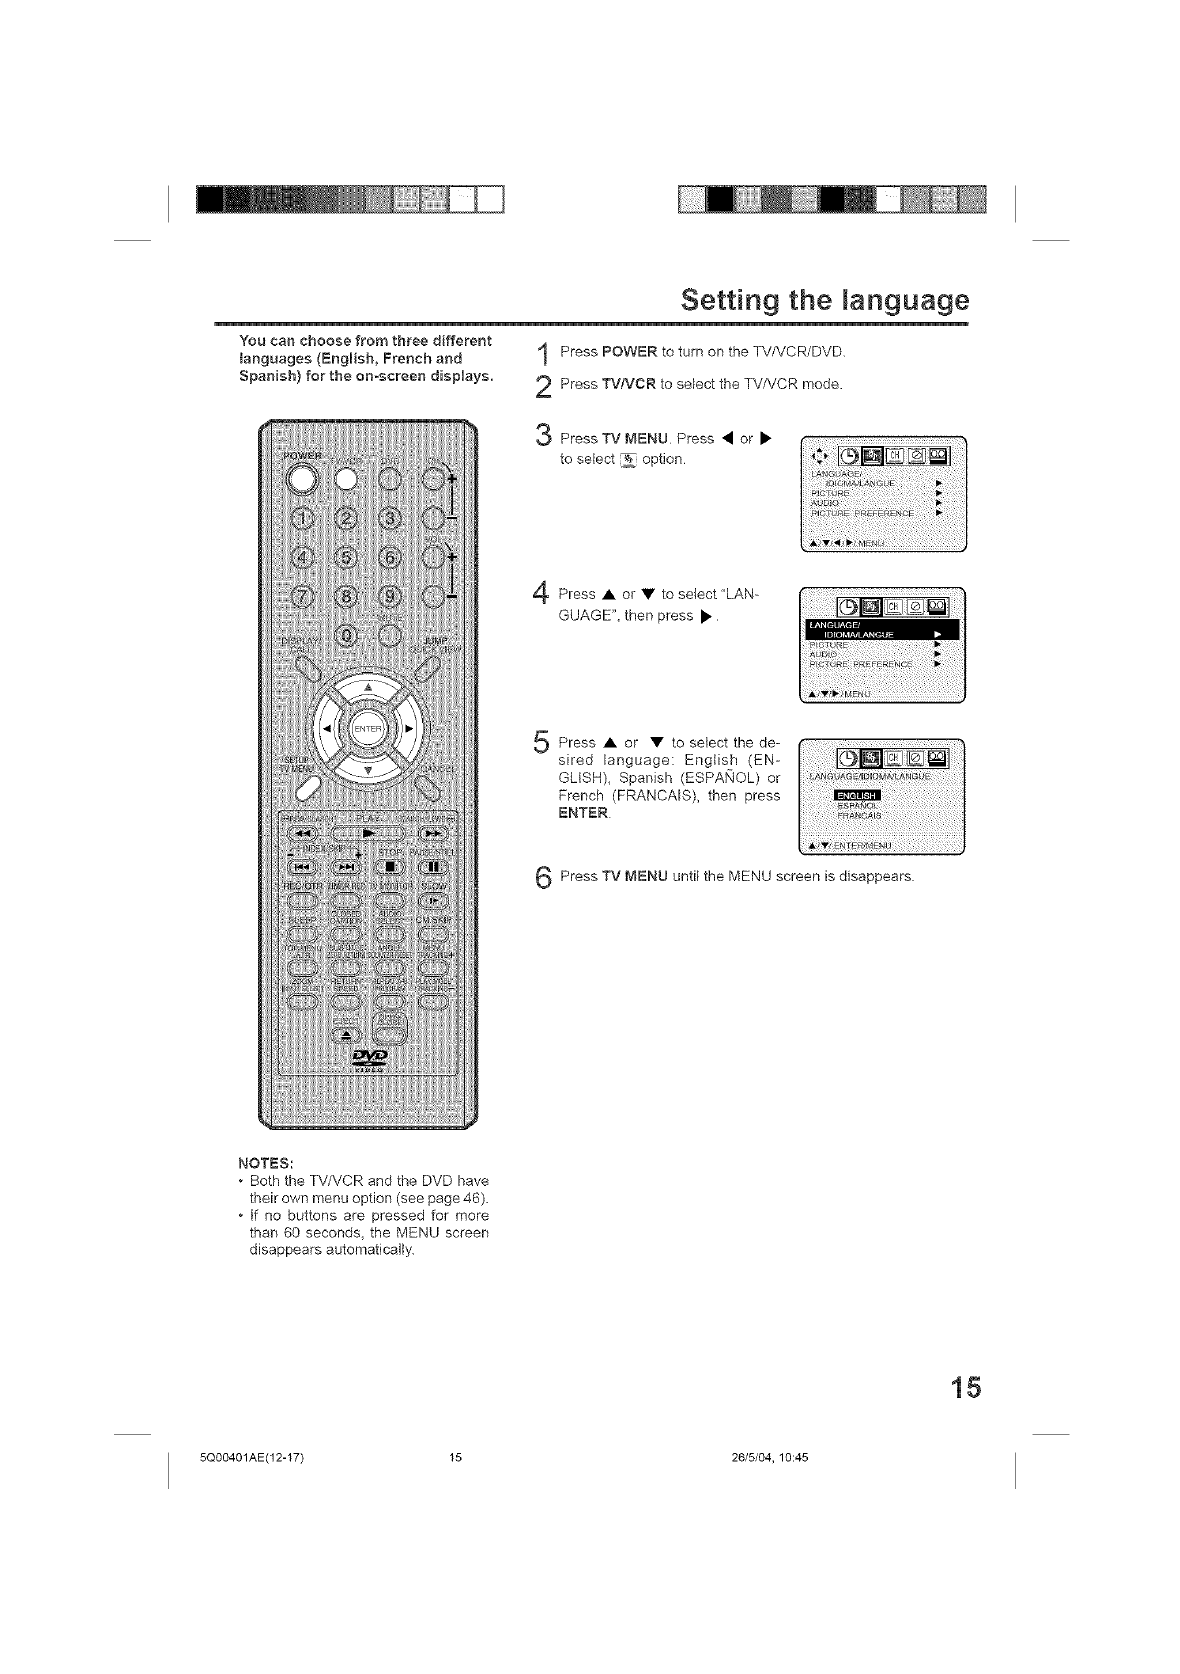
Setting the anguage
You can choose from three different
languages (English,French and
Spanish) for the on-screen displays.
Press POWER to turn on the TV/VCR/DVD.
Press TV!VCR to select the TV/VCR mode.
Press TV MENU Press • or •
to se ect _ option
Press • or • to select"LAN-
GUAGE", then press •
Press • or • to select thede-
sired language: English (EN-
GMSH), Spanish (ESPANOL) or
French (FRANCAIS), then press
ENTER
Press TV t_,IENU until the MENU screen is disappears
NOTES:
*Both the TV/VCR and the DVD have
their own menu option (see page 46).
*If no buttons are pressed for more
than 60 seconds, the MENU screen
disappears automatically.
15
5Q00401AE(12-17) 15 26/5/04, 10:45

Auto clock setting
The Auto Clock function will
automatically set the builtoin clock
(Month, Day, Year and Time) when
the TV/VCR/DVD is connected to an
Antenna or Cable system and it is
turned off. As the TV/VCR/DVD
searches for a receivabOe station in
your area and it receives a broad- '_
cast signal for Auto Clock, the Auto
Clock needs several minutes to set
itself. 4
5
6
AUTO CLOCK SETTING
Connect the Antenna or Cable system.
•if you use a cable box, turn it on
Plug the AC Power cord to the AC outlet.
Make sure the TV/VCR/DVD is turned off.
•If you press POWER, Auto Clock set is not effective.
Wait at least three minutes and press POWER
Press DISPLAY[CALL to check the clock on the screen
If the dock is not set, make sure you are receiving TV channels.
The Auto C}ock may not function properly if the reception condi-
tion is not good.
AUTO CLOCK ADJUSTMENT
The Auto Clock Adjustment will be performed at 12:00 PM
everyday if you turn off the TV/VCR/DVD.
• If you use a cable box and you want Auto Clock adjustment to be
performed, the cable box must be left on
• The Auto Clock Adjustment won't work if there is more than 5
minutes between the builtdn clock time and the actual time
TO SET AUTO CLOCK TO OFF
When shipped from factory "AUTO CLOCK" is set to "ON".
But if you do not want Auto Clock set (Adjustment):
Turn on the TVNCR/DVD.
Press TV MENU
3 Press • or • to select Q option.
Press • or • to select "AUTO
CLOCK".
Press • or • to select"OFF"
NOTES:
* After a power failure or disconnection
of the power, the timer settings will be
lost. In this case, reset the present time.
* If you live in Newfoundland and the
Auto Clock does not function properly,
set the AUTO CLOCK menu option to
"OFF" and set the clock manually
Press TV MENU repeatedly to
return to the normal screen.
• When "AUTO CLOCK" is set
to "OFF", the Auto Clock
adjustment does not function.
• Set the clock manually (see
page 18)
16
5Q00401AE(12-17) 16 26/5/04.10:45
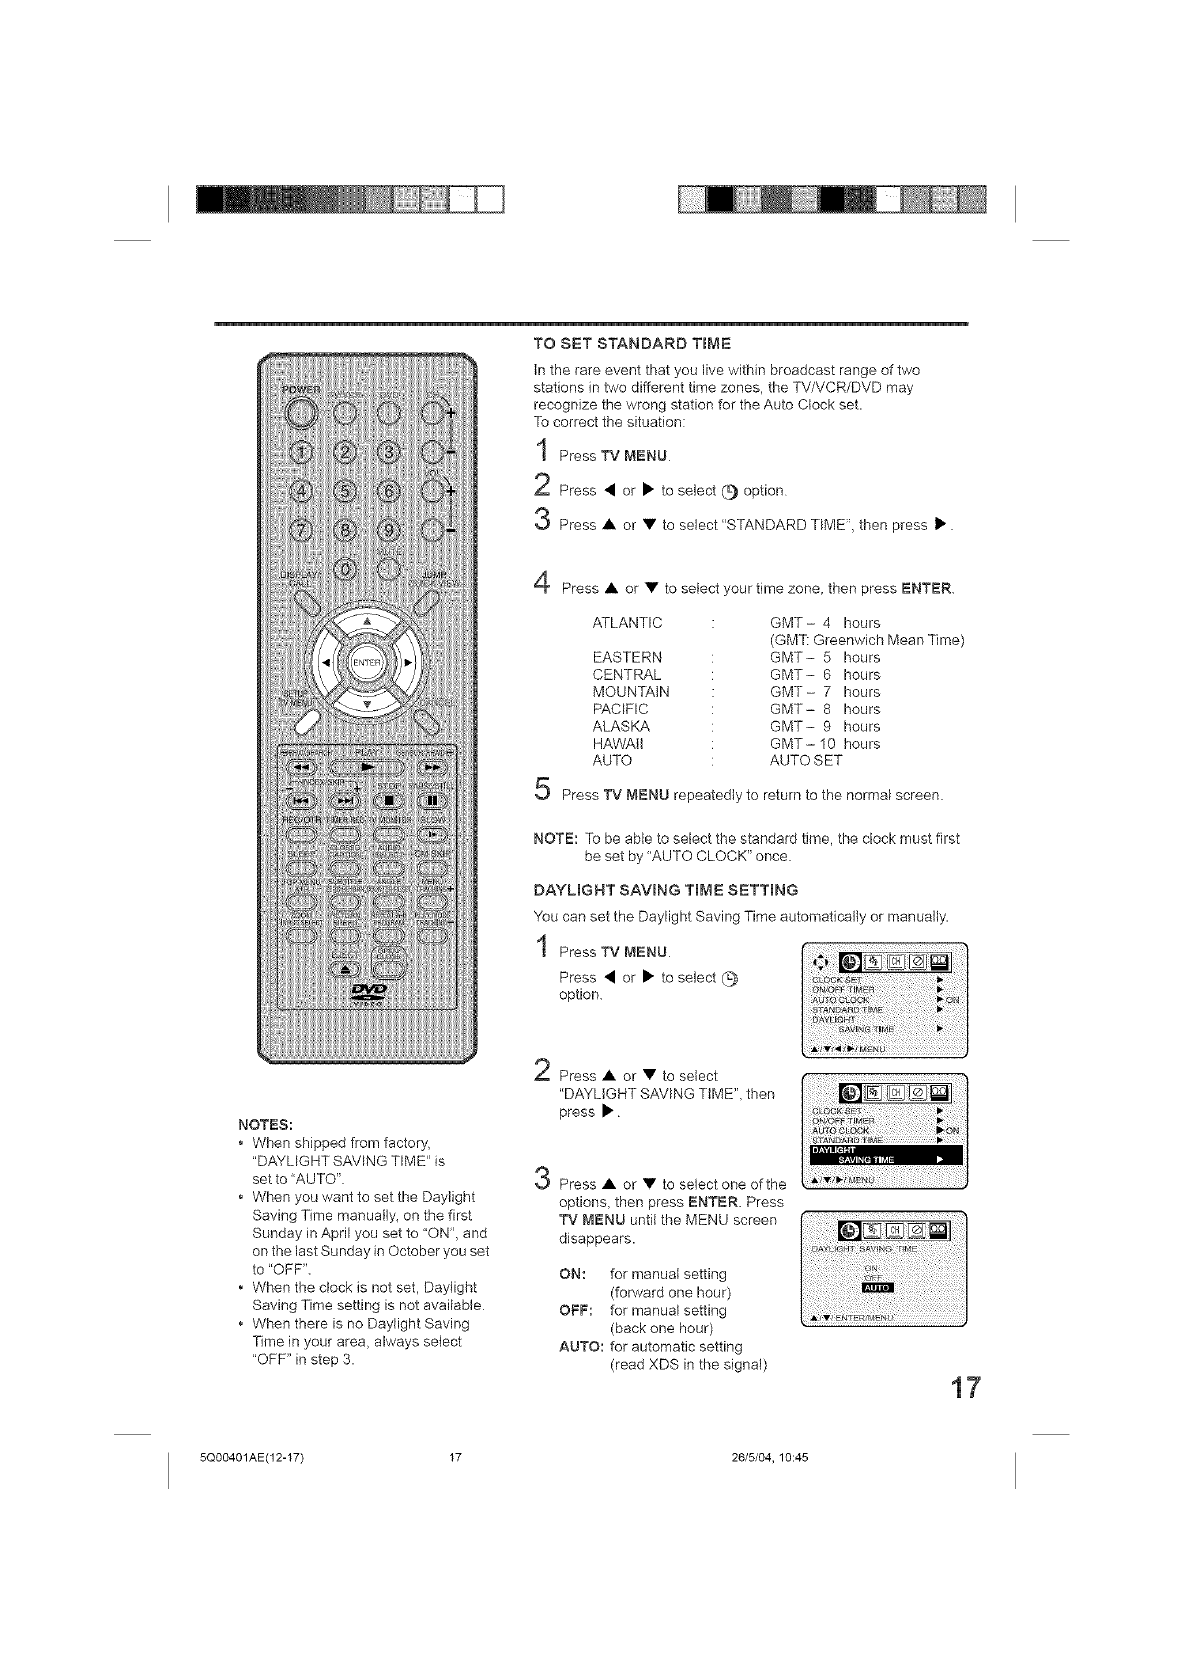
TO SET STANDARD TIME
In the rare event that you live within broadcast range of two
stations in two different time zones, the TV/VCR/DVD may
recognize the wrong station for the Auto Clock set.
To correct the situation:
PressTV MENU
2Press • or • to select (_ option
Press • or • to select "STANDARD TIME", then press •.
Press • or • to select your time zone, then press ENTER.
ATLANTIC
EASTERN
CENTRAL
MOUNTAIN
PACIFIC
ALASKA
HAWAII
AUTO
GMT- 4 hours
(GMT: Greenwich Mean Time)
GMT- 5 hours
GMT- 6 hours
GMT- 7 hours
GMT- 8 hours
GMT- 9 hours
GMT- 10 hours
AUTO SET
Press TV MENU repeatedly to return to the normal screen.
NOTE: To be able to select the standard time, the clock must first
be set by "AUTO CLOCK" once.
DAYLIGHT SAVING TIME SETTING
You can set the Daylight Saving Time automatically or manually.
PressTV MENU
Press • or • to select (_
option.
NOTES:
• When shipped from factory,
"DAYLIGHT SAVING TIME" is
set to "AUTO"
• When you want to set the Daylight
Saving Time manually_ on the first
Sunday in April you set to "ON", and
on the last Sunday in October you set
to "OFF".
• When the clock is not set, Daylight
Saving Time setting is not available
• When there is no Daylight Saving
Time in your area, always select
"OFF" in step 3.
Press • or • to select
"DAYLIGHT SAVING TIME", then
press •
Press • or • to select one of the
options, then press ENTER. Press
TV MENU until the MENU screen
disappears.
ON: for manual setting
(forward one hour)
OFF: for manual setting
(back one hour)
AUTO: for automatic setting
(read XDS in the signal) 17
5Q00401AE(12-17) 17 26/5/04, 10:45
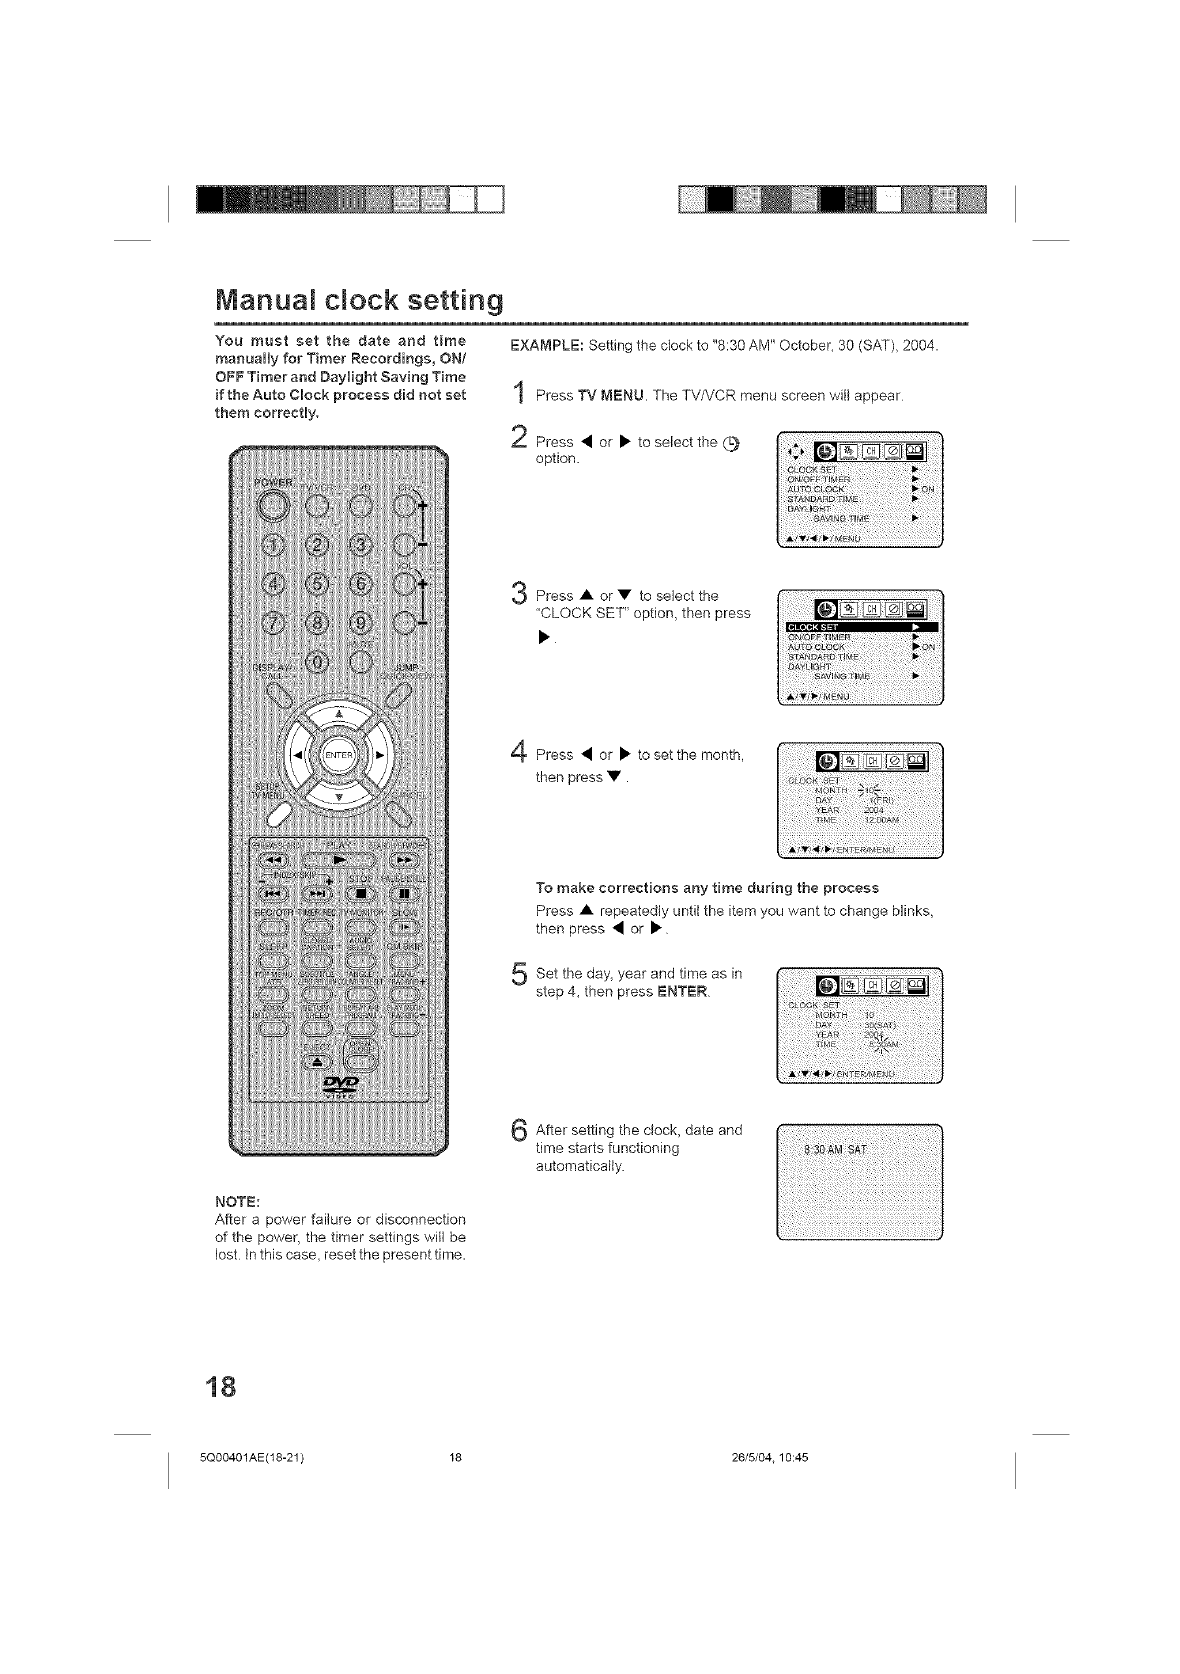
Manuat c ock setting
You must set the date and time
manually for Timer Recordings, ON/
OFF Timer and Daylight Saving Time
if the Auto Clock process did not set
them correctly.
EXAMPLE: Setting the clock to "8:30 AM" October, 30 (SAT), 2004.
Press TV MENU. The TV/VCR menu screen will appear
f Press • or • to select the (_,
option.
Press • or • to select the
"CLOCK SET" option, then press
Press • or • to set the month,
then press •.
NOTE:
After a power failure or disconnection
of the power, the timer settings will be
lost In this case, reset the present time.
To make corrections any time during the process
Press • repeatedly until the item you want to change blinks,
then press • or •
Set the and time in
day, year as
step 4, then press ENTER ill i_i! ¸ _!iig!iii0ilgil iili!
:sn MO_T_ a rJi i ¸au
G After the date and
setting clook,
time starts functioning
automatically.
18
5Q00401AE(18-21) 18 26/5/04.10:45
To turn on the TV/VCR/DVD,
press POWER.
Adjust the volume level by
pressing VOL +or -. The
volume levet appears
TV operation
Set the TV/CABLE menu
option to the appropriate
position. (See page 22.)
TV - VHF/UHF channels
CABLE- CABLE TV channels
NOTES:
*If a channel with no broadcast is
selected, the sound will automati-
cally be muted
*If a station being viewed stops
broadcasting, the TV will automati-
cally shut itself off after 15 minutes.
4Press the Direct Channel selection
buttons to select the channel.
TV Mode Direct Channel Selection
When the TV/CABLE menu option
is in the TV position, all channels
can be instantly selected by using
two buttons. (for example, to select
channel 2, press "0", then "2" If
you press only "2", channel
selection will be delayed for a few
seconds.) For channels 10 and
above, press the 2 digits in order.
CABLE Mode Direct Channel Selection
When the TV/CABLE menu option is in the CABLE position, channels
can be selected as follows:
TO SELECT Cable TV CHANNELS:
1-9: Press "0" twice, then 1-9 as needed. Example, to select
channel 2, press "002".
10-12: Press "0", then the remaining 2 digits Example, to
select channel 12, press "012"
13-99: Press the 2 digits in order. Example, to select channel
36, press "86"
100-125: Press the 3 digits in order. Example, to select channel
120, press "120".
NOTE FOR CHANNELS 1-12:
If only 1 or 2 buttons are pressed, the corresponding channel
will be selected in 2 seconds.
TV CABLE
VHF VEF
2-13 2-13
UBF STD/HRC/IRC
14-69 14-36
(A)(W)
37-59
(AA) (WW)
60-85
(AAA) (ZZZ)
86-94
(86) (94)
95-99
(A-5) (A-1)
190-125
(100) (125)
01
(5A)
19
5Q00401AE(18-21) 19 26/5/04, 10:45

TV operation (continued)
CHANNEL +/=
Press and release CH + or =. The
channel automatically stops at the
next channel set into memory.
For proper operation, before select-
ing channels, they should be set into
the memory See pages 22 and 23
"Memorizing channels".
NOTE:
To listen through the headphones,
insert the headphones (not supplied)
with a 1/8" mini plug into PHONES
jack on the front. The sound from the
TV speaker is muted.
2O
CALL
Press BISPLAY/CALL to display the
current informations on the screen
Press DISPLAY/CALL again to clear
the call display
Channel number or VIDEO mode,
Stereo or SAP (second audio
program) audio status,
Audio output status.
QUICK VIEW
This button allows you to go back to
the last channel selected by press-
ing QUICK VIEW Press QUICK
VIEW again to return to the last
channel you were watching
MUTE
Press MUTE to switch offthe sound.
The unit's sound will be silenced and
"MUTE" will briefly appear on the
screen The sound can be switched
back on by pressing this button
again or one ofVOL + or -
SLEEP
To set the TV/VCR/DVD to turn off
after a preset amount of time, press
SLEEP on the remote control. The
clock will count down 10 minutes for
each press of SLEEP (120, 110,
.10, 0). After the sleep time is
programmed, the display wilt appear
briefly every ten minutes to remind
you that the sleep timer is operating
To confirm the sleep timer setting,
press SLEEP and the remaining
time will be displayed for a few
seconds To cancel the sleep timer,
press SLEEP repeatedly until the
display turns to 0.
I¸,:
i !
5Q00401AE(18-21) 20 26/5/04.10:45
Cmosed caption
WHAT iS CLOSED CAPTIONING?
This television has the capability to decode and display closed captioned television programs. Closed captioning
will display text on the screen for hearing impaired viewers or it will translate and display text in another language
Captions: This closed caption mode will display text on the
screen in English or another language (depending on the set-
ting of the closed captions CH 1/2)
Generally, closed captions in English are transmitted on captions
channel 1 and closed captions in other languages are transmitted
on captions channel 2
Text: The text closed caption mode will usually fill the screen
with a programming schedule or other information
After selecting a closed caption mode, it will stay in effect until it
is changed, even if the channel is changed.
If the captions signal is lost due to a commercial or a break in
the signal, the captions will reappear when the signal is received
again. If the channels are changed, the captions will be delayed
approximately 10 seconds. The captions will appear in places
on the screen where they will least interfere with the picture,
usually on the bottom of the screen. News programs will usually
show three-line closed captions which scroll onto the screen.
Most other shows provide two or three lined captions placed
near the character who is speaking so the viewer can follow the
dialogue Words in italics or underlined describe titles, words in
foreign languages or words requiring emphasis. Words that are
sung usually appear enclosed by musical notes.
For television programs broadcasting with closed captions, look
in your TV guide for the closed captions symbol (CC)
TO ViEW CLOSED CAPTmONS
Press CLOSED CAPTION to
switch between normal TV and the
two closed caption modes (cap-
tions and full screen text). Closed
captioning will display text on the
screen for hearing impaired
viewers
NOTES:
When selecting closed captions, the captioning will be delayed approximately 10 seconds
• If no caption signal is received, no captions will appear, but the television will remain in the caption mode.
Misspellings or unusual characters may occasionally appear during closed captioning. This is normal with
closed captioning, especially with live programs. This is because during live programs, captions are also
entered live. These transmissions do not allow time for editing.
When captions are being displayed, on-screen displays, such as volume and mute may not be seen or may
interfere with closed captions.
Some cable systems and copy protection systems may interfere with the closed captioned signal.
If using an indoor antenna or ifTV reception is very poor, the closed caption decoder may not appear or
may appear with strange characters or misspelled words tn this case, adjust the antenna for better reception
or use an outdoor antenna
21
5Q00401AE(18-21) 21 26/5/04, 10:45
Memorizing channels
This TV/VCR/DVD is equipped with a channel memory feature which allows channels to skip up or down to the
next channel set into memory, skipping over unwanted channels. Before selecting channels, they must be
programmed into the unit's memory, tn addition to normal VHF and UHF channels, this TV/VCR/DVD can
receive up to 113 Cable TV channels. To use this TV/VCR/DVD with an antenna, set the TV/CABLE menu
option to the TV mode. When shipped from the factory, this menu option is in the CABLE mode
TVICABLE SELECTION
Press TV MENU in the TV/VCR
mode. The TV/VCR menu screen
will appear
2Press • or • to select [_ option.
Press • or • to select "TV/
CABLE"
,4 Press • or • to select "TV" or
"CABLE"
Press TV MENU until the MENU
screen disappears
CABLE CHART
The chart below is typical of many cable system channel allocations
Number on this TV
CO r respo_din[_ C ............. I 1#,4 1Bb 16 1D/ IE8 1F9 _ 21 22
AA BB OD
EE [_F GG JJ KK LL MM NN PP QQ RR SS TT UU
.......... E6E4E .......... 7KOK .......... Q_Q
ww AAA BBB COO ODD FFF GGG HHtl III JJd ILl MMM NNN OOO PPP
77 78 79 80 81 82 83 ySy4y Z85Z 86 87 88 89 90 91 92 93 94
RRR SSS TTT UUU VVVWWWXXX 86 87 88 89 90 91 92 93 94
95 96 97 9.82 99 .............. 0.....................
A4 100 101 102 103 104 105 106 107 108 109 110 111 112
113 114 115 116 117 118 119 120 121 122 123 124 125 01
113 114 115 116 117 118 119 120 121 122 123 124 125 5A
22
5QOO401AE(22-25) 22 26/5/04.10:45
AUTOMATIC MEMORY TUNING
Press TV/VCR. Press TV MENU, the
TV/VCR menu screen will appear
2Press _ or • to select _ option
Press • or • to select "AUTO CH
MEMORY"
_i; ¸
;_TQ ¸_H _4_ ¸ : _i?
Press •. The TV will begin
memorizing all the channels
available in your area
Press TV MENU until the MENU
screen disappears
TO ADD/DLCLETE CHANNELS
Press TV MENU. The TV/VCR
menu screen will appear.
2Press 4 or • to select _ option
Press • • to select "ADD/
or
DELETE", then press •
_i _ _i itt!ii: :iiiii_ ¸ii ii
_DDi_ELETE I_
Select the desired channel to be
memorized or deleted using the
number buttons (0-9), or • or •
Press _ or • to select "ADD" or
"DELETE", whichever function you
want to perform
PressTV MENU until the MENU
screen disappears
_Dg i ; ; /i i; : _!_i ¸¸
23
5Q00401AE(22-25) 23 26/5/04, 10:45
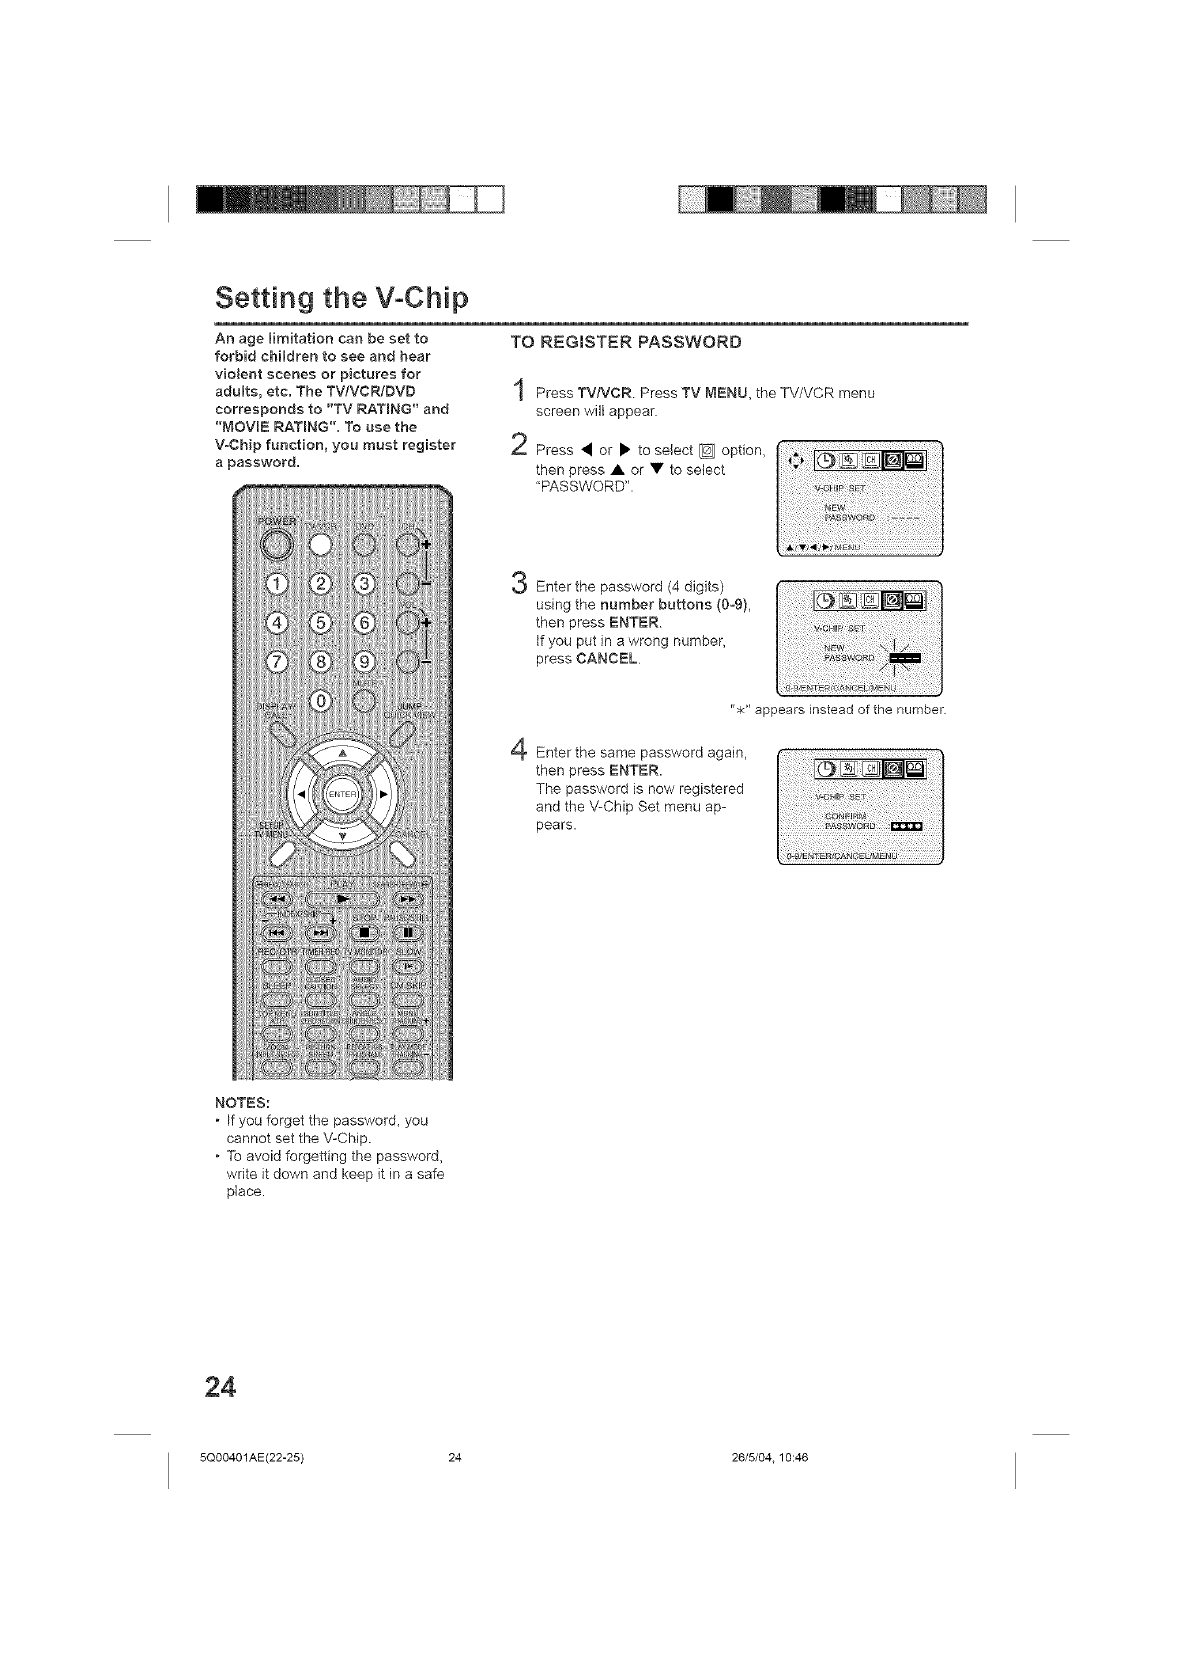
Setting the V-Chip
An age limitation can be set to
forbid children to see and bear
violent scenes or pictures for
adults, etc. The TV/VCR/DVD
corresponds to "TV RATmNG" and
"MOVIE RATING", To use the
V-Chip function, you must register
a password.
TO REGISTER PASSWORD
Press TVNCR Press TV MENU, the TV/VCR menu
screen will appear
/,_ Press • or • to select _ option,
then press • or • to select
"PASSWORD".
Enter the password (4 digits)
using the number buttons (0_9),
then press ENTER
If you put in a wrong number,
press CANCEL
"*" appears instead of the number.
Enter the same password again,
then press ENTER.
The password is now registered
and the V-Chip Set menu ap-
pears.
NOTES:
, If you forget the password, you
cannot set the V-Chip.
, To avoid forgetting the password,
write it down and keep it in a safe
place.
24
5Q00401AE(22-25) 24 26/5/04.10:46
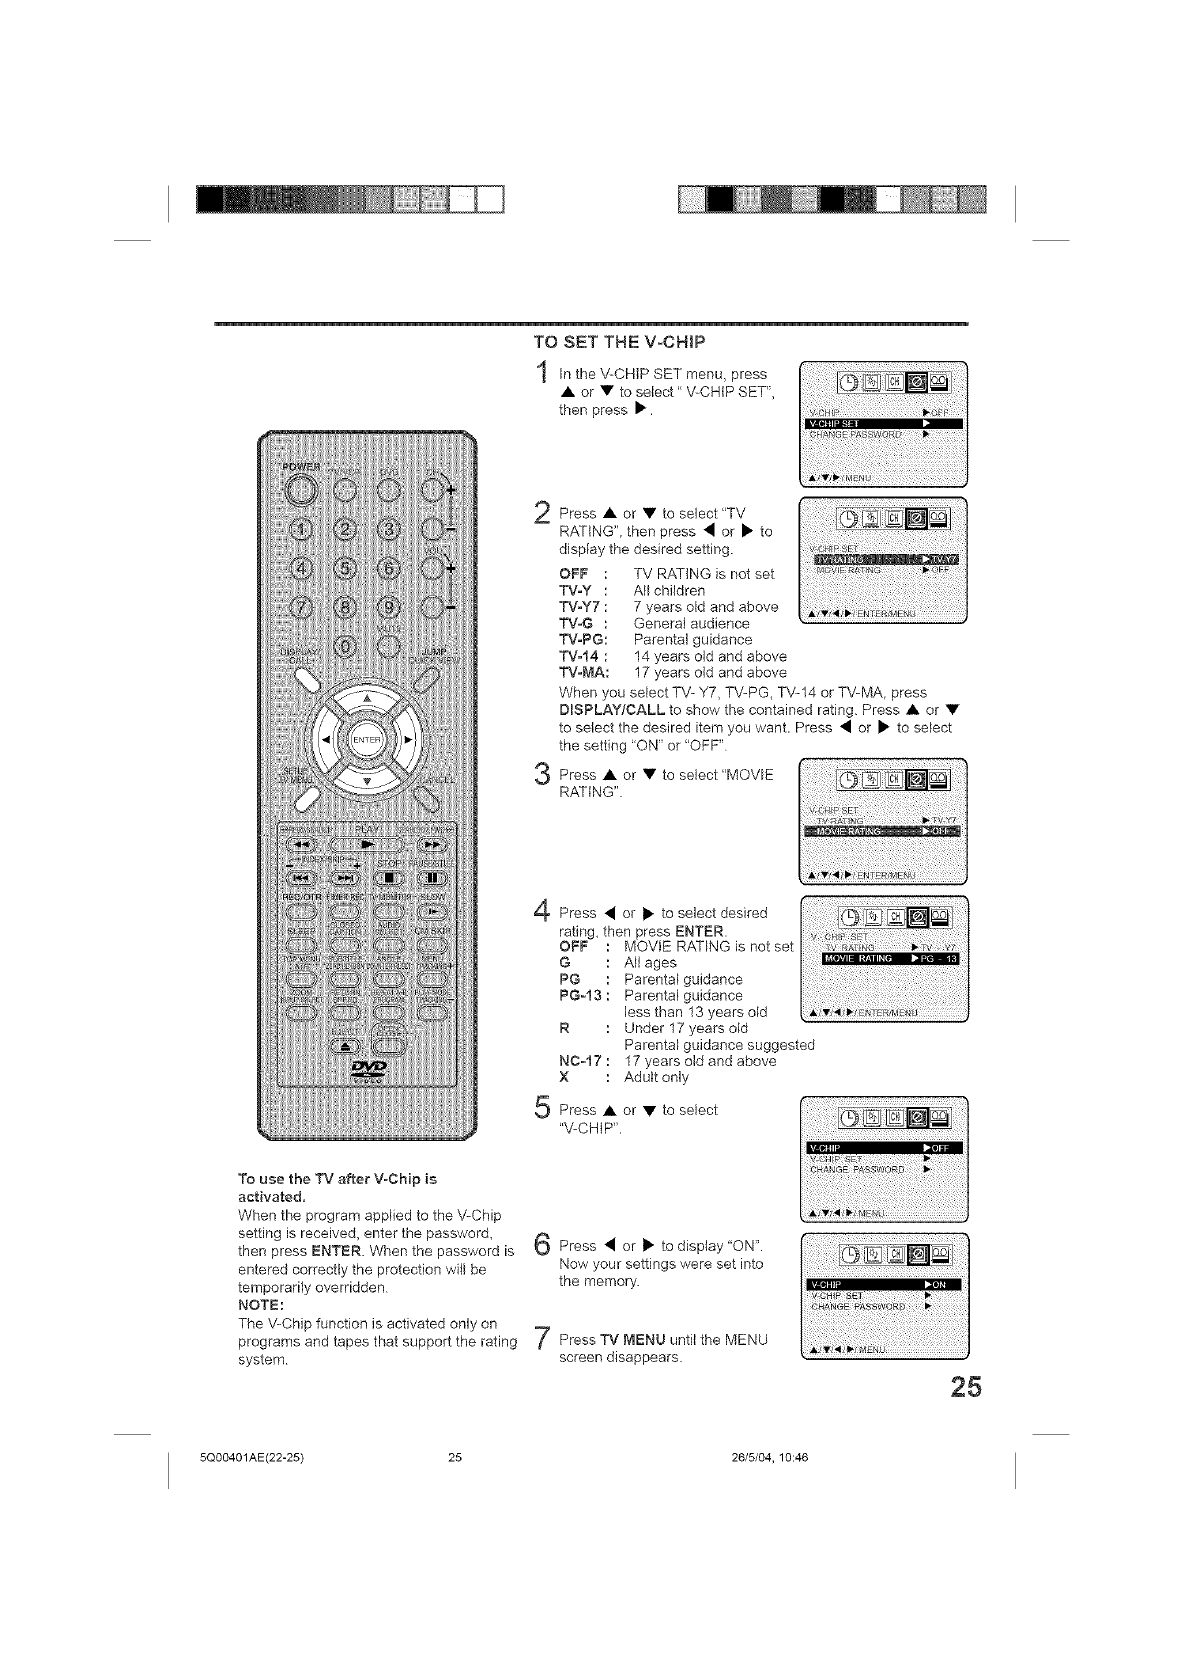
TO SET THE VoCHtP
hi the V-CHIP SET menu, press
• or • to select" V-CH(PSET",
then press •.
2
3
4
5
Press • or • to select "TV
RATING", then press • or • to
display the desired setting.
OFF : TV RATING )s not set
TWY : All children
TV-Y7 : 7 years old and above
TWG : Genera( aud)ence
TWPG: Parenta( guidance
TWt4 : 14 years old and above
TWMA: 17 years o(d and above
When you select TV- Y7, TV-PG, TV-14 or TV-MA, press
DmSPLAY/CALL to show the contained rating. Press • or •
to select the desired item you want. Press • or • to se)ect
the setting "ON" or "OFF"
Press • or • to select "MOVIE
RATING".
i,iiiiii!i i !'iiiili ii! iiii!ii ii!i! i!iiiii i ! !i i!! i,iiiiii!!il
Press • or • to select desired
rating, then press ENTER.
OFF : MOVE RATING is not set
G : A)l ages
PG : Parenta) guidance
PG-13 : Parenta(gu)dance
)ess than 13 years old
R : Under 17 years old
Parenta) gu)dance suggested
NC-17 : 17 years old and above
X : Adult on)y
Press • or • to select
"V-CHIP".
To use the TV after V-Chip is
activated,
When the program appi)ed to the ',!-Chip
setting is received, enter the password,
then press ENTER. When the password is
entered correctly the protect)on wii) be
temporarily overridden
NOTE:
The \!-Chip function is activated only on
programs and tapes that support the rating
system
}Press • or • to display "ON".
Now your settings were set into
the memory.
Press TV MENU unt)i the MENU
screen disappears.
25
5Q00401AE(22-25) 25 26/5/04, 10:46
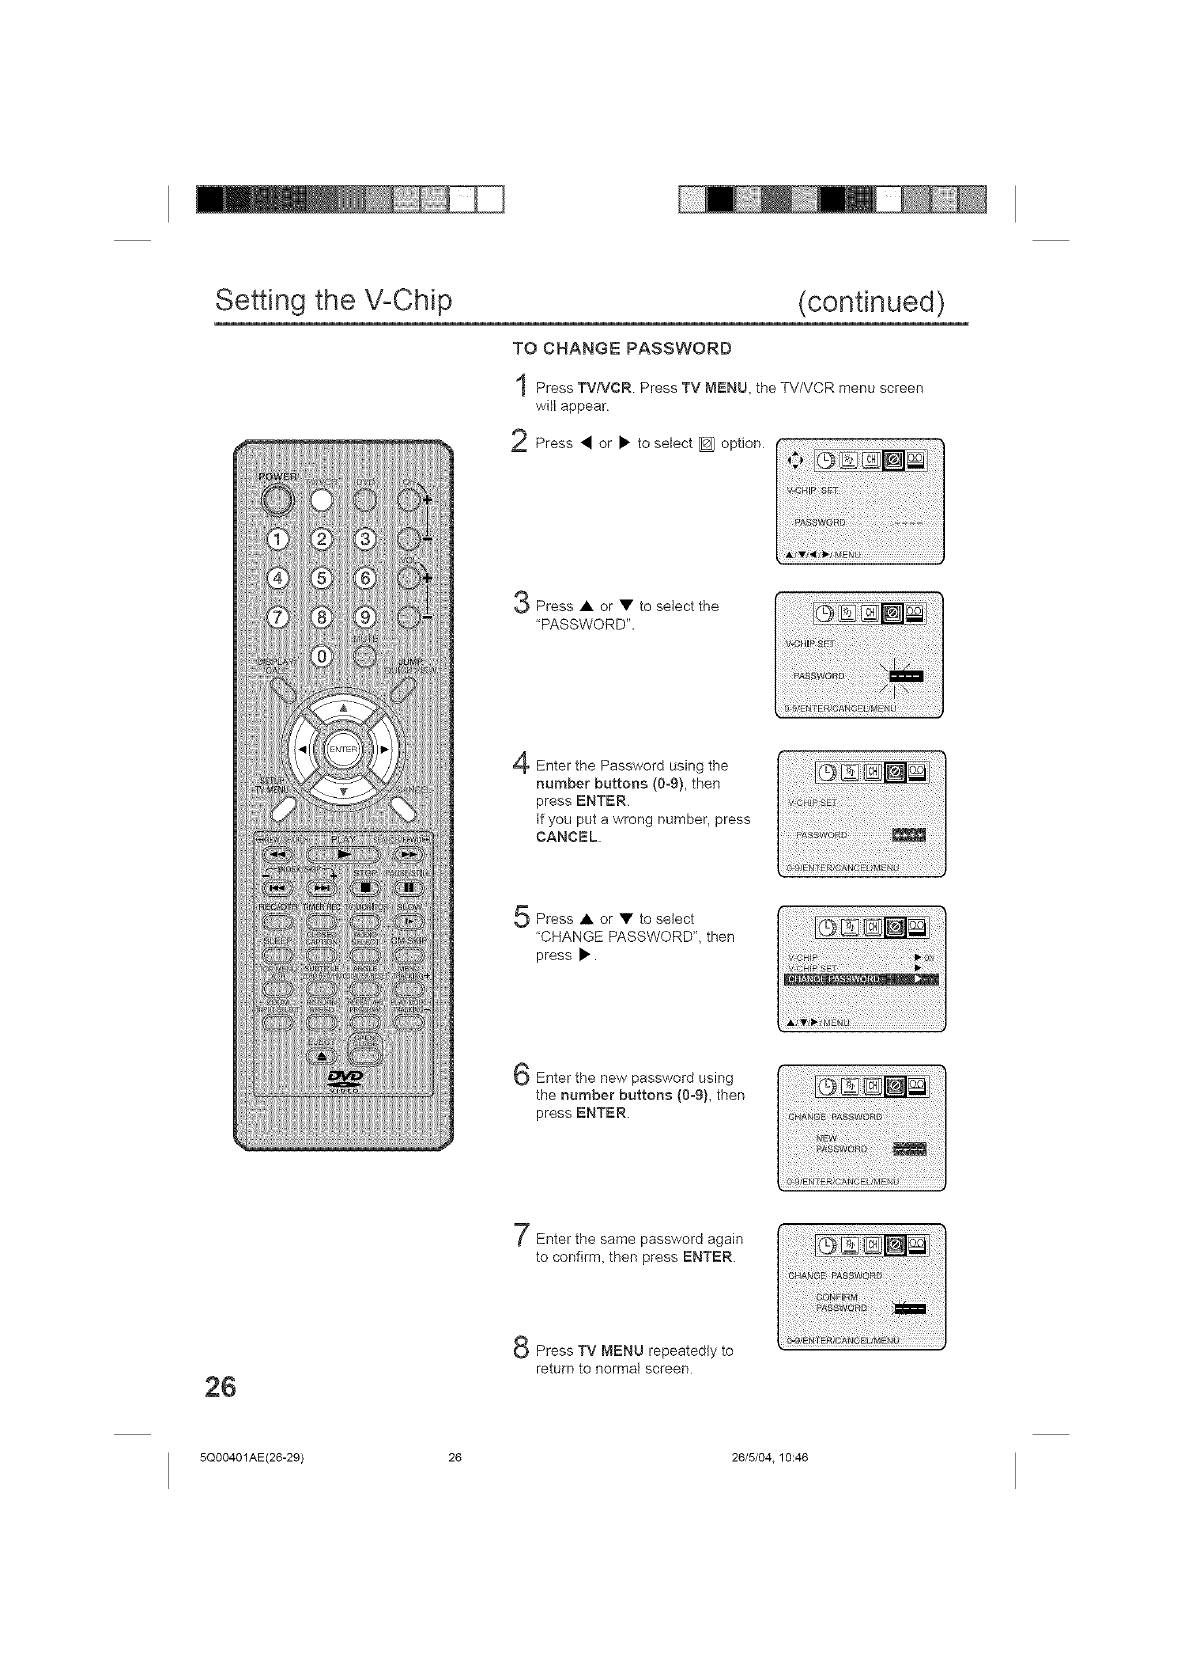
TO CHANGE PASSWORD
Setting the V-Chip (continued)
Press TV/VCR Press TV MENU, the TV/VCR menu screen
will appear
2Press • or • to select _ option
Press • or • to select the
"PASSWORD".
............I@:.__1_1_1
i
Enter the Password using the
number buttons (0o9), then
press ENTER.
If you put a wrong number, press
CANCEL.
Press • or • to select
"CHANGE PASSWORD", then
press •.
Enter the new password using
the number buttons (0_9),then
press ENTER.
Enter the same password again
to confirm, then press ENTER.
Io_iiiii_iiii_ii_ii_ii_ii_i_i!i_i_iiii;!i_i_i_ii!i_!i_iii_i_ii_i;!_i_il_iiii_ii!;_iii!i_!i_ii:_!iii_iiiii!:_igiti_i_ii_i;
iiii:ii_ i_ili_ii!¸ _i ii! i:ilgglgti;!;i ¸
26
Press TV MENU repeatedly to
return to normal screen
5Q00401AE(26-29) 26 26/5/04.10:46
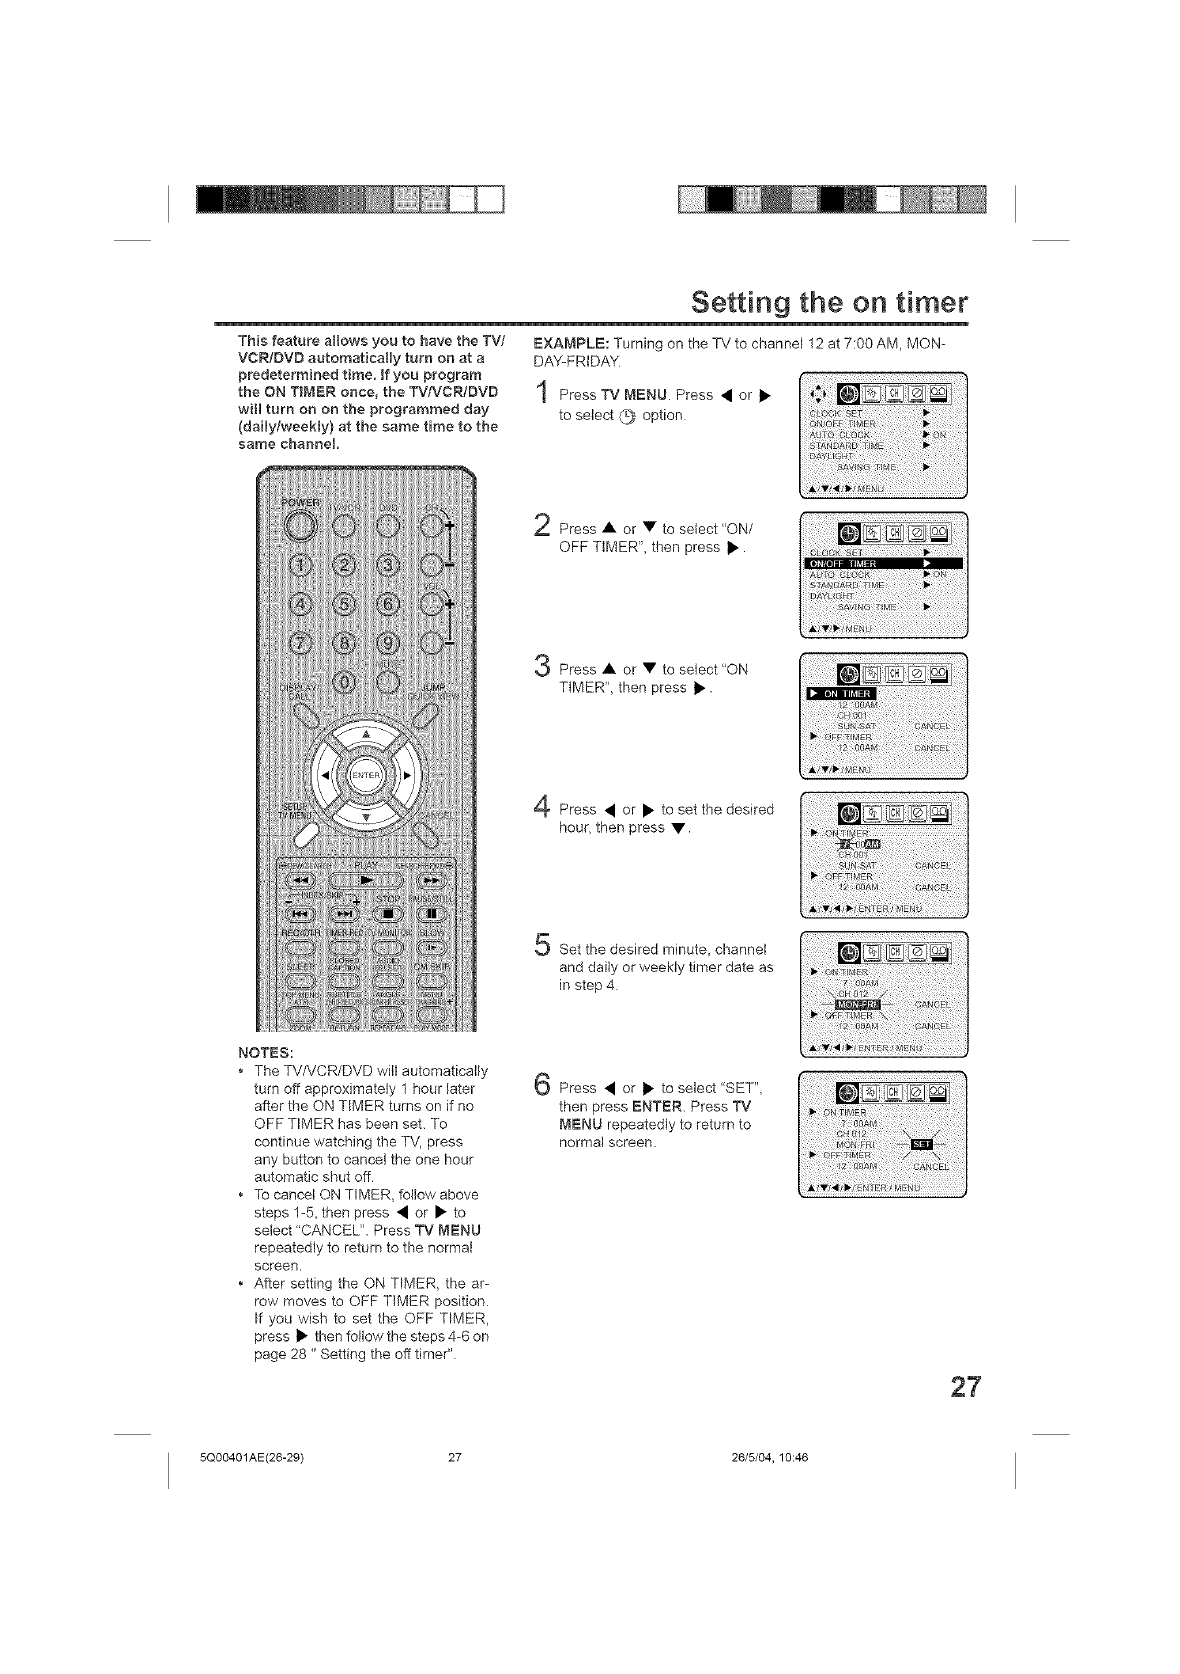
Setting the on timer
This feature allows you to have the TV/
VCR/DVD automatically turn on at a
predetermined time. If you program
the ON TIMER once, the TV/VCR!DVD
witl turn on on the programmed day
(daily!weeHy) at the same time to the
same channel.
EXAMPLE: Turning on the TV to channel 12 at 7:00 AM, MON-
DAY-FRIDAY
1Press TV MENU Press • or •
to select Q option
Press • or • to select "ON/
OFF TIMER", then press •.
Press • or • to select "ON
TIMER", then press •.
Press • or • to set the desired
hour, then press •.
NOTES:
• The TV/VCR/DVD will automatically
turn off approximately 1 hour later
after the ON TIMER turns on if no
OFF TIMER has been set. To
continue watching the TV, press
any button to cancel the one hour
automatic shut off
• To cancel ON TIMER, follow above
steps 1-5, then press • or • to
select "CANCEL". Press TV MENU
repeatedly to return to the normal
screen.
• After setting the ON TIMER, the ar-
row moves to OFF TIMER position
If you wish to set the OFF TIMER,
press • then follow the steps 4-6 on
page 28 "Setting the off timer"
Set the desired minute, channel
and daily or weekly timer date as
in step 4
Press • or • to select "SET",
then press ENTER. Press TV
MENU repeatedly to return to
normal screen.
5Q00401AE(26-29) 27 26/5/04, 10:46
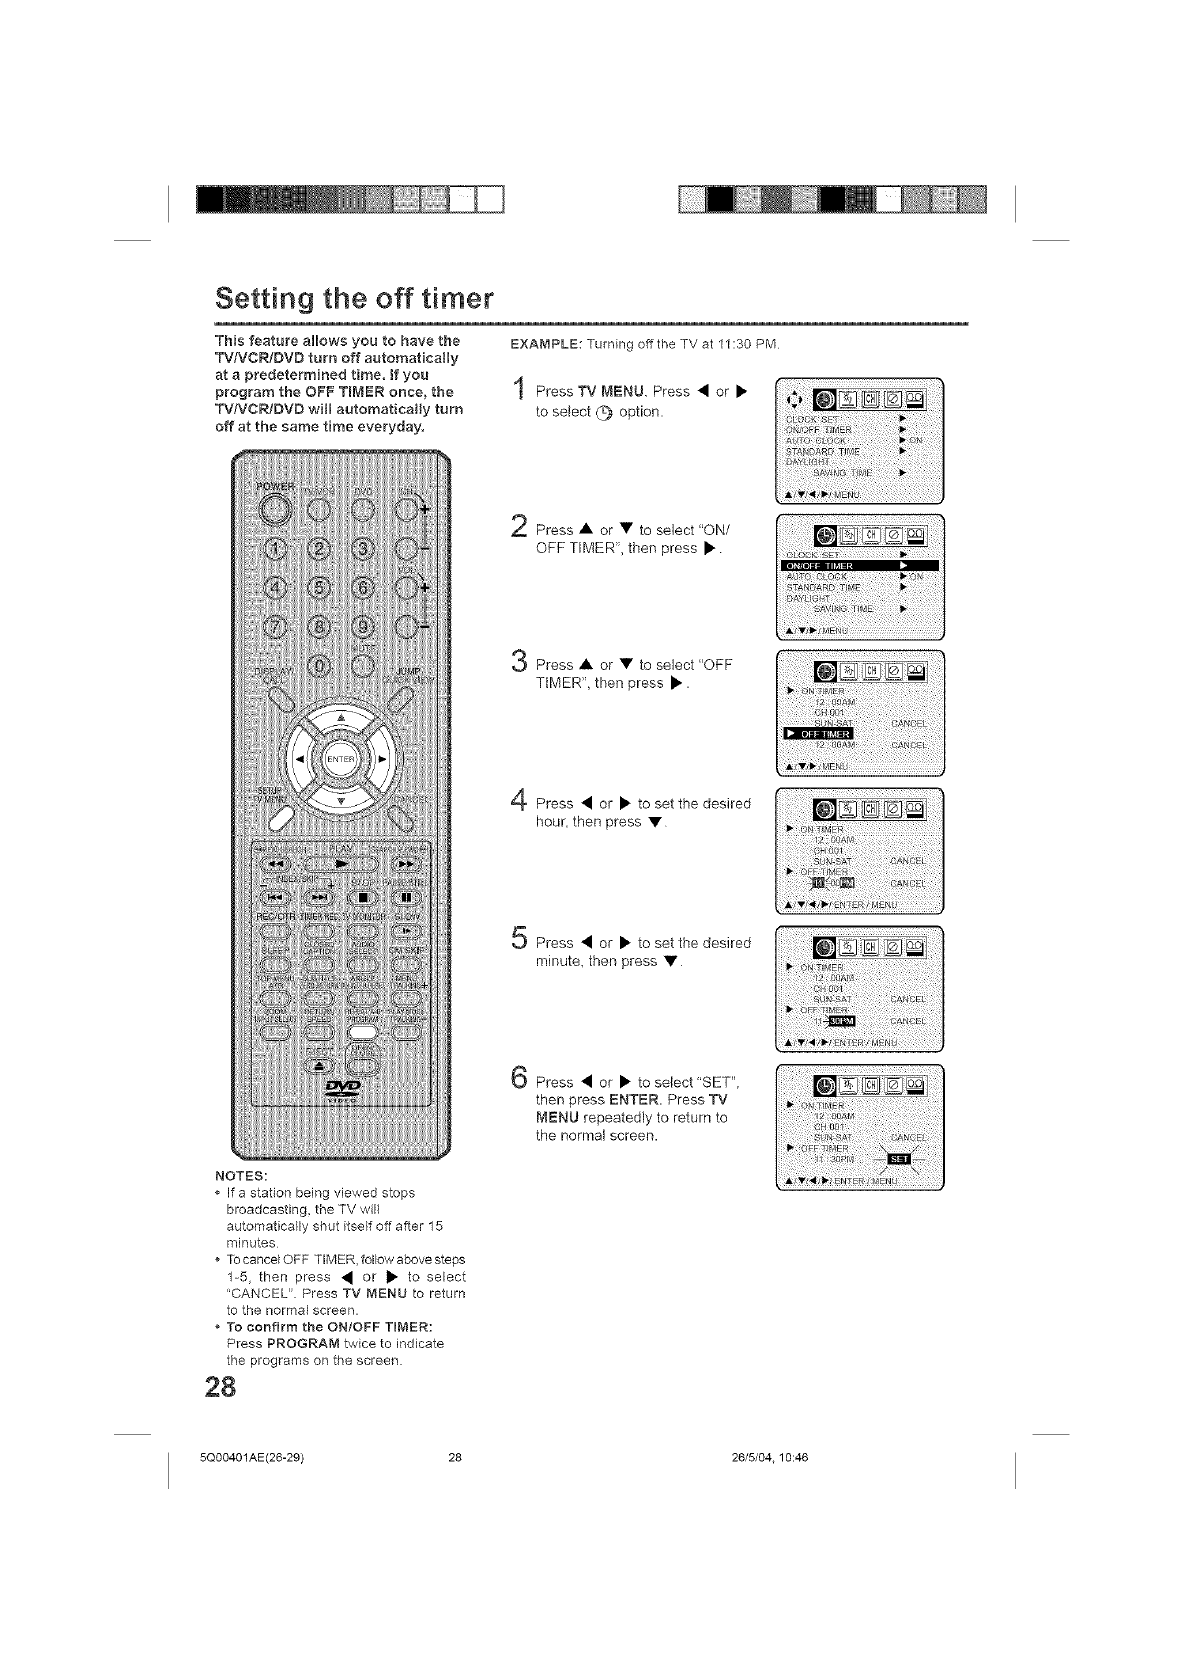
Setting the off timer
This feature allows you to have the
TVIVCR/DVD turn off automatically
at a predetermined time, tf you
program the OFF TIMER once, the
TW'VCR/DVD will automatically turn
off at the same time everyday,
EXAMPLE: Turning off the TV at 11:30 PM
Press TV MENU. Press • or •
to select (_ option.
Press • or • to select "ON/
OFF TIMER", then press •
NOTES:
If a station being viewed stops
broadcasting, the TV will
automatically shut itself off after 15
minutes
To cancer OFF TIMER, follow above steps
1-5, then press • or • to select
'CANCEL" Press TV MENU to return
to the normal screen.
*To confirm the ON/OFF TIMER:
Press PROGRAM twice to indicate
the programs on the screen.
28
Press • or • to select "OFF
TIMER", then press •.
Press • or • to set the desired
hour, then press •
Press • or • to set the desired
minute, then press •
Press • or • to select"SET",
then press ENTER. Press TV
MENU repeatedly to return to
the normal screen.
il _iil¸_i_i_ ¸:i ! t g ! i iis:ii
i5 #5_
N} :i:
i
5Q00401AE(26-29) 28 26/5/04.10:46
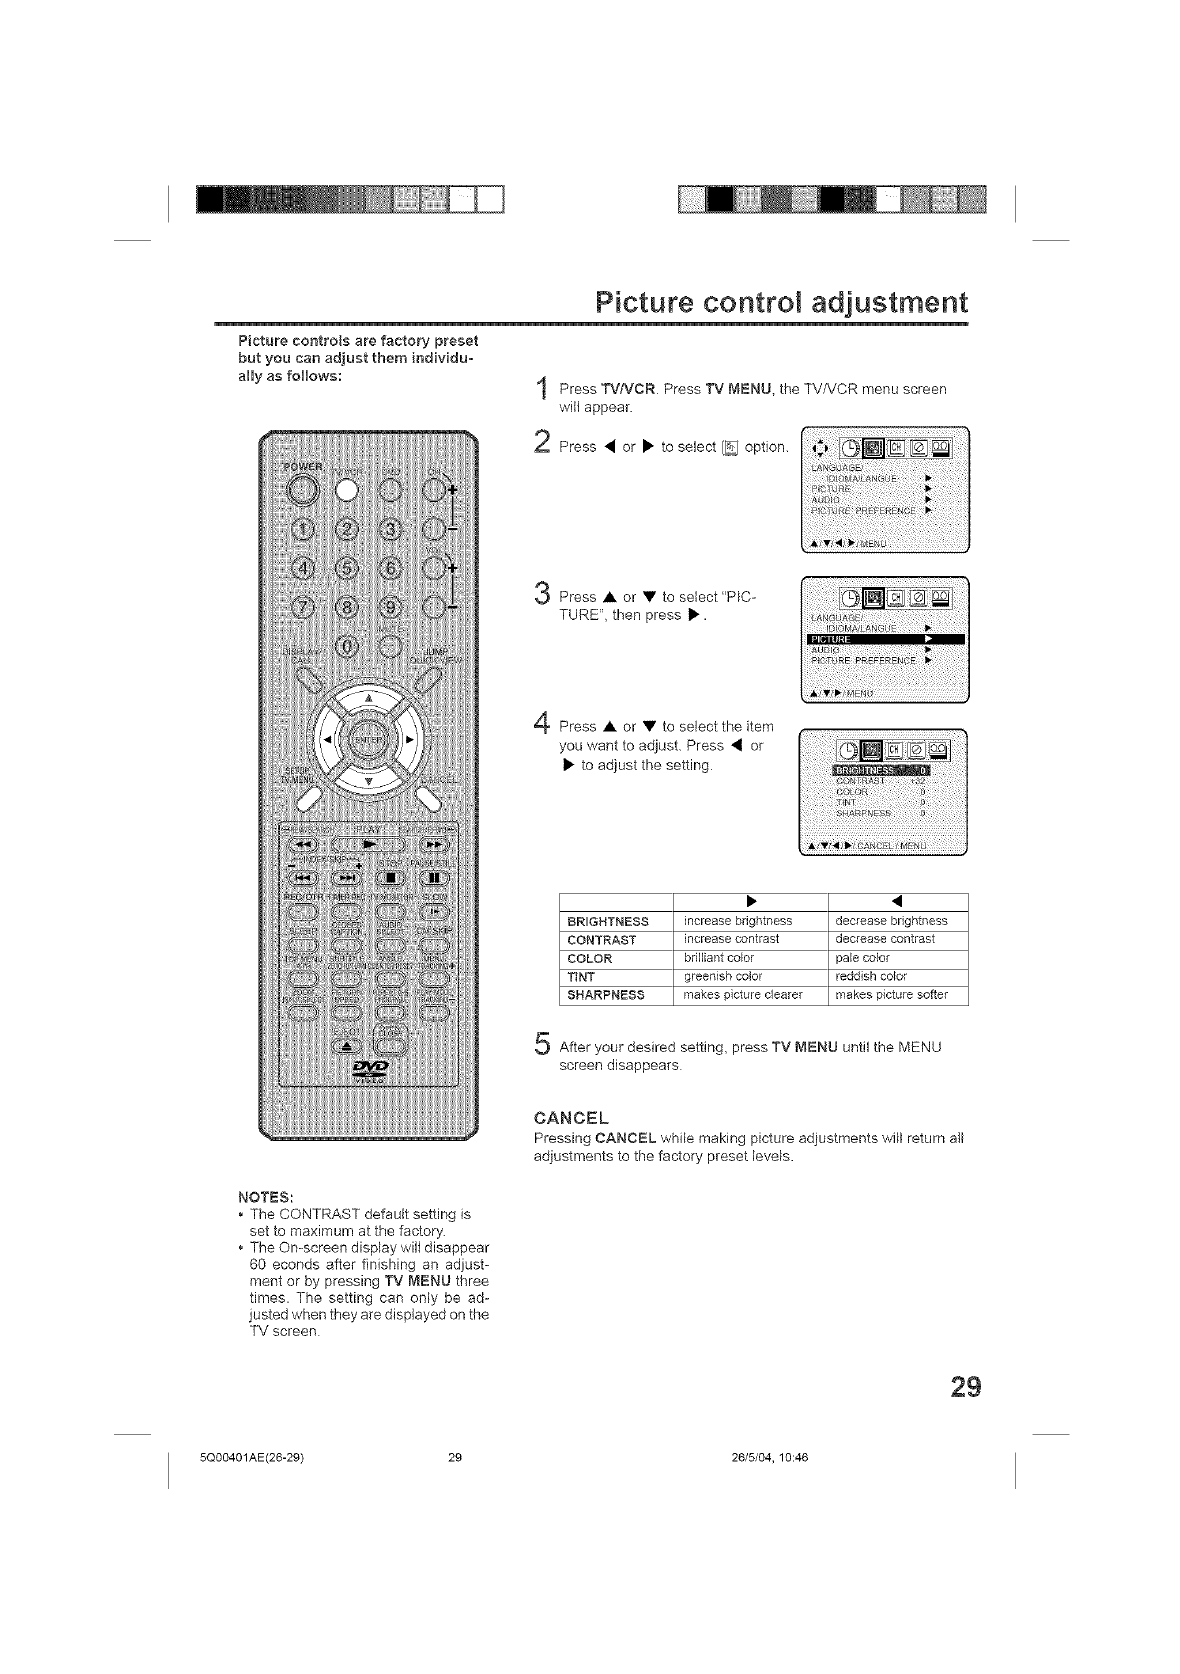
Picture controls are factory preset
but you can adjust them individu-
ally as follows:
Picture control adjustment
Press TVtVCR Press TV t_,IENU, the TV/VCR menu screen
wilt appear.
2Press • or • to select [__ option.
Press • or • to select "PIC-
TURE", then press •.
Press • or • to select the item
you want to adjust. Press • or
• to adjust the setting
NOTES:
• The CONTRAST default setting is
set to maximum at the factory.
• The On-screen display will disappear
60 econds after finishing an adjust-
ment or by pressing TV MENU three
times. The setting can only be ad-
justed when they are displayed on the
TV screen
BRIGHTNESS increase brightness decrease brightness
CONTRAST increase contrast decrease contrast
COLOR brilliant color pale color
TINT greenish color reddish co_or
SHARPNESS makes picture clearer makes picture softer
After your desired setting, press TV MENU until the MENU
screen disappears
CANCEL
Pressing CANCEL while making picture adjustments will return all
adjustments to the factory preset levels.
29
5Q00401AE(26-29) 29 26/5/04, 10:46
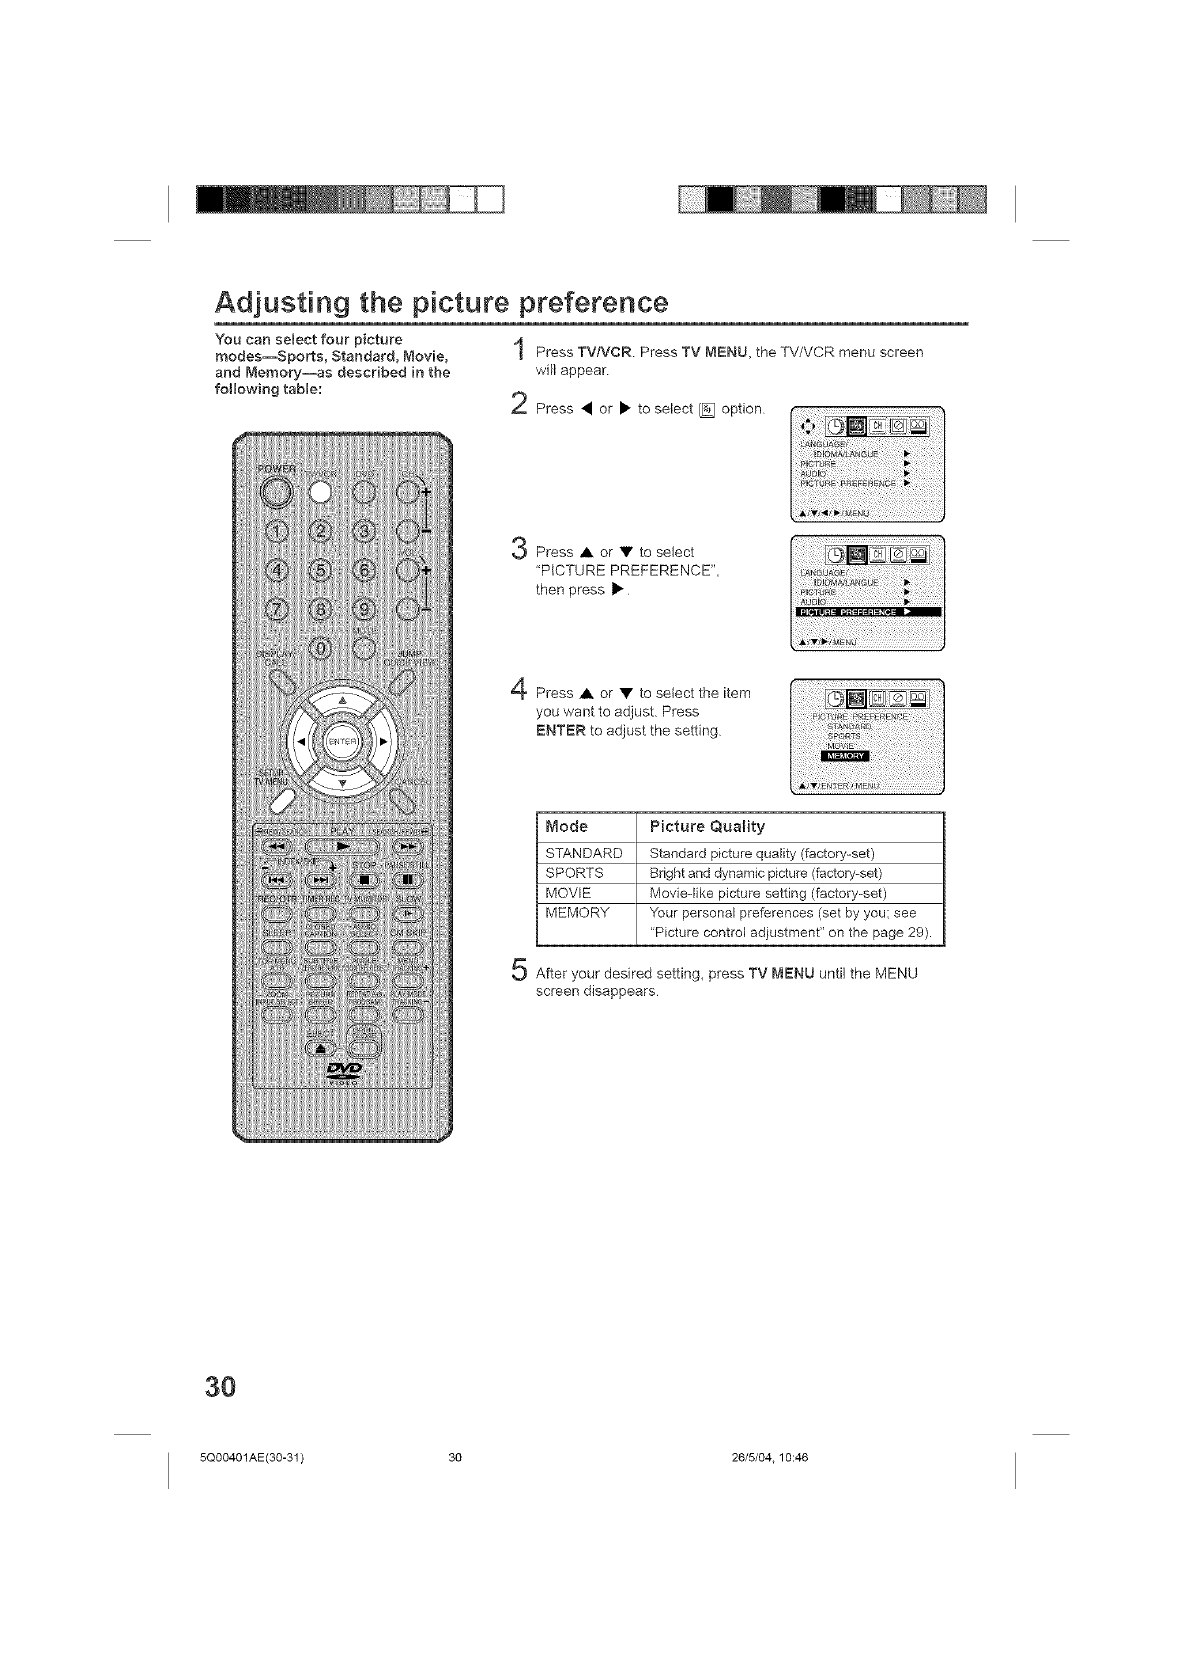
You can select four picture
modes--Sports, Standard, Movie,
and Memory--as described in the
following table:
Adjusting the picture preference
Press TVtVCR Press TV MENU, the TV/VCR menu screen
will appear
2Press • or • to select [] option
Press • or • to select
"PICTURE PREFERENCE",
then press •
Press • or • to select the item
you want to adjust. Press
ENTER to adjust the setting
Mode
STANDARD
SPORTS
MOVIE
MEMORY
Picture Quality
Standard picture quality (factory-set)
Bright and dynamic picture (factory-set)
Movie-like picture setting (factory-set)
Your personal preferences (set by you: see
'Picture control adjustment" on the page 29).
After your desired setting, press TV MENU until the MENU
screen disappears
3O
5Q00401 AE(30-31 ) 30 26/5/04.10:46
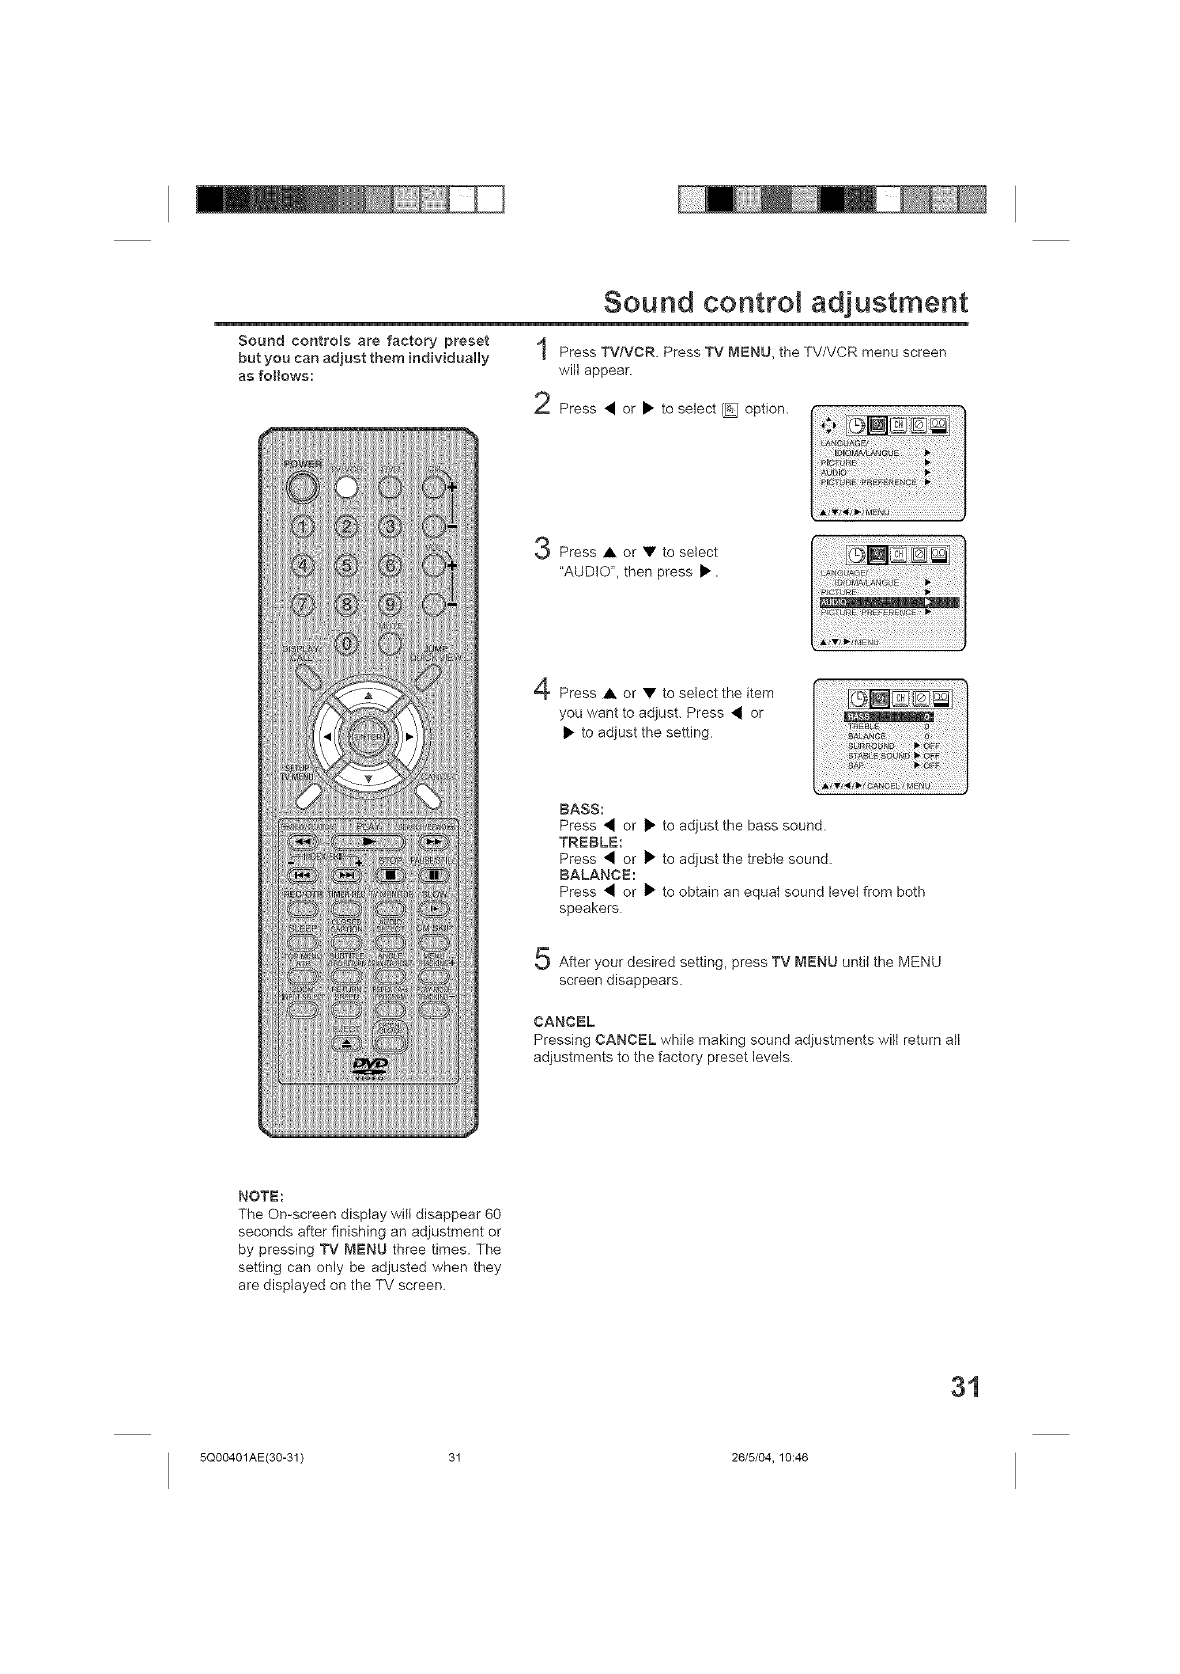
Sound controls are factory preset
but you can adjust them individually
as follows:
Sound control adjustment
Press TV/VCR. Press TV MENU, the TV/VCR menu screen
will appear.
2Press • or • to select _ option. .ION_%_I .....
Press • or • to select
"AUDIO", then press •.
Press • or • to select the item
you want to adjust. Press • or
• to adjust the setting
BASS:
Press • or • to adjust the bass sound.
TREBLE:
Press • or • to adjust the treble sound.
BALANCE:
Press • or • to obtain an equat sound level from both
speakers
After your desired setting, press TV MENU until the MENU
screen disappears.
CANCEL
Pressing CANCEL while making sound adiustments will return all
adjustments to the factory preset levels
NOTE:
The On-screen display will disappear 60
seconds after finishing an adjustment or
by pressing TV MENU three times. The
setting can only be adjusted when they
are displayed on the TV screen.
31
5Q00401AE(30-31) 31 26/5/04, 10:46
Setting the surround sound /Setting the stabJe sound
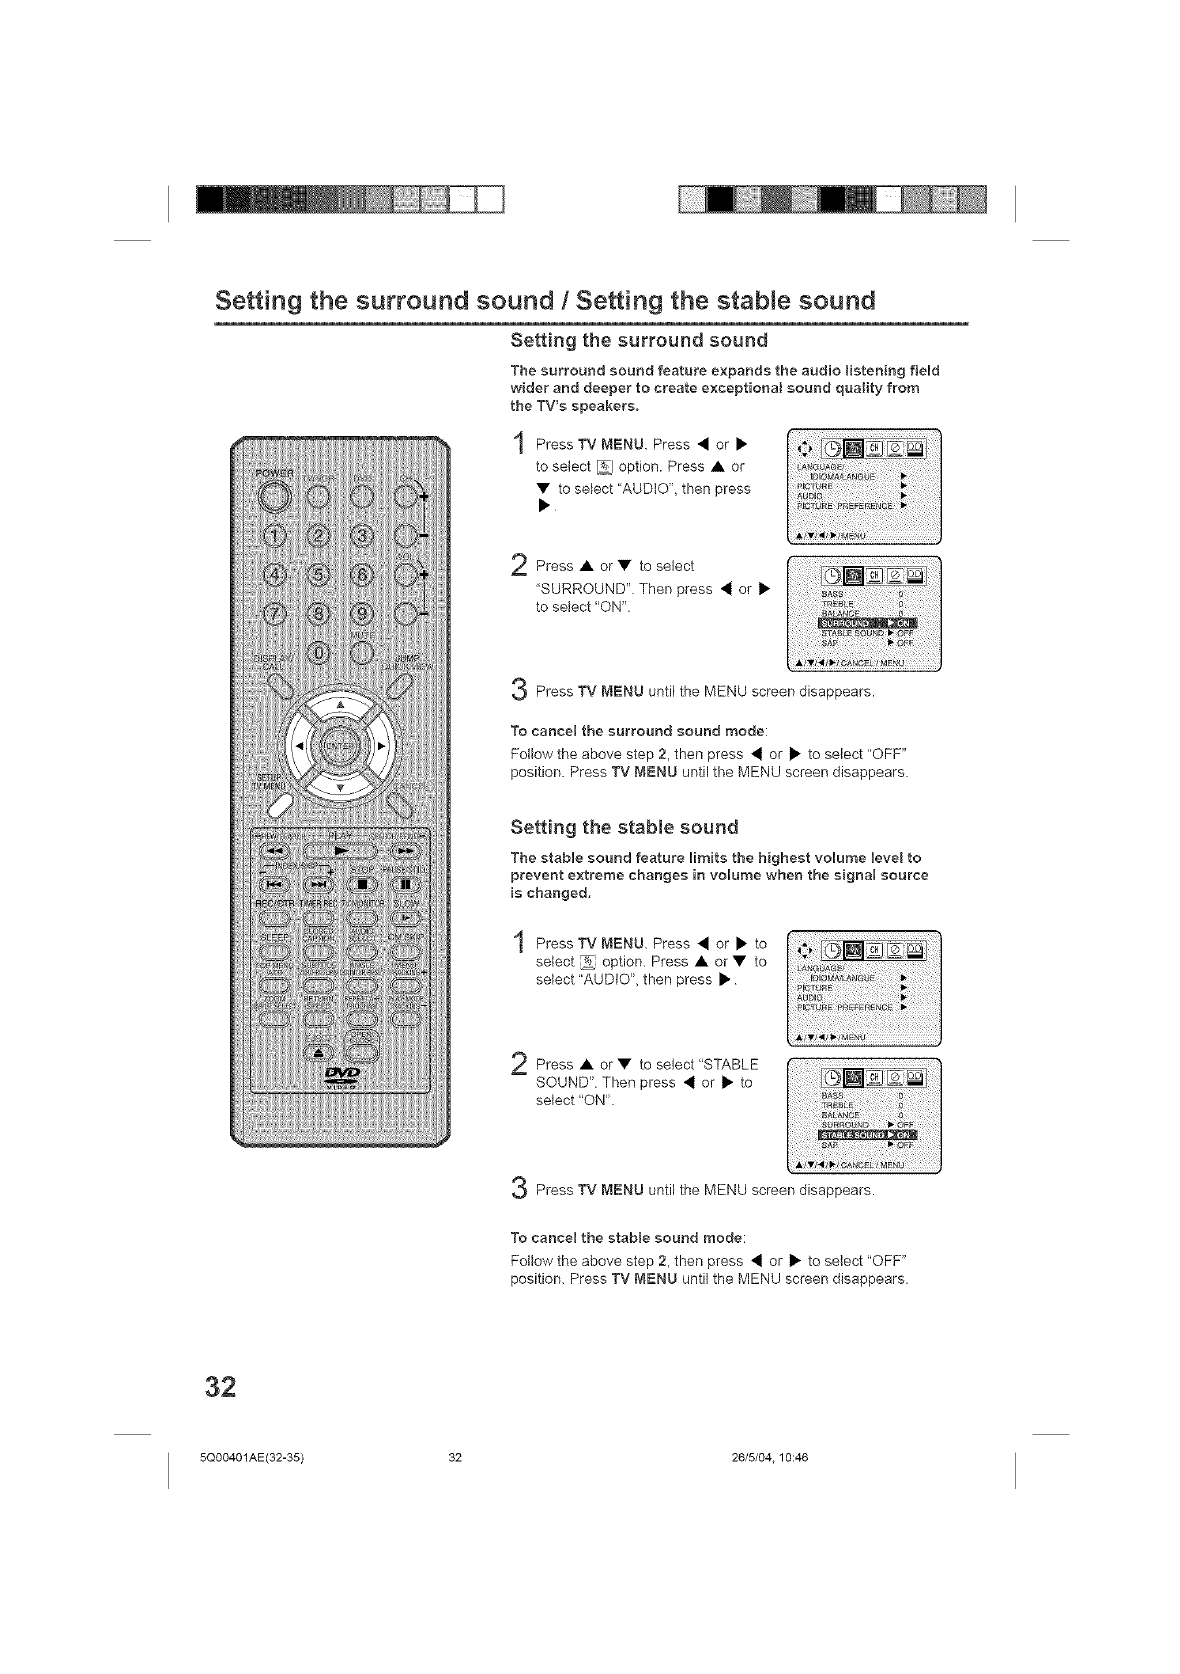
Settingthesurround sound
The surround sound feature expands the audio listeningfield
wider and deeper to create exceptional sound quality from
the TV's speakers,
"l Press TV MENU. Press • or •
to select _ option. Press • or
• to select "AUDIO", then press
Press • or • to select
"SURROUND" Then press • or •
to select "ON".
Press TV MENU until the MENU screen disappears,
To cancel the surround sound mode:
Follow the above step 2, then press • or • to select "OFF"
position. Press TV MENU until the MENU screen disappears.
Setting the stable sound
The stable sound feature limits the highest volume level to
prevent extreme changes in volume when the signal source
is changed,
Press TV MENU. Press • or • to
select _ option. Press • or • to
select "AUDIO", then press •
Press • or • to select "STABLE
SOUND". Then press • or • to
select "ON".
Press TV MENU until the MENU screen disappears.
To cancel the stable sound mode:
Follow the above step 2, then press • or • to select "OFF"
position. Press TV MENU until the MENU screen disappears.
32
5Q00401AE(32-35) 32 26/5/04.10:46
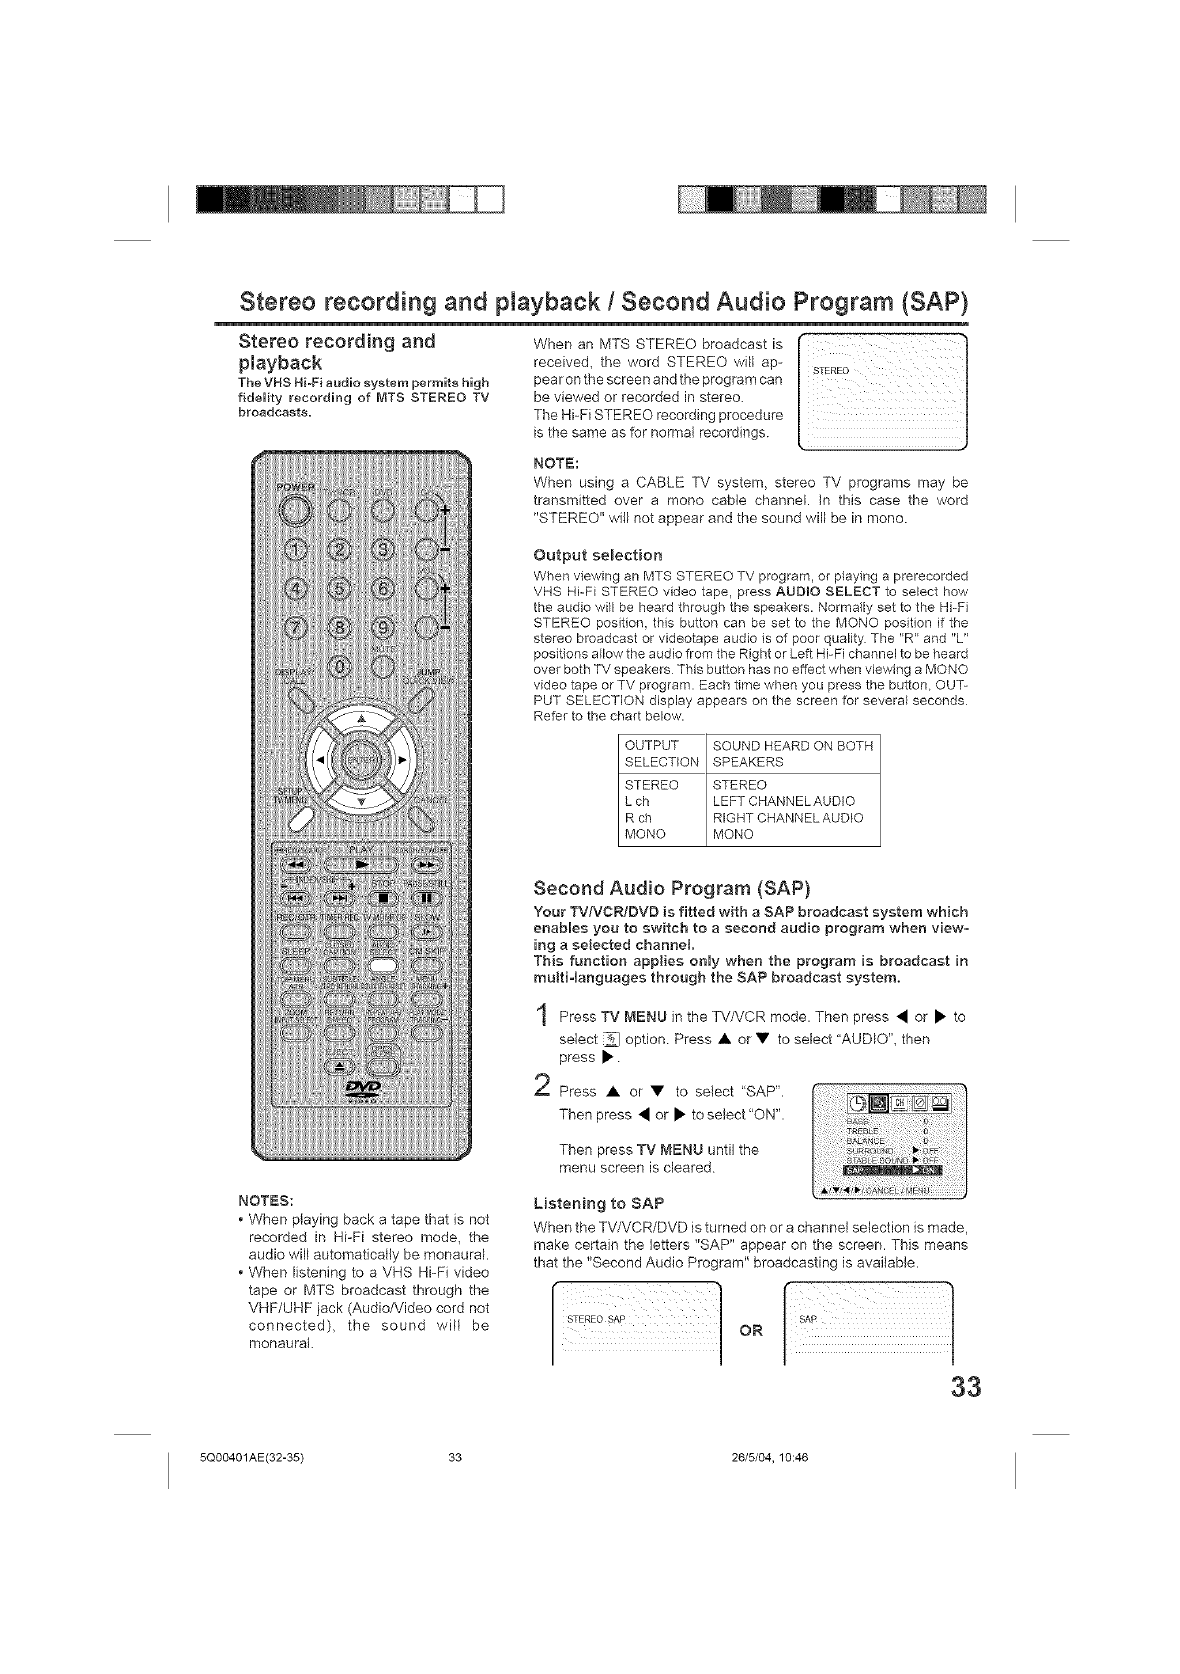
Stereo recording and playback/Second Audio Program (SAP)
Stereo recording and
playback
The VHS Hi-Fi audio system permits high
fidelity recording of MTS STEREO TV
broadcasts.
When an MTS STEREO broadcast is
received, the word STEREO will ap-
pearon the screen end the program can
be viewed or recorded in stereo.
The Hi-Fi STEREO recording procedure
is the same as for normal recordings.
NOTE:
When using a CABLE TV system, stereo TV programs may be
transmitted over a mono cable channel. In this case the word
"STEREO" will not appear and the sound will be in mono.
Output selection
When viewing an MTS STEREO TV program, or playing a prerecorded
VHS Hi-Fi STEREO video tape, press AUDIO SELECT to select how
the audio will be heard through the speakers. Normally set to the Hi-Fi
STEREO position, this button can be set to the MONO position if the
stereo broadcast or videotape audio is of poor quality The "R" and "L"
positions allow the audio from the Right or Left Hi-Fi channel to be heard
over both TV speakers This button has no effect when viewing a MONO
video tape or TV program. Each time when you press the button, OUT-
PUT SELECTION display appears on the screen for several seconds
Refer to the chart below.
OUTPUT SOUND HEARD ON BOTH
SELECTION SPEAKERS
STEREO STEREO
L ch LEFT CHANNELAUDIO
R ch RIGHT CHANNEL AUDIO
MONO MONQ
NOTES:
*When playing back a tape that is not
recorded in Hi-Fi stereo mode, the
audio will automatically be monaural.
*When listening to a VHS Hi-Fi video
tape or MTS broadcast through the
VHF/UHF jack (Audio/Video cord not
connected), the sound will be
monaural
Second Audio Program (SAP}
Your TV/VCR/DVD is fitted with a SAP broadcast system which
enables you to switch to a second audio program when view-
ing a selected channel
This function applies only when the program is broadcast in
multiqanguages through the SAP broadcast system,
Press TV MI=NUin the TV/VCR mode. Then press • or • to
select _ option Press • or • to select "AUDIO", then
press •
Press • or • to select "SAP".
Then press • or • to select"ON".
Then press TV MENU until the
menu screen is cleared
Listening to SAP
When the TV/VCR/DVD is turned on or a channel selection is made,
make certain the letters "SAP" appear on the screen. This means
that the "Second Audio Program" broadcasting is available.
]oo
33
5Q00401AE(32-35) 33 26/5/04, 10:46
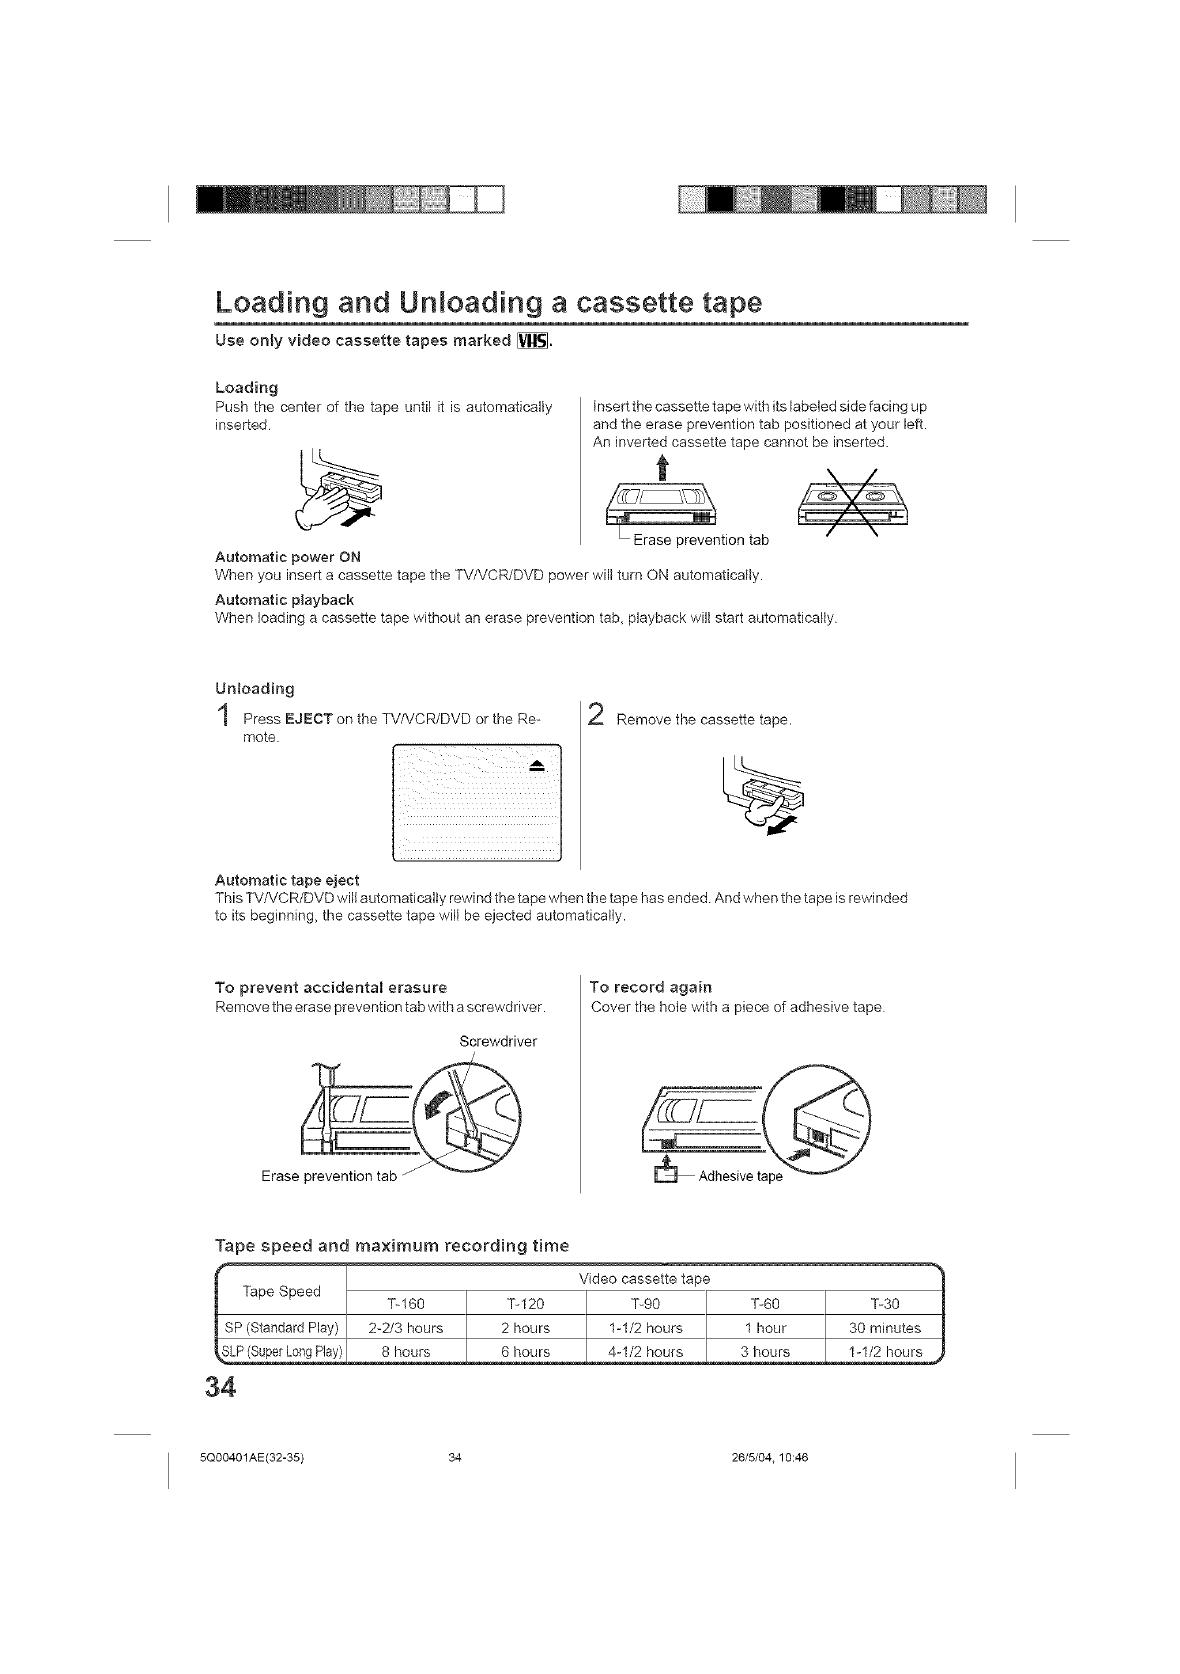
Loading and Unloading a cassette tape
Use only video cassette tapes marked [_.
Loading
Push the center of the tape until it is automatically
inserted
insert the cassette tape with its labeled side facing up
and the erase prevention tab positioned at your left.
An inverted cassette tape cannot be inserted.
t
• Erase prevention tab
_ower will turn ON automatically.
/\
Automatic power ON
When you insert a cassette tape the TV/VCR/DVD
Automatic playback
When loading a cassette tape without an erase prevention tab, playback will start automatically
Unloading
Press EJECT on the TV/VCR/DVD or the Re-
mote.
Automatic tape eject
Remove the cassette tape.
This TV/VCR/DVD will automatically rewind the tape when the tape has ended And when the tape is rewinded
to its beginning, the cassette tape will be ejected automatically.
To prevent accidentaB erasure
Remove the erase prevention tab with a screwdriver.
Screwdriver
To record again
Cover the hole with a piece of adhesive tape
Tape speed and maximum recording time
Video cassette tape
%160 %120 %90 %60 %30
SP (Standard Play) 2-2/3 hours 2 hours 1-1/2 hours 1 hour 30 minutes
_LP(Super LongPlay) 8 hours 6 hours 4-1/2 hours 3 hours !-!/2 h0urs
34
5Q00401AE(32-35) 34 26/5/04.10:46
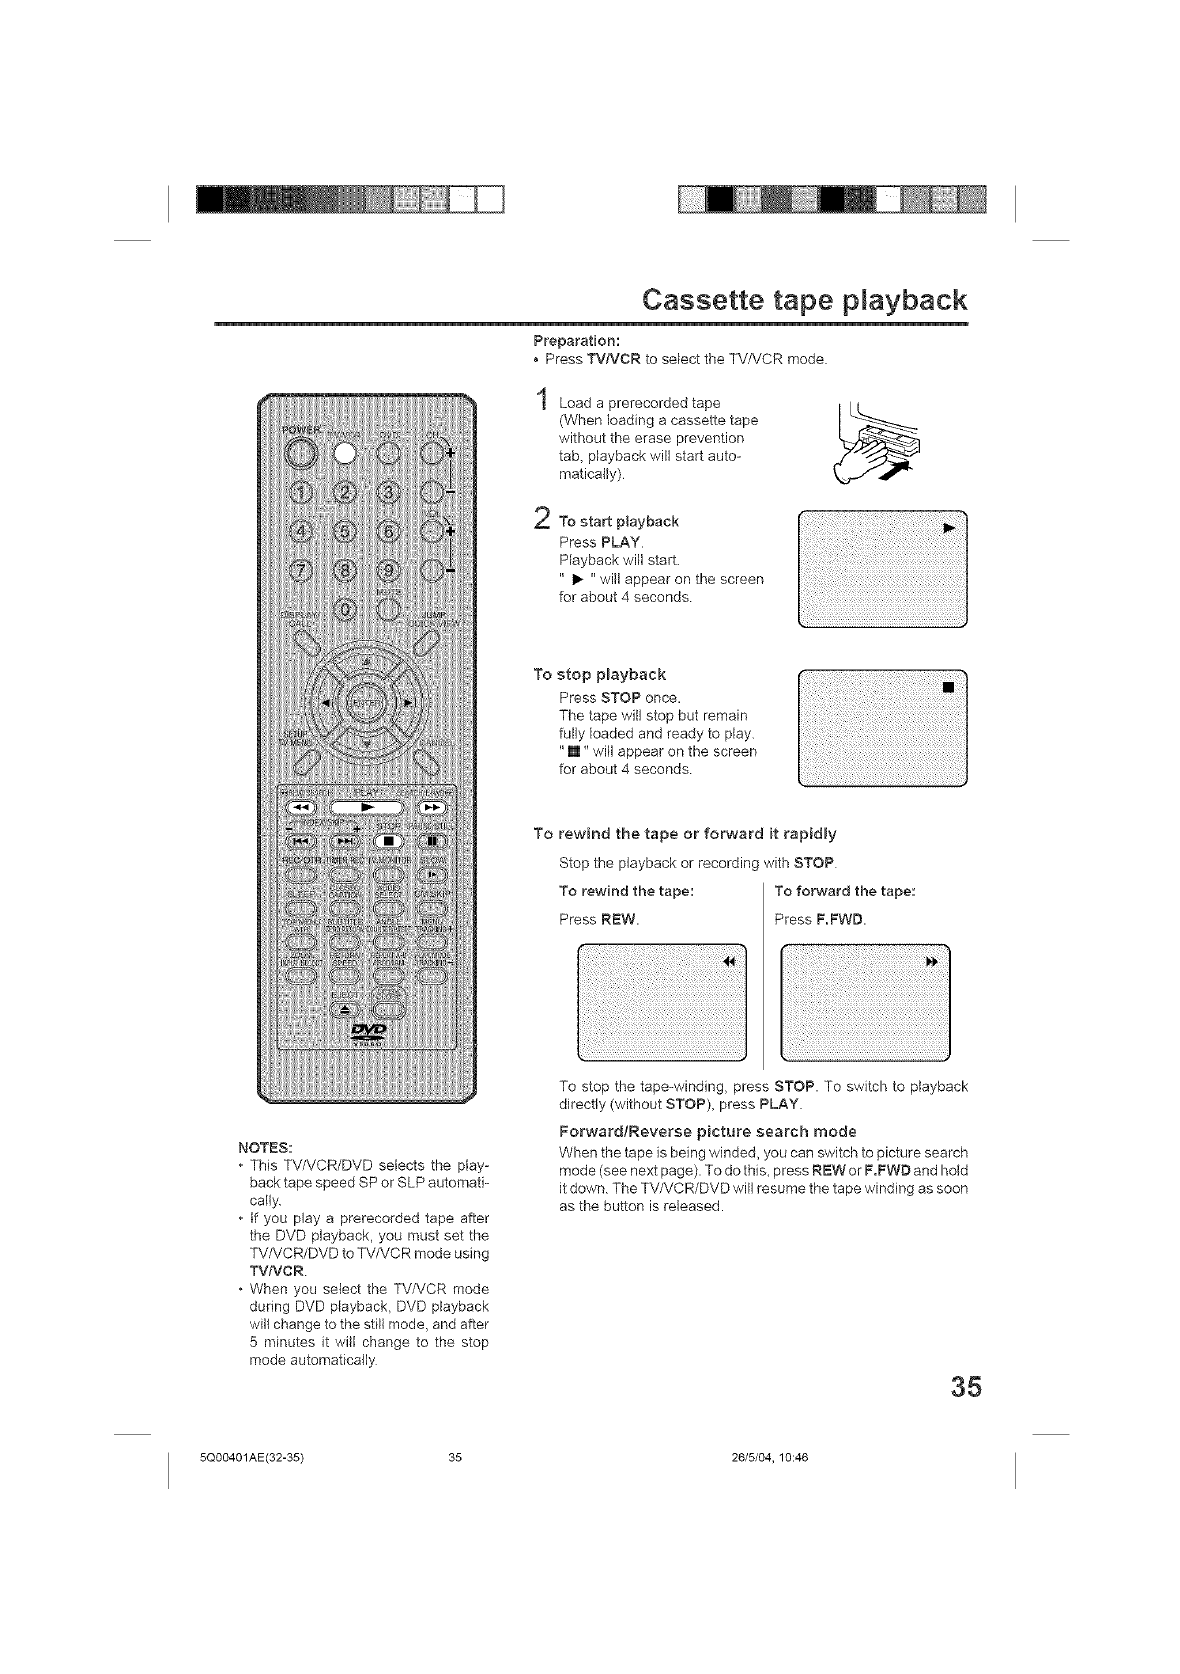
Cassette tape playback
Preparation:
•Press TVNCR to select the TVtVCR mode
2
Load a prerecorded tape
(When loading a cassette tape
without the erase prevention
tab_ playback will start auto-
matically)
To start playback
Press PLAY
Playback will start.
" I_ "will appear on the screen
for about 4 seconds
To stop p_ayback
Press STOP once.
The tape will stop but remain
fully loaded and ready to play.
"[]" will appear on the screen
for about 4 seconds
NOTES:
This TV/VCR/DVD selects the play-
back tape speed SP or SLP automati-
cally.
• if you play a prerecorded tape after
the DVD playback, you must set the
TV/VCR/DVD to TV/VCR mode using
TVNCR
o When you select the TV/VCR mode
during DVD piayback, DVD playback
will change to the still mode, and after
5 minutes it will change to the stop
mode automatically
To rewind the tape or forward it rapidly
Stop the playback or recordinc with STOP
To rewind the tape: To forward the tape:
Press REW. Press F.FWD.
To stop the tape-winding, press STOP. To switch to playback
directly (without STOP), press PLAY.
ForwardtReverse picture search mode
When the tape is being winded, you can switch to picture search
mode (see next page). To do this, press R_=W or F,FWD and hold
it down. The TV/VCR/DVD will resume the tape winding as soon
as the button is released.
35
5Q00401AE(32-35) 35 26/5/04, 10:46
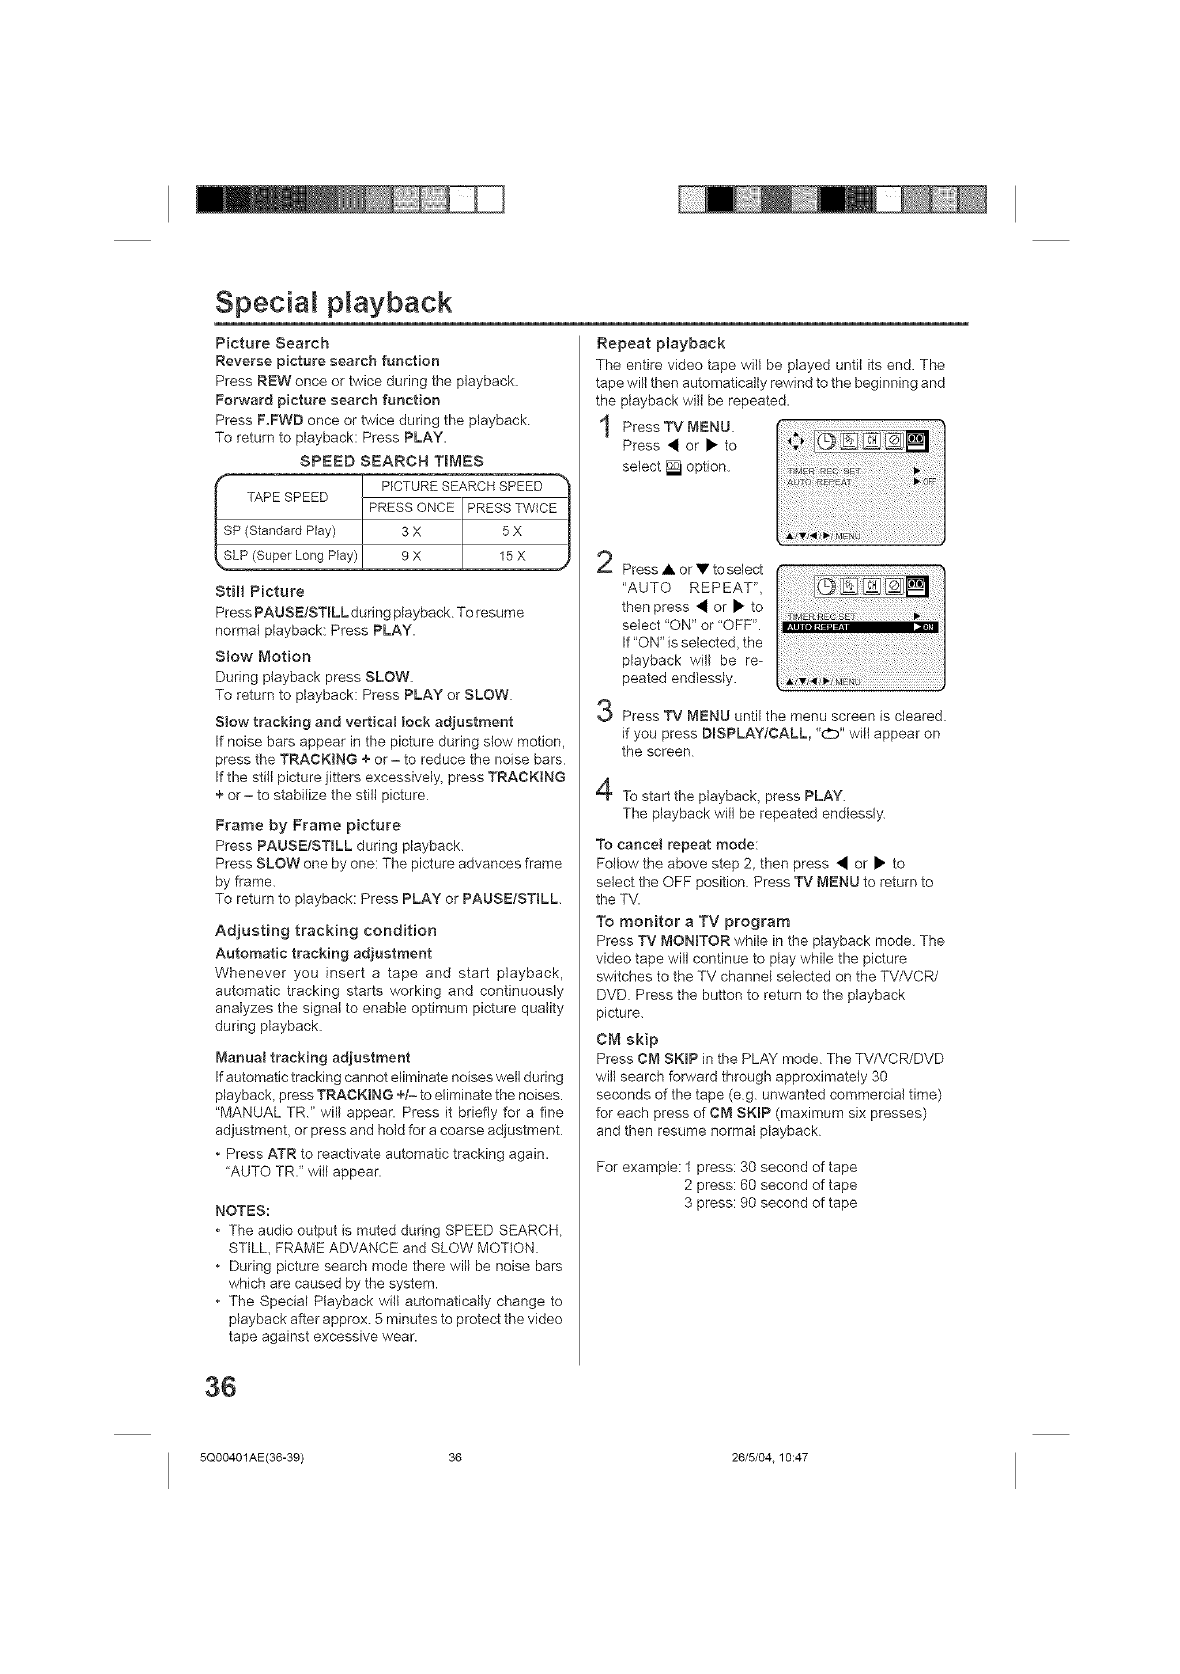
Special playback
Picture Search
Reverse picture search function
Press REW once or twice during the playback.
Forward picture search function
Press F.FWD once or twice during the playback
To return to playback: Press PLAY.
SPEED SEARCH TIMES
PICTURE SEARCH SPEED
TAPE SPEED PRESS ONCE PRESS TWICE
SP (Standard Play) 3 X 5 X
9X 15X
Still Picture
Press PAUSEfSTILL dudng playback To resume
normal playback: Press PLAY.
Slow Motion
During playback press SLOW.
To return to playback: Press PLAY or SLOW.
Slow tracking and vertical lock adjustment
If noise bars appear in the picture during slow motion,
press the TRACKING + or =to reduce the noise bars
If the still picture jitters excessively, press TRACKtNG
+ or =to stabilize the still picture
Frame by Frame picture
Press PAUSE[STroLL during playback.
Press SLOW one by one: The picture advances frame
by frame.
To return to playback: Press PLAY or PAUSE/STILL
Adjusting tracking condition
Automatic tracking adjustment
Whenever you insert a tape and start playback,
automatic tracking starts working and continuously
analyzes the signal to enable optimum picture quality
during playback.
Manual tracking adjustment
If automatic tracking cannot eliminate noises well during
playback, press TRACKING +t- to eliminate the noises.
"MANUAL TR." will appear. Press it briefly for a fine
adjustment, or press and hold for a coarse adjustment
•Press ATR to reactivate automatic tracking again.
"AUTO TRi wil} appear.
NOTES:
•The audio output is muted during SPEED SEARCH,
STILL, FRAME ADVANCE and SLOW MOTION.
•During picture search mode there will be noise bars
which are caused by the system.
•The Special Playback will automatically change to
playback after approx. 5 minutes to protect the video
tape against excessive wear.
Repeat playback
The entire video tape will be played until its end. The
tape will then automatically rewind to the beginning and
the playback will be repeated.
Press TV MENU.
Press • or • to
select _ option.
2
3
4
Press • or • to select
"AUTO REPEAT",
then press • or • to
select "ON" or "OFF".
If "ON" is selected, the
playback will be re-
peated endlessly.
Press TV MENU until the menu screen is cleared.
if you press DiSPLAYICALL, "(:_D" will appear on
the screen
To start the playback_ press PLAY.
The playback will be repeated endlessly
To cancel repeat mode:
Fellow the above step 2, then press • or • to
select the OFF position Press TV [vIENU to return to
the TV.
To monitor a TV program
Press TV MONITOR while in the playback mode. The
video tape will continue to play while the picture
switches to the TV channel selected on the TV/VCR/
DVD. Press the button to return to the playback
picture.
CM skip
Press CM SKIP in the PLAY mode. The TV/VCR/DVD
will search forward through approximately 30
seconds of the tape (eg. unwanted commercial time)
for each press of CM SKIP (maximum six presses)
and then resume normal playback
For example: 1 press: 30 second of tape
2 press: 60 second of tape
3 press: 90 second of tape
36
5Q00401AE(36-39) 36 26/5/04.10:47
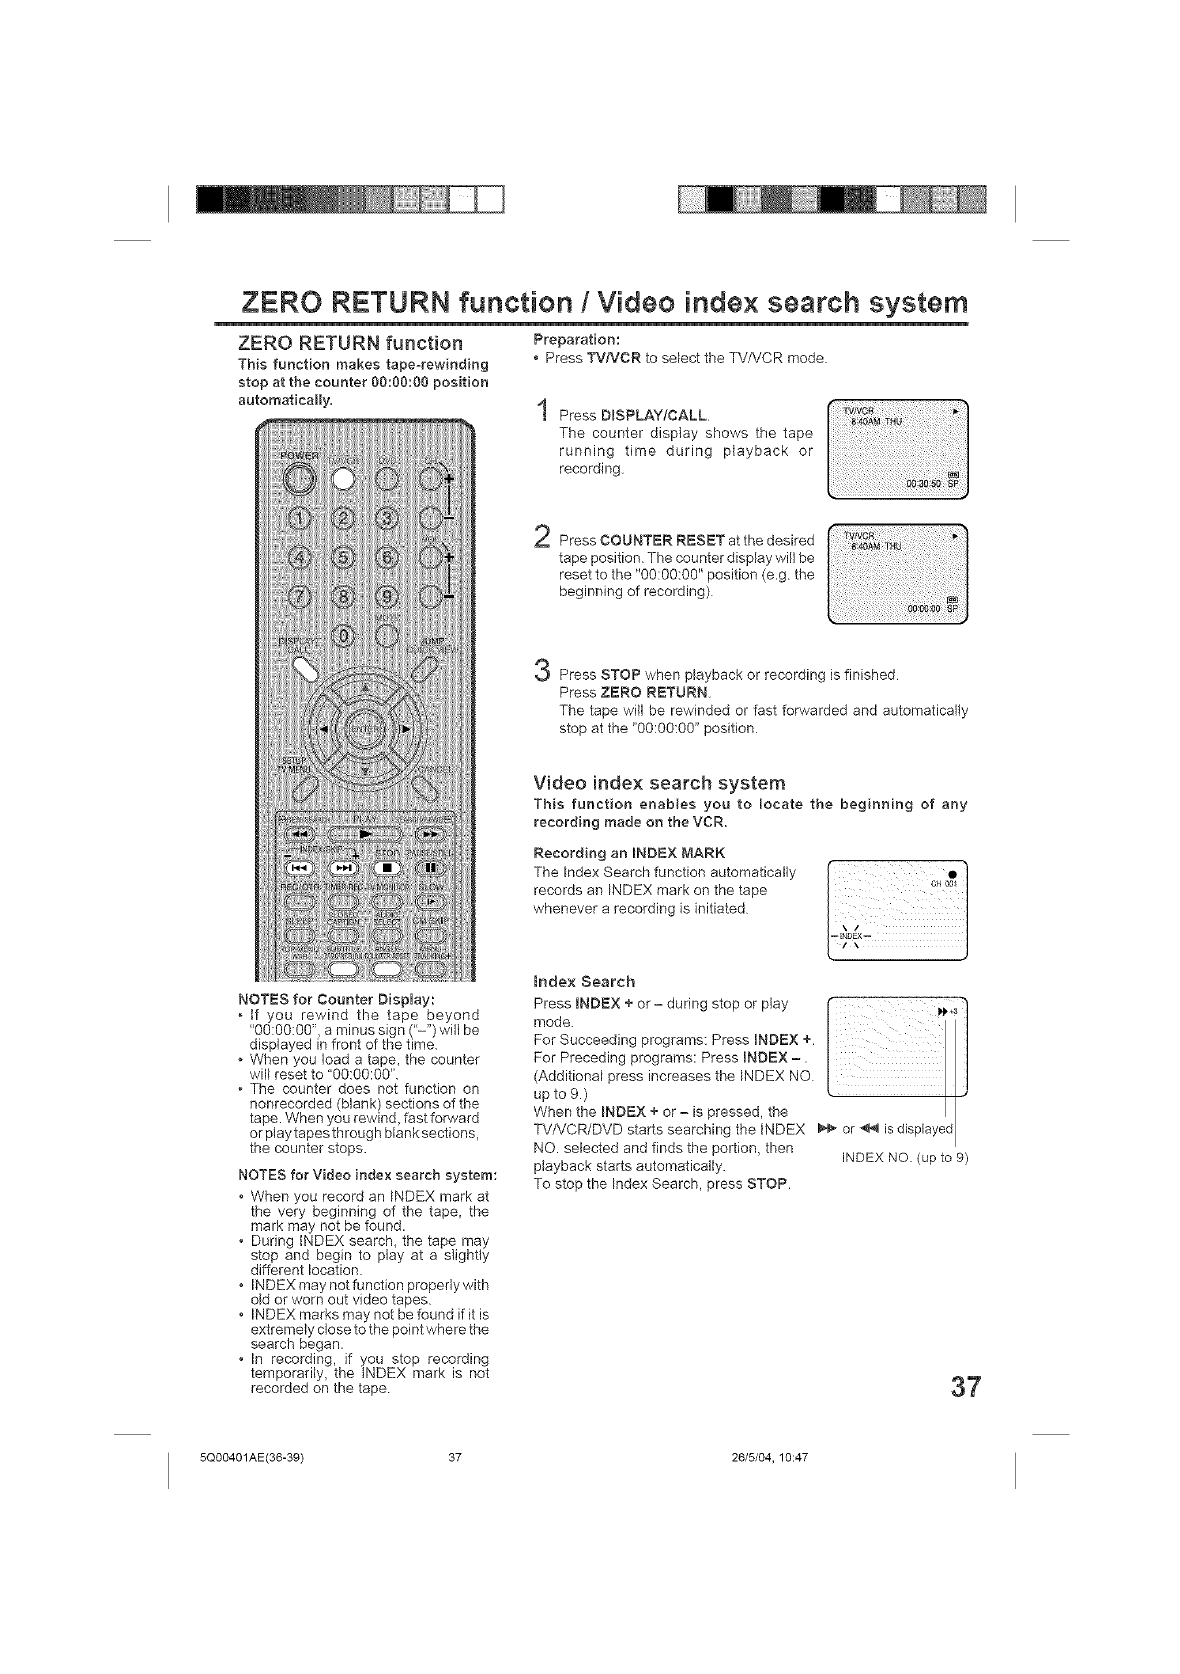
ZERO RETURN function /Video index search system
ZERO RETURN function
This function makes tape-rewinding
stop at the counter 00:00:00 position
automatically.
NOTES for Counter Display:
, If you rewind the tape beyond
"O0:0O:0O",a minus sign ("-") will be
displayed in front of the time.
•When you load a tape, the counter
will reset to "go:go:go".
, The counter does not function on
nonrecorded (blank) sections of the
tape. When you rewind, fast forward
or play tapes through blank sections,
the counter stops.
NOTES for Video index search system:
• When you record an INDEX mark at
the very beginning of the tape, the
mark may not be found.
During INDEX search_ the tape may
stop and begin to play at a slightly
different location.
INDEX may not function propedy with
old or worn out video tapes.
INDEX marks may not be found if it is
extremely close to the point where the
search began.
In recording, if you stop recording
temporarily_ the iNDEX mark is not
recorded on the tape
Preparation:
Press TV/VCR to select the TVNCR mode
Press DmSPLAYICALL
The counter display shows the tape
running time during playback or
recording.
Press COUNTER RESET at the desired
tape position. The counter display will be
reset to the "00:00:00" position (e.g the
beginning of recording)
Press STOP when playback or recording isfinished
Press ZERO RETURN.
The tape will be rewinded or fast forwarded and automatically
stop at the "go:go:g0" position
Video index search system
This function enables you to locate the beginning of any
recording made on the VCR,
Recording an mNDEX MARK c0
whenever a recording is initiated ,,
Index Search
Press iNDEX + or - during stop or play
mode.
For Succeeding programs: Press _NDEX +.
For Preceding programs: Press _NDEX -.
(Additional press increases the INDEX NO
up to 9.)
When the INDEX + or = is pressed, the
TV/VCR/DVD starts searching the INDEX _ or _ is displayed
NO. selected and finds the portion, then
playback starts automatically, INDEX NO. (up to 9)
To stop the Index Search, press STOP,
37
5Q00401AE(36-39) 37 26/5/04, 10:47
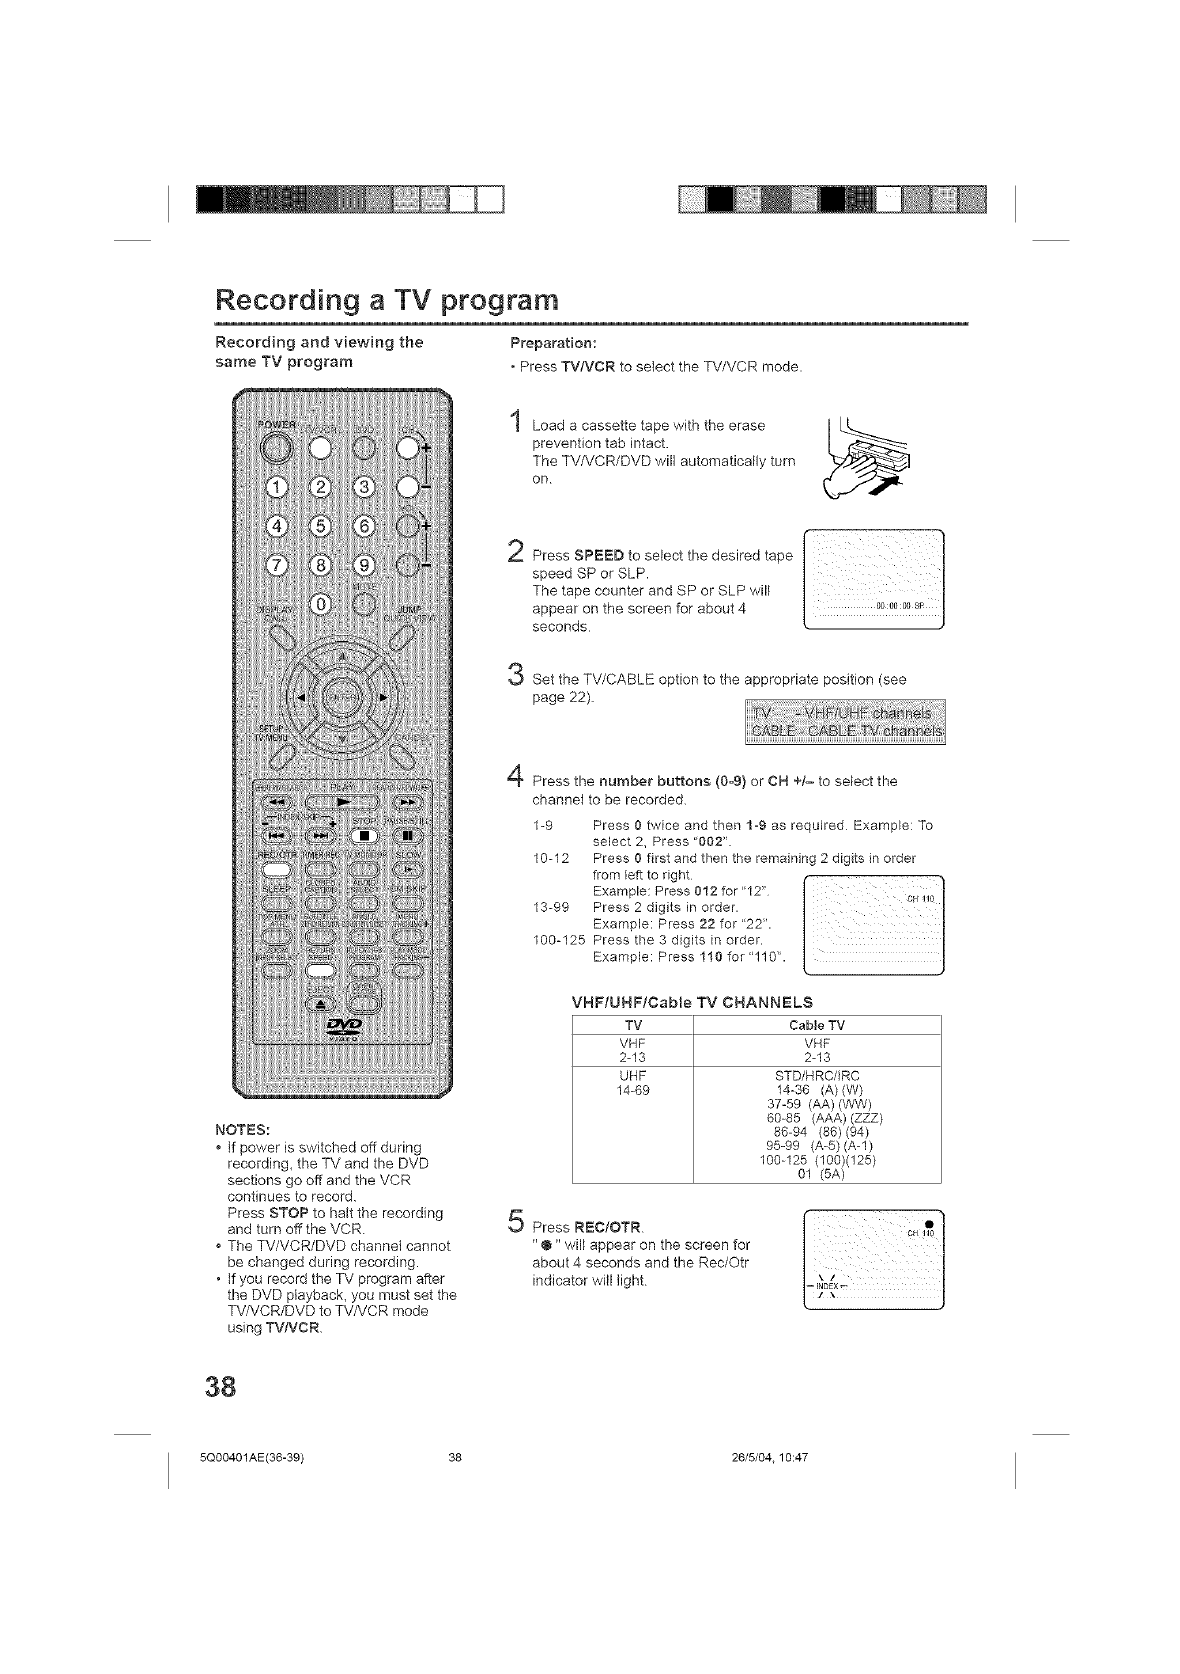
Recording a TV program
Recording and viewing the PreparaNon:
same TV program • Press TV/VCR to select the TV/VCR mode.
Load a cassette tape with the erase
prevention tab intact.
The TV/VCR/DVD will automatically turn
on
Press SPEED to select the desired tape
speed SP or SLP.
The tape counter and SP or SLP will
appear on the screen for about 4
seconds
Set the TV/CABLE option to the appropriate position (see
page 22).
NOTES:
If power is switched off during
recording, the TV and the DVD
sections go off and the VCR
continues to record.
Press STOP to halt the recording
and turn off the VCR.
The TV/VCR/DVD channel cannot
be changed during recording.
• If you record the TV program after
the DVD ptayback_ you must set the
TV/VCR/DVD to TVA/CR mode
using TV/VC R.
Press the number buttons (0-9) or CH +/= to select the
channel to be recorded.
1-9 Press 0 twice and then 1-9 as required Example: To
select 2, Press "002".
10-12 Press 0 first and then the remaining 2 digits in order
Examp,o:Press012 or"12" [
13-99 Press 2 ,digits in order.
Example: Press 22 for "22".
100-125 Press the 3 digits in order.
Example: Press 110 for "110".
VHFIUHF/Cable TV CHANNELS
TV Cable TV
VHF VHF
2-13 2-13
UHF STD/HRC/IRC
14-69 14-36 (A) (W)
37-59 (AA) (WW)
60-85 (AAA) (ZZZ)
86-94 (86) (94)
95-99 (A-5)(A-l)
100-125 (100)(125}
01 (5A)
Press R_=C;OTR.
"@" will appear on the screen for
about 4 seconds and the Rec/Otr
indicator will light
38
5Q00401AE(36-39) 38 26/5/04.10:47
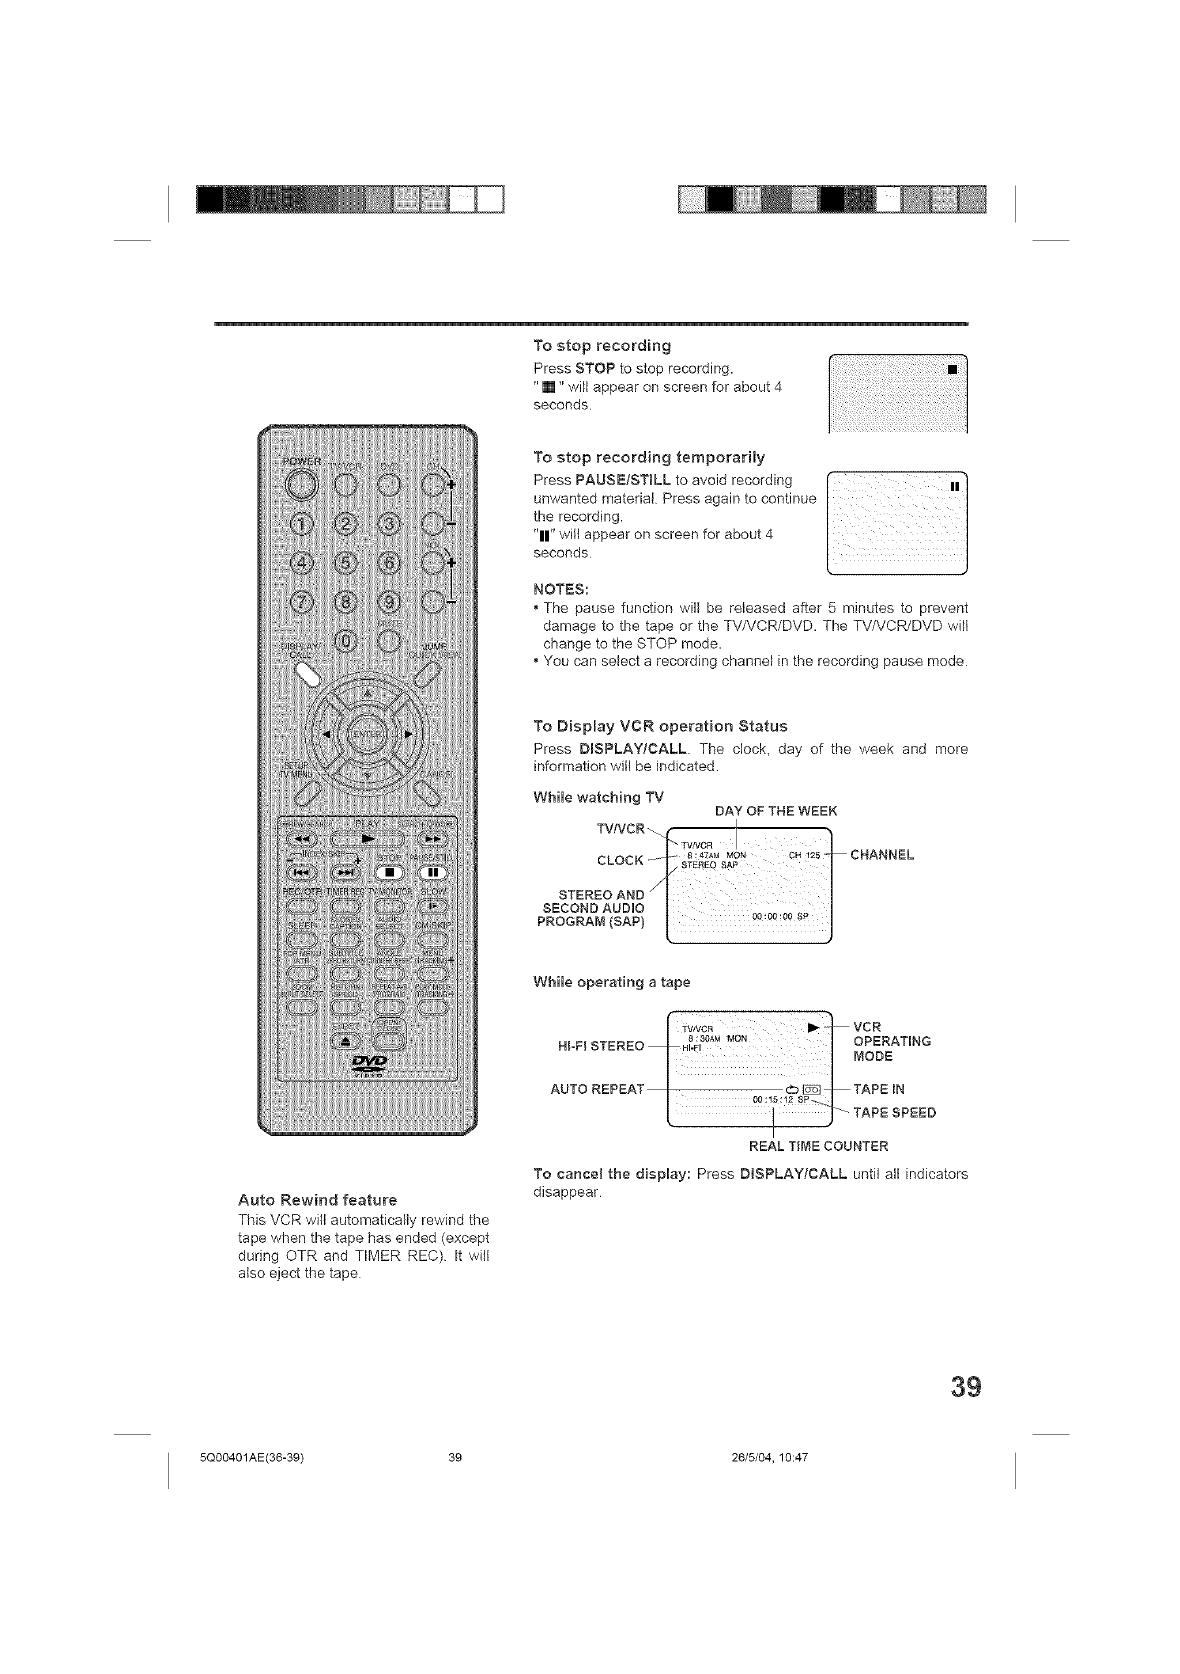
To stop recording
Press STOP to stop recording.
"[]" will appear on screen for about 4
seconds
To stop recording temporarily
Press PAUSEtSTtLL to avoid recording I
unwantedmater,a,Preesaga,ntocont,nuo
the recording.
"11" will appear on screen for about 4
seconds
NOTES:
•The pause function will be released after 5 minutes to prevent
damage to the tape or the TV/VCR/DVD. The TV/VCR/DVD will
change to the STOP mode.
You can select a recording channel in the recording pause mode
Auto Rewind feature
This VCR will automatically rewind the
tape when the tape has ended (except
during OTR and TIMER REC) It will
also eject the tape
To Display VCR operation Status
Press DISPLAY/CALL The clock, day of the week and more
information will be indicated.
While watcMng TV DAY OF THE WEEK
TVtVCR I
CLOCK _IL; T_:/V4C_MM;N CH'25 ]i CHANNEL
_ STEREO SAP /
STEREOAND
SECOND AUDIO_ p /
PRO RAM SA ) !!:!! J
While operating a tape
r TVJVCR I_ -'_'_ VC R
HIoFI STEREO _ H_F,_0_'_ _ OPERATING
OODE
AUTO REPEAT | cb _ _ TAPE IN
I
REAL TIME COUNTER
To cancel the display: Press DISPLAY,CALL until all indicators
disappear
39
5Q00401AE(36-39) 39 26/5/04, 10:47
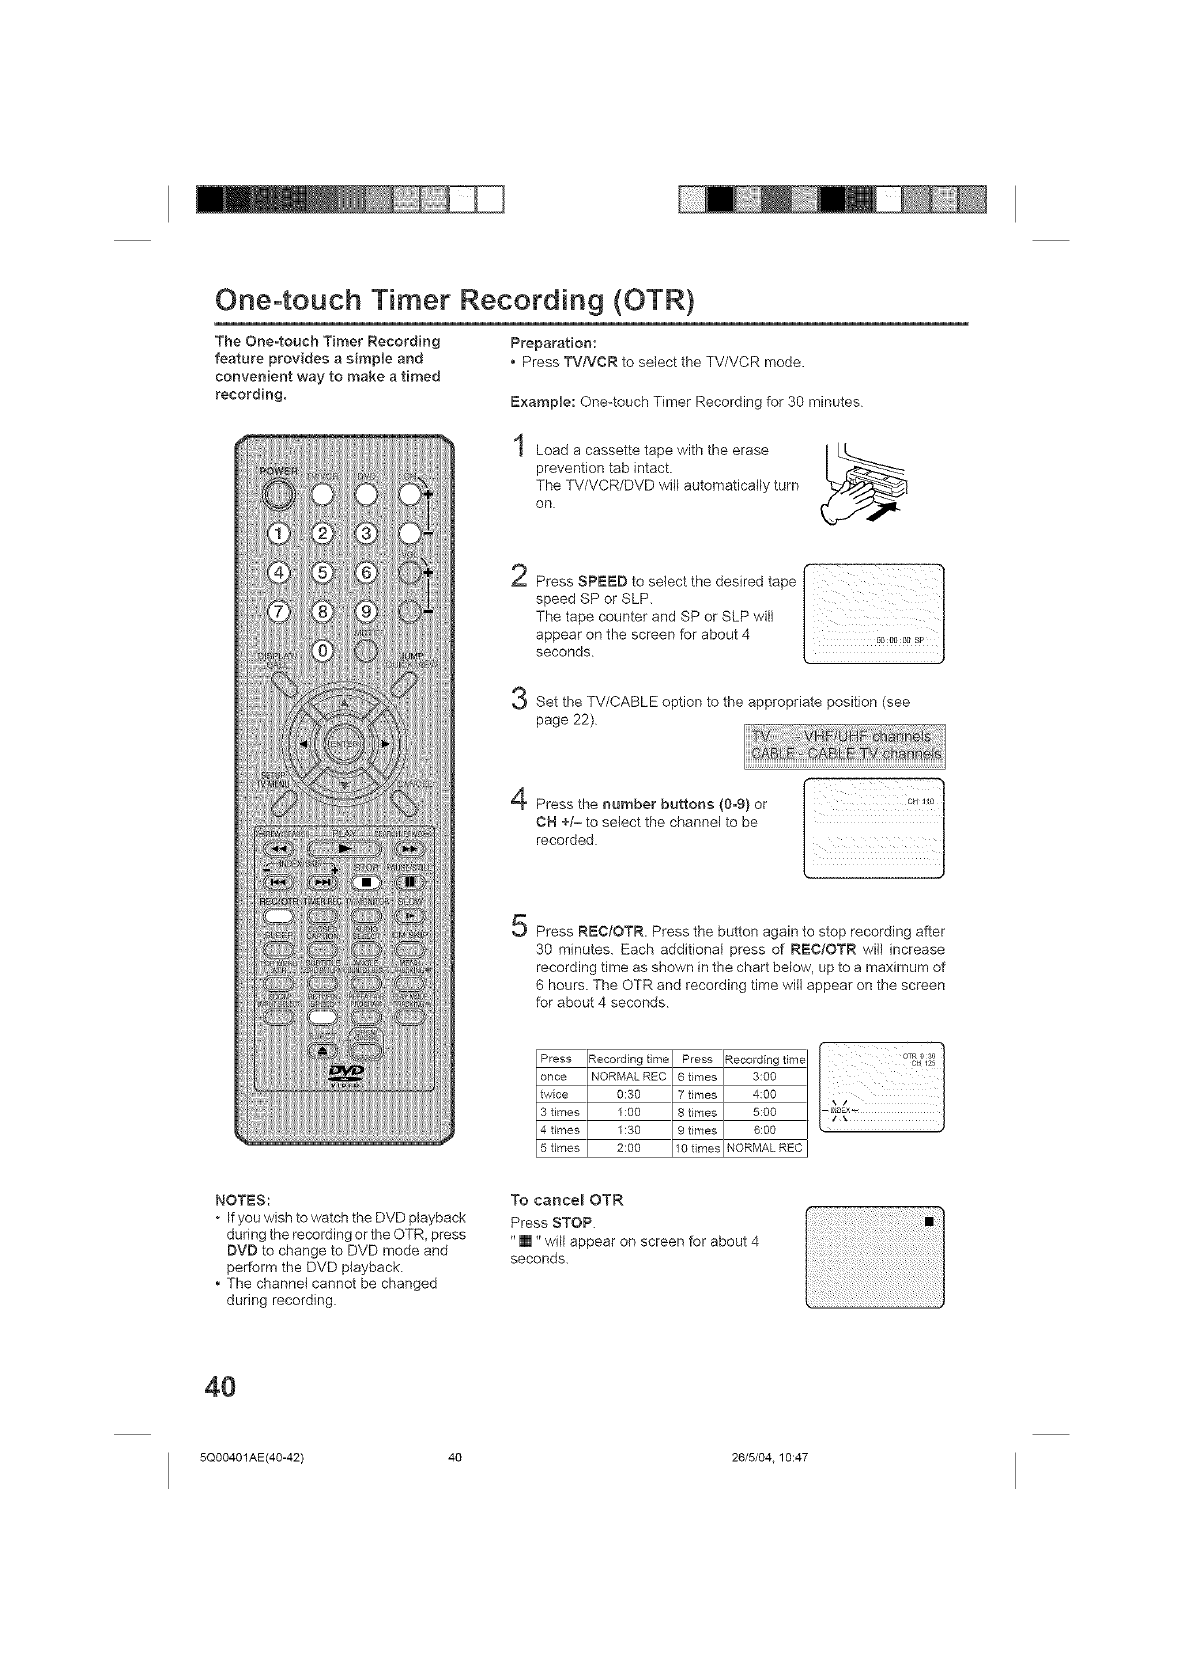
One-touch Timer Recording (OTR)
The One-touch Timer Recording
feature provides a simple and
convenient way to make atimed
recording,
Preparation:
Press TV/VCR to select the TV/VCR mode.
Example: One-touch Timer Recording for 30 minutes
Load a cassette tape with the erase
prevention tab intact.
The TV/VCR/DVD will automatically turn
on
Set the TV/CABLE option to the appropriate position (see
page 22)
Press the number buttons (0_9)or
CH +t= to select the channel to be
recorded
5Press REC/OTR. Press the button again to stop recording after
30 minutes. Each additional press of REC/OTR will increase
recording time as shown in the chart below, up to a maximum of
6 hours. The OTR and recording time will appear on the screen
for about 4 seconds
Press Recording time Press Recording time
once NORMAL REC 6 times 3:00
twice 0:30 7 times 4:00
3 times 1:00 8 times 5:00
4 times 1:30 9 times 6:00
5frees 2:00 10 times NORMAL REC
NOTES:
• If you wish to watch the DVD playback
during the recording or the OTR_ press
DVD to change to DVD mode and
perform the DVD playback.
• The channel cannot be changed
during recording
To cance_ OTR
Press STOP.
"[]" will appear on screen for about 4
seconds.
4O
5Q00401AE(40-42) 40 26/5/04.10:47
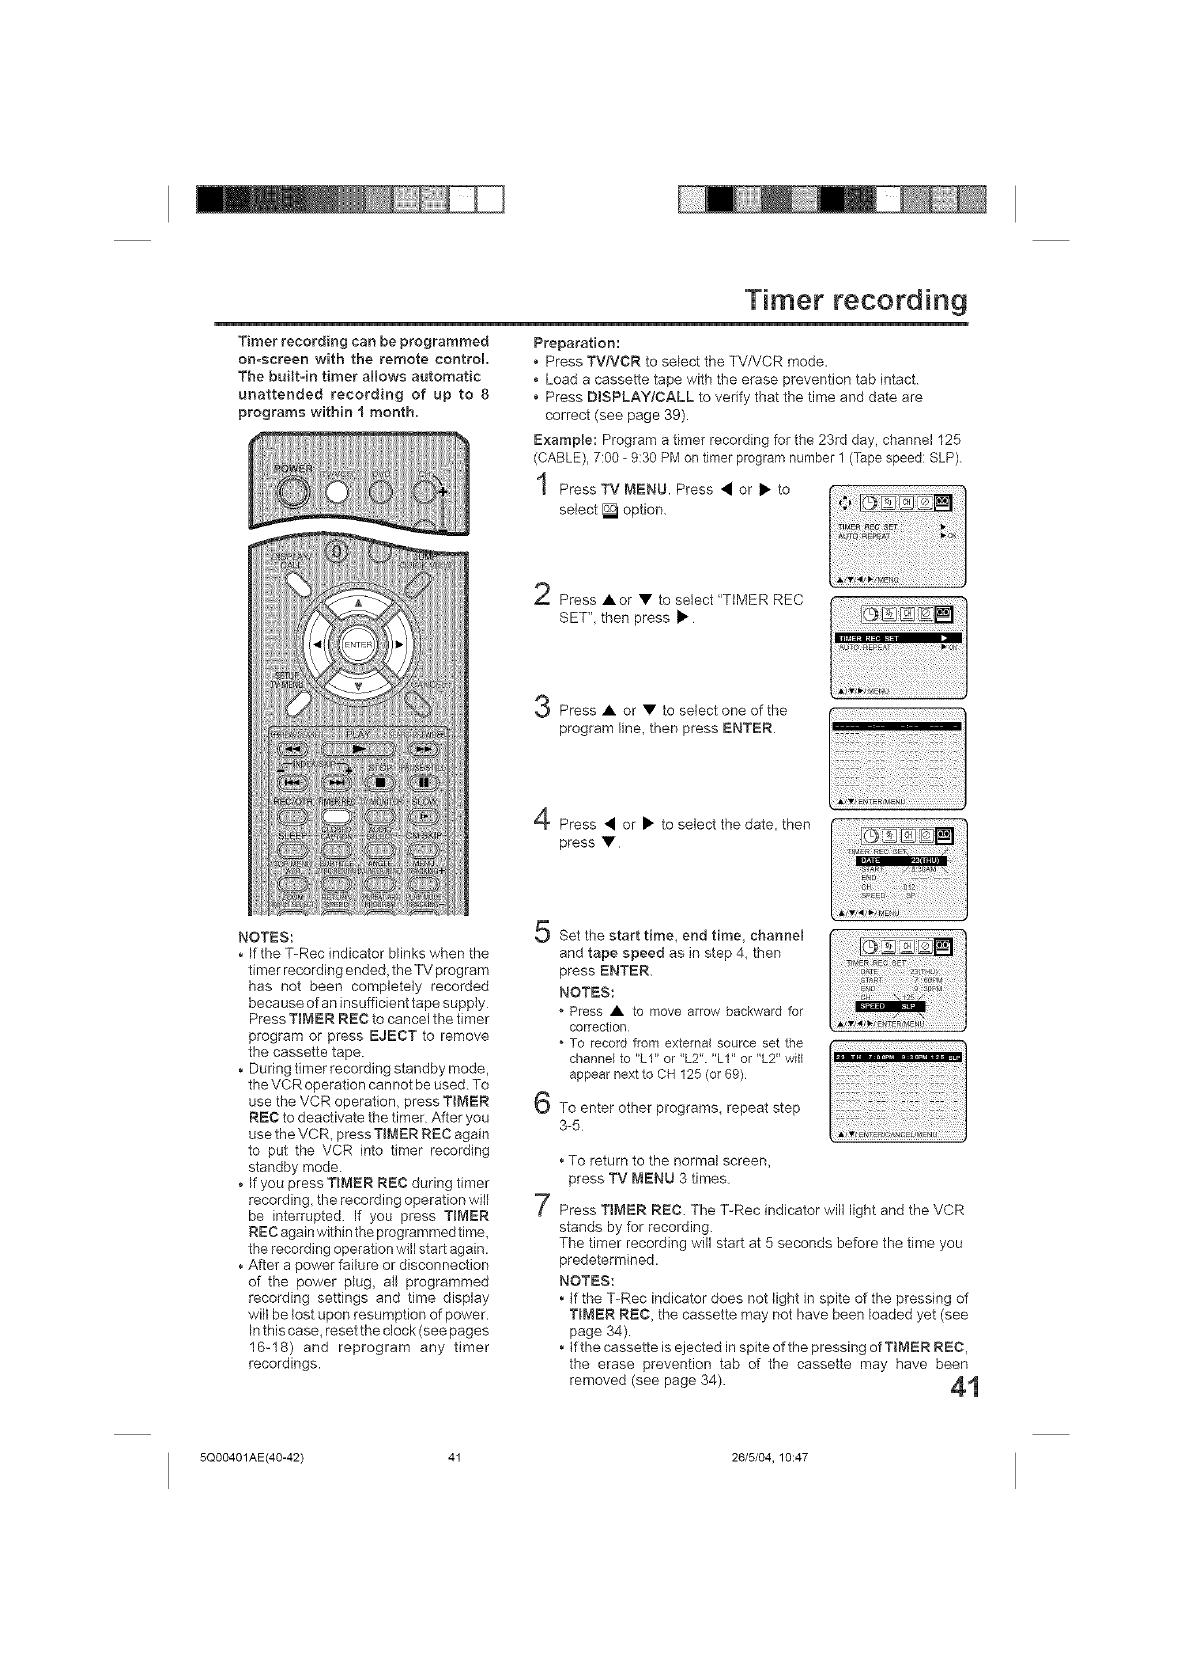
Timer recording
Timer recording can be programmed
on-screen with the remote control.
The built-in timer allows automatic
unattended recording of up to 8
programs witMn i month.
Preparation:
Press TVN(CR to select the TV/VCR mode.
• Load a cassette tape with the erase prevention tab intact.
• Press DiSPLAY/CALL to verify that the time and date are
correct (see page 39).
ExampEe: Program a timer recording for the 23rd day, channel 125
(CABLE), 7:00 - 9:30 PM on timer program number 1 (Tape speed: SLP).
Press TV MENU. Press • or • to .............
select _ option.
Press •or • to select "TIMER REC
SET",thenpress•
Press • or • to select one of the
program line, then press ENTER
NOTES:
• If the T-Rec indicator blinks when the
timer recording ended, the TV program
has not been completely recorded
because of an insufficient tape supply
Press TIMER REC to cancel the timer
program or press EJECT to remove
the cassette tape.
• During timer recording standby mode,
the VCR operation cannot be used To
use the VCR operation, press TIMER
REC to deactivate the timer After you
use the VCR, press TIMER RE(:: again
to put the VCR into timer recording
standby mode.
• If you press TmMER RE(:: during timer
recording, the recording operation will
be interrupted If you press TIMER
RE(:: again within the programmed time,
the recording operation will start again.
• After a power failure or disconnection
of the power plug, all programmed
recording settings and time display
will be lost upon resumption of power.
In this case, reset the clock (see pages
16-18) and reprogram any timer
recordings.
Press • or • to select the date, then
press •
5
6
Set the start time, end time, channel
and tape speed as in step 4, then
press ENTER.
NOTES:
Press • to move arrow backward for
correction
•To record from external source set the
channel to "LI" or "L2". "LI" or "L2" will
appear next to CH 125 (or 69)
To enter other programs, repeat step
3-5 iiiiii!iii!iiii
7
• To return to the normal screen,
press TV MENU 3 times.
Press TIMER REC. The T-Rec indicator will light and the VCR
stands by for recording.
The timer recording will start at 5 seconds before the time you
predetermined,
NOTES:
• if the T-Rec indicator does not light in spite of the pressing of
TIMER REC, the cassette may not have been loaded yet (see
page 34).
• if the cassette is ejected in spite of the pressing of TIMER REC,
the erase prevention tab of the cassette may have been
removed (see page 34). ,4,t
5Q00401AE(40-42) 41 26/5/04, 10:47
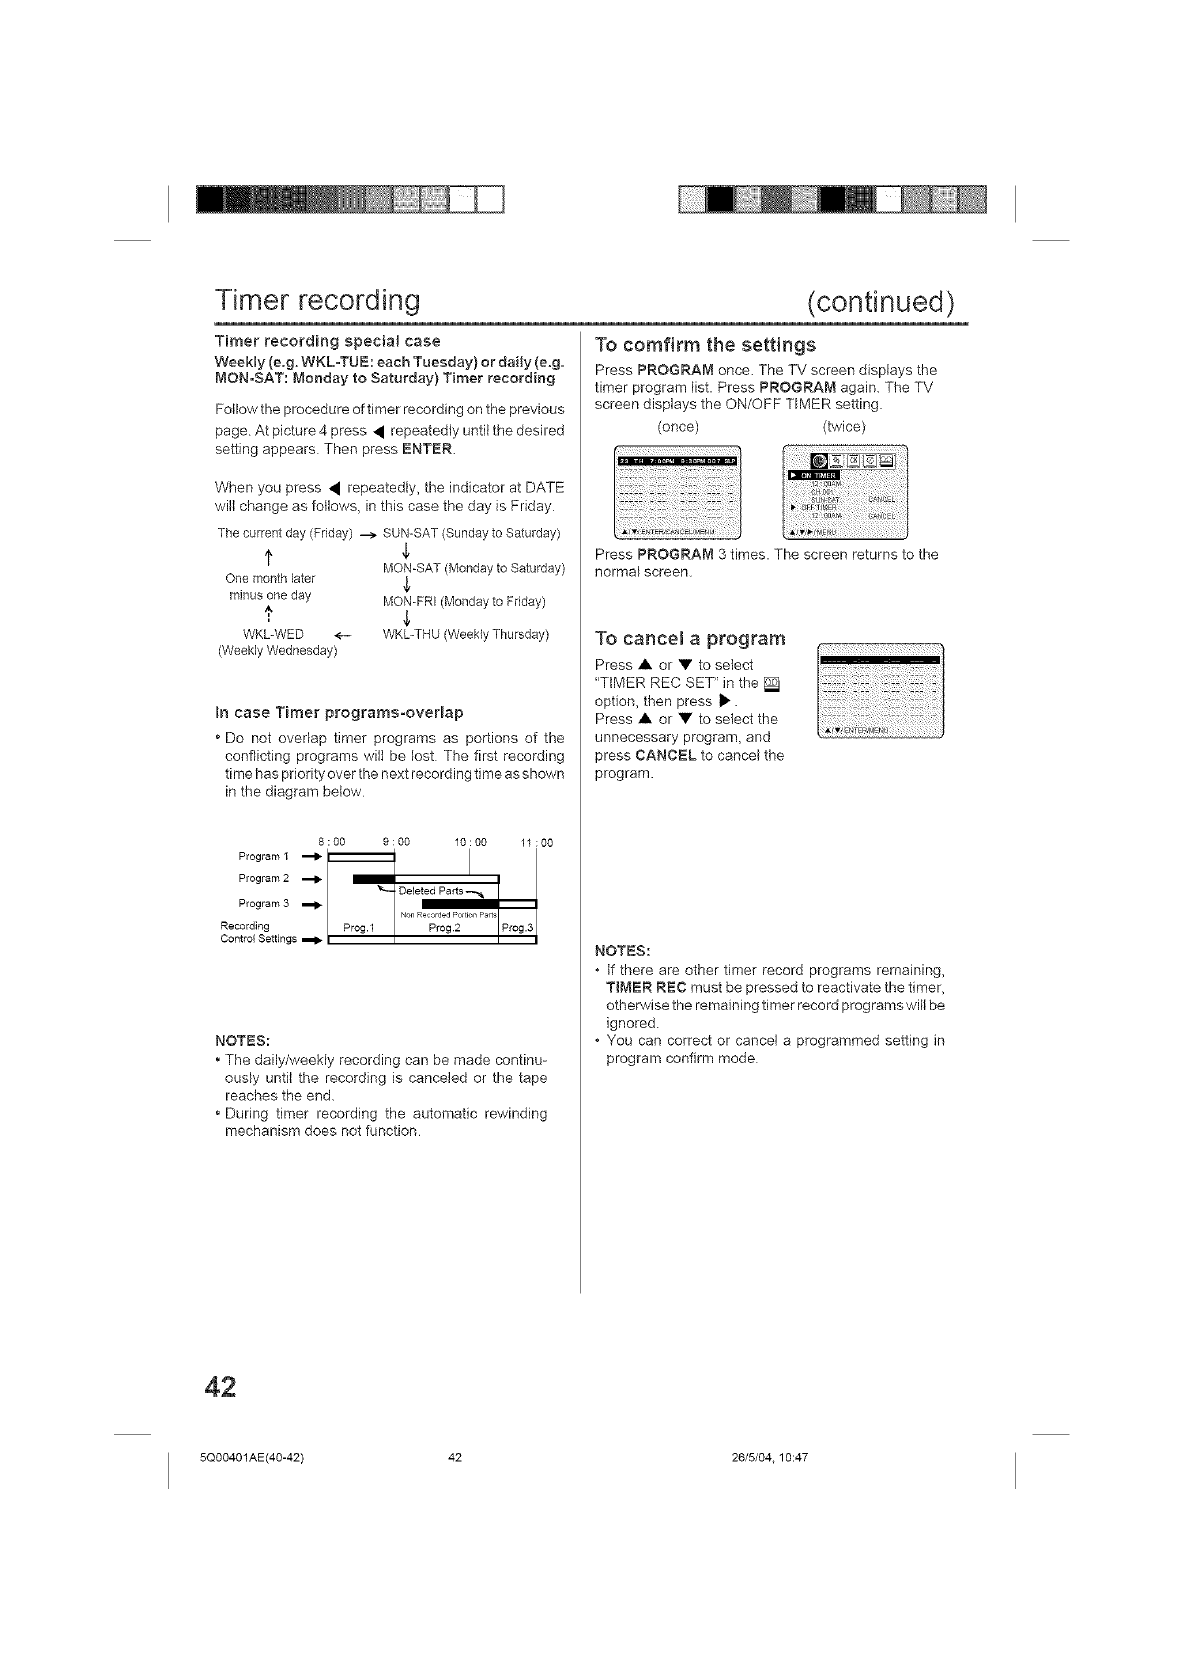
Timer recording
Timer recording special case
Weekly (e,g. WKL-TUE: each Tuesday) or dally (e.g.
MON-SAT: Monday to Saturday) Timer recording
Follow the procedure of timer recording on the previous
page At picture 4 press • repeatedly until the desired
setting appears Then press ENTER.
When you press • repeatedly, the indicator at DATE
will change as follows, in this case the day is Friday
The current day (Friday) ---> SUN-SAT (Sundayto Saturday)
f $
MON-SAT (Monday to Saturday)
One month Eater
minus one day MON-FRI (Monday to Friday)
WKL-WED <-.- WKL-THU (Weekly Thursday)
(WeeHy Wednesday)
in case Timer programs-oveHap
* Do not ovedap timer programs as portions of the
conflicting programs wilt be lost The first recording
time has priority over the next recording time as shown
in the diagram below
8:00 9:00 10:00 11:00
Program I
Program 2
Deleted Parts ,-*,_
Program 3
Non Recorded PoeticalPads
Recording Prog. 1 Prog 2 Prog.3
Control Settings
NOTES:
• The daily/weekly recording can be made continu-
ously until the recording is canceled or the tape
reaches the end.
• During timer recording the automatic rewinding
mechanism does not function
(continued)
To comfirm the settings
Press PROGRAM once. The TV screen displays the
timer program list. Press PROGRAr,'I again. The TV
screen displays the ON/OFF TIMER setting.
(once) (twice)
Press PROGRAM 3 times. The screen returns to the
normal screen.
To cancel a program ...................
Press • or • to select
"TIMER REC SET" in the [S_
option, then press I_.
Press • or • to select the
unnecessary program, and
press CANCEL to cancel the
program.
NOTES:
If there are other timer record programs remaining,
TIMER REC must be pressed to reactivate the timer,
otherwise the remaining timer record programs will be
ignored.
• You can correct or cancel a programmed setting in
program confirm mode
42
5Q00401AE(40-42) 42 26/5/04.10:47
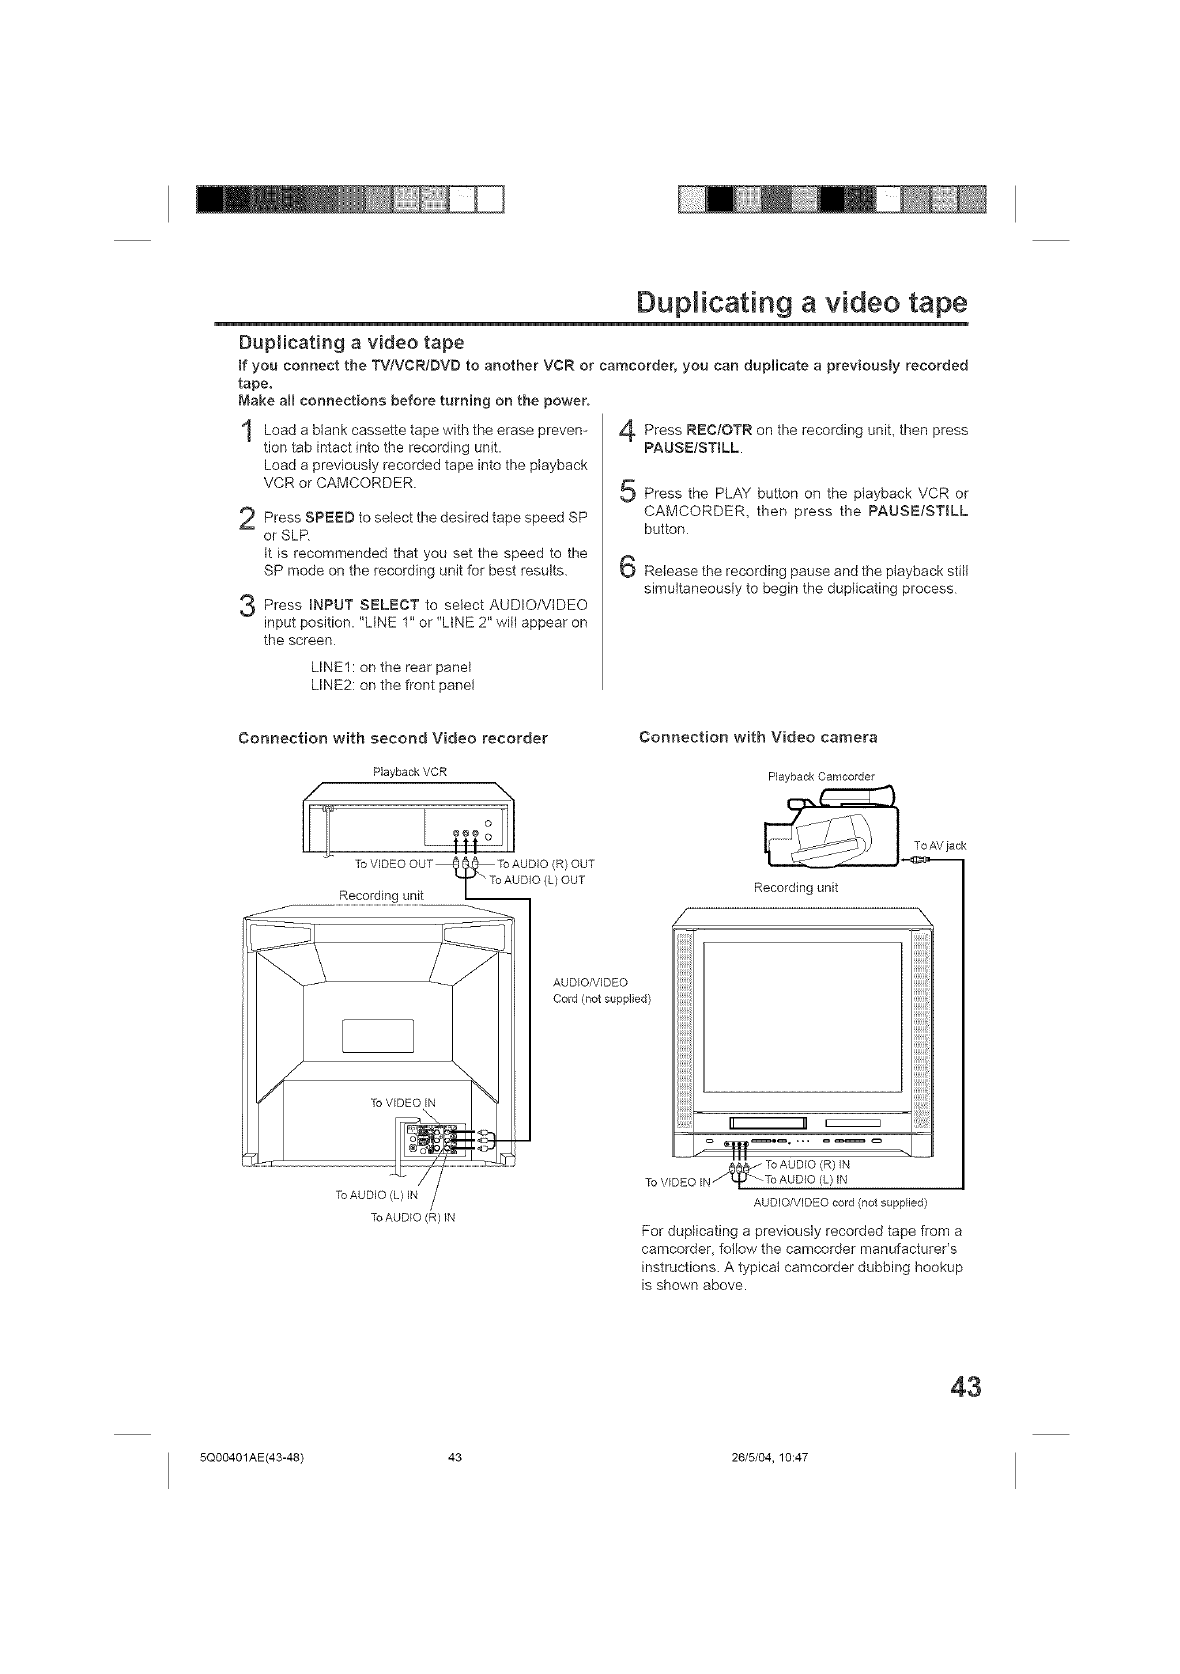
Duplicating a video tape
Duplicating a video tape
tf you connect the TV!VCR/DVD to another VCR or camcorder, you can duplicate apreviously recorded
tape,
Make all connections before turning on the power.
Load blank cassette with the 4 Press REC!OTR the unit, then
atape erase preven- on recording press
tion tab intact into the recording unit. PAUSE/STILL.
Load a previously recorded tape into the playback
VCR or CAMCORDER.
Press SPEED to select the desired SPtape speed
or SLR
It is recommended that you set the speed to the
SP mode on the recording unit for best results.
Press }NPUT SELECT to select AUDIO/VIDEO
input position. "LINE 1" or "LtNE 2" wilt appear on
the screen
LINE1: on the rear panel
LINE2: on the front panel
Press the PLAY button on the playback VCR or
CAMCORDER, then press the PAUSE/STILL
button
Release the recording pause and the playback still
simultaneously to begin the duplbating process
Connection with second Video recorder
PlaybackVCR
@@@
ToWDEOOUT_ _ ToAUDIO<R>OUT
T "To AUDIO (L) OUT
Recording unit L
AUDIO/VIDEO
Cord (not supplied)
/
ToAUDIO (R) IN
Connection with Video camera
PlaybackCamcorder
ToAVjack
Recording unit
X
AUDIO/VIDEOcord (not supplied)
For duplicating a previously recorded tape from a
camcorder_ follow the camcorder manufacturer's
instructions. A typical camcorder dubbing hookup
is shown above.
43
5Q00401AE(43-48) 43 26/5/04, 10:47
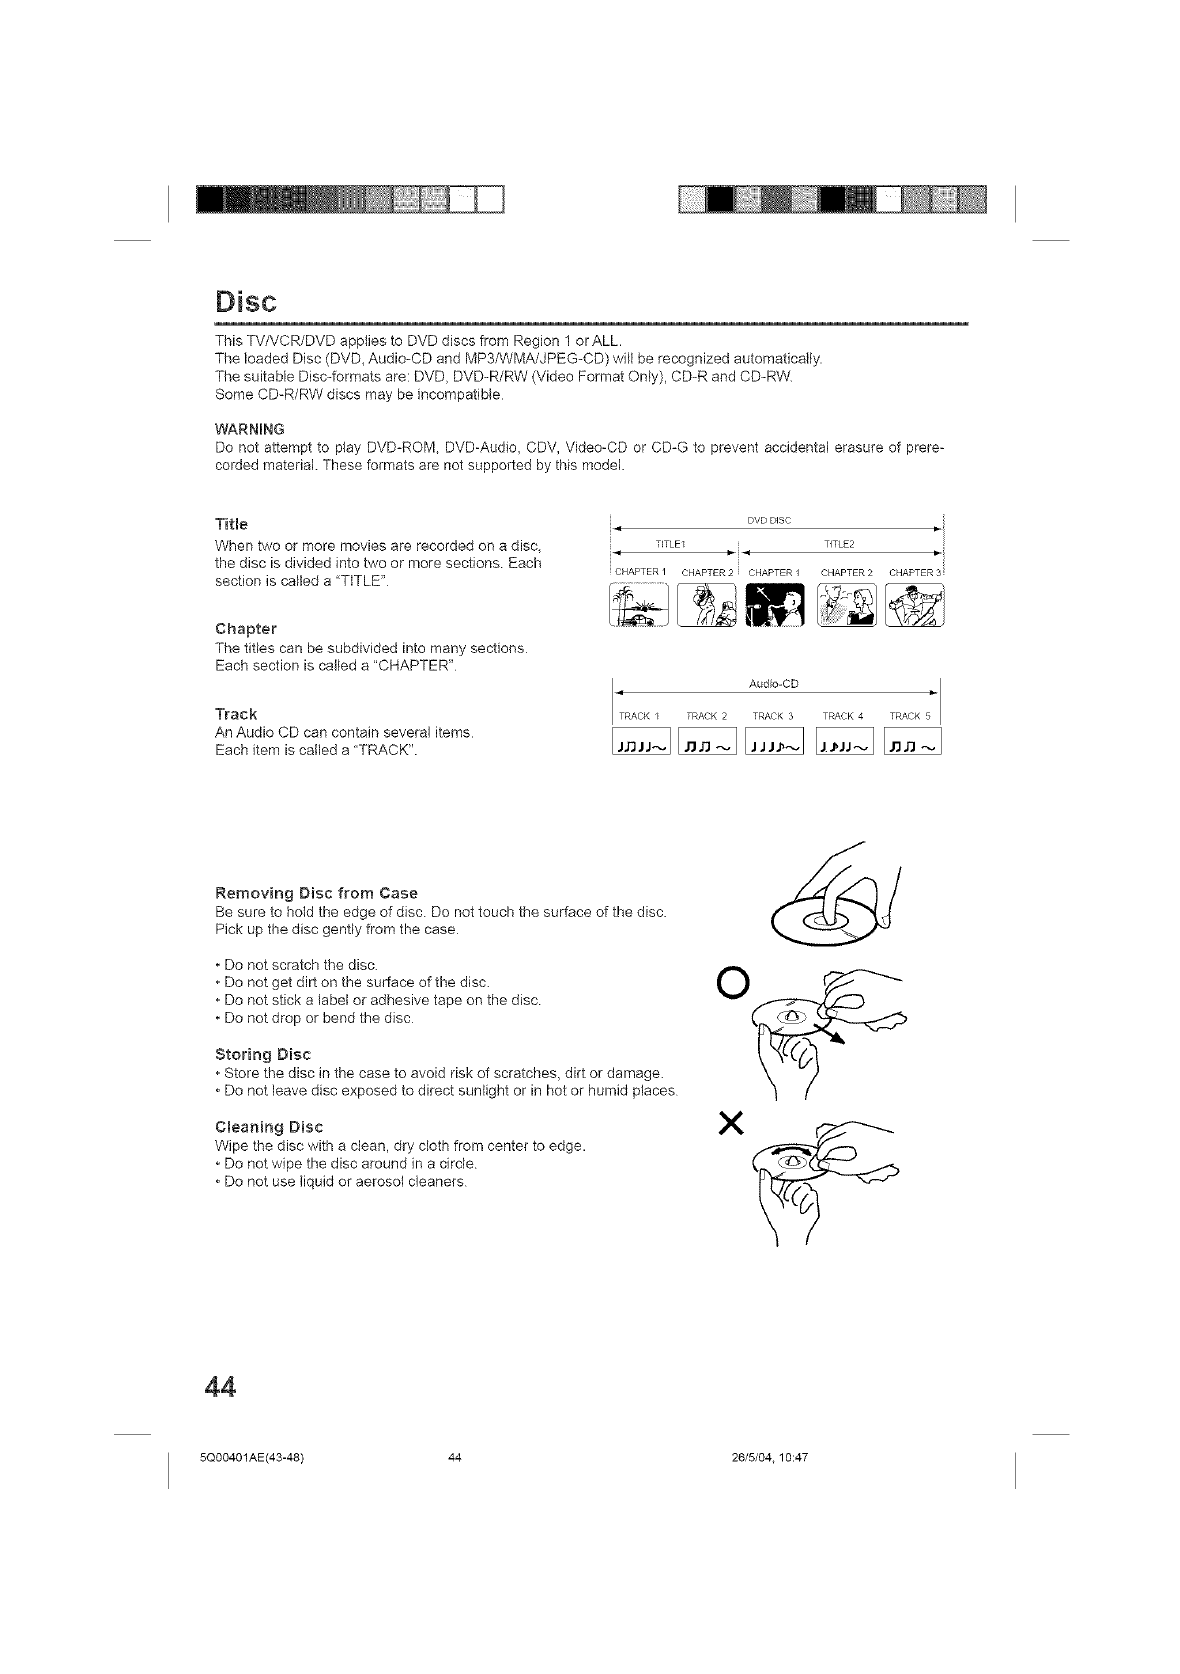
Disc
This TV/VCR/DVD applies to DVD discs from Region 1 or ALL.
The loaded Disc (DVD_ Audio-CD and MP3/WMA/JPEG-CD) will be recognized automatically
The suitable Disc-formats are: DVD, DVD-R/RW (Video Format Only), CD-R and CD-RW
Some CD-R/RW discs may be incompatible
WARNING
Do not attempt to play DVD-ROM, DVD-Audio, CDV, Video-CD or CD-G to prevent accidental erasure of prere-
corded material. These formats are not supported by this model.
Title
When two or more movies are recorded on a disc,
the disc is divided into two or more sections Each
section is called a "TITLE"
Chapter
The titles can be subdivided into many sections
Each section is cafled a "CHAPTER"
Track
An Audio CD can contain several items
Each item is called a "TRACK".
DVD DISC
TITLE1 TITLE2
CHAPTER / CHAPTER 2 CHAPTER / CHAPTER 2 CHAPTER 3
Audio-CD TRACK 5
RACK I TRACK 2 TRACK 3 TRACK 4
Removing Disc from Case
Be sure to hotd the edge of disc. Do not touch the surface of the disc.
Pick up the disc gently from the case
Do not scratch the disc.
Do not get dirt on the surface of the disc.
Do not stick a label or adhesive tape on the disc
Do not drop or bend the disc
Storing Disc
Store the disc in the case to avoid risk of scratches, dirt or damage.
Do not leave disc exposed to direct sunlight or in hot or humid places
Cleaning Disc
Wipe the disc with a clean, dry cloth from center to edge.
Do not wipe the disc around in a circle
Do not use liquid or aerosol cleaners
44
5Q00401AE(43-48) 44 26/5/04.10:47
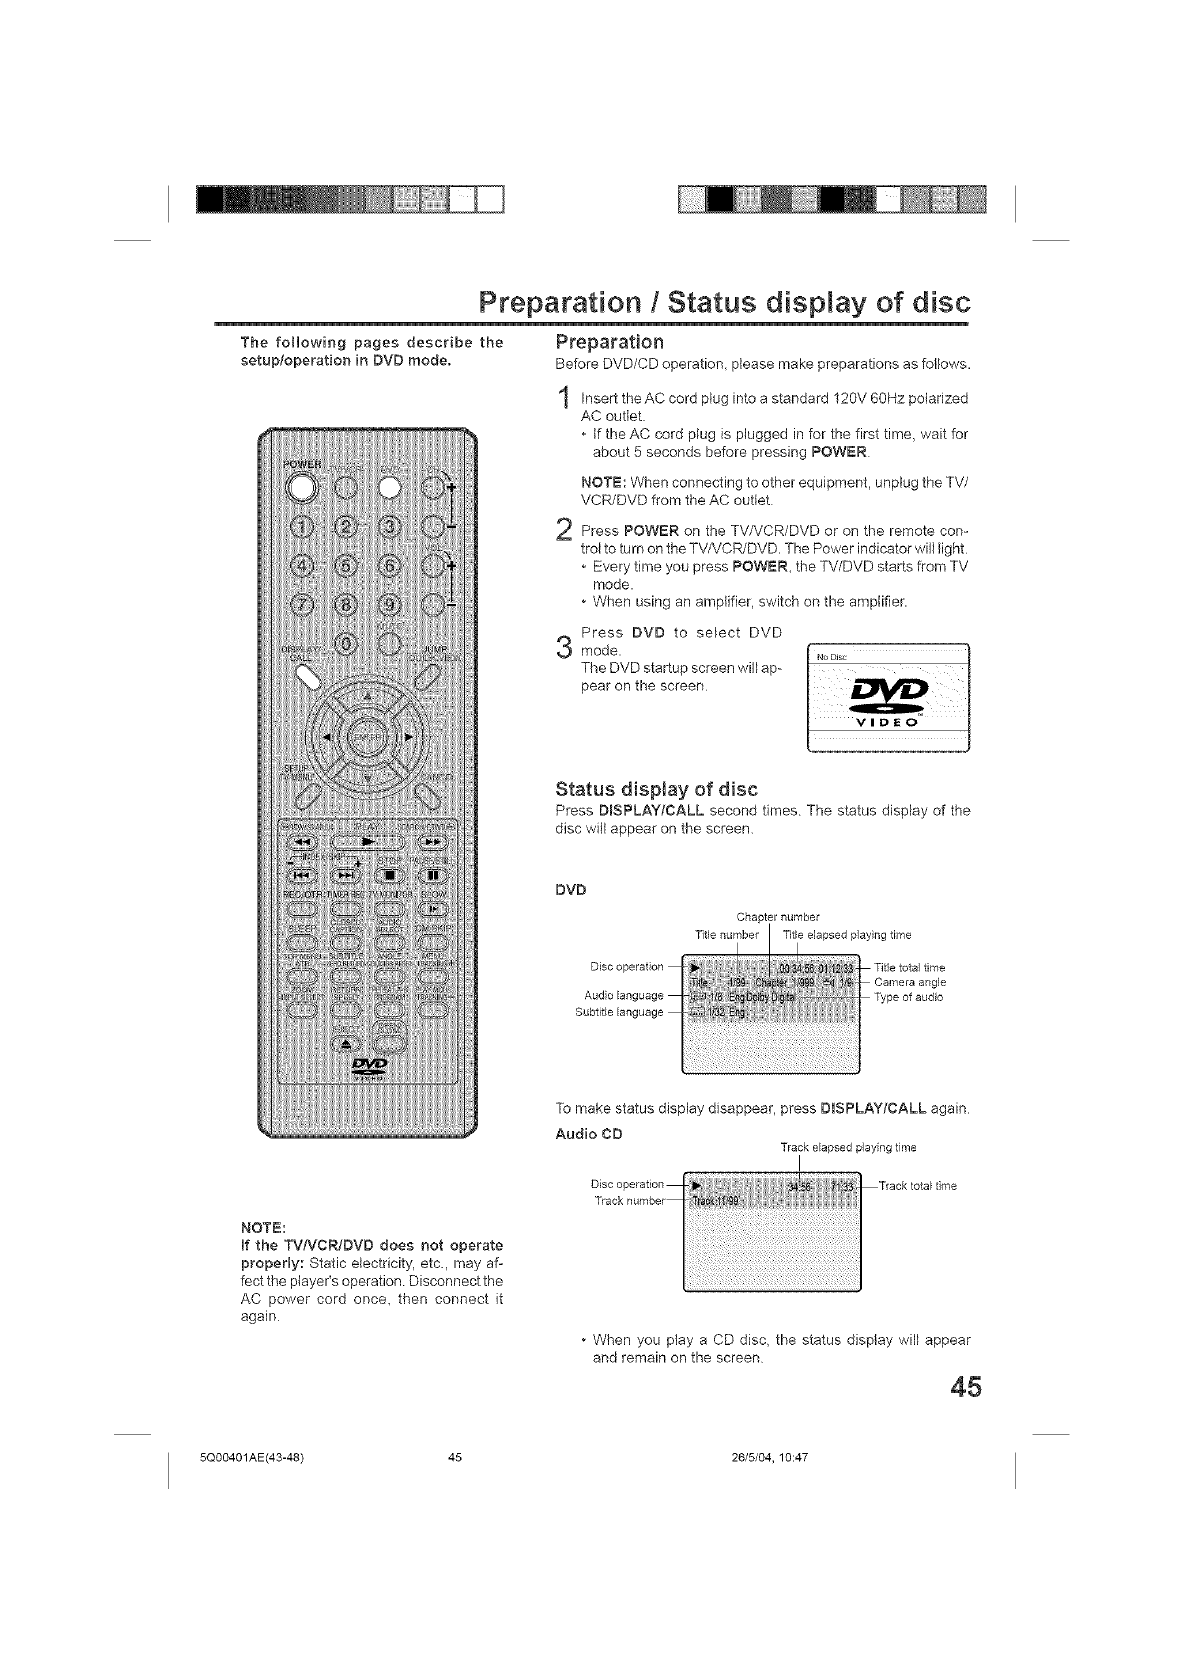
The following pages describe the
setup/operation in DVD mode.
Preparation /Status display of disc
Preparation
Before DVD/CD operation, please make preparations as follows.
Insert the AC cord plug into a standard 120V 6OHz polarized
AC outlet.
If the AC cord plug is plugged in for the first time, wait for
about 5 seconds before pressing POWER
NOTE: When connecting to other equipment, unplug the TV/
VCR/DVD from the AC outlet
Press POWER on the TV/VCR/DVD or on the remote con-
trol to turn on the TV/VCPJDVD. The Power indicator will light
Every time you press POWER, the TV/DVD starts from TV
mode.
• When using an amplifier, switch on the amplifier.
Press DVD to select DVD
mode.
The DVD startup screen will ap-
pear on the screen
Status display of disc
Press DISPLAY/CALL second times The status display of the
disc wilt appear on the screen.
DVD
Disc operation
Audio Eanguage
Subtitle Eanguage
Chapternumber
Titlenumber TitEeeJapsedplayingtime
N:_N
NOTE:
If the TVtVCR/DVD does not operate
properly: Static electricity, etc., may af-
fect the player's operation Disconnect the
AC power cord once, then connect it
again
To make status display disappear, press DISPLAYtCALL again
Audio CD Track elapsedplaying time
oi oopo,ot,oo T,oo oto,tim°
T_aokoumb_
• When you piay a CD disc, the status display will appear
and remain on the screen
45
5Q00401AE(43-48) 45 26/5/04, 10:47
Setting setup manguage
You can change the default settings
to customize performance to your
preference.
Press DVD to select the
DVD mode.
"No Disc" will appear on
the screen. (if a DVD disc
has already loaded, the
playback will start auto-
matically )
Press SETUP in the stop
mode, The SETUP MENU
of DVD will appear on the
screen
Then press • to sebct
Other
Press ENTER to
or
select OSD Language
Press • ENTER and
or
then press • or • to
select desired language
(eg. English), then press
ENTER
Press SETUP or RETURN to remove the MENU screen
if the TV/VCR/DVD does not operate
properly:
Static electricity, etc. may affect the play-
er's operation Disconnect the AC mains
lead once, then connect it again
46
5Q00401AE(43-48) 46 26/5/04.10:47
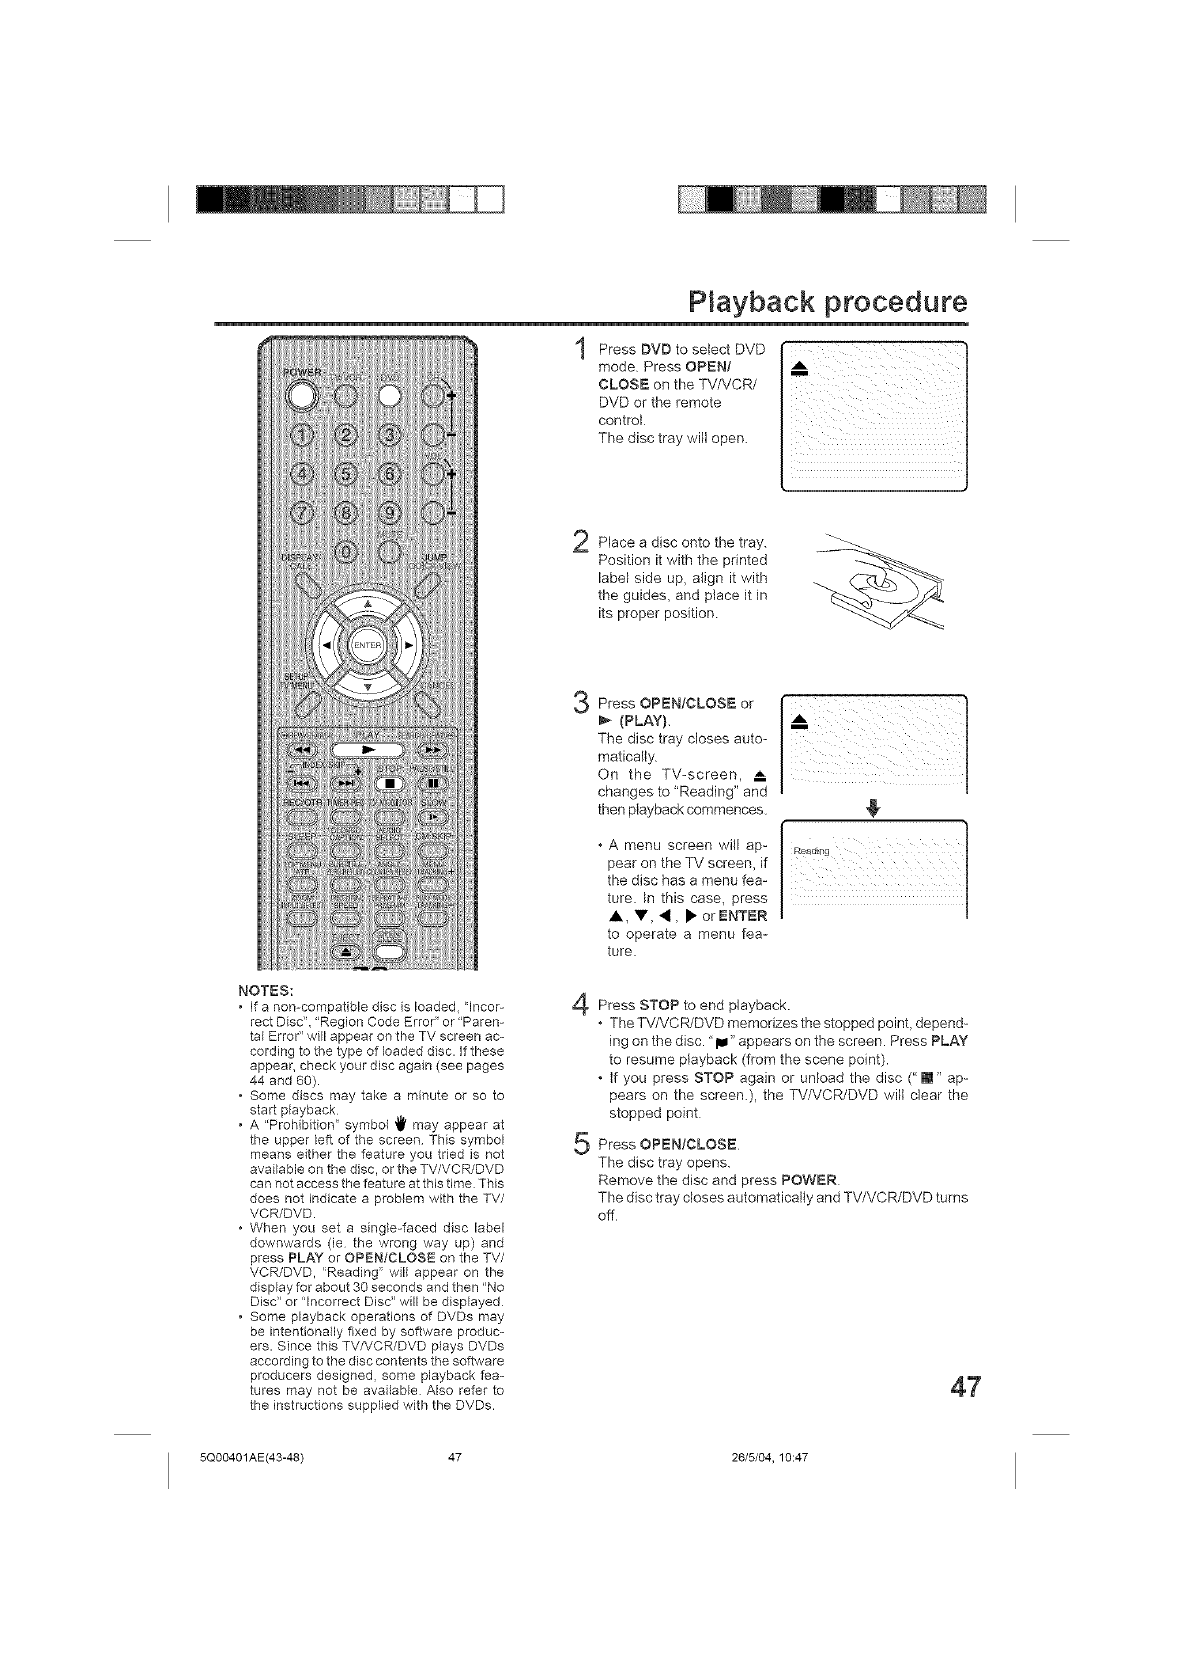
Pmayback procedure
Press DVD to select DVD
mode Press OPEN/
CLOSE on the TV/VCR/
DVD or the remote
control
The disc tray will open.
n
_i iiiiiiiiiiiiiiiiiiiiiiiiiiiiiiiiiiiiiiiiiiiiiiiiiii ii
Place a disc onto the tray.
Position it with the printed
label side up, align it with
the guides, and place it in
its proper position
NOTES:
If a non-compatible disc is Ioaded_ "Incor-
rect Disc '_,"Region Code Error" or "Paren-
tal Error" will appear on the TV screen ac-
cording to the type of loaded disc. if these
appear, check your disc again (see pages
44 and 60).
Some discs may take a minute or so to
start playback
A "Prohibition" symbol _' may appear at
the upper left of the screen This symbol
means either the feature you tried is not
availabb on the disc, or the TV/VCR/DVD
can not access the feature at this time Tflis
does not indicate a problem with the TV/
VCR/DVD.
When you set a single-faced disc label
downwards (ie the wrong way up) and
press PLAY or OPEN/CLOSE on the TV/
VCR/DVD, "Reading" will appear on the
display for about 30 seconds and then "No
Disc' or "Incorrect Disc" will be displayed
Some playback operations of DVDs may
be intentionally fixed by software produc-
ers. Since this TV/VCR/DVD plays DVDs
according to the disc contents the software
producers designed_ some playback fea-
tures may not be available Also refer to
the instructions supplied with the DVDs.
3
4
5
Press OPEN/CLOS _=or
(PLAY).
The disc tray closes auto-
matically.
On the TV-screen, ,,_
changes to "Reading" and
then playback commences.
A menu screen will ap-
pear on the TV screen, if
the disc has a menu fea-
ture. In this case, press
A, V 'd, • orENTER
to operate a menu fea-
ture.
/',¸ !1
Press STOP to end playback.
The TV/VCR/DVD memorizes the stopped poinL depend-
ing on the disc. "lu" appears on the screen. Press PLAY
to resume playback (from the scene point).
if you press STOP again or unload the disc (" []" ap-
pears on the screen.), the TV/VCR/DVD will clear the
stopped point
Press OPENfCLOSE
The disc tray opens.
Remove the disc and press POWER
The disc tray closes automatically and TV/VCR/DVD turns
off
47
5Q00401AE(43-48) 47 26/5/04, 10:47
Special playback
There may be a slight delay between
when you press tbe button and the
function activating.
WARNING:
The TV/VCR/DVD is capable of holding a
still video image or on-screen display im-
age on your television screen indefinitely.
If you leave the still video image or on-
screen display image displayed on your
TVfor an extended period of time, you risk
permanent damage to your television
screen. Projection screen televisions are
especially susceptible to such damage.
48
Fast Forward P_ayback
Press SEARCH I)_ during normal playback.
Each press of the SEARCH IN_ button will increase the speed
of the search _ (x 2), _ (x 4), _ (x 8), _ (x 15)
(CD: _ (x 2), I1_ (x 4), I1_ (x 8), _ (x 20))
*To resume normal playback, press PLAY.
Review Playback
Press SEARCH 4t_ during normat playback.
Each press of the SEARCH _ button will increase the speed
of the search _1_ (x 2), _ (x 4), _ (x 8)_ _ (x 15)
(CD: _,_ (x 2), _ (x 4)_ _ (x 8), _ (x 20))
•To resume normal playback, press PLAY.
Still Playback
Press PAUSE/STroLL during
normal playback to pause play-
back
iI _:i_ iiiiiiii
To resume normal playback,
press PLAY.
Frame Advance
Press PAUSE!STroLL during still playback.
One frame is advanced each time you press PAUSEtSTILL
To resume normal playback, press PLAY
Slow-motion Playback
Press SLOW( I_) during normal playback or still playback.
Each press of SLOW will change the speed of the slow xl/2,
xl/4, xl/6, xl/7.
•To resume normal playback, press PLAY.
• To resume the still playback, press PAUSEtSTILL
Locating a chapter or track
Press SKIP(I_I)R) Forward or SKIP(14141) Reverse during
playback to locate a chapter that you want to watch.
Each time you press the button, a chapter or track is
skipped
5Q00401AE(43-48) 48 26/5/04.10:47
MP3!WMAIJPEG playback
MP3/WMA/JPEG CD information
This player can play back MP3/WMAJJPEG files
recorded on e CD-R or CD-RW
MP3 is an audio file format which compresses
recorded music It was developed by Freunhofer
Gesellscheft in collaboration with Thomson inc. The
main advantage of the MP3 format is that it means
CD-quelity music tracks can be stored on a personal
computer
WMA (Windows Media Audio) is another audio file
format developed by Microsoft
JPEG flies ere image files
To create these files you need e Windows-PC with '_
CD-ROM drive end MP3/WMA]JPEG-encoding
software (not supplied)
The Apple-HFS-System cannot be played
Playback Limitations
MP3/WMA CD playback
Press OPENICLOSE
The disc tray will open.
Place a disc on which MP3 or WMA
files have been recorded onto the tray
Press OPEN/CLOSE or _ PLAY)
The disc tray closes automatically. On
the TV-screen, "Reading" will appear
Reading will take as much time as
the number of file
A file menu screen will appear on
the TV screen
Press • /• to select folder
File names on a MP3/WMA/JPEG CD must include 4 Press A/V or • /• or the number buttons (0_9) to select
3-digit extension letters such as, "mp3", "wma" or
.jpg, the desired file.
This unit can read 200 files per disc Keep directory
sizes to 200 files or less Anything over that limit will
be omitted
This unit is able to recognize up to a maximum of 50
directories per disc
If a CD has both audio and graphic files on the same
CD, only the audio tracks wil{ play
It may take more than one minute for MP3/WMA/
JPEG files to play depending on their structure
Music recorded by "Joliet Recording Specification"
can be played back.
The unit can play back baseline and progressive
JPEG files
Music files recorded by "HierarcNcai File System"
(HFS) cannot be played
Notes on _']P3!WMAtJPEG fi[]s
To play MP3/WMA/JPEG files in the recorded order, t=
1 Use MP3/WMA/JPEG software that records data
alphabetically or numerically
2 Name each file including a two-digit or three-digit
number (eg. "01" "02" or "001" "002"). _,_
3 Refrain from creating too many subfolders
Limitations on disp[]y
• File names ere displayed (within 16 characters) on
the screen File names longer than 16 letters ere
condensed
Available letters for display are the following: capital
or small letters A through Z, numbers O through 9,
and _ (under score).
• Letters other than those above are replaced with a
hyphen Press ENTER. The selected file starts
playing back Press l (STOP) to end playback
CAUTION:
•Some MP3/WMA/JPEG flies cannot be played back
depending on the recording conditions
• The CD-R/RW that has no music data or non-MP3/
WMA/JPEG files cannot be played back
In case the folder includes more than 15 files, press • or
• to display next file list.
if2 _B q72
I
0_ _lnleffal
N_
. When _* (PLAY) has been pressed after displaying the file
menu, or when the disc tray has been closed after pressing _'*
(PLAY) in step 2, playback begins automatically starting from
the first file In this case, if the first file is an MP3/WMA file,
only MP3/WMAfiles are played back in order. If the first file is
a JPEG file, the first JPEG file is played back.
Press ENTER.
The selected file starts playing back
Press [] (STOP) to end playback
• The TV/VCR/DVD records the stopped point. "[]"
appears on the screen. Press _ (PLAY) to resume
playback (from the scene point).
. If you press [] (STOP) again or unload the disc, the TV/
VCR/DVD will clear the stopped point
NOTES:
During MP3iWMA/JPEG-Playback, you cannot use
SEARCH, A-B Repeat functions
. 'You can use Repeat (Track or All), Random functions and
Program playback for MP3/WMA/JPEG CD Playback (see
pages 54, 55)
. In the case of a CD containing a mixture of MP3, WMA and
JPEG flies, the files are played back by selecting them from
the file menu.
49
5Q00401AE(49-52) 49 26/5/04, 10:47
MP3/WMA/JPEG playback (continued)
JPEG CD pmayback
Press OPEN/CLOSE.
The disc tray will open
Place a disc on which JPEG files have
been recorded onto the tray.
2
3
Press OPEN/CLOSE or _'-
(PLAY). The disc tray closes au-
tomatically. On the TV-screen,
"Reading" will appear. Reading
will take as much time as the
number of file
A file menu screen will appear
on the TV screen
Press _ /• to select folder.
,4
¢@ Press A/V or _/• orthe
number buttons (0-9) to select
the desired file
About file menu
Operation Elapsed time
{_ : Indicates MP3 file
_ : Indicates WMAfile
[] : Indicates JPEG file
NOTES:
•The picture menu is displayed when
the FUJtCOLOR CD or the Kodak
Picture CD are played. To dispiay the
file menu press TOP MENU.
MP3 or WMA file on the KODAK
Picture CD is not recognized on this
TV/VCR/DVD
50
To displaya picturemenu, press [r
ME.o Toretumtoaf,emenu
press TOP MENU )
Press A/. or _ /• to select [_
the desired file. _
•To display next list, press SKmP
Ip,t_l /1_141
, When _ (PLAY) has been pressed after displaying the
file menu_ or when the disc tray has been closed after press-
ing _,_ (PLAY) in step 2, playback begins automatically
starting from the first file, In this case_ if the first file is a
JPEG file, the first JPEG file is played back. if the first file
is an MP3/WMAfile, only MP3/WMA files are played back
in order
Press ENTER
The selected picture appears
on the TV screen.
Press l (STOP) to end playback.
The file menu appears on the TV screen.
If you want to watch another file, repeat steps 4-5.
5Q00401AE(49-52) 50 26/5/04.10:47
Setting the JPEG interval
Setting the JPEG Interval
You can continuously play back all JPEG files automatically
1Press SETUP in the stop
mode.
Press _ /• to select
"Picture", then press • or
ENTER.
Press • or • to select
"JPEG Interval".
3Press ENTER or _ /• to select
your desired time
Off:
Plays back one file at a time.
5 Seconds:
Displays images in the form of a slide show Every 5 seconds
the image changes
10 Seconds:
Displays images in the form of a slide show Every 10 seconds
the image changes
15 Seconds:
Displays images in the form of a slide show Every 15 seconds
the image changes
Press SETUP or RETURN to remove the MENU screen.
51
5Q00401AE(49-52) 51 26/5/04, 10:47
Setting the select flies
playing back aCD containing a 1
When
mixture of MP3, WMA and JPEG files,
only MP3/WMA or JPEG files can be
displayed on the file menu.
Press SETUP in the stop mode
Press • /_. to select "Picture",
then press • or ENTER.
Press • or • to select"Select
Files"
Press ENTER or •/• to se-
lect your desired file type
All:
Displays all files
Music Only:
Displays only MP3/WMA files
Pictures Only:
Displays only JPEG files.
Press SETUP or RETURN to remove the MENU screen
52
5Q00401AE(49-52) 52 26/5/04.10:47
Zooming / Locating desired scene
Zooming
This TVNCR/DVD will allow you to zoom in on the frame
image, You can then make selections by switching the
position of the frame.
Press DVD to select DVD
mode.
Press ZOOM during play-
back.
The center part of the
image will be zoomed in.
Each press of ZOOM will
change the ZOOM O_1
(xf.3), 0,2 (x f.5)_0,3
(x 20)
Press A/V/'_ /• to view a different part of the frame.
You may move the frame from the center position to UP,
DOWN, LEFT or RIGHT direction
Sin the zoom mode press ZOOM repeatedly to return to a
1:1 view (O,, Off)
Locating Desired Scene
Use the title, chapter and time recorded on the disc to
locate the desired point to play back.
Press JUMP during play-
back
NOTES:
You can select the Pause, Slow or
Search playback in the zoom mode.
Some discs may not respond to zoom
feature
Press • or • to select the "Time", "Title" or "Chapter"
Press the number buttons (0-9) to input the number
If you input a wrong number, press CANCEL.
• Refer to the package supplied with the disc to check the
numbers
Press ENTER.
, Playback starts.
• When you change the title, playback starts from
Chapter 1 of the selected title.
, Some discs may not work in the above operation.
53
5Q00401AE(53-57) 53 26/5/04, 10:47

Repeat playback
Title, Chapter, Track P_ayback
Press PLAY MODE during playback or stop mode.
DVD
_ll_dEn!er/£1ayMode |
/
2
CD
P_yMode; }
R_ea;/EntedPiayMoOff
Press • or • or ENTER once or twice to select 'Chapter" or
'Title".
In case of CD, at first press • to select "Repeat" and then
press • or • or ENTER once or twice to select "Track" or "All".
DVD
I
3
CD
PlayMode : off
I 4 _Av/En[e_/PlayMode 1
Press PLAY MODE again to make the screen disappear.
Press PLAY to start Repeat playback
To resume normal playback, select Repeat Off
NOTES:
*Some discs may not work with the
repeat operation.
, In A-B repeat mode, subtitles near
point A or B may not appear.
During the A-B Repeat Playback the
ANGLE feature will not operate.
"You may not be able to set A-B Re-
peat, depending on the scenes of the
DVD
54
AoB Repeat Playback
A-B repeat playback allows you to repeat material between two
selected points.
ok
Thestartpo, t,ase,eoted.
tomatically, then starts again.
To resume normal playback press REPEAT A-B again.
"_,,'_,,_Off" appears on the screen.
5Q00401AE(53-57) 54 26/5/04.10:47
Program playback/Random playback (CD)
Program playback
You can arrange the order of tracks on the disc.
1Press PLAY MODE in the stop I}
I PlayMode : Off
mode I
IRep°°t : °_ I
2Press • or • to select "Play I'PlayMode : Program l
Mode', then press ' °r • or /R_peat4 : i Off i0 /
ENTER to select "Program" 2_: 5'-- 8,.-it--.-
3'-. 6 '-- 9 --- 12-.-
3Example: in case you wish to
program in order of 7, 3, 11:
Enter as 7 •, 3 •, 11
if you input a wrong number,
press CANCEL
I PlayMode : Program 1
Repeat : Off 1
3 6--:---!2---
[ _I_A'V/Enter0:9 Can_iTPayMode J
4Press •/• or _ /• to select f _,
'Program Playback" and press t ProgramP!aYbaCk 02:3! 08:29|
ENTER. "Program Playback" will tTm ck 7/11 1
appear on the screen. The | |
program you selected wit{ begin | |
to playback in the order set |
To return to normal playback, se- | |
[ect "P_ay Mode: Off" at step 2 k )
above.
NOTES:
• To cancel program play. setect"Clear"
at step 4 and press ENTER.
•The program is cancelled when you
open the disc tray or turn the power off
• Random playback can not be com-
bined with Repeat playback.
Random playback
Press PLAY MODE during
playback or stop mode.
Press • to select
or "Play
Mode"_ then press _/• or EN_
TER to select "Random".
I
Play Mode :
Repeat : Off
_ _-,_{E_teup!ayMtde
Press PLAY.
"Random Play" will appear on the screen and Random Playback
will start.
55
5QOO401AE(53-57) 55 26/5/04, 10:48
Changing soundtrack language /Subtitles
Changing soundtrack language
You can select the language when you play amultilingual
disc.
1Press AUDIO SELECT [
during playback
The current soundtrack
language will appear
2 Press AUDIO SELECT I
repeatedly until the desired
language is selected.
The on-screen display will
disappear after a few sec-
onds.
NOTES:
•If the desired language is not heard af-
ter pressing AUDIO SELECT several
times, the language is not recorded on
the disc.
°Changing soundtrack language is can-
ceNed when you open the disc tray The
initial default language or available lan-
guage will be heard if the disc is played
back again
•Changing subtitle language is cancelled
when you open the disc tray or turn the
power off.
•Some functions may not work on some
DVDs You may not be able to turn sub-
titles on or off or change subtitles. While
playing the DVD, the subtitle may
change when:
- you open or close the disc tray
- you change the title.
•In some cases, the subtitle language is
not changed to the selected one imme-
diately.
56
Subtitles
Turning the Subtitles On and Off
When playing back a disc recorded with subtitles, you
can turn the subtitles on or off.
PressSOOT,TLEdur,ngp,ay-back until "Off' appears I
Changing the subtitle language
You can select the language when playing back a diss
recorded with multi:lingual subtitles.
1 pressSOBT,TLErepeat- i32Eng
edlyduringpiaybackuntilDi
your desired language ap-
pears.
The on-screen display will disappear after a few seconds.
5Q00401AE(53-57) 56 26/5/04.10:48
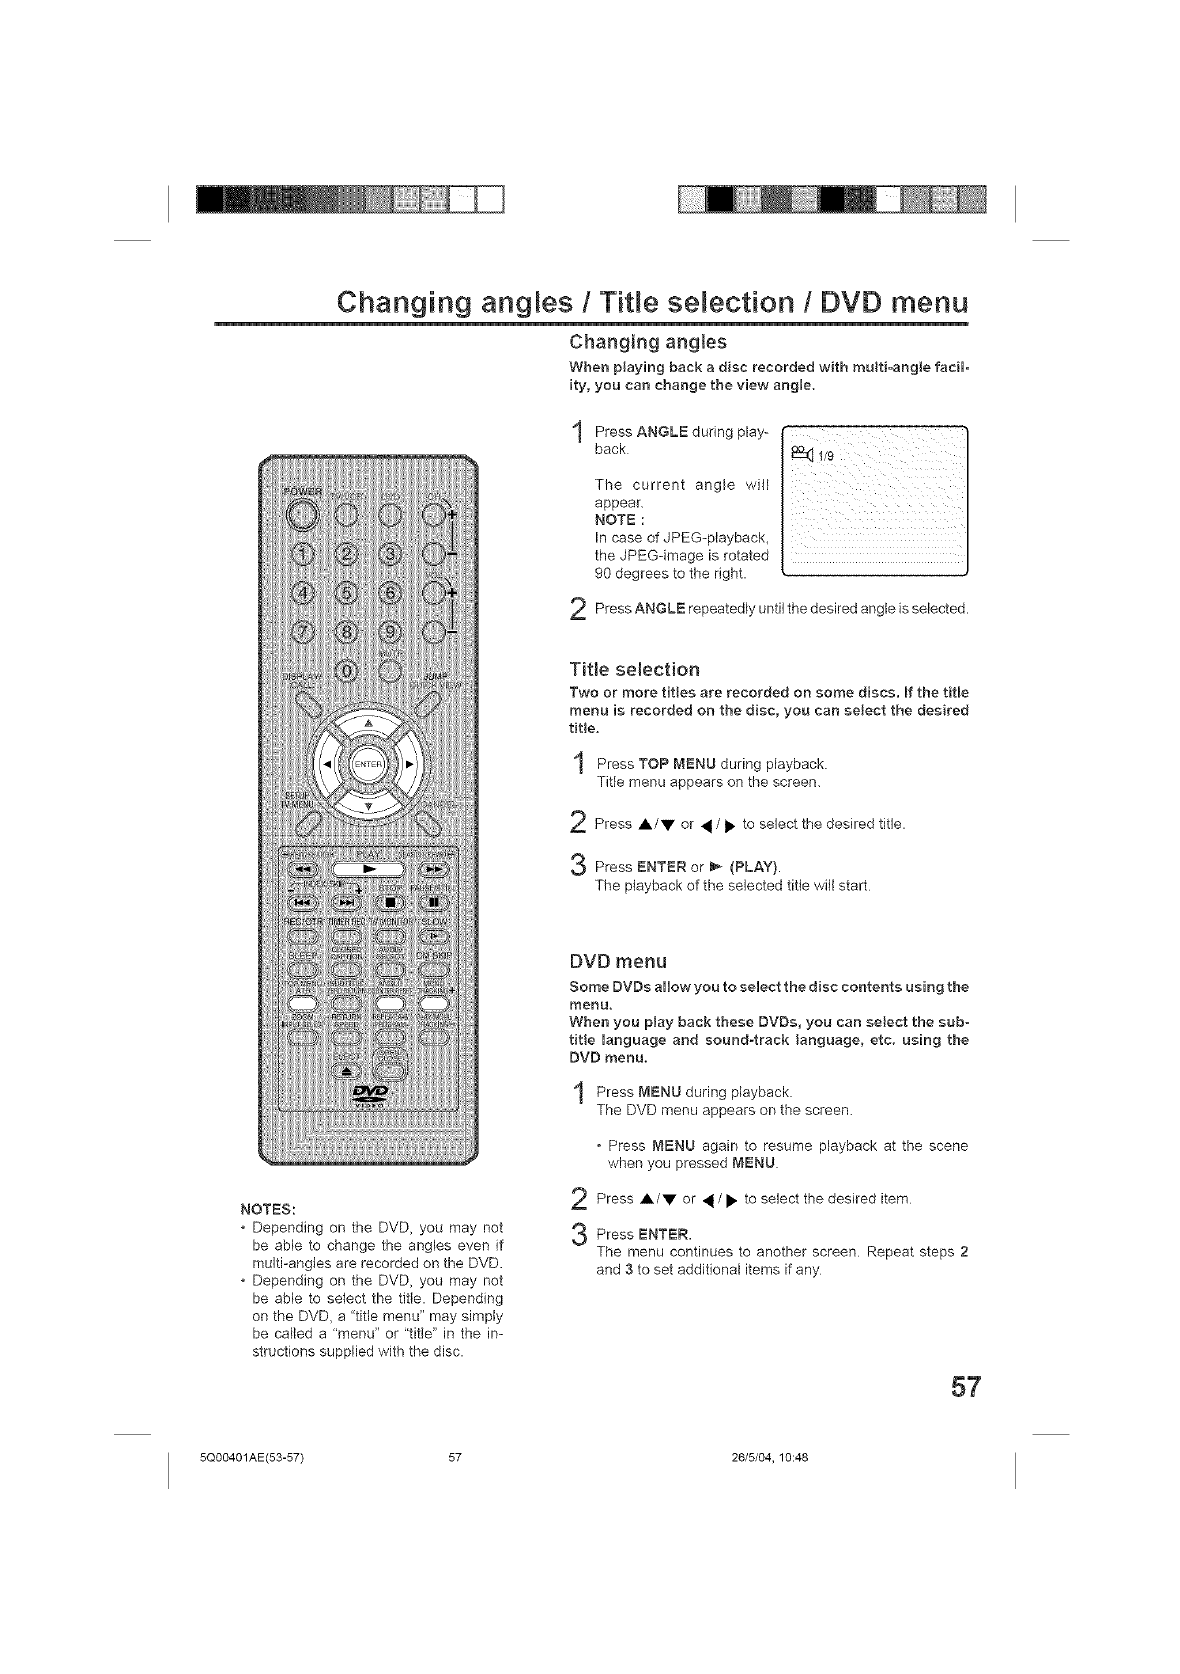
Changing angmes /Title selection /DVD menu
Changing angles
When pJaying back a disc recorded with multi-angle facil-
ity, you can change the view angle.
during play-
Press ANGLE
back
2
The current angle will
appear.
NOTE :
In case of JPEG-playback,
the JPEG-image is rotated
90 degrees to the right.
Press ANGLE repeatedly until the desired angle is selected.
Title selection
Two or more tiEes are recorded on some discs. Bfthe title
menu is recorded on the disc, you can seJect the desired
tiEe,
Press TOP _4ENU during playback.
Title menu appears on the screen.
Press A/V or • /• to select the desired title.
Press ENTER or _ (PLAY).
The playback of the selected title will start
NOTES:
•Depending on the DVD, you may not
be able to change the angles even if
multi-angles are recorded on the DVD.
•Depending on the DVD, you may not
be able to select the title. Depending
on the DVD, a "title menu" may simply
be called a "menu" or "title" in the in-
structions supplied with the disc.
DVD menu
Some DVDs allow you to select the disc contents using the
menu,
When you play back these DVDs, you can seJect the sub-
title 0anguage and sound4rack language, etc, using the
DVD menu.
during playback.
Press MENU
The DVD menu appears on the screen.
, Press MENU again to resume playback at the scene
when you pressed MENU
Press /to select the desired item
A/V or
Press ENTER.
The menu continues to another screen Repeat steps 2
and 3 to set additional items if any
57
5Q00401AE(53-57) 57 26/5/04, 10:48
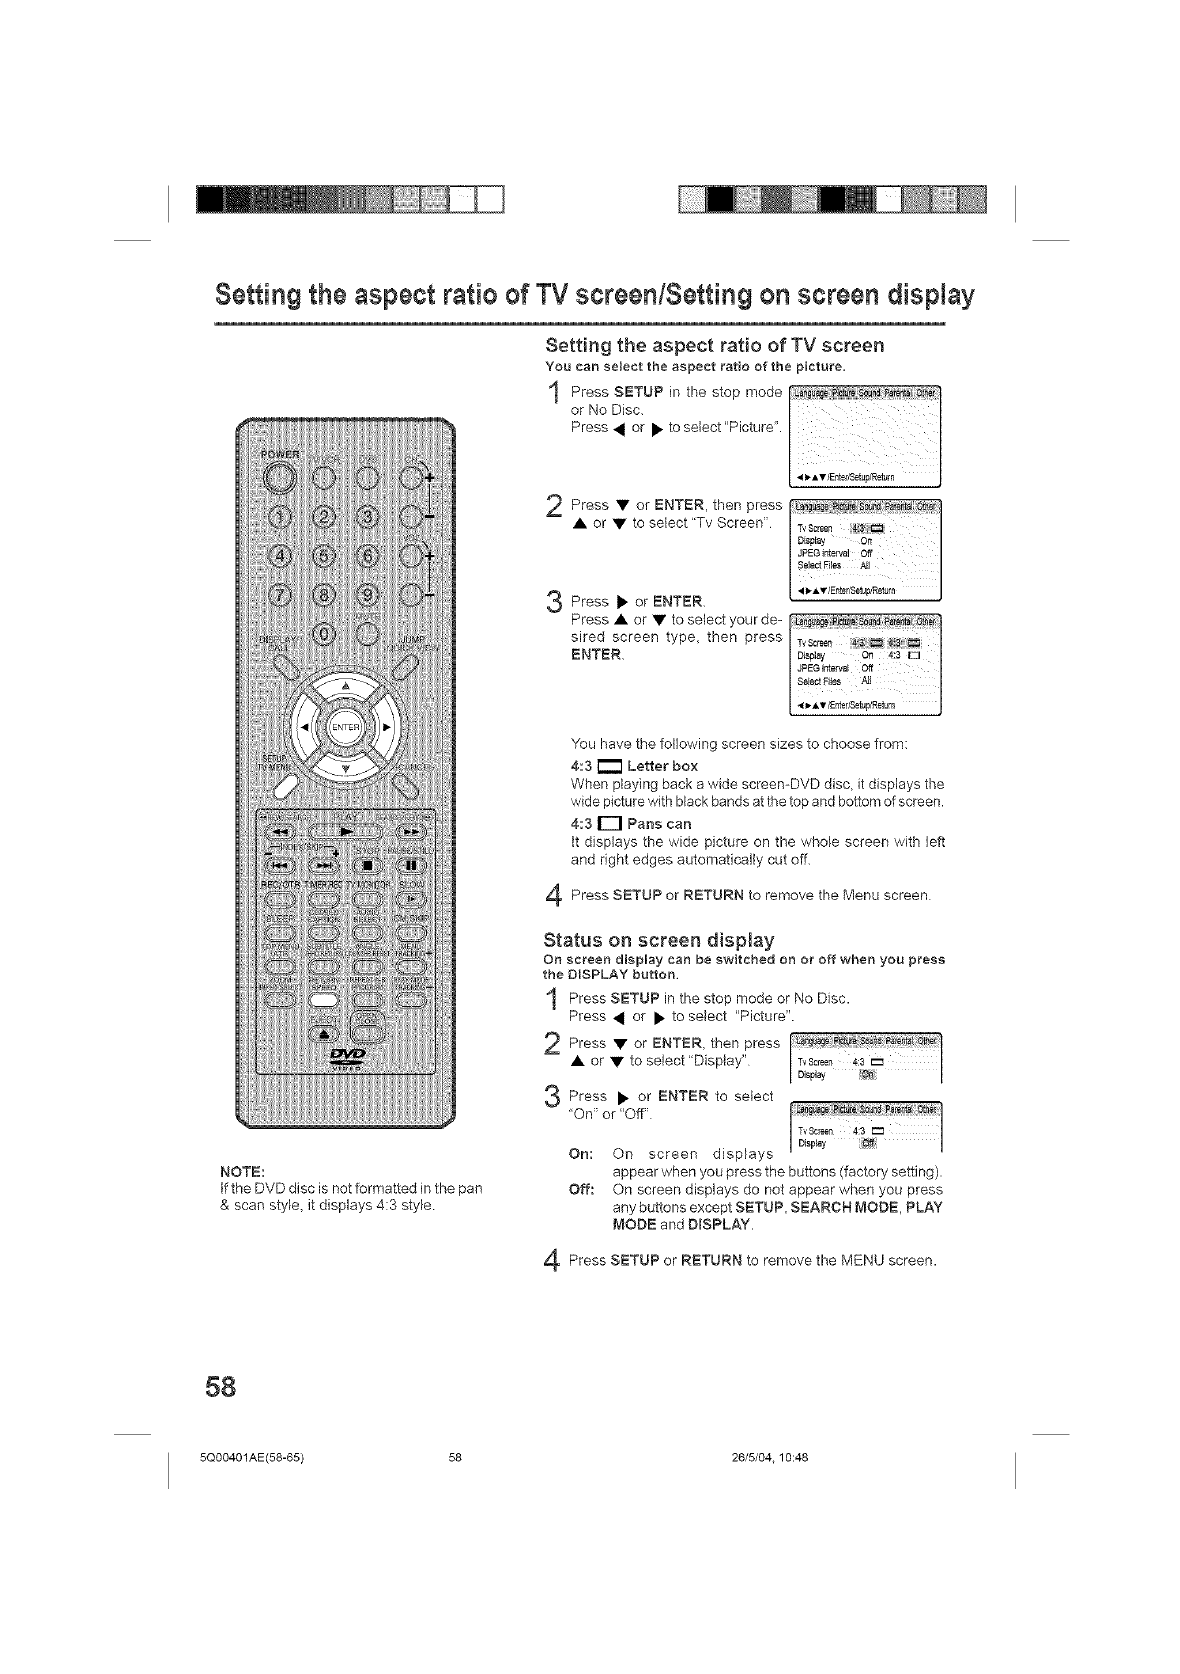
Setting the aspect ratio of TV screen/Setting on screen display
Setting the aspect ratio of TV screen
You can select the aspect ratio of the picture=
2Press • or ENTER, then press
A or • to select "Tv Screen" /TvScreen__-, v/Ether/Setup/ReturnSe]eeEiasJPEainte_alDisPLayOnA_,Off J
Press • or ENTER.
Press • or • to select your de-
sired screen type_ then press
ENTER.
NOTE:
If the DVD disc is not formatted in the pan
& scan style, it displays 4:3 style
You have the following screen sizes to choose from:
4:3 _ Letter box
When playing back a wide screen-DVD disc_ it displays the
wide picture with black bands at the top and bottom of screen.
4:3 r-1 Pans can
It displays the wide picture on the whole screen with left
and right edges automatically cut off.
Press SETUP RETURN to the Menu
or remove screen
Status on screen display
On screen display can be switched on or off when you press
the DISPLAY button.
Press SETUP in the mode No Disc.
stop or
Press _ or • to select "Picture".
2 Press• orENTER,thenpress
• or • to select "Display" TvScreen 4:3 I:_
I /
I D'sp'ay _ /
Press ENTER to select
or
"On" or "Off"
On: On screen displays
appear when you press the buttons (factory setting).
Off: On screen displays do not appear when you press
any buttons except SETUP, SEARCH MODE, PLAY
MODE and DISPLAY.
Press SETUP or RETURN to remove the MENU screen.
58
5Q00401AE(58-65) 58 26/5/04.10:48
DRC (Dynamic Range Control) ena-
bles you to control the dynamic range
so as to achieve a suitable sound for
your equipment,
Dynamic Range Contro
_ .,n,A,/EnterlSetup/Return I
• or se-
Press ENTER to
lect "DRC".
Press I_ or ENTER, then
press • or • to select
"On" or "Off"
Press SETUP or RETURN to remove the MENU screen.
NOTES:
• This function works only during play-
back of Dolby Digital recorded discs.
•The level of Dynamic Range Reduction
may differ depending on DVD video
disc
59
5Q00401AE(58-65) 59 26/5/04, 10:48
Parental contro setting
if you want to limit the types of discs
that can be played, use the Parental
Control feature.
Press SETUP in the stop mode
or No Disc.
Press • or • to select "Pa-
rental". Then press • or
ENTER.
Press • or • to select "Pa-
rental", then press • or •
until the level you require ap-
pears.
•Level Off : The parental control setting does not
function.
• Level 8 : Virtually all DVD software can be played
back.
• Level I : DVD software for adults cannot be
played back.
• Select from level 1 to level 8. The limitation will be
more severe as the level number decreases.
3Press • or • to select"Pass-
word". I
Passwod
Press the number buttons (0 ........... ............................. I
9) to input a 4.-digit password. Pa[enta} 3 I
Be sure to remember tMs I
number! 0-9/Cancel I
°If yOU Input a wrong _AVtEnter/SetuplRetu_ J
number, press CANCEL.
NOTES:
•if each setup (P.46,51,52,58~61,
63~65) has been completed, the TVI
VCR/DVD can always be worked
under the same conditions (espe-
cially with DVD discs),
Each setup will be retained in the
memory when you turn the power off.
•Depending on the discs, the TV/VCR/
DVD cannot limit playback
•Some discs may not be encoded with
specific rating level information though
its disc jacket says "adult." For those
discs, the age restriction will not work
60
Press ENTER to store the pass-
word.
NOTE: Now the rating is locked
and the setting cannot be
changed unless you enter the
correct password
Press SETUP or RETURN to remove the MENU screen.
5Q00401AE(58-65) 60 26/5/04.10:48

Changing the parental [eve[
Press SETUP in the stop mode
or No Disc
Press • or • to select
"Parental" Then press • or
ENTER.
2
3
Press the number buttons _
9) to enter the password you I I
have stored I Password I
O-9/Cancel
4 _A'_/Enter/aetup/Return
Press ENTER
The rating is now unlocked.
Press • or • to select
"Parental", then press • or
• to change the parental
level
NOTE:
Do not forget the password If you forget
the password, contact the dealer that
you purchased the unit from
Press • or • to select
"Password", then press the
number buttons (0o9} to
enter the password.
NOTE: You can change the
password at this time if you
want.
Press ENTER.
The parental leve} is changed
and locked.
Press SETUP or RETURN to remove the MENU screen.
61
5Q00401AE(58-65) 61 26/5/04, 10:48
Temporary disabling of rating levem by DVD disc
Depending on the DVD disc, the disc
may try to temporarily caneeJ the
rating leveJ that you have set.
tt is up to you to decide whether to
cancel the rating level or not.
Load a DVD disc and press PLAY
or OPEN/CLOSE (see page 47).
If the DVD disc has been designed to temporarily cancel the
Rating level, the screen which follows the "Reading" screen will
change, depending on which disc is played tf you select "YES"
with ENTER key, "Your disc exceeds the parental control level 12
(e.g.) screen will then appear
the parental contr0!level 1.
c,ooo,p,c,o,o
3If you wish to cancel the set rating level temporarily, select
"Parental Control Level" with • or V, then press ENTER. If the
4-digits password at step 3 on page 60 has been set, the pass-
word entering screen will appear as shown in step 4 below.
Alternatively, if the password has not been set, playback will
commence tf you don't know (or have forgotten) the password,
select "Cancel Picture".
The setting screen will disappear Press OPEN/CLOSE to
remove the disc.
Enter the password with
number buttons (0-9).
Then press ENTER.
if you interrupt the entering,
press RETURN
Playback wilt commence if the entered password was correct.
NOTE:
This temporary cancellation of rating level
will be kept until the disc is ejected,
When the disc is ejected, the original rat-
ing level will be set again automatically
62
5Q00401AE(58-65) 62 26/5/04.10:48
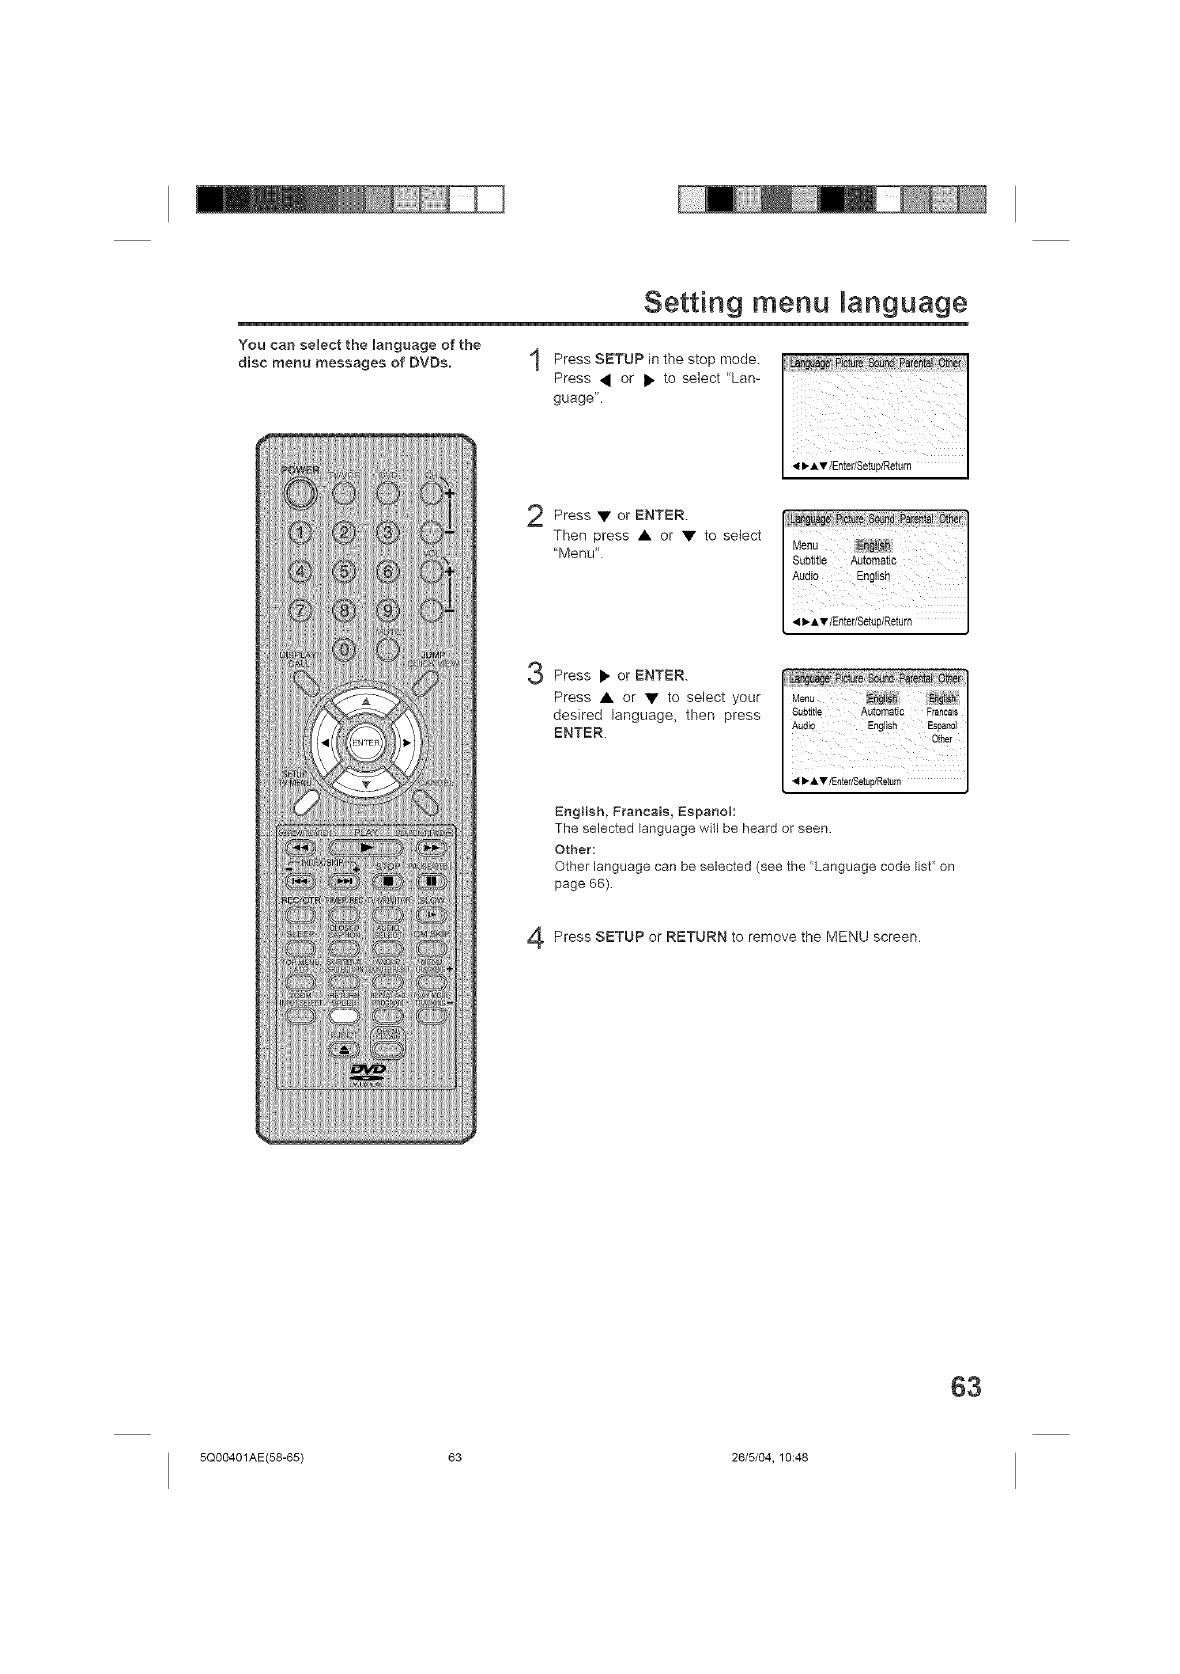
You can select the language of the
disc menu messages of DVBs.
Setting menu anguage
Press SETUP in the stop mode.
Press • or • to select "Lan-
guage",
•or
Press ENTER.
Then press • or • to select
"Menu"
Press • or ENTER.
Press • or • to select your
desired language, then press
ENTER.
English, Franeais, Espanol:
The selected language will be heard or seen,
Other:
Other language can be selected (see the "Language code list" on
page 66)
Press SETUP or RETURN to remove the MENU screen
63
5Q00401AE(58-65) 63 26/5/04, 10:48
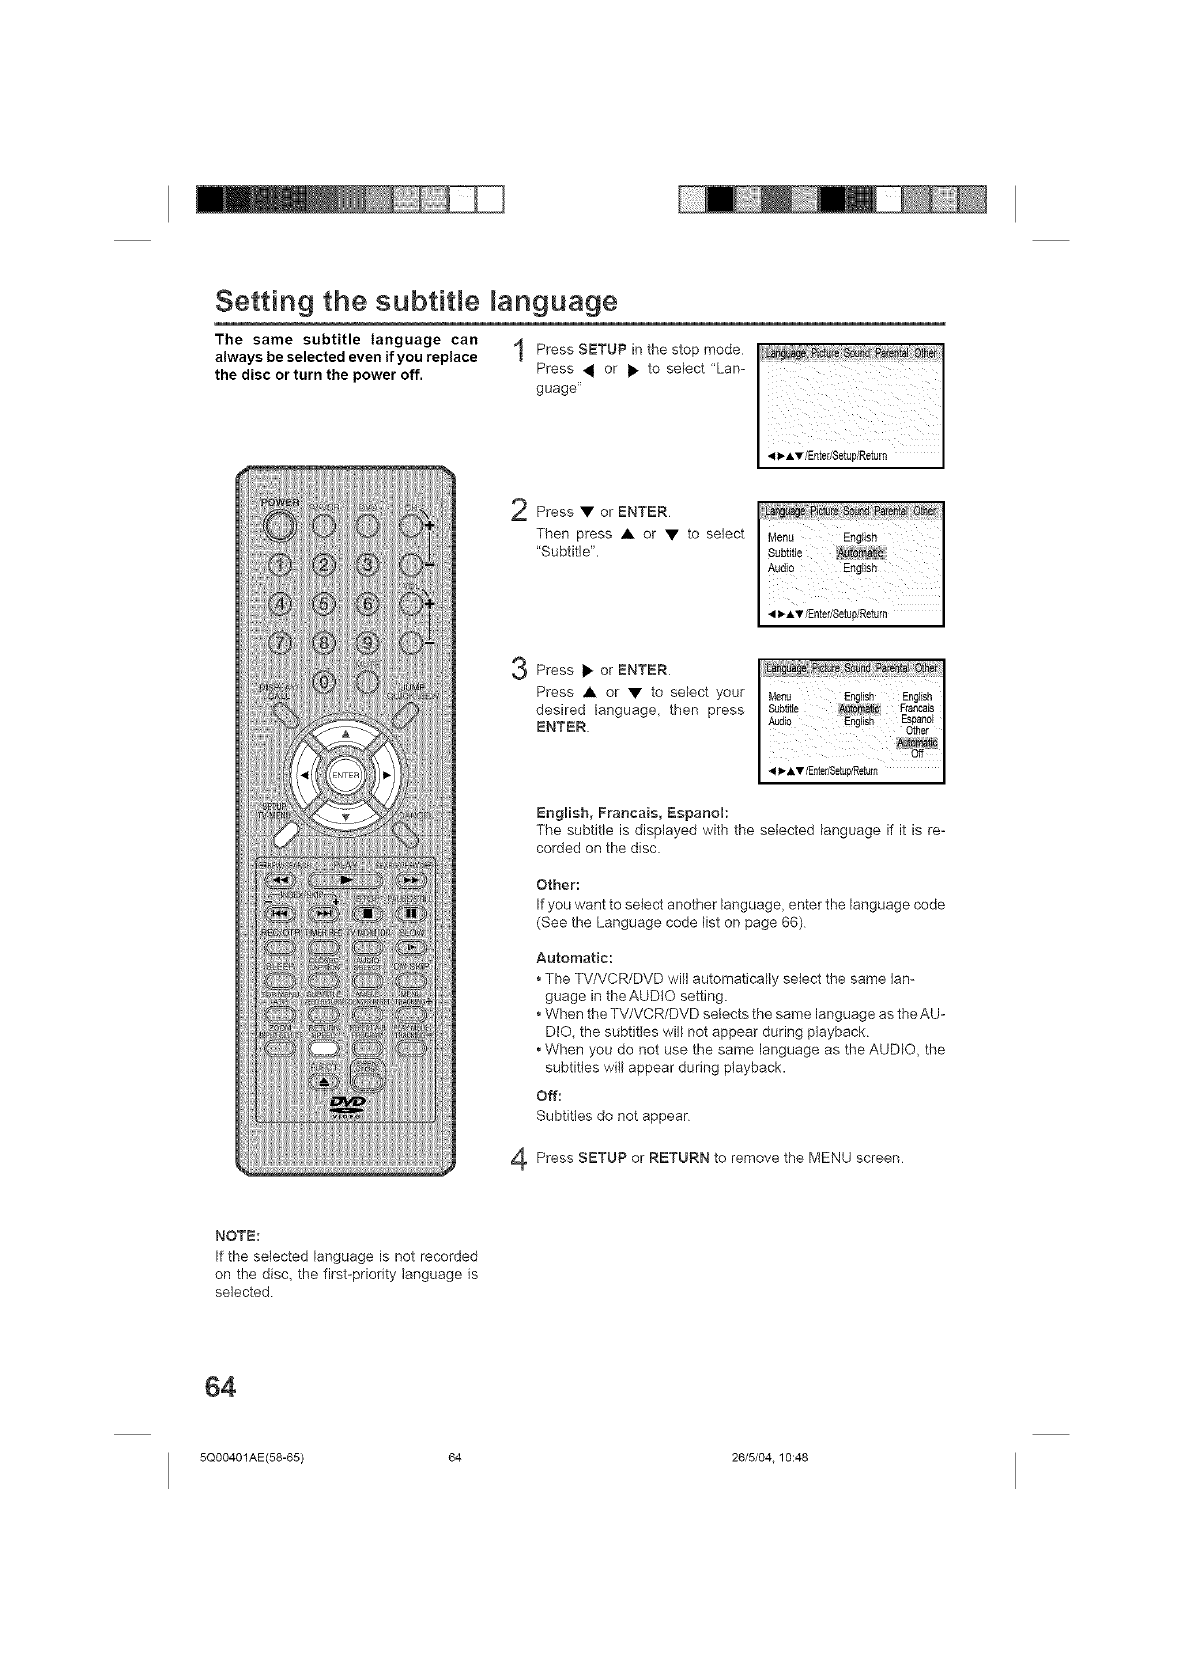
Setting the subtitle language
The same subtitle language can
always be selected even if you replace
the disc or turn the power off.
Press SETUP in the modestop
Press _ or • to select "Lan-
guage"
Press • or ENTER
Then press • or • to select
"Subtitle",
Press • orENTER
Press• or• to select your
desired language, then press
ENTER
4
English, Francais, Espanoh
The subtitle is displayed with the selected language if it is re-
corded on the disc.
Other:
If you want to select another language, enter the language code
(See the Language code list on page 66)
Automatic:
• The TVfVCR/DVD will automatically select the same lan-
guage in theAUDtO setting.
• When the TV/VCR/DVD selects the same language as the AU-
DiO, the subtitles will not appear during playback
• When you do not use the same language as the AUDIO, the
subtitles will appear during playback.
Off:
Subtitles do not appear
Press SETUP or RETURN to remove the MENU screen
NOTE:
If the selected language is not recorded
on the disc, the first-priority language is
selected
64
5Q00401AE(58-65) 64 26/5/04.10:48
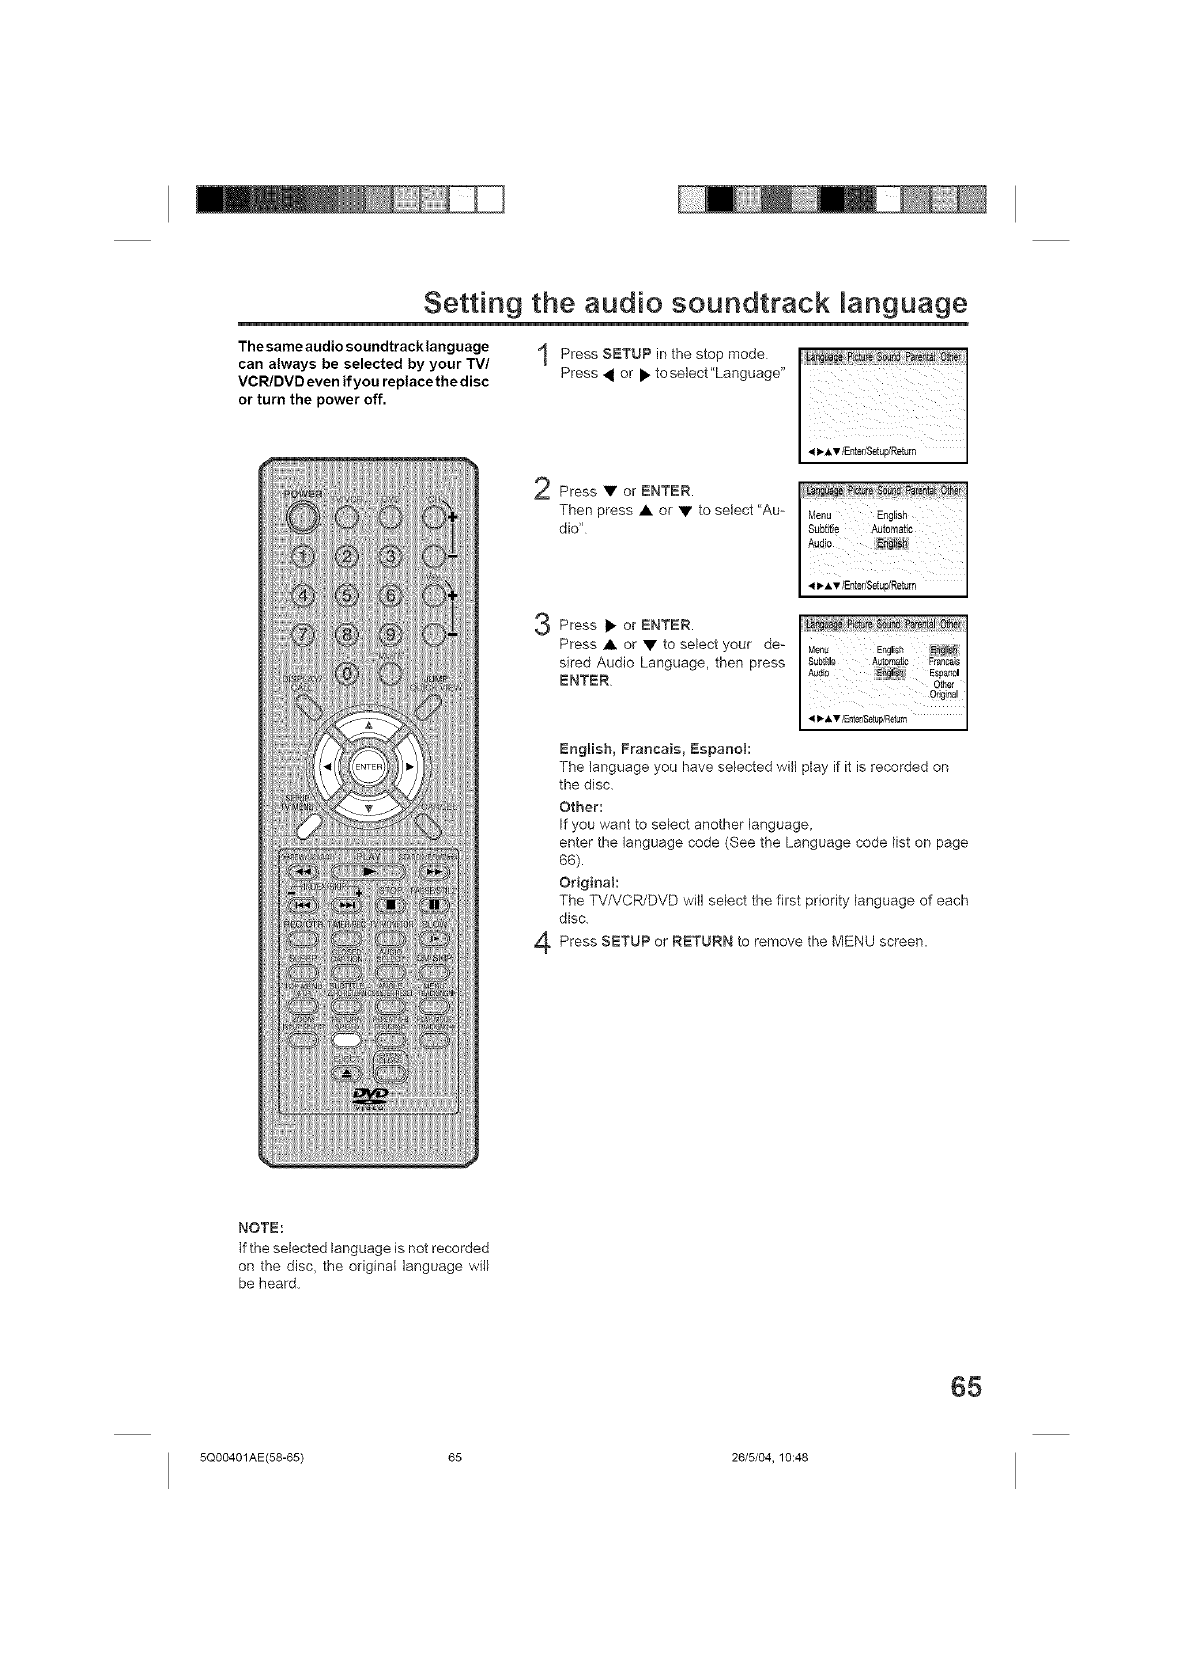
Setting the audio soundtrack anguage
The same audio soundtrack language
can always be selected by your TV/
VCR/DVD even if you replacethe disc
or turn the power off.
Press SETUP in the mode
stop
Press _ or • to select"Language"
Press • or ENTER.
Then press • or • to select "Au-
dW'
Press • or ENTER.
Press • or • to select your de-
sired Audio Language, then press
ENTER
4
Engmish, Francais, Espanol:
The language you have selected will play if it is recorded on
the disc.
Other:
If you want to select another language,
enter the language code (See the Language code list on page
66).
Original:
The TV/VCR/DVD will select the first priority language of each
disc.
Press SETUP or RETURN to remove the MENU screen.
NOTE:
If the selected language is not recorded
on the disc, the original language will
be heard.
65
5Q00401AE(58-65) 65 26/5/04, 10:48
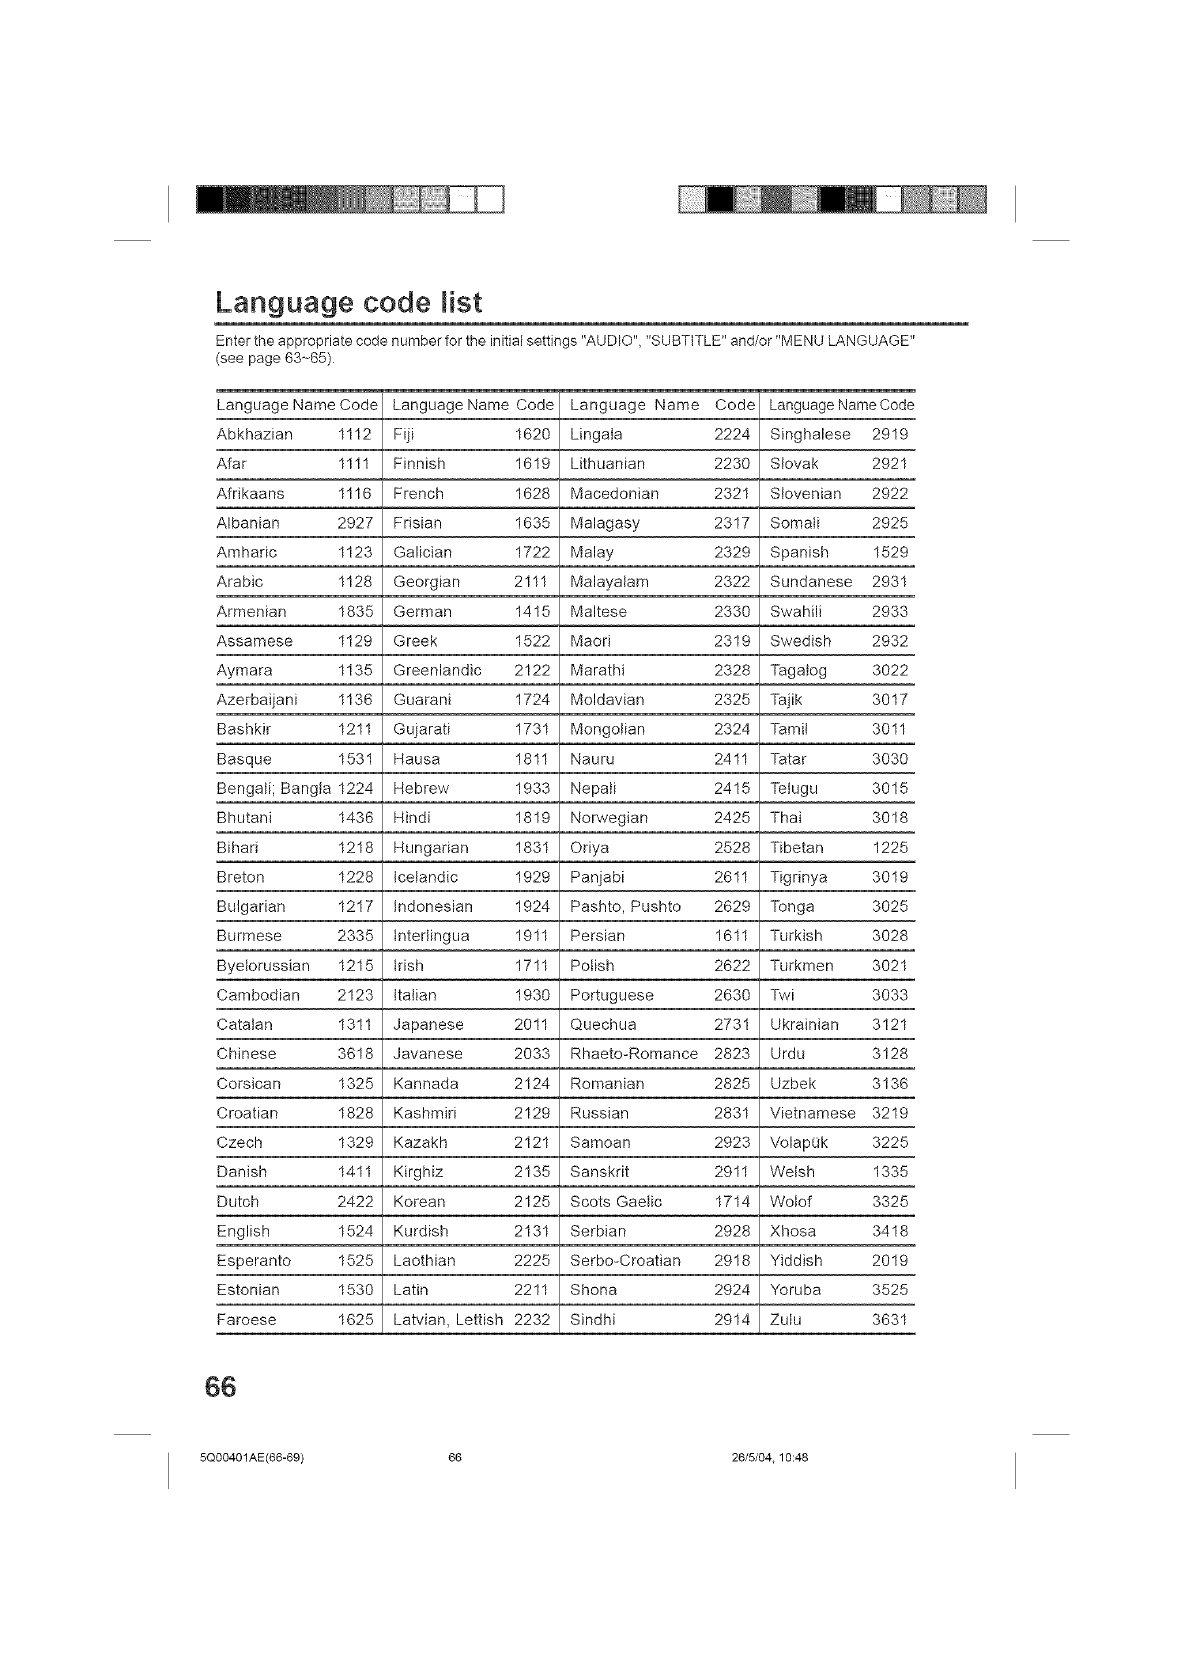
Language code list
Enter the appropriate code number for the initial settings "AUDIO", "SUBTITLE" and/or "MENU LANGUAGE"
(see page 63-65)
Language Name Code Language Name Code Language Name Code Language Name Code
Abkhazian 1112 Fiji 1620 Lingata 2224 Singhalese 2919
Afar 1111 Finnish 1619 Lithuanian 2230 Siovak 2921
Afrikaans 1116 French 1628 Macedonian 2321 Siovenian 2922
Albanian 2927 Frisian 1635 Malagasy 2317 Somali 2925
Amharic 1123 Galician 1722 Malay 2329 Spanish 1529
Arabic 1128 Georgian 2111 Malayatam 2322 Sundanese 2931
Armenian 1835 German 1415 Maltese 2339 Swahili 2933
Assamese 1129 Greek 1522 Maori 2319 Swedish 2932
Aymara 1135 Greenlandic 2122 Marathi 2328 Tagatog 3022
Azerbaijani 1136 Guarani 1724 Moldavian 2325 Tajik 3017
Bashkir 1211 Gujarati 1731 Mongolian 2324 Tamit 3011
Basque 1531 Hausa 1811 Nauru 2411 Tatar 3030
Bengali; Bangta 1224 Hebrew 1933 Nepali 2415 Tetugu 3015
Bhutani 1436 Hindi 1819 Norwegian 2425 Thai 3018
Bihari 1218 Hungarian 1831 Oriya 2528 Tibetan 1225
Breton 1228 icelandic 1929 Panjabi 2611 Tigrinya 3019
Bulgarian 1217 indonesian 1924 Pashto, Pushto 2629 Tonga 3025
Burmese 2335 tntertingua 1911 Persian 1611 Turkish 3028
Byetorussian 1215 irish 1711 Polish 2622 Turkmen 3021
Cambodian 2123 italian 1930 Portuguese 2630 Twi 3033
Catalan 1311 Japanese 2011 Quechua 2731 Ukrainian 3121
Chinese 3618 Javanese 2033 Rhaeto-Romance 2823 Urdu 3128
Corsican 1325 Kannada 2124 Romanian 2825 Uzbek 3136
Croatian 1828 Kashmiri 2129 Russian 2831 Vietnamese 3219
Czech 1329 Kazakh 2121 Samoan 2923 VolapOk 3225
Danish 1411 Kirghiz 2135 Sanskrit 2911 Welsh 1335
Dutch 2422 Korean 2125 Scots Gaelic 1714 Wotof 3325
English 1524 Kurdish 2131 Serbian 2928 Xhosa 3418
Esperanto 1525 Laothian 2225 Serbo-Croatian 2918 Yiddish 2019
Estonian 1530 Latin 2211 Shona 2924 Yoruba 3525
Faroese 1625 Latvian, Lettish 2232 Sindhi 2914 Zutu 3631
66
5Q00401AE(66-69) 66 26/5/04.10:48
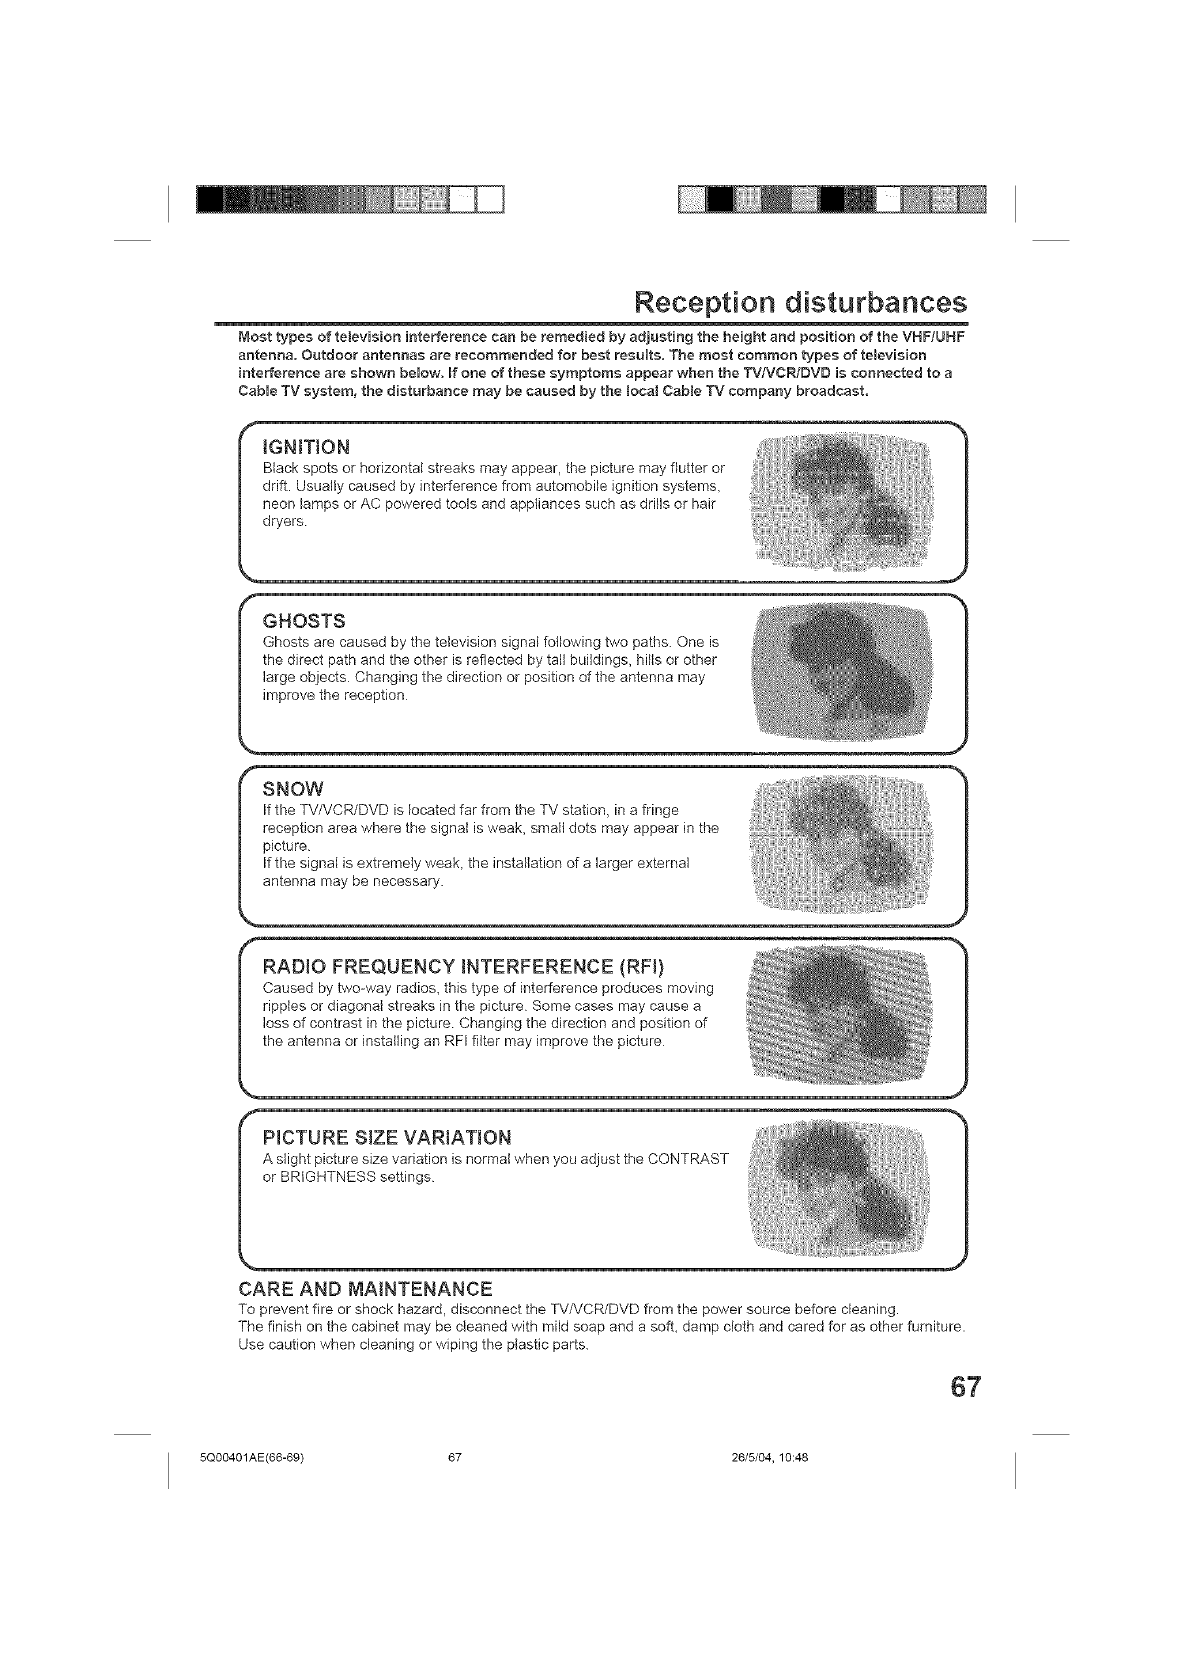
Reception disturbances
Most types of television interference can be remedied by adjusting the height and position of the VHF!UHF
antenna. Outdoor antennas are recommended for best results. The most common types of television
interference are shown below, if one of these symptoms appear when the TV/VCR./DVD is connected to a
Cable TV system, the disturbance may be caused by the Jocat CabJe TV company broadcast.
iGNiTiON
Black spots or horizontal streaks may appear, the picture may flutter or
drift. Usually caused by interference from automobile ignition systems,
neon lamps or AC powered tools and appliances such as drills or hair
dryers
GHOSTS
Ghosts are caused by the television signal following two paths. One is
the direct path and the other is reflected by tall buildings, hills or other
large objects Changing the direction or position of the antenna may
improve the reception
SNOW
If the TV/VCR/DVD is located far from the TV station, in a fringe
reception area where the signal is weak, small dots may appear in the
picture.
If the signal is extremely weak, the installation of a larger external
antenna may be necessary.
RADIO FREQUENCY INTERFERENCE (RF!)
Caused by two-way radios, this type of interference produces moving
ripples or diagonal streaks in the picture Some cases may cause a
loss of contrast in the picture Changing the direction and position of
the antenna or installing an RFI filter may improve the picture
PICTURE SIZE VARIATION
A slight picture size variation is normal when you adjust the CONTRAST
or BRIGHTNESS settings
CARE AND MAINTENANCE
To prevent fire or shock hazard, disconnect the TVNCR/DVD from the power source before cleaning.
The finish on the cabinet may be cleaned with mild soap and a soft, damp cloth and cared for as other furniture.
Use caution when cleaning or wiping the plastic parts.
67
5Q00401AE(66-69) 67 26/5/04, 10:48
ProbJerns and troubJeshooting
Use the following check list for troubleshooting when you have problems with your TV/VCR/DVD. Consult your
local dealer or service outlet if problems persist.
Be sure all connections are properly made when using with other units.
SYMPTOMS CAUSE POSSIBLE SOLUTIONS PAGE "_
NO power The AC power cord is not connected Connect the AC power cord to the AC 5
outlet
Cassette or disc is not inserted Insert a video cassette or disc
The TIMER REC buttons are depressed Press the TIMER REC buttons
Although the power is on, the
TV/VCR/DVD does not operate
Poor or no p_cture
Poor or no co,or
Picture wobbles or drifts
No CABLE reception
No reception above
channel 13
Poor or no sound
TV shuts off
Closed caption is not
activated
TV recording does not work
Timer recording does not
work
Noise bars appear on the
screen.
TV station experiencing problems
Picture control is not adjusted
Possible local interference
Antenna (CABLE) connector is not connected
or possible local interference
TV station experiencing problems
Picture control is not adjusted
Possible local interference
Antenna (CABLE) connector is not connected
or possible local interference
TV station experiencing problems
Antenna (CABLE) connector is not connected
or possible local interference
Cable TV channel is scrambled
CABLE connector is not connected
TV/CABLE Mode menu option is set to the
TV mode
Cable TV service interrupted
TV/CABLE Mode menu option is not set to
the appropriate mode
UHF antenna is not connected
TV station experiencing problems
Antenna (CABLE) connector is not connected
or possible local interference
Possible local interference
The MUTE button is depressed
TV station stopped broadcastir_g
Bleep timer is set
TV station experiencing problems o_ program
tuned is not closed captions
TV signal is weak
The CLOSED CAPTION button is not
depressed
34, 47
41
Try another channel 19
Check picture control adiustments 29
Check for source o1 reception distur-
bance
Check CABLE connection or VHF/UHF
antenna, reposition or rotate antenna 11. 12
Try another channel 19
Check picture control adjustments 29
Check for source of reception disturbance
Check CABLE connection or VHF/UHF 11. 12
antenna, reposition or rotate antenna
Try another channel 19
Check CABLE connection or VNF/UHF 11. 12
antenna, reposition or rotate antenna
Try another channel 19
Check all CABLE connections 12
Set the TV/CABLE Menu option to the 22
CABLE mode
Contact your Cable TV company 12
Make sure TV/CABLE menu option is in 22
the appropriate mode
Check UHF antenna 11
Try another channel 19
Check CABLE connection or VNF/UHF 11, 12
antenna, reposition or rotate antenna
Check for source o1reception disturbance
Check the MUTE button has not been 2O
sressed.
Tune new channel 19
Set Sleep Timer to "0" 20
Try another channel 19
Check CABLE connection of VHF/UHF 11, 12
antenna, reposition or rotate antenna
Press the CLOSED CAPTION button to
turn on the closed caption 21
The video cassette's erase prevention tab Place a piece of adhesive tape over the 34
is broker_ off hole
The time is not set correctly Reset the present time 16~18
The recording start/end time is not set Reset the start/end time 41
correctly
Tape is old or worn Replace the tape
Tracking adjustment is beyond range of Adjust tracking manually using the 36
automatic tracking circuit TRACKING +/- buttons on the remote control
Video heads are dirty. I Clean the video heads. I 69_
68
5Q00401AE(66-69) 68 26/5/04.10:48
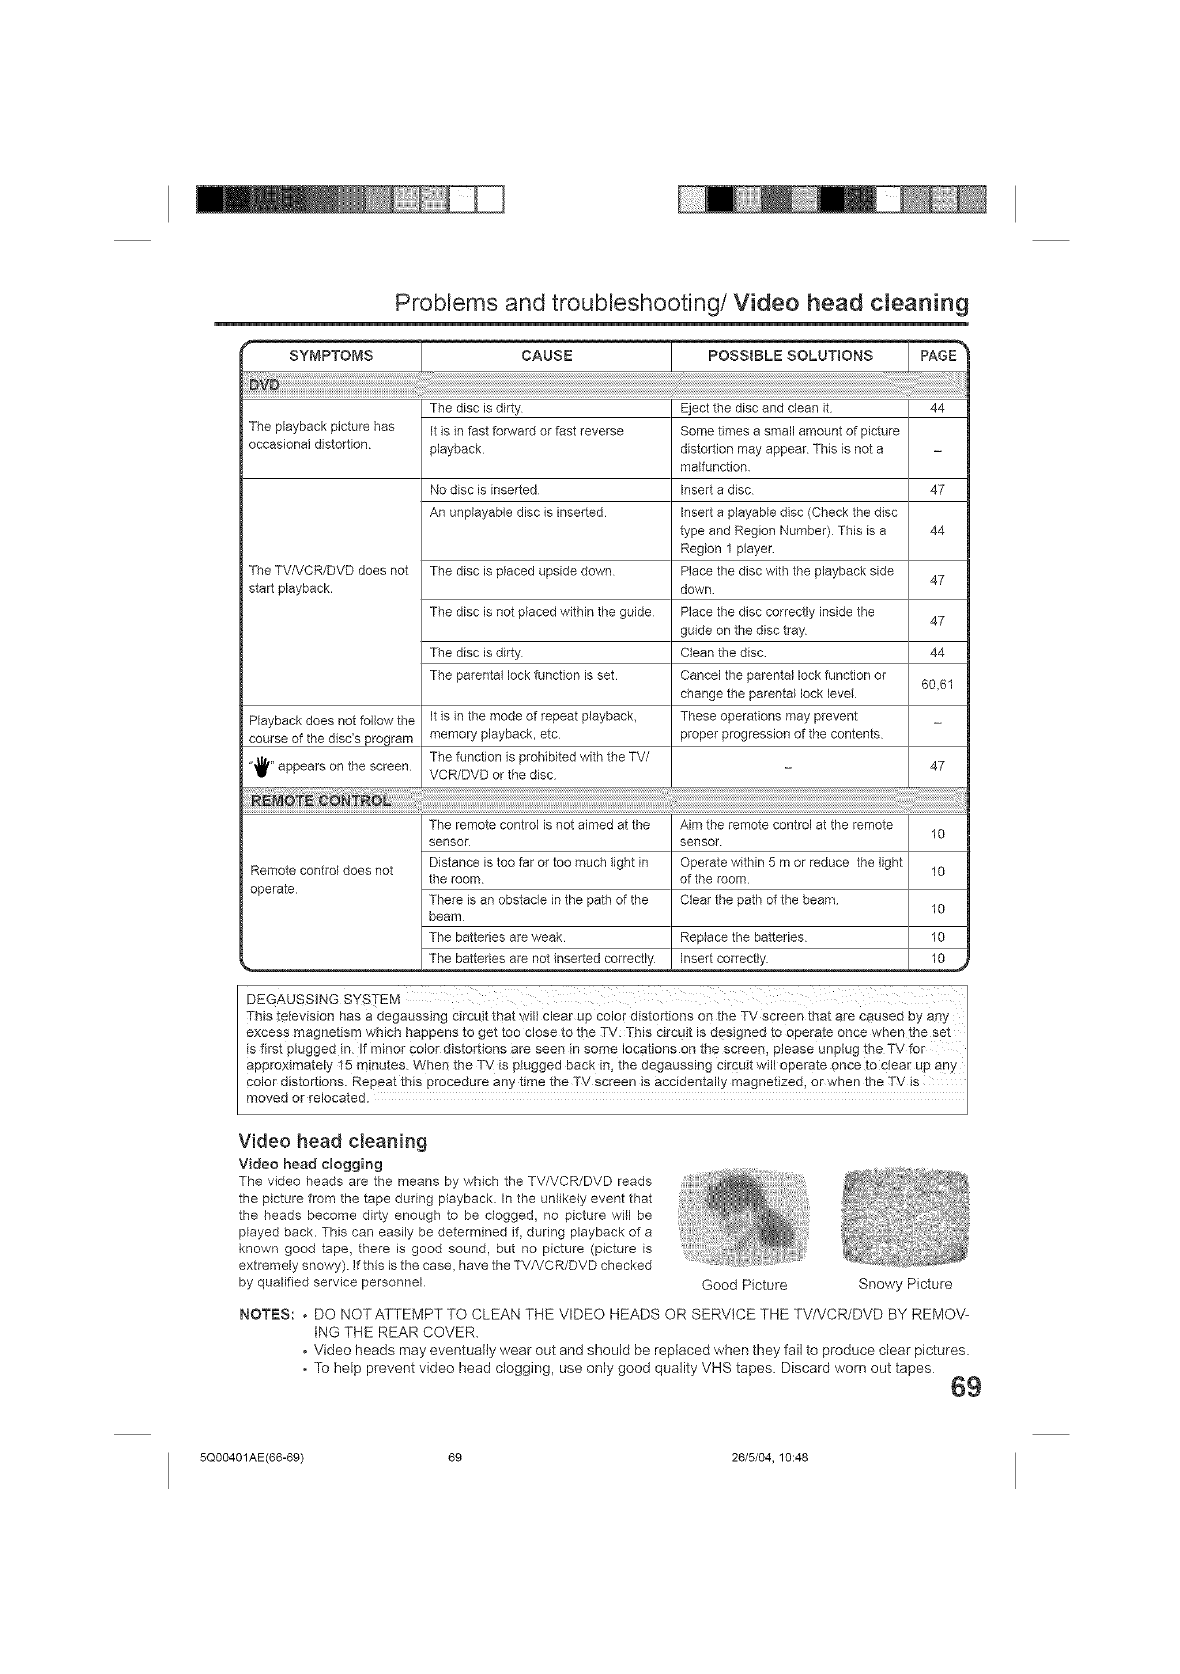
Problems and troubleshooting/Video head cleaning
CAUSE
The playback picture has
occasional distortion
The TV/VCR/DVD does not
start playback.
Playback does not follow the
course of the disc's program
"'_l_" appears on the screen
The disc is dirty
It is in fast fo_vard or fast reverse
playback
No disc is inserted
An unplayable disc is inserted
The disc is placed upside down
The disc is not placed within the guide
The disc is dirty
The parenta_ lock function is set
It is in the mode of repeat playback,
memory playback, etc
The function is prohibited with the TV/
VCR/DVD or the disc
Eject the disc and dean it 44
Some times a small amount of picture
distortion may appear This is not a
malfunction
Insert a disc 47
Insert a playable disc (Check the disc
type and Region Number) This is a 44
Region 1 player
Place the dbc with the playback side 47
down
Place the dbc correctly inside the 47
guide on the disc tray
Clean the disc 44
Cancel the parental lock function or 60,61
change the parental lock level
These operations may prevent
proper progression of the contents
47
The remote control is not aimed at the Aim the remote control at the remote 10
sensor sensor
Remote control does not Distance is too far or too much }ight in Operate within 5 m or reduce the light 10
the room of the room
operate There is an obstacle in the path of the Clear the path ofthe beam
beam 10
The batteries are weak Replace the batteries 10
The batteries are not inserted correctly Insert correctly 10
DEGAUSSING SYSTEM I
This television has a degaussing Circuit that will clear up color distortions od the TV screen that are Caused by aay I
exces s magnetis m which happens to get too close to the TV: This circuit is designed to operate once when the set
is first plugged in. If minor Color distortions are seen in som e locations on th e screen, please unplug the TV for
approximately 15 minute s. When the TV is plugged back in, the degaussing cirfiuit will operate once to clear up any
color distortions. Repeat !tds procedu[e an}, !!me the TV scree n is accidentally magnetized ! 0[ when !he TV iS I
moved or relocated. J
Video head cleaning
Video head clogging
The video heads are the means by which the TV/VCR/DVD reads
the picture from the tape during playback In the unlikely event that
the heads become dirty enough to be clogged, no picture will be
played back. This can easily be determined if, during playback of a
known good tape, there is good sound, but no picture (picture is
extremely snowy). If this isthe case, have the TV/VCR/DVD checked
by qualified service personnel Good Picture Snowy Picture
NOTES: . DO NOT ATTEMPT TO CLEAN THE VIDEO HEADS OR SERVICE THE TV/VCR/DVD BY REMOV-
ING THE REAR COVER.
. Video heads may eventually wear out and should be replaced when they fail to produce clear pictures.
• To help prevent video head clogging, use only good quality VHS tapes. Discard worn out tapes 69
5Q00401AE(66-69) 69 26/5/04, 10:48

Specifications
GENERAL
Power supply:
Power consumption:
Weight:
Dimensions:
Inputs/Outputs:
Video:
Audio:
Hi-Fi frequency response:
Hi-Fi dynamic range:
TELEVISION
Picture tube:
Tuner type:
Receiving channels:
Antenna input:
Speaker:
Audio output power:
VCR section
Video head:
Audio track:
Tuner:
F.FWD/REW Time at 25C (77 F):
DVD section
Signa_ system:
Applicable disc:
Frequency response:
S/N Ratio:
Harmonic distortion:
Wow and flutter:
Output:
Pickup:
ACCESSORY:
AC 120V 60Hz
Operation: 135 W
Stand by: 4 W
794 Ibs (36.0 kg)
25-13/16 inches (655 ram)
22-13/16 inches (580 mm)
18-3/4 inches (477 mm)
in: 1 Vp-p/75 ohm
Out: 1 Vp-p/75 ohm
in: -8 dBm/50 K ohm
Out: -8 dBm/1 K ohm
20Hz to 20,O00Hz
More than 90dB
24" (600 mm diagonal)
Quartz PLL Frequency Synthesized
VHF 2-13
UHF 14-69
CABLE 14-36 (A)-(W)
37-59 (AA)-(WW)
60-85 (AAA)-(ZZZ)
86-94 (86)-(94)
95-99 (A-5)-(A-1)
100-125 (100)-(125)
01 (5A)
VHF/UHF In 75 ohm coaxial
1-13/16" (46 mm) x 3-7/8" (99 mm), 8 ohm x 2
1.5W + 1.5W
4 Rotary Heads
Hi-Fi Sound - 2 Tracks /MONO
Sound - 1 Track
181 Channel Freq. Synthesized
VHF 2-13
UHF 14-69
CABLE 14-36 (A)-(W)
37-59 (AA)-(WW)
60-85 (AAA)-(ZZZ)
86-94 (86)-(94)
95-99 (A-5)-(A-1)
100-125 (100)-(125)
01 (5A)
Approx. 1minute and 48 seconds (with T-120 Cassette Tape)
NTSC
DVD (12cm, 8cm), CD (12cm, 8cm)
DVD: 4Hz -22KHz/CD: 4Hz - 20KHz
90dB
0.06%
Below Measurable Level
Video : (RCA) 1 Vp-p/75 ohm
Audio : (RCA) -12 dBm/1 K ohm
Digital Audio : 0.5 Vp-p/75 ohm
CD : Wavelength: 770 - 8OOnm
Maximum output power: 07 mW
DVD : Wavelength: 645 - 660 nm
Maximum output power: 05 mW
Remote control x 1
70
5Q00401AE(70-BACK) 70 26/5/04.10:48
90 Day FullWarranty
tf this product experiences any failure due to a defect in material or workmanship within 90 days
from the date of purchase, return it to your nearest Sears Parts & Repair Center, and Sears will
repair it free of charge.
After 90 days and until one (1) year from the date of purchase, Sears will replace defective parts
free of charge. You pay for labor.
After 90 days and until two (2) years from the date of purchase, Sears will replace the Picture
Tube if it is defective. You pay for labor.
This warranty applies only if this (product) is used for private household purposes.
This warranty gives you specific legal rights, and you may also have other rights which vary from
state to state.
Sears, Roebuck and Co., Dept. 817WA, Hoffman Estates, IL $0179
5Q00401AE(70-BACK) 71 26/5/04, 10:48
Your Home
For repair = in your home = of atl major brand appliances,
lawn and garden equipment, or heating and cooling systems,
no matter who made it, no matter who sold it!
For the replacement parts, accessories and
owner's manuals that you need to do=it=yourself.
For Sears professional installation of home appliances
and items like garage door openers and water heaters.
1-800-4-MY-HOME '_ (t-800-469-4663)
Call anytime, day or night (U.S.A. and Canada)
www,sears.com www,sears.ca
................ iiiiiiiiiiii'
OurHome iiiiiiiiiiii
For repair of carry-in items like vacuums, lawn equipment,
and electronics, call or go on-line for the location of your nearest
Sears Parts & RepairCenter.
(_) TM SM
i Registered Trademark /Trademark /, Service Mark of Sears, Roebuck and Co
(_ TM SM
_) Mama Registrada /, Marca de Fabrica / , Marca de Servicio de Sears, Roebuck and Co
M _ u
,c Marque de commerce /" Marque d@posee de Sears, Roebuck and Co
IIIIIIIIIIIIIIIIIIIIII
*J5Q00401 A*
04/06 []
<_)Sears, Roebuck and Co
Printed in Thailand
Impreso en Tailandia
5Q00401AE(70-BACK) 72 26/5/04.10:48
