MGA Entertainment 337966 TextMe!Walkie-Talkies User Manual
MGA Entertainment (HK) Ltd. TextMe!Walkie-Talkies
User Manual
Users Manual
Contents
1. Introduction
2. Product Package Contents
3. Key Layout
4. Charging the Battery
5. Main features
A. Talking function
B. Messages
C. Contact / Phone book
D. Tools
E. Notes
F. Applications
G. Settings
H. Checking ID Number
1 - Introduction
This product is a walkie-talkie with features of text messages transferring and data
bank. It enables you to converse with other users of this type of Walkie-talkies,
which is similar to chat on phone. You can communicate with them by messages
transferring through it without any charge.
2 – Product Package Contents
2 Walkie-talkies and 1 instruction manual
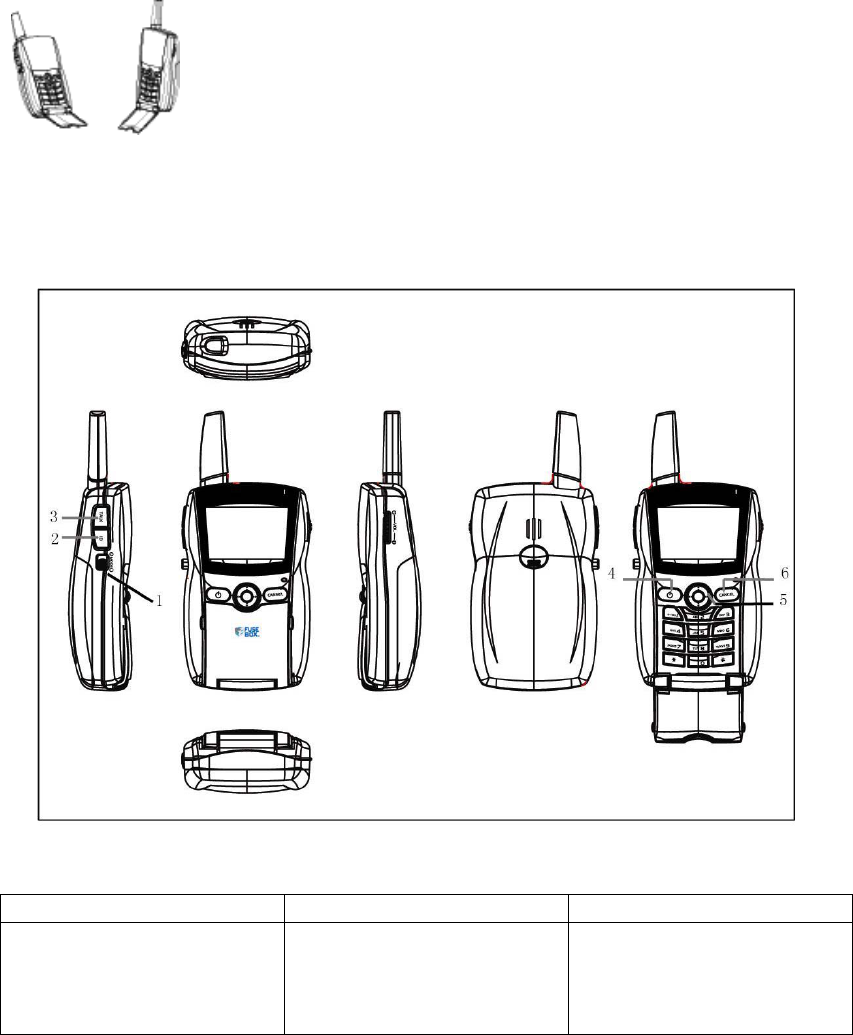
3 – Key Layout
Key Functions Remark
1 Talk/SMS switch Slide switch, which allows
you to select talking mode
and SMS mode.
If mode A is selected,
y
ou
Mode A is talking mode
Mode B is SMS mode
can receive the voice
transmitted by other
Walkie-talkies tuned to the
same channel.
If model B is selected, you
can use SMS transmission
to communicate with other
users
2 ID Press it to see your
Walkie-talkie ID
The ID can be showed
when mode B is activated.
3 Talk Press to transmit This key can work when
mode A is activated.
4 Power Press to switch on/off the
Walkie-talkie
This key can work
provided that mode B is
activated.
5 5-directions key Moves cursor to select
menu items, etc
Press the middle “OK” key
to confirm your selection
6 Cancel Cancel
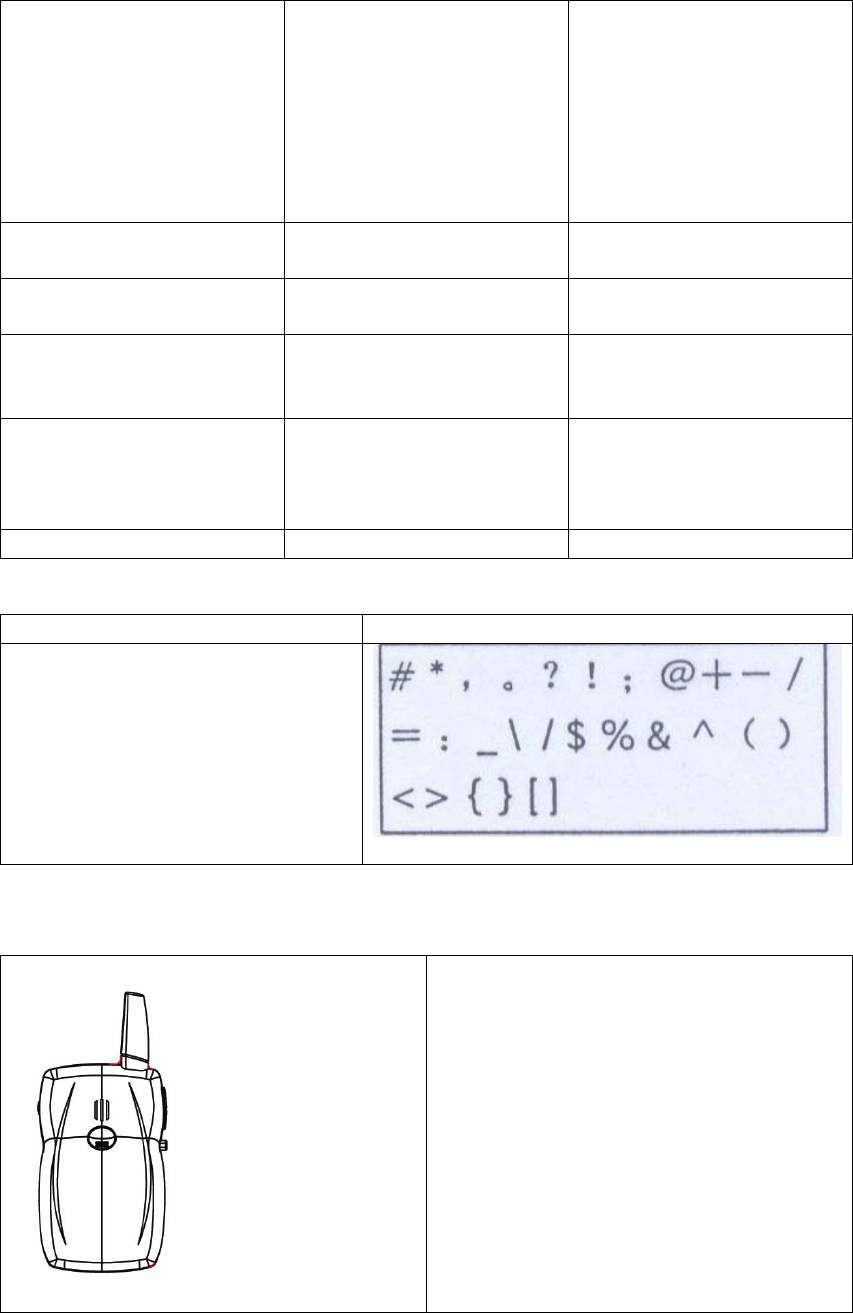
Keypad
* / Shift key Switches input methods, e.g.: ABC, abc
#
In SMS mode, launches symbol screen.
4 – Charging the Battery
1 Open the battery door
2 Insert 4 AAA batteries into the Walkie-
talkie
3 – Close the battery door
5 - Main features
A - Talking function
Function Step
Talk through the Walkie-talkie Press Talk/SMS switch until the screen
shows “Talk / Listen”
Press “Talk”
Listen Press Talk/SMS key until the screen
shows “Talk / Listen”
Volume Press → to increase volume
Press ← to reduce volume
Or adjust the volume through the rotary
volume
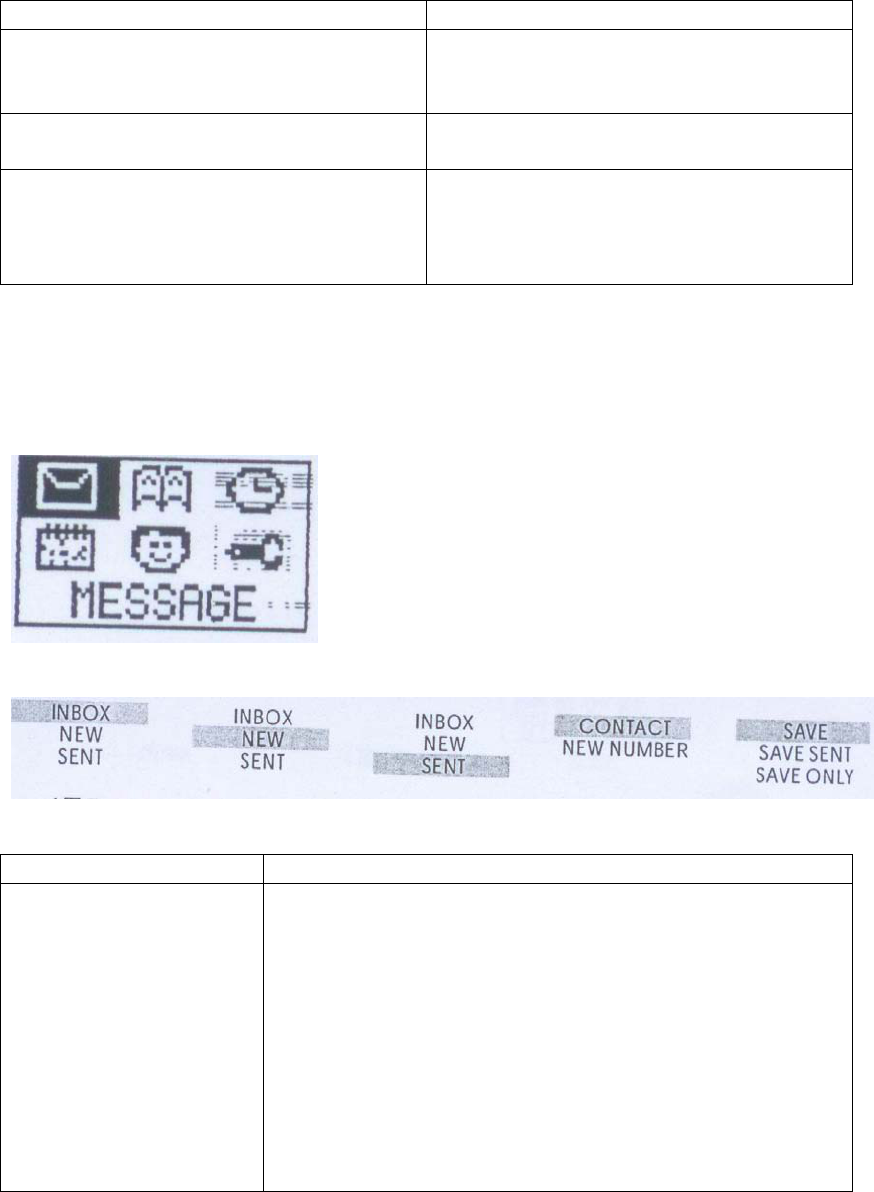
B - Messages
Press Talk/SMS key until the screen shows the following diagram
Press “OK”
Fig 1 Fig 2 Fig 3 Fig 4 Fig 5
Function Steps
Create messages to the
Walkie-talkie which ID
has been saved on the
contact list
Move the cursor to “NEW” by pressing ↓ shown as Fig 2
Press “OK”
Press the message you want
After you complete your message, press “OK”. The
screen will change to Fig 4
Move the cursor to “CONTACT” by pressing ↑ or ↓
shown as Fig 4
Press “OK”
Select the ID by moving the cursor
Press “OK”
The screen will change to a new menu shown as Fig 5

Select “SAVE” if you want to save the message only.
Select “SAVE SENT” if you want to save the message and
send it out.
Select “SENT ONLY” if you want to send the message out
and do not want to save it.
Create messages to the
Walkie-talkie which ID
has not been saved
Move the cursor to “NEW” by pressing ↓ shown as Fig 2
Press “OK”
Press the message you want
After you complete your message, press “OK”. The
screen will change to Fig 4
Move the cursor to “NEW NUMBER” by pressing ↑ or ↓
Press “OK”
Input ID number
Press “OK”
The screen will change to a new menu shown as Fig 5
Select “SAVE” if you want to save the message only.
Select “SAVE SENT” if you want to save the message and
send it out.
Select “SENT ONLY” if you want to send the message out
and do not want to save it
Check inbox Move the cursor to “INBOX” in the menu shown as Fig 1
The screen will show MESSAGE 10 FROM
XXXXXXXX
Move the cursor to the messages you want to read by
pressing ↑ or ↓
Press “OK” to read the message
Press → change to a new screen shown as Fig 6
Move the cursor to “SAVE “ and press “OK” if you want
to save the message
Move the cursor to “DELETE” and press “OK” if you
want to delete the message
Move the cursor to “FORWARD” and press “OK” if you
want to send forward the message to others
Remark:
“1” means the message number
Max 8 messages can be saved
The remark means the message was saved.
The remark means the message was not saved.
“XXXXXXXX” means the message was sent from
“XXXXXXXX”
If you have 8 messages have been stored, the
“MEMORYFULL” shows on the screen if you receive a
new message.
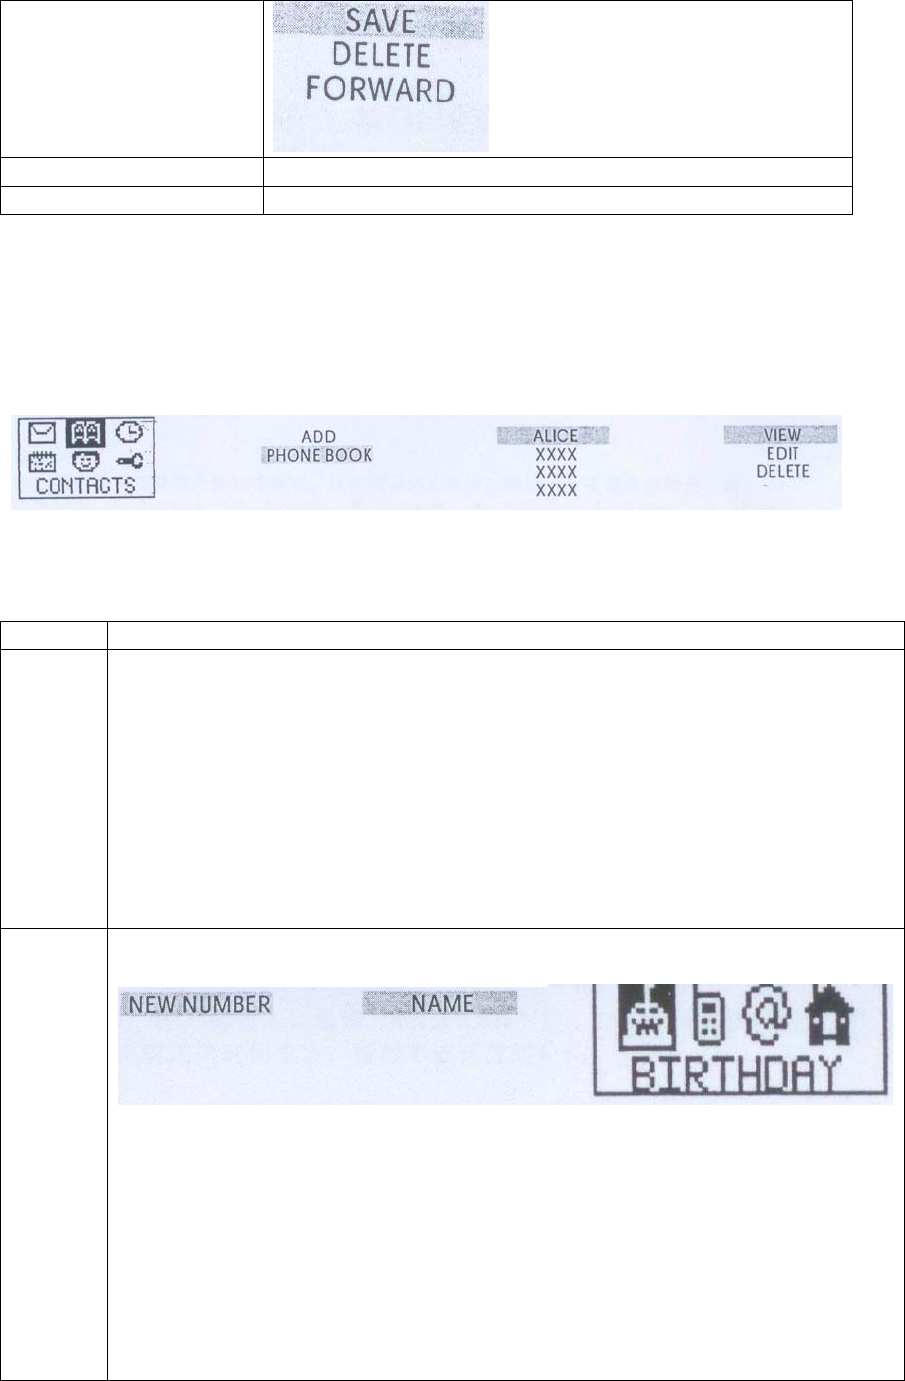
Fig 6
Check Outbox Similar to the steps in check inbox
Receiving messages The Walkie-talkie can receive messages in any mode
Remark: you can save 8 messages in the inbox folder and can save 8 messages in the
sent folder.
C - Contact / Phone book
Press Talk/SMS key, ← and → until the screen shows the menu as Fig 7
Fig 7 Fig 8 Fig 9 Fig 10
Press “OK”
Function Steps
Search Move the cursor to “PHONE BOOK” as shown on Fig 8
Press “OK”
A new menu Fig 9 is shown
Move the cursor to the name you want to search by pressing ↑ or ↓
Press “OK”
A new menu Fig 10 is shown
Move the cursor to “VIEW” and press “OK” if you want to see his/her record
Move the cursor to “EDIT” and press “OK” if you want to edit his/her record
Move the cursor to “DELETE” and press “OK” if you want to delete his/her
record
Save
your
friends’
record
Move the cursor to “ADD” as shown on Fig 8
Press “OK”
Fig 11 Fig 12 Fig 13
A new menu Fig 11 is shown
Input your friend’s ID
Press “OK”
A new menu Fig 12 is shown
Input your friend’s name
Press “OK”
A new menu Fig 13 is shown
Move the cursor to “BIRTHDAY” and press “OK” if you want to input your
friend’s birthday
Move the cursor to “PHONE” and press “OK” if you want to input your friend’s
cell phone number
Move the cursor to “@” and press “OK” if you want to input your friend’s email
address
Move the cursor to “HOUSE” and press “OK” if you want to input your friend’s
home address
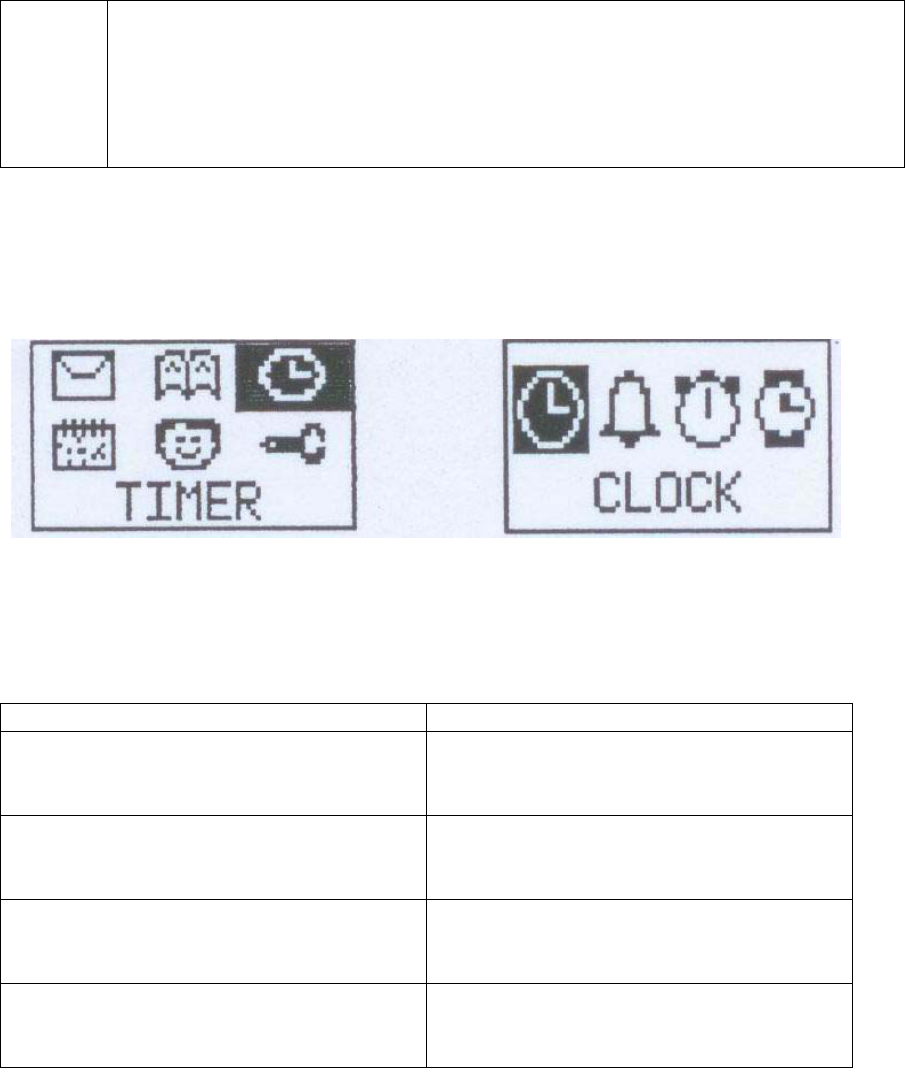
D - Tools
Press Talk/SMS key, ← and → until the screen shows the menu as Fig 14
Fig 14 Fig 15
Press “OK”
A new menu Fig 15 is shown.
Function Steps
Time Move the cursor to “CLOCK” and
press ”OK”
The screen shows what time it is
Alarm setting Move the cursor to “ALARM” and press
“OK”
Input the alarm you want
Countdown Move the cursor to “COUNT” and press
“OK”
Adjust the countdown timer
Stopwatch Move the cursor to “STOPWATCH” and
press “OK”
Press “OK” for start counting
E - Notes
Press Talk/SMS key, ← and → until the screen shows the menu as Fig 16
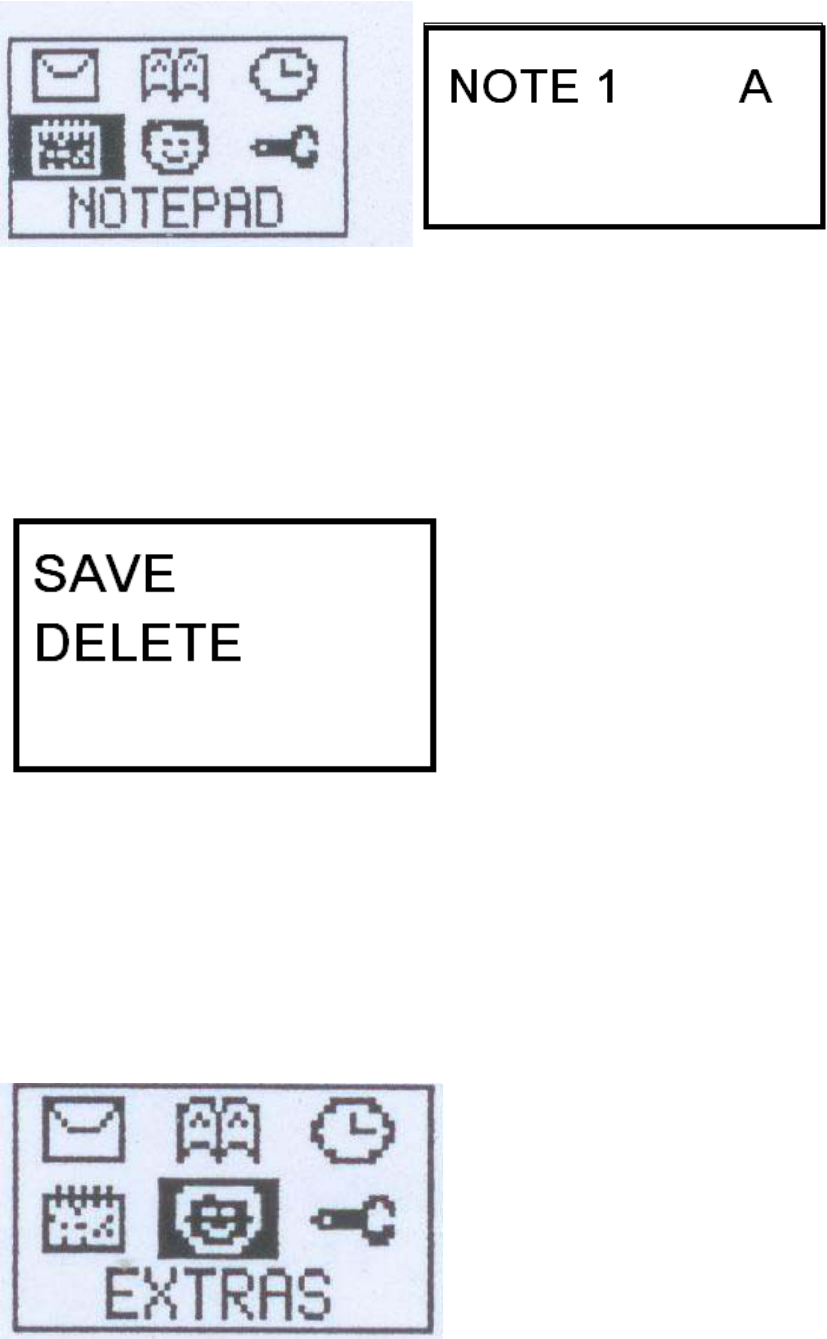
Fig 16 Fig 17
Press “OK”
A new menu Fig 17 is shown
Input the notes you want to save
Press →
A new menu Fig 18 is shown
Move the cursor to “SAVE” and press “OK” if you want to save the notes
Move the cursor to “DELETE” and press “OK” if you do not want to save it
Fig 18
Press “OK” to jump to next fields
Remark: you can save max 8 notes.
F - Applications
Press Talk/SMS key, ← and → until the screen shows the menu as Fig 19
Fig 19
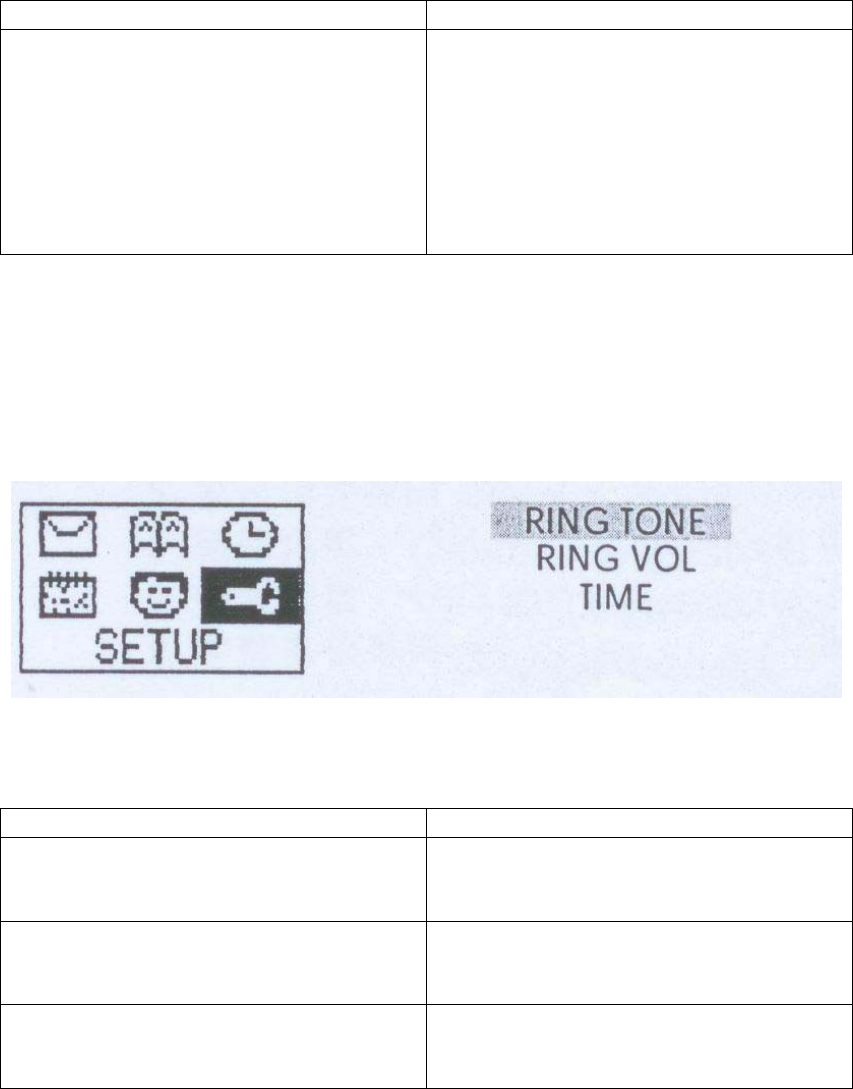
Press “OK”
Function Steps
To do list Move the cursor to the date that you want
to add records by pressing ↑ and ↓
Press → , ↑, ↓ and “OK” to select
“edit” or “delete” features.
Move the cursor to “Edit” and press
“OK” to enter the alarm subject.
Move the cursor to “Delete” and press
“OK” to delete your current subject.
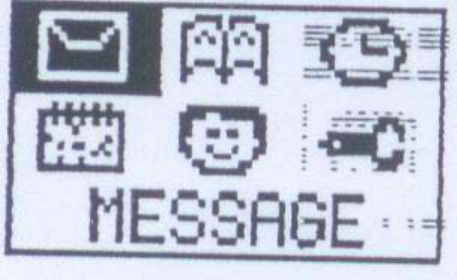
G - Settings
Press Talk/SMS key, ← and → until the screen shows the menu as Fig 20
Fig 20 Fig 21
Press “OK”
Function Steps
Select ring tone Move the cursor to “RING TONE” and
press “OK”
4 pre-set ring tone are available
Adjust ring volume Move the cursor to “RING VOL” and
press “OK”
4 pre-set volume are available
Time setting Move the cursor to “TIME” and press
“OK”
Adjust the time you want
H - Checking ID Number
Press Talk/SMS key, ← and → until the screen shows the following menu
Press “ID”
The screen shows the ID of your Walkie-talkie
Note;
Operation Temperature: 0 ℃-40℃
FCC Warning statement:
Warning:
Changes or modifications to this unit not expressly approved by the party responsible
for compliance will void the user’s authority to operate the equipment. Any change to
the equipment will void FCC grant.
This equipment has been tested and found to comply with the limits for a Class B digital device,
pursuant to part 95 of the FCC Rules. These limits are designed to provide reasonable protection
against harmful interference in a residential installation. This equipment generates, uses and can
radiate radio frequency energy and, if not installed and used in accordance with the instructions,
may cause harmful interference to radio communications. However, there is no guarantee that
interference will not occur in a particular installation. If this equipment does cause harmful
interference to radio or television reception, which can be determined by turning the equipment off
and on, the user is encouraged to try to correct the interference by one or more of the following
measures:
--Reorient or relocate the receiving antenna.
--Increase the separation between the equipment and receiver.
--Connect the equipment into an outlet on a circuit different from that to which the receiver is
connected.
--Consult the dealer or an experienced radio/TV technician for help.
The equipment compliance with FCC radiation exposure limit set forth for
uncontrolled environment
This device complies with RSS-210 of Industry Canada. Operation is subject to the
following two conditions: (1) this device may not cause interference, and (2) this
device must accept any interference, including interference that may cause undesired
operation of the device.