MOTREX MTXM100JA Smart display User Manual MTXM100JA
MOTREX CO., LTD. Smart display MTXM100JA
UserManual.wiki
>
MOTREX
>
MTXM100JA User Manual
Confidential_User Manual_MTXM100JA
Navigation menu
Upload a User Manual
Namespaces
Wiki Guide
HTML
PDF
Info
Views
User Manual
Discussion / Help
Navigation


![ Bluetooth AudioBefore playing the Bluetooth audioˍMusic saved in the mobile phone can be played in the car through Bluetooth audio streaming. ˍBluetooth audio can be played only when a Bluetooth phone or Bluetooth audio device has been connected. To play Bluetooth audio, connect the Bluetooth phone to the car system. For more information on connecting Bluetooth, please refer to the user’s manual [Pairing and connecting the unit and a Bluetooth phone] on the page 28. ˍIf Bluetooth is disconnected while playing Bluetooth audio, the audio stream will be inter-rupted. ˍThe audio streaming function may not be sup-ported in some mobile phones. Only one func-tion can be used at a time, either the Bluetooth handsfree or the Bluetooth audio function. For example, if you convert to the Bluetooth hands-free while playing Bluetooth audio, the music stream is interrupted. ˍPlaying music from the car is not possible when there are no music files saved in the mobile phone. Playing Bluetooth audioPress the +20( key ▶ Press the 0HGLD button ▶ Press the %OXHWRRWK$XGLR button.ˍPress the ԡ button to play files saved within the Bluetooth® phone.ˍPress the OO button to pause the file.Searching Bluetooth audio FilesYou can play the previous or next file. For details, refer on the page 17.NOTEr The title/artist info may not be supported in some mobile phones. When it is not supported, only the symbol will be displayed.r The play/pause feature may operate differently depending on the mobile phone.Using the Menu ButtonsPress the 0(18 button to set List and Sound settings menus.For details, refer to the “Sound” on the page 35.](https://usermanual.wiki/MOTREX/MTXM100JA/User-Guide-3449246-Page-26.png)

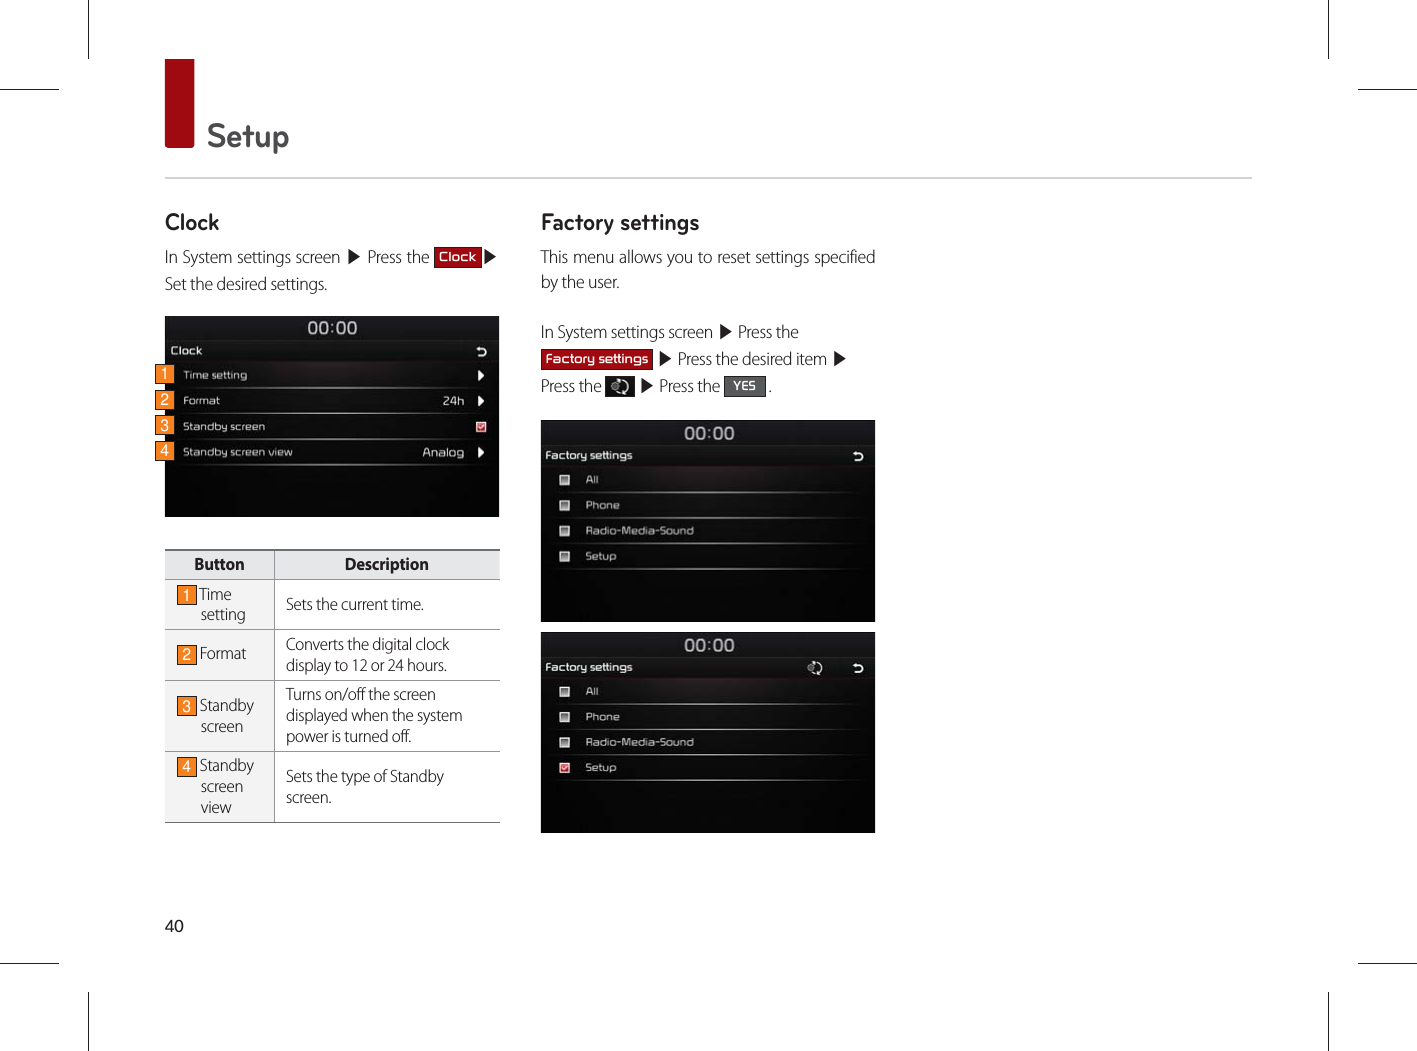
![ Trouble shooting1. Errors which occur during the operation or installation of the device may be mistaken as a malfunction of the actual device.2. If you are having problems with the device, try the suggestions listed below.3. If the problems persist, contact your dealerProblem Possible CauseThere are small red, blue, or green dots on the screenBecause the LCD is manufactured with technology requiring high point density, a pixel or lighting deficiency may occur within 0.01% of total pixels.The sound or image is not working ˍHas the Switch for the vehicle been turned to [ACC] or [ON]?ˍHas the SYSTEM been turned OFF?The screen is being displayed but sound is not workingˍHas the volume been set to a low level?ˍHas the volume been muted?When the power is turned on, the corners of the screen are darkˍThe display appearing somewhat dark after prolonged periods of use is normal with LCD panels. It is not a malfunction.ˍIf the screen is very dark, contact your nearest dealer for assistance.Sound is working from only one speaker Are the positions of Fader or Balance sound controls adjusted to only one side?Sound does not work in AUX mode Are the audio connector jacks fully inserted into the AUX terminal?The external device is not working Is the external device connected with a standard connector cable?When turning power on, the most recent mode screen is not displayedWithin modes that play files by reading external sources, such as USB, iPod, or Bluetooth® streaming mode, the most recently played mode screen prior to turning off power may not properly load.ˍIf the corresponding device is not connected, the mode operated prior to the most recent mode will operate.ˍIf the previous mode still cannot be properly played, the mode operated prior to that will operate.](https://usermanual.wiki/MOTREX/MTXM100JA/User-Guide-3449246-Page-42.png)