MOTREX MTXM110TL Smart Display User Manual
MOTREX CO., LTD. Smart Display
UserManual.wiki
>
MOTREX
>
MTXM110TL User Manual
User Manual
Navigation menu
Upload a User Manual
Namespaces
Wiki Guide
HTML
PDF
Info
Views
User Manual
Discussion / Help
Navigation

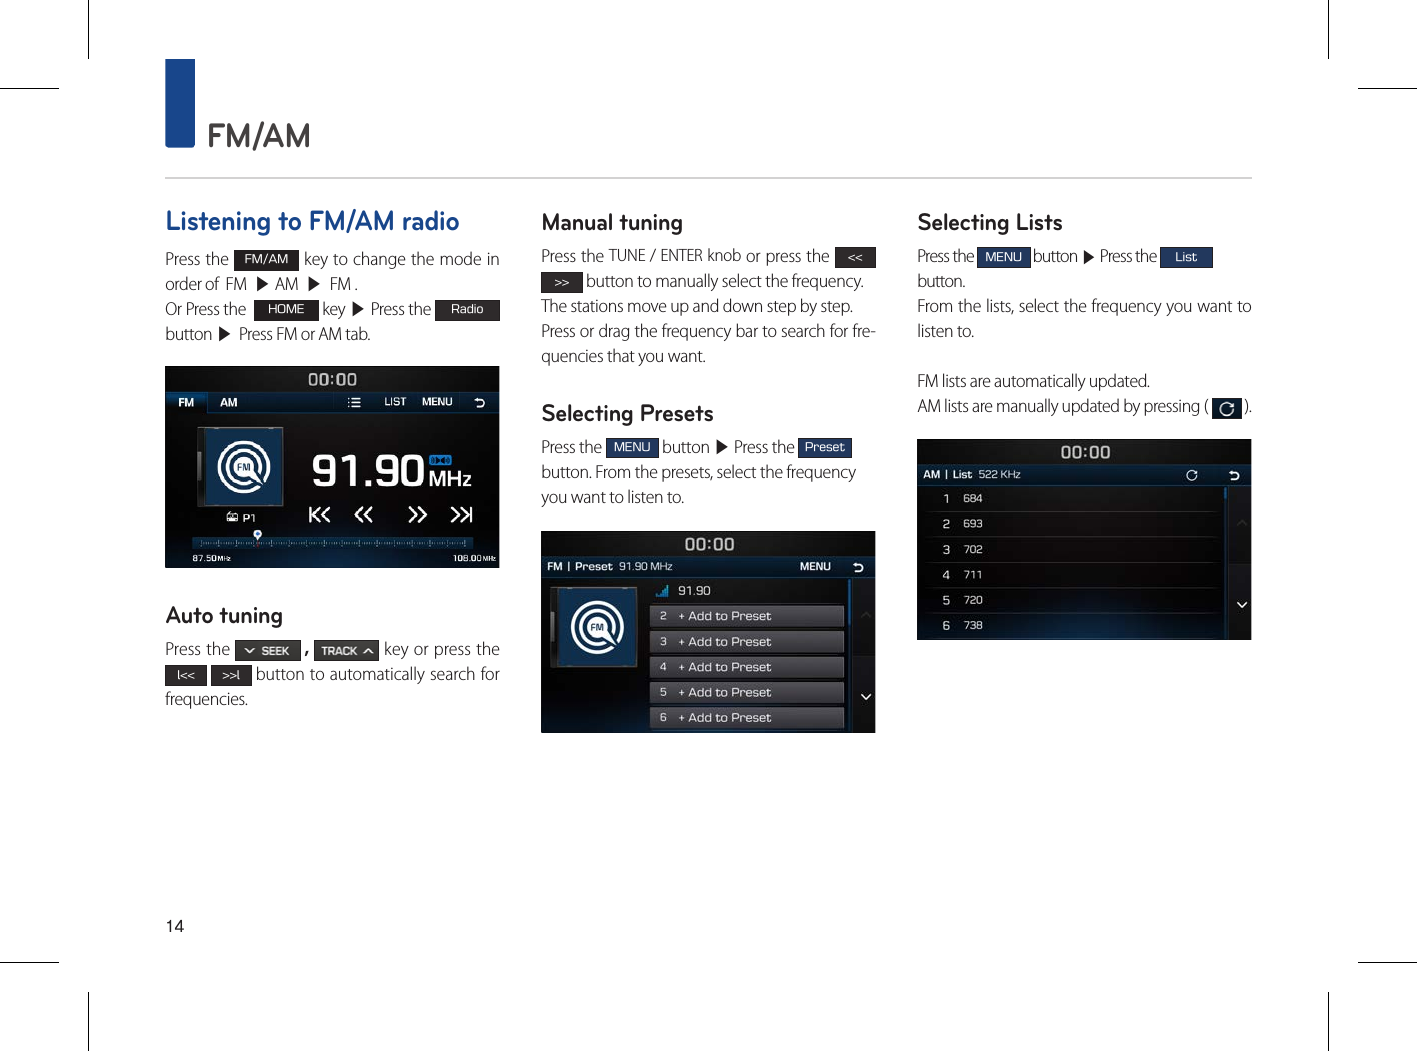


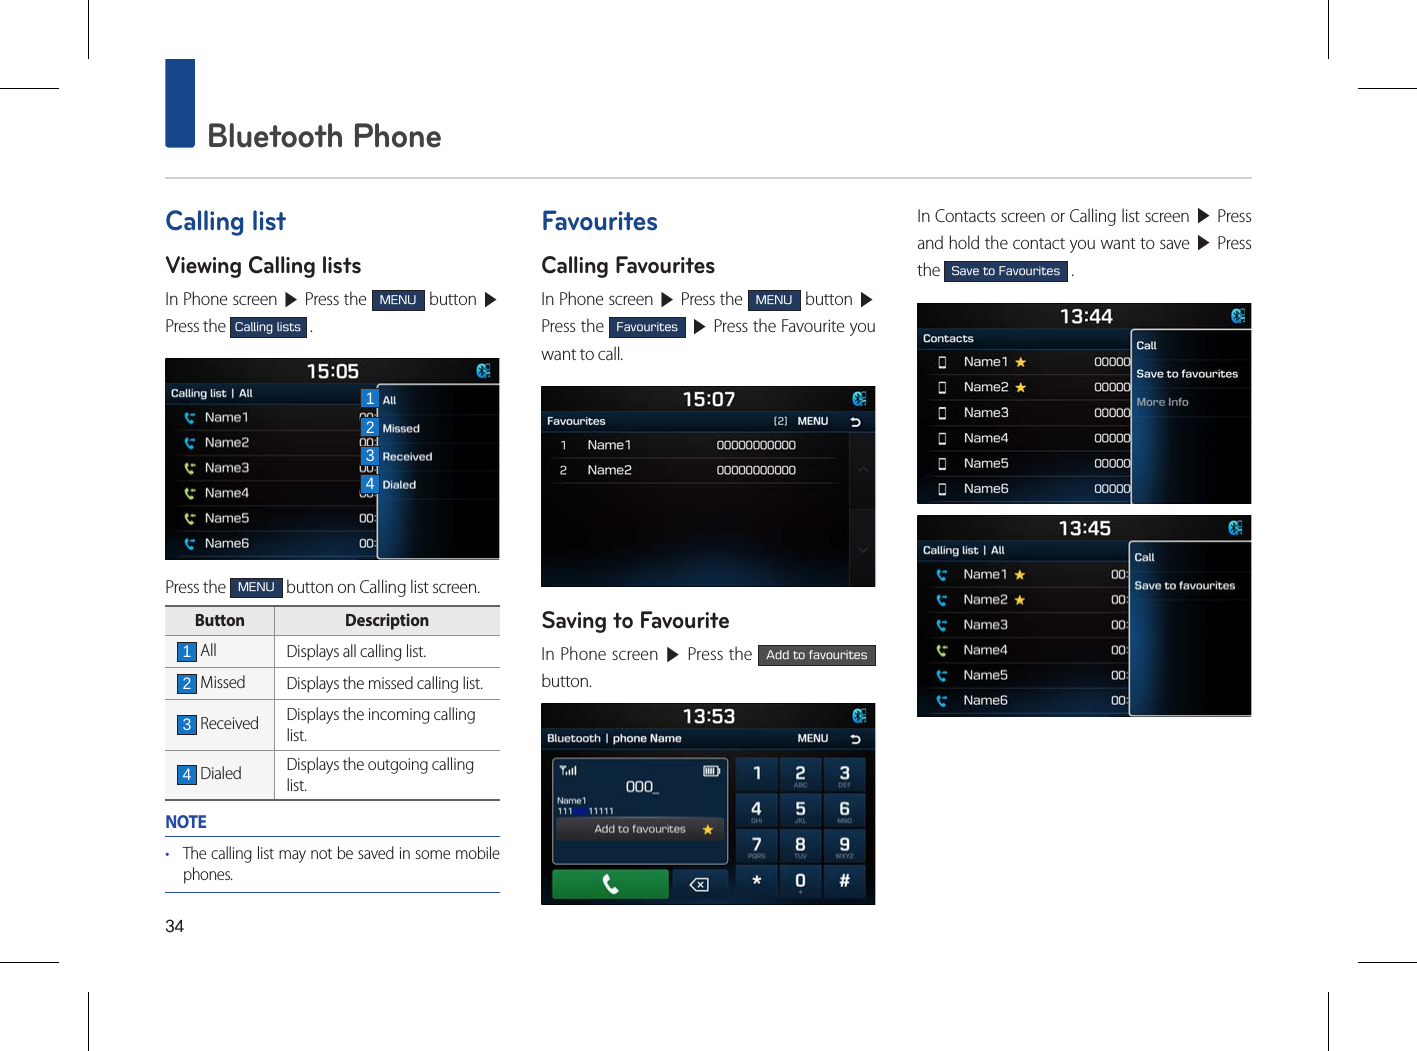
![27Getting started with navigationENGLISHPrecautions for safe drivingPlease observe and comply with local trafficrules and regulations.••For your safety, some features cannot be oper-ated while driving. Features that cannot be operated will be disabled.••The route displayed for destination guidance is a reference and the route guidance will take you to the vicinity of your destination. The high-lighted route is not always the shortest distance, the least congested, and in some cases might, not be the fastest route.••Road, name, and POI information may not always been completely updated. It might hap-pen that road names and POI information is not up to date.••The car position mark does not always indicate your exact location. This system uses GNSS information, various sensors, and road map data to display the current position. However, errors in displaying your location may occur if the sat-ellite is transmitting inaccurate signals or two or less satellite signals can be received. Errors that occur in such conditions cannot be corrected.••The position of the vehicle within the navigation may differ from your actual location depending on various reasons, including the satellite trans-mission state, vehicle state (driving location and conditions), etc. Additionally, the car position mark may differ from the actual position if the map data is different from the actual road land-scape, such as changes due to the construction of new roads. If such differences occur, driving for a short period of time will automatically correct the position of the vehicle through map matching or GNSS information.What is GNSS?The GNSS(Global Navigation Satellite System) is a satellite-based navigation system made up of a network of 32 satellites placed into orbit by the Global Positioning System (GPS) of U.S.A, GLONASS of RUSSIA, etc.GNSS works in any weather conditions, anywhere in the world, 24 hours a day.There are no subscription fees or setup charges to use GNSS.About satellite signalsYour unit must acquire satellite signals to operate. If you are indoors, near tall buildings or trees or in a parking garage, the unit cannotacquire satellite signals.Acquiring satellite signalsBefore the unit can determine your current posi-tion and navigate a route, you must do the follow-ing steps:1. Go outside to an area free from tall obstructions.2. Turn on the unit.Acquiring satellite signals can take a fewminutes.Initial navigation screenWhen you enter a navigation mode for the firsttime, the caution screen is displayed on thescreen. Read the caution carefully and thenpress [Agree].•• If you want to change the system language, press [Language]. For details refer to page 42(“Language”).•• If there is no operation for 10 seconds in the caution screen the system automatically switches to the navigation screen.](https://usermanual.wiki/MOTREX/MTXM110TL/User-Guide-3094196-Page-27.png)
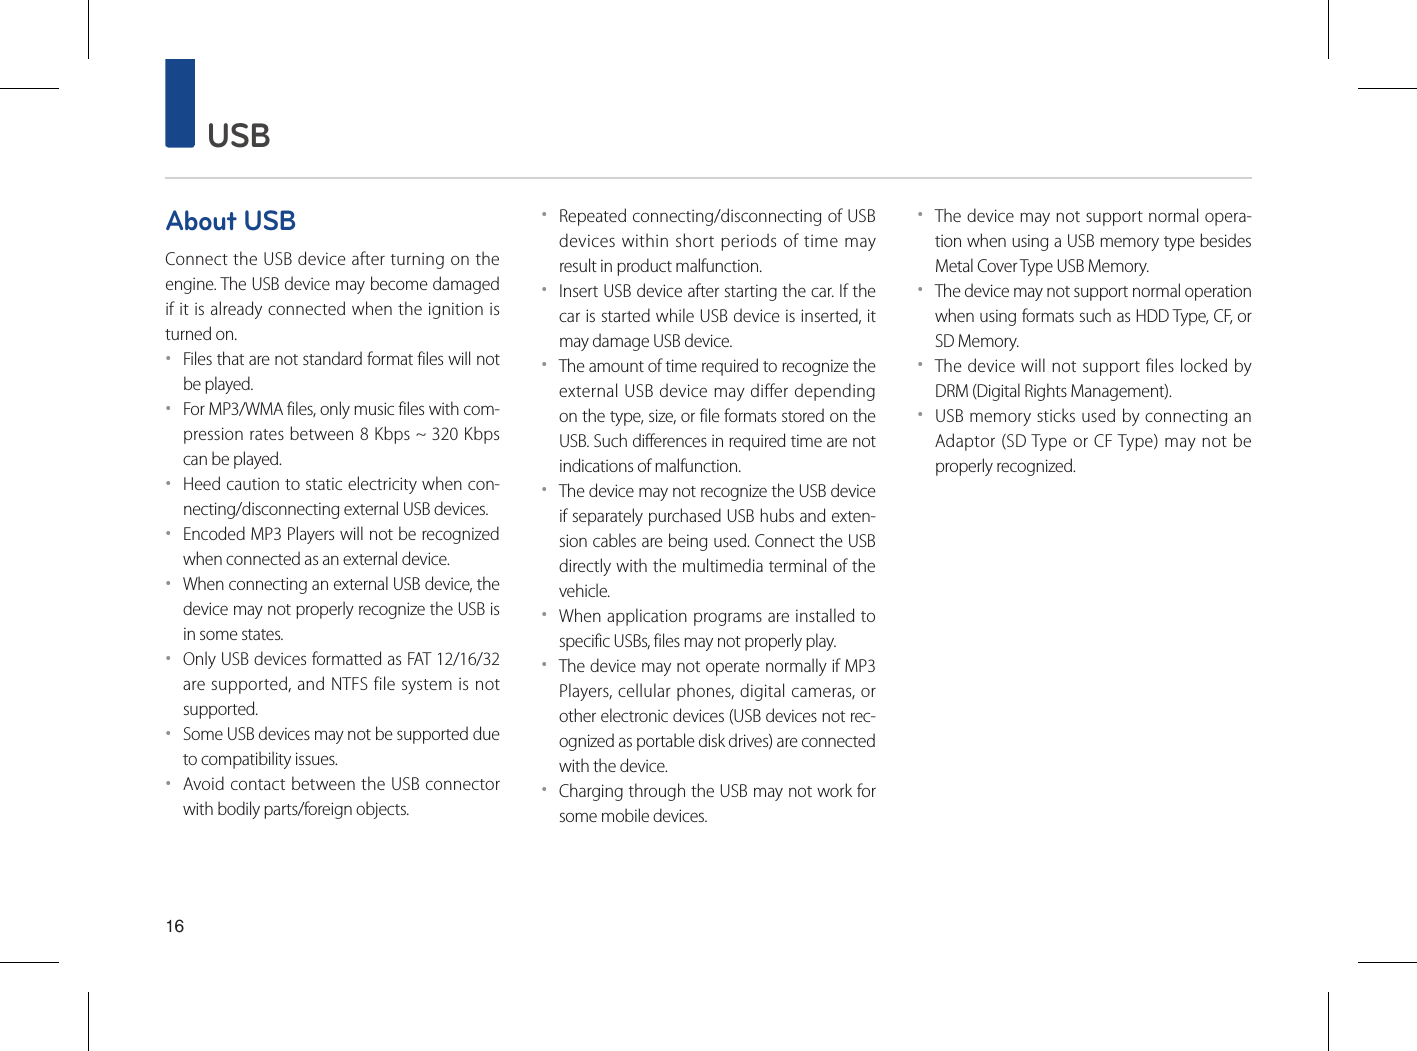
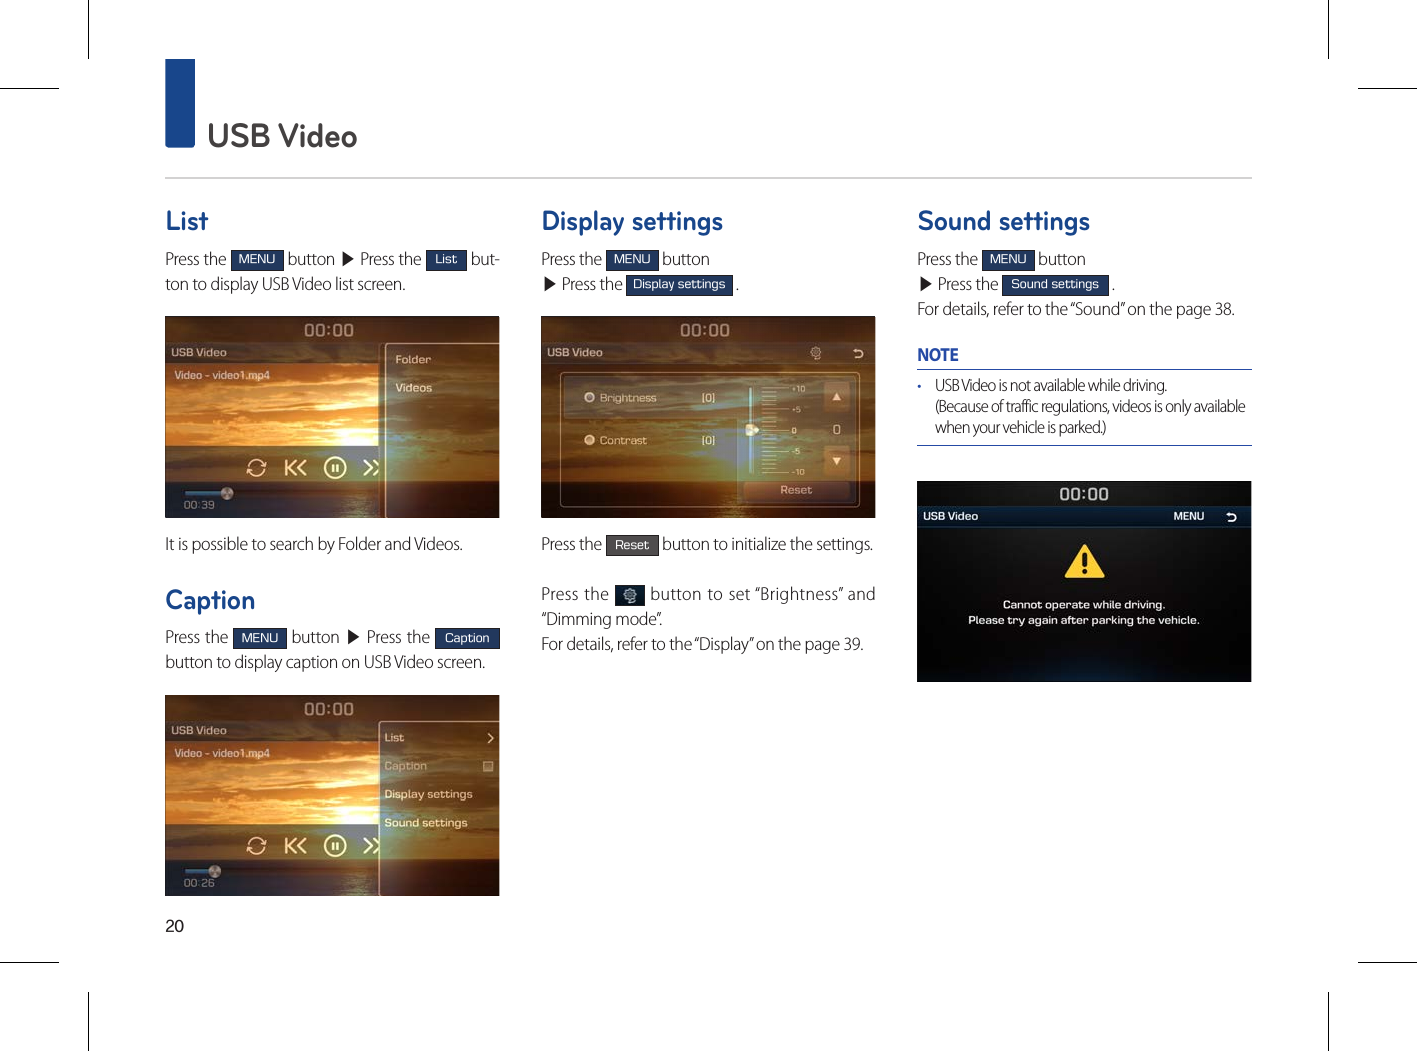
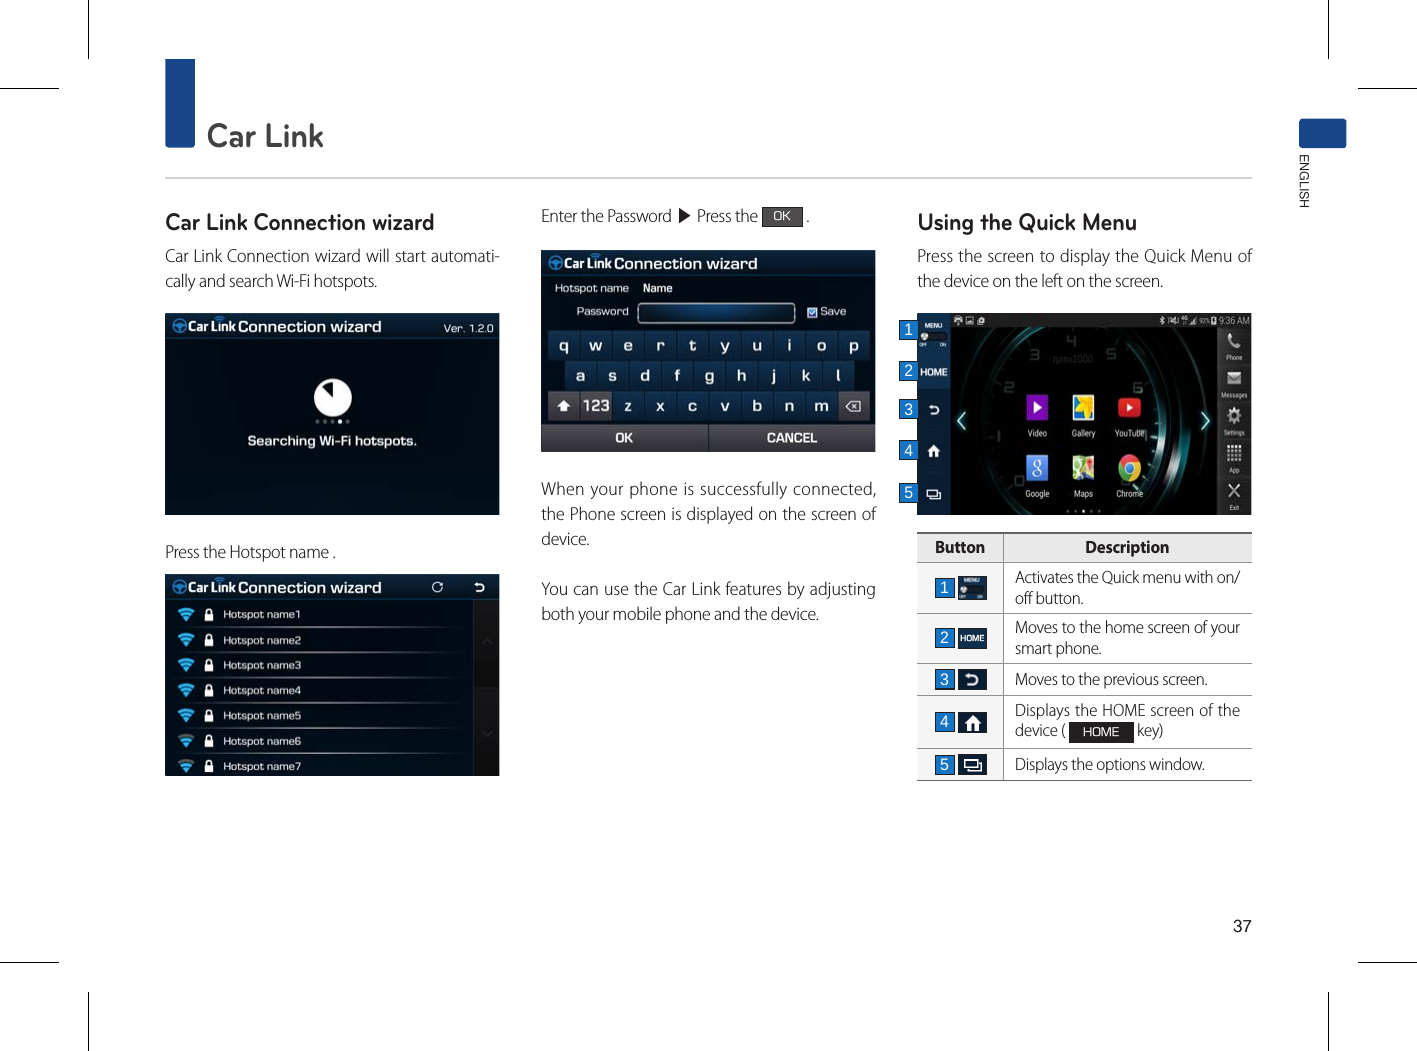
![36 Car LinkBefore starting Car LinkInstalling the Car Link Application••Install the Car Link application into your mobile phone.••Car Link application automatically turns on Wi-Fi Hotspot of Your mobile phone by press-ing [Connection with navigation] button on connection setting screen of application.••Following screen is displayed when Car Link is ready to connect.••It is not possible to use Car Link feature and Bluetooth Audio at the same time. Bluetooth connection will be disconnected, when Car Link is connected.••iPhone is not supported.••For details, visit the Car Link website (http://www.car-link.co.kr/motrex).Starting modePress the HOME key ▶ Press the Car Link button ▶Press the Agree .](https://usermanual.wiki/MOTREX/MTXM110TL/User-Guide-3094196-Page-36.png)

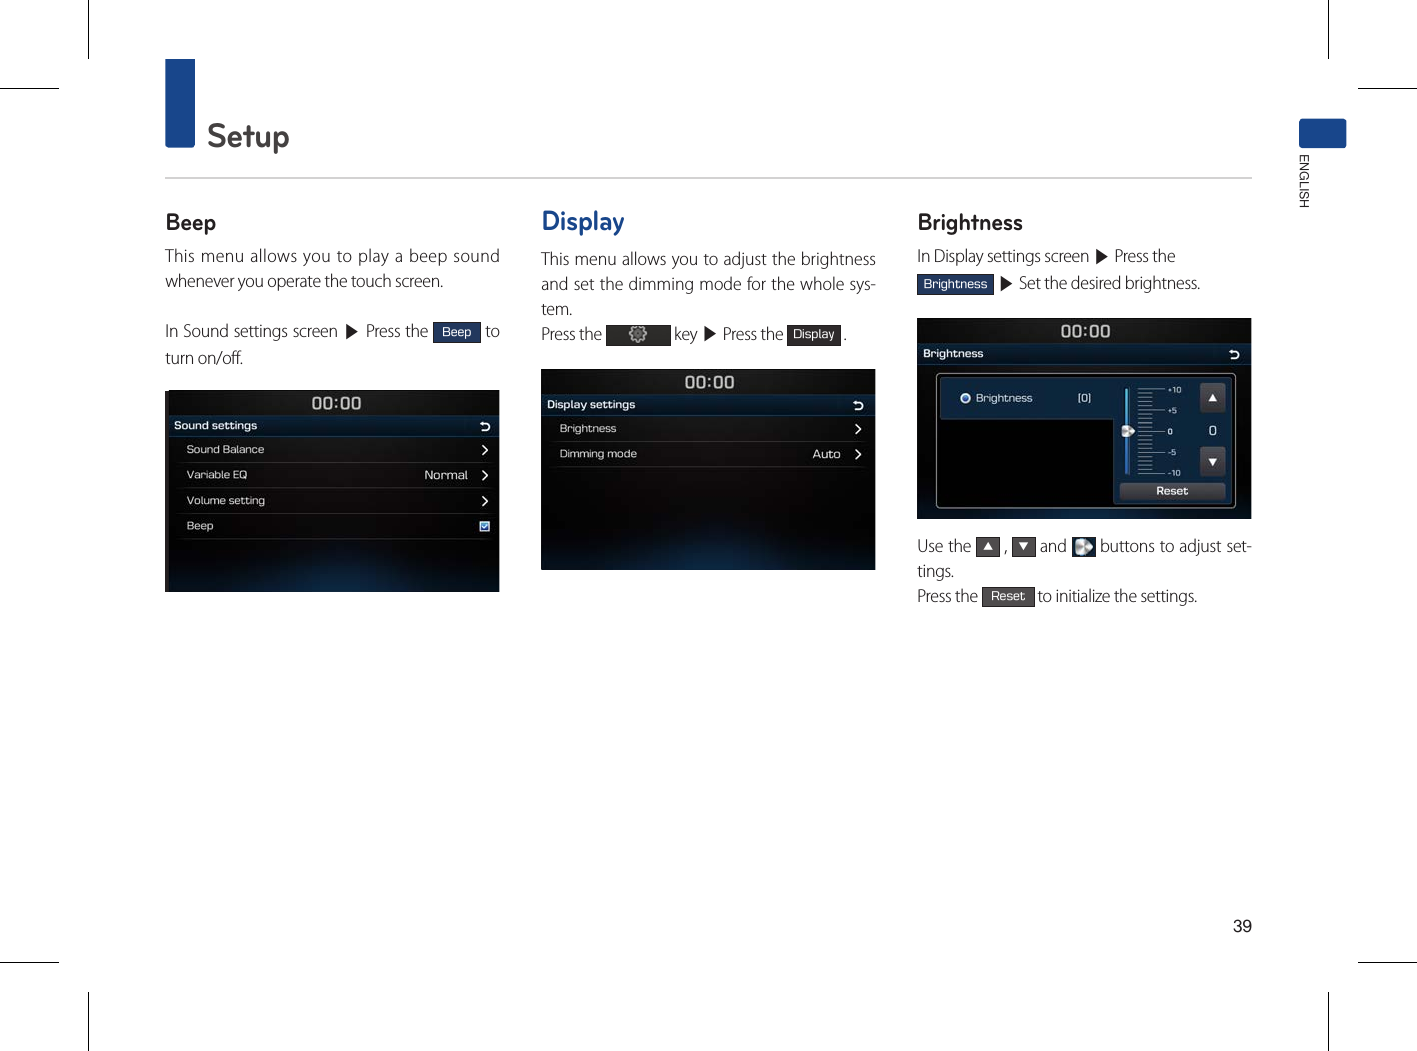
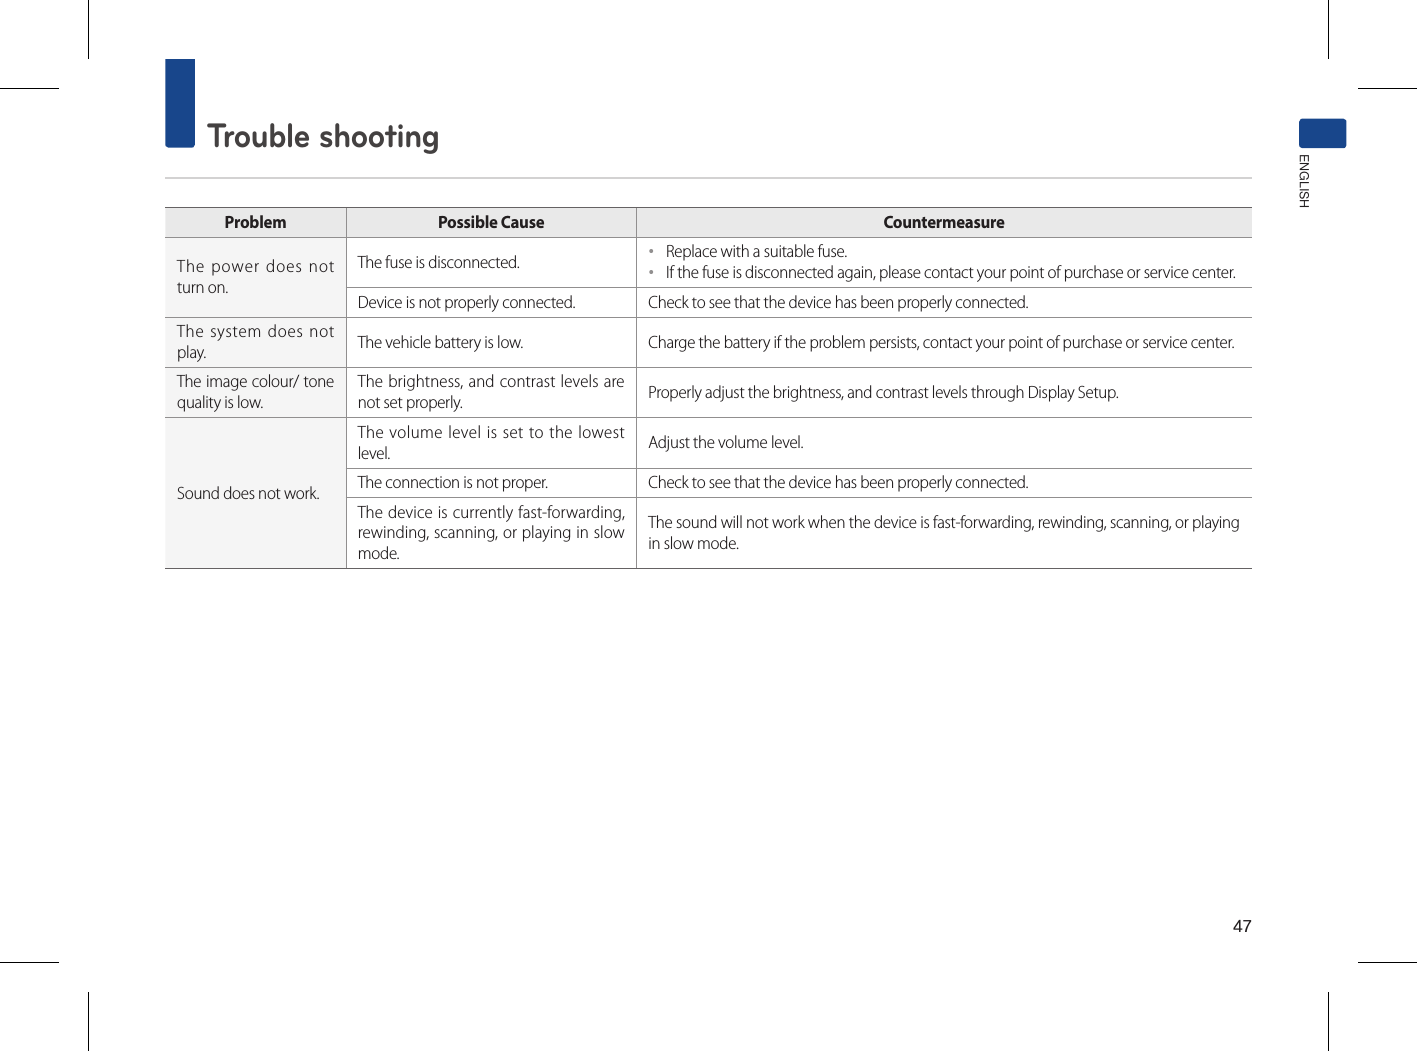
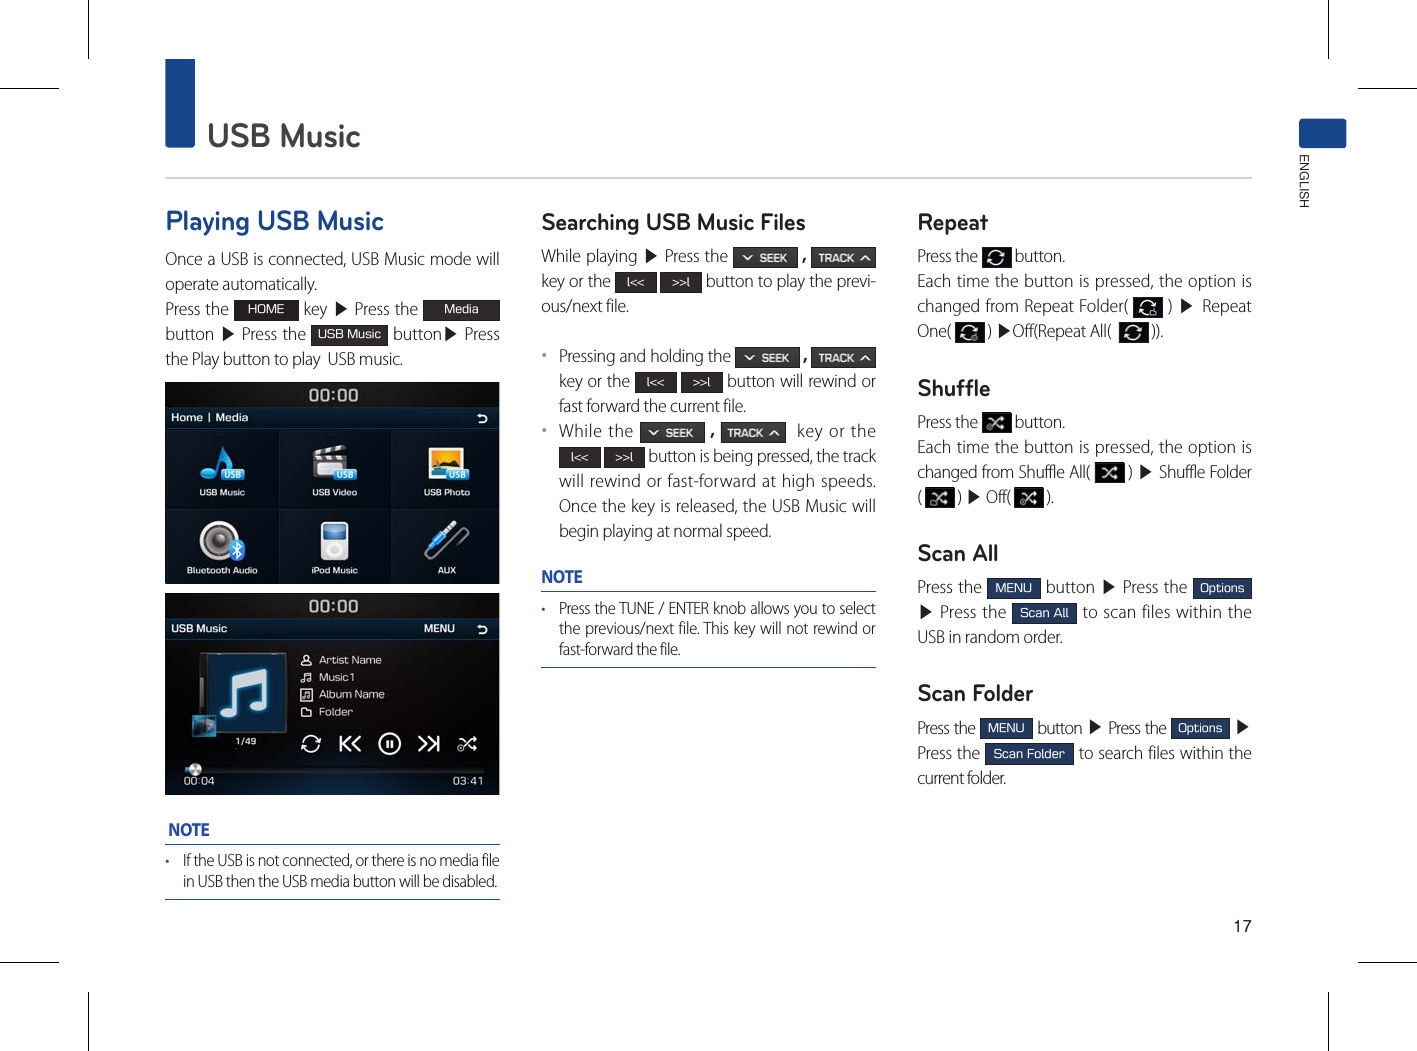
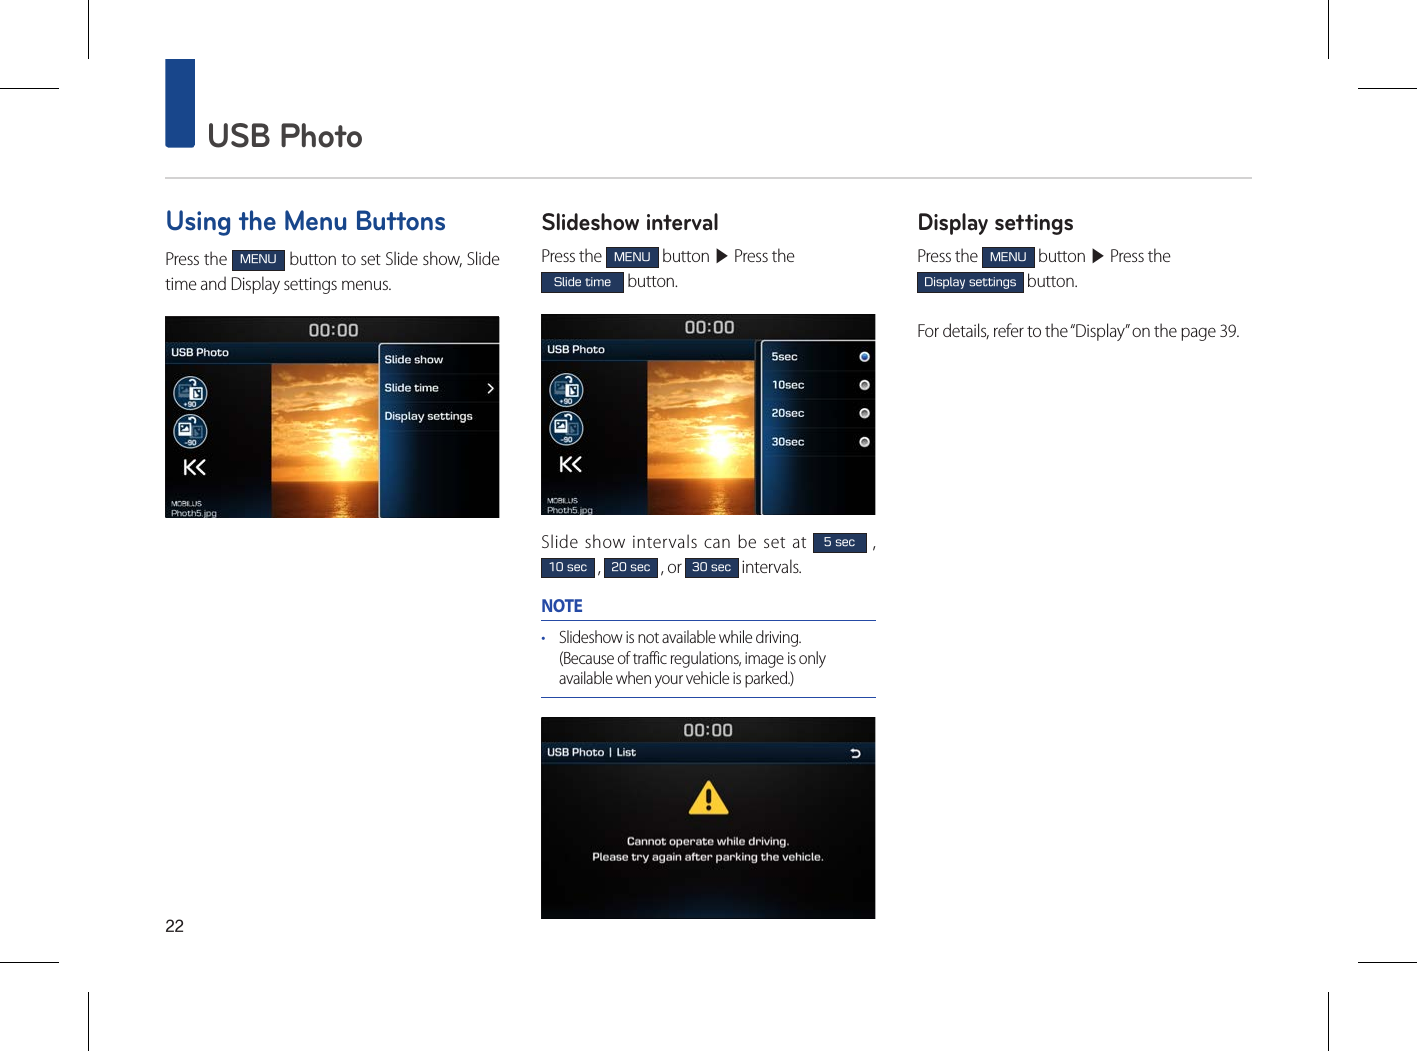
![46 Trouble shooting1. Errors which occur during the operation or installation of the device may be mistaken as a malfunction of the actual device.2. If you are having problems with the device, try the suggestions listed below.3. If the problems persist, contact your dealerProblem Possible CauseThere are small red, blue, or green dots on the screenBecause the LCD is manufactured with technology requiring high point density, a pixel or lighting deficiency may occur within 0.01% of total pixels.The sound or image is not working ••Has the Switch for the vehicle been turned to [ACC] or [ON]?••Has the SYSTEM been turned OFF?The screen is being displayed but sound is not working••Has the volume been set to a low level?••Has the volume been muted?When the power is turned on, the corners of the screen are dark••The display appearing somewhat dark after prolonged periods of use is normal with LCD panels. It is not a malfunction.••If the screen is very dark, contact your nearest dealer for assistance.Sound is working from only one speaker Are the positions of Fader or Balance sound controls adjusted to only one side?Sound does not work in AUX mode Are the audio connector jacks fully inserted into the AUX terminal?The external device is not working Is the external device connected with a standard connector cable?When turning power on, the most recent mode screen is not displayedWithin modes that play files by reading external sources, such as USB, iPod, or Bluetooth® streaming mode, the most recently played mode screen prior to turning off power may not properly load.••If the corresponding device is not connected, the mode operated prior to the most recent mode will operate.••If the previous mode still cannot be properly played, the mode operated prior to that will operate.](https://usermanual.wiki/MOTREX/MTXM110TL/User-Guide-3094196-Page-46.png)