MOVEON TECHNOLOGY PERFORMANCE Smart phone User Manual ZOOM Performance x
MOVEON TECHNOLOGY LIMITED Smart phone ZOOM Performance x
User manual
UserManual
Model:Performance
Trademark:ZOOM
Readmefirst
Pleasereadthismanualbeforeoperatingyourphone,andkeepitforfuturereference.
Thedescriptionsinthismanualarebasedonthedefaultsettings.
Imagesandscreenshotsusedinthismanualmaydifferfromtheactualproduct.
Availablefeaturesandadditionalservicesmayvarybydevice,softwareorservice
provider.
Ourcompanyisnotliableforperformanceissuescausedbythird‐partyapplications.
6.0Systemfeatures
1.TheAppPermissions(softwarerightsmanagement):inAndroidM,suggestyoucan
customizetheapplicationlicense.Itallowstohighlyapplicationpermissionsmanagement,
suchastheapplicationcanuselocation,camera,microphone,contacts,etc.,thesecanbe
opentodevelopersandusers.
2.ChromeCustomTabs(webexperienceascension):thenewMforChromeweb
browsingexperienceascension,itontheweb,thestoredpassword,automaticcompletion
data,thesafetyofthemultithreadedwebbrowsingaseriesofoptimization.
3.TheAppLinks(App):AndroidMtostrengthentheassociationbetweenthesoftware,
Googleshowsanexampleatthescene,suchasyourphoneemailreceivedanemail,inthe
texttoaTwitterlink,usersclickonthelinktojumpdirectlytotheTwitterapplication,
insteadofawebpage.
4.Power&Change(energymanagement):anewPowermanagementmodulewillbe
moreintelligent,suchasAndroidphonesforalongtimedoesnotmove,Msystemwill
automaticallyshutdownsomeoftheApp.

CONTENTS
目录
Assembling .................................................................................................................................. - 1 -
Unpack.................................................................................................................................. - 1 -
Chargethebattery ............................................................................................................... - 1 -
InstalltheSIMcard ............................................................................................................... - 1 -
Installthememorycard ....................................................................................................... - 1 -
Gettingstarted ............................................................................................................................. - 2 -
Turnyourdeviceonandoff ................................................................................................. - 2 -
Switchtoflightmode ........................................................................................................... - 2 -
Homescreen ........................................................................................................................ - 2 -
Taskbar ................................................................................................................................ - 2 -
Notificationpanel ................................................................................................................. - 3 -
Autorotation ........................................................................................................................ - 3 -
Lock&unlockthescreen ..................................................................................................... - 3 -
Entertext .............................................................................................................................. - 4 -
Customizeyourdevice ......................................................................................................... - 4 -
Manageapplications ............................................................................................................ - 4 -
Security ................................................................................................................................ - 4 -
Setupthefingerprint ........................................................................................................... - 5 -
Resetphone ......................................................................................................................... - 5 -
Communication ........................................................................................................................... - 6 -
Phone ................................................................................................................................... - 6 -
Contacts ............................................................................................................................... - 7 -
Messaging ............................................................................................................................ - 8 -
Email ..................................................................................................................................... - 9 -
Gmail .................................................................................................................................. - 10 -
Web ............................................................................................................................................ - 11 -
Browser .............................................................................................................................. - 11 -
PlayStore ........................................................................................................................... - 12 -
Entertainment............................................................................................................................ - 12 -
Gallery ................................................................................................................................ - 12 -
Music .................................................................................................................................. - 14 -
Camera ............................................................................................................................... - 14 -
Tools ........................................................................................................................................... - 16 -
Calendar ............................................................................................................................. - 16 -
Alarm .................................................................................................................................. - 16 -
FileManager ...................................................................................................................... - 17 -
SoundRecorder .................................................................................................................. - 17 -
Calculator ........................................................................................................................... - 17 -
Connectivity ............................................................................................................................... - 17 -
USBConnection .................................................................................................................. - 17 -
Wi‐Fi ................................................................................................................................... - 18 -
Bluetooth ........................................................................................................................... - 18 -
SafetyPrecautions ..................................................................................................................... - 18 -
Care&Maintenance .................................................................................................................. - 19 -
warnings .................................................................................................................................... - 20 -
- 1 -
Assembling
Unpack
Checkyourproductboxforthefollowingitems.
Phone
Usermanual
Adapter
Youcanpurchaseadditionalaccessoriesfromyourlocalretailer.
Chargethebattery
Beforeusingthedeviceforthefirsttime,youmustchargethebattery.
1. YoucanchargethedevicewithatraveladapterorbyconnectingthedevicetoaPCwitha
USBcable.
2. Batteryfulliconisshownwhenfinishedifyourdeviceisoff.
Warning:Useonlyoriginalbatteriesandchargers.Unapprovedchargersorcablescancause
batteriestoexplodeordamageyourdevice.
InstalltheSIMcard
YouneedtoinsertaSIMcardtousethePhonefunction.ToinstalltheSIMcard,followthe
instructionsbelow.
1. Makesurethatthecard’sgoldcontactsfaceintothedevice.
2. PushtheSIMcardintotheslotuntilitclicks.
Installthememorycard
Tostoreadditionalmultimediafiles,youneedinsertamemorycard.
1. Insertamemorycardwiththegoldcontactsfacingdownwards.
2. Pushthememorycardintotheslotuntilitclicks.
Notice:Ourcompanyusesapprovedindustrystandardsformemorycards,butsomebrandsmay
notbefullycompatiblewithyourdevice.

- 2 -
Gettingstarted
Turnyourdeviceonandoff
Toturnonyourdevice,pressandholdthepowerkey.
Toturnoffyourdevice,pressandholdthepowerkey,select““poweroff”andthentapOK.
Switchtoflightmode
Touseonlyyourdevice’snon‐networkservices,switchtoflightmode.Pleasefollowthe
instructionsbelowtoturnonflightmode:
TapSettingsWIRELESS&NETWORKSMoreAirplanemodefromapplicationlisttocreatea
checkmark.
Homescreen
Thehomescreenhasmultiplepanels.Scrollleftorrighttothepanelsonthehomescreen,you
canviewindicatoricons,widgets,shortcutstoapplications,andotheritems.
Taskbar
Thetaskbarisshownatthetopofthescreen.Itdisplayscommonlyusedoptionbuttons,battery
levelindicator,currenttimeandotherindicatoricons.
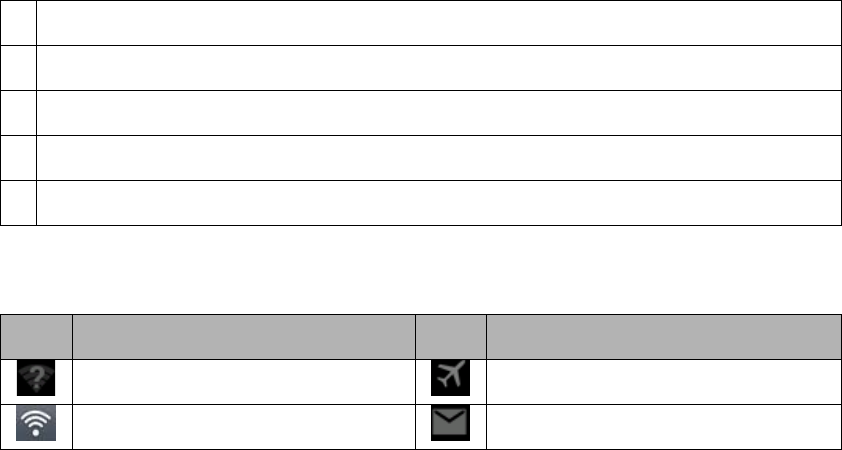
1Returntopreviousscreen.
2Returntohomescreen.
3Viewtheapplicationsyouhaveaccessedrecently.
4Openapplicationmenu
5Displaynotificationicons.Tapthenotificationsareatoopenthenotificationpanel.
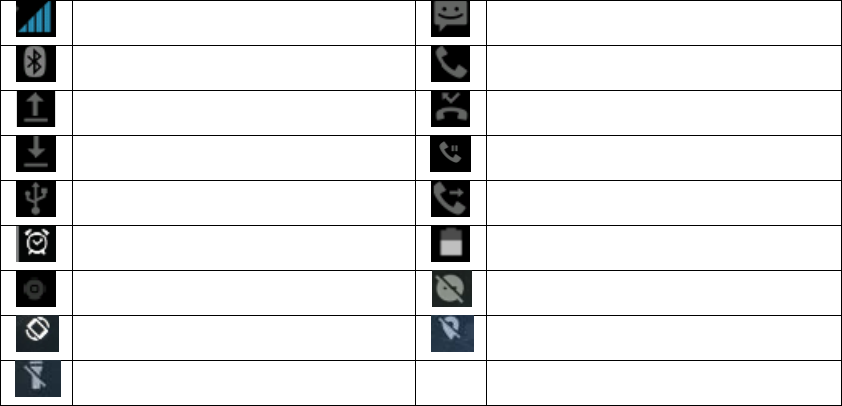
Indicatoricons
IconDefinitionIcon Definition
OpenWiFiavailableFlightmodeactivated
WiFiconnectedNewemail

- 3 -
SignalstrengthNewtextormultimediamessage
BTconnectedCallinprogress
UploadingdataMissedcall
DownloadingdataCallonhold
ConnectedtoPCCalldivertingactivated
AlarmactivatedBatterypowerlevel
MusicbeingplayedDo'tdisturb
Auto‐rotateLocation
Flashlight
Notificationpanel
Tapthenotificationsareatoopenthenotificationpanelshownbelow.Youcanaccessalistof
notifications.
Tapicontoactivateordeactivatewirelessconnectionfeaturesandothersettings.
Wi‐Fi:ActivateordeactivatetheWi‐Ficonnection.
Auto‐rotatescreen:Activateordeactivatetheautorotationfeature.
Brightness:Adjustthebasicbrightnesslevelofthedisplaytolighterordarker.
Notifications:Activateordeactivatethenotificationfeature.
Settings:AccessSettingsapplication.
Autorotation
Ifyourotatethedevicewhileusingsomefeatures,theinterfacewillautomaticallyrotateaswell.
Topreventtheinterfacefromrotating,openthenotificationspanelandselectAuto‐rotate
screen,thenscrollittoOff.
Lock&unlockthescreen
Tounlockthescreen,tapandholdthelockicon,thendragittotheunlockareawheretheunlock
iconis.
Tolockthescreenmanually,pressPowerkey.

- 4 -
Entertext
Youcanentertextbyselectingcharactersonthevirtualkeyboard.
Tapthetextinputfieldtodisplaythevirtualkeyboard.Tohidethekeyboard,tapatthetask
bar.
Tochangethetextinputmethod,tapatthetaskbar.
Fromatextfield,youcanusethecopyandpastefeatureforfastinputting.
Customizeyourdevice
Tocustomizeyourdeviceaccordingtoyourpreferences,tapSettingsfromapplicationlistor
notificationpanel.
Manageapplications
Tomanagetheapplicationsinstalledonyourdevice,tapSettingsApps.
1. Touninstallanapplication,selectDOWNLOADED,thenselectanitemandtapUninstall,tap
OKtoconfirm.
2. Tostoporchangethesettingsofanapplication,selectRUNNINGorALL,thenselectanitem
andtaptheoptionyouneed.
Security
Youcanprotectyourdeviceanddatabysettingscreenlockorencryptingyourphone.
Setascreenlock
Tosetascreenlock,tapSettingsSecurityScreenlockfromapplicationlist.
None:Deactivatethescreenlock.
Slide:Slidetounlockthescreen.
FaceUnlock:FacerecognitiontounlocktheScreen.
VoiceUnlock:SpeechrecognitiontounlocktheScreen.
Pattern:Drawapatterntounlock.Followtheinstructionstodrawyourlock
pattern.Whenprompted,drawthepatterntounlockthescreen.
PIN:EnteranumericPINtounlock.Whenprompted,enterthePINtounlockthe
screen.
- 5 -
Password:Enterapasscodetounlock.Whenprompted,enterthepasscodeto
unlockthescreen.
Screentime‐out
SelectSettingsDisplaySleepfromapplicationlist,youcansetthetimebeforethescreen
timesoutandgoesintolockmode.(youhavenotenteredanycharactersormadeother
selections).
Setupthefingerprint
Fingerprint:Wanttouseyourfingerprinttounlockthescreenorconfirmationof
purchase,youneedto:
1,setthestandbyscreenlockmode;
2,andaddyourfingerprint;
Attention:In addition to using fingerprint unlock their devices, you can also set the equipment
before startup requires the user to unlock pattern, to further protect the equipment.Equipment starts, to
answer the phone, receiving a message or notice (including alarm clock).
This can be in to protect the data on the equipment after the device is lost or stolen.
Resetphone
Youcanresetsystemanddesktopsettingstotheiroriginalvaluesbythefollowingsteps:
1. SelectSettingsBackup&resetfromapplicationlist.
2. TapFactorydatareset.
3. Ifyouwanttoerasealldataonyourphone,suchasmusic,pictures,andotherdata,tap
EraseMEMORYcardcheckboxtocreateacheckmark.
4. TapResetphone.
Thedeviceresetstothefactorydefaultsettingsautomatically.
Warning!:Factorydataresetwillerasealldatafromyourdevice,includingyourgoogleaccount,
systemandapplicationdataandsettings,anddownloadedapplications.
- 6 -
Communication
Phone
Tousecallingfunctions,tapPhonefromapplicationlist.
Makecalls
Tomakecalls,youcanuseanyofthethreeways:
Enternumbersbyusingthevirtualnumerickeypadonthescreen
Makeacallfromcalllog.
Makeacallfromcontacts.
Answeracall
Toansweracall,dragthecircledbuttontothegreenbutton.
Declineorendacall
Todeclineacall,dragthecircledbuttontotheredbutton.
Toendacallinprogress,taptheredbutton.
Callsettings
Tochangecallsettings,taptheoptionbuttonatthelowerRightbelowthedial‐upinterface.
1. Ringtone&Vibrate
Youcansetdifferentringtonesforincomingcalls.SettingsAudioprofilesSelect
Voice/Videocallringtonetoopenalistofringtones,selectthedesiredringtone,and
thenselectOKtoconfirm.
SettingsAudioprofilesSelectVibratetocreateacheckmarkandthephonevibrates
tonotifyyouofincomingcalls.
2. Dialpadtouchtones
SettingsAudioprofilesSelectcheckmarktheTouchsoundsyourdevicewillsoundatone
onceyoutapthedialpad.
3. Voicemail
Withthecalldivertnetworkservice,youcandirectincomingcallstoyourvoicemailbox.
TapServicetosetyourvoicemailserviceprovider.
TapSetuptosetyourvoicemailnumber.
TapSoundtosetthedesiredringtoneforyourvoicemail.
TicktheboxnexttoVibrateandthephonevibratestonotifyyouofavoicemail.

- 7 -
4. FixedDialingNumbers
IfFDNmodeisactivated,yourdevicewillrestrictoutgoingcalls,exceptforthenumbers
storedintheFDNlist.
5. Quickresponses
Quickresponseisafeaturetorejectthecallwiththepredefinedmessages.
Taponeofthepre‐writtenmessagestobedisplayedwhenyouwantthecalltoberejected,
thentapOK.
6. Callforwarding
Calldivertingisanetworkfeaturetosendincomingcallstoanothernumberthatyouspecify.
7. Callwaiting
Ifcallwaitingisactivated,thenetworknotifiesyouofanewincomingcallwhileyouhavea
callinprogressoryoucanmakeanewcallduringacall.
Contacts
TapPeoplefromapplicationlisttoaccesscontacts.
Groups:Listallyourcontactsbygroup.
All:Listallyourcontactssavedinthedevicememory.
Favorites:Listthecontactsthatyouhavesetasfavoritesorthecontactsthatyou
havesentmessagetoordialed.
Addnewcontact
1. AccessContactnumber.
2. Click
3. EnternecessaryContactname.
4. ClickDONE.
Editacontact
1. Toeditacontact,scrolltothecontactyouwanttochange.
2. Clicktheoptionbuttonattheupperright,thenselectEdit.
3. Changenecessaryfields.
4. ClickDONE.
Createnewgroup

- 8 -
1. Clickthefirsttabattheupperleft.
2. Click attheupperright.
3. Enteracategoryname.
4. ClickDONE.
Renamegroup
1. Torenamethegroup,scrolltothegroupyouwanttochange.
2. Click attheupperrightortaptheoptionbuttonandthenselectEdit.
3. Enteranewcategoryname.
4. ClickDONE.
Import/Exportcontacts
1. ImportfromtheSIMcard
TocopythecontactsfromtheSIMcard,clicktheoptionbuttonattheupperrightandthen
selectImport/ExportImportfromtheSIMcard,selectcontacts,andthenselectImport.
2. ImportfromMEMORYcard
Toimportcontactfiles(invcfformat)fromamemorycardtoyourdevice,taptheoption
buttonattheupperrightandthenselectImport/ExportImportfromMEMORYcard,
selectamemorylocationandcontactfilestoimportandselectOK.
3. ExporttoMEMORYcard
Toexportcontactsfromyourdevicetoamemorycard,taptheoptionbuttonattheupper
rightandthenselectImport/ExportExporttoMEMORYcard,selectOKtoconfirm.
4. Sharevisiblecontacts
Withthisfeature,youcansendthevisiblecontactsviaEmail.
Searchforcontacts
1. Click atthetitlebarfromcontactlistscreen,enterthedesiredinformation,thenyour
deviceshowstheresult.
2. Clickthesearchiconattheupperleftfromhomescreen,enterthecontact’snameor
number,yourdeviceshowstheresultimmediately.
Messaging
Learntocreateandsendatextormultimediamessage,andviewormanagemessagesthatyou
havesentorreceived.

- 9 -
Viewmessages
1. ClickMessagingfromapplicationlist.
2. Clickthemessagetoviewthedetailedinformation.
CreateandsendSMS
1. ClickenterNEWMESSAGE.
2. InTofield,entertherecipient’smobilephonenumbersmanually.Ifyouentermore
thanonenumber,separatethenumberswithacomma.
3. InTypemessage,enterthetextofthemessage.
4. SelectSendtosendthemessage.
CreateandsendMMS
Multimediamessagecanincludepictures,soundandtext.
1. ClickNEWMESSAGE.
2. Click atthetitlebar.
3. Selectoneoftheitemsbelow.
Pictures:Insertimage.
Capturepicture:Capturenewpictureandinsertthepicture.
Videos:Insertvideoclip.
Capturevideo:Capturenewvideoclipandinsertthevideoclip.
Audio:Insertsoundclip.
Recordaudio:Recordsoundclipandinsertthesoundclip.
Slideshow:Addmorethanoneslide.
4. InTofield,entertherecipient’smobilephonenumbersoremailaddressesmanually.If
youentermorethanonenumberoremail,separatethemwithacomma.
5. InTypemessagefield,enterthetextofthemessage.
6. SelectSendtosendthemessage.
Email
Toreceiveandsendmail,youmusthavearemotemailboxservice.Thisservicemaybeofferedby
aserviceprovider.Yourdeviceiscompliantwithapplicableinternetstandardsfor
POP3/IMAP/Exchange.
Beforeyoucansendorreceivemailonyourdevice,youneedtosetupanemailaccountand

- 10 -
definetheemailsettingscorrectly.Youcandefinemorethan1mailbox.
Setupyouremail
1. ClickEmailfromapplicationlist.
2. Youcanusemailboxguidetosetupyourmailbox,tapNextuntilit’sdone.
3. Ifyouneedtoaddanotheremailaccount,taptheoptionbuttonattheupper
rightSettingsADDACCOUNT,thensetuptheemailaccountwiththemailboxguide.
Whenyouarefinishedsettinguptheemailaccount,theemailmessagesaredownloadedto
yourdevice.Ifyouhavecreatedmorethantwoaccounts,youcanswitchbetweenemail
accounts.Selectanaccountnameatthetopleftofthescreenandselecttheoneyouwant
toretrievemessagesfrom.
Deleteyouremailaccount
EnterthesettingsscreenSelect"POP3"applicationClickontheemailaddress
Clickthemenubuttonselectthe"RemoveAccount"function
Createandsendemail
1. OpenEmailapplication.
2. Click .
3. InTofield,entertherecipient’semailaddressesmanuallyandseparatethemwithacomma.
AddmorerecipientsbytappingCc/Bcc.
4. Toinsertattachments,taptheoptionbuttonattheupperrightandselectAttachfile.
5. Enterthesubjectandthetext.
6. ClickSENDtosendtheemail.
Gmail
YoucanretrievenewemailmessagesfromtheGoogleMailwebmailservicetoyourinbox.Before
youcansendorreceivemailonyourdevice,youneedtosetupaGmailaccount.
CreateaGmailaccount
Ifyoudon’thaveaGoogleAccount,tapNew,thenfollowtheon‐screeninstructionstocreatea
newone.
SetupaGmailaccount
Ifyouwanttoaddanexistingaccount,tapExisting,enteryouremailaddressandpassword,
andthenselectNext,whenyouarefinishedsettinguptheemailaccount,theemail
messagesaredownloadedtoyourdevice.

- 11 -
Viewemailmessages
1. Whenyouopentheemailaccount,theamountofunreademailmessagesisdisplayedatthe
titlebarandtheunreademailmessagesaredisplayedinbold.
2. Toviewanemailmessage,tapit.
3. Tomarkanimportantemailmessage,tapthestariconbelowthedate.Tocancelthemark,
tapthestariconagain.
Createandsendanemail
1. Click .
2. InTofield,entertherecipient’semailaddressesmanuallyandseparatethemwithacomma.
AddmorerecipientsbytappingCc/Bcc.
3. Toinsertattachments,taptheoptionbuttonattheupperrightandselectAttachfile.
4. Enterthesubjectandthetext.
5. ClickSENDtosendtheemail.
Web
Browser
TapBrowserfromapplicationlisttoaccesstotheweb.
Browserwebpages
1. SelectBrowsertolaunchaspecifiedhomepage.
2. Toaccessaspecificwebpage,selecttheURLinputfield,enterthewebaddressofthe
webpage,andselectGo.
3. Tozoomin,placetwofingersonthescreenandspreadthemapart.Tozoomout,move
yourfingersclosertogether.Youcanalsodouble‐tapthescreen.
Addwindows
Youcanhavemultiplewindowsopenatonetime.
1. Toaddanewwindow,click atthetitlebar.
2. Toopenupawindow,clickthetitleofthewindow.
3. Toclosethewindow,click atthetitlebar.
Sethomepage
1. Taptheoptionbuttonattheupperright.

- 12 -
2. SelectSettingsGeneralSethomepage.
3. Enterthewebaddressofthedesiredwebpage.
Addbookmarks
Whilenavigatingawebsite,click toSavetobookmarksandeasilyaccessitlater.
Viewbookmarksandhistory
Click toopenthebookmarklistandtherecenthistory.clickabookmarkoranyentryto
displaythewebpage.
Customizebrowser
Tomakeadjustmentsinyourbrowsersettings,clicktheoptionbuttonattheupperright,
andthenselectSettings.
PlayStore
PlayStoreallowsyoutoeasilydownloadanabundanceofapplicationsdirectlytoyourdevice.
BeforeusingthePlayStore,youmusthaveaGoogleAccount.
1. Fromtheapplicationlist,tapPlayStore.
2. SignintoyourGoogleAccount.
3. Searchforanddownloadapplicationsasdesired.
4. Followtheon‐screeninstructions.
Note
AllapplicationsofferedbyPlayStorearedevelopedbythirdparty.Togetthe
informationaboutthedevelopers,youcanreadthedescriptionsofeachapplication.
Ourcompanyisnotliableforperformanceissuescausedbythird‐partyapplications.
Entertainment
Gallery
Toviewororganizeyourimagesandvideoclips,oreditandsendyourfilestootherdevices,or
setphotosaswallpapers,selectGalleryfromapplicationlist.
Note:Ittakesafewmoreminutestoenterthisapplicationifyoustoremorefiles.
Supportedfileformats

- 13 -
TypeFormat
ImageJPEG、GIF、BMP、PNG
VideoMPEG4‐SP,H264/AVC,H263,VPX,3GP,3G2,MP4,MKV,AVI,WEBM
Note:Somefilesmaynotplayproperlydependingonhowtheyareencoded.
Viewaphoto
1. Selectafolder.
2. Selectaphototoview.Toviewmorephotos,scrollleftorright.
3. Tozoomin,placetwofingersonthescreenandspreadthemapart.Tozoomout,move
fingersclosertogether.Youcanalsodouble‐tapthescreen.
4. Tostartaslideshow,tapatthetitlebar.
5. Toviewthedetailsofafile,taptheoptionbutton,thenselectDetails.
6. ToshareaphotowithothersviaEmail,GmailorMessaging,tapatthetitlebar.
7. Tosetaphotoaswallpaper,taptheoptionbuttonattheupperrightselectSetpicture
asWallpaperdragtheslidesofthecropboxtocreatethecroparea,thenclickSave.
8. TosetaphotoasacallerID,taptheoptionbuttonattheupperrightselectSetpicture
asContactphotoContactsCreateanewcontactorselectanexistingcontactdrag
theslidesofthecropboxtocreatethecroparea,thenclickSave.
Editaphoto
1. Tocroptheimage,taptheoptionbuttonattheupperright,thenselectCrop.
Tomovethecropbox,tapandholdthecropboxanddragittothedesiredlocation.
Toaddorsubtractfromtheselectionborderofthecropbox,dragthecropboxto
thedesiredsize.
Whenyouarefinished,tapSave.
2. Toeditphotosandapplyvariouseffects,taptheoptionbuttonattheupperright,then
selectEdit.
Playavideo
1. Selectafolder.
2. Selectavideotoplay.
3. Controlplaybackwiththevirtualkeys.

- 14 -
Music
WithMusic,youcanplaymusicfiles.Themusicplayersupportsthefollowingfileformats:MP3,
AAC,APE,WMA,OGG,WAV,M4Aandsoon.
Note:Somefilesmaynotplayproperlydependingonhowtheyareencoded.
Addmusicfilestoyourdevice
Startbytransferringfilestoyourdeviceormemorycard.
Playmusic
1. Selectamusicfile.
2. Controlplaybackwiththevirtualkeys.
Thecurrentlistofsongsarerandomlyshuffledforplayback.
Returnbacktothecurrentlistofsongs
Repeatsthecurrentplayingsong.
Createaplaylist
1. Tapandholdamusicfile.
2. SelectAddtoplaylist.
3. SelectNew.
4. Enteraname.
5. TapSave.
Deleteaplaylist
1. TapPlaylists.
2. Tapandholdtheplaylistyouwanttodelete.
3. SelectDelete.
Camera
Withthecamerafunction,youcancapturephotosandtakevideos.
Captureaphoto
1. OpentheapplicationlistandselectCamera.
2. Beforetakingapicture,youneedtoknowsomesettings.
Placetwofingersonthescreenandspreadthemapartormovefingersclosertogetherto
zoominorzoomout.
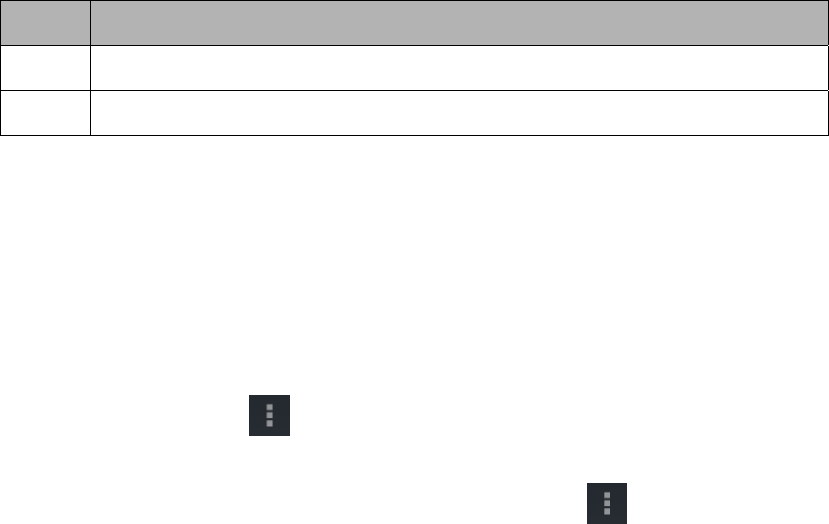
IconDefinition

- 15 -
Settings
Changetovideomode.
takephotos
Taptoswitchbetweenthefrontandrearcameralenses
SmileMode
Changetopanoramamodetotakealandscapephoto.
3. Aimthelensatthesubjectandtap totakeaphoto.Thephotoissaved
automaticallytothefolderDCIM.
4. Selecttheimageviewericonatthelowerrighttoviewthepictures.

- 16 -
Recordavideo
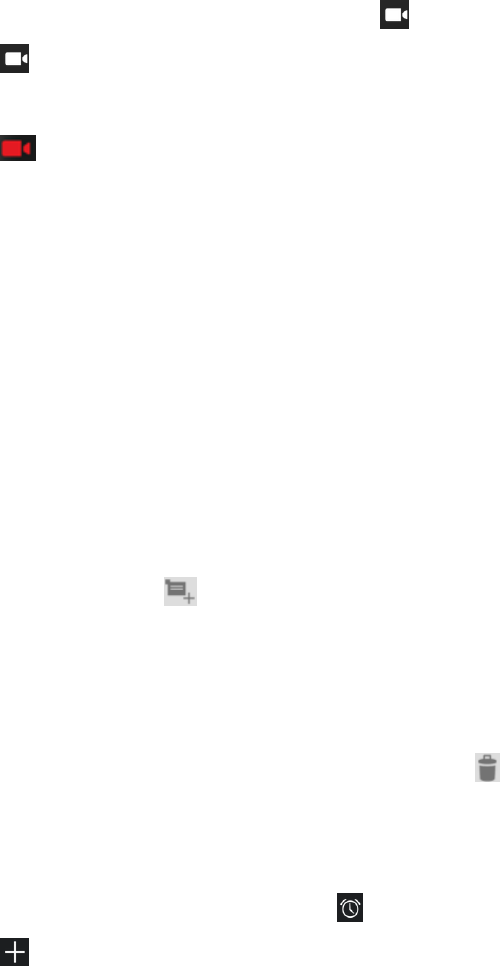
1. OpentheapplicationlistandselectCamera.Taptochangetovideomode.
2. Taptostartrecording.Thelengthofthevideorecordingisrestrictedbythe
availablespaceonyourstorage.
3. Taptostoprecording.ThevideoissavedautomaticallytothefolderDCIM.
4. Afterrecordingvideos,selecttheimageviewericonatthelowerrighttoviewthe
recordedvideos.
Tools
Calendar
WiththeCalendarfeature,youcanconsultthecalendarbyday,week,ormonth,createevents,
andsetanalarmtoactasareminder,ifnecessary.
Toaccessthecalendar,tapCalendarfromapplicationlist.
1. Tocreateanevent,tap.
Fillinthefields,andsetcategory,date,time&analarm.
Afteryoufinish,selectDONE.
2. Youcanviewcalendarindifferentviews,Day,Week,MonthandAll.
3. Todeleteanentry,taptheeventtoopenit,andthenselectOK.
Alarm
Fromapplicationlist,tapClock,andthenselect.
1. Taptoaddalarm.
Tapthenumericpadtosetalarmtime,andthenselectAMorPM,whenyouare
finished,tapOK.
Tapthetimetochangealarmtime.
2. Setalarmtime,repeatcycle,andalarmringtone,tapOKafterfinished.
3. Tap“cancel”toshutdownthealarm,andtap”ringagain”,thenthealarmwillstop
ringingforafewminutes.
4. Unticktheclocktostopusingtheclock.

- 17 -
5. Longtapingtheclockthenitcanbedeleted.
FileManager
Manyfeaturesofthedevice,suchasimages,videos,documents,receivedattachmentsand
downloadedfilesorapplications,usememorytostoredata.WithFilemanager,youcanstore
andbrowsefilesandfoldersinyourdevice,oredit,move,copyfiles;youcansendfilesto
compatibledevicesaswell.
Note:
1. Somefilesformatsarenotsupporteddependingonthesoftwareofthedevice.
2. Somefilesmaynotplayproperlydependingonhowtheyareencoded.
SoundRecorder
WithRecorder,youcanrecordavoicememo.Fromapplicationlist,tapRecorder.
1. Torecordavoicememo,tap.
2. Topausetherecording,tap.
3. Tolistentoavoicerecordingthatyoujustrecorded,tap .
Calculator
Withthisfeature,youcanusethedeviceasacalculator.Thecalculatorprovidesthebasic
arithmeticfunctions.Tapthevirtualnumericandcalculationkeystoperformacalculation.
Connectivity
USBConnection
YoucanconnectyourdevicetoaPCanduseitasaremovabledisk,whichallowsyouaccessthe
filedirectory.
1. Ifyouwanttotransferfilesfromortoamemorycard,insertamemorycardintothe
device.
2. WithaUSBcable,connectyourdevicetoaPC.
3. Openthenotificationpanel,selectUSBconnected.
4. TapTurnonUSBstorage.
5. Openthefoldertoviewfiles.
6. CopyfilesfromthePCtothememorycard.
- 18 -
Wi‐Fi
WithWi‐Fi,youcanconnecttotheinternetorothernetworkdevicesanywhereanaccesspoint
orwirelesshotspotisavailable.
ActivatetheWi‐Fifeature
1. Fromapplicationlist,tapSettings.
2. InthefieldofWIRELESS&NETWORKS,turnontheWi‐Fifeature.
FindandconnecttoWi‐Fi
1. OncetheWi‐Fifeatureisactivated,thedeviceautomaticallysearchforavailableWi‐Fi
connection.
2. Selectanetwork.
3. Enterapasswordforthenetwork(ifnecessary).
4. SelectConnect.
Bluetooth
Withbluetooth,youcansharemusic,pictures,video,contactswithanotherphone.Youcanuse
bluetoothheadsetphoneorlisteningtomusic.
Activatethebluetoothfeature
1.Fromapplicationlist,tapSettings.
2.turnonthebluetoothfeature.
ScanandconnecttootherBluetoothdevices
1.Oncethebluetoothfeatureisactivated,thedeviceautomaticallysearchforotherBluetooth
devices.
2.Selectadeviceandpair.
SafetyPrecautions
Readthesesimpleguidelinesbeforeusingyourdevice.Notfollowingthemmaybedangerousor
illegal.
Aircraft
Switchoffinaircraftandfollowanyrestrictions.Wirelessdevicescancauseinterferencein
aircraft.
- 19 -
Vehicles
Neveruseyourdevicewhiledriving.Placeitinasafeplace.
Positionyourdevicewithineasyreach.Beabletoaccessyourdevicewithoutremovingyour
eyesfromtheroad.
Electronicdevices
Insomecircumstancesyourdevicemaycauseinterferencewithotherdevices.
Potentiallyexplosiveenvironments
Switchoffyourdevicewheninanyareawithapotentiallyexplosiveatmosphere,andobey
allsignsandinstructions.Sparksinsuchareascouldcauseanexplosionorfireresultingin
bodilyinjuryorevendeath.
Pacemakersandothermedicaldevices
Pacemakermanufacturersrecommendthataminimumseparationof8inchesbemaintained
betweenawirelessdeviceandapacemakertoavoidpotentialinterferencewiththe
pacemaker.
Operationofanyradiotransmittingequipment,includingwirelessphonesmayinterference
withthefunctionalityofinadequatelyprotectedmedicaldevices.Consultaphysicianorthe
manufacturerofthemedicaldevicetodetermineiftheyareadequatelyshieldedfrom
externalRFenergyorifyouhaveanyquestions.
Switchoffyourdeviceinheathcarefacilitieswhenanyregulationspostedintheseareas
instructyoutodoso.
Operatingenvironment
Whenconnectingtootherdevice,readitsuserguidefordetailedsafetyinstructions.Do
notconnectincompatibleproducts.
Donotplaceyourdeviceintheairbagdeploymentarea.
Usethedeviceonlyinitsnormaloperatingpositionsasexplainedintheproduct
documentation.
Alwaysswitchoffyourdevicewhenitsuseisprohibitedorwhenitmaycauseinterference
anddanger.
Areaswithpostedregulations
Switchoffyourdevicewhenanyregulationspostedintheseareasinstructyoutodoso.
Care&Maintenance
Useonlymanufacturer‐approvedaccessories.Usegeneralaccessoriesmayshortenthelifeof
yourdeviceorcausedevicetomalfunction.
Keepyourdevicedry.Humidityandalltypesofliquidsmaydamagedevicepartsorelectronic
circuits.
Donotuseorstorethedeviceindusty,dirtyareas.
Donotstorethedeviceinhotorcoldareas.

- 20 -
Donotstoreyourdevicenearmagneticfields.
Donotstoreyourdevicewithsuchmetalobjectsascoins,keysandnecklace.
Donotdropyourdeviceorcauseimpactstoyourdevice.
warnings
FCC RF EXPOSURE INFORMATION:
WARNING!! Read this information before using your phone
In August 1986 the Federal Communications Commission (FCC) of the
United States with its action in Report and Outer FCC 96-326 adopted an
updated safety standard for human exposure to radio frequency (RF)
electromagnetic energy emitted by FCC regulated transmitters. Those
guidelines are consistent with the safety standard previously set by both
U.S. and international standards bodies. The design of this phone complies
with the FCC guidelines and these international standards. Use only the
supplied or an approved antenna. Unauthorized antennas modifications, or
attachments could impair call quality, damage the phone, or result in
violation of FCC regulations. Do not use the phone with a damaged
antenna. If a damaged antenna comes into contact with the skin, a minor
burn may result. Please contact your local dealer for replacement antenna.
- 21 -
FCC Statement
1. This device complies with Part 15 of the FCC Rules. Operation is subject to the
following two conditions:
(1) This device may not cause harmful interference.
(2) This device must accept any interference received, including interference that may
cause undesired operation.
2. Changes or modifications not expressly approved by the party responsible for
compliance could void the user's authority to operate the equipment.
NOTE:
This equipment has been tested and found to comply with the limits for a Class B digital
device, pursuant to Part 15 of the FCC Rules. These limits are designed to provide
reasonable protection against harmful interference in a residential installation.
This equipment generates uses and can radiate radio frequency energy and, if not
installed and used in accordance with the instructions, may cause harmful interference to
radio communications. However, there is no guarantee that interference will not occur in a
particular installation. If this equipment does cause harmful interference to radio or
television reception, which can be determined by turning the equipment off and on, the
user is encouraged to try to correct the interference by one or more of the following
measures:
Reorient or relocate the receiving antenna.
Increase the separation between the equipment and receiver.
Connect the equipment into an outlet on a circuit different from that to which the receiver
is connected.
Consult the dealer or an experienced radio/TV technician for help.
SAR Information Statement
Your wireless phone is a radio transmitter and receiver. It is designed and manufactured
not to exceed the emission limits for exposure to radiofrequency (RF) energy set by the
Federal Communications Commission of the U.S. Government. These limits are part of
comprehensive guidelines and establish permitted levels of RF energy for the general
population. The guidelines are based on standards that were developed by independent
scientific organizations through periodic and thorough evaluation of scientific studies. The
standards include a substantial safety margin designed to assure the safety of all persons,
regardless of age and health. The exposure standard for wireless mobile phones employs
a unit of measurement known as the Specific Absorption Rate, or SAR. The SAR limit set
by the FCC is 1.6 W/kg. * Tests for SAR are conducted with the phone transmitting at its
highest certified power level in all tested frequency bands. Although the SAR is
determined at the highest certified power level, the actual SAR level of the phone while
operating can be well below the maximum value. This is because the phone is designed to
operate at multiple power levels so as to use only the power required to reach the network.
In general, the closer you are to a wireless base station antenna, the lower the power
output. Before a phone model is available for sale to the public, it must be tested and
certified to the FCC that it does not exceed the limit established by the government
adopted requirement for safe exposure. The tests are performed in positions and
locations (e.g., at the ear and worn on the body) as required by the FCC for each model.
- 22 -
The highest SAR value for this model phone when tested for use at the ear is 0.18W/Kg
and when worn on the body, as described in this user guide, is 0.72W/Kg(Body-worn
measurements differ among phone models, depending upon available accessories and
FCC requirements). The maximum scaled SAR in hotspot mode is 0.72W/Kg. While there
may be differences between the SAR levels of various phones and at various positions,
they all meet the government requirement for safe exposure. The FCC has granted an
Equipment Authorization for this model phone with all reported SAR levels evaluated as in
compliance with the FCC RFexposure guidelines. SAR information on this model phone is
on file with the FCC and can be found under the Display Grant section of
http://www.fcc.gov/ oet/fccid after searching on
FCC ID: 2AFD9-PERFORMANCE, Additional information on Specific Absorption Rates
(SAR) can be found on the Cellular Telecommunications Industry Asso-ciation (CTIA)
web-site at http://www.wow-com.com. * In the United States and Canada, the SAR limit for
mobile phones used by the public is 1.6 watts/kg (W/kg) averaged over one gram of tissue.
The standard incorporates a sub-stantial margin of safety to give additional protection for
the public and to account for any variations in measurements.
Body-worn Operation
This device was tested for typical body-worn operations. To comply with RF exposure
requirements, a minimum separation distance of 10mm must be maintained between the
user’s body and the handset, including the antenna. Third-party belt-clips, holsters, and
similar accessories used by this device should not contain any metallic components.
Body-worn accessories that do not meet these requirements may not comply with RF
exposure requirements and should be avoided. Use only the supplied or an approved
antenna.