Mandolyn Electronic Technology WS1200 Weather Station Receiver User Manual
Mandolyn Electronic Technology Inc. Weather Station Receiver
User Manual
1 of 6
OWNERS MANUAL
FEATURES
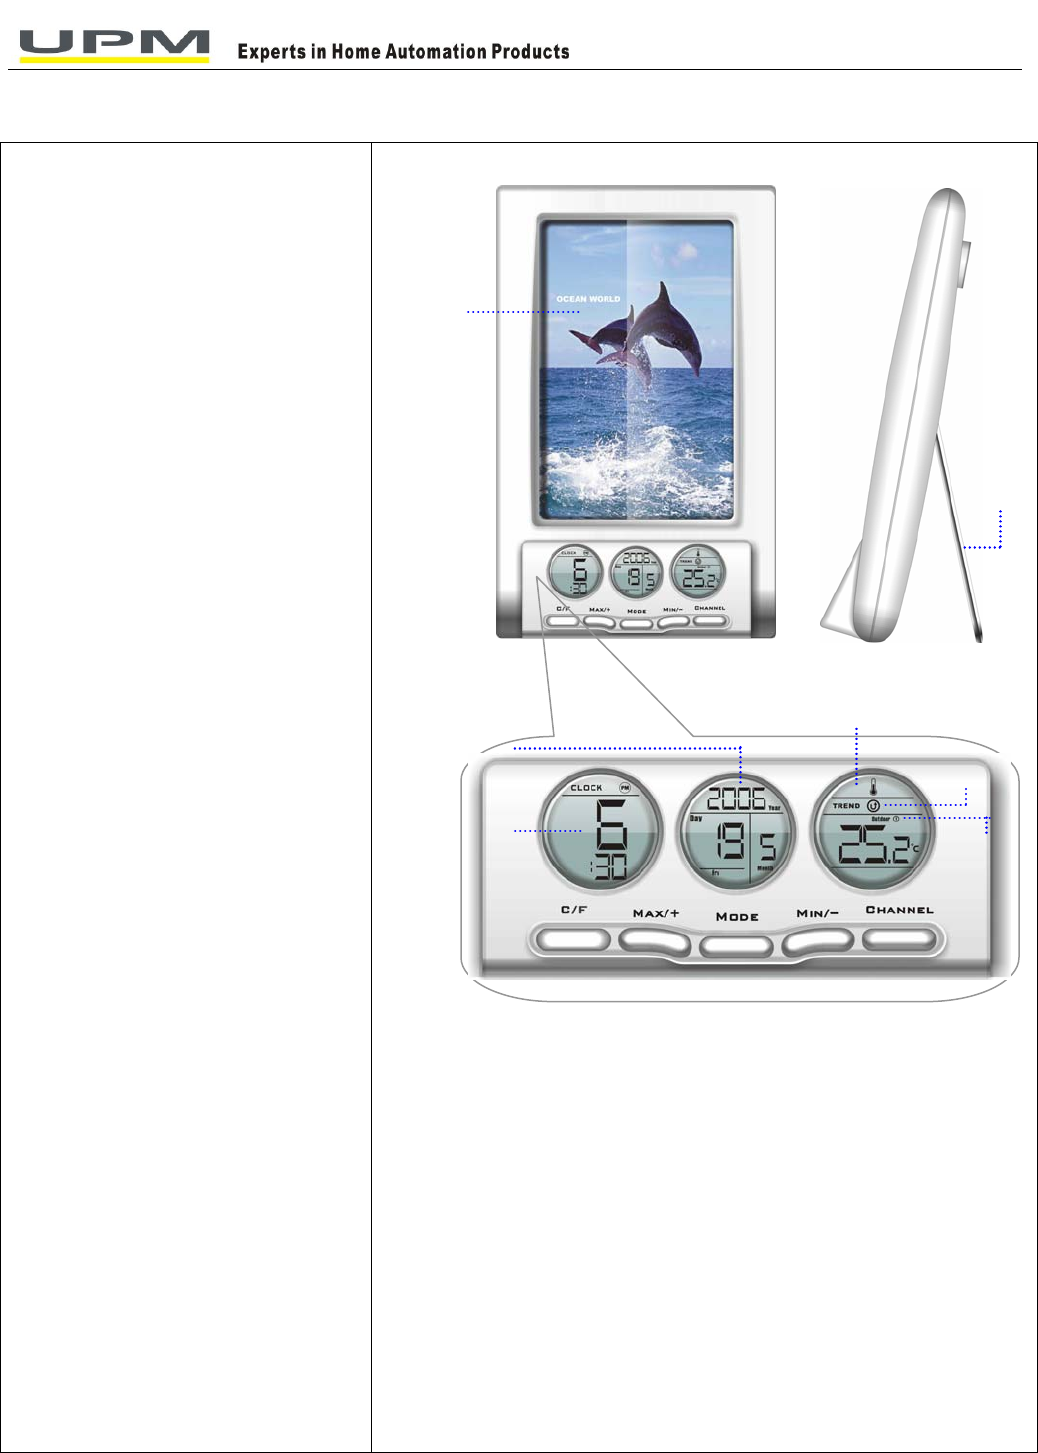
Base Station: WS1200
z With 4R size photo frame
z Perpetual calendar
z Clock (Hour, Minute display)
z User selectable 12 or 24 hour display
z Local & Remote temperature display in
selectable °C or °F display format
z Temperature trend indicator
z Remote temperature display
--Able to receive and display signals of
remote temperature up to 4 different
transmitters
z Low-Battery indicator
z Maximum and minimum temperature
memory recall for local and remote
temperature
Remote Transmitter: WT440
z Compact size with Wall-mount holder
z Drip-proof design
z Transmit temperature data to main unit
--Green LED for the transmission indication.
z Transmission Range: approx. 40 meters in
open area
Stand
Outdoor Channel
Indicator
Indoor & Outdoo
r
Temperature Display Area
(With Trend Display)
Trend Symbol
Clock Display
A
rea
(Selectable 12 hours
or 24 hours display)
Perpetual Calenda
r
Display Area
(Year, Month, Day)
Photo Frame
2 of 6
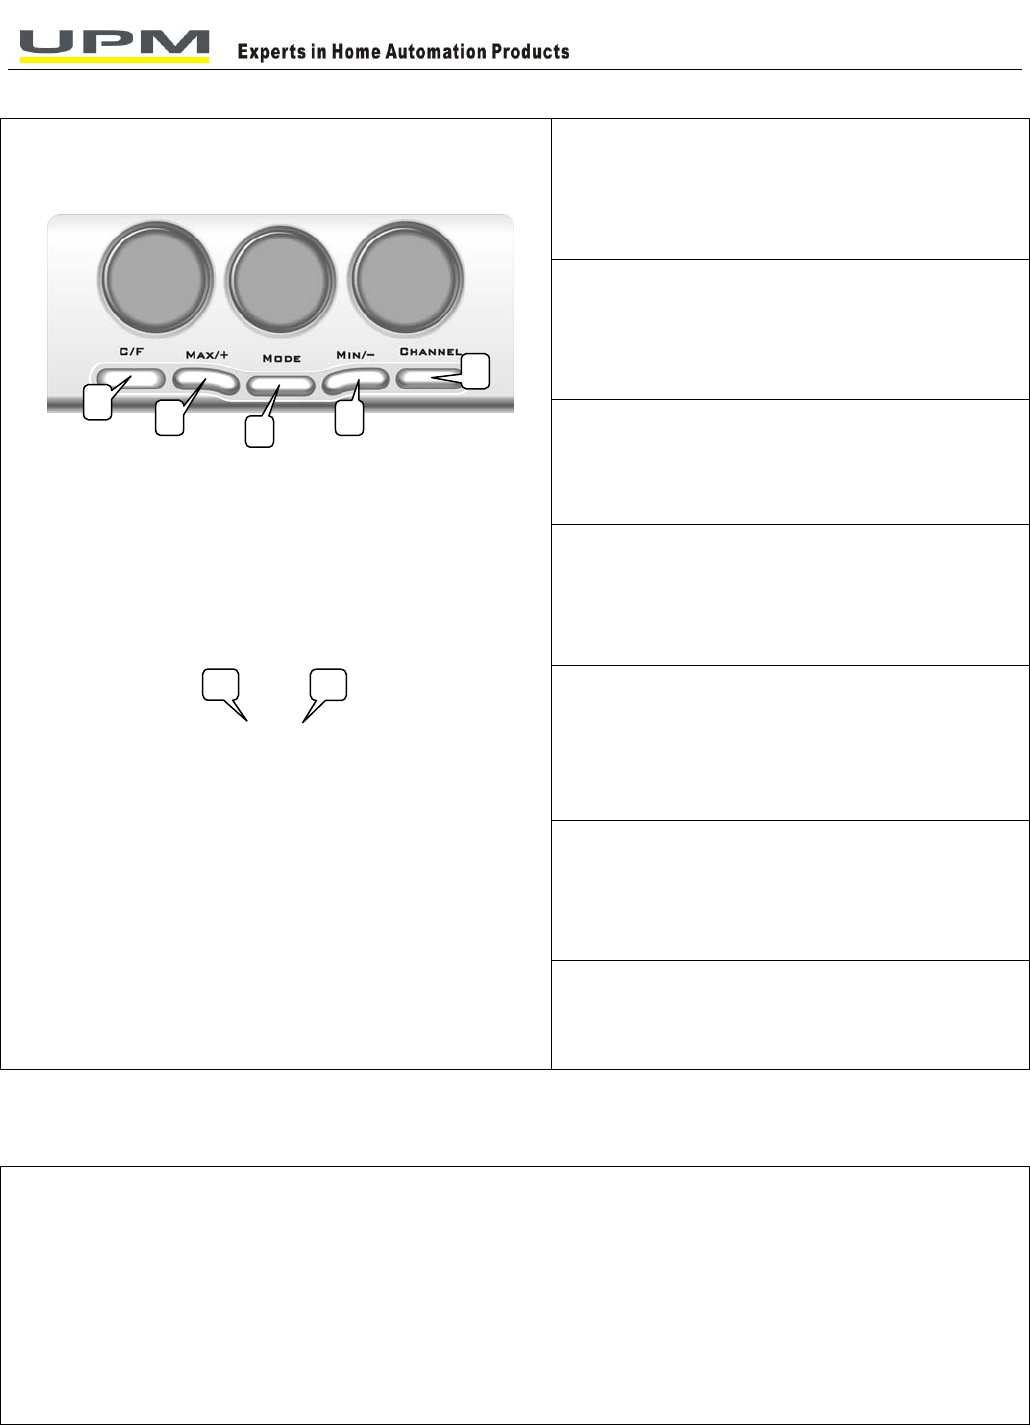
KNOW YOUR PRODUCT
1. °C / °F
Change between °C or °F display format
2. MAX / +
Increase the value during setting status /
Show maximum temperature detected by local
and remote sensors
3. MODE
Scroll between clock, date setting mode
12/24 hr clock display selection
4. MIN / -
Decrement the value during setting status /
Show minimum temperature detected by local
and remote sensors
5. CHANNEL
Scroll through remote channels 1-4 /
Manual start remote channel learning
6. SET
Confirm “House Code” (“01” to “15”) & Channel
(“1” to “4”)
Function setting of WS1200:
Function setting of remote transmitter WT490:
7. C/F
Select channel (1-4)
READ THIS BEFORE YOU BEGIN
For the best operation:
1. Insert batteries for remote transmitter(s) first, and then the receiver
2. Place the receiver and remote transmitter(s) close together. This will ensure that the receiver can
synchronize with remote transmitter(s).
3. Place the remote transmitter(s) within effective transmission range.
* Although remote transmitter are weather proof, it is recommended to place it away from direct sunlight, rain or snow. This will help to
make measurement more accurate.
# The building materials and where the receiver and remote transmitter are positioned vastly affect the effective range. Try various set-ups
for best result.
2 3 4
5
1
6 7

3 of 6
GETTING STARTED
Warning: Any changes or modifications made to this equipment not expressly approved by
Mandolyn Electronic Ltd. may void the FCC authorization to operate this equipment.
USING THE THERMOMETER FOR THE FIRST TIME
! Set up the transmitter for use first so that the base station can receive a signal immediately.
Step 1: Using the transmitter for the first time
1. Open the battery compartment of the transmitter.
2. Insert 2xAA batteries included with purchase. Ensure correct polarity +/- as shown in the compartment.
Replace the cover.
3. Once the batteries are inserted correctly, the display will show “01H” for House Code, and the range of House
Code is from “01” to “15”, change the House Code by pressing C/F key and SET key to confirm. Make sure all
transmitters in your system are set to the same House Code.
Note: It is highly recommended to change to different House Code if interference is experienced.
4. After the House Code is set, it goes to Channel setting, and there is a number 1 is flashing at the left-hand side
of LCD. Same as House Code setting, pressing C/F key to change the Channel and SET key to confirm. After this,
it will go to Temp unit setting.
Note: if there are more than 1 transmitters need to be connect to same receiver, then the House Code of all the
transmitter should be the same but the Channel number is different.
5. The temp display will be flashing after the Channel, and pressing C/F to toggle between C and F display. Then, it
can leave it and the transmitter will transmit the 1st signal automatically. If pressing SET key, then will go back to the
house code setting again.
6. Once setup of remote transmitter is completed, it will start transmission in one minute interval.
*The setting is confirmed automatically if it is in idle for 8 seconds.
*Use different house code if your weather station detected other signals from neighboring sources
*Factory default: house code=01 and channel=01
Step 2: Setting the base station
1. Remove battery cover and insert 2xAA size batteries, ensure correct polarity + / - as shown in the compartment,
replace the cover.
4 of 6
SYNCHRONIZE
Automatic Learn Function:
1. After inserting the batteries, the indoor temperature is displayed.The base station now tries to pick up signals
from sensors for 3 minutes.If no signal is detected, bars are shown on the display.
2. As soon as the base station has detected a sensor signal, the display then shows the temperature value
received from the sensor.
3. If reception is lost before the time can be set, then place the base station, which has better reception, such as,
near a window. Please re-do the above procedure to restart the search for signals from sensors.
*If the signals are not received within this 3 minutes, the outside temperature will show ”- - -“ , during this time, bringing the unit close
together or try different location and restart the auto learning function by removing and replacing the batteries for receiver.
Manual-Learn function (Searching for Remote Signals):
If a new transmitter is added or if signal is lost (outdoor display blinking), learn function must be executed again.
1. Press the “Channel” button and hold for 3 seconds. The Outdoor symbol starts to flash and the base station
confirms your setting by sounding an audible tone.
2. As soon as the base station has detected a sensor signal, the base station display then shows the temperature
value received from the sensor.
3. It is recommended to place the transmitter and receiver together during synchronization process. If the green
indicator of transmitter flashes and the data is shown onto the receiver, this process is considered to be
successful; otherwise, it is recommended to repeat this process.
CLOCK/DATE SETTING
Clock / Date / Month / Year Setting:
1. Hold “Mode” key to go into Clock Setting Mode;
2. Press “MAX / +” key to increase hour digit and “MIN / -” key to increase min digit;
3. Press “Mode” key to go into Date Setting Mode;
4. Press “MAX / +” key to increase Date digit and “MIN / -” key to increase Month digit;
5. Press “Mode” key to go into Year Setting Mode;
6. Press “MAX / +” key to increment and “MIN / -” key to decrease Year digit;
7. Press “Mode” key to cease the setting and back to clock display
8. Press “Mode” at clock display mode to change between 12/24 hr display
5 of 6
TEMPERATURE DISPLAY
Check Local Temperature:
1. After insert batteries, indoor temperature will display
Check Remote Temperature:
2. Press “CHANNEL” to toggle between channel 1,2,3 and 4
oC or oF Temperature Display:
3. Toggle between oC and oF by pressing “C / F”
Max and Min Temperature Display:
4. Press “MAX / + “ to display maximum temperature
5. Press “MIN / -” to display minimum temperature
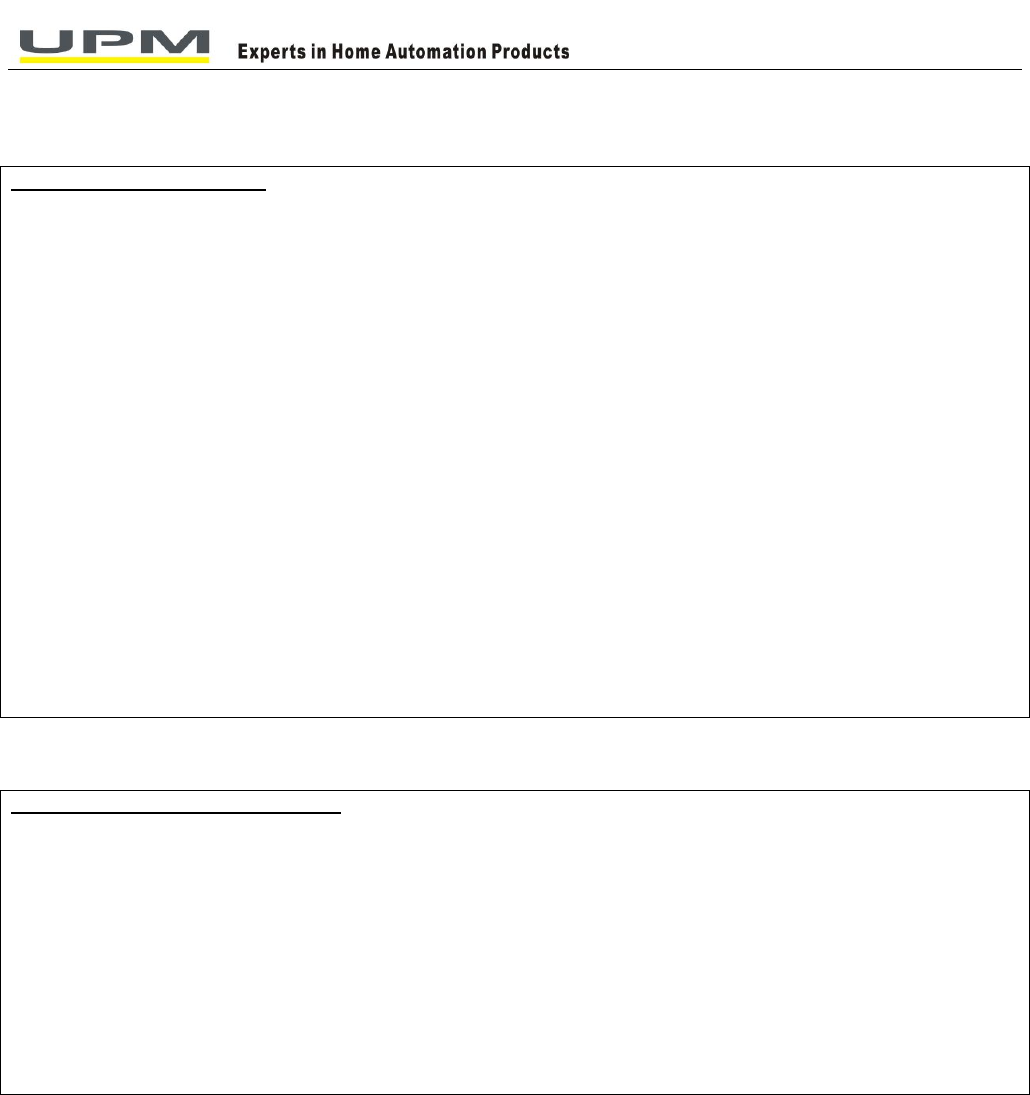
Temperature Trend Indicator:
The trend indicator shows the trend of temperature determined by the particular sensor in the
past half-hour interval
Arrow Indicator
Trend Rising Steady Falling
LOW BATTERY INDICATION
Transmitter:
1. When the batteries are running out, low battery symbol will display onto the receiver as well as transmitter.
It will directly degrade the performance, for example:
- the LCD display is faint ;
- may cause the transmission range to be limited and lose the data with receiver
2. You will need 2 x AA batteries and re-perform the setting of transmitter
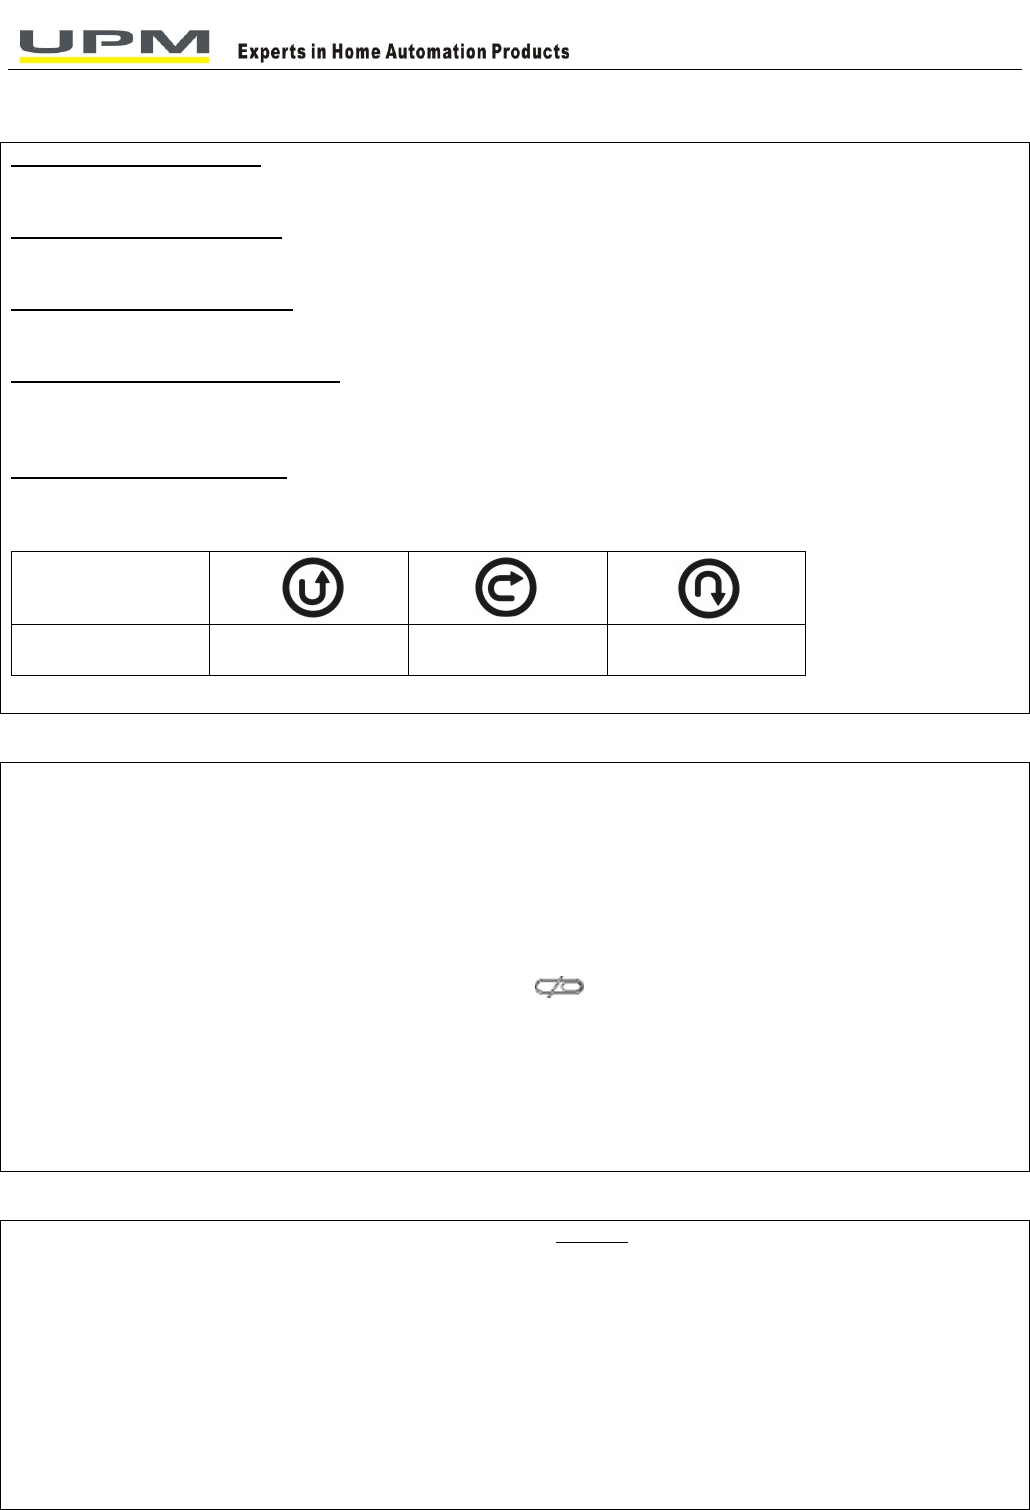
Base Station:
1. When the batteries are running out , low battery symbol “ ” will display under the temperature digit.
It will directly lower the receiver’s performance, for example:
- the LCD display is faint ;
- may cause the transmission range to be limited and lose the data from remote transmitter(s)
2. You will need 2 x AA batteries for the base station
- Changing the batteries in the base station will cause all settings to be erased
TROUBLESHOOTING
1. Base station is no longer receiving remote sensor
signals or display
2. Operation is not normal or certain functions do not
perform
Solution
1. -Repeat the learning procedures
-Temperature may be below -30oC
-Batteries in remote sensor may need changing
-Move remote sensor closer to the receiver
-Make sure remote sensor is away from sources of
electrical disturbance
2. Device requires reset. Reset the device by replacing
new batteries in both transmitters and receiver
SPECIFICATION

6 of 6
Base Station: WS1200
Battery Type: 2 x 1.5V AA batteries
Operation Temperature Range: -5 oC~+50 oC
Remote Transmitter: WT440
Battery Type: 2 x 1.5V AA batteries
Operation Temperature Range: -30 oC~+60 oC
Transmission Frequency: 433.92MHz
Transmission Range: Up to 40 meters in open area
FCC Statement
The statement required by 15.105 is as follows:
This equipment has been tested and found to comply with the limits for a Class B digital device, pursuant to Part
15 of the FCC Rules. These limits are designed to provide reasonable protection against harmful interference in
a residential installation. This equipment generates, uses and can radiate radio frequency energy and, if not
installed and used in accordance with the instructions, may cause harmful interference to radio communications.
However, there is no guarantee that interference will not occur in a particular installation. If this equipment does
cause harmful interference to radio or television reception, which can be determined by turning the equipment off
and on, the user is encouraged to try to correct the interference by one or more of the following measures:
- Reorient or relocate the receiving antenna.
- Increase the separation between the equipment and receiver.
- Connect the equipment into an outlet on a circuit different from that to which the receiver is connected.
- Consult the dealer or an experienced radio/TV technician for help.
Statement required by 15.19 and RSS210
This device complies with Part 15 of the FCC Rules and with RSS-210 of Industry Canada.
Operation is subject to the following two conditions:
(1) this device may not cause harmful interference, and
(2) this device must accept any interference received, including interference that may cause
undesired operation.