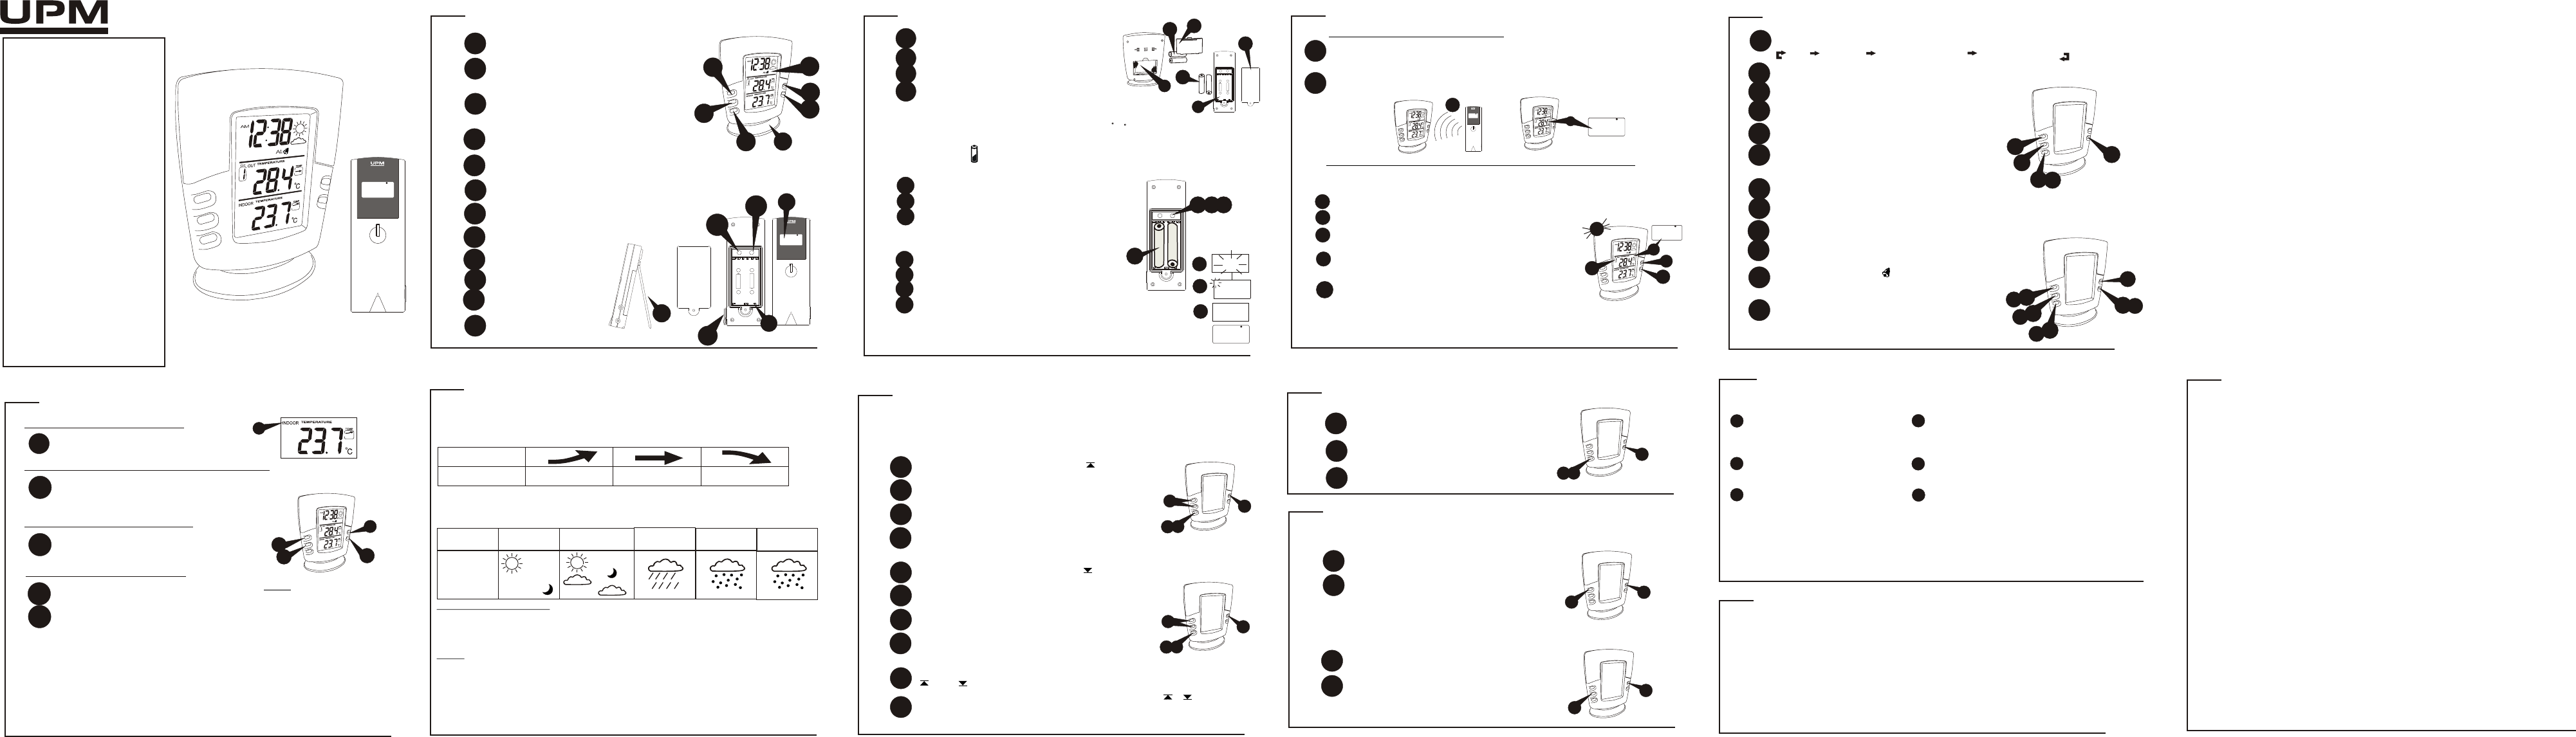
Mandolyn Electronic Technology WS330 Weather Station Receiver User Manual WS330 WT440H English Use Manual
Mandolyn Electronic Technology Inc. Weather Station Receiver WS330 WT440H English Use Manual
Users Manual
28.4
c
1
28.4
c
1
WS330 + WT440H
Wireless Weather Station
GETTING STARTED battery installation
GETTING STARTED
1
1
2
remove battery cover
2 AA size batteries (WS330)
2 AA size batteries (WT440H)
Insert between terminals observing
proper polarity then replace cover
LOW BATTERY INDICATION: Low battery indication will be indicated by
flashing trend box on the receiver (for both indoor & outdoor).
On transmitter, will be displayed
button placement
1
2
3
4
1
2
3
4
5
CHANNEL - scrolls through remote
channels 1-4
ALARM/ (AM/PM)/ (C/F) - toggles between C
and F, 12 and 24 hour format, turns alarm
on/off; clears temperature alarm presets
MODE/SNOOZE - scrolls through time,
alarm and temperature alarm set points
(high/low); activates alarm snooze
UP/HOUR/MAX - scrolls through hours; shows
maximum temperature
DOWN/MINUTE/MIN - scrolls through
minutes; show minimum temperature
WS330 receiver
WT440H transmitter
1Press & hold ALRAM/(AM/PM)/(C/F) for 3 seconds to start.
2Beep sound indicates that learn function has started.
3CHANNEL symbol will flash and unit will
beep as each transmitter is detected.
3
1
4
5
Insert batteries to start setup
HOUSE CODE will flash for 8 seconds
Select HOUSE CODE (1-15) by pressing
CHANNEL will flash for 8 seconds
Select CHANNEL(1-4) by pressing C/F
2
Transmitters for each receiver must be
set to the same HOUSE CODE
6
7
Humidity & Temperature will display
Select C o r F of Temperatu re by pr essing C/F k ey
setting remote transmitters
clock setting
3
1
4
5
Press and hold MODE until time flashes
Select hour using HOUR
Select minute using MINUTE
Press AM/PM to toggle between
12 or 24 hour format
Press MODE to finish setting
2
CLOCK & ALARM SETTING
alarm setting
3
*
Select alarm mode using MODE
Select hour using HOUR
Select minute using MINUTE
In alarm mode, press ALARM to toggle
alarm On and Off
2
1
4
5
c
b
Modes are arranged in a circular pattern starting with clock:
*
*
clock alarm clock high temperature alarm low temperature alarm
Congratulations on your purchase of this
weather station set, WS330 + WT440H.
Please take the time to read and
understand this manual so you can begin
to enjoy the convenience and features this
product has to offer.
FEATURES
Main Display Unit WS330:
* 12/ 24 hour clock and alarm
* local temperature display
* receives and displays temperature and
humidity readings from up to 4 remote
transmitter via RF technology of 433MHz
* minimum and maximum temperature
record
* high/ low temperature alarm function
* temperature and humidity trend indicator
* weather report symbols
* user-selectable C or F
* battery type: 2 x AA
Remote Transmitter WT440H
* drip-proof design with LCD
* socket of external sensor probe
* temperature display in user-selectable C
or F
* humidity display
* transmission range: up to 40 meters in
open area
* battery type: 2 x AA
OWNERS
MANUAL
high temperature alarm
SPECIFICATIONS
Weather Station Receiver WS330
Battery Type: 2 X 1.5V AA batteries
Temp. Range: -20C to +55C
Weather Station Transmitter WT440H
Battery Type: 2 X 1.5V AA batteries
Temp. Range: -30C to +70C
Humidity Range: 15 to 95%
Transmission Frequency: 433.92 MHz
Transmission Range: up to 40 meters
in open area
TEMPERATURE ALARM
The temperature alarm function allows you to have an alarm sound if
the temperature rises above or drops below a particular set point.
low temperature alarm
to clear high/low temperature alarm
1Select high/low temperature alarm
set point using MODE
2Press ALARM to clear value
Press MODE to finish setting
3
OTHER FEATURES
1
2
Toggle between current and maximum
temperature using MAX
Press CHANNEL to view the maximum
temperature for other channels
to view minimum temperature
1
2
Toggle between current and minimum
temperature using MIN
Press CHANNEL to view the minimum
temperature for other channels
to view maximum temperature
2
1
2
1
14
3
1
13
14
2
1
When alarm sounds, the sounding channel is displayed, and or
flashes to indicate whether it is the high or low temperature alarm.
Press any button to shut off alarm.
1Select high temperature alarm mode using MODE
3Press DOWN or UP to set high
temperature
Press MODE to finish setting
4
2Select channel (1, 2, 3, 4 or local) using CHANNEL
*Once the high/low temperature alarm is set for a particular channel,
and/or will appear on display for that channel
1Select low temperature alarm mode using MODE
3Press DOWN or UP to set low
temperature
Press MODE to finish setting
4
2Select channel (1, 2, 3, 4 or local) using CHANNEL
*
32
2
The trend indicator shows the trend of temperature and humidity
determined by the particular transmitter in the past half-hour interval.
The receiver is able to monitor and display the weather status based on
collected data from Channel 1.
About Freeze Warning
* Snow symbol will flash to warn of 'freezing'.
* Activated when Channel 1's temperature is between -1.9 C and +2.9 C
* Snow will appear solid if and when Channel 1's temperature falls below -1.9 C.
Note:
* Initially, the weather will be cloudy
* Remote transmitter Channel 1 will be used for weather indication.
* If Channel 1 is empty, then weather will always be cloudy.
* If Channel 1 has no humidity data, weather indication will always be
cloudy, but freeze warning and snow indication will be available.
weather report symbols
WEATHER DISPLAY
Arrow Indicator
Rising Steady Falling
Trend
Weather
Indicator
OR
OR
temperature & humidity trend
Raining Snowing
Sunny Cloudy
Freeze
Warning
<flashing snow>
Check Remote Temperature & Humidity
Check Local Temperature
C or F Temperature Display
Min and Max Temperature
A
*
B
C
D
WEATHER DISPLAY
Press CHANNEL to toggle between Channel 1, 2, 3 and 4.
Temperature and humidity readings will alternate
on the receiver.
Local temperature displays instantly after
batteries are inserted.
Toggle between C and F by pressing
C/F in clock mode.
Press MIN in Clock mode to display
minimum temperature record
Press MAX in Clock mode to display
maximum temperature record
Note:
Min/Max temperature
records are automatically
cleared daily at 00:00
*
1
2
SETUP
Automatic Learn Function:
Learn function executes automatically and runs for approximately 3
minutes when batteries are first installed in the receiver.
If a new remote transmitter is added or if signal is lost (outdoor display
blinking), learn function must be executed again.
Within these 3 minutes, receiver picks up the temperature &
humidity signals from remote transmitter and displays the readings.
synchronization
4Temperature & humidity readings of remote
transmitter displays on the receiver.
Manual-Learn (Searching for Remote Signals):
f
When alarm sounds, will flash
Press SNOOZE to snooze the alarm for 5 minutes.
After that the alarm will sound again.
Press ANY other key will shut off the alarm.
Without interruption, alarm will shut off
automatically after one minute.
e
a
b
c
d
F
f
a
e
ff
f
d
D
B
A
C
3
4
* Use a different house code if your weather station detecTs other
signals from neighboring sources
* Factory default: house code = 01 and channel = 01
7
10
11
12
8
9
SET: enter to House code and Channel
setting mode
C/F: change between C or F, change
channel and house code
Battery compartment
LCD display
Socket for external
sensor probe.
Wall Mount Holder &
Table Stand
7
11
6
12
6Table Stand
10
ii
ii ii
iii iii
Re-synchronize receiver by holding ALARM
for 3 seconds until a beep is heard.
Ensure the remote transmitter is out of direct sunlight,
and away from sources of heat.
- Repeat the learning procedures.
- Temperature may be below -30
transmitter
transmitter
transmitter
C.
- Batteries in remote may need changing.
- Move remote closer to the receiver.
- Make sure remote is away from sources of
electrical disturbance.
The temperature measurement of
remote transmitter and receiver does
not match.
Temperature reading of the outdoor
remote transmitter seems too high.
Receiver is no longer receiving
remote transmitter signals or
temperature display reads Lo
problem solution
TROUBLESHOOTING
1
2
5
Press & hold Channel for 3 seconds to start auto
channel scroll function. In this mode, the display will
scroll through the data from all the valid channels,
each of which will be shown for 8 seconds.
2
3
1
4
*
*
3
Press & hold Channel for 3 seconds again to disable this function.
1
1
2
4
4
3
RF WIRELESS
WEATHER
TRANSMITTER
23.1
c
1
RF WIRELESS
WEATHER
TRANSMITTER
23.1
c
1
RF WIRELESS
WEATHER
TRANSMITTER
23.1
c
1
SET C/F
-
AA 1.5V
+
-
AA 1.5V +
SET C/F
-
AA 1.5V
+
-
AA 1.5V +
810
99
2
4
6
23.1
c
1
50 %
1
01h
1
01h
1
SET C/F
-
AA 1.5V
+
-
AA 1.5V +
357
1
NOTICE
This equipment has been tested and found to comply with the limits for
a Class B digital device, pursuant to Part 15 of the FCC Rules. These
limits are designed to provide reasonable protection against harmful
interference in a residential installation. This equipment generates,
uses and can radiate radio frequency energy and, if not installed and
used in accordance with the instructions, may cause harmful
int er feren ce to radi o communi cati ons. How ever, th ere is no gua ran tee
that interference will not occur in a particular installation. If this
equi pmen t does cause har mfu l in ter feren ce to radi o or telev isi on
recept ion, w hich ca n be deter min ed by tur nin g the equ ipm ent off an d
on, the user is encour aged t o tr y to correct th e inter feren ce by one or
more of th e follow ing m easur es:
* Reori ent or rel ocate th e receiv ing a nten na.
* Incr ease the sepa rat ion bet ween th e equip ment an d recei ver.
* Conn ect the equi pment int o an outl et on a circu it di ffer ent fr om that
to whi ch the recei ver i s connected .
* Consu lt th e dealer or an exp eri enced ra dio/ TV techn ici an for h elp.
Warning:
Changes or modifications made to this equipment not expressly
approved by the manufacturer may void the FCC authorization to
operate this equipment.