EFLH2580 Bind Instructions
User Manual: Manual Blade mCX Tandem Rescue BNF | HorizonHobby
Open the PDF directly: View PDF ![]() .
.
Page Count: 2

The Blade Tandem Rescue BNF requires you to bind to your own compatible DSM2™
aircraft transmitter.
Binding is the process of programming the receiver of the control unit to recognize
the GUID (Globally Unique Identifier) code of a single specific transmitter. You need to
“bind” your chosen Spektrum DSM2 technology equipped transmitter to the receiver
for proper operation.
The following is a list of some of the Spektrum DSM2-equipped transmitters and
modules we recommend for the Blade Tandem Rescue BNF.
• E-flite MLP4DSM
• E-flite LP5DSM
• ParkZone Vapor/Ember 2 Transmitter
• JR 12X 2.4/JR X9303 2.4
• Spektrum DX5e/Spektrum DX6i
• Spektrum DX7/DX7se
• All Spektrum Air Modules
Note: The Spektrum DX6 (SPM2460) is equipped with DSM (not DSM2)
technology and is not compatible with the receiver of the Blade Tandem Rescue
Helicopter.
Blade® mCX Tandem Rescue
Helicopter Bind-N-Fly Addendum
EFLH2580
© 2010 Horizon Hobby, Inc.
US patent D578,146. PRC patent ZL 200720069025.2.
Multiple patents pending
DSM and DSM2 are trademarks or registered trademarks of Horizon Hobby, Inc.
The Spektrum trademark is used with permission of Bachmann Industries, Inc.
Spektrum radios and accessories are exclusively available from Horizon Hobby, Inc.
E-fliteRC.com
18269
Printed 01/10
Declaration of Conformity
(in accordance with ISO/IEC 17050-1)
No. HH20100106U1
Product(s): EFL Blade Tandem Rescue Heli BNF
Item Number(s): EFLH2580EU
Equipment class: 1
The object of declaration described above is in conformity with the requirements of the
specifications listed below, following the provisions of the European R&TTE directive 1999/5/EC:
EN 301 489-1, 301 489-17 General EMC requirements for Radio equipment
Signed for and on behalf of:
Horizon Hobby, Inc.
Champaign, IL USA
Jan. 06, 2010
Steven A. Hall
Vice President
International Operations and Risk Management
Horizon Hobby, Inc.
Transmitter-Specific Binding Instructions
MLP4DSM and ParkZone Vapor/Ember 2 Transmitter:
1. After verifying the LED is flashing on the receiver/5-in-1, PUSH directly down on
the left-hand stick while switching the transmitter on (you will feel a ‘click’ when
you push in on the end of the stick).
2. After approximately 5–10 seconds the receiver/5-in-1 should be bound to the
transmitter and you should have full control and function.
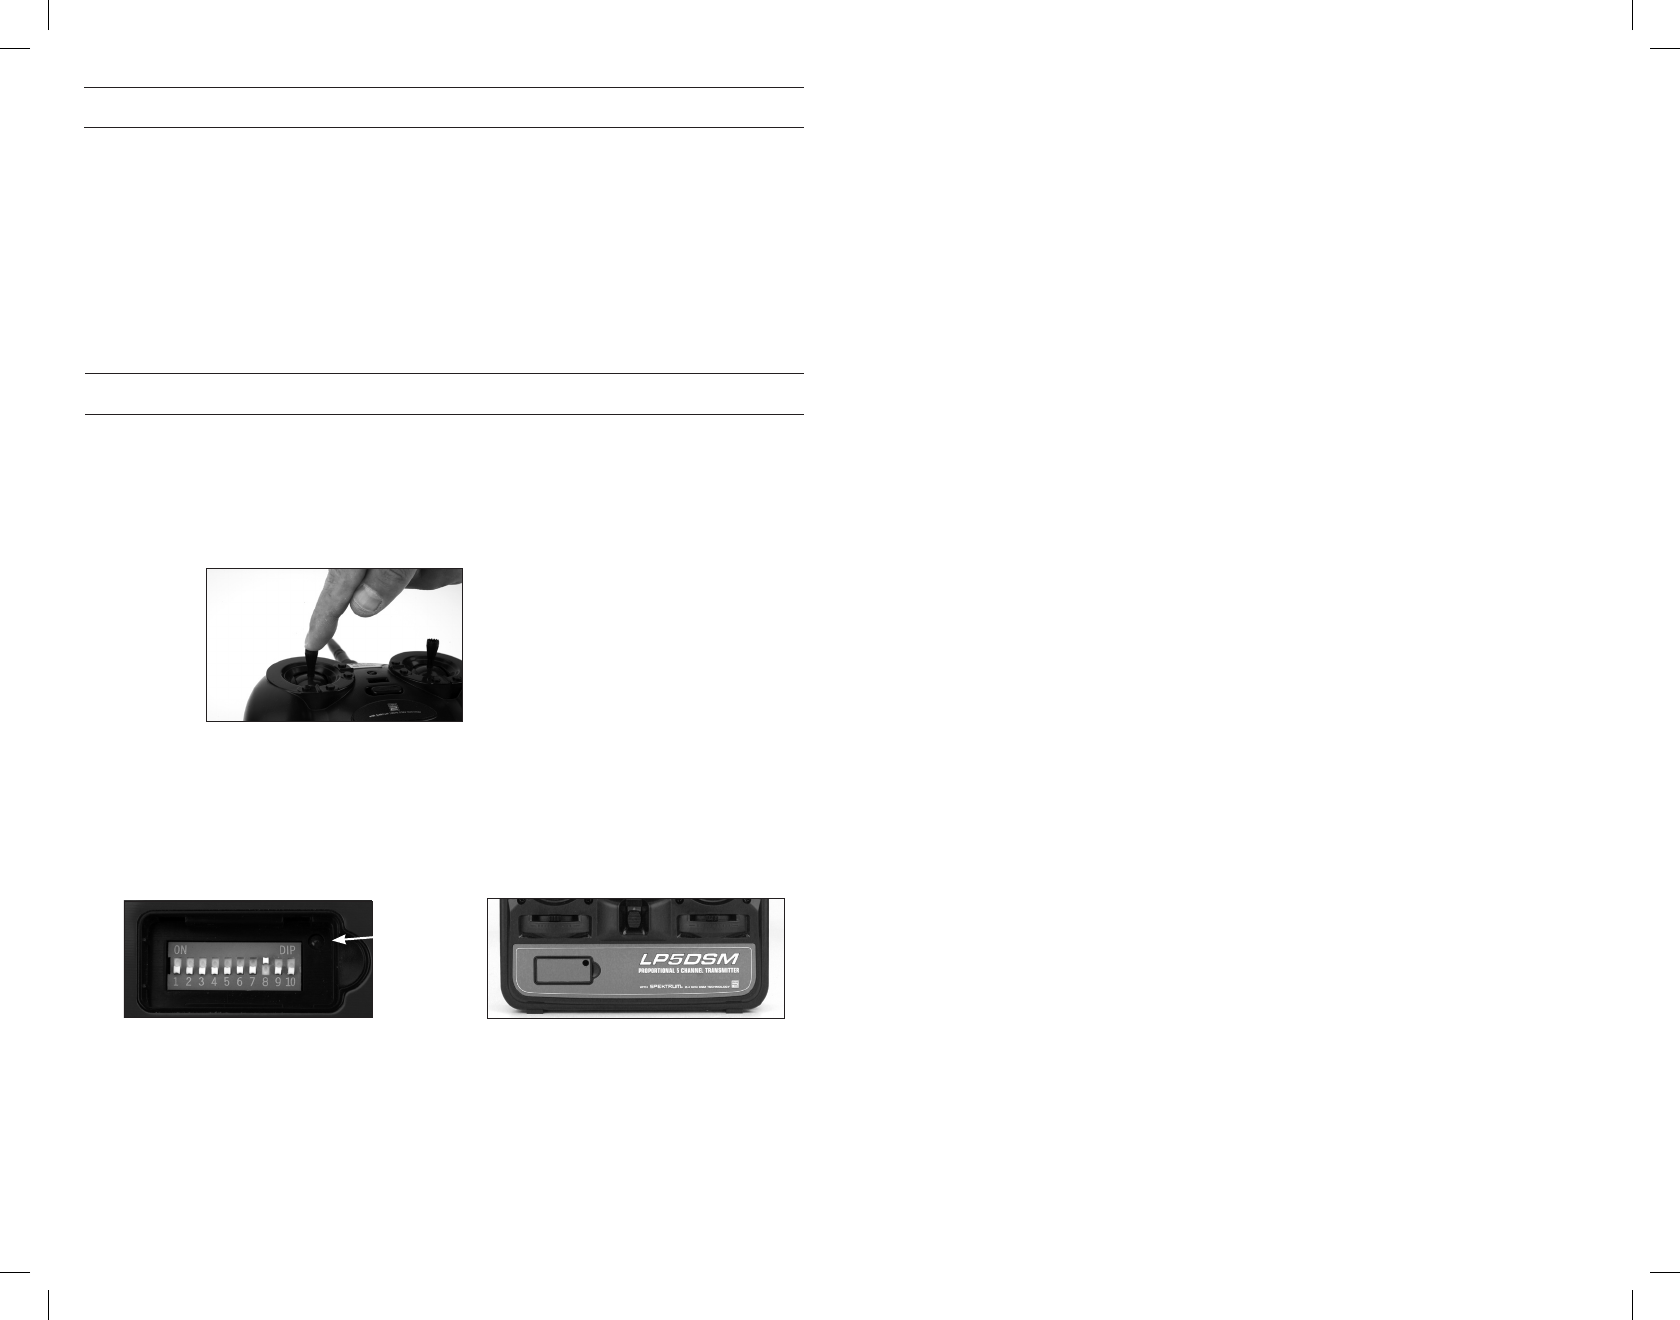
LP5DSM Transmitter:
If you decide to use an E-flite LP5DSM transmitter, please position your channel
reversal dip switches as follows:
1. Plug the flight battery into the 5-in-1 unit. After 5 seconds the LED on the 5-in-1
unit will begin flashing.
2. Move the sticks and switches on the transmitter to the desired failsafe positions
(low throttle and neutral control positions).
3. Turn the transmitter on. The red LED located under the door on the bottom left
front of the transmitter will blink rapidly.
4. After approximately 5–10 seconds the LED on the receiver/5-in-1 will go solid red;
the system will connect after several seconds.
DX5e or DX6i:
1. Plug the flight battery into the 5-in-1 unit. After 5 seconds the LED on the 5-in-1
unit will begin flashing.
2. Move the sticks and switches on the transmitter to the desired failsafe positions
(low throttle and neutral control positions).
3. Pull and hold the Trainer Switch on the transmitter while turning the transmitter
on. For DX5e: Release the trainer switch once the LEDs on the front of the
transmitter flash. For DX6i: Release the trainer switch once “BIND” Flashes on the
LCD screen of the transmitter.
4. After approximately 5–10 seconds the LED on the receiver/5-in-1 will go solid red;
the system will connect after several seconds.
DX7, DX7se, X9303, or 12X:
1. Plug the flight battery into the 5-in-1 unit. After 5 seconds the LED on the 5-in-1
unit will begin flashing.
2. Move the sticks and switches on the transmitter to the desired failsafe positions
(low throttle and neutral control positions).
3. Press the bind button on the back of the transmitter while turning the transmitter
on. The bind button on the back of the transmitter will flash. Release the button
after 2–3 seconds.
4. After approximately 5–10 seconds the LED on the receiver/5-in-1 will go solid red;
the system will connect after several seconds.
The transmitter is now bound to the airplane. If you encounter any problems, repeat
the binding process again or call the Horizon Support Team at:
United States 1-877-504-0233
Horizon Hobby UK +44 (0) 1279 641 097
Horizon Technischer Service in Germany +49 4121 46199 66
Horizon Hobby SAS in France +33(0)1.60.47.44.70
Additional Binding Information
Prior to each flight, power on your transmitter and wait about five seconds before
you plug the flight battery into the receiver. This allows time for the transmitter to
scan and secure two open frequencies. If you plug the flight battery in too quickly
and miss the link, the receiver may inadvertently enter bind mode. If this occurs
leave the transmitter on, then disconnect and reconnect the flight battery.
The Binding Process
• Make sure the flight battery is disconnected from the 5-in-1 unit and the transmitter
is turned off.
• Plug the flight battery into the 5-in-1 unit in the helicopter.
• After 5 seconds the LED on the 5-in-1 unit will begin flashing. Perform the
Transmitter-Specific Binding Instructions detailed below and following.
• We recommend you start with your transmitter set to default (or reset) aircraft
settings.
LED
LP5DSM
Transmitter
