Marelli Europe S p A EE0001 EE0001 User Manual
Magneti Marelli S.p.A. EE0001 Users Manual
Users Manual

Owner's Handbook for Navigation, Entertainment,
Communication
Congratulations on your choice of a BMW.
The more familiar you are with the systems of your BMW, the
more you can master their operation. We would therefore like to
offer you the following advice:
Please read the Owner's Handbook before setting out in your
new BMW. Also use the integrated Owner's Handbook in your
vehicle. It contains important notes on how to operate your Nav‐
igation, Entertainment, Communications systems, enabling you
to derive maximum benefit from the technical advantages of
these systems.
If applicable, you will find updates after the editorial deadline in
the appendix of the Owner's Handbook for the vehicle.
Supplementary information is provided in the other documents
of on-board literature.
We wish you a safe and pleasant journey.
The Owner's Handbook is available as an app in many coun‐
tries. You will find further information on the Internet at:
www.bmw.com/bmw_drivers_guide
Online Edition for Part no. 01 40 2 976 378 - X/16

© 2016 Bayerische Motoren Werke
Aktiengesellschaft
Munich, Germany
Not to be reproduced, wholly or in part, without written
permission from BMW AG, Munich.
English X/16, 11 16 490
Printed on environmentally friendly paper, bleached
without chlorine, suitable for recycling.
Online Edition for Part no. 01 40 2 976 378 - X/16
Contents
For quick access to a particular topic or item,
please consult the detailed alphabetical index,
see page 122.
Navigation
8Overview
9Destination input
14 Journey
17 Map
24 Settings
27 Split screen
28 Traffic information
31 Navigation data
32 Frequently Asked Questions
Entertainment
36 General
38 Sound
41 Radio
46 Audio
57 Video
60 Television, TV
63 Audio remote control in the rear
64 Rear entertainment
Communication
76 Telephone
107 Services and applications
Reference
122 Everything from A to Z
Online Edition for Part no. 01 40 2 976 378 - X/16

Online Edition for Part no. 01 40 2 976 378 - X/16

Navigation
Various examples of how the navigation system
reliably guides you to your destination are shown
here.
Online Edition for Part no. 01 40 2 976 378 - X/16

Overview
Vehicle equipment
This chapter describes all standard, national
and special equipment provided in the model
series. Equipment not available in the vehicle is
therefore also described, for example the se‐
lected special equipment or country variant.
This also applies to safety-relevant functions
and systems. Comply with the relevant laws
and regulations when using the corresponding
functions and systems.
General
The navigation system can determine the pre‐
cise position of the vehicle by means of satel‐
lites and guide you reliably to any specified
destination.
Navigation data is saved in the vehicle and can
be updated with a USB data storage medium.
Calling up navigation system
1. Press the button on the Controller.
2. "Navigation"
Safety instructions
WARNING
Operating integrated informations sys‐
tems and communication devices during the
journey can distract from traffic. You could lose
control of the vehicle. Danger of accidents.
Only operate the systems or devices if permis‐
sible in the traffic situation. Stop if necessary
and operate the systems or devices with the
vehicle at a standstill.◀
WARNING
Deviations can occur between the cur‐
rent traffic situation and the instructions given
by the navigation system, e. g changes in road
routing or roadworks. Danger of accidents. Al‐
ways obey the traffic regulations and road
signs.◀
Seite 8
Navigation Overview
8Online Edition for Part no. 01 40 2 976 378 - X/16

Destination input
Vehicle equipment
This chapter describes all standard, national
and special equipment provided in the model
series. Equipment not available in the vehicle is
therefore also described, for example the se‐
lected special equipment or country variant.
This also applies to safety-relevant functions
and systems. Comply with the relevant laws
and regulations when using the corresponding
functions and systems.
Entering destination using
address
General
If only the town/city has been entered, route
guidance to the town/city centre is started.
Selecting country
1. "Navigation"
2. "Address input"
3. "Country?"
4. Tilt the Controller to the right to select the
country from the list.
Entering an address
1. "Town/Postcode?"
2. Enter letters or numbers.
Tilt the Controller to the right to select the
town/city or postal code from the list.
3. "Street?"
4. Enter street in the same way as town/city.
5. "House number/Road junction?"
6. Switch to the list of house numbers and
junctions.
7. Select house number or junction.
Alternative: entering a street and
junction
1. "Street?"
2. Enter street in the same way as town/city.
3. "House number/Road junction?"
4. Switch to list of intersections.
5. If applicable, "Road junctions"
6. Select required intersection.
Searching by street
The desired road/street is not in the entered
town/city because it is part of another city dis‐
trict.
1. "Navigation"
2. "Address input"
3. Select "Street?" or the displayed street.
4. Move to the list of street names.
5. "in:" Select displayed country or town/city.
All the roads/streets of the selected coun‐
try are offered. The respective town/city is
shown after the street name.
6. Select the letters.
7. Move to the list of street names.
8. Select the street.
Starting route guidance
"Start route guidance" or add an intermediate
destination, see page 14.
Last destinations
General
The last destinations reached are saved auto‐
matically.
Seite 9
Destination input Navigation
9
Online Edition for Part no. 01 40 2 976 378 - X/16
Calling up destination from last
destinations
1. "Navigation"
2. "Recent destinations"
3. Select destination.
Deleting the last destinations
1. "Navigation"
2. "Recent destinations"
3. Highlight destination.
4. Press the button.
5. "Delete destination" or "Delete all recent
destinations"
Quick search
General
Depending on the equipment version, Points
of Interest and addresses can be searched on‐
line or in the navigation data saved in the vehi‐
cle by entering a sequence of letters online.
All entries containing this sequence of letters
is shown.
You can search for town/city and street at the
same time. To do this, enter a sequence of let‐
ters for the town name, then a space, and then
a sequence of letters for the street name.
Calling up quick search
1. "Navigation"
2. "Enter new destination"
3. "Quick search"
4. Enter at least three letters or characters.
5. Select symbol as appropriate.
Results are shown as a list.
Vehicles with charge point: Display of
charging stations, see page 12.
6. Tilt the Controller to the right.
7. Select desired destination.
Destination input by voice
control
General
▷For the handbook for the voice control sys‐
tem, see Owner's Handbook for the vehi‐
cle.
▷A changeover between voice operation
and iDrive is possible when entering desti‐
nations using spoken commands.
▷Having possible voice commands read
aloud: ›Voice commands‹ or ›Help‹.
Voice commands
▷Complete addresses can be spoken in a
single command or countries, towns/cities,
roads and junctions can be spoken as
whole words. To do so, the language of the
system must be set to the language of the
country of destination.
▷Addresses can be spelled if the language
of the system and the language of the
country of destination are set differently.
Pronounce letters fluently and avoid ex‐
cessive intonation and pauses.
▷The options for input depend on the spe‐
cific navigation data, country and language
settings.
Entering an address in a command
1. Press the button on the steering
wheel.
2. ›Enter destination‹
3. Wait for the prompt from the voice control
system.
4. Say the address aloud in the sequence
suggested.
5. Continue input as specified by the voice
control system.
If required, say each part of the address sepa‐
rately, for example town/city.
Seite 10
Navigation Destination input
10 Online Edition for Part no. 01 40 2 976 378 - X/16

Home address
Accepting your home address as a
destination
The home address must be created.
1. "Navigation"
2. "Enter new destination"
3. "Home address"
Defining the home address
1. "Navigation"
2. "Enter new destination"
3. "Set home address"
4. Enter the address and possibly the name
and other details.
Changing the home address
The home address is saved in contacts and
can be changed there. Editing contacts, see
page 80.
Points of interest
General
Points of Interest are special locations that can
be useful during a journey. Points of Interest,
such as restaurants, hotels or service stations/
charging stations, can be accepted as a desti‐
nation. Even with the most up-to-date naviga‐
tion data, information on individual points of in‐
terest may have changed, for example, service
stations may not be in operation.
Searching points of interest
Calling up Point of Interest search
1. "Navigation"
2. "Enter new destination"
3. "Points of interest"
4. Select the desired setting.
▷"Online search": search for Points of
Interest on the Internet.
▷"Keyword search" or "Category
search": search for Points of Interest in
navigation data saved in the vehicle.
▷Search using preferred Point of Inter‐
est categories.
Search online
1. "Online search"
2. Enter keyword.
Suggestions are displayed.
3. Select suggestion.
The list of points of interest is displayed.
Vehicles with charge point: Display of
charging stations, see page 12.
4. "Search location"
The search location can be adapted if nec‐
essary.
5. Select a point of interest.
Details are displayed.
6. Select address.
7. If applicable, "Start route guidance"
Key word search
1. "Keyword search"
2. Enter search term.
3. Select the symbol.
Points of Interest are searched for at the
current location.
The list of points of interest is displayed.
Points of Interest are sorted by distance.
Vehicles with charge point: Display of
charging stations, see page 12.
4. "Change location and sorting": the search
can be adapted if necessary.
▷"Location": change search location.
▷"Sort by": change sorting.
5. Select a point of interest.
Seite 11
Destination input Navigation
11
Online Edition for Part no. 01 40 2 976 378 - X/16

Details are displayed.
6. Select address.
7. If applicable, "Start route guidance"
Category search
1. "Category search"
2. Select "All categories" or desired Point of
Interest category.
Points of Interest are searched for at the
current location.
3. The list of points of interest is displayed.
Points of Interest are sorted by distance.
Vehicles with charge point: Display of
charging stations, see page 12.
4. "Change location and filter criteria": adapt
the search criteria if necessary:
▷"Location": change search location.
▷"Sort by": change sorting.
▷Select category details if necessary.
▷"Keyword": restrict list by a key word
search.
5. "Show results"
6. Select a point of interest.
Details are displayed.
7. Select address.
8. If applicable, "Start route guidance"
Preferred point of interest categories
Point of interest categories that have been
searched for most frequently are displayed.
Select a preferred Points of Interest category
to search at the location for Points of Interest
of the desired category.
Displaying points of interest in the
map
The categories of the points of interest can be
shown as symbols on the map.
Select categories:
1. "Navigation"
2. "Settings"
3. "Map elements"
4. "Points of interest"
5. Select the desired setting.
The display can be switched on and off in the
function bar of the map view, see page 21.
In vehicles with charge point: display
of charging stations
General
Depending on the equipment, the map view
shows different symbols for charging stations:
▷ General charging stations.
▷ Quick charging stations.
▷ BMW Partner charging stations, use via
ChargeNow card or possibly ChargeNow
app possible.
Availability display of the charging
stations
Depending on the equipment, country version
and available online data, a coloured symbol
marks the occupation of the charging station.
Colour Meaning
Green Charging station free.
Yellow Several charging stations available,
some occupied.
Red Charging station is occupied.
Even with the most up-to-date online data, in‐
formation on the occupations of the charging
stations may have changed.
Seite 12
Navigation Destination input
12 Online Edition for Part no. 01 40 2 976 378 - X/16

Selecting destination from
contacts
1. "Navigation"
2. "Enter new destination"
3. "Contacts"
Contacts with addresses are displayed if
these addresses for the contacts have
been checked as destinations. Checking
address as destination, see page 80.
4. Select a contact.
5. Select address.
6. "Start route guidance"
Entering destination using
GPS coordinates
Principle
Destinations can also be entered directly using
GPS coordinates.
The coordinates can be entered in degrees,
minutes and seconds or as a decimal value.
Calling up
1. "Navigation"
2. "Enter new destination"
3. "GPS coordinates"
4. "Format"
▷"Degrees Minutes Seconds"
▷"Decimal"
5. "Longitude" or "Latitude"
6. Turn the Controller until the desired coor‐
dinates or compass direction is/are dis‐
played.
7. Press the Controller.
8. If necessary, enter values for minutes and
seconds, and compass direction.
9. "Accept destination"
Destination entry using the
Concierge Service
The Concierge Service provides information
about hotels and restaurants, for example. Ad‐
dresses can also be sent directly to the naviga‐
tion system.
1. "Navigation"
2. "Enter new destination"
3. "Concierge Services"
A voice connection to the Concierge Service is
established.
Seite 13
Destination input Navigation
13
Online Edition for Part no. 01 40 2 976 378 - X/16

Journey
Vehicle equipment
This chapter describes all standard, national
and special equipment provided in the model
series. Equipment not available in the vehicle is
therefore also described, for example the se‐
lected special equipment or country variant.
This also applies to safety-relevant functions
and systems. Comply with the relevant laws
and regulations when using the corresponding
functions and systems.
General
To plan a trip, more than one stopover can be
entered.
New trip
1. "Navigation"
2. "Map"
3. If necessary, tilt the Controller to the left.
4. "Route guidance"
5. "Enter new destination"
6. Select individual destination.
7. Enter intermediate destination.
Entering intermediate
destination (stopover)
An individual destination must be set prior to
entering a stopover.
For one trip, a maximum of 20 stopovers can
be entered.
1. "Navigation"
2. "Add intermediate destination"
3. Select the mode of destination entry.
4. Enter intermediate destination.
Alternatively, the stopover can be entered via
the map:
1. "Navigation"
2. "Map"
3. "Route guidance"
4. "Add intermediate destination"
5. Select the mode of destination entry.
6. Enter intermediate destination.
The stopover is added to the destinations list
and is highlighted.
Starting the trip
1. Enter the desired stopovers.
2. "Start route guidance"
Editing stopovers
1. "Navigation"
2. "Map"
3. "Route guidance"
4. Select the intermediate destination.
5. Select the desired setting.
▷"Skip destination": bypass current
stopover.
▷"Start route guidance": start route
guidance to stopover.
▷"Change order": move the stopover in
the list.
▷"Delete destination": delete stopover.
Seite 14
Navigation Journey
14 Online Edition for Part no. 01 40 2 976 378 - X/16
Saving a trip
Up to 30 trips can be saved in the trip list. If
necessary, delete existing trips so that new
trips can be saved.
1. "Navigation"
2. "Map"
3. "Route guidance"
4. "Save journey"
5. Enter names.
6. Select the symbol.
Selecting a trip saved in
memory
1. "Navigation"
2. "Journeys"
3. "My journeys"
4. Select trip.
5. "Edit journey" or "Start route guidance"
Deleting a trip saved in
memory
1. "Navigation"
2. "Journeys"
3. "My journeys"
4. Highlight the desired trip if necessary.
5. Press the button.
6. "Delete all journeys" or "Delete journey"
Call up last trip
The last journey driven is automatically saved
and can be called up again.
1. "Navigation"
2. "Journeys"
3. "Last journey created"
4. Select another stopover if necessary.
5. "Edit journey" or "Start route guidance"
Importing trips via a USB
data storage medium
1. Connect USB data storage medium to a
USB interface in the front.
2. "Navigation"
3. "Journeys"
4. "Import journey (USB)"
The maximum number of trips that can be
saved on the USB data storage medium and in
the navigation system together is 30, other‐
wise import is not possible.
Importing trips
Journeys can also be imported using Connec‐
tedDrive.
BMW Routes
General
BMW routes can be imported using Connec‐
tedDrive and transferred into the route guid‐
ance.
Starting route
1. "Navigation"
2. "Journeys"
The number of new BMW routes arrived is
shown.
3. "BMW Routes"
4. Select desired BMW route.
5. "Start route guidance"
Seite 15
Journey Navigation
15
Online Edition for Part no. 01 40 2 976 378 - X/16

Ending route guidance
1. "Navigation"
2. "Map"
3. "Route guidance"
4. "Stop route guidance"
Seite 16
Navigation Journey
16 Online Edition for Part no. 01 40 2 976 378 - X/16
Map
Vehicle equipment
This chapter describes all standard, national
and special equipment provided in the model
series. Equipment not available in the vehicle is
therefore also described, for example the se‐
lected special equipment or country variant.
This also applies to safety-relevant functions
and systems. Comply with the relevant laws
and regulations when using the corresponding
functions and systems.
Calling up the map
1. "Navigation"
2. "Map"
The map can also be directly called up
with the button on the Controller.
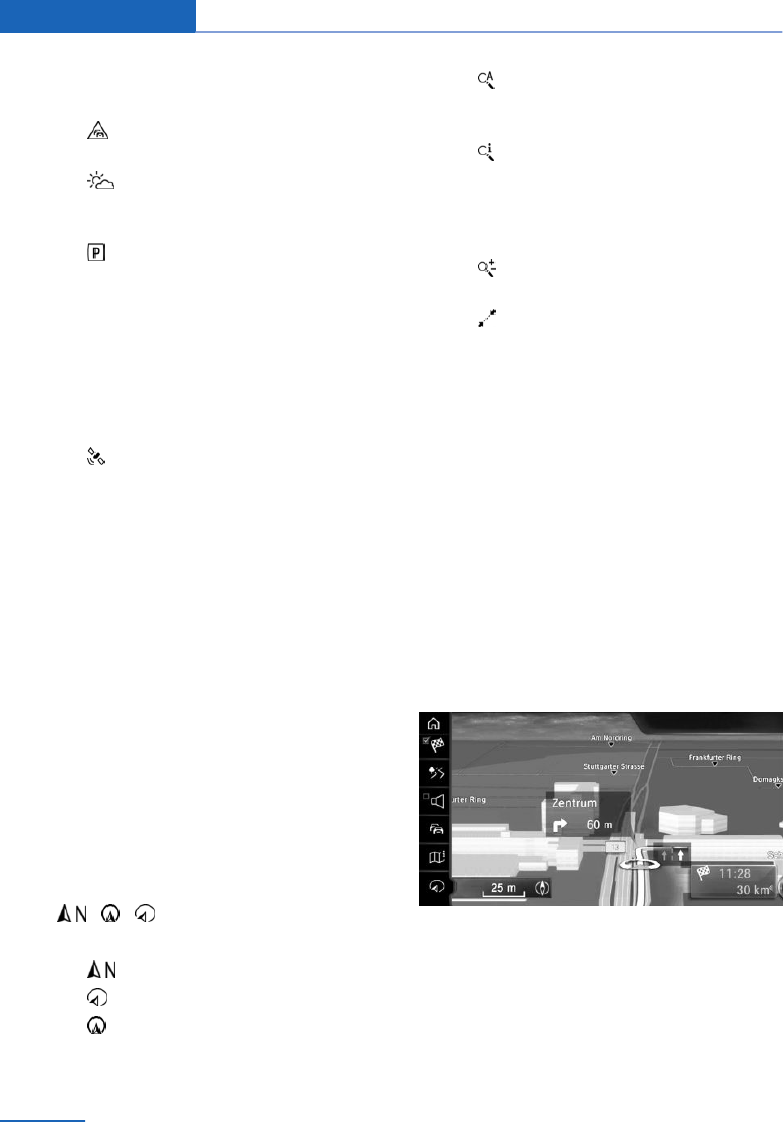
Overview
General
The map can be operated using iDrive.
For an explanation of the principle of operation
using iDrive, see Owner's Handbook for the
vehicle.
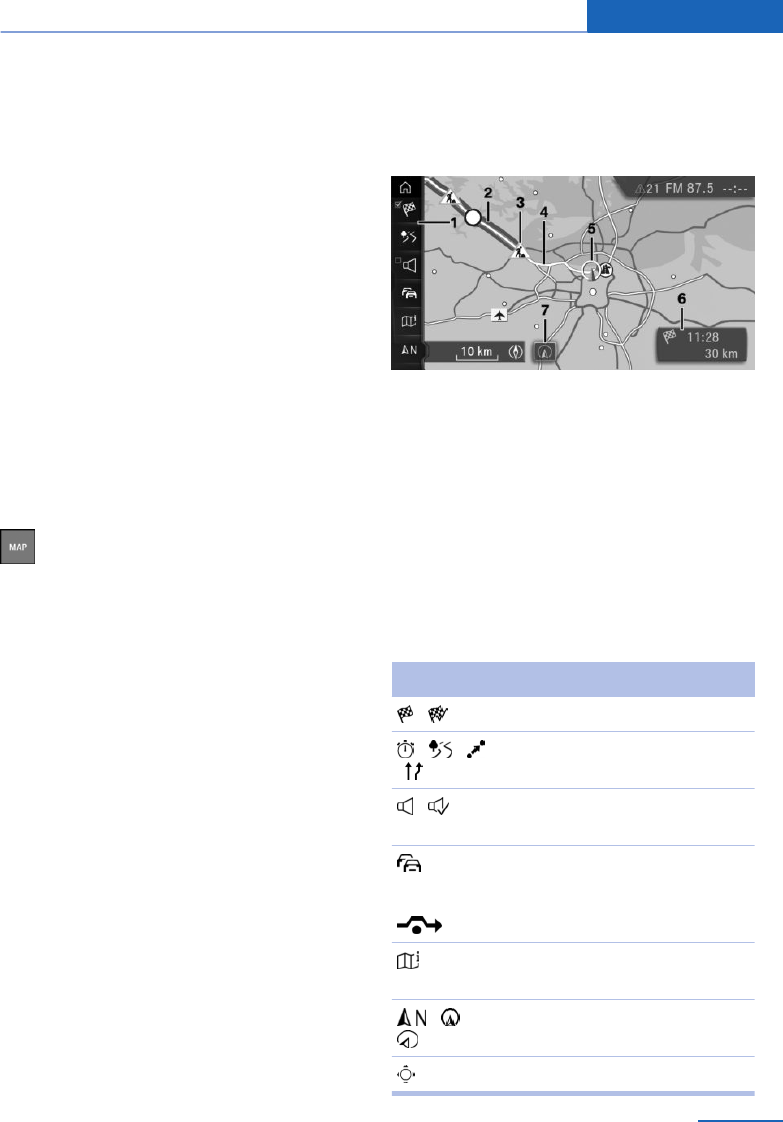
Map view
1Function bar
2Route stage with traffic obstruction
3Road sign for traffic obstruction
4Planned route
5Location
6Status field
7With touchscreen equipment: display loca‐
tion
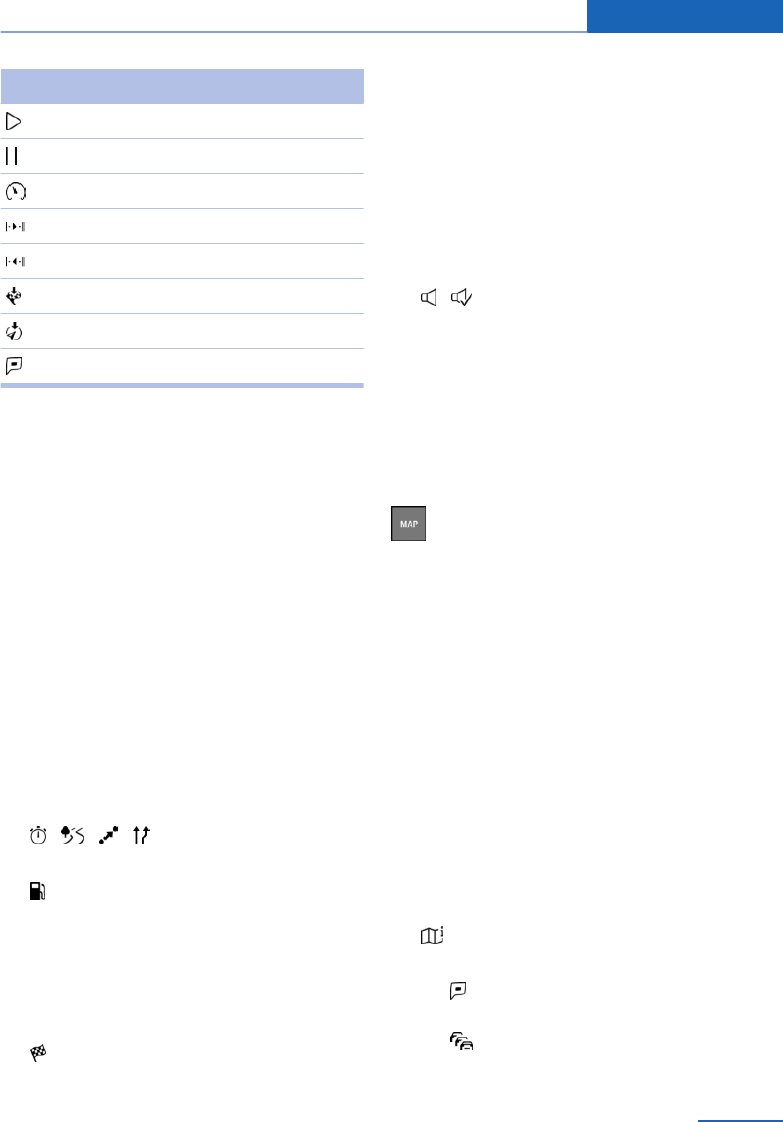
Function bar
Symbol Function
Start/stop route guidance.
Change current route.
Switch spoken instructions on/
off.
Traffic information.
Status of traffic information.
Diversion exists.
Display additional information
on map.
Select map view.
Interactive map.
Seite 17
Map Navigation
17
Online Edition for Part no. 01 40 2 976 378 - X/16

To switch to the toolbar, tilt the Controller to
the left.
Status field
The following information is displayed:
▷Symbol for active route guidance.
▷Arrival time and distance to destination.
▷Possible time delay due to traffic obstruc‐
tions.
Lines on the map
Roads and streets are displayed in various col‐
ours and lines in accordance with their classifi‐
cation.
▷Dashed lines: railway and ferry connec‐
tions.
▷Thin lines: national borders.
Traffic obstructions
If traffic information of a radio station or a traf‐
fic warning service is received, traffic obstruc‐
tions may be shown on the map.
Route guidance
Starting
1. "Navigation"
2. Enter destination, see page 9.
3. "Start route guidance"
Once the route has been started, a message is
displayed with most important set route crite‐
ria.
Ending
1. "Navigation"
2. "Map"
3. Tilt the Controller to the left.
4. Select the symbol.
5. "Stop route guidance"
Saving current destination as contact
After destination input, save the destination in
the contacts.
1. "Navigation"
2. "Map"
3. "Route guidance"
4. Select destination.
5. Press the button.
6. "Save as contact" or "Add to contact"
7. If applicable, select an existing contact.
8. Enter name and possibly further details.
9. "Save contact in the vehicle"
Changing the route
Route criteria
General
You can influence the route that is calculated
by selecting various criteria. The suggested
route can differ from your personal experience.
For BMW Routes the route criteria cannot be
changed.
Default settings for route criteria
The route criteria can be set individually. The
settings are saved as default and are automati‐
cally used for new route guidance procedures.
Standard settings for route, see page 24.
With active route guidance: changing
route criteria in the map view
With active route guidance, the route criteria
for the current destination can be changed in
the map view:
1. "Navigation"
2. "Map"
3. Tilt the Controller to the left.
Seite 18
Navigation Map
18 Online Edition for Part no. 01 40 2 976 378 - X/16

4. "Route"
5. Select the desired setting.
6. Select general route criteria if necessary:
"General route settings"
Alternative Routes
When route guidance is active, alternative
routes are suggested if possible.
1. "Navigation"
2. "Map"
3. Tilt the Controller to the left.
4. "Route"
An overview of the current route and the
proposed alternative routes is shown. In
addition, details such as travel time and
route length and with alternative routes any
data on consumption compared with the
current route is shown.
The routes are illustrated in colour in the
split screen.
5. Select an alternative route to add it to route
guidance.
Online alternative routes
General
Online alternative routes are transmitted to the
vehicle online.
Information about traffic obstructions and traf‐
fic forecasts can be taken into account here.
Symbol identifies online alternative routes.
Activating/deactivating online alternative
routes
If dynamic route guidance is activated as well
as online alternative routes, available online al‐
ternative routes are automatically included in
route guidance.
1. "Navigation"
2. "Settings"
3. "Route settings"
4. "Online routes"
Course of route
General
During route guidance, more detailed informa‐
tion can be displayed about the current route,
or the route itself can be adapted.
Depending on the equipment version, various
views of the course of the route are available
during route guidance:
▷List of route sections, see page 19.
▷Map view, see page 17.
▷Route guidance information on the map,
see page 22.
▷Arrow view in split screen, see page 27.
▷Arrow view in the instrument cluster.
▷Arrow view in Head-Up Display.
Displaying list of route sections
With active route guidance, a list of the route
sections can be displayed. The distance to be
travelled is displayed per route section.
If required, refuelling recommendations are
also displayed.
1. "Navigation"
2. "Map"
3. Tilt the Controller to the left.
4. "Route"
5. "Route summary"
6. Mark route section.
The section of the route is also shown in
the split screen.
Bypassing a section of the route
Calculate a new route for a route stage.
1. "Navigation"
2. "Map"
3. Tilt the Controller to the left.
Seite 19
Map Navigation
19
Online Edition for Part no. 01 40 2 976 378 - X/16
4. "Route"
5. "Change route"
6. "Diversion:"
7. Turn the Controller until the distance at
which you want to return to the original
route is shown.
8. Press the Controller.
Cancelling bypass
In case you no longer wish to bypass this sec‐
tion of the route:
1. "Navigation"
2. "Map"
3. Tilt the Controller to the left.
4. "Route"
5. "Change route"
6. "Delete diversion"
Changing the route
Principle
If route guidance is active, the route displayed
on the map can be manually adjusted. For this
purpose, drag the route using a marking point
on the route, the so-called route magnet, into
the desired direction.
Setting route magnet
1. "Navigation"
2. "Map"
3. Tilt the Controller to the left.
4. "Route"
5. "Change route"
6. "Add route magnet"
7. As with the interactive map, drag the route
magnet with the Controller onto the de‐
sired location
▷To change the scale: turn the Control‐
ler.
▷To move the map: tilt the Controller in
the corresponding direction.
▷To move the map diagonally: tilt the
Controller in the corresponding direc‐
tion and turn the Controller.
8. Press the Controller.
9. "Accept magnet"
Editing route magnet
1. "Navigation"
2. "Map"
3. Tilt the Controller to the left.
4. "Route"
5. "Change route"
6. Select the desired setting.
▷"Modify route magnet": change amen‐
ded route again.
▷"Remove route magnet": the original
route is resumed.
Simulating route guidance
Principle
With a stationary vehicle and active route guid‐
ance, the journey on the route can be simula‐
ted.
Calling up
1. "Navigation"
2. "Map"
3. "Route"
4. "Aerial view"
The route is shown on the map.
Functions and settings
Tilt the Controller to the left to call up further
functions and settings.
Seite 20
Navigation Map
20 Online Edition for Part no. 01 40 2 976 378 - X/16
Symbol Function
"Start aerial view"
"Stop"
"Speed:"
"Next route section"
"Previous route section"
"Jump to destination"
"Jump to position"
"Points of interest"
Refuelling recommendation
Principle
The remaining range is calculated and, as nee‐
ded, service stations along the way are dis‐
played.
Even with the most up-to-date navigation data,
information on individual service stations may
have changed, for example, service stations
may not be in operation.
Refuelling recommendations are shown in the
route list, see page 19.
Calling up
1. "Navigation"
2. "Map"
3. Tilt the Controller to the left.
4. "Route"
5. "Route summary"
6. "Refuel"
A list of service stations is displayed.
7. Highlight the service station.
The position of the service station is
shown in the split screen.
8. Select the service station.
9. Select the symbol.
10. "Start route guidance"
Spoken instructions
Switching on/off
The setting is saved for the currently used
driver profile.
1. "Navigation"
2. "Map"
3. Tilt the Controller to the left.
4. "Spoken instructions"
Repeating
1. "Navigation"
2. "Map"
3. Press the Controller.
4. "Repeat spoken instruction"
Using button:
Press the button twice.
Volume control
Turn the volume knob during the spoken in‐
struction until the desired volume is obtained.
Saving in favourites buttons
The function enable/disable spoken instruc‐
tions can be saved to a favourites button for
quick access.
Displaying additional
information on map
1. "Navigation"
2. "Map"
3. "Additional information"
4. Select the desired setting.
▷ "Points of interest": symbols for
points of interest are shown.
▷ "Traffic flow": lines are displayed
for the traffic flow.
Seite 21
Map Navigation
21
Online Edition for Part no. 01 40 2 976 378 - X/16
Information on traffic flow in the map
view, see page 28.
▷ "Traffic events": symbols for traffic
information is shown.
▷ "Weather": display weather sym‐
bols on the map using Connected‐
Drive.
▷ "Parking information": coloured
lines indicate the probability of free
parking spaces along a road. The more
visible the lines, the greater the proba‐
bility of finding a parking space. The list
of towns/cities in which parking infor‐
mation is available can be displayed.
Showing list of towns/cities, see
page 25.
▷ "Satellite images": depending on
availability and resolution, satellite im‐
ages are shown as the background in
several scales.
Selecting map view
Principle
The map view can be displayed in different
perspectives, for example pointing towards
north or pointing in the direction of travel.
The sale of the map can be enlarged or re‐
duced
Further map settings, see page 25.
Selecting map view
1. "Navigation"
2. "Map"
3. "Map views"
4. Select the desired setting.
▷ "North-oriented"
▷ "Perspective"
▷ "In direction of travel"
▷ "Auto zoom": if route guidance is
active, the map is automatically en‐
larged when approaching a manoeuvre.
▷ "Auto zoom with info": if route guid‐
ance is active, the map is automatically
enlarged when approaching a manoeu‐
vre. Route guidance information is ad‐
ditionally shown on the map.
▷ "Manual zoom": manually enlarge or
reduce scale of the map.
▷ "Route overview": display route be‐
tween location and destination.
Route guidance information
General
With active route guidance, route guidance in‐
formation can be displayed in the map view at
the corresponding manoeuvring points on the
current route.
On multi-lane roads, lane information shows
the recommended lanes, if necessary.
Route guidance information can also be dis‐
played using arrow view in split screen, see
page 27.
Display
Functions in the map view
General
Different information can be called up and set‐
tings made for any point on the map.
Seite 22
Navigation Map
22 Online Edition for Part no. 01 40 2 976 378 - X/16
The map can be operated using iDrive in this
case.
Operation via Controller
1. "Navigation"
2. "Map"
3. Tilt the Controller to the left.
4. "Interactive map"
5. Select the destination with the cross-hairs.
▷To change the scale: turn the Control‐
ler.
▷To move the map: tilt the Controller in
the corresponding direction.
▷To move the map diagonally: tilt the
Controller in the corresponding direc‐
tion and turn the Controller.
6. Press the Controller.
7. Select the desired setting.
Functions
Various functions are available, depending on
the selected point on the map:
▷ "Repeat spoken instruction"
With active route guidance.
▷ "Start route guidance": start route guid‐
ance.
▷ "Add as intermediate dest.": add desti‐
nation.
▷ "Show details": any details on the des‐
tination can be shown.
▷ "Show details": if the cross-hairs re‐
main over a position with several points of
interest, these are shown as a list.
▷ "Leave interactive map": for operation
using Controller: exit interactive map.
▷ "Back to current location": with
touchscreen equipment: change to normal
map view.
▷ "Show destination": map section around
the destination is displayed.
▷ "Save position": save current position
as contact.
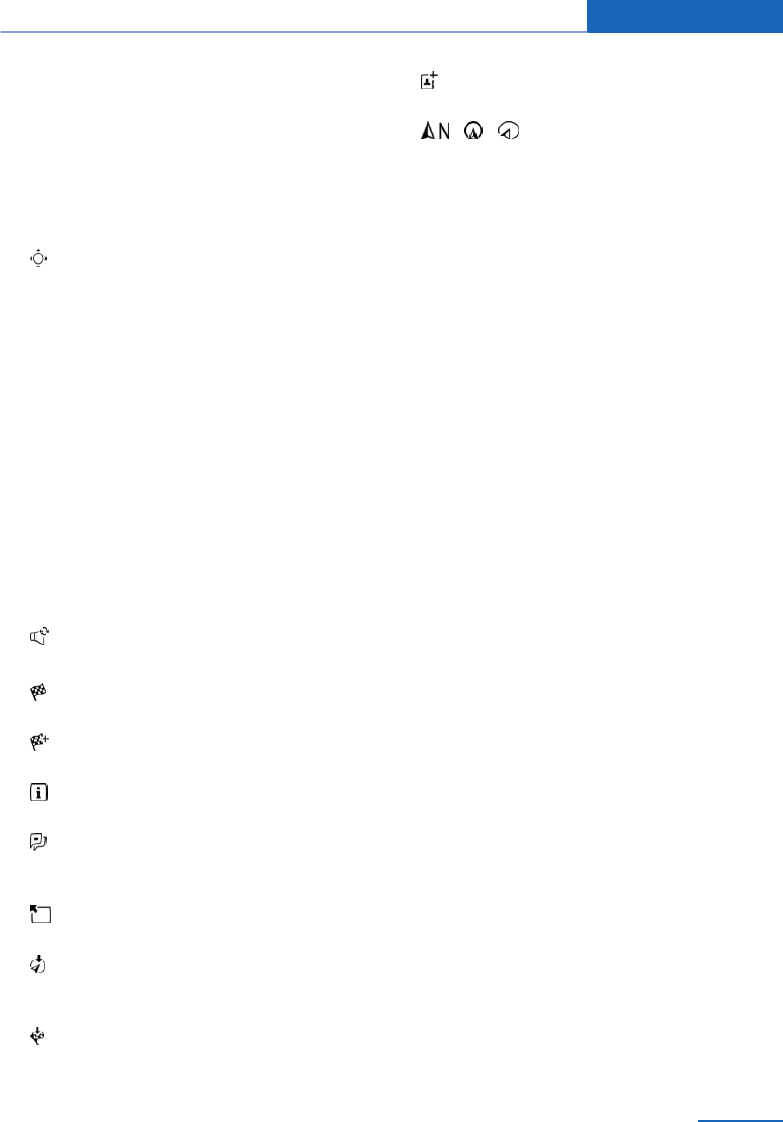
▷ "Change map view": switch
map view.
Seite 23
Map Navigation
23
Online Edition for Part no. 01 40 2 976 378 - X/16

Settings
Vehicle equipment
This chapter describes all standard, national
and special equipment provided in the model
series. Equipment not available in the vehicle is
therefore also described, for example the se‐
lected special equipment or country variant.
This also applies to safety-relevant functions
and systems. Comply with the relevant laws
and regulations when using the corresponding
functions and systems.
General
The navigation settings can be configured indi‐
vidually. The settings are saved for the cur‐
rently used driver profile.
Route
Principle
The route criteria can be set individually. The
settings are saved as default and are automati‐
cally used for new route guidance procedures.
Default criterion
1. "Navigation"
2. "Settings"
3. "Route settings"
4. "Default criterion"
5. Select the desired setting.
▷"Fast": time-optimised route resulting
from a combination of a route as short
as feasible and fast roads.
▷"ECO PRO": or "Efficient": fuel-opti‐
mised route resulting from a combina‐
tion of a route requiring the lowest pos‐
sible fuel consumption and fast roads.
Arrival time and consumption are
based on driving in ECO PRO drive
mode.
▷"Short": distance-optimised route re‐
sulting from a combination of a route
as short as feasible and fast roads.
Further criteria
Adjusting
1. "Navigation"
2. "Settings"
3. "Route settings"
4. Select the desired setting.
▷Settings for Dynamic Route Guidance:
▷"Automatic": traffic information is
taken into account in route guid‐
ance. The current route is changed
automatically if necessary. De‐
pending on equipment, online al‐
ternative routes are also accepted
automatically.
▷"With confirmation": a message is
displayed first if appropriate diver‐
sion routes are available.
▷"Online routes": accept online alterna‐
tive routes.
▷"Avoid motorways": motorways are
avoided as far as possible.
▷"Avoid toll roads": routes with tolls are
avoided as far as possible.
▷"Avoid tax vignette roads": routes with
long-term tolls are avoided as far as
possible.
▷"Avoid ferries/motorail trains": ferries
are avoided as far as possible.
Seite 24
Navigation Settings
24 Online Edition for Part no. 01 40 2 976 378 - X/16

Avoid areas
Principle
Areas that should be bypassed, can be defined
as avoid areas.
Setting an avoid area
1. "Navigation"
2. "Settings"
3. "Route settings"
4. "Areas to avoid"
5. "Set new area to avoid"
6. Follow the instructions on the Control Dis‐
play.
7. "Accept area"
Deleting an avoid area
1. "Navigation"
2. "Settings"
3. "Route settings"
4. "Areas to avoid"
5. Highlight desired avoid area if necessary.
6. Press the button.
7. Delete desired or all avoid areas.
Learning a route
Principle
If the driver deviates from the proposed route
several times in an identical manner, this devi‐
ation will be taken into account in future route
planning.
Activating learning a route
1. "Navigation"
2. "Settings"
3. "Route settings"
4. "Learn route"
Parking information
Principle
In the map view, coloured lines indicate the
probability of free parking spaces along a road.
The list of towns/cities in which parking infor‐
mation is available can be displayed.
Show list of towns/cities
1. "Navigation"
2. "Settings"
3. "Available on-street parking info"
List of towns/cities is displayed.
Map
Principle
The map view can be individually adjusted. For
example, the map colour and map mode can
be set. In addition, it is possible to define which
Points of Interests are displayed on the map.
Setting the map
1. "Navigation"
2. "Settings"
3. Select the desired setting.
Home address
Principle
The home address can be defined or changed.
Setting the home address
1. "Navigation"
2. "Settings"
3. "Set home address" or "Change home
address"
Seite 25
Settings Navigation
25
Online Edition for Part no. 01 40 2 976 378 - X/16

Navigation data
Principle
Information for position determination and ver‐
sion of navigation data can be called up.
Adjusting
1. "Navigation"
2. "Settings"
3. "Position and version"
4. Select the desired setting.
▷"Enter position": in situations without
GPS reception or, for example, imme‐
diately after travelling on a ferry, the ve‐
hicle position can be manually set on
the map.
▷"Version information": information to
current map version.
▷"Help to improve the navigation map":
data such as speed or position are
saved anonymised in the vehicle and
transferred to BMW to improve the dig‐
ital map.
Resetting settings
1. "Navigation"
2. "Settings"
3. Press the button.
4. "Reset all settings"
Seite 26
Navigation Settings
26 Online Edition for Part no. 01 40 2 976 378 - X/16
Split screen
Vehicle equipment
This chapter describes all standard, national
and special equipment provided in the model
series. Equipment not available in the vehicle is
therefore also described, for example the se‐
lected special equipment or country variant.
This also applies to safety-relevant functions
and systems. Comply with the relevant laws
and regulations when using the corresponding
functions and systems.
Principle
For the split screen, various views can be set
independently of the main screen.
Adjusting
1. Tilt the Controller to the right until the split
screen is selected.
2. Press the Controller.
3. Select the desired setting.
▷"Map view:": set map view and select
any additional information such as traf‐
fic events.
▷"Arrow view": arrow display is shown
during active route guidance. A com‐
pass is displayed if no route guidance
is active.
▷"Position": display current position.
▷"3D exit roads": selected sections of
route, for example motorway intersec‐
tions, are shown in perspective.
Arrow view
Principle
With active route guidance, route guidance in‐
formation can be displayed as a list in the split
screen.
Adjusting
It is possible to set which additional informa‐
tion should be displayed in the arrow view.
▷"Arrow view"
▷"Traffic information": display traffic
flow and traffic incidents.
▷"Additional information": display addi‐
tional information, for example tunnels.
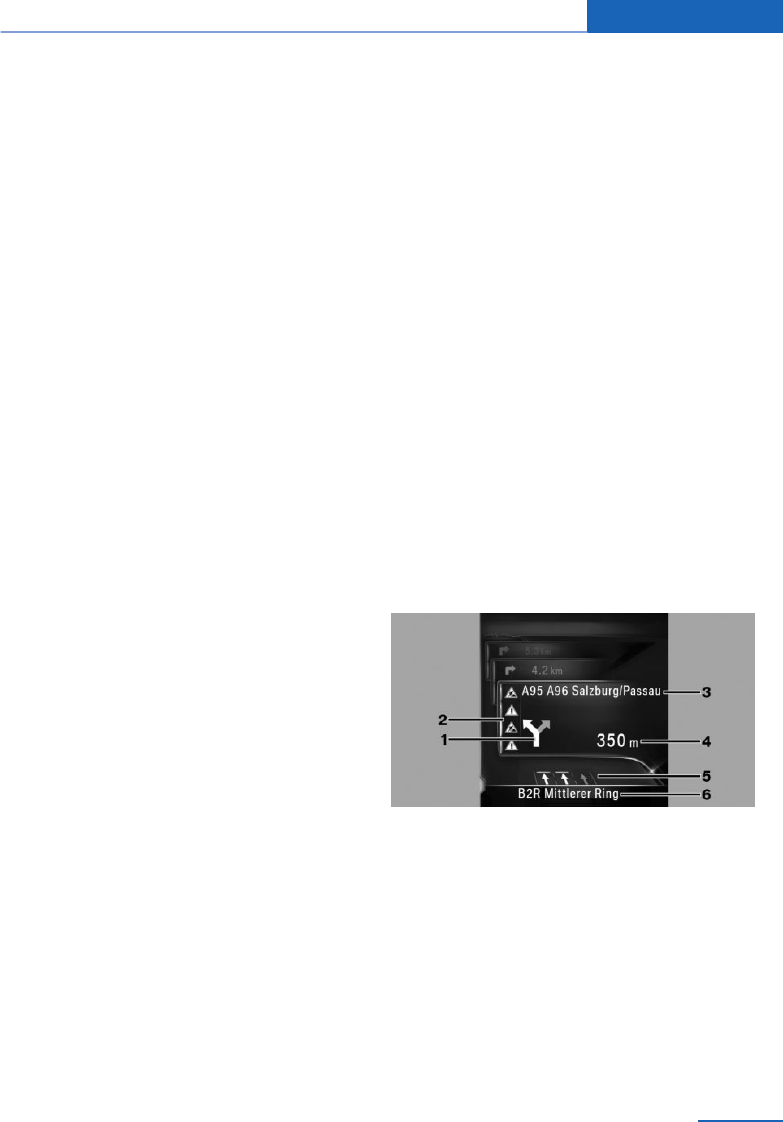
Display
The following information is displayed during
route guidance:
1Turn-off prompt
2Traffic flow and traffic incidents
3Upcoming road
4Distance to manoeuvre
5Lane information
6Current road
Depending on the country variant, the display
may deviate from the illustration.
Seite 27
Split screen Navigation
27
Online Edition for Part no. 01 40 2 976 378 - X/16
Traffic information
Vehicle equipment
This chapter describes all standard, national
and special equipment provided in the model
series. Equipment not available in the vehicle is
therefore also described, for example the se‐
lected special equipment or country variant.
This also applies to safety-relevant functions
and systems. Comply with the relevant laws
and regulations when using the corresponding
functions and systems.
General
Traffic information from radio stations sending
a traffic warning service on the Traffic Mes‐
sage Channel, TMC, is shown in the map view
and considered when calculating route. Infor‐
mation on traffic obstructions and dangers is
continuously updated.
Traffic information is displayed on the map by
symbols.
For particular dangers, for example objects on
the road, a message is displayed.
Some danger messages are also displayed as
Check Control message in instrument cluster.
Display of map view in the function bar
Symbol Function
Yellow symbol:
The traffic information concerns the
calculated route and the expected
delay is less than 20 minutes.
Red symbol:
The expected delay is more than 20
minutes or there is a blockage of
the risk information for the route.
Symbol Function
Grey symbol:
No traffic information is available or
the expected delay is less than
5 minutes.
There is an appropriate diversion
for the traffic information.
Real-Time Traffic Information, RTTI
In some countries additional bookable services
send real-time traffic information, RTTI, which
is then used and shown instead of traffic infor‐
mation from the radio station.
The location of traffic obstructions is specified
more comprehensively and precisely with real-
time traffic information. In addition, the traffic
situation off the motorways, for example, on
side streets and urban roads, is extensively re‐
corded and shown. Diversion recommenda‐
tions can be calculated more precisely on the
basis of this information. This lowers the risk of
coming across another traffic obstruction on
diversions. Several recommended diversions
or further information may be provided.
During journeys in countries in which real-time
traffic information is available, the traffic infor‐
mation continues to use radio stations.
It is shown in the bar of the map view, see
page 17, whether TMC or RTTI traffic informa‐
tion is used.
Switching on/off
1. "Navigation"
2. "Settings"
3. "Receive traffic information"
Seite 28
Navigation Traffic information
28 Online Edition for Part no. 01 40 2 976 378 - X/16

Displaying list of traffic
information
1. "Navigation"
2. "Map"
3. "Traffic information"
With active route guidance traffic informa‐
tion affecting the calculated route is first
shown with red symbols. Traffic informa‐
tion not affecting the route is then shown
with grey symbols. The various items of
traffic information is sorted by distance
from the vehicle's current position.
4. Select the item of traffic information.
▷"Previous message": browse to the
previous traffic information.
▷"Next message": browse to the next
traffic information.
Displaying recommended
diversion
1. "Navigation"
2. "Map"
3. "Traffic information"
4. "Diversion": a recommended diversion is
displayed.
The following functions are available:
▷"Current route": keep current route.
▷"New route in": accept diversion.
Traffic information in the
map
Set map view
1. "Navigation"
2. "Map"
3. "Additional information"
▷ "Traffic events": symbols for traffic
incidents are displayed.
▷ "Traffic flow": lines are displayed
for the traffic flow.
Symbols in the map view
Symbols for traffic incidents are displayed de‐
pending on the map scale and location of the
traffic obstruction.
Information on traffic flow in the map
view
The length and effect of a traffic obstruction
are indicated on the map by coloured lines, de‐
pending on the scale.
▷Black: obstruction.
▷Red: traffic jam.
▷Orange: queuing traffic.
▷Yellow: heavy traffic.
▷Green: free-flowing journey.
▷Grey: general traffic information, for exam‐
ple road works.
The information displayed depends on the
specific traffic information service.
Dynamic route guidance
Principle
With Dynamic Route Guidance, the traffic in‐
formation is taken into account in the calcula‐
tion of the route.
Adjusting
1. "Navigation"
2. "Settings"
3. "Route settings"
4. "Dynamic guidance"
5. Select the desired setting.
Seite 29
Traffic information Navigation
29
Online Edition for Part no. 01 40 2 976 378 - X/16

▷"With confirmation": a message is dis‐
played as to whether the route is to go
around a traffic obstruction.
▷"Automatic": the route is automatically
changed if a traffic obstruction is en‐
countered.
Seite 30
Navigation Traffic information
30 Online Edition for Part no. 01 40 2 976 378 - X/16

Navigation data
Vehicle equipment
This chapter describes all standard, national
and special equipment provided in the model
series. Equipment not available in the vehicle is
therefore also described, for example the se‐
lected special equipment or country variant.
This also applies to safety-relevant functions
and systems. Comply with the relevant laws
and regulations when using the corresponding
functions and systems.
Principle
Information for position determination and ver‐
sion of navigation data can be called up.
Adjusting
1. "Navigation"
2. "Settings"
3. "Position and version"
4. Select the desired setting.
▷"Enter position": in situations without
GPS reception or, for example, imme‐
diately after travelling on a ferry, the ve‐
hicle position can be manually set on
the map.
▷"Version information": information to
current map version.
▷"Help to improve the navigation map":
data such as speed or position are
saved anonymised in the vehicle and
transferred to BMW to improve the dig‐
ital map.
Map update
General
Navigation data is saved in the vehicle and can
be updated via an USB medium.
Current navigation data is available from a
Service Partner of the manufacturer or another
qualified Service Partner or a specialist work‐
shop or in the ConnectedDrive store.
Depending on the volume of data, updating the
navigation data can take several hours. You
can check the status of the update process.
Update the navigation data during the journey,
to save the vehicle battery.
Updating
1. Connect a USB medium with the new navi‐
gation data to a USB interface in the front.
2. Follow the instructions on the Control Dis‐
play.
3. After updating, remove the media with nav‐
igation data.
Checking status
1. Press the button.
2. "Saving navigation data in the vehicle…
(USB )"
Automatic map update
General
With the corresponding equipment and coun‐
try versions, navigation data for the home re‐
gion is transferred to the vehicle online four
times a year, automatically installed and upda‐
ted.
Seite 31
Navigation data Navigation
31
Online Edition for Part no. 01 40 2 976 378 - X/16

Frequently Asked Questions
Vehicle equipment
This chapter describes all standard, national
and special equipment provided in the model
series. Equipment not available in the vehicle is
therefore also described, for example the se‐
lected special equipment or country variant.
This also applies to safety-relevant functions
and systems. Comply with the relevant laws
and regulations when using the corresponding
functions and systems.
Frequently Asked Questions
Why can the current position not be displayed?
▷The position is in an area not covered by
the data, is in a poor reception area or the
system is currently calculating the position.
Reception will normally be possible out‐
doors.
Why is a destination not transferred to the
route guidance system?
▷No city centre can be determined for the
town/city entered.
Enter any street in the town/city selected
and start route guidance.
Why is a destination not transferred to the
route guidance system?
▷The data for the destination is not available
in the navigation data. Choose a destina‐
tion as close as possible to the original
one.
Why can letters not be selected for destination
input?
▷The data for the destination is not available
in the navigation data. Choose a destina‐
tion as close as possible to the original
one.
Why are spoken instructions no longer given
immediately before junctions during route
guidance?
▷The area is not fully recorded, or you have
deviated from the suggested route and the
system requires a few seconds to calculate
a new route.
Seite 32
Navigation Frequently Asked Questions
32 Online Edition for Part no. 01 40 2 976 378 - X/16

Seite 33
Frequently Asked Questions Navigation
33
Online Edition for Part no. 01 40 2 976 378 - X/16

Online Edition for Part no. 01 40 2 976 378 - X/16

Entertainment
This chapter ensures your enjoyment when
receiving radio and television stations or when
playing CDs, DVDs and tracks from the music
hard disc.
Online Edition for Part no. 01 40 2 976 378 - X/16
General
Vehicle equipment
This chapter describes all standard, national
and special equipment provided in the model
series. Equipment not available in the vehicle is
therefore also described, for example the se‐
lected special equipment or country variant.
This also applies to safety-relevant functions
and systems. Comply with the relevant laws
and regulations when using the corresponding
functions and systems.
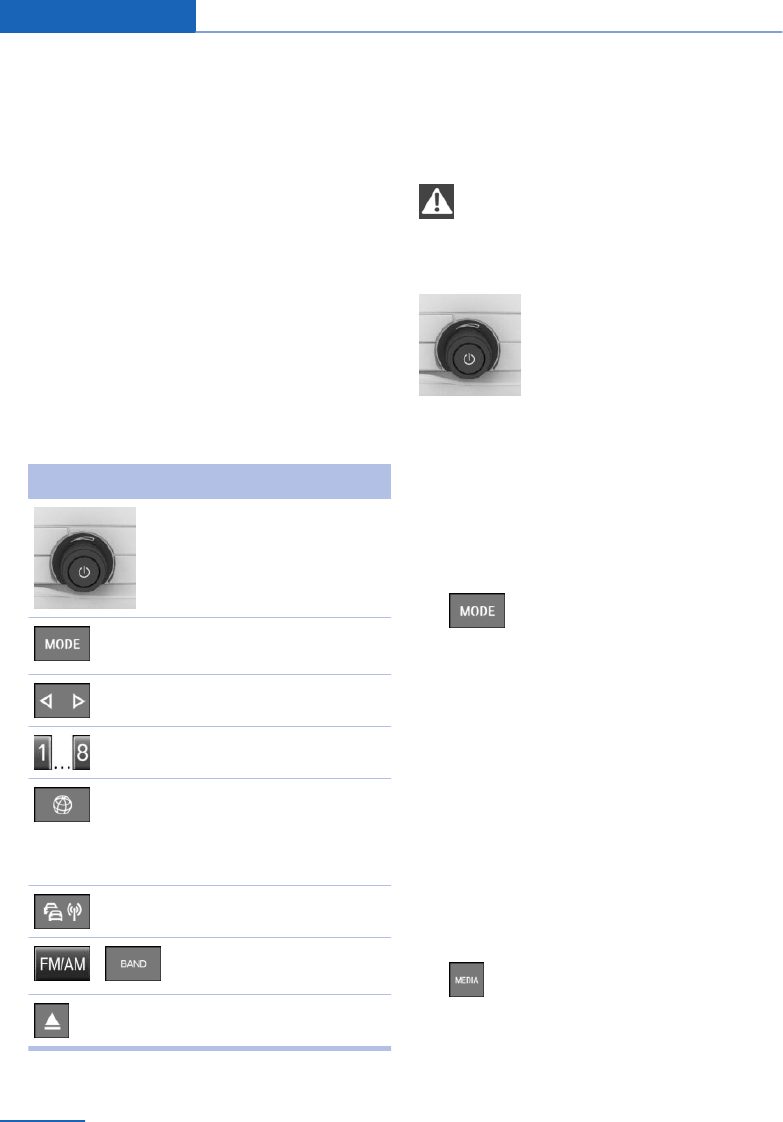
Control functions
Press the button Function
Press: switch sound out‐
put on/off.
Turn: set volume.
Switches entertainment
sources.
Change station/track.
Favourites button.
Connected Drive.
Depending on equipment,
button 8 is replaced by
this button.
Traffic information on/off.
Change waveband/satellite
radio.
Eject CD/DVD.
Sound output
WARNING
High volume of the sound output can
damage your hearing. Danger of injury. Do not
set a high volume.◀
Turn the knob to set the volume.
Press the knob to mute the
sound output. Pressing again
restores the previous volume.
Playback of audio recordings is stopped when
muting is active.
Changing entertainment
source
On the radio:
1. Press the button.
A list of all available entertainment sources
is displayed.
2. ▷Press button repeatedly to select an
entertainment source.
▷Turn and press the controller to select
an entertainment source.
Via iDrive:
1. "Media/Radio"
A list of all available entertainment sources
is displayed.
2. Select the desired setting.
Via the button on the Controller:
1. Press the button.
The entertainment source last selected is
played.
Seite 36
Entertainment General
36 Online Edition for Part no. 01 40 2 976 378 - X/16

2. A list of all available entertainment sources
is displayed.
3. ▷Press button repeatedly to select an
entertainment source.
▷Turn and press the controller to select
an entertainment source.
Possible entertainment sources:
▷Radio, see page 41.
▷Audio CD, see page 47.
▷Video DVD, see page 57.
▷Music hard disc, see page 48.
▷USB audio, see page 52.
▷USB video, see page 57.
▷Bluetooth audio, see page 53.
▷Television, TV, see page 60.
▷Screen Mirroring, see page 59.
Adjusting the list of
entertainment sources
It can be selected, which entertainment sour‐
ces are displayed in the selection list.
1. "Media/Radio"
A list of all available entertainment sources
is displayed.
2. "Personalise menu"
3. Select the desired setting.
Seite 37
General Entertainment
37
Online Edition for Part no. 01 40 2 976 378 - X/16

Sound
Vehicle equipment
This chapter describes all standard, national
and special equipment provided in the model
series. Equipment not available in the vehicle is
therefore also described, for example the se‐
lected special equipment or country variant.
This also applies to safety-relevant functions
and systems. Comply with the relevant laws
and regulations when using the corresponding
functions and systems.
General
Settings are saved in the currently used driver
profile.
Treble, bass, balance, fader
1. "Media/Radio"
2. "Sound" or "Bowers & Wilkins sound"
3. Select the desired setting.
▷"Treble": treble adjustment.
▷"Bass": bass adjustment.
▷"Balance": left/right volume distribu‐
tion.
▷"Fader": front/rear volume distribution.
4. Adjusting: turn the Controller.
5. Saving: press the Controller.
The following settings can be made by moving
the circle in the vehicle graphic directly on the
Control Display:
▷"Balance"
▷"Fader"
Multichannel reproduction,
surround
When surround is activated, multichannel re‐
production is simulated when playing a sound‐
track in stereo.
1. "Media/Radio"
2. "Sound"
3. "Surround" or "Logic 7 Surround"
LOGIC7 and the LOGIC7 logo are registered
trademarks of Lexicon, Inc., a company of the
Harman International Group.
Equaliser
Settings for individual sound frequency
ranges.
1. "Media/Radio"
2. "Sound" or "Bowers & Wilkins sound"
3. "Equaliser"
The current treble and bass settings, see
page 38, are shown on the left and right edges
of the equalizer screen. These values can also
be set in the equalizer. The acoustic settings of
the trebles and basses affect the settings of
the sound frequency ranges of the equalizer.
Select and set trebles, basses or a frequency
range.
Via iDrive:
1. Turn the Controller to select the value to
be set.
2. Press the Controller.
3. Turn Controller to set the value.
4. Press Controller to save the setting.
On the screen:
Adjust the required value up or down by mov‐
ing the column with your finger.
Seite 38
Entertainment Sound
38 Online Edition for Part no. 01 40 2 976 378 - X/16

Bowers & Wilkins Diamond
Surround Sound System
It is possible to select from several acoustic
profiles.
1. "Media/Radio"
2. "Bowers & Wilkins sound"
3. "Sound profiles"
4. Select the desired setting.
Bang & Olufsen High End
Surround SoundSystem
It is possible to select from several acoustic
profiles.
1. "Media/Radio"
2. "Sound"
3. "Bang & Olufsen"
4. Select the desired setting.
An additional speaker is provided in the centre
of the instrument panel. This automatically ex‐
tends when Entertainment is switched on and
is illuminated according to the illumination set‐
ting.
With Entertainment switched off or mute
switching, the speaker contracts again.
Speaker equalisation
To compensate for the increasing driving noise
at higher speed, it is possible to set an auto‐
matic volume increase.
1. "Media/Radio"
2. "Sound" or "Bowers & Wilkins sound"
3. "Volume settings"
4. Select the desired setting:
▷"Speed volume": ratio between enter‐
tainment volume and speed.
With Harmann/Kardon Surround Sound
System: audibility is improved by
adapting the acoustic settings.
With Bowers & Wilkins Diamond Sur‐
round Sound System or with Bang &
Olufsen High End Surround System:
volume is automatically adjusted ac‐
cording to the driving noise audible in
the interior.
"Speed volume": deleted in this case.
▷"PDC": ratio of the PDC acoustic signal
volume to the entertainment volume.
The basic setting ensures that the
acoustic signal will be heard at any vol‐
ume.
▷"Gong": ratio of the acoustic signal vol‐
ume, for example for seat belt re‐
minder, to the entertainment volume.
The basic setting ensures that the
acoustic signal will be heard at any vol‐
ume.
▷"Telephone": sensitivity of the micro‐
phone during a telephone call.
The setting is made during the tele‐
phone call and is stored for the mobile
telephone.
▷"Loudspeakers": loudspeaker volume
during a telephone call.
Playback of audio recordings is stop‐
ped when muting is active.
The setting is made during the tele‐
phone call and is stored for the mobile
telephone.
5. Adjusting: turn the Controller.
6. Saving: press the Controller.
The volume setting for the Traffic Programme,
see page 44, is made during an announce‐
ment.
Seite 39
Sound Entertainment
39
Online Edition for Part no. 01 40 2 976 378 - X/16

Resetting
The acoustic settings are reset to factory set‐
tings.
1. "Media/Radio"
2. "Sound"
3. "Reset"
Seite 40
Entertainment Sound
40 Online Edition for Part no. 01 40 2 976 378 - X/16
Radio
Vehicle equipment
This chapter describes all standard, national
and special equipment provided in the model
series. Equipment not available in the vehicle is
therefore also described, for example the se‐
lected special equipment or country variant.
This also applies to safety-relevant functions
and systems. Comply with the relevant laws
and regulations when using the corresponding
functions and systems.
General
Settings are saved in the currently used driver
profile.
AM/FM stations
Selecting station
1. "Media/Radio"
2. "FM" or "AM"
It is possible that AM stations might not be
received, depending on the equipment and
country variant.
The station last played is played and the
station list is shown.
3. Select the desired station.
Changing stations
Press the button on the radio.
The next or previous station from the station
list is played.
Saving stations
1. "Media/Radio"
2. "FM" or "AM"
It is possible that AM stations might not be
received, depending on the equipment and
country variant.
A symbol at the highlighted station indicates
whether the station has already been saved.
Symbol Meaning
Station has not been saved.
Station has already been saved.
To save the played station:
1. Tilt the Controller to the left.
2. "Save station"
The memory list is displayed.
3. Select the desired memory location.
Or:
1. Highlight the played station.
2. Press the Controller.
The memory list is displayed.
3. Select the desired memory location.
To save a station different from the played sta‐
tion:
1. Highlight the desired station.
2. Press and hold the Controller until the
memory list is displayed.
3. Select the desired memory location.
Or:
1. Highlight the desired station.
2. Press the button.
3. "Save station"
The memory list is displayed.
4. Select the desired memory location.
The stations can also be saved on the favour‐
ites buttons.
Seite 41
Radio Entertainment
41
Online Edition for Part no. 01 40 2 976 378 - X/16

Manual station selection
Station selection via frequency.
1. "Media/Radio"
2. "FM" or "AM"
It is possible that AM stations might not be
received, depending on the equipment and
country variant.
3. Tilt the Controller to the left.
"Manual search"
4. To select the frequency: turn the Control‐
ler.
5. To save the frequency: press the Control‐
ler.
Renaming a station
When saving a station with RDS signal, the
RDS information transferred when saving is
adopted as a the station name. This name can
be changed.
1. "Media/Radio"
2. "FM"
3. Select the desired station.
4. Press the button.
5. "Rename as:"
Wait until the desired name is displayed.
6. Press the Controller to save this name.
Displaying additional information
If a radio station broadcasts a radio text or ra‐
dio text plus, this information can be shown, for
example, track or artist of a piece of music.
Availability, content and sequence depend on
the radio station.
1. "Media/Radio"
2. "FM"
3. Select the desired station.
4. Press the button.
5. "Station information"
RDS
Principle
RDS broadcasts additional information in the
FM waveband, for example the station name.
For a station with a number of frequencies, an
automatic changeover to the frequency with
the best reception quality takes place if re‐
quired.
It is recommended that you switch on RDS.
Switching on/off
1. "Media/Radio"
2. "FM"
3. Press the button.
4. "RDS"
Digital radio DAB/DMB
Principle
Digital stations are bundled into what are
known as ensembles. Some stations feature
additional programmes. Sports stations, for ex‐
ample, may broadcast various sports events at
the same time.
Depending on what the station provides, addi‐
tional information or even images transmitted
by the station can be shown.
Selecting station
1. "Media/Radio"
2. "DAB" or "DAB/DMB"
The station last played is played and the
station list is shown.
▷DAB: the station last played is played
and the station list is shown.
▷DMB: the current video is shown.
3. Select station.
Seite 42
Entertainment Radio
42 Online Edition for Part no. 01 40 2 976 378 - X/16
DAB: the station on the station playing and
schedule is shown. Availability, content and
sequence depend on the radio station.
Changing stations
Press the button on the radio.
The next or previous station from the station
list is played.
Saving stations
1. "Media/Radio"
2. "DAB" or "DAB/DMB"
A symbol at the highlighted station indicates
whether the station has already been saved.
Symbol Meaning
Station has not been saved.
Station has already been saved.
To save the played station:
1. Tilt the Controller to the left.
2. "Save station"
The memory list is displayed.
3. Select the desired memory location.
Or:
1. Highlight the played station.
2. Press the Controller.
The memory list is displayed.
3. Select the desired memory location.
To save a station different from the played sta‐
tion:
1. Highlight the desired station.
2. Press and hold the Controller until the
memory list is displayed.
3. Select the desired memory location.
Or:
1. Highlight the desired station.
2. Press the button.
3. "Save station"
The memory list is displayed.
4. Select the desired memory location.
The stations can also be saved on the favour‐
ites buttons.
Additional information
If a radio station broadcasts a radio text or ra‐
dio text plus, this information can be shown, for
example, track or artist of a piece of music or
the telephone number or e-mail address of the
radio station. Availability, content and se‐
quence depend on the radio station.
1. "Media/Radio"
2. "DAB" or "DAB/DMB"
3. Select the desired station.
4. Press the button.
5. "Station information"
Automatic station following
General
If a station can no longer be received with ade‐
quate quality, it is searched for in other ensem‐
bles. If the station can be received better in an‐
other ensemble, it is changed over
automatically.
If station tracking is activated, the station is ad‐
ditionally searched for in the analogue fre‐
quency band. If it is not available in another en‐
semble, the station's analogue frequency is
switched to instead. This changeover is only
possible if the corresponding station's signal is
available in adequate quality and the IDs of the
stations match.
Seite 43
Radio Entertainment
43
Online Edition for Part no. 01 40 2 976 378 - X/16
Switching on automatic station
following
1. "Media/Radio"
2. "DAB" or "DAB/DMB"
3. Press the button.
4. "DAB station following"
Electronic programme guide
Several stations broadcast an electronic pro‐
gramme guide for their programme.
1. "Media/Radio"
2. "DAB" or "DAB/DMB"
3. Tilt the Controller to the left.
4. "DAB programme"
All available programme guides are displayed.
For each programme, the programme currently
being broadcast and the next programme are
displayed.
Select the desired entry to show the details on
a programme.
Enlarging image
If a radio station transmits images, these are
shown. The image display can be shown en‐
larged.
1. "Media/Radio"
2. "DAB" or "DAB/DMB"
3. Tilt the Controller to the left.
4. "Enlarge image"
Saved stations
General
40 stations can be saved.
Calling up a station
1. "Media/Radio"
2. "Saved stations"
3. Select the desired station.
Deleting a station
1. "Media/Radio"
2. "Saved stations"
3. Highlight the station to be deleted.
4. Press the button.
5. "Delete entry"
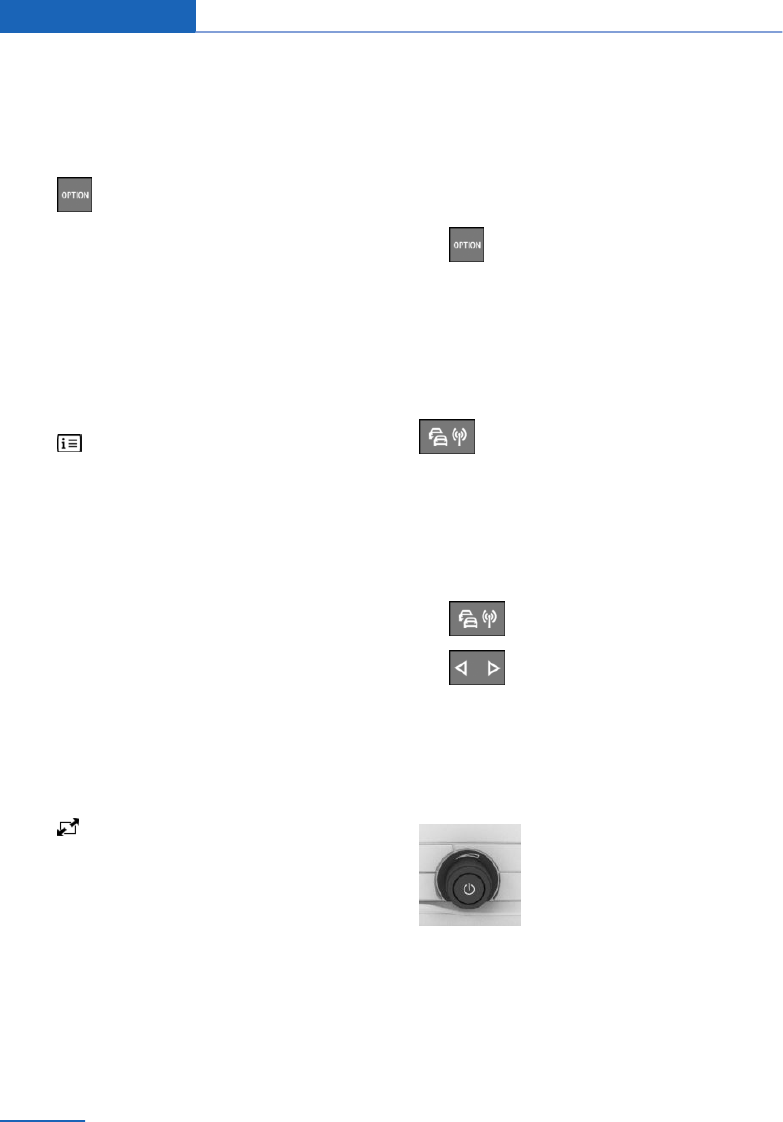
Traffic programme
Switching on/off
Press the button.
Traffic messages are switched on and
off.
Interrupting
Press one of the following buttons during a
traffic announcement:
▷
▷
▷"Cancel traffic information"
Confirm the message on the Control Dis‐
play with the Controller.
Adjusting the volume
Turn the knob during a traffic
announcement until the desired
volume is obtained.
Note the following regarding volume setting:
▷The set volume is not saved.
▷At the start of each journey, the volume of
the traffic announcements is adapted to
the volume of the playback.
Seite 44
Entertainment Radio
44 Online Edition for Part no. 01 40 2 976 378 - X/16

▷The volume cannot be reduced further be‐
yond the point at which the traffic an‐
nouncement is still plainly audible.
Seite 45
Radio Entertainment
45
Online Edition for Part no. 01 40 2 976 378 - X/16
Audio
Vehicle equipment
This chapter describes all standard, national
and special equipment provided in the model
series. Equipment not available in the vehicle is
therefore also described, for example the se‐
lected special equipment or country variant.
This also applies to safety-relevant functions
and systems. Comply with the relevant laws
and regulations when using the corresponding
functions and systems.
General
Music tracks, audiobooks and podcasts can be
played. Sound output is via the vehicle loud‐
speakers.
The settings are saved for the currently used
driver profile.
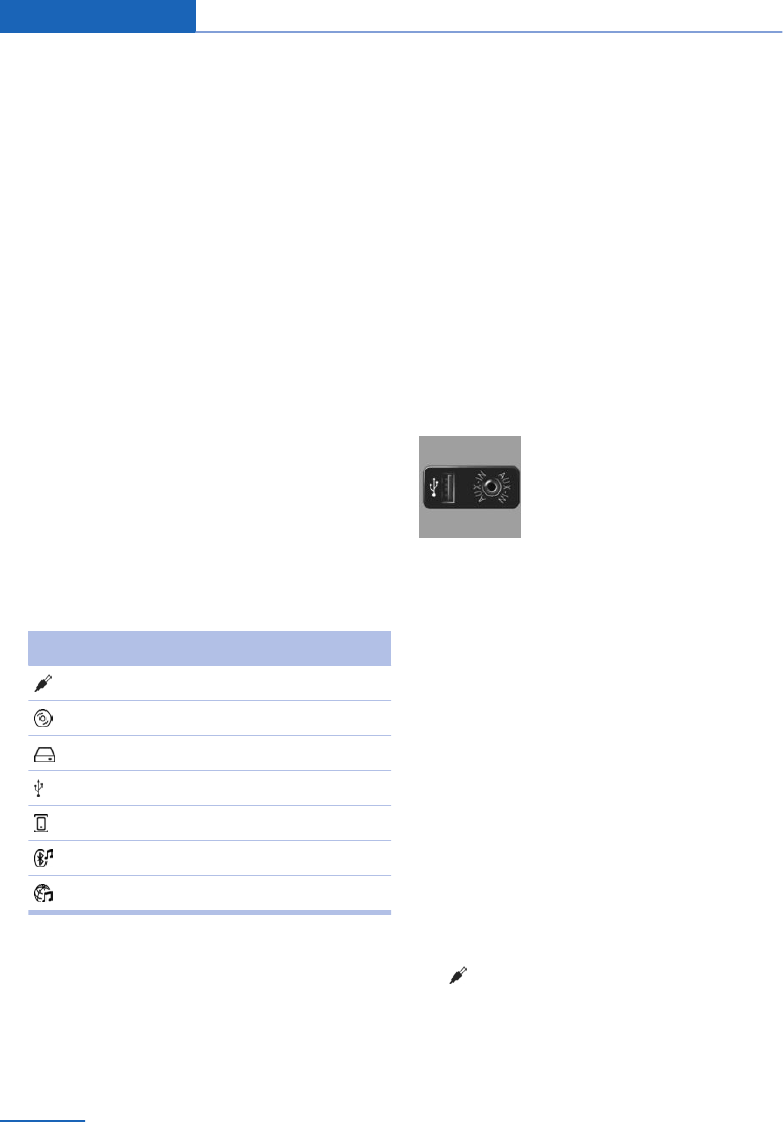
The following audio sources can be used, de‐
pending on the vehicle equipment:
Symbol Meaning
AUX-IN port.
Audio CD.
Music hard disc.
USB device.
Music interface for smartphones.
Bluetooth device.
Online Entertainment
AUX-IN
Principle
▷To connect audio devices, for example
MP3 players. The sound output is via the
vehicle loudspeakers.
▷Recommendation: medium sound and vol‐
ume settings on the audio device. The
sound might depend on the quality of the
audio files.
Connecting
Connect the headphones or
line-out connection of the
equipment to the AUX-IN port.
Ensure that the plug is plugged
into the AUX-IN port until it
clicks.
Playback
1. Connect the audio device, switch it on and
select a track.
2. "Media/Radio"
3. "AUX"
Volume control
The volume of the sound output depends on
the audio device. If this volume differs signifi‐
cantly from other audio sources, it makes
sense to balance the volumes.
1. "Media/Radio"
2. "AUX"
3. Tilt the Controller to the left.
4. "Volume"
5. Turn the Controller until the desired vol‐
ume setting is reached and press the Con‐
troller.
Seite 46
Entertainment Audio
46 Online Edition for Part no. 01 40 2 976 378 - X/16
Audio CD
General
MACROVISION
This product contains copyrighted technology
based on a number of registered US patents
and intellectual property of the Macrovision
Corporation and other manufacturers. The use
of this copy protection must be approved by
Macrovision. Media with the corresponding
protection – unless otherwise agreed with
Macrovision – may only be shown privately. It
is prohibited to copy this technology.
DTS Digital Surround™
Manufactured under licence of US pat‐
ent numbers: 5,451,942; 5,956,674;
5,974,380; 5,978,762; 6,487,535 & other pat‐
ents issued and applied for in the USA and
worldwide. DTS and the logo are registered
trademarks & DTS Digital Surround and the
DTS logos are trademarks of DTS Inc. © DTS,
Inc. All rights reserved.
Safety instructions
CD/DVD player and changer
WARNING
The CD/DVD players and changers are
Class 1 laser products. Lasers can damage the
retina of the eye. Danger of injury. Do not use
the CD/DVD player or changer if the cover is
damaged.◀
CDs and DVDs
NOTE
If incompatible CD sizes are used, the CD
can jam and be impossible to eject. Adhesive
labels that have been affixed subsequently
may peel off during playback. Danger of dam‐
age to property.
▷Do not use CDs with adhesive labels that
have been affixed subsequently.
▷Only use round CDs with a standard diam‐
eter of 12 cm, approximately 5 in and do
not play back CDs with adapter, for exam‐
ple single CDs.
▷Do not use combined CD/DVD, for exam‐
ple DVD Plus.◀
Formats that can be played
CD-R, CD-RW, CD-DA.
Inserting CD
Insert the CD in the CD slot with the label side
uppermost.
Playback begins automatically.
Removing CD
1. Press the button.
The CD is ejected slightly.
2. Remove the CD.
Selecting audio CD
1. "Media/Radio"
2. "CD"
Further descriptions for playback, see
page 53.
Album information
A database with album information is saved in
the vehicle. Depending on the information en‐
tered in this database for the played audio CD,
the album name, artist, track name and album
cover will be displayed.
To update this database, contact a Service
Partner of the manufacturer or another quali‐
fied Service Partner or a specialist workshop.
Gracenote® technology
Music recognition technology and rela‐
ted data is provided by Gracenote®. Grace‐
note is the industry standard in music recogni‐
tion technology and related content delivery.
Seite 47
Audio Entertainment
47
Online Edition for Part no. 01 40 2 976 378 - X/16

For more information, please visit www.grace‐
note.com.
CD and music-related data from Gracenote,
Inc., copyright © 2000 to now Gracenote.
Gracenote Software, copyright © 2000 to now
Gracenote. This product and service may prac‐
tice one or more of the following U.S. Patents:
#5,987,525; #6,061,680; #6,154,773,
#6,161,132, #6,230,192, #6,230,207,
#6,240,459, #6,330,593, and other patents is‐
sued or pending. Some services supplied un‐
der license from Open Globe, Inc. for U.S. Pat‐
ent: #6,304,523.
1. "Media/Radio"
2. "CD"
3. Press the button.
4. "Album information"
The information saved for the album is dis‐
played. If an album cannot be clearly rec‐
ognised, all matching entries are displayed.
5. ▷Select the appropriate entry if neces‐
sary.
▷If information is displayed that does not
match the played album, the informa‐
tion can be hidden. In this case, updat‐
ing the database may also provide a
solution.
"Reset album information"
The album information is no longer dis‐
played.
▷With ConnectedDrive Services, it is
possible to perform an online update of
the database.
"Search for album info online"
The found entries are displayed.
Select the appropriate entry.
The found information is entered in the
vehicle database and displayed.
Malfunctions
The CD/DVD player and changer are optimised
for operation in the vehicle. In some instances,
they may be more sensitive to faulty CDs/
DVDs than devices for stationary use.
If a CD/DVD cannot be played back, first check
whether it has been inserted correctly.
Atmospheric humidity
The CD/DVD or the focussing lens can carry
condensation due to high humidity and play‐
back may temporarily not be possible.
Self-recorded CDs/DVDs
▷With self-recorded CDs/DVDs, possible
causes of malfunction include inconsistent
data-creation or burning process, low qual‐
ity or old blank CD/DVD.
▷Only write on the upper side of CDs/DVDs
using a special marker pen.
Damage
▷Avoid causing fingerprints and protect
against dust, scratches and moisture.
▷Store CDs/DVDs in a case.
▷Do not expose CDs/DVDs to temperatures
above 50 ℃/122 ℉, high levels of humidity
or direct sunlight.
CDs/DVDs with copy protection
CDs/DVDs are often copy-protected by the
manufacturer. This could result in CDs/DVDs
being impossible to play, or only being playa‐
ble with restrictions.
Music hard disc
General
Tracks from audio CDs and USB media can be
saved on the music hard disc in the vehicle and
played from there.
Seite 48
Entertainment Audio
48 Online Edition for Part no. 01 40 2 976 378 - X/16

▷Audio CD: tracks are converted into a com‐
pressed audio format and saved in a direc‐
tory with the album name. If no information
to the album, see page 47, is saved, the di‐
rectory and all tracks receive an automatic
name.
▷USB device with compressed audio files:
all playable audio files of the USB medium
are saved in a directory with the name of
the USB device. Tracks and directories can
be renamed and deleted subsequently.
Manage the music hard disc, see
page 50.
Tracks with copy protection, DRM, are saved,
but cannot be played.
Back up the music hard disc regularly, see
page 52, otherwise the saved music could be
lost in the event of a fault in the hard disc.
Saving from audio CD
1. Insert the audio CD, see page 47, in the CD
player.
2. "Media/Radio"
3. "CD"
4. Tilt the Controller to the left.
5. "Save CD"
The audio CD is saved on the music hard
disc.
During saving, bear the following in mind:
▷Do not remove the audio CD during saving.
▷A changeover to the music hard disc takes
place. Tracks that have already been trans‐
ferred can be played.
▷No tracks on the audio CD can be played.
▷It is possible to change over to other audio
sources.
Cancelling saving from CD
1. "Media/Radio"
2. "CD"
3. Tilt the Controller to the left.
4. "Cancel saving"
The saving process is interrupted and can be
continued at any time.
Resuming saving from CD
1. "Media/Radio"
2. "CD"
3. Tilt the Controller to the left.
4. "Continue saving"
Saving from a USB data storage
medium
1. Connect the USB device, see page 52, to
the USB interface.
2. "Media/Radio"
3. "USB"
Or:
Select the name of the USB device.
4. Tilt the Controller to the left.
5. "Import music"
The audio data is saved on the music hard
disc.
During saving, bear the following in mind:
▷Do not remove the USB device during sav‐
ing.
▷The tracks on the USB device can be fur‐
ther played.
▷It is possible to change over to other audio
sources.
Cancelling saving from USB data
storage medium
1. "Media/Radio"
2. "USB"
Or:
Select the name of the USB device.
3. Tilt the Controller to the left.
4. "Cancel saving"
Saving procedure is interrupted.
Seite 49
Audio Entertainment
49
Online Edition for Part no. 01 40 2 976 378 - X/16

Resuming saving from USB medium
1. "Media/Radio"
2. "USB"
Or:
Select the name of the USB device.
3. Tilt the Controller to the left.
4. "Import music"
Selecting the music hard disc
1. "Media/Radio"
2. "Music collection"
Further descriptions for playback, see
page 53.
Managing the music hard disc
Renaming folders or tracks
If a folder with the name of an album is re‐
named, the album name in the track informa‐
tion for the individual tracks does not change.
If a track is renamed, file name changes but not
the track name saved in the track information.
1. "Media/Radio"
2. "Music collection"
3. Tilt the Controller to the left.
4. "Media search"
5. "Browse folder"
Folders and tracks on the highest directory
level are displayed.
6. Mark desired folder or track, search sub-
folders if necessary.
7. Press the button.
8. "Rename folder" or "Rename track"
The current name is shown.
9. Adapt name as desired and confirm.
Select the symbol.
Deleting folders or tracks
A folder cannot be deleted if a track is currently
being played back from it.
A track cannot be deleted if it is currently being
played.
1. "Media/Radio"
2. "Music collection"
3. Tilt the Controller to the left.
4. "Media search"
5. "Browse folder"
Folders and tracks on the highest directory
level are displayed.
6. Mark desired folder or track, search sub-
folders if necessary.
7. Press the button.
8. "Delete folder" or "Delete track"
Album information
A database with album information is saved in
the vehicle. Depending on the information en‐
tered in this database for the selected album,
the album name, artist, track name and album
cover will be displayed.
To update this database, contact a Service
Partner of the manufacturer or another quali‐
fied Service Partner or a specialist workshop.
Gracenote® technology
Music recognition technology and rela‐
ted data is provided by Gracenote®. Grace‐
note is the industry standard in music recogni‐
tion technology and related content delivery.
For more information, please visit www.grace‐
note.com.
CD and music-related data from Gracenote,
Inc., copyright © 2000 to now Gracenote.
Gracenote Software, copyright © 2000 to now
Gracenote. This product and service may prac‐
tice one or more of the following U.S. Patents:
#5,987,525; #6,061,680; #6,154,773,
#6,161,132, #6,230,192, #6,230,207,
#6,240,459, #6,330,593, and other patents is‐
Seite 50
Entertainment Audio
50 Online Edition for Part no. 01 40 2 976 378 - X/16

sued or pending. Some services supplied un‐
der license from Open Globe, Inc. for U.S. Pat‐
ent: #6,304,523.
▷ Symbol for saved audio CDs.
▷The update takes place for each individual
album.
▷Album information can also be updated if
the album has been imported from another
vehicle.
1. "Media/Radio"
2. "Music collection"
3. Tilt the Controller to the left.
4. "Media search"
5. "Browse folder"
Folders and tracks on the highest directory
level are displayed.
6. Mark desired folder, search sub-folders if
necessary.
7. Press the button.
8. "Album information"
The information saved for the album is dis‐
played. If an album cannot be clearly rec‐
ognised, all matching entries are displayed.
9. ▷Select the appropriate entry if neces‐
sary.
▷If information is displayed that does not
match the played album, the informa‐
tion can be hidden. In this case, updat‐
ing the database may also provide a
solution.
"Reset album information"
The album information is no longer dis‐
played.
▷With ConnectedDrive Services, it is
possible to perform an online update of
the database.
"Search for album info online"
The found entries are displayed.
Select the appropriate entry.
The found information is entered in the
vehicle database and displayed.
Free capacity
Displaying free capacity on the music hard
disc.
1. "Media/Radio"
2. "Music collection"
3. Press the button.
4. "Manage music collection"
5. "Available memory"
Deleting selected music
Selected tracks can be deleted.
1. "Media/Radio"
2. "Music collection"
3. Press the button.
4. "Manage music collection"
5. "Delete selected tracks"
The music search is displayed. Proceed
according to the description for Track
search, see page 54.
A list of tracks to be deleted is created ac‐
cording to the search criteria.
6. Select music tracks.
Deleting all tracks
1. "Media/Radio"
2. "Music collection"
3. Press the button.
4. "Manage music collection"
5. ▷"Delete music collection"
▷"Delete all music tracks"
6. "OK"
Seite 51
Audio Entertainment
51
Online Edition for Part no. 01 40 2 976 378 - X/16

Backing up the music hard disc
Back up the music hard disc regularly, other‐
wise the saved music could be lost in the event
of a fault in the hard disc.
When backing up, ensure that the USB device
has adequate free capacity.
Depending on the number of tracks, backing
up the music hard disc may take a long time.
This is why it is best to make the backup dur‐
ing a longer journey. If the backup cannot be
created, do not remove USB data storage me‐
dium, the back-up will be continued on the
next journey.
1. Connect the USB device, see page 52, to
the USB interface.
2. "Media/Radio"
3. "Music collection"
4. Press the button.
5. "Manage music collection"
6. "Save music collection to USB"
Restoring the music hard disc
When restoring from the USB medium, the
music hard disc available in the vehicle is over‐
written. It is best to make the backup during a
longer journey. If it cannot be saved, do not re‐
move USB data storage medium, the saving
will be continued on the next journey.
1. Connect the USB device, see page 52, to
the USB interface.
2. "Media/Radio"
3. "Music collection"
4. Press the button.
5. "Manage music collection"
6. "Restore music collection from USB
device"
USB devices
Formats that can be played
MP3, MP4, M4A, M4B, AAC, WMA.
Apple iPod/iPhone
Music search and music playback of Apple
iPod/iPhone is supported.
Audio players and storage media with
USB port
Information on all tracks, for example artist,
genre or track, as well as the playlists are
transferred to the vehicle. This might take
some time, depending on the USB data stor‐
age medium and the number of tracks.
During transfer, the tracks can be called up via
the file directory.
The information for approximately
40,000 tracks can be saved in the vehicle, al‐
though no more than 16,000 tracks per USB
device.
Music tracks with integrated Digital Rights
Management, DRM, cannot be played.
Selecting USB device
Connect the device to the USB interface, pref‐
erably using the adapter cable supplied with
the USB device.
Information regarding the USB interface, see
the Owner's Handbook for the vehicle.
1. "Media/Radio"
2. "USB"
Or:
Select the name of the USB device.
Further descriptions for playback, see
page 53.
Seite 52
Entertainment Audio
52 Online Edition for Part no. 01 40 2 976 378 - X/16

Bluetooth audio
General
▷Playback of music files via Bluetooth from
external devices, for example audio devi‐
ces or mobile telephones.
▷The sound output is via the vehicle loud‐
speakers.
▷The volume of the sound output depends
on the device. If applicable, change volume
settings on the device.
▷Up to four external devices can be paired
with the vehicle.
Requirements
▷The Bluetooth device is connected with
the vehicle. Bluetooth connections, see
Owner's Handbook for the vehicle.
▷Bluetooth audio playback has been activa‐
ted.
Selecting Bluetooth device
1. "Media/Radio"
2. Select the required Bluetooth device from
the list.
Further descriptions for playback, see
page 53.
If the Bluetooth device is not listed in the list of
devices, possibly audio playback has not been
activated. Proceed as follows to activate audio
playback:
1. "Media/Radio"
2. "Manage mobile devices"
3. Select required Bluetooth device.
4. "Bluetooth audio"
Online Entertainment
Principle
Online music services can be accessed via the
Internet. It is necessary to have a valid mem‐
bership with the selected music service.
The music offered there can be played and
saved in the vehicle. Saved tracks can also be
played back when there is no Internet connec‐
tion.
The Owner's Handbook for Online Entertain‐
ment is available on the Internet at
www.bmw.com, under ConnectedDrive Serv‐
ices.
Selecting Online Entertainment
1. "Media/Radio"
2. "Online Entertainment"
Playback
General
Once an audio source has been selected, the
playback screen is displayed.
This screen shows the available information
about the current track and the playlist. The
content and scope of the playlist depends on
the selected audio source and the search crite‐
ria used.
▷On an audio CD, all tracks on the CD are
displayed.
▷The selected playlist is displayed in the
case of USB and Bluetooth devices as well
as for the music hard disc. This can be the
result of a search or a previously saved
playlist.
Tilting the Controller to the left displays further
functions. The extent of applications available
depends on the selected audio source.
With Bluetooth devices, the extent of applica‐
tions that can be operated using iDrive may be
restricted depending on the supported Blue‐
Seite 53
Audio Entertainment
53
Online Edition for Part no. 01 40 2 976 378 - X/16

tooth version. If necessary, the missing func‐
tions can be operated directly on the device.
Selecting track
1. Turn the Controller to mark a track in the
playlist.
2. Press the Controller.
All tracks in the playlist are played, starting
from the selected track.
Changing the track
Press the button on the radio.
The next or previous track from the playlist is
played.
Fast forward/rewind
Keep button pressed.
Searching for tracks
General
The possible search criteria depend on the se‐
lected audio source.
Searching for track information
The following search criteria relate to the data
saved in the track information.
1. Tilt the Controller to the left.
2. "Media search"
3. Select the desired setting:
▷"Search"
All tracks are displayed which have
track information containing the en‐
tered search term. The more charac‐
ters are entered, the more tightly the
result is restricted.
Tilting the Controller to the right jumps
to the result list.
▷"Genres"
A list of all available genres is dis‐
played.
Once a genre has been selected, all
matching artists are displayed.
▷"Artists"
A list of all available artists is displayed.
Once an artist has been selected, all
matching albums and tracks are dis‐
played.
▷"Albums"
A list of all available albums is dis‐
played.
Once an album has been selected, all
matching tracks are displayed.
▷"Tracks"
A list of all available tracks is displayed.
4. If necessary, select an album.
5. Select the track you want to start the play‐
back with.
The display changes to the playback
screen. The playlist corresponds to the
track list resulting from the search.
Search for artists and tracks can also be di‐
rectly selected.
1. Tilt the Controller to the left.
2. "Artists" or "Tracks"
Tracks which do not contain the selected
search criterion are grouped as "unknown".
Searching for playlists
1. Tilt the Controller to the left.
2. "Media search"
3. "Playlists"
A list of all available playlists is displayed.
4. Select playlist.
5. Select the track you want to start the play‐
back with.
The display changes to the playback
screen. The playlist corresponds to the
track list resulting from the search.
Seite 54
Entertainment Audio
54 Online Edition for Part no. 01 40 2 976 378 - X/16

Searching for other media
Depending on the USB device and the equip‐
ment, audio books and podcasts can be
searched for separately.
1. Tilt the Controller to the left.
2. "Media search"
3. Select the desired setting:
▷"Podcasts"
A list of all available podcasts is dis‐
played.
▷"Audio books"
A list of all available audiobooks is dis‐
played.
4. Select the track you want to start the play‐
back with.
The display changes to the playback
screen. The playlist corresponds to the
track list resulting from the search.
Searching in the folder structure
In this search, the folder structure on the disk
is displayed. This search is only possible on
the music hard disc and on USB devices.
The names of the folders and tracks corre‐
spond to the folder and file names. These may
differ from the names in the track information.
1. Tilt the Controller to the left.
2. "Media search"
3. "Browse folder"
4. Change to a subfolder if necessary.
Select the track you want to start the play‐
back with.
The display changes to the playback
screen. The playlist corresponds to the
track list resulting from the search.
Browse through the albums
1. Tilt the Controller to the left.
2. "Browse albums"
The available albums are shown graphi‐
cally.
3. Turn the Controller to browse through the
albums.
4. Select the desired album.
All tracks on the selected album are dis‐
played.
5. Select the track you want to start the play‐
back with.
6. Tilt the Controller to the left to return to the
playback screen. The playlist corresponds
to the track list of the album.
Searching for similar tracks
1. Tilt the Controller to the left.
2. "More like this (local)"
A list of similar tracks is displayed.
3. Select the track you want to start the play‐
back with.
The display changes to the playback
screen. The playlist corresponds to the
track list resulting from the search.
Random playback
Random playback is possible for the current
playlist, and for all tracks on the selected audio
source.
1. Tilt the Controller to the left.
2. Select the desired setting:
▷ "Shuffle"
The playlist is played in a random se‐
quence.
▷ "Media search"
"Shuffle (music)"
All tracks on the audio source are
played in random order.
Creating a favourites list
The current track can be allocated to a special
playlist, the favourites list. If the current track is
already in the favourites list, it can be deleted
Seite 55
Audio Entertainment
55
Online Edition for Part no. 01 40 2 976 378 - X/16

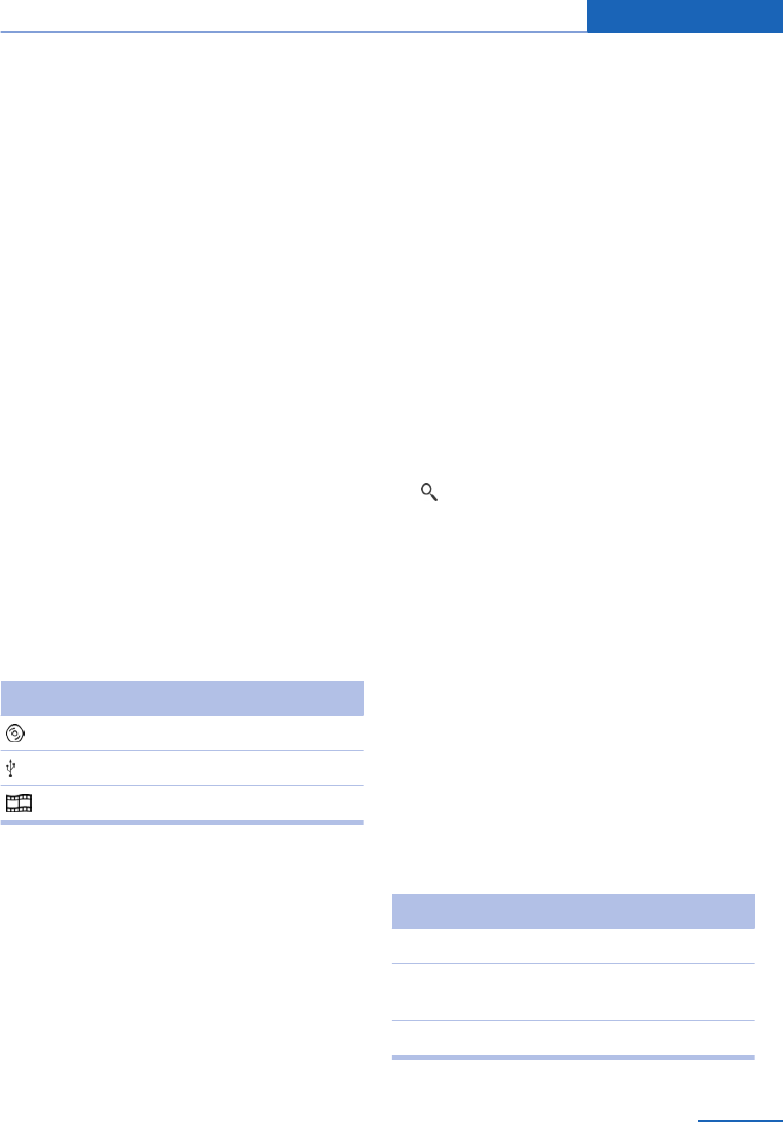
Video
Vehicle equipment
This chapter describes all standard, national
and special equipment provided in the model
series. Equipment not available in the vehicle is
therefore also described, for example the se‐
lected special equipment or country variant.
This also applies to safety-relevant functions
and systems. Comply with the relevant laws
and regulations when using the corresponding
functions and systems.
General
Video files and video DVDs can be played.
Sound output is via the vehicle loudspeakers.
The settings are saved for the currently used
driver profile.
The video screen on the front Control Display
will be switched off when exceeding a speed
dependent on country.
Depending on the vehicle equipment, the fol‐
lowing video sources are possible.
Symbol Meaning
Video DVD.
USB device.
Screen Mirroring.
USB devices
General
Depending on the USB device, video playback
via the USB connection may not be possible.
Formats that can be played
MP4, M4V, AVI, WMV, XVID, H.264.
Selecting USB device
Connect the device to the USB interface, pref‐
erably using the adapter cable supplied with
the USB device.
Information regarding the USB interface, see
the Owner's Handbook for the vehicle.
1. "Media/Radio"
2. "USB"
Or:
Select the name of the USB device.
Searching for video films
1. Tilt the Controller to the left.
2. "Media search"
3. "Videos"
A list of all available video films is dis‐
played.
4. Select the track you want to start the play‐
back with.
The display changes to the playback
screen. The playlist corresponds to the film
list resulting from the search.
Video DVD
Country codes
Only DVDs with the regional code selected
when the vehicle was ordered can be played.
See also information on the DVD.
Code Region
1 USA, Canada.
2 Japan, Europe, Middle East, South Af‐
rica.
3 South-East Asia.
Seite 57
Video Entertainment
57
Online Edition for Part no. 01 40 2 976 378 - X/16
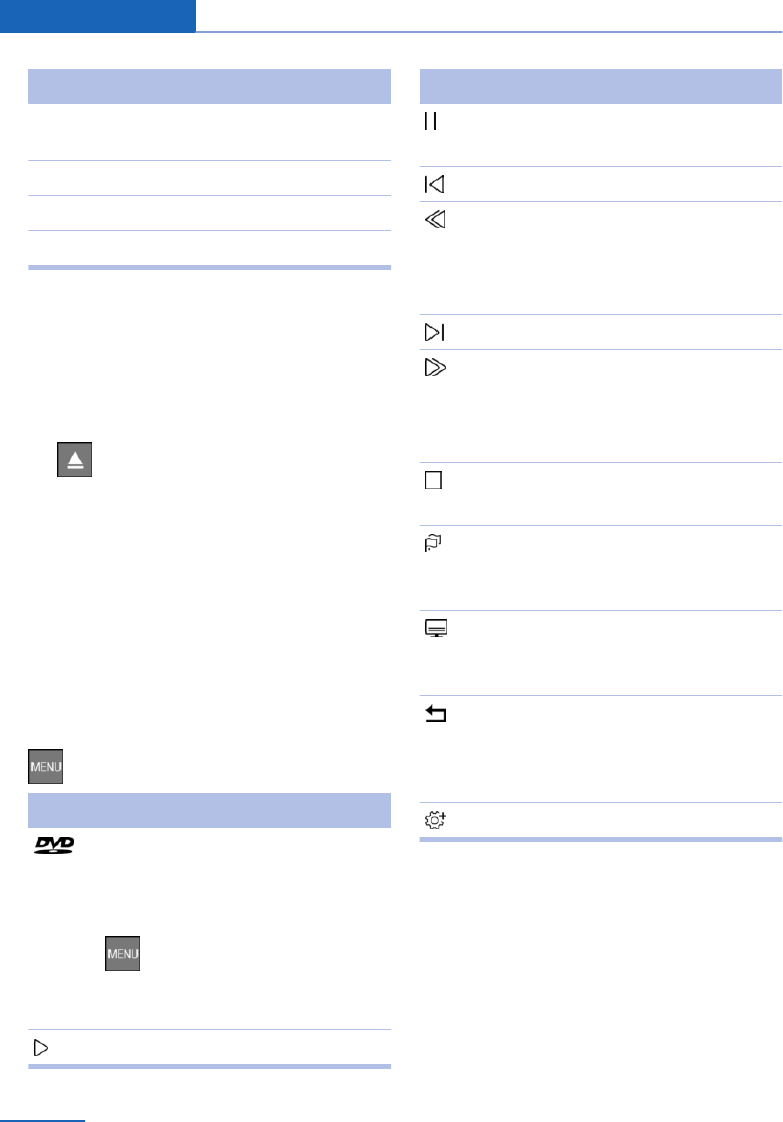
Code Region
4 Australia, Central and South America,
New Zealand.
5 North-West Asia, North Africa.
6 China.
0 All regions.
Inserting a DVD
Insert the DVD in the DVD slot with the label
side uppermost.
Playback begins automatically.
Removing a DVD
1. Press the button.
The DVD is ejected slightly.
2. Remove the DVD.
Selecting a video DVD
1. "Media/Radio"
2. "CD/DVD"
3. Playback begins automatically.
Video menu
To open the Video menu:
Press button during playback.
Symbol Function
Call up the DVD menu.
Many DVDs have their own menu.
The display depends on the con‐
tents of the DVD.
Press thebutton to exit the DVD
menu.
Start playback.
Symbol Function
Pause.
Playback is interrupted.
Previous chapter.
Rewind.
The speed is increased with every
additional push on the Controller.
To stop, start playback.
Next chapter.
Fast forward.
The speed is increased with every
additional push on the Controller.
To stop, start playback.
Stop.
Playback is stopped.
Setting the language.
The languages available depend on
the DVD.
Setting subtitles.
The available subtitles depend on
the DVD.
Back.
Returns into the superordinate
menu. This function is not suppor‐
ted by all media.
More functions.
The video menu is shown automatically after
some time.
DVD settings
Depending on the DVD, some settings are only
possible via the DVD menu, see also informa‐
tion on your DVD.
Seite 58
Entertainment Video
58 Online Edition for Part no. 01 40 2 976 378 - X/16

Selecting camera angle
The availability of an alternative camera angle
depends on the DVD and the current track on
the DVD.
1. Press button during playback.
2. "More functions"
3. "Viewing angle"
4. Select the desired setting.
Setting the brightness, contrast,
colour
1. Press button during playback.
2. "More functions"
3. Select the desired setting.
4. Turn the Controller until the desired set‐
ting is reached, then press the Controller.
Setting the zoom
Showing an enlarged TV image.
1. Press button during playback.
2. "More functions"
3. "Zoom mode"
4. Check the box to play an enlarged video
image.
Uncheck the box to play an unenlarged
video image.
Selecting track
1. Press button during playback.
2. "More functions"
3. "Select track"
4. Select the desired track.
Selecting a chapter
1. Press button during playback.
2. "More functions"
3. "Select chapter"
4. Select the desired chapter.
Screen Mirroring
The screen of a smartphone is reproduced on
the vehicle screen via a WiFi connection.
Sound is played back via the vehicle's loud‐
speakers.
This function must be supported by the smart‐
phone.
The smartphone is used for operation.
Connecting the smartphone with the vehicle,
see Owner's Handbook for the vehicle.
Seite 59
Video Entertainment
59
Online Edition for Part no. 01 40 2 976 378 - X/16
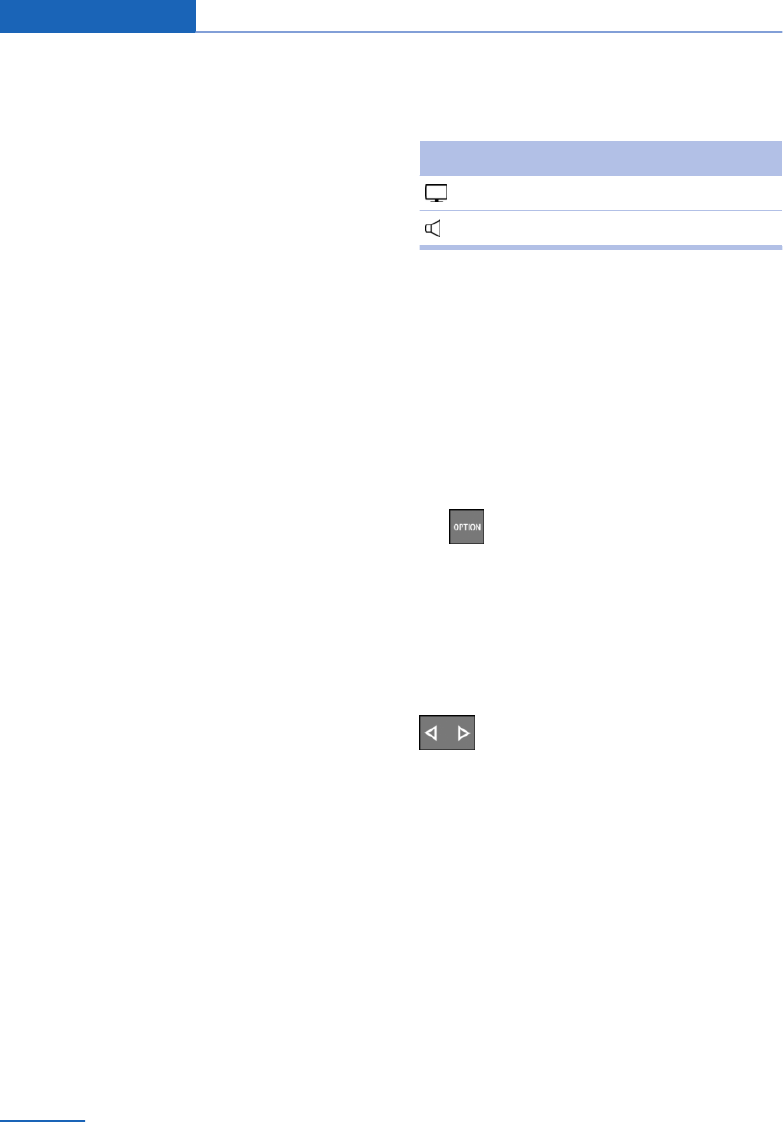
Television, TV
Vehicle equipment
This chapter describes all standard, national
and special equipment provided in the model
series. Equipment not available in the vehicle is
therefore also described, for example the se‐
lected special equipment or country variant.
This also applies to safety-relevant functions
and systems. Comply with the relevant laws
and regulations when using the corresponding
functions and systems.
General
For your own safety, the TV picture is only dis‐
played up to approximately 3 km/h, approxi‐
mately 2 mph. On some country versions, it is
only displayed when the parking brake or se‐
lector lever position P is engaged.
The settings are saved for the currently used
driver profile.
Selecting programme
In certain circumstances, the list of channels
that can be received might not be updated au‐
tomatically. Update the list with station search,
see page 60, if necessary.
1. "Media/Radio"
2. "TV"
The channel last seen is displayed.
3. Turn the Controller to display the station
list.
All receivable TV channels and radio sta‐
tions are shown in a list. The radio stations
are shown at the end of the list.
4. Select the desired channel.
Symbol Meaning
TV programme
TV radio station
Station search
The station search takes up to 2 minutes de‐
pending on the number of channels offered. If
not all offered channels are listed, it might be
necessary to reset the TV region, see
page 62.
1. "Media/Radio"
2. "TV"
3. Press the button.
4. "Station scan"
5. To cancel the search:
"Cancel"
Changing the channel
Press the button on the radio.
The next or previous channel from the channel
list is displayed.
Saving the channel
1. "Media/Radio"
2. "TV"
A symbol at the highlighted channel indicates
whether the channel has already been saved.
Seite 60
Entertainment Television, TV
60 Online Edition for Part no. 01 40 2 976 378 - X/16
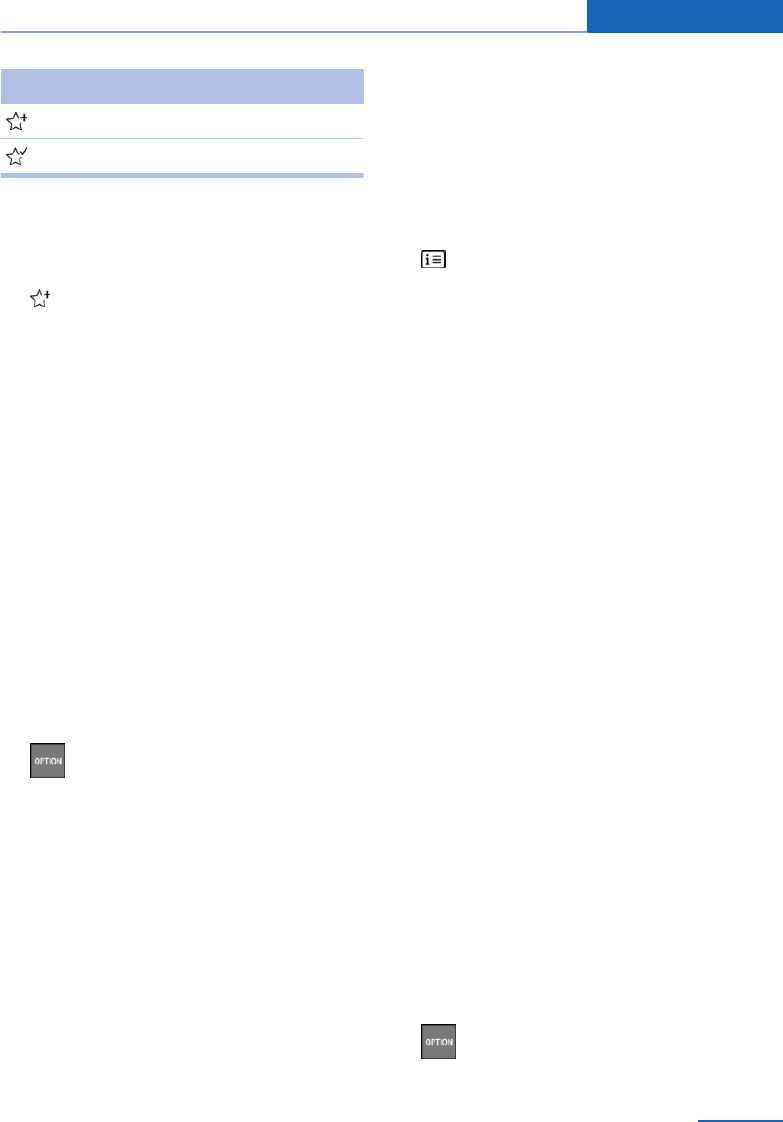
Symbol Meaning
Channel has not been saved.
Channel has already been saved.
Memory locations 1 - 25 are available.
To save the channel shown:
1. Tilt the Controller to the left.
2. "Save station"
The memory list is displayed.
3. Select the desired memory location.
Or:
1. Highlight the shown channel.
2. Press the Controller.
The memory list is displayed.
3. Select the desired memory location.
To save a channel different from the shown
channel:
1. Select the desired channel.
2. Press and hold the Controller until the
memory list is displayed.
3. Select the desired memory location.
Or:
1. Select the desired channel.
2. Press the button.
3. "Save station"
The memory list is displayed.
4. Select the desired memory location.
The stations can also be saved on the favour‐
ites buttons.
Electronic programme guide
Many stations provide an electronic pro‐
gramme guide.
1. "Media/Radio"
2. "TV"
3. Tilt the Controller to the left.
4. "TV guide"
The stations' current and next programmes are
displayed.
Depending on the information that a station
transmits, the entire daily schedule of the sta‐
tion may be shown.
Select station names to display the daily
schedule.
If some characters are not correctly displayed
adjust TV region, see page 62.
Showing programme information
Depending on the information a station trans‐
mits, more detailed information on a pro‐
gramme can be shown.
Select programme to show the more detailed
information.
The corresponding station can be selected.
Saved channels
1. "Media/Radio"
2. "Saved stations"
3. Select the desired channel.
Deleting channels
1. "Media/Radio"
2. "Saved stations"
3. Highlight the channel to be deleted.
4. Press the button.
5. "Delete entry"
Seite 61
Television, TV Entertainment
61
Online Edition for Part no. 01 40 2 976 378 - X/16
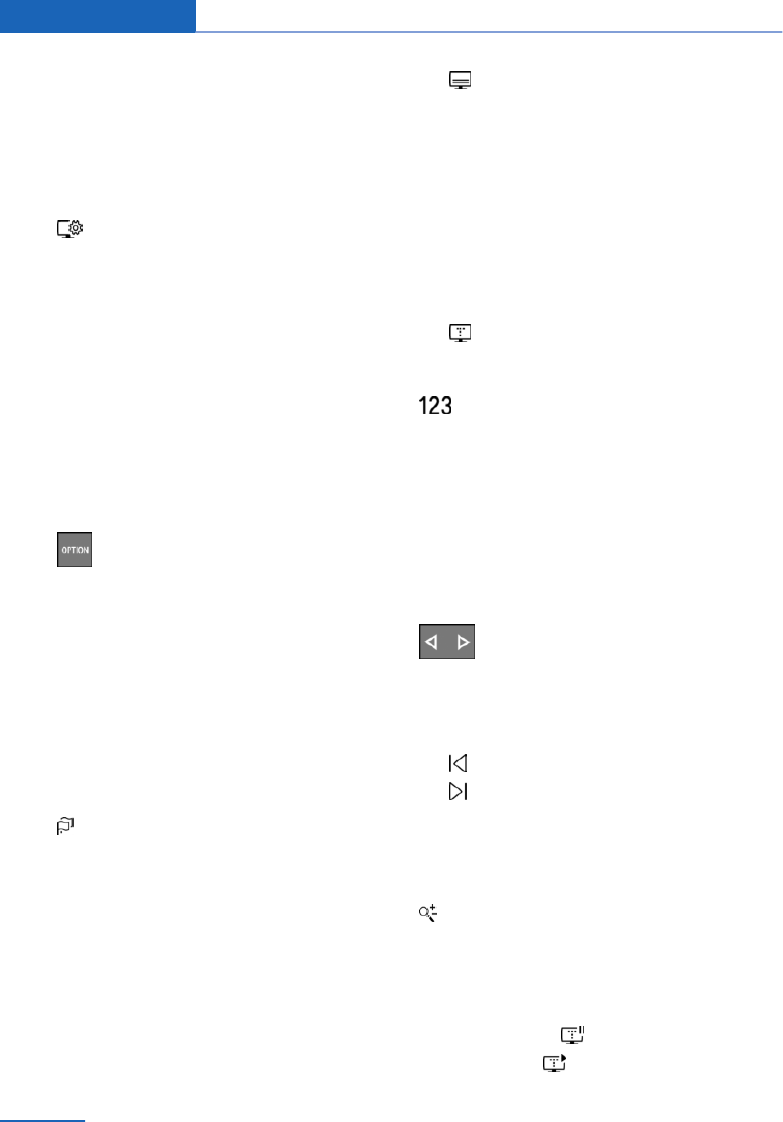
Adjusting TV
Setting the brightness, contrast,
colour, zoom
1. Till the Controller to the left during play‐
back.
2. "Display settings"
3. Select the desired setting.
4. Turn the Controller until the desired set‐
ting is reached, then press the Controller.
TV Region
The TV region is not the same in every coun‐
try. Adjust the TV region for optimum TV re‐
ception.
For more information: www.bmw.com/tvregion.
1. "Media/Radio"
2. "TV"
3. Press the button.
4. "TV region"
5. Select the desired region.
Selecting the soundtrack
The range of soundtracks available depends
on the TV program and time of day.
1. "Media/Radio"
2. "TV"
3. Tilt the Controller to the left.
4. "Audio"
5. Select soundtrack.
Showing subtitles
Displaying subtitles depends on what the rele‐
vant station provides.
1. "Media/Radio"
2. "TV"
3. Tilt the Controller to the left.
4. "Subtitles"
5. Select subtitles.
Teletext
Calling up teletext
1. "Media/Radio"
2. "TV"
3. Tilt Controller to the left
4. "Teletext"
Selecting page
"Select page"
Turn the Controller until the desired page
number is displayed.
If the contents are too long to be shown on a
single page the display is scrolled automati‐
cally.
Changing pages
On the radio:
Press the button on the radio.
The next or previous page is displayed.
Via iDrive:
▷Turn the Controller in the desired direction.
▷ Move to previous page.
▷ Move to next page.
Zoom
The top or bottom half of the page can be en‐
larged.
"Zoom"
Automatic scrolling
A page may consist of several sub-pages
which are automatically scrolled through.
Prevent scrolling: "Hold page"
Allow scrolling: "Hold page"
Seite 62
Entertainment Television, TV
62 Online Edition for Part no. 01 40 2 976 378 - X/16
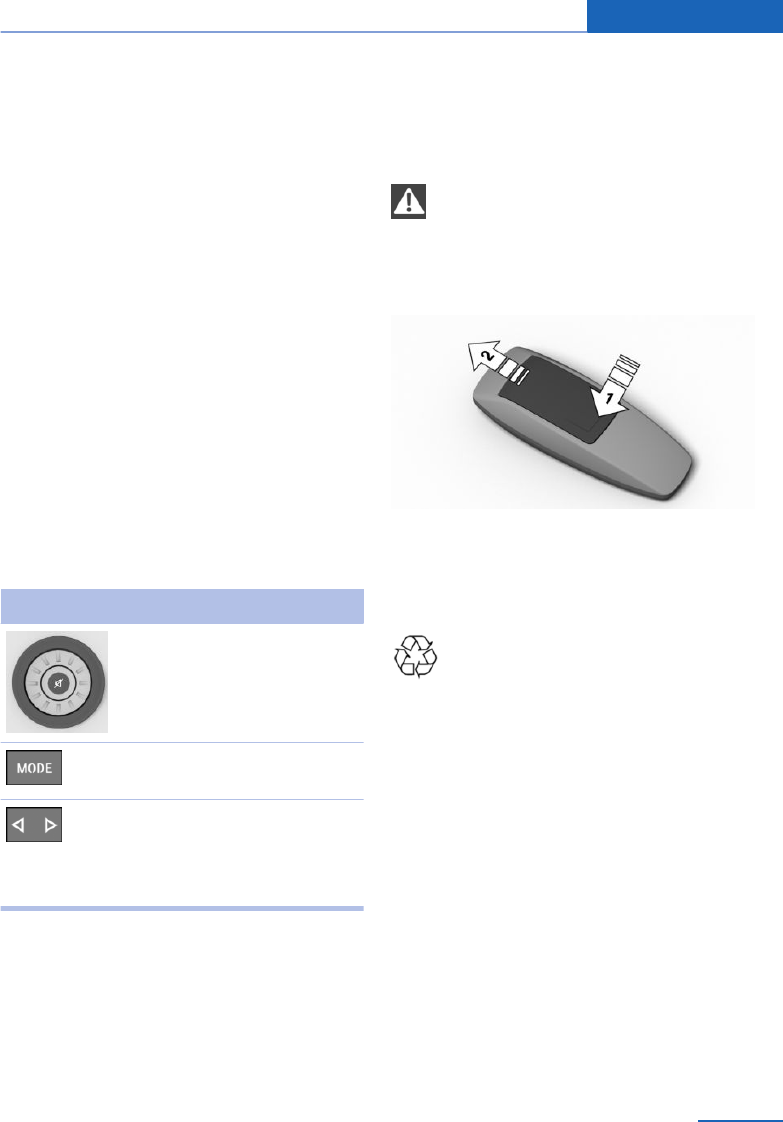
Audio remote control in the rear
Vehicle equipment
This chapter describes all standard, national
and special equipment provided in the model
series. Equipment not available in the vehicle is
therefore also described, for example the se‐
lected special equipment or country variant.
This also applies to safety-relevant functions
and systems. Comply with the relevant laws
and regulations when using the corresponding
functions and systems.
Principle
Operation is in the same way as the corre‐
sponding buttons on the radio.
Menu guidance
Press the button Function
Turn the wheel: adjusts the
volume.
Press middle button:
switches the sound on/off.
Switches entertainment
sources.
Switches stations, tracks
or chapters.
Keep button pressed: fast
forward/rewind.
The send time of the remote control is limited
in accordance with legal regulations. Pressing
or turning the relevant button again allows a
function to be executed again.
Changing the batteries
NOTE
If batteries are used in the remote con‐
trol, damage can occur due to the contained
substances. Danger of damage to property. Do
not use rechargeable batteries.◀
1. Remove the cover. To do so, press the
cover, arrow 1, and push forwards, arrow 2.
2. Insert batteries of the same type.
3. Close the cover.
Dispose of old batteries at a Service
Partner of the manufacturer or another
qualified Service Partner or a specialist
workshop or hand them into an authorised col‐
lecting point.
Seite 63
Audio remote control in the rear Entertainment
63
Online Edition for Part no. 01 40 2 976 378 - X/16
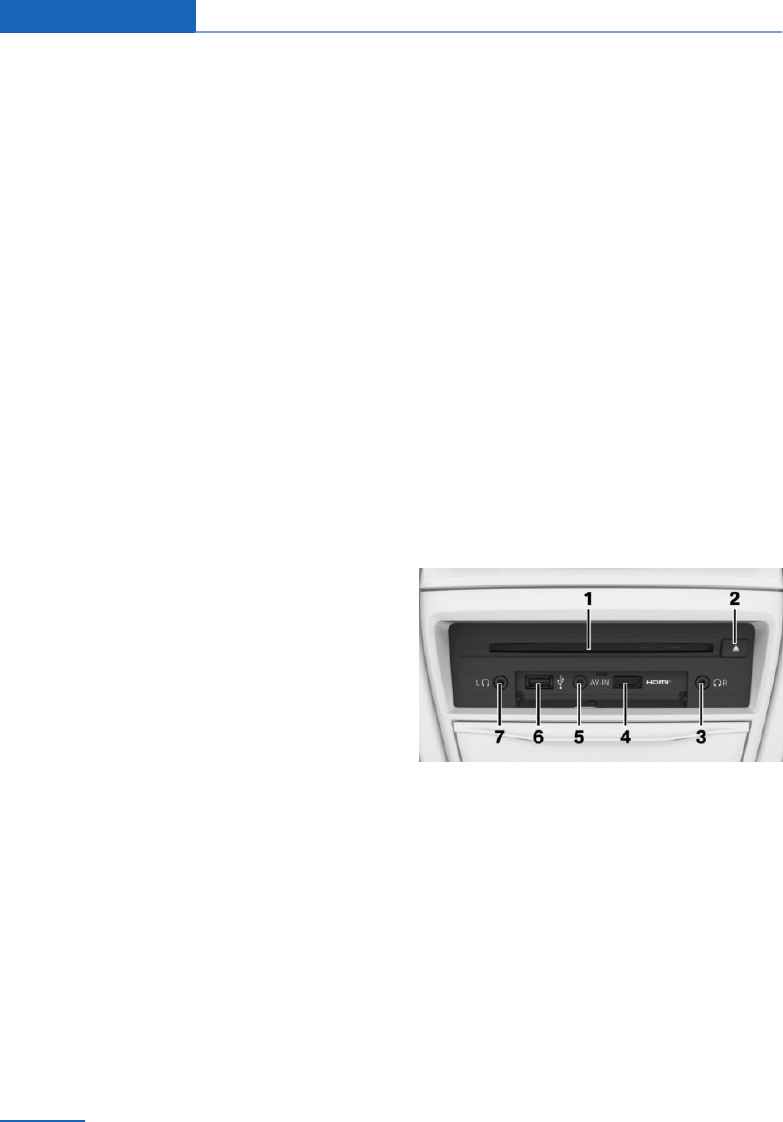
Rear entertainment
Vehicle equipment
This chapter describes all standard, national
and special equipment provided in the model
series. Equipment not available in the vehicle is
therefore also described, for example the se‐
lected special equipment or country variant.
This also applies to safety-relevant functions
and systems. Comply with the relevant laws
and regulations when using the corresponding
functions and systems.
Principle
Rear entertainment enables passengers in the
rear to access entertainment sources irrespec‐
tive of the driver's selection. There are two
screens in the rear for this purpose, as well as
various media connections and a Blu-ray
player. Sound is output is either via head‐
phones or the vehicle loudspeakers.
Different entertainment sources can be selec‐
ted via the screens.
Rear entertainment also allows access to many
iDrive functions.
Some entertainment sources can be controlled
from the front and rear at the same time. A cor‐
responding rear enable, see page 69, can be
set for these situations.
Entertainment sources that can be selected at
front and rear:
▷Radio stations.
Only one radio station can be listened to in
the vehicle.
▷Music hard disc.
Various tracks from the music hard disc
can be listened to.
▷TV station with vehicle stationary.
Only one TV station can be received in the
vehicle.
Entertainment sources that can only be selec‐
ted in front:
▷Front USB input.
▷Front CD/DVD player.
DVD only with vehicle stationary.
Entertainment sources that can only be selec‐
ted in rear:
▷Rear AUX-IN input.
▷Rear USB input.
▷Rear HDMI input.
▷Rear CD/DVD/Blu-ray player.
▷TV station while the vehicle is in motion.
CD/DVD/Blu-ray player in the
rear
1CD/DVD/Blu-ray slot
2Ejecting CD/DVD/Blu-ray
3Headphone connection, right
4HDMI/MHL connection
5AUX-IN port
6USB port
7Headphone connection, left
Seite 64
Entertainment Rear entertainment
64 Online Edition for Part no. 01 40 2 976 378 - X/16
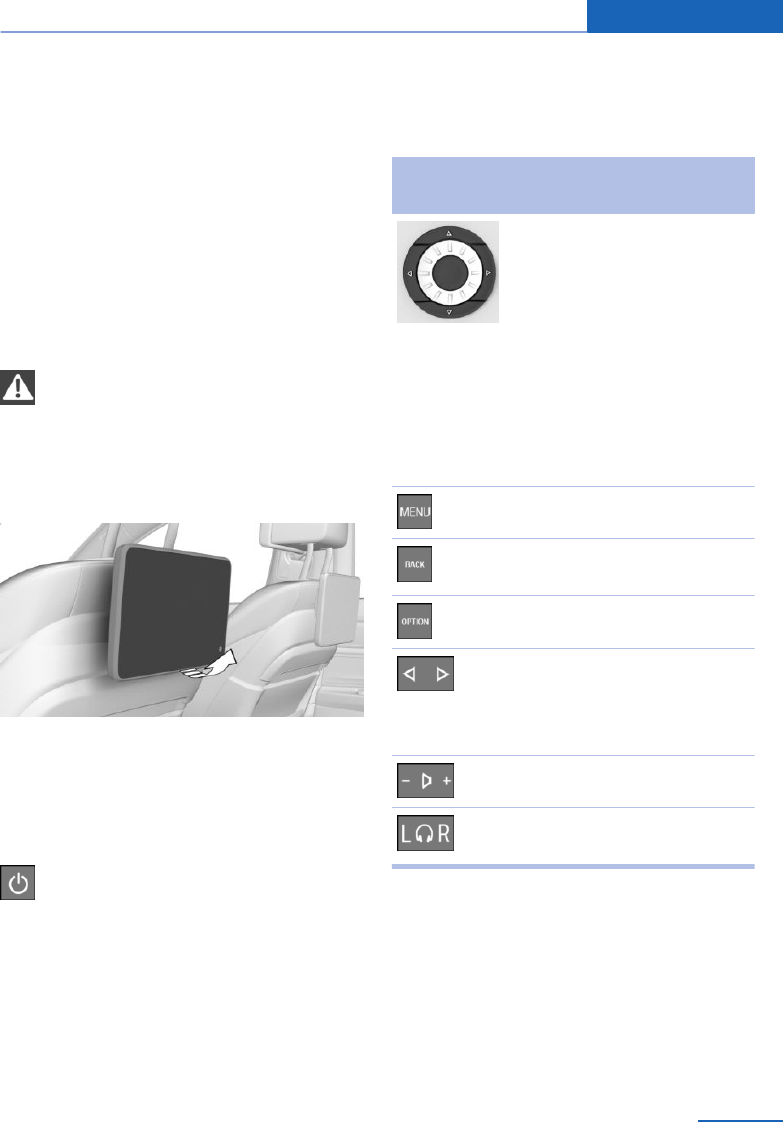
Screens
General
When loading the rear seats and adjusting the
backrests of the front seat, fold in the screens.
Please fold in the display screens when mak‐
ing use of the through-loading system.
To clean the screens, comply with the informa‐
tion regarding care, see Owner's Handbook for
the vehicle.
Safety note
WARNING
The back of the screen can get very hot
during operation. Danger of injury. Do not grip
the back of the screen.◀
Adjusting
Pull on the lower edge and/or press against the
lower edge to adjust the inclination.
Switching system on/off
Press the button on the lower edge of
the screen.
The rear entertainment and relevant screens
are switched on/off.
If the rear entertainment was switched off in
the rear enable, see page 69, switching on in
the rear is not possible.
Remote control
Control functions
Press the but‐
ton
Function
Operating principle as front
Controller.
Turning the wheel: high‐
lights a menu item.
Pressing middle button:
confirm selection.
Pressing the arrow buttons
corresponds to tipping the
Controller, change be‐
tween screens, operate
DVD/Blu-ray menu.
Calls up the main menu.
Displays the previous
menu.
Call up options.
Switches stations, tracks
or chapters.
Keep button pressed: fast
forward/rewind.
Adjusts the volume.
Toggling between the
screens.
The send time of the remote control is limited
in accordance with legal regulations. Pressing
or turning the respective button again allows a
function to be executed again.
Connecting remote control
2 wireless remote controls can be connected.
Seite 65
Rear entertainment Entertainment
65
Online Edition for Part no. 01 40 2 976 378 - X/16
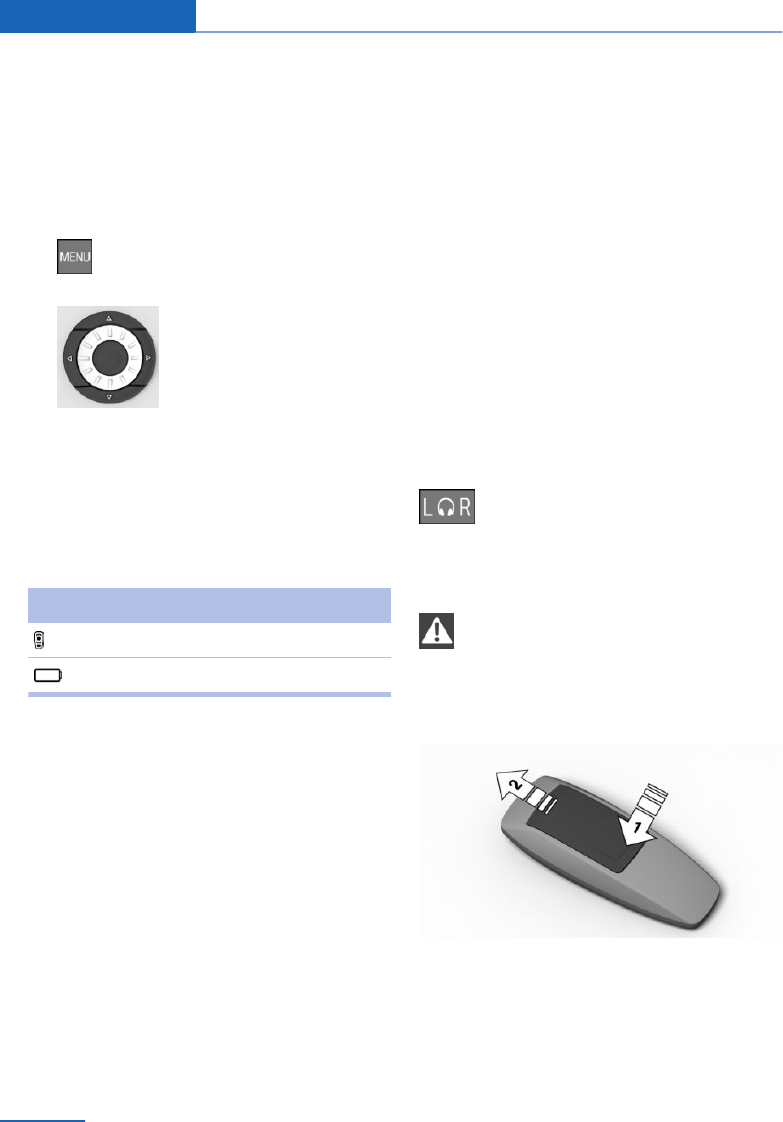
The first remote control must be connected via
iDrive at the front.
1. "My Vehicle"
2. "iDrive settings"
3. "Headphones/Remote control"
A list of connected devices is displayed.
4. Press and hold the button on the re‐
mote control for 5 seconds.
5. Simultaneously, press and
hold the middle button for 5 seconds.
2 LEDs on the remote control flash for
10 seconds. Perform next step while LEDs
are flashing.
6. "Connect new device"
The remote control is shown on the list of con‐
nected devices.
Symbol Meaning
Remote control.
Battery charge state.
Renaming remote control
The name with which the remote control is dis‐
played can be changed.
1. "My Vehicle"
2. "iDrive settings"
3. "Headphones/Remote control"
A list of connected devices is displayed.
4. Highlight the remote control which is to be
renamed.
5. "Rename"
6. Enter desired names.
Deleting connection of the remote
control
The connection with the vehicle may be de‐
leted.
1. "My Vehicle"
2. "iDrive settings"
3. "Headphones/Remote control"
A list of connected devices is displayed.
4. Highlight the remote control for which the
connection is to be deleted.
5. "Remove device"
Selecting page
A remote control can be connected to the left
or right side of the rear entertainment. The
side can be changed at any time.
Push switch to the left or right.
The corresponding side is operated.
Changing the batteries
NOTE
If batteries are used in the remote con‐
trol, damage can occur due to the contained
substances. Danger of damage to property. Do
not use rechargeable batteries.◀
1. Remove the cover. To do so, press the
cover, arrow 1, and push forwards, arrow 2.
2. Insert batteries of the same type.
3. Close the cover.
Seite 66
Entertainment Rear entertainment
66 Online Edition for Part no. 01 40 2 976 378 - X/16
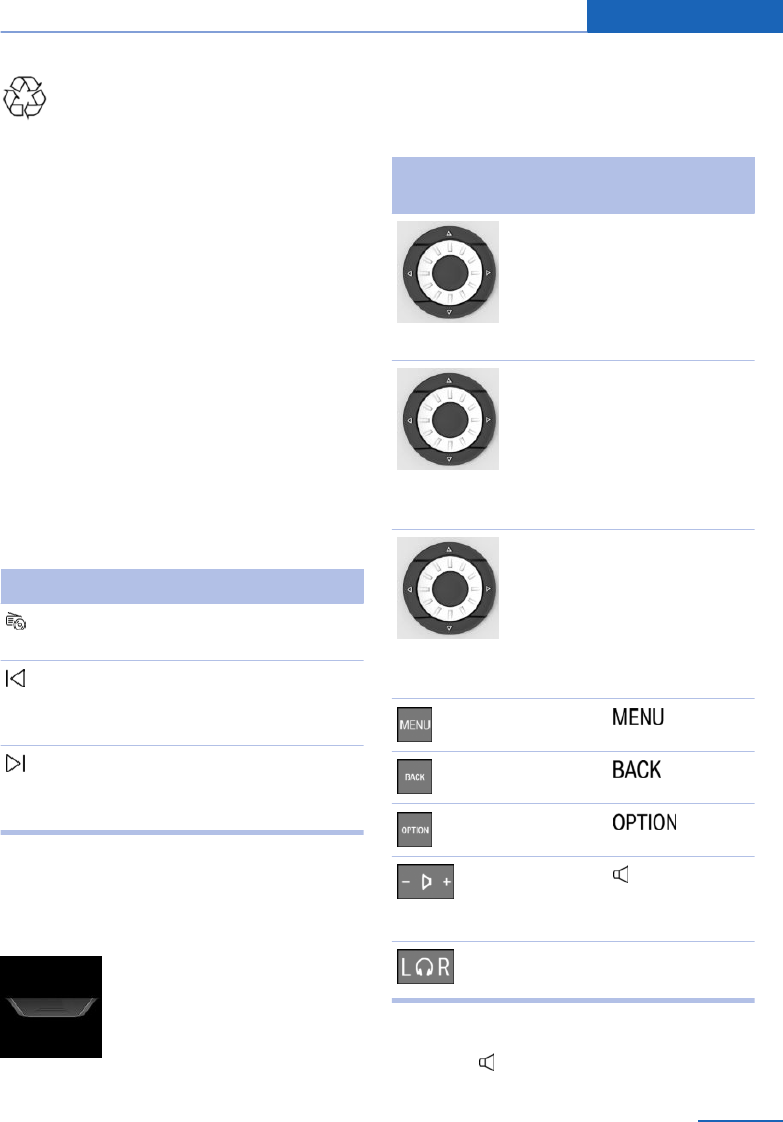
Dispose of old batteries at a Service
Partner of the manufacturer or another
qualified Service Partner or a specialist
workshop or hand them into an authorised col‐
lecting point.
BMW Touch Command
Principle
Rear entertainment can either be operated via
the remote control or via BMW Touch Com‐
mand.
For this purpose, the entertainment menu can
be called up or a remote control used.
Operation via menu
1. "Media/Radio"
2. Touch L to operate the left screen.
Touch R to operate the right screen.
Symbol Function
Display and select available enter‐
tainment sources.
Switch to the previous station, track
or chapter.
Keep button pressed: fast rewind.
Switch to the next station, track or
chapter.
Keep button pressed: fast forward.
Further operation is described in chapter En‐
tertainment.
Operation via remote control
Touch graphic with your finger
and slide it down.
The remote control is opened.
Touch graphic with your finger
and slide it up.
The remote control is closed.
BMW Touch Command compared to the re‐
mote control:
Remote control BMW Touch Com‐
mand
Turn wheel.
Swipe up or down us‐
ing your finger.
Press the left and
right arrow buttons.
Swipe left or right us‐
ing your finger.
Tap the arrow sym‐
bols on the left or right
side.
Press button in the
middle.
Tap on screen with
your finger.
Tap symbol.
Tap symbol.
Tap symbol.
Tap symbol.
Further setting op‐
tions are displayed.
Tap on l for left screen
or R for right screen.
Volume control
Touch the symbol to set the volume:
Seite 67
Rear entertainment Entertainment
67
Online Edition for Part no. 01 40 2 976 378 - X/16
It is possible to set for each screen whether
the sound should be output via headphones or
via loudspeakers.
The volume is set individually for each set of
headphones and for the loudspeakers.
▷Touch the left arrow to switch between
sound output via headphones or via loud‐
speakers for the left screen.
▷Touch the right arrow to switch between
sound output via headphones or via loud‐
speakers for the right screen.
Symbol Function
Reduce volume.
Increase volume.
Mute/unmute sound.
Headphones and vehicle
loudspeakers
Principle
To select an entertainment source on a screen
in the rear irrespective of the selection made at
the front, the sound must be played back via
headphones.
If sound playback via loudspeakers is set on
the screens then the selection made for the
sound source for the vehicle loudspeakers can
be made both at front and in rear. The required
setting can be selected in the rear enable, see
page 69, for these situations.
Changing over
1. Press the button.
2. Select desired sound output:
"Loudspeakers" or "Headphones"
Behaviour when changing over from
vehicle loudspeakers to headphones
If it is changed over to headphones on one
screen only, the sound output of the vehicle
loudspeakers does not change. If it is changed
over to headphones on both screens in the
rear, the following must be observed:
▷If the entertainment source of the vehicle
loudspeakers can be operated using the
front Controller, the sound output from the
vehicle loudspeakers does not change.
▷If the entertainment source of the vehicle
loudspeakers cannot be operated using
the front Controller, the sound output from
the vehicle loudspeakers is stopped.
Another entertainment source must be se‐
lected.
Behaviour when changing over from
headphones to vehicle loudspeakers
The entertainment source of the headphones
is played back via the vehicle loudspeakers.
Headphones
Headphones connected by a cable
Connection of headphones and compatible
headsets using a jack connector 3.5 mm, ap‐
proximately 1/8 in, see page 64, on the Blu-ray
player in the rear.
Wireless headphones
Connecting headphones
Suitable wireless headphones are available
from a Service Partner of the manufacturer or
another qualified Service Partner or a specialist
workshop.
3 sets of wireless headphones can be connec‐
ted.
1. Switch on headphones.
2. "My Vehicle"
Seite 68
Entertainment Rear entertainment
68 Online Edition for Part no. 01 40 2 976 378 - X/16
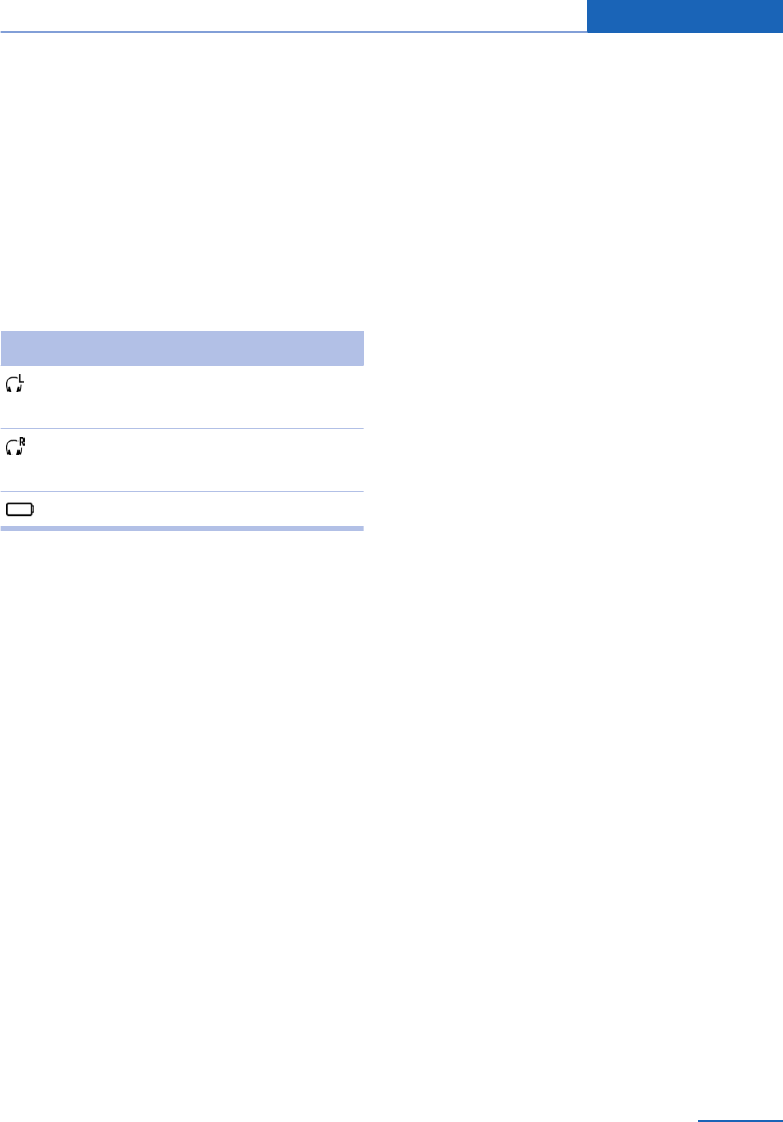
3. "iDrive settings"
4. "Headphones/Remote control"
A list of connected devices is displayed.
5. "Connect new device"
6. Press and hold the switch-on button on the
headphones until the following text is dis‐
played:
"Connecting…"
The headphones are shown on the list of con‐
nected devices.
Symbol Meaning
Headphones.
Connection to left side.
Headphones.
Connection to right side.
Battery charge state.
Renaming headphones
The name shown with the headphones can be
changed.
1. "My Vehicle"
2. "iDrive settings"
3. "Headphones/Remote control"
A list of connected devices is displayed.
4. Select the headphones you want to re‐
name.
5. "Rename"
6. Enter desired names.
Deleting connection of the
headphones
The connection with the vehicle may be de‐
leted.
1. "My Vehicle"
2. "iDrive settings"
3. "Headphones/Remote control"
A list of connected devices is displayed.
4. Highlight the headphones for which the
connection is to be deleted.
5. "Remove device"
Selecting page
A set of headphones can be connected to the
left or right side of the rear entertainment. The
page selection is made on the headphones,
see the user manual for the headphones.
Enabling rear
Settings
This setting is only possible using the iDrive at
the front.
1. "My Vehicle"
2. "iDrive settings"
3. "Rear-seat entertainment"
4. Select the desired setting.
▷"Limited (only Media/Radio)"
If the same entertainment source is se‐
lected at the front and rear, no settings
can be made to this source from the
rear. For example, if the radio is being
listened to in the front and rear, a sta‐
tion change is only possible in the
front.
The entertainment source selected at
the front is output via the vehicle loud‐
speakers.
The entertainment source selected in
the rear can only be played back via
headphones.
It is only possible to access the follow‐
ing function in the rear when this set‐
ting is selected: "Media/Radio"
▷"Enable rear-seat control"
If the same entertainment source is se‐
lected at the front and rear, adjust‐
ments can be made to this source at
the front and from the rear.
Seite 69
Rear entertainment Entertainment
69
Online Edition for Part no. 01 40 2 976 378 - X/16

Switching off rear entertainment
1. "My Vehicle"
2. "iDrive settings"
3. "Rear-seat entertainment"
4. "Disable rear-seat control"
The rear entertainment is switched off and
cannot be switched on any longer from the
rear.
To switch rear entertainment on again, select
one of the two enable settings.
Volume limit for headphones
For the headphones in the rear, a volume limit
can be switched on in the front.
1. "My Vehicle"
2. "iDrive settings"
3. "Rear-seat entertainment"
4. "Volume limitation"
Selecting entertainment
source for rear
An entertainment source can be selected for
the screens in the rear using iDrive at the front.
The selection can be changed using the con‐
trols in the rear.
1. "Media/Radio"
2. "Rear"
3. Select desired screen or both screens.
4. Select desired entertainment source.
It is only possible to select entertainment
sources that can be controlled from the
rear.
Settings
Brightness
1. "My Vehicle"
2. "iDrive settings"
3. "Control display"
4. Set screen brightness.
Language
1. "My Vehicle"
2. "iDrive settings"
3. "Language"
4. Select language for all screens.
Headphones/remote control
Connect wireless headphones, see page 68.
Connect remote control, see page 65.
Sound
If the vehicle loudspeakers are selected for
sound output, the settings are made as in the
front.
If the headphones are selected for sound out‐
put, only trebles, basses and surround can be
adjusted. The setting is made separately for
the headphones on the left and right.
1. "My Vehicle"
2. "iDrive settings"
3. "Sound"
Controls
Almost all functions can be operated in the
same way as they are in the front. Special fea‐
tures of operation in the rear are listed in the
following section.
Music hard disc
▷Saving music only using the front CD/DVD
player or the front USB interface.
▷Export and import of data only using the
front USB interface.
Seite 70
Entertainment Rear entertainment
70 Online Edition for Part no. 01 40 2 976 378 - X/16
Blu-ray video
Country codes
Only Blu-ray discs with the regional code se‐
lected when the vehicle was ordered can be
played. See also information on the Blu-ray
disc.
Code Region
A North America, South America, Japan,
Korea, Taiwan, Hong Kong, Southeast
Asia.
B Europe, Africa, Oceania, Greenland.
C India, Nepal, China, Russia, central
and southern Asia.
No autoplay
Playback does not start automatically on in‐
serting a CD, DVD or Blu-ray disc.
To start playback:
1. "Media/Radio"
2. "CD/DVD/Blu-ray"
Video menu
The following changes occurred in the video
menu:
Sym‐
bol
Function
Call up the Blu-ray menu.
The film is paused.
Press thebutton to exit the Blu-ray
menu.
Call up the Blu-ray pop-up menu.
The film continues playing in the
background.
Press thebutton to exit the Blu-ray
menu.
More functions.
It is also possible to mark scenes of
a film. The function depends on the
possibilities of the Blu-ray disc.
Blu-ray memory
A Blu-ray memory is located in the vehicle,
which must be deleted from time to time. If a
corresponding prompt is displayed on the
Control Display, proceed as follows:
1. "Media/Radio"
2. Press the button.
3. "Clear Blu-ray memory"
Image in image function
Some Blu-ray discs offer the possibility of inte‐
grating an image into an ongoing video film,
which shows different contents of the Blu-ray
disc.
If this option is used on a screen, the second
screen cannot play back a different video
source than the Blu-ray disc.
Seite 71
Rear entertainment Entertainment
71
Online Edition for Part no. 01 40 2 976 378 - X/16

To enable playback of Blu-ray discs and other
video sources at the same time, proceed as
follows:
1. "Media/Radio"
2. Press the button.
3. "Permit simultaneous playback of Blu-ray
and other video sources"
Cinavia Notice
This product uses technology from Cinavia for
restricting the use of unauthorised copies of
commercial film and video products and their
soundtracks. As soon as unauthorised use of a
pirated copy is detected, a message is dis‐
played and the playback or copying process is
interrupted. If the playback of copying process
is interrupted and one of the following mes‐
sages is displayed, this means it is an unautor‐
ised copy of content that is protected by Cina‐
via technology.
Messsage code 1: Playback stopped. The me‐
dia content to be played is protected by Cina‐
via® and is not authorised for playback on this
device. For further information visit http://
www.cinavia.com. Message code 1.
Message code 3: Audio playback has been
temporarily muted. Do not adjust the playback
volume. The media content to be played is
protected by Cinavia® and is not authorised
for playback on this device. For further infor‐
mation visit http://www.cinavia.com. Message
code 3.
For more information about Cinavia technol‐
ogy, refer to the Cinavia online consumer infor‐
mation centre at http://www.cinavia.com. To
request additional information about Cinavia
by post, send a postcard with your postal ad‐
dress to: Cinavia Consumer Information Cen‐
ter, P.O. Box 86851, San Diego, CA, 92138,
USA.
Intellectual property law
Copyright 2004-2012 Verance Corporation.
Cinavia® is a trademark of the Verance Corpo‐
ration. Protected by US patent 7.369.677 and
worldwide patents that have been licenced and
registered by the Verance Corporation. All
rights reserved.
Navigation
Route planning is possible separately in the
rear left/right. It is only possible to start the
route guidance at the front.
Suggesting a destination
A destination or trip can be forwarded to the
front as a suggestion. The suggestion can be
accepted at the front or cancelled. This func‐
tion is not available with the following setting:
"Limited (only Media/Radio)".
1. Enter destination.
2. "Suggest destination to driver"
Options
No split screen possible.
External devices
General
▷Connection of external audio and video de‐
vices or digital cameras using the AUX-IN
port or HDMI connection in the rear. The
operation is done via the external device.
▷Connection of external devices using USB
audio interface in the rear. Operation is
same as in front.
Due to the large number of audio and video de‐
vices available on the market, faultless play‐
back via the screen cannot be ensured for ev‐
ery audio and video device.
Starting play
1. "Media/Radio"
Seite 72
Entertainment Rear entertainment
72 Online Edition for Part no. 01 40 2 976 378 - X/16

2. Select device.
▷"HDMI"
▷"AUX"
▷"USB"
Or:
Select the name of the USB medium.
Volume control
The volume of the sound output depends on
the audio device. If this volume differs signifi‐
cantly from other audio sources, it makes
sense to balance the volumes.
1. "Media/Radio"
2. "AUX"
3. Tilt the Controller to the left.
4. "Volume:"
5. Turn the Controller until the desired vol‐
ume is set.
6. Press the Controller.
Frequently Asked Questions
Why is only a black screen visible?
▷Switch on system.
Why can nothing be selected on the screen?
▷Toggle remote control on these screens.
Why are radio or TV channels greyed out and
cannot be selected?
▷Function is restricted based on the selec‐
ted enable setting. Change setting.
Why is the CD/DVD/Blu-ray not played back?
▷The disc does not begin to play automati‐
cally. Start CD/DVD/Blu-ray manually.
Why can the vehicle loudspeaker volume not
be adjusted in the rear?
▷Sound output in the rear is done via the
headphones. Change any priority and out‐
put the sound via the vehicle loudspeakers.
Seite 73
Rear entertainment Entertainment
73
Online Edition for Part no. 01 40 2 976 378 - X/16
Online Edition for Part no. 01 40 2 976 378 - X/16

Communication
All of the possibilities available for mobile
communication with your family, friends,
business partners or service providers are
summarised in this chapter.
Online Edition for Part no. 01 40 2 976 378 - X/16
Telephone
Vehicle equipment
This chapter describes all standard, national
and special equipment provided in the model
series. Equipment not available in the vehicle is
therefore also described, for example the se‐
lected special equipment or country variant.
This also applies to safety-relevant functions
and systems. Comply with the relevant laws
and regulations when using the corresponding
functions and systems.
Telephone functions
General
Mobile telephones can be connected to the
vehicle using Bluetooth, see Owner's Hand‐
book for the vehicle.
At high temperatures, the charging function of
the mobile telephone can be restricted and no
longer operate.
Do not operate a connected mobile telephone
with the keypad of the phone to avoid malfunc‐
tions.
When using the mobile telephone through the
vehicle, follow the user manual of the mobile
telephone.
Safety note
WARNING
Operating integrated informations sys‐
tems and communication devices during the
journey can distract from traffic. You could lose
control of the vehicle. Danger of accidents.
Only operate the systems or devices if permis‐
sible in the traffic situation. Stop if necessary
and operate the systems or devices with the
vehicle at a standstill.◀
Incoming call
If the number of the caller is saved in the tele‐
phone book and is transferred from the net‐
work, the name of the contact is displayed.
Otherwise, only the phone number is dis‐
played.
Accepting a call
Incoming calls can be accepted in different
ways.
▷Via iDrive:
"Accept"
▷ Press the button on the steering
wheel.
▷Via the selection list in the instrument clus‐
ter:
Select using knurled wheel on steering
wheel: "Accept"
Rejecting a call
▷Via iDrive:
"Reject"
▷Via the selection list in the instrument clus‐
ter:
Select using knurled wheel on steering
wheel: "Reject"
▷By gestures: swipe your hand in the direc‐
tion of the front passenger seat.
Ending a call
▷Via iDrive:
"End call"
▷ Press the button on the steering
wheel.
Seite 76
Communication Telephone
76 Online Edition for Part no. 01 40 2 976 378 - X/16
Last calls
The last 20 outgoing, missed or incoming calls
from both mobile telephones are transferred to
the vehicle. Depending on the equipment ver‐
sion, the transfer is from the main and addi‐
tional telephone.
Displays
1. "Communication"
2. "Recent calls"
3. The last 20 calls are displayed.
Filter call list
1. "Calls:"
2. Select the desired setting.
Dial number from list
Select from list. Call is established using the
mobile telephone from which the entry came.
Using options: start the call using the second
mobile telephone.
To cancel: "End call"
Saving as a contact or adding to a
contact
1. Highlight the contact.
2. Press the button.
3. "Save as new contact" or "Add to contact"
Active calls
Adjusting the volume
During a call, turn the volume knob on the radio
until the required volume has been reached.
The setting is saved for the currently used
driver profile.
Automatic volume equalisation
1. "My Vehicle"
2. "iDrive settings"
3. "Sound"
4. "Volume settings"
5. "Microphone" or "Loudspeakers"
6. Adjusting: turn the Controller
7. Saving: press the Controller.
Dialling a number
1. "Communication"
2. "Dial number"
3. Enter numbers.
4. Select the symbol.
The call is made using the mobile tele‐
phone assigned to the telephone function.
If the connection is to be made through the ad‐
ditional telephone:
1. Press the button.
2. "Call via"
Hold, resume
An active call can be held and resumed later.
▷ "Hold/Resume"
Call is held.
▷ "Hold/Resume"
Call is continued.
Microphone muting
The microphone can be muted during active
calls.
"Microphone"
A muted microphone is activated automati‐
cally:
▷When a new call is set up.
▷When alternating between call parties.
DTMF overlap dialling
Using DTMF overlap dialling to access net‐
work services or to control devices, for exam‐
ple remote answer phone access. This re‐
quires the DTMF code.
1. "Digit input"
Seite 77
Telephone Communication
77
Online Edition for Part no. 01 40 2 976 378 - X/16

2. Enter DTMF code.
Calls with a number of participants
General
It is possible to switch between calls or merge
two calls to set up a conference. The functions
must be supported by the mobile telephone
and service provider.
Accepting a call during another call
If there is a second call during an ongoing call
you hear a call waiting signal, if applicable.
"Accept"
The call is accepted and the existing call is
held.
Setting up a second call
Another call can be set up during a call.
1. "Contacts"
2. Select new call number.
The call is started and the first call is held.
Switching between two calls,
alternating
You can switch between two calls.
1. Setting up two calls.
2. "Resume"
The phone switches to the call that is in
progress.
Setting up a conference
Two calls can be merged to set up a telephone
conference. The calls must be set up using the
same mobile telephone.
1. Setting up two calls.
2. "Place conference call"
Hands-free system
General
Calls taken via the hands-free system can be
continued via the mobile telephone and vice
versa.
From mobile telephone to the hands-
free system
Calls that were started outside the Bluetooth
range of the vehicle can be continued via the
hands-free system when the ignition or the
standby state is switched on, provided the re‐
mote control is in the vehicle.
Depending on the mobile telephone, there is
an automatic switch to the hands-free mode.
If the changeover does not take place auto‐
matically, follow what is shown on the mobile
telephone display. See also the user manual of
the mobile telephone.
From the hands-free system to the
mobile telephone
Calls taken via the hands-free system can also
be continued via the mobile telephone, de‐
pending on the mobile telephone.
Follow what is shown on the mobile telephone
display. See also the user manual of the mobile
telephone.
Contacts
General
Contacts can be created and edited. In addi‐
tion, the contacts are transferred from the mo‐
bile telephone and displayed. Contact pictures
can be displayed if the mobile telephone sup‐
ports this function.
Displaying all contacts
1. "Communication"
2. "Contacts"
The contacts are listed in alphabetical or‐
der. The contact search function and the
Seite 78
Communication Telephone
78 Online Edition for Part no. 01 40 2 976 378 - X/16

quick search are offered, depending on the
number of contacts.
Contact search
With more than 30 contacts, the contact
search is offered.
1. "Search"
2. Enter letters.
The hits are displayed on the right side.
3. Tilt the Controller to the right.
4. Select contact to display it.
Quick search in lists
With more than 30 contacts, a quick search is
available. Letters for which an entry is available
are displayed in alphabetical order along the
left edge of the Control Display.
1. Turn Controller quickly to the left or right.
At the left edge, all letters are displayed for
which a contact has been saved.
2. Select the initial letter of the required con‐
tact.
The first entry of the selected letter is dis‐
played.
Saving home contact
A home contact can be saved. This is the first
item on your contact list.
1. "Home contact (empty)"
2. Fill in required fields.
3. "Save contact in the vehicle"
Saving a contact in the vehicle
1. Press the button.
2. "Save contact in the vehicle"
A copy of the contact from the mobile tele‐
phone is saved in the vehicle.
Additional functions
The following functions are available in a selec‐
ted contact:
▷ Start route guidance.
▷ Call up contact.
▷ Call up Internet address.
▷ New e-mail.
Deleting a contact
A contact saved in the vehicle can be deleted.
It is not possible to delete contacts transferred
from the mobile telephone.
1. Highlight the required contact.
2. Press the button.
3. "Delete contact"
Deleting all contacts in the vehicle
All contacts saved in the vehicle are deleted.
The contacts transferred from the mobile tele‐
phone are not deleted.
1. Press the button.
2. "Delete all contacts in the vehicle"
3. "OK"
New contact
If applicable, "Clear fields"
1. Press the button.
2. "New contact"
3. Fill in required fields.
4. "Save contact in the vehicle"
Selecting sources
It is possible to select whether the contacts
should be transferred from the mobile tele‐
phone, and if so, from which mobile telephone.
1. Press the button.
Seite 79
Telephone Communication
79
Online Edition for Part no. 01 40 2 976 378 - X/16
2. "Select sources for contacts"
3. Select required mobile telephone.
Sorting contacts
The contact names can be displayed in a dif‐
ferent sequence. The sort order for contacts
might not be the same as the selected sort or‐
der, depending on how contacts are saved on
your mobile telephone.
1. Press the button.
2. "Sort contacts"
3. "Surname" or "First name"
Checking address as destination
If the vehicle is equipped with a navigation sys‐
tem, a contact can be adopted as a destina‐
tion.
1. Select the desired contact.
2. Select address.
3. "Check address" or "Search for address
online"
4. Correct entries if necessary.
5. "Start route guidance"
The address can be accepted into route guid‐
ance.
Editing contacts
If a contact that was transferred from the mo‐
bile telephone is changed, a copy of the entry
is created in the vehicle when saving.
In other words, identical contact entries are
merged into a single contact.
1. Select the desired contact.
2. "Edit contact"
3. Change required entry or add entries.
4. "Save contact in the vehicle"
Displaying contact pictures
Photos saved for contacts are saved in the ve‐
hicle when the mobile telephone is connected
to the vehicle.
1. "My Vehicle"
2. "iDrive settings"
3. "Mobile devices"
4. "Settings"
5. "Contact pictures"
6. Tilt the Controller to the left.
Voice control
A connected smartphone can be operated by
voice commands.
To do this, activate the voice control in the
smartphone.
Button on
the steering
wheel
Function
Press the button for at
least three seconds. Voice con‐
trol in the smartphone is activa‐
ted.
Symbol on the Control Display shows
that voice control is active.
Additional functions
General
Depending on the mobile telephone, the fol‐
lowing content from the mobile telephone is
transferred to the vehicle:
▷Contacts, see page 78.
▷SMS messages, see page 81.
▷E-mails, see page 82.
Seite 80
Communication Telephone
80 Online Edition for Part no. 01 40 2 976 378 - X/16
▷Calendar entries, appointments, see
page 83.
▷Tasks, see page 84.
▷Memos, see page 84.
The data transfer can take a few minutes.
It might be necessary to have certain functions
enabled by the mobile telephone or service
provider.
SMS messages
Displaying all SMS messages
1. "Communication"
2. "Messaging"
All SMS messages are displayed.
Information to BMW messages, see page 112.
Status
A symbol indicates the status of the SMS mes‐
sage.
Symbol Meaning
Read SMS message.
Unread SMS message.
Filtering a message list
1. Press the button.
2. "Filter messages"
3. Select the desired setting.
Selecting sources
It is possible to select whether the SMS mes‐
sages should be transferred from the mobile
telephone, and if so, from which mobile tele‐
phone.
1. Press the button.
2. "Select sources for messages"
3. Select required mobile telephone.
Deleting SMS history
Delete the entire conversation with a call party.
1. Highlight required SMS message.
2. Press the button.
3. "Delete text message thread"
4. "Yes"
Displaying SMS message
Select the desired SMS or conversation. The
conversation with this call party is displayed.
Additional functions
The following functions are available with a se‐
lected SMS message or a conversation.
▷ "Call sender"
▷ "Add to contacts" or "Show sender"
▷ "Forward", see page 81.
▷ "Reply", see page 81.
▷ "Delete"
▷ Read out contents, see page 85.
▷"Use data", see page 86.
Answering or forwarding an SMS
message
1. Select required SMS message.
2. ▷ "Reply"
The recipient of the SMS message is
entered automatically.
▷ "Forward"
"To:"
Enter number or contact. Tilt the Con‐
troller to the right, if necessary, to se‐
lect the contact from the list.
3. "From:"
Select the mobile telephone if necessary
from which the SMS message should be
sent.
4. "Text:"
Seite 81
Telephone Communication
81
Online Edition for Part no. 01 40 2 976 378 - X/16
Text recognition, see page 85.
5. "Send"
New SMS message
1. "Communication"
2. "Messaging"
3. "Compose text message"
4. "To:"
Enter number or contact. Tilt the Controller
to the right, if necessary, to select the con‐
tact from the list.
5. "From:"
Select the mobile telephone if necessary
from which the SMS message should be
sent.
6. "Text:"
Text recognition, see page 85.
7. "Send"
To cancel: "Delete all contents"
E-mail
Displaying all e-mails
1. "Communication"
2. "Email"
All e-mails are displayed.
Selecting account
It is possible to select whether the e-mails
should be transferred from the mobile tele‐
phone, and if so, from which mobile telephone
and if necessary from which user accounts.
1. Press the button.
2. "Select account"
3. Select required accounts.
Status
A symbol identifies the status of the e-mail.
Symbol Meaning
Read e-mail.
Unread e-mail.
Filtering e-mails
1. Press the button.
2. "Filter emails"
3. Select the desired setting.
Deleting an e-mail
1. Select required e-mail.
2. Press the button.
3. "Delete email"
4. "OK"
Display all recipients
If an e-mail has several recipients, they can be
displayed and their data used for further func‐
tions.
1. Select desired E-mail.
2. Press the button.
3. "Show all recipients"
New e-mail
1. "Communication"
2. "Email"
3. "Compose email"
4. "To:"
Enter e-mail address or contact. Tilt the
Controller to the right, if necessary, to se‐
lect the contact from the list.
5. "From:"
If necessary, select an account from which
the e-mail should be sent.
6. "Subject:"
Text recognition, see page 85.
Seite 82
Communication Telephone
82 Online Edition for Part no. 01 40 2 976 378 - X/16
7. "Text:"
Text recognition, see page 85.
8. "Send"
To cancel: "Delete all contents"
Additional functions
The following functions are available with a se‐
lected e-mail.
▷ "Read out", see page 85.
▷ "Reply", see page 83.
▷ "Add to contacts" or "Show sender"
▷ "Mark as unread"
▷ "Delete email"
Answering or forwarding an e-mail
1. Select desired E-mail.
2. "Reply"
▷ "Reply"
The recipient of the e-mail is entered
automatically.
▷ "Reply to all"
All recipients of the e-mail are entered
automatically.
▷ "Forward"
Enter e-mail address or contact. Tilt
the Controller to the right, if necessary,
to select the contact from the list.
3. "To:"
Enter e-mail address or contact. Tilt the
Controller to the right, if necessary, to se‐
lect the contact from the list.
4. "From:"
If necessary, select a mobile telephone or
user account from which the e-mail should
be sent.
5. If applicable, "Subject:"
Text recognition, see page 85.
6. "Text:"
Text recognition, see page 85.
7. "Send"
Calendar
Display calendar
1. "Communication"
2. "Calendar"
The dates of the current week are dis‐
played.
To display other days in the calendar:
▷"Show previous week"
▷"Show next week"
Showing calendar month
Select calendar day. The month overview is
displayed. Calendar days with appointments
are marked.
Changing to current day
1. Press the button.
2. "Change to today"
Selecting sources
It is possible to select whether the appoint‐
ments should be transferred from the mobile
telephone, and if so, from which mobile tele‐
phone.
1. Press the button.
2. "Select source"
3. Select required mobile telephone.
Additional functions
The following functions are available in a selec‐
ted appointment.
▷ Read out contents, see page 85.
▷Starting route guidance.
▷"Use details", see page 86.
Seite 83
Telephone Communication
83
Online Edition for Part no. 01 40 2 976 378 - X/16
Activating reminders
1. Press the button.
2. "Activate reminders"
Reminders are displayed in the messages
and in the status field, see Owner's Hand‐
book for the vehicle.
Deactivating reminders
1. Select required calendar entry.
2. "Deactivate reminders"
Updating data
Update data, see page 86.
Tasks
Display tasks
1. "Communication"
2. "Tasks"
All tasks are displayed.
Sorting tasks
1. "Sorted by"
2. Select the desired setting.
Activating reminders
1. Press the button.
2. "Activate reminders"
Reminders are displayed in the messages
and in the status field, see Owner's Hand‐
book for the vehicle.
Updating data
Update data, see page 86.
Selecting sources
It is possible to select whether the tasks
should be transferred from the mobile tele‐
phone, and if so, from which mobile telephone.
1. Press the button.
2. "Select source"
3. Select required mobile telephone.
Additional functions
The following functions are available in a selec‐
ted task.
▷ Read out contents, see page 85.
▷"Use data", see page 86.
Memos
Displaying all memos
1. "Communication"
2. "Memos"
All voice memos and text memos are dis‐
played.
Exporting all voice memos
To export voice memos via the USB port, it is
necessary for a compatible device to be con‐
nected to the USB interface.
▷Compatible devices: USB mass storage
media, for example USB memory sticks or
MP3 players with USB interface.
▷Incompatible devices: USB hard disks,
USB hubs, USB memory card readers with
a number of bays, Apple iPod/iPhone.
▷File systems: current file systems for USB
data storage media are supported. FAT 32
format is recommended.
1. Press the button.
2. "Export all memos (USB)"
The export overwrites voice memos that are al‐
ready on the USB device.
Seite 84
Communication Telephone
84 Online Edition for Part no. 01 40 2 976 378 - X/16
Deleting all voice memos
1. Press the button.
2. "Delete all voice memos"
3. "OK"
New voice memo
1. "New voice memo"
2. "Start recording"/"Resume recording"
3. "Pause recording"
4. "Save"
The voice memo is displayed in the list of
voice memos.
To cancel: "Cancel"
Display memo
Select the desired memo.
Additional functions
The following functions are possible with a se‐
lected voice memo.
▷ "Email with voice memo", see page 82.
▷ "Export (USB)", see page 84.
▷ "Delete"
▷ "Play", see page 86.
Updating data
Update data, see page 86.
Text recognition
Principle
Spoken words are detected by voice recogni‐
tion and converted to text. This can be correc‐
ted and added to as needed. The text can be
used as a subject or content of e-mails or SMS
messages.
Recording texts
1. Select the desired language.
2. Select the symbol to start the record‐
ing.
3. Select the symbol to stop the recording.
4. "Confirm text"
5. ▷ "Delete last dictation"
▷ "Delete all"
▷ "Read out full text"
▷ "Read out last dictation"
Improving voice recognition for
contact names
The contact names on a connected mobile tel‐
ephone are transferred to the voice recogni‐
tion. This achieves better recognition of con‐
tact names when they are converted into text.
Activating/deactivating function
This function can be enabled or disabled for
each mobile telephone.
1. "My Vehicle"
2. "iDrive settings"
3. "Mobile devices"
4. Select required device.
5. "Server speech recognition"
Activating/deactivating function globally
The function can be enabled or disabled jointly
for all mobile telephones.
1. "My Vehicle"
2. "iDrive settings"
3. "Language"
4. "Server speech recognition"
Reading out
SMS, e-mail, tasks, text memos, calendar en‐
tries can be read out.
▷ "Play"
Seite 85
Telephone Communication
85
Online Edition for Part no. 01 40 2 976 378 - X/16

▷ "Pause"
▷ "Next section"/"Next element"
▷ "Previous section"/"Previous element"
▷Tilt the Controller to the left to finish.
Playback
Voice memos can be played back.
▷ "Play"
▷ "Pause"
▷ "Fast forward"
▷ "Fast reverse"
Updating data
Memos, tasks and the appointments in the cal‐
ender can be updated.
1. "Communication"
2. Select the desired setting:
▷"Calendar"
▷"Tasks"
▷"Memos"
3. Press the button.
4. "Update data"
Using data
Telephone number, mail addresses in calen‐
dar, SMS messages etc. can be processed fur‐
ther.
During the journey:
1. Select the required element, for example
an SMS message.
2. "Use data"
3. All data that can be used is displayed.
4. Select the required element, for example a
telephone number.
5. Tilt the Controller to the right.
All available options are displayed.
▷"Compose email"
▷"Compose text message"
▷"Add to contact"
▷"Save as contact"
▷"Call number"
▷"Go to website"
6. Select the desired setting.
The elements can be selected individually at a
standstill. The available options are displayed.
Adapting menu
The menu can be adapted, for example to re‐
move the entries for unused functions from the
menu.
1. "Communication"
2. "Personalise menu"
3. Select the desired setting.
4. Tilt the Controller to the left.
Snap-in adapter
Principle
The snap-in adapter enables:
▷Storage of the mobile telephone.
▷Charging of the battery.
▷Connection to the external aerial of the ve‐
hicle.
This ensures better network reception and uni‐
form reproduction quality.
General
Further information on snap-in adapters, com‐
patibly supporting the mobile telephone func‐
tions is available from a Service Partner of the
manufacturer or another qualified Service Part‐
ner or a specialist workshop.
At high temperatures, the charging functions
of the mobile telephone can be restricted and
no longer operate.
Seite 86
Communication Telephone
86 Online Edition for Part no. 01 40 2 976 378 - X/16
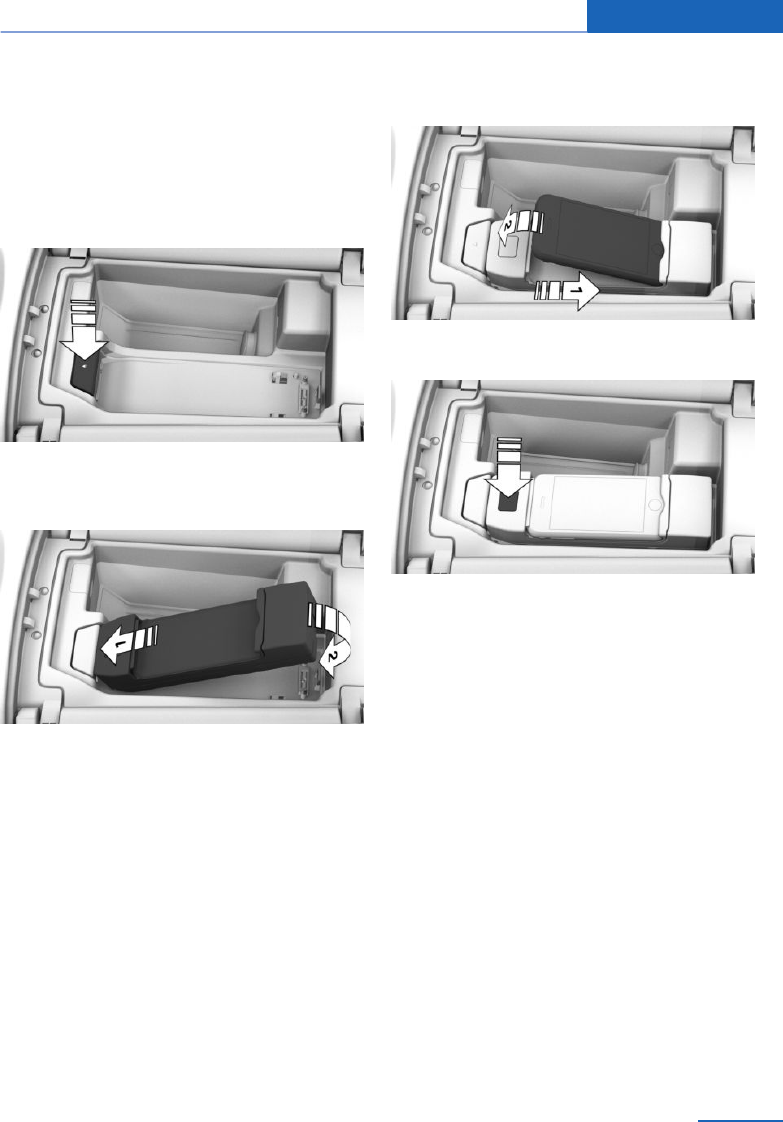
Installed position
The snap-in adapter is in the centre armrest.
The direction of installation in the centre arm‐
rest varies from vehicle to vehicle.
Inserting the snap-in adapter
1. Press the button and take out the cover.
2. Insert snap-in adapter at the front, arrow 1,
and press to the bottom, arrow 2, until the
adapter engages.
Inserting mobile telephone
1. Depending on the mobile telephone, re‐
move the protective cap from the aerial
connector and from the USB port of the
mobile telephone if necessary.
2. Push the mobile telephone with buttons
upwards in the direction of the electrical
connections, arrow 1, and push down, ar‐
row 2, until it engages.
Removing mobile telephone
Depending on the mobile telephone, press or
slide key and remove mobile telephone. De‐
pending on the mobile telephone, reinsert the
protective cap from the aerial connector and
from the USB port of the mobile telephone if
necessary.
Removing snap-in adapter
Push button in front of snap-in adapter. Re‐
move adapter and reinsert cover if necessary.
Wireless charging cradle
Principle
The mobile telephone can be kept in the wire‐
less charging cradle.
It enables the following wireless functions:
▷Charging the battery of a Qi-capable mo‐
bile telephone.
Seite 87
Telephone Communication
87
Online Edition for Part no. 01 40 2 976 378 - X/16
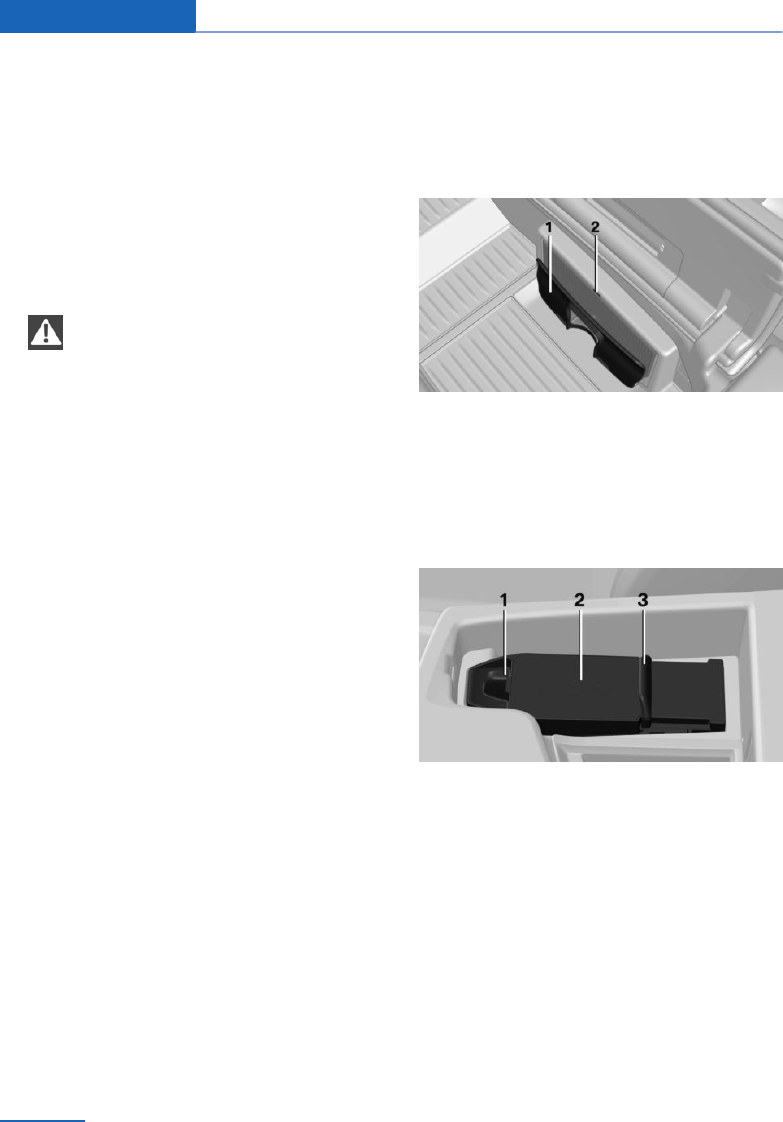
▷Charging the BMW display key, see Own‐
er's Handbook for the vehicle.
▷Connection of the mobile telephone to the
external aerial.
This ensures better network reception and
uniform reproduction quality, depending
on the country. The radiation in the vehicle
interior is also reduced.
Safety note
NOTE
The cradle is provided for mobile tele‐
phones up to a certain size. Forceful insertion
into the cradle can damage the cradle or the
mobile telephone. Danger of damage to prop‐
erty. Observe maximum dimension for the mo‐
bile telephone. Do not force the mobile tele‐
phone into the cradle.◀
Functional requirements
▷The mobile telephone must support and be
compatible with the required Qi standard.
Compatible mobile telephones, see Own‐
er's Handbook for the vehicle.
If the mobile telephone does not support
the Qi standard, the mobile telephone can
be charged using a special Qi-compatible
charging pad.
▷The mobile telephone is not allowed to ex‐
ceed a maximum size of approximately
151 x 74 x 16 mm, 5.9 x 2.9 x 0.6 in.
▷Only use protective sleeves and covers up
to a maximum thickness of 2 mm, 0.07 in.
Otherwise, the charging function may be
impaired.
▷Ignition or standby state is switched on.
▷Charging cradle: the device to be charged
is located in the middle of the cradle.
Overview
Vertical storage
The wireless charging cradle is in the centre
armrest at the front.
1Bracket
2LED
Horizontal storage
The wireless charging cradle is in the centre
armrest at the front.
1Front holder with LED
2Storage area
3Adjustable holding clip
Charging cradle
The wireless charging cradle is in the centre
armrest at the front.
Seite 88
Communication Telephone
88 Online Edition for Part no. 01 40 2 976 378 - X/16
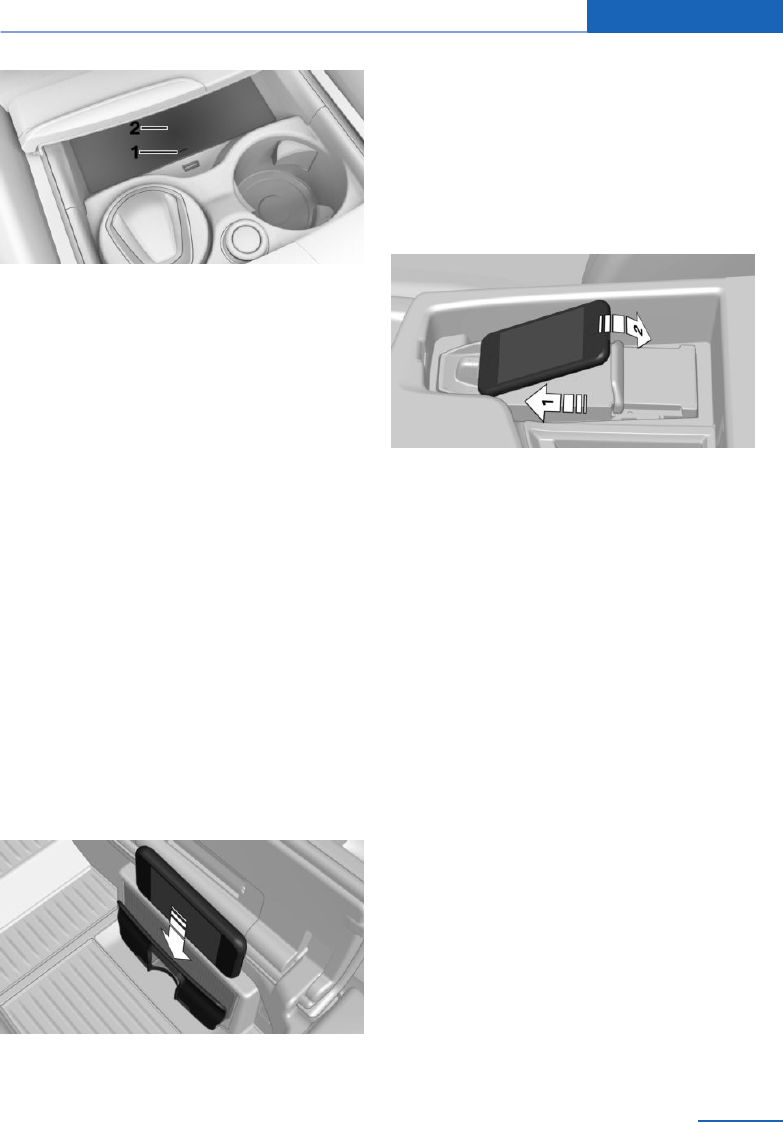
1LED
2Storage area
Activating do not forget warning
If the vehicle is equipped with a forget warning,
a warning can be output if a device was forgot‐
ten in the wireless charging cradle when exit‐
ing the vehicle.
Via iDrive:
1. "My Vehicle"
2. "iDrive settings"
3. "Wireless charging tray"
4. "Forgotten mobile device alert"
Inserting mobile telephone
Vertical storage
1. Opening the centre armrest, see Owner's
Handbook for the vehicle.
2. Push the mobile telephone into the storage
with the display on the side of the holding
clip.
3. Close the centre armrest.
Horizontal storage
1. Opening the centre armrest, see Owner's
Handbook for the vehicle.
2. Slide the holding clip backwards.
3. Insert the mobile telephone with the dis‐
play upwards in the direction of the front
holder, arrow 1.
4. Secure the mobile telephone in the storage
with the holding clip, arrow 2.
5. Close the centre armrest.
Charging cradle
1. Push the cover of the storage compart‐
ment forward.
2. Insert the mobile telephone in the middle
of the charging cradle and with the display
facing upwards.
3. Tap handle strip to close the cover of the
storage compartment.
Removing mobile telephone
Vertical storage
1. Open centre armrest.
2. Remove the mobile telephone.
Horizontal storage
1. Open centre armrest.
2. Open the holding clip and take out the mo‐
bile telephone.
Seite 89
Telephone Communication
89
Online Edition for Part no. 01 40 2 976 378 - X/16
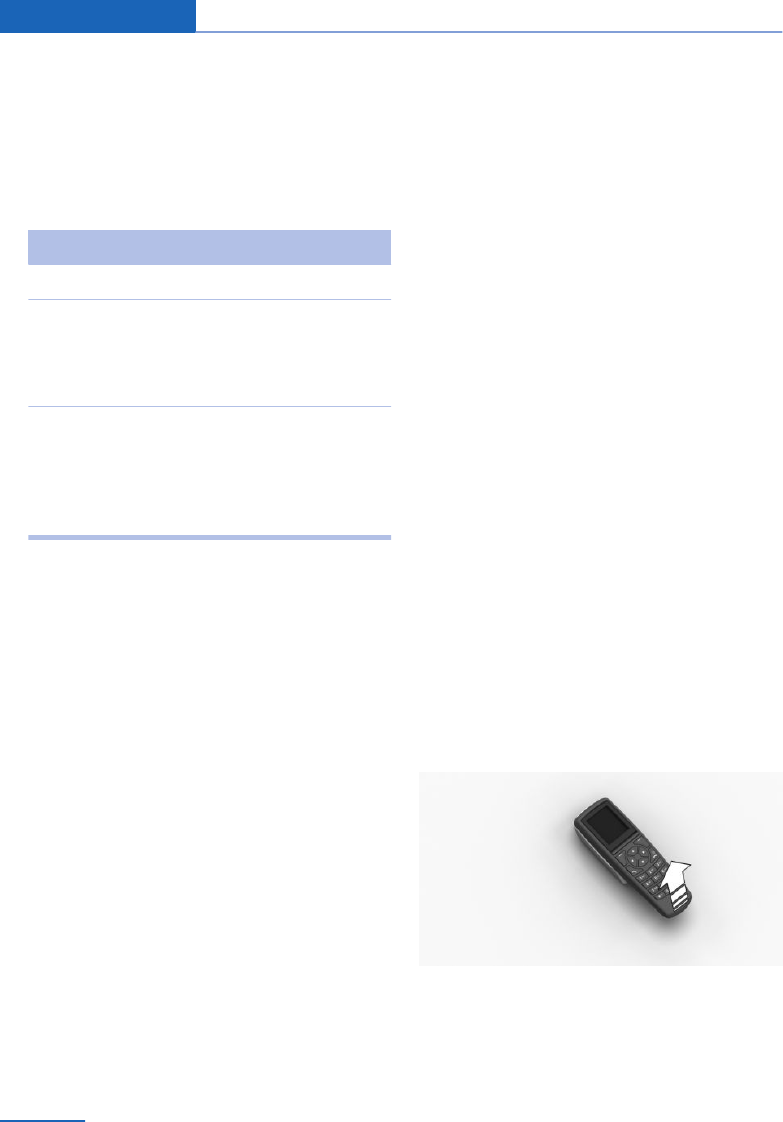
Charging cradle
1. Push the cover of the storage compart‐
ment forward.
2. Remove the mobile telephone.
LED displays
Colour Meaning
Blue Device is being charged.
Or‐
ange
Device is not being charged.
Possibly excessive temperature on
the mobile telephone or foreign
body in charging cradle.
Red Device is not being charged.
Contact a Service Partner of the
manufacturer or another qualified
Service Partner or a specialist work‐
shop.
System limits
At high temperatures on the mobile telphone
or in the vehicle, the charging functions of the
mobile telephone might be restricted and func‐
tions might no longer work.
Rear phone
Principle
The rear phone consists of a handset and a
snap-in adapter.
Via a SIM card, it is used just like a mobile tele‐
phone, with the advantage that the handset
can be used.
When the snap-in adapter is connected to the
vehicle, it is possible to make phone calls via
the hands-free system in the front and via the
handset in the rear.
Calls can be transferred from the handset to
the hands-free system and vice versa.
Through the integrated WiFi hotspot, various
devices, such as a notebook, for example, can
connect to the Internet wirelessly with WLAN.
General
Service providers
Many functions depend on the service provider
and contract.
If you have any other questions, contact the
service provider directly.
TWIN SIM cards
If so-called TWIN SIM cards (cards with the
same phone number) are used as SIM cards in
the snap-in adapter and in an additional mobile
telephone, the device not being used must be
switched off, otherwise the function of the rear
phone is not ensured.
Overview
Handset and snap-in adapter
Handset and snap-in adapter are in the centre
armrest in the rear.
The arrangement of the handset and snap-in
adapter can vary depending on fitted equip‐
ment.
Removing handset
Pull the handset upwards.
Seite 90
Communication Telephone
90 Online Edition for Part no. 01 40 2 976 378 - X/16
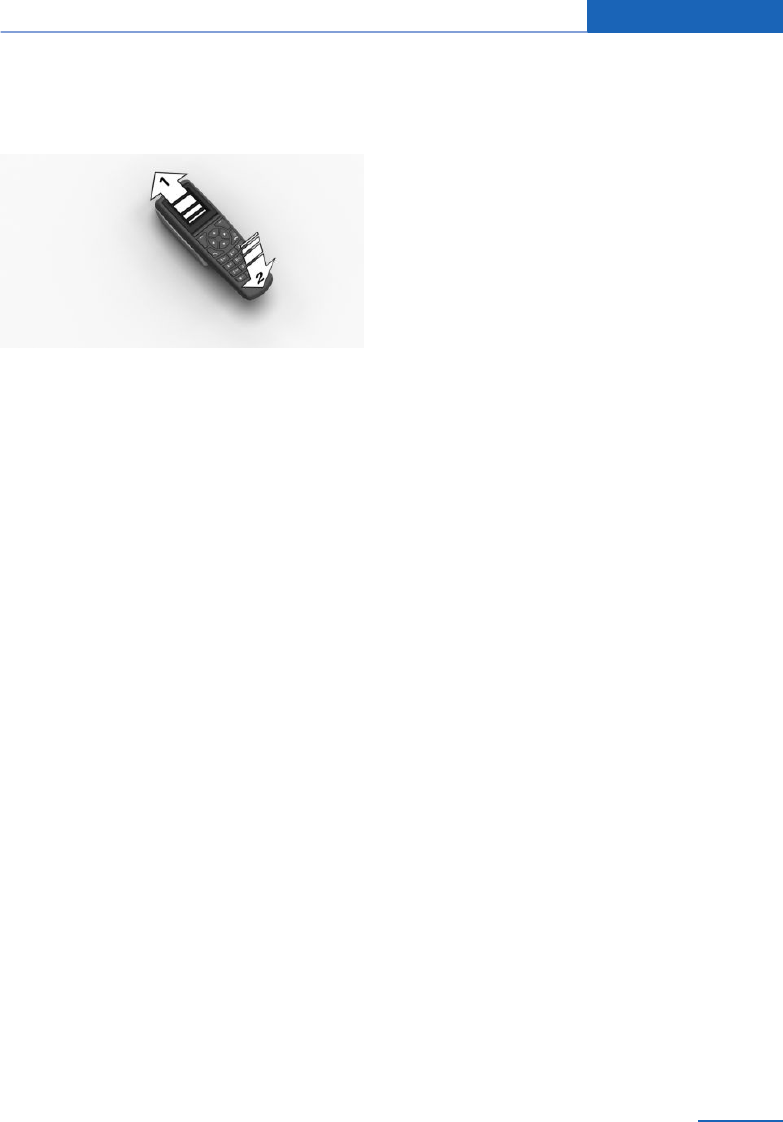
Inserting handset
1. Snap the handset into place at the top, ar‐
row 1.
2. Press the handset downwards, arrow 2.
Options for use
Preparations
To be able to use the rear phone, the following
must be carried out depending on the type of
use:
▷Insert the SIM card into the snap-in
adapter, see page 91.
▷Connect the mobile telephone via the SIM
Access Profile (SAP) to the snap-in
adapter, see page 92.
▷In addition, the snap-in adapter can be
connected to the vehicle, see page 92.
Operation via the handset
Principle
Calls can only be made directly via the hand‐
set.
Operating requirements
▷Snap-in adapter installed in the vehicle.
▷SIM card inserted in the snap-in adapter.
Or:
Mobile telephone connected via the SIM
Access Profile (SAP) to the snap-in
adapter.
Operation via the hands-free system
Principle
Calls can be made from the front via the
hands-free system or directly via the handset.
Operating requirements
▷Snap-in adapter installed in the vehicle.
▷SIM card inserted in the snap-in adapter.
Or:
Mobile telephone connected via the SIM
Access Profile (SAP) to the snap-in
adapter.
▷Snap-in adapter connected to the vehicle.
Operation via Bluetooth headset
Principle
Calls can be made via a Bluetooth headset.
Operating requirements
▷Snap-in adapter installed in the vehicle.
▷SIM card inserted in the snap-in adapter.
Or:
Mobile telephone connected via the SIM
Access Profile (SAP) to the snap-in
adapter.
▷Bluetooth headset connected to snap-in
adapter.
Operation using SIM card
Principle
The snap-in adapter directly accesses the SIM
card of the mobile telephone.
Seite 91
Telephone Communication
91
Online Edition for Part no. 01 40 2 976 378 - X/16
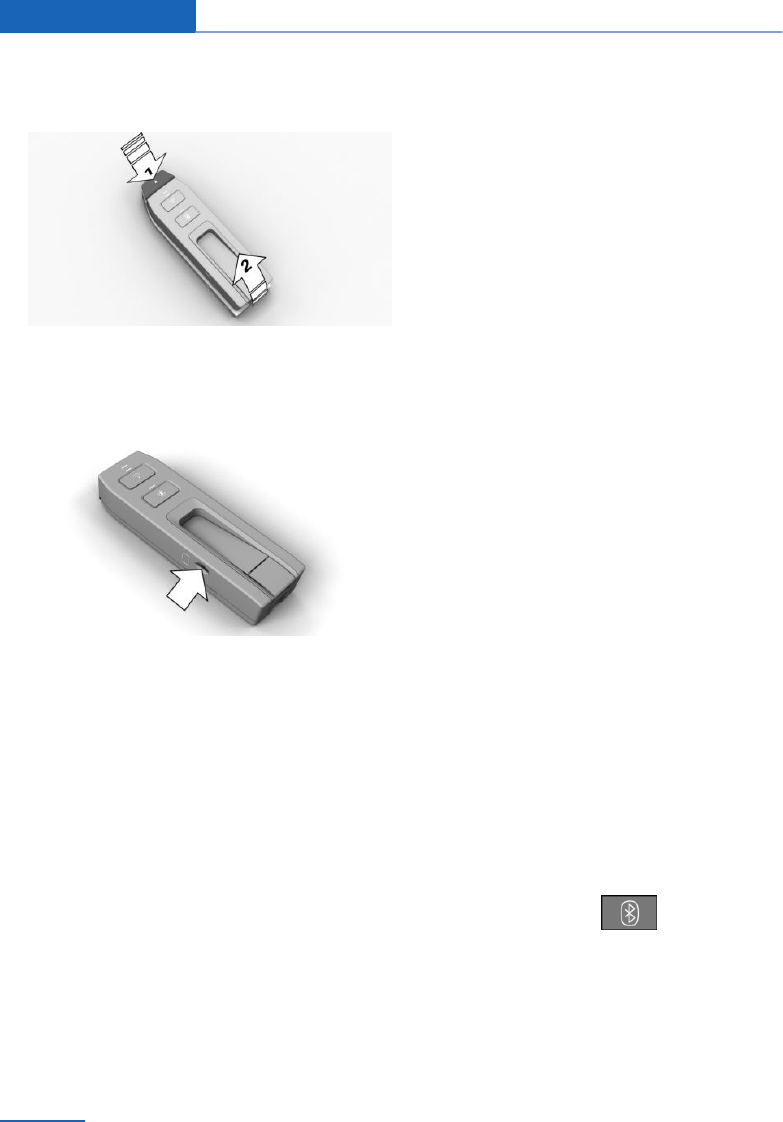
Inserting SIM card
1. Press the button, arrow 1.
2. Pull the snap-in adapter upwards and for‐
wards, arrow 2.
3. Insert SIM card as described on the side of
the snap-in adapter.
4. Snap the snap-in adapter at the lower end.
5. Push downwards until it clicks.
Removing the SIM card
To remove SIM card from snap-in adapter,
press SIM card.
Connect snap-in adapter to the
vehicle
Connect the snap-in adapter to the vehicle
The phone book is shown on the Control Dis‐
play and the front hands-free system can be
used.
Connecting snap-in adapter, see Owner's
Handbook for the vehicle.
Operation using SIM Access Profile
(SAP)
Principle
Using the SIM access profile (SAP), the snap-
in adapter accesses the SIM card of the mobile
telephone using Bluetooth. Through the hand‐
set connected with the snap-in adapter, the
phone can be operated in the rear.
The calls and the connection to the external
aerial run via the snap-in adapter. Radiation
which is caused by the transmission operation
is dissipated from the vehicle interior.
If the mobile telephone is connected to the ve‐
hicle and downloading the internal phone book
entries of the mobile telephone is supported,
the internal phone book can be displayed on
the handset and on the Control Display.
Operating requirements
▷SAP-capable mobile telephone. Further in‐
formation on compatible models is availa‐
ble from a Service Partner of the manufac‐
turer or another qualified Service Partner or
a specialist workshop or via
www.bmw.com/fond-telefonie.
▷Mobile telephone is switched on with acti‐
vated Bluetooth interface.
▷No SIM card is inserted into the snap-in
adapter.
▷Snap-in adapter is installed.
▷The handset is switched on.
Connecting the mobile telephone via
SAP
1. Press and hold the button on the
snap-in adapter for approximately 5 sec‐
onds until the acoustic signal sounds twice
in quick succession.
Seite 92
Communication Telephone
92 Online Edition for Part no. 01 40 2 976 378 - X/16

The LED above the button flashes, alter‐
nating green and yellow.
2. The 16-digit SAP PIN is displayed on the
handset.
3. "Connect" with BMW GSM SIA.
4. Enter the displayed PIN in the mobile tele‐
phone.
Breaking the connection
▷Disable the SAP connection on the mobile
telephone. If the Bluetooth interface is not
disabled, the connection is automatically
re-saved after approximately ten seconds.
▷Switch off the handset.
▷Take the mobile telephone to a distance
approximately 10 metres away from the
vehicle.
Connecting the handset
Principle
To be able to use the handset, it must be con‐
nected to the snap-in adapter.
General
The handset is already connected at the fac‐
tory. The connection is set up automatically
each time the handset is switched on. This
means it is only necessary to reconnect the
handset if there is a new handset.
Ensure that the battery on the rear of the hand‐
set is correctly inserted.
Operating requirements
▷The Bluetooth passkey, see page 104, on
the back of the snap-in adapter is known.
▷The snap-in adapter is inserted in the cen‐
tre armrest.
▷Standby state is switched on.
▷The SIM card is inserted into the snap-in
adapter.
Connecting the handset
1. Press and hold the button on the
snap-in adapter for approximately 7 sec‐
onds until the acoustic signal sounds three
times in quick succession.
The LED above the button flashes yellow.
2. Switch on the handset.
3. "Search BT devices"
4. "Ok"
5. BMW CON SIA II
6. "Conn."
7. Enter the Bluetooth passkey.
8. "Ok"
The connection to the snap-in adapter is
established.
Connecting Bluetooth headset
Principle
To be able to use a Bluetooth headset, it is
necessary for the Bluetooth headset to be
connected to the snap-in adapter. A Bluetooth
headset that has already been registered is au‐
tomatically connected to snap-in adapter.
General
If another Bluetooth headset is registered, the
data of the previous Bluetooth headset is de‐
leted. Only one Bluetooth headset at a time
can be registered and connected.
Functional requirements
▷Depending on Bluetooth headset, registra‐
tion on snap-in adapter is performed auto‐
matically. Bluetooth headset supports a
fixed passkey. The default setting is 0000,
which can be altered if required on web
server http://192.168.1.1 at Connectivity-
SIA2.0 page under BT headset.
▷Bluetooth headset is switched on, Blue‐
tooth headset must be set visible if neces‐
sary.
Seite 93
Telephone Communication
93
Online Edition for Part no. 01 40 2 976 378 - X/16

▷The snap-in adapter is inserted in the cen‐
tre armrest.
▷Standby state is switched on and remote
control is in the vehicle.
▷SIM card is inserted in snap-in adapter or
mobile telephone is connected to snap-in
adapter via SIM Access Profile.
Connecting Bluetooth headset
1. Press and hold the button on the
snap-in adapter for approximately 9 sec‐
onds until the acoustic signal sounds four
times in quick succession.
The LED above the button flashes blue.
2. Switch on Bluetooth headset and set visi‐
ble if necessary.
3. Depending on the Bluetooth headset,
press and hold the talk button on the Blue‐
tooth headset to connect with the snap-in
adapter. See operating instructions for
Bluetooth headset.
Bluetooth headset is connected once LED
on snap-in adapter is no longer illuminated.
Accepting a call
Incoming calls are displayed on hands-free
system or snap-in adapter. They can also be
accepted using a Bluetooth headset that is al‐
ready connected.
Press the talk button on the Bluetooth head‐
set.
Initiating a call
Using Bluetooth headset, it is possible to call
last number dialled using hands-free system or
handset.
Press the talk button on the Bluetooth headset
twice.
Transferring a call
General
Calls can only be conducted on one terminal
unit at a time:
▷Using hands-free system.
▷Using handset in the rear.
▷Using the Bluetooth headset.
An incoming call can be heard using terminal
unit that took the call, such as handset in rear.
A call can be transferred between terminal
units during a call.
Audio using hands-free system
▷Press the talk button on the Bluetooth
headset twice to accept the call using the
Bluetooth headset.
▷Select "Handsfree off" on handset in rear
or lift handset in rear out of cradle to take
call with handset in rear.
Audio using handset in rear
▷Press the talk button on the Bluetooth
headset twice to accept the call using the
Bluetooth headset.
▷Select "Handsfree on" on handset in rear
to accept call using hands-free system.
Audio using Bluetooth headset
▷Press the talk button on the Bluetooth
headset twice within 1 second to take the
call using the hands-free system.
▷Remove handset in rear from cradle to take
the call using the handset in rear.
▷Select "Handsfree on" on handset in rear
to accept the call using the hands-free sys‐
tem.
Seite 94
Communication Telephone
94 Online Edition for Part no. 01 40 2 976 378 - X/16
Controls
Basic principles
Connect button
Press the button. Select the displayed
or highlighted phone number, accept
the call.
On/off/exit button
Keep the button pressed: switch on
and off.
Press button: ends a call.
If the handset is switched off and on again
while the vehicle is in motion, the Bluetooth
connection in the Control Display must be re-
saved.
Functional requirement for readiness
displays
▷SIM card is inserted into the snap-in
adapter or a mobile telephone is connec‐
ted via SIM Access Profile.
▷The handset is switched on.
▷The PIN for the SIM card has been entered
or the PIN query, see page 103, has been
suppressed.
▷Entering the PIN is also possible on the
Control Display if the snap-in adapter is
connected to the vehicle.
▷Mobile telephony reception must be guar‐
anteed.
The standby indicator and name of the net‐
work operator are displayed.
Display keys
The current functions of these buttons are
shown in the bottom line of the display.
Press the button: selects the function.
Arrow keys
Press the up/down arrow buttons: browses in
menus.
Press the left/right arrow buttons: sets the call
volume during a call.
Seite 95
Telephone Communication
95
Online Edition for Part no. 01 40 2 976 378 - X/16

Text input
▷Press a numerical key repeatedly until the
desired character is displayed. If the next
letter is entered with the same key as the
current letter, wait briefly until the cursor is
displayed again.
▷Insert space: 0 key.
▷Switch between upper or lower case: #
key.
▷Insert symbols: 1 key.
▷Change to digit mode: press and hold #
key.
Menus
Press "Menu". This contains the following
sub-menus:
▷"Last calls"
▷"Phone book"
▷"Text messag."
▷"Settings"
Press the arrow keys up/down, to toggle be‐
tween the menus. Press "Ok" to select the
menu.
Symbols
White square: function deactivated.
Black square: function activated.
Initiating a call
Via numerical keys
1. Enter the complete phone number with
area code/national dialling code.
2. Press the button.
Delete last digit during input: "Delete"
Via repeat dialling
The last ten phone numbers dialled are auto‐
matically saved.
1. Press the button.
The last dialled numbers are displayed.
2. Highlight number.
3. Press the button.
Via phone book
1. "Ph.book"
2. Insert first letter of desired entry or browse
using arrow keys.
3. Mark entry.
4. Press the button.
Via SMS
In the "Text messag." menu:
1. "Inbox" or "Outbox"
2. "Ok"
3. Mark entry.
4. "Ok"
5. Call up "Options".
6. "Call"
7. "Ok"
The number is shown on the display.
8. Press the button.
Via the call list
In the "Last calls" menu:
1. "Missed calls" or "Received calls"
2. "Ok"
3. Mark entry.
4. Press the button.
Incoming call
Accepting a call
If the number of the caller is saved in the
phone book and is transferred from the net‐
work, the name of the phone book entry is dis‐
played.
Seite 96
Communication Telephone
96 Online Edition for Part no. 01 40 2 976 378 - X/16

▷Press the button or "Answer".
▷With call acceptance, see page 102, acti‐
vated, take the handset from its cradle.
Rejecting a call
Press the button or "Reject".
Call Forward
Principle
Incoming calls are diverted to another phone
number.
A password might be required to set this up.
All functions are in the "Settings" menu under
"Call forward".
Diverting calls
1. "Voice calls"
2. "Ok"
3. "Forward all calls", "If busy", "If not avail."
or "If no answer"
4. "Ok"
5. "Activate"
6. "Ok"
7. Enter the phone number for the diversion.
8. "Ok"
Diverting fax and data inputs
1. "Fax calls" or "Data calls"
2. "Ok"
3. "Activate"
4. "Ok"
5. Enter the phone number for the diversion.
6. "Ok"
Checking the status
1. Select desired call forwarding.
2. "Status"
3. "Ok"
The status is displayed.
Disabling all diversions
1. "Deactivate all"
2. "Ok"
Phone book
Selecting the storage location
If the mobile telephone supports downloading
of internal phone book entries and this func‐
tion is active, the internal memory of the phone
book is selected as the storage location. The
function "Memory place" is then not available.
Select the SIM card or snap-in adapter as the
storage location.
In the "Phone book" menu:
1. "Memory place"
2. "Ok"
3. "SIM" or "GSM-SIA" or "Both"
4. "Ok"
Setting the display
In the "Phone book" menu:
1. "Private Ph.book"
2. "Ok"
Function is enabled or disabled.
Available memory
In the "Phone book" menu:
1. "Memory place"
2. "Ok"
3. "Status"
4. "Ok"
New entry
Save phone numbers in the international for‐
mat.
Press and hold the asterisk key until + is
shown on the display.
Seite 97
Telephone Communication
97
Online Edition for Part no. 01 40 2 976 378 - X/16

In the "Phone book" menu:
1. "New entry"
2. "Ok"
3. Enter name.
4. "Ok"
5. Enter the complete phone number.
6. "Store"
7. "Ok"
Transferring entries
Contact data can be transferred to phone in
rear, for example from an Outlook file via a
WLAN connection. To do this, connect, see
page 105, a WiFi-capable mobile telephone or
notebook to phone in rear.
Calling up:
1. Start Internet browser on the device.
2. Enter following address in address line of
Internet browser:
http://192.168.1.1
The CON-SIA2 page is displayed.
3. Select UPLOAD tab.
When doing this, make sure settings and
notation for source file are precisely as
shown in example. Each line in Excel file is
saved in phone book as separate entry.
4. Press the Browse button and select the re‐
quired file.
5. Press the UPLOAD PB button.
Entry from call lists
Save phone numbers from call lists in the
phone book.
In the "Last calls" menu:
1. "Numbers dialled", "Missed calls" or
"Received calls"
2. "Ok"
3. Mark entry.
4. "Options"
5. "Store number"
6. "Ok"
7. Enter name and number and confirm each
with "Ok".
8. "Store"
9. "Ok"
Entry from SMS
In the "Text messag." menu:
1. "Inbox" or "Outbox"
2. "Ok"
3. Highlight SMS and select with "Ok".
4. "Options"
5. "Extract number"
6. "Ok"
Editing an entry
In the "Phone book" menu:
1. "Find entry"
2. "Ok"
3. Highlight entry and select with "Ok".
4. "Edit"
5. "Ok"
6. Edit name and number and confirm with
"Ok".
7. "Store"
8. "Ok"
Deleting an entry
In the "Phone book" menu:
1. "Find entry"
2. "Ok"
3. Mark entry.
4. "Ok"
5. "Delete"
6. "Ok"
7. "Yes"
Seite 98
Communication Telephone
98 Online Edition for Part no. 01 40 2 976 378 - X/16

Showing details
In the "Phone book" menu:
1. "Find entry"
2. "Ok"
3. Mark entry.
4. "Ok"
5. "Details"
6. "Ok"
SMS
General
Received SMS messages are saved automati‐
cally. If necessary, delete saved SMS mes‐
sages so that you can receive new SMS mes‐
sages.
Observe the memory status, see page 100, on
the SIM card.
All functions are in the "Text messag." menu.
Setting the SMS Service Centre
The phone number of the Service Centre is
saved.
1. "Settings"
2. "Ok"
3. "Servicecentre"
4. "Ok"
5. Check the phone number.
6. "Ok"
Displaying SMS
1. "Inbox"
2. "Ok"
All SMS are displayed.
To read an SMS, highlight the message and
"Ok".
Writing an SMS
Creating and sending an SMS
1. "New text msg"
2. "Ok"
3. Enter text, see page 96, and insert tem‐
plate/symbol, see page 100.
4. "Options"
5. "Send"
6. "Ok"
7. Enter the phone number or use "Search"
to open the phone book and highlight an
entry.
8. "Ok"
9. "Send"
Forwarding an SMS
Displaying desired SMS, see page 99.
1. "Options"
2. "Forward"
3. "Ok"
4. "Options"
5. "Send"
6. "Ok"
7. Enter the phone number or use "Search"
to open the phone book and highlight an
entry.
8. "Ok"
9. "Send"
Replying to an SMS
1. Displaying SMS, see page 99.
2. "Options"
3. "Reply"
4. "Ok"
5. Enter text, see page 96.
6. "Options"
7. "Send"
Seite 99
Telephone Communication
99
Online Edition for Part no. 01 40 2 976 378 - X/16

Inserting template/symbol
1. Create an SMS, see page 99.
2. "Options"
3. Highlight template/symbol.
4. "Ok"
5. "Options"
6. "Send" or "Store"
Saving created SMS messages
Created SMS messages can be saved for fu‐
ture use on the SIM card.
1. "New text msg"
2. "Ok"
3. Enter text, see page 96.
4. "Options"
5. "Store"
6. "Ok"
Automatically save SMS
Save sent SMS messages automatically.
1. "Settings"
2. "Ok"
3. "Store text msg"
4. "Ok"
Function is enabled or disabled.
Deleting an SMS
1. "Inbox" or "Outbox"
2. "Ok"
3. Highlight SMS and select with "Ok".
4. "Options"
5. "Delete"
6. "Ok"
7. "Yes"
Deleting oldest read text message
If the text message memory is full, the LED
above the key illuminates orange.
The oldest read SMS can be deleted.
Press and hold the button on the
snap-in adapter for approximately
3 seconds until the LED above the button illu‐
minates orange.
Options
Querying memory status
Symbol indicates that memory capacity is
no longer available for SMS messages.
Delete, see page 100, saved SMS.
1. "Settings"
2. "Ok"
3. "Memory capacity"
4. "Ok"
The number of occupied and free memory
slots is displayed.
Activating automatic status report
Show free memory when sending an SMS.
1. "Settings"
2. "Ok"
3. "Status report"
4. "Ok"
Function is enabled or disabled.
Setting transmission time
Validity period for attempts to send an SMS.
1. "Settings"
2. "Ok"
3. "Validity"
4. "Ok"
5. Highlight time period.
6. "Ok"
Function is enabled or disabled.
Seite 100
Communication Telephone
100 Online Edition for Part no. 01 40 2 976 378 - X/16

Setting the language
Set the language for the SMS.
1. "New text msg"
2. "Ok"
3. "Options"
4. "Input language"
5. "Ok"
6. Highlight language.
7. "Ok"
Desired language is enabled.
Calls with a number of participants
Call waiting
If there is a second call during an ongoing call,
you hear a call waiting signal.
"Answer" or "Reject".
Setting up a second call
1. "Options"
2. "Hold"
3. "Back"
4. Select entry from phone book or the num‐
ber of another subscriber.
Switching between two calls, alternating
1. "Options"
2. "Switch"
Telephone conference
Merge two calls to set up a conference.
1. "Options"
2. "Conference"
Terminating a call
Terminating current call
"End call"
Terminating all calls
1. "Options"
2. "End call"
Terminating second call when conference
calling
1. "Options"
2. "Switch"
3. "End call"
Terminating conference call
1. "Options"
2. "Conf. participants"
3. Select the call.
4. "End active call"
Settings
General
Unless otherwise indicated, the functions are
in the "Settings" menu.
Telephone
Activating/deactivating call number
transmission
Display call number on receiver.
1. "Call options"
2. "Ok"
3. "Transmit caller ID"
4. "Ok"
5. "Activate", "Deactivate" or "Network-
depend."
Setting call waiting
Acoustic signal for a call during another call.
1. "Call options"
2. "Ok"
3. "Call waiting"
4. "Ok"
Seite 101
Telephone Communication
101
Online Edition for Part no. 01 40 2 976 378 - X/16

5. "Activate" or "Deactivate"
6. "Ok"
Selecting menu language and entry
language
1. "Telephone"
2. "Ok"
3. "Language"
4. "Ok"
5. "Menu language" or "Input language"
6. "Ok"
7. Highlight language.
8. "Ok"
Resetting the language
1. Press the button.
2. "Menu"
3. Press the arrow button downwards three
times.
4. Press the right-hand arrow once.
5. Press the arrow button downwards once.
6. Press the right-hand arrow once.
7. Press the arrow button downwards three
times.
8. Press the right-hand arrow twice.
9. Highlight language and select with "Ok".
Deleting the call list
In the "Last calls" menu:
1. "Delete"
2. "Ok"
3. "All calls" or select entry.
4. "Ok"
5. "Yes"
Taking a call when removing
The call is accepted when you lift the handset
from the cradle.
1. "Call options"
2. "Ok"
3. "Answer on eject"
4. "Ok"
Setting call volume
1. "Telephone"
2. "Ok"
3. "Ring tone vol. SIA"
4. "Ok"
5. Alter the setting.
6. "Ok"
Setting brightness and lighting duration
Alter the setting for the display.
1. "Telephone"
2. "Ok"
3. "Brightness" or "Backlight durat."
4. Adjust the settings.
5. "Ok"
Automatic key lock
Locks the keypad automatically if no key has
been pressed for a certain time.
Providing protection against inadvertent oper‐
ation of the keys.
1. "Telephone"
2. "Ok"
3. "Autom. keylock"
4. "Ok"
Cancelling the key lock
Follow the instructions on the handset display.
Seite 102
Communication Telephone
102 Online Edition for Part no. 01 40 2 976 378 - X/16

Restoring factory settings
If you reset the handset to the factory settings,
the following settings are made. This does not
affect the SIM card and network settings.
1. "Telephone"
2. "Ok"
3. "Default settings"
4. "Ok"
5. "Yes"
Function Factory setting
Phone book. The phone book
is deleted.
Display of the phone
book.
Both.
Save text messages au‐
tomatically.
Switched off.
Transfer duration of text
messages.
Maximum.
Status report for text
messages.
Switched off.
Key lock. Switched off.
Brightness. 3
Lighting duration. 3
Language. English.
Bluetooth name. GSM SIA BMW.
Call acceptance for
handset.
Switched on.
Private phone book. Switched off.
Ring sound volume. 4
Network selection
Principle
On older SIM cards, it might be necessary to
enable roaming.
Roaming enables you to connect to other
phone networks abroad.
Automatic or manual network selection
With automatic network selection, the handset
connects to an available network.
With manual network selection, an available
network can be selected. If the handset is con‐
nected to another network, a triangle is shown
on the display.
1. "Network selection"
2. "Ok"
3. "Automatic" or "Manual"
4. "Ok"
Manual network selection
1. "Netw. select."
2. "Ok"
3. "Select network"
4. Select network.
5. "Ok"
Authorisation and security
Enabling/disabling the PIN query
PIN query is not deactivated, otherwise the
SIM card is not protected against abuse.
1. "Security"
2. "Ok"
3. "PIN query"
4. "Ok"
5. "Activate" or "Deactivate"
6. "Ok"
7. Enter any PIN and confirm with "Ok".
Changing the PIN
If the PIN query is activated:
1. "Security"
2. "Ok"
Seite 103
Telephone Communication
103
Online Edition for Part no. 01 40 2 976 378 - X/16
3. "Change PIN"
4. "Ok"
5. Enter the current PIN and confirm with
"Ok".
6. Enter the new PIN twice and confirm each
one with "Ok".
Resetting SIM card block
If the incorrect PIN is entered three times, the
SIM card is blocked.
"Please enter PUK:" is shown on the display.
The PIN Unblocking Key (PUK) or Super PIN is
required. These can only be entered on the
handset.
After entering the PUK, assign a new PIN, see
page 103.
Barring calls
General
These functions are protected with a password
against unauthorised use.
Calling up the menu
1. "Security"
2. "Ok"
3. "Call barring"
4. "Ok"
Barring outgoing calls
Outgoing calls can be suppressed:
▷All except for emergency call.
▷All international calls.
▷All international calls except home country.
1. "Outgoing calls"
2. "Ok"
3. "All calls", "International calls" or "Int. exc.
homectry"
4. "Ok"
5. "Activate", "Deactivate" or "Status"
6. Enter your password.
7. "Ok"
Incoming calls
Incoming calls can be suppressed:
▷All calls.
▷All international calls.
1. "Incoming calls"
2. "Ok"
3. "All calls", "Int'l calls"
4. "Ok"
5. "Activate", "Deactivate" or "Status"
6. Enter your password.
7. "Ok"
Deactivating call barring
1. "Deactivate all"
2. Enter the password and confirm with "Ok".
Resetting settings
All snap-in adapter settings are reset to factory
settings, see page 103. The WLAN has to be
reconfigured and the Bluetooth connections
have to be re-established.
Press buttons simultane‐
ously.
Bluetooth passkey
General
The Bluetooth passkey is loca‐
ted on the back of the snap-in
adapter.
To read the passkey remove the
snap-in adapter, see page 91.
The number in the PIN line is the Bluetooth
passkey. A new PIN can be chosen.
Seite 104
Communication Telephone
104 Online Edition for Part no. 01 40 2 976 378 - X/16

Changing the Bluetooth passkey
In the "Settings" menu:
1. "Bluetooth"
2. "Ok"
3. "Change Passkey"
4. "Ok"
5. Enter new passkey.
6. "Ok"
Resetting Bluetooth passkey
Press and hold the button on the
snap-in adapter for approximately
11 seconds. The LED above the button illumi‐
nates red. All Bluetooth passkey connections
are deleted.
WLAN
Principle
A device such as a WLAN-capable notebook
can be wirelessly connected to the snap-in
adapter using WLAN.
Operating requirements
▷SIM card has been inserted into snap-in
adapter and snap-in adapter is ready for
operation.
▷Device is on and ready for operation.
▷WLAN connection on device is switched
on.
▷Access data of the service provider is
known: APN, user name, password.
The APN, in other words the access point
of the service provider, is different when
changing to another mobile telephone net‐
work, for example abroad. Please obtain in‐
formation from the service provider which
APN is used in a different mobile telephone
network.
▷WPA2 key and the name of the snap-in
adapter, SSID, are available. This data is
available on the back of the snap-in
adapter.
Connecting device with snap-in
adapter
1. Check whether the bottom LED
above the WLAN button flashes green.
If the LED does not illuminate green:
Press the button on the snap-in adapter for
approximately 5 seconds until the bottom
LED above the WLAN button illuminates
green.
2. Start the program on the device to set up
wireless network, see Owner's Handbook
of the device.
3. Select from the list of wireless networks
"BMW Wireless" within range of the snap-
in adapter and connect.
4. Enter WPA2 key.
Bottom LED above WLAN button on the
snap-in adapter is illuminated green if a
connection has been established.
Configuring connection to the Internet
To establish a connection to the Internet you
must configure the snap-in adapter.
1. Start Internet browser on the device.
2. Enter the following URL in the Internet
browser's URL line: http://192.168.1.1
The CON-SIA2 page is displayed.
3. Select "WAN".
4. If the fields are not yet filled in, make the
entries. Data is provided by the service
provider.
"APN": access point of the service pro‐
vider.
"Username": user name.
"Password": password.
5. Confirm with "Submit".
6. Select "WLAN".
Seite 105
Telephone Communication
105
Online Edition for Part no. 01 40 2 976 378 - X/16

7. The name of the snap-in adapter is stated
in the "SSID" field. You can individually
adapt this name, if required.
8. Keep all other settings.
Resetting WLAN settings
WLAN settings of the snap-in adapter are re‐
set to factory settings. The configuration must
be set again.
Press and hold WLAN button for ap‐
proximately 9 seconds until the bot‐
tom LED over the button flashes red. Subse‐
quently let go of the button.
Switching WLAN on the snap-in
adapter on and off
To switch on: press and hold WLAN
button until bottom LED is illuminated
green.
To switch off: press and hold WLAN button un‐
til bottom LED flashes green and then goes off.
Frequently Asked Questions
Why can no connection to the Internet be es‐
tablished?
Check whether WLAN is switched on at the
snap-in adapter and on the device.
Why can no connection to the Internet be es‐
tablished even though WLAN is switched on
on the snap-in adapter and the device?
The UMTS network may be busy. In such a
case, change to another network, see
page 103, GSM.
Status display LEDs
Top LED above
WLAN button
Meaning
Illuminates yel‐
low.
Internet connection via
GSM, 2G.
Illuminates
green.
Internet connection via
UMTS, 3G.
Bottom LED
above WLAN
button
Meaning
Does not illumi‐
nate.
WLAN deactivated.
Illuminates
green.
WLAN is activated.
LED above Blue‐
tooth button
Meaning
Illuminates
green.
Bluetooth connection to
the vehicle, operating
handset, headset or mo‐
bile telephone activated.
Illuminates or‐
ange.
Text message memory
full.
Seite 106
Communication Telephone
106 Online Edition for Part no. 01 40 2 976 378 - X/16

Services and applications
Vehicle equipment
This chapter describes all standard, national
and special equipment provided in the model
series. Equipment not available in the vehicle is
therefore also described, for example the se‐
lected special equipment or country variant.
This also applies to safety-relevant functions
and systems. Comply with the relevant laws
and regulations when using the corresponding
functions and systems.
BMW Teleservices
Principle
Teleservices are services that help to keep the
vehicle mobile.
General
The offer depends on the vehicle equipment
and the country variant.
When driving abroad, the services may only be
available with restrictions.
For more information regarding available serv‐
ice, the manufacturer of the vehicle recom‐
mends contacting a Service Partner or the hot‐
line.
Teleservices can comprise the following serv‐
ices:
▷Teleservice Call, see page 107.
▷Automatic Teleservice Call, see page 107.
▷Teleservice Report, see page 108.
▷Teleservice Battery Guard, see page 109.
▷Your Service partner, see page 109.
▷Breakdown assistance, see page 108.
Requirements
▷Activated ConnectedDrive contract, equip‐
ment with intelligent emergency call or
BMW ConnectedDrive services.
▷Mobile telephony reception must be guar‐
anteed.
▷Standby state or ignition is switched on.
Automatic Teleservice call
Principle
The Teleservice data on the service require‐
ment for the vehicle is transmitted to the Serv‐
ice partner by BMW automatically when a serv‐
ice is due. If possible, the partner will make
contact and a service appointment can be
agreed.
In so doing, the Service partner can prepare
precisely for service appointments. The work‐
shop stay is shortened.
Last Teleservice Call
Checking when the Service partner was noti‐
fied, see page 108.
Manual Teleservice Call
Principle
A Teleservice Call triggered manually by the
customer causes the Teleservice data for the
vehicle's service requirements to be transfer‐
red by BMW to the Service Partner. If possible,
the partner will make contact and a service ap‐
pointment can be agreed.
General
A Teleservice Call can also be started through
a Check Control message, see Owner's Hand‐
book for the vehicle.
Seite 107
Services and applications Communication
107
Online Edition for Part no. 01 40 2 976 378 - X/16

Starting a Teleservice Call
1. "ConnectedDrive"
2. "BMW Assistance"
3. "Teleservice Call"
Teleservice Report
Principle
As needed, transfers the technical data from
your vehicle to BMW at regular intervals. This
is used to evaluate the further development of
BMW products.
General
The Teleservice Report is free of charge. It is
activated in vehicles with certain technical pre‐
conditions and an active BMW Connected‐
Drive contract or when the vehicle is equipped
with intelligent emergency call or BMW Con‐
nectedDrive Services.
Neither personal information nor position data
is transferred.
Displays
Displays when the last Teleservice Report has
been transferred, see page 108.
Last Teleservice Call
Principle
The last Teleservice Calls, such as the last
message to the Service partner, can be shown
on the Control Display.
Displaying last Teleservice Call
Check when the last Teleservice Call has been
transferred.
1. "My Vehicle"
2. "Vehicle status"
3. "Teleservice Call"
Breakdown assistance
Principle
The Mobile Service offered by the BMW Group
can be contacted if you require help in the
event of a breakdown.
General
In the case of a breakdown, data on the vehicle
condition can be transferred to the Mobile
Service. It might be that malfunctions can be
remedied directly.
Contact with the Mobile Service can also be
done with a Check Control message, see Own‐
er's Handbook for the vehicle.
Starting breakdown assistance
Starting service
When equipped with Teleservices, support is
provided first through the Teleservice diagno‐
sis and then by the Teleservice assistance.
1. "ConnectedDrive"
2. "BMW Assistance"
3. "BMW Mobile Care"
Phone number of Mobile Service is dis‐
played. A voice connection to Mobile Serv‐
ice can be established.
Teleservice Diagnosis
Teleservice Diagnosis enables the transfer of
detailed vehicle data that is necessary for diag‐
nosis of the vehicle via mobile telephony. This
data is transferred automatically.
After transfer of the data, a voice connection to
the Mobile Service is established.
Starting Teleservice Assistance
The Teleservice Assistance enables a deeper
diagnosis of the vehicle by the Mobile Service.
Certain functions within the vehicle may be re‐
saved to a drivable condition.
Seite 108
Communication Services and applications
108 Online Edition for Part no. 01 40 2 976 378 - X/16
As requested by the Mobile Service and on
terminating the voice connection, the Teleser‐
vice Assistance can be started.
1. Park the vehicle safely.
2. Apply the parking brake.
3. Control Display is switched on.
4. "Teleservice Help"
After concluding the Teleservice Assistance, a
voice connection to the Mobile Service is es‐
tablished.
Teleservice Battery Guard
Principle
If the battery charge state falls below certain
levels, BMW informs you or the Service partner
directly or when the vehicle is next started in
defined cases.
General
If required, the Service partner will contact you
to agree a service appointment.
Teleservice Battery Guard is only activated in
vehicles with certain technical preconditions
and an active BMW ConnectedDrive contract,
when equipped with intelligent emergency call
or BMW ConnectedDrive services. To be in‐
formed by Teleservice Battery Guard, your
contact data must be saved in the Connected‐
Drive customer portal.
Displays
Displays when the last Teleservice Battery
Guard Call has been transferred, see page 108.
Your Service partner
Principle
Possible contact with the Service partner.
General
In special cases, for example after change of
owner or address, it may be necessary to ad‐
just the Service partner. This can be done us‐
ing the hotline, by a Service Partner of the
manufacturer or another qualified Service Part‐
ner or a specialist workshop or if necessary in‐
dependently on the Control Display.
Display current service partner
The Service Partner is created as a contact in
the vehicle.
1. "ConnectedDrive" or "Communication"
2. "BMW Assistance"
3. "Your Service Partner"
Depending on the equipment, the following
functions are available in a selected contact:
▷ "Start route guidance"
▷ Call up contact.
▷ Call up Internet address.
▷ "Compose email"
Changing Service partners
1. "ConnectedDrive"
2. "BMW Assistance"
3. Select entry for 'Service Partner Manage‐
ment'.
4. The Service Partner currently assigned to
your vehicle is shown with all contact infor‐
mation.
Another Service Partner can be found at
'Change Service Partner'.
To change the Service Partner, the current lo‐
cation of the vehicle is preselected. Adapt the
search criteria of the location search if neces‐
sary.
It can take a few minutes until the new Service
Partner is visible in the Service Partner con‐
tact. Following that, the Service Partner you
have selected will be informed about all service
requirements signalled by your vehicle or by
you manually.
Seite 109
Services and applications Communication
109
Online Edition for Part no. 01 40 2 976 378 - X/16

Depending on the equipment, the following
functions are available for a Service Partner
contact:
▷ "Start route guidance"
▷ Call up contact.
▷ Call up Internet address.
▷ "Compose email"
Online logbook
Principle
The online trip book saves and documents
completed trips.
General
Up to 150 trips can be saved continuously in
the vehicle.
Here, at least the date, time, geoposition and
number of kilometres at the start and end of
each trip, kilometres travelled and selected
type of trip are recorded.
With "official" trips, the trip destination, reason
for travel, business partner visited and start
and end of the trip are also entered.
The logbook entries are automatically transfer‐
red to the ConnectedDrive Portal and can be
shown and edited there later. As a template for
the financial authorities, a report can be com‐
piled by the user containing all the necessary
information to ensure compliance with the le‐
gal requirements in Germany.
The entries can be completed subsequently in
the ConnectedDrive Portal.
The trips recorded are encrypted and can only
be shown and processed in the vehicle or in
the ConnectedDrive Portal.
Operating requirements
▷Unlimited use of the function is only guar‐
anteed with mobile telephone reception.
▷The correct date and time are set on the
Control Display, see Owner's Handbook for
the vehicle.
▷The current software version must be in‐
stalled, see the Owner's Handbook for the
vehicle.
Updates and related, up-to-date information is
posted on the website at www.bmw.com/
update.
Activating logbook
1. "ConnectedDrive"
2. "Logbook"
3. "Logbook"
Select menu item and activate the func‐
tion.
Starting a new trip
1. "New journey"
2. Adjust the following trip data as necessary:
▷"Driver:"
▷"Journey type:"
▷"Visited business contacts:"
▷"Purpose of journey:"
▷"Journey destination:"
3. "Start journey"
Changing trip data
1. "Manage current journey"
2. "Modify data"
3. Change desired trip data.
4. "Resume journey"
Showing a logbook
Display chronological listing of all trips saved in
the vehicle.
"Show logbook"
Select a journey to open the detailed view of
the journey.
Transmitting a logbook
All completed trips saved in the vehicle are au‐
tomatically transferred to the ConnectedDrive
Seite 110
Communication Services and applications
110 Online Edition for Part no. 01 40 2 976 378 - X/16

Portal. They can continue to be displayed in
the vehicle.
Manual transfer of the trips saved in the vehi‐
cle:
1. "Transfer logbook"
The time of the last transfer is displayed.
2. "Transfer to customer portal"
Saving a logbook
To save trips manually, a compatible device
must be connected to the USB interface in the
centre armrest.
1. Connecting USB medium to USB interface,
see the Owner's Handbook for the vehicle.
2. "Transfer logbook"
3. "Transfer to USB"
The trip data is encoded and saved onto the
medium and can be transmitted to the Con‐
nectedDrive Portal by PC.
Settings
▷"Pop-up at start of journey"
The trip last undertaken is shown on the
Control Display automatically.
The pop-up can be ended manually at any
time.
Continue the new trip with this trip data or
change the trip data.
▷"Automatic break recognition"
The current trip is not terminated automat‐
ically if the trip is interrupted for a period
defined by the user.
The desired break time can be set between
1 and 90 minutes.
Resetting a logbook
Deletes all trips and trip data saved in the vehi‐
cle. Trips already transferred to the Connec‐
tedDrive Portal are retained there.
"Delete all data"
Deactivating a logbook
If the logbook is deactivated, all saved journeys
are transferred to the BMW ConnectedDrive
Portal. All data entered in the vehicle is re‐
tained.
The current trip is ended.
1. "Logbook"
2. "OK"
Select menu item and deactivate the func‐
tion.
If you want to use the logbook again, this must
be reactivated. Activating logbook, see
page 110.
Data transfer
Principle
When updating services, the status of the data
transfer can be displayed.
Displaying data transfer
1. "ConnectedDrive"
2. Press the button.
3. "Data transfer"
Updating BMW Services
Principle
Manually update all the services available in
the vehicle.
Updating services
1. "ConnectedDrive"
2. Press the button.
3. "Update BMW Services"
Seite 111
Services and applications Communication
111
Online Edition for Part no. 01 40 2 976 378 - X/16
ConnectedDrive Services
Functional requirements
▷Connected Drive Services are applied for
at a Service Partner or have been pur‐
chased via the ConnectedDrive Store.
▷Mobile telephony reception must be guar‐
anteed.
▷For certain services, for example informa‐
tion on current location, the vehicle must
be able to determine your current location.
▷The correct date is set on the Control Dis‐
play, see Owner's Handbook for the vehi‐
cle.
ConnectedDrive Store
Principle
For vehicles with the technical requirements,
various additional services can be ordered in
the vehicle.
General
The offering is country-specific.
Ordering services
1. "ConnectedDrive"
An overview of the services present and
yet to be ordered in the vehicle is shown.
2. To buy a service, select this and following
the instructions in the Control Display.
BMW messages
General
Messages from the Concierge Service and
from My Info are displayed.
Information about SMS messages from the
mobile telephone, see page 81.
Displaying BMW messages
1. "ConnectedDrive"
or
"Communication"
2. "BMW messages"
The latest BMW messages are displayed.
Status
A symbol indicates the status of the message.
Symbol Meaning
Read BMW message.
Unread BMW message.
Filtering the message list according to
status
1. Press the button.
2. "Filter BMW messages"
3. Select the desired setting.
Filtering message list by message type
1. "Filter"
2. Select the desired setting.
Additional functions
The following functions are available in a selec‐
ted SMS message, from the Concierge Service
or My Info.
▷ Select town/city to start route guidance.
▷Select telephone number to dial it.
▷Select Internet address to call it up.
Deleting a message
1. Press the button.
2. Delete selected message: "Delete
message"
Deleting all messages: "Delete all
messages"
Seite 112
Communication Services and applications
112 Online Edition for Part no. 01 40 2 976 378 - X/16

My Info
General
Messages from My Info can come from the
ConnectedDrive customer portal or be sent by
selected partners.
Vehicle apps
Principle
BMW ConnectedDrive Services offer the pos‐
sibility of displaying apps and other functions
or information, for example about weather or
news, on the Control Display.
Displaying BMW ConnectedDrive
service apps
1. "ConnectedDrive"
2. Select required app.
Messages
▷My Info messages, see page 112.
Driver profiles
▷Exporting/importing driver profile, see
Owner's Handbook for the vehicle.
Navigation
▷Importing trips, see page 15.
▷Information to Points of Interest, see
page 11.
Log on
To display personal data, e.g. e-mails, a log on
is required.
The function is country-dependent.
1. "ConnectedDrive"
2. Press the button.
3. "Login"
4. "User:"
Enter the ConnectedDrive user name.
5. "Password:"
Enter the ConnectedDrive password.
6. "OK"
Automatic log on
The log on takes place automatically when the
vehicles apps are called up.
"Auto-login"
The function "Auto-login" can be disabled in
the ConnectedDrive customer portal in the
area 'Security settings under password protec‐
tion in the vehicle'.
Logging off
1. "ConnectedDrive"
2. "Vehicle apps"
3. Press the button.
4. "Log out"
Adapting menu
The menu can be adapted, for example to re‐
move the entries for unused functions from the
menu.
1. "ConnectedDrive"
2. "Personalise menu"
3. Select the desired setting.
4. Tilt the Controller to the left.
Hotline
Principle
Contact the BMW Hotline for information cov‐
ering every aspect of the vehicle.
Calling the hotline
1. "ConnectedDrive"
2. "BMW Assistance"
3. "Customer support"
Seite 113
Services and applications Communication
113
Online Edition for Part no. 01 40 2 976 378 - X/16
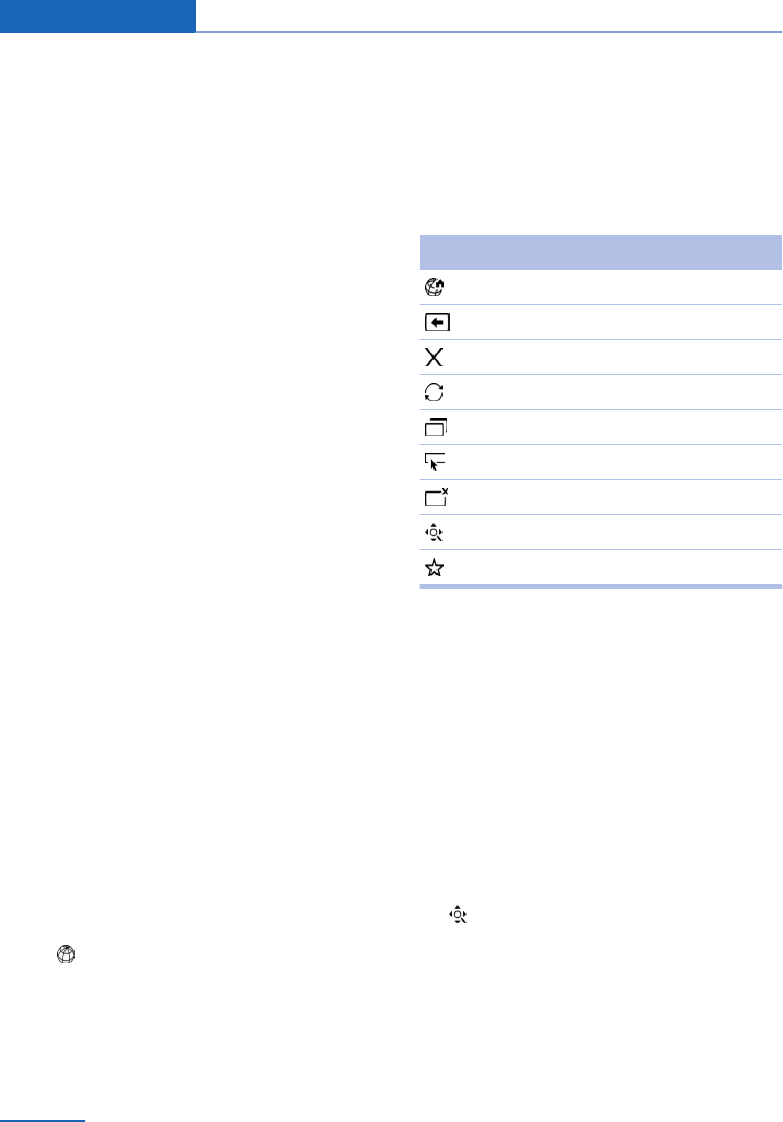
The number of the hotline is displayed and
a voice connection to the hotline can be
established.
Concierge Service
Principle
The Concierge Service provides information
about hotels, restaurants etc. and can send an
SMS with the required information to the vehi‐
cle. Addresses can also be sent directly to the
navigation system. A voice connection to the
Concierge Service is established for this pur‐
pose.
Start Concierge Service
1. "ConnectedDrive"
2. "Concierge Services"
A voice connection to the Concierge Service is
established.
Internet
General
The Internet is available through the SIM card
in the vehicle.
Operating possibilities using iDrive, see Own‐
er's Handbook for the vehicle.
For your own safety, the Internet is displayed
only at up to approximately 5 km/h, approxi‐
mately 3 mph; for some country versions, only
when the vehicle is at a standstill.
Calling up
1. "ConnectedDrive"
2. "Internet"
The home page is displayed. It is possible that
the Internet sites are not displayed in the same
way as on a PC. Flash or Java contents cannot
be displayed in the vehicle browser.
Operating
Function bar
A toolbar for operation is displayed. To activate
the toolbar, tilt the Controller to the left until
the mouse pointer is located in the function bar
or press the BACK button.
Symbol Function
"Homepage"
"Back"
"Cancel"
"Reload"
"Tabs"
"Enter Internet address"
"Close browser"
"Zoom and pan"
"Favourites history"
Navigating with Controller
▷To move the mouse pointer: tilt the Con‐
troller in the corresponding direction.
▷To move the mouse pointer diagonally: tilt
the Controller in the corresponding direc‐
tion and turn it.
▷To select an element: move the mouse
pointer onto the element and press the
Controller.
▷To scroll: turn the Controller.
Zoom
1. "Zoom and pan"
2. Press the Controller to activate the func‐
tion.
3. Turn Controller to enlarge or reduce web
page.
4. Press the Controller.
The setting is saved.
Seite 114
Communication Services and applications
114 Online Edition for Part no. 01 40 2 976 378 - X/16
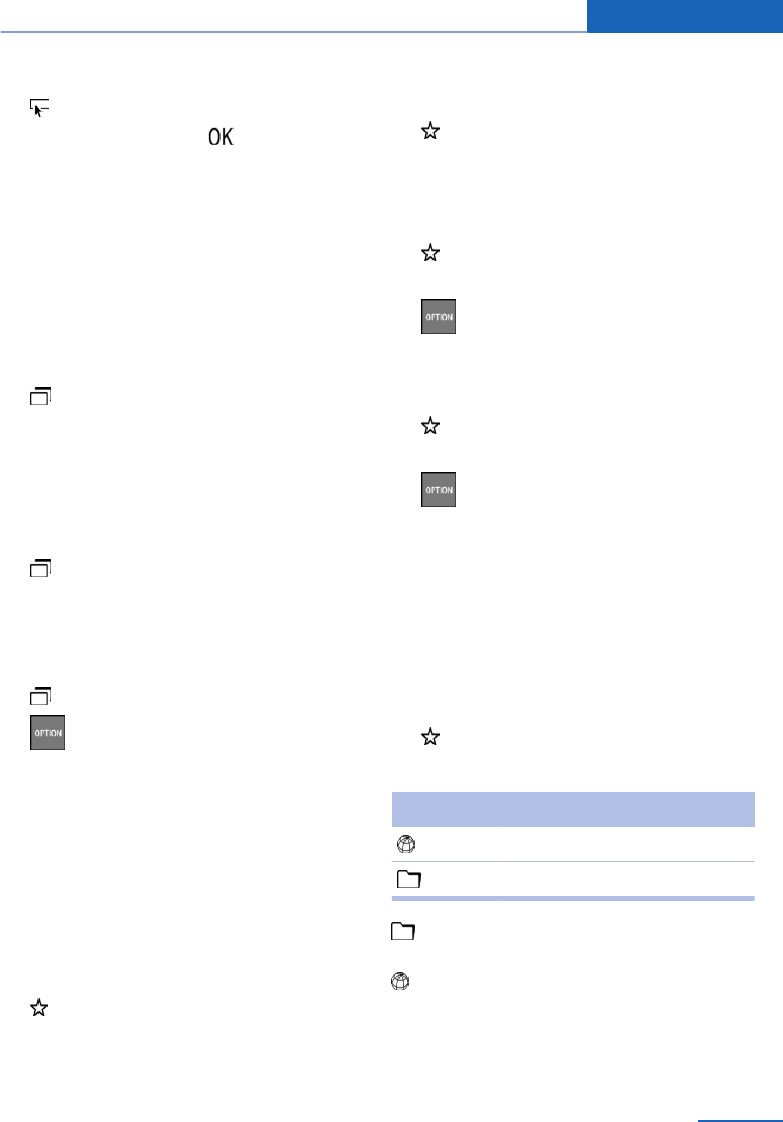
Entering Internet addresses
1. "Enter Internet address"
2. ▷Enter address and
▷Or tilt Controller to the right and select
address from list.
Tabs
General
Open a new tab, to show more than one web
page at a time.
Opening web page in a new tab
1. "Tabs"
2. Press the Controller.
3. Enter web address, select web address
through favourites or through history. The
web page is opened in a new tab.
Changing between tabs
1. "Tabs"
2. Turn Controller to the left or right.
3. Press Controller to show selected tab.
Deleting a tab
1. "Tabs"
2. Press the button.
3. "Close tab"
Selected tab is deleted.
Favourites
General
Web pages can be saved in Favourites so they
can be called up quickly as needed.
Adding a web page to favourites
1. "Favourites history"
2. "Add to favourites"
Calling up web page from favourites
list
1. "Favourites history"
2. Select required web page.
Deleting a web page from favourites
list
1. "Favourites history"
2. Highlight the web page to be deleted.
3. Press the button.
4. "Delete favourite" or "Delete all favourites"
Setting as home page
1. "Favourites history"
2. Highlight the desired favourites.
3. Press the button.
4. "Set as homepage"
History
Principle
The web pages called up are saved in the his‐
tory.
Show history
1. "Favourites history"
2. "History"
Symbol Meaning
Pages visited today.
Pages visited earlier.
Select the symbol. The web pages visited
on the selected date are shown.
Select the symbol. The web page is called
up.
Seite 115
Services and applications Communication
115
Online Edition for Part no. 01 40 2 976 378 - X/16

Deleting all entries
1. Press the button.
2. "Delete all entries"
Settings
1. "ConnectedDrive"
2. "Internet"
3. Press the button.
4. Select the desired setting:
▷"Sound"
▷"Block cookies"
▷"Block pop-ups"
▷"Block HTTPS warnings"
▷"Clear personal settings"
HTTPS certificates and history are de‐
leted.
Remote Services
Principle
With Remote Services, a connection can be
established between a compatible smartphone
and the vehicle.It can be used to lock and un‐
lock the vehicle, for example.
General
Other functions are available depending on the
vehicle.
To be able to run the functions, the BMW Con‐
nectedDrive app must be downloaded. This
function is done using the app.
For the functions to be used, they must be ac‐
tivated in the ConnectedDrive customer portal
as a one-time procedure. An active BMW Con‐
nectedDrive contract is required.
Alternatively, a selection of certain functions
can also be run using the BMW Connected‐
Drive call centre.
You can find the Owner's Handbook for the
BMW ConnectedDrive app in the Connected‐
Drive customer portal or at www.bmw.com.
Apps
Principle
Certain apps of a compatible smartphone can
be integrated into the vehicle. These apps are
displayed on the Control Display.
General
Some apps can only be used when the vehicle
is stationary for safety reasons.
The vehicle manufacturer recommends using
applications that have been classified by BMW
as compatible with your vehicle; otherwise
there is a risk of system malfunctions.
▷The extent of software applications shown
on the Control Display depends on the
functions of the app installed on the smart‐
phone.
▷The data transfer of the apps from the
smartphone to the vehicle may take a
while. Some apps are dependent on the
speed of the available Internet connection
of the smartphone.
▷Some smartphones cannot use apps and
Bluetooth hands-free at the same time.
Restart the app on the smartphone after a
phone call as necessary.
▷Using the apps on the smartphone can re‐
sult in mobile telephone costs. These
costs do not form part of apps.
Information about compatible smartphones is
available at www.bmw.com/bluetooth, informa‐
tion about available apps and installing them is
available at www.bmw.com/connectivity, or
contact a Service Partner of the manufacturer
or another qualified Service Partner or a spe‐
cialist workshop.
Seite 116
Communication Services and applications
116 Online Edition for Part no. 01 40 2 976 378 - X/16

Safety note
WARNING
Operating integrated informations sys‐
tems and communication devices during the
journey can distract from traffic. You could lose
control of the vehicle. Danger of accidents.
Only operate the systems or devices if permis‐
sible in the traffic situation. Stop if necessary
and operate the systems or devices with the
vehicle at a standstill.◀
Requirements
▷Corresponding mobile radio contract.
▷Compatible smartphone.
▷Apps are installed on the smartphone and
ready for use.
▷The smartphone is connected to the vehi‐
cle via the snap-in adapter, a USB port or
Bluetooth, see Owner's Handbook for the
vehicle.
Operate Apps
1. "ConnectedDrive"
2. Select the desired app on the smartphone.
Displaying status
1. "ConnectedDrive"
2. "Mobile devices"
Frequently Asked Questions
Why are the apps installed on my smartphone
not displayed on the Control Display, even
though the smartphone is connected to the
vehicle?
▷The smartphone is no longer selected for
the use of apps.
Another smartphone connected to the ve‐
hicle has been selected for the use of apps.
▷The smartphone is no longer selected for
the use of Bluetooth audio.
The smartphone is connected to the vehi‐
cle via Bluetooth. Another smartphone has
been selected for the use of Bluetooth au‐
dio. Without Bluetooth audio, the use of
apps via a Bluetooth connection is not pos‐
sible.
If two different smartphones are to be used
for the audio playback and the use of apps,
one of the smartphones must be connec‐
ted to the vehicle via the USB interface.
▷The smartphone is connected to the vehi‐
cle simultaneously via Bluetooth and the
USB interface.
With simultaneous connection via the USB
interface and Bluetooth, the Bluetooth
connection takes precedence.
Apple CarPlay
Principle
Apple CarPlay makes it possible to operate
certain functions of a compatible Apple iPhone
by voice commands and using iDrive.
General
CarPlay and the associated functions are pro‐
vided by the iPhone. The scope and content
depend on the device manufacturer, and may
vary from country to country.
The following restrictions apply to an iPhone
connected via CarPlay:
▷Telephoning is only possible via CarPlay.
▷The iPhone cannot be registered as an ad‐
ditional telephone.
▷The entries in the phonebook are not
transferred to the vehicle.
▷Only one further telephone can be connec‐
ted to the vehicle.
▷Using CarPlay may incur mobile phone
costs. These costs do not form part of ve‐
hicle's optional equipment.
Seite 117
Services and applications Communication
117
Online Edition for Part no. 01 40 2 976 378 - X/16
Safety note
WARNING
Operating integrated informations sys‐
tems and communication devices during the
journey can distract from traffic. You could lose
control of the vehicle. Danger of accidents.
Only operate the systems or devices if permis‐
sible in the traffic situation. Stop if necessary
and operate the systems or devices with the
vehicle at a standstill.◀
Functional requirements
▷Compatible iPhone.
▷Corresponding mobile radio contract.
▷WiFi and Siri voice operation are activated
on the iPhone.
▷Bluetooth and Apple CarPlay are activated
on the vehicle.
Switching on Bluetooth and CarPlay
1. "My Vehicle"
2. "iDrive settings"
3. "Mobile devices"
4. "Settings"
5. ▷"Bluetooth"
▷"Apple CarPlay"
Registering iPhone with CarPlay
Register iPhone via Bluetooth on the vehicle,
see the Owner's Handbook for the vehicle.
Select the Apple CarPlay function:
"Apple CarPlay"
Selecting CarPlay
CarPlay can be selected using the following
menus:
▷"Apple CarPlay"
If this entry is selected in the main menu,
the CarPlay menu is shown on the Control
Display.
▷"Media/Radio"
The following entry is displayed: "Now
playing in Apple CarPlay"
If the entry is selected, the music app on
the iPhone is started.
▷"Navigation"
The following entry is displayed: "Maps in
Apple CarPlay"
If the entry is selected, the navigation app
on the iPhone is started.
▷"Communication"
The following entry is displayed: "Phone in
Apple CarPlay"
If the entry is selected, the telephone app
on the iPhone is started.
Operating CarPlay
CarPlay can be operated using iDrive and by
voice commands.
By voice:
1. Press the button on the steering
wheel until Siri voice control is activated on
the iPhone.
2. Speak the commands recognised by the
iPhone.
Switching off CarPlay
1. "My Vehicle"
2. "iDrive settings"
3. "Mobile devices"
4. "Settings"
5. "Apple CarPlay"
Uncheck the box.
CarPlay navigation
The destination of the active CarPlay naviga‐
tion can be transferred to the BMW navigation.
Route guidance is taken over by the BMW nav‐
igation and the CarPlay navigation is closed.
Transferring back to CarPlay is not possible.
Seite 118
Communication Services and applications
118 Online Edition for Part no. 01 40 2 976 378 - X/16

Seite 119
Services and applications Communication
119
Online Edition for Part no. 01 40 2 976 378 - X/16

Online Edition for Part no. 01 40 2 976 378 - X/16

Reference
The section contains the alphabetical index that
will lead you to the desired information in the
quickest manner possible.
Online Edition for Part no. 01 40 2 976 378 - X/16

Everything from A to Z
Index
A
Alternative routes 19
AM/FM stations 41
Apple Car Play 117
Applications, see Apps 116
Appointments, see Calen‐
dar 83
App, Remote Services 116
Apps 116
Arrow view, split screen 27
Audio 46
Audio CD 47
Audio playback, Bluetooth 53
Audio playback, pause 36
Audio remote control 63
Automatic Teleservice
call 107
AUX-IN port in the rear 64
AUX-IN port, operation 46
Avoid areas 25
B
Balance, sound settings 38
Bang & Olufsen, sound set‐
ting 39
Bass, sound settings 38
Battery changing, audio re‐
mote control 63
Battery Guard, Teleser‐
vice 109
Bluetooth audio 53
Bluetooth headset 91
Bluetooth headset, connect‐
ing 93
Blu-ray player in the rear 64
Blu-ray video 71
BMW ConnectedDrive 112
BMW ConnectedDrive
Store 112
BMW messages 112
BMW Routes 15
BMW Teleservices 107
BMW Touch Command, with
rear entertainment 67
Bowers & Wilkins, sound set‐
tings 39
Breakdown assistance 108
Brokering, see Calls with a
number of participants 78
Bypassing a section of the
route 19
C
Calendar 83
Calling up the map, naviga‐
tion 17
CD 47
CD/DVD, safety instruc‐
tions 47
Changing entertainment
source 36
Changing the batteries, re‐
mote control for rear enter‐
tainment 66
Charging cradle, see Wireless
charging 87
Concierge Service 114
Concierge Service messages,
see BMW messages 112
Conference, Calls with a num‐
ber of participants 78
ConnectedDrive 112
ConnectedDrive Store 112
Connecting headset, Rear
phone 93
Contacts 78
Country selection, naviga‐
tion 9
Course of route, see Naviga‐
tion 19
D
DAB, digital radio 42
Destination input 9, 10
Destination input by voice
control 10
Digital radio DAB/DMB 42
DMB, digital radio 42
DVD, Video 57
Dynamic route guidance 29
E
Electronic logbook 110
E-mail 82
Emergency assistance, see
Breakdown assistance 108
Emergency services, see
Breakdown assistance 108
Entering an address, naviga‐
tion 9
Entering destination using
GPS coordinates 13
Entertainment, control func‐
tions 36
Entertainment in the rear 64
Equaliser 38
F
Fader, sound settings 38
FM/AM stations 41
G
Gong, speaker equalisa‐
tion 39
Seite 122
Reference Everything from A to Z
122 Online Edition for Part no. 01 40 2 976 378 - X/16

GPS coordinates, entering
destination 13
GPS navigation, see Naviga‐
tion system 8
H
Handset, see Rear phone 90
Hands-free system 78
Hands-free unit 78
HDMI connection in the
rear 64
Headphones and vehicle
loudspeakers in the rear 68
Help for navigation, see Fre‐
quently Asked Ques‐
tions 32
Help for rear entertainment,
see Frequently Asked Ques‐
tions 73
Help for WLAN to phone in
the rear, see Frequently
Asked Questions 106
Home address, navigation 11
Hotline 113
I
Importing a trip via USB me‐
dium 15
Importing trips, Connected‐
Drive 15
Inductive charging, see Wire‐
less charging 87
Interactive map, see Func‐
tions in the map view 22
Intermediate destination, nav‐
igation 14
Internet 114
iPod/iPhone 52
J
Journey, route guidance with
stopovers 14
Junction, entering for naviga‐
tion 9
L
Last destinations 9
List of route guidance infor‐
mation, split screen 27
Logbook, online 110
M
Manoeuvre information, see
Route guidance informa‐
tion 22
Map update 31
Map view, functions 22
Memos 84
Message list, traffic informa‐
tion 28
Messages from BMW 112
Mobile Service, see Break‐
down assistance 108
MP3 player, see Audio 46
Multichannel reproduction
surround 38
Music hard disc 48
My information messages,
see BMW messages 112
N
Navigation announcement,
see spoken instructions 21
Navigation, split screen 27
Navigation system 8
O
Online alternative routes 19
Online Entertainment 53
Online logbook 110
P
Pause, audio playback 36
Phone book 97
Points of interest, naviga‐
tion 11
Q
Quick search 10
R
Radio 41
Radio, control functions 36
Radio, muting 36
Radio, see changing enter‐
tainment source 36
Radio, setting volume 36
Radio, sound settings 38
RDS 42
Reading out 85
Real-Time Traffic Information
RTTI 28
Rear entertainment 64
Rear entertainment, connec‐
tions 64
Rear phone 90
Recommended tours, see
BMW Routes 15
Refuelling recommenda‐
tion 21
Remote control, audio 63
Remote control for rear enter‐
tainment 65
Remote Services, App 116
Renaming a station 42
Route, changing 18
Route criteria, route 18
Route guidance 18
Route guidance information,
route 22
Route guidance with stop‐
overs, see Journey 14
Route magnet, see Changing
the route 20
Routes, see BMW Routes 15
RTTI Real-Time Traffic Infor‐
mation 28
Seite 123
Everything from A to Z Reference
123
Online Edition for Part no. 01 40 2 976 378 - X/16

S
Saved stations 44
Saving destination as con‐
tact 18
Saving stations 41
Screen Mirroring, video 59
Searching for charging sta‐
tions, see Charging stations
and points of interest 11
Selecting destination from
contacts, navigation 13
Service messages, see BMW
messages 112
Service partner 109
Service, see Breakdown as‐
sistance 108
Services, Remote 116
Settings, navigation 24
Short messages SMS, see
Short messages 81
Snap-in adapter, mobile tele‐
phone 86
Software applications, Car
Play 117
Software applications, see
Apps 116
Sound 38
Sound, Bang & Olufsen 39
Sound, Bowers & Wilkins 39
Sound, multichannel repro‐
duction surround 38
Sound output 36
Speaker equalisation 39
Speed Volume, speaker
equalisation 39
Split screen, navigation 27
Spoken instructions, naviga‐
tion 21
Standard settings, naviga‐
tion 24
Stations AM/FM 41
Stopover, navigation 14
Store, see BMW Connected‐
Drive Store 112
Street, entering for naviga‐
tion 9
Surround, multichannel re‐
production 38
T
Tablet, with rear entertain‐
ment 67
Tasks 84
Telephone conference, see
Calls with a number of par‐
ticipants 78
Telephone in the rear 90
Teleservice Battery
Guard 109
Teleservice Call 107
Teleservice Report 108
Teleservices 107
Television, TV 60
Text recognition 85
Touch Command, with rear
entertainment 67
TP, Traffic Programme 44
Traffic information, naviga‐
tion 28
Traffic Programme 44
Treble, sound settings 38
TV 60
U
Update, navigation map 31
USB audio interface 52
USB port in the rear 64
V
Vehicle apps 113
Video DVD 57
Video replay 57
Video, Screen Mirroring 59
Voice memos 84
W
Wireless charging 87
Wireless charging cradle 87
Y
Your Service partner 109
Seite 124
Reference Everything from A to Z
124 Online Edition for Part no. 01 40 2 976 378 - X/16

More about BMW
www.bmw.com
The Ultimate
Driving Machine
01 40 2 976 378 en
*BL297637800S*
Online Edition for Part no. 01 40 2 976 378 - X/16