Mattel Asia Pacific Sourcing FLY56-18A5R RC Robot User Manual FLY56 3A70 180413 English R2 G1 ai
Mattel Asia Pacific Sourcing Ltd. RC Robot FLY56 3A70 180413 English R2 G1 ai
UserManual.wiki
>
Mattel Asia Pacific Sourcing
>
FLY56-18A5R User Manual
>
User Manual
Contents
1.
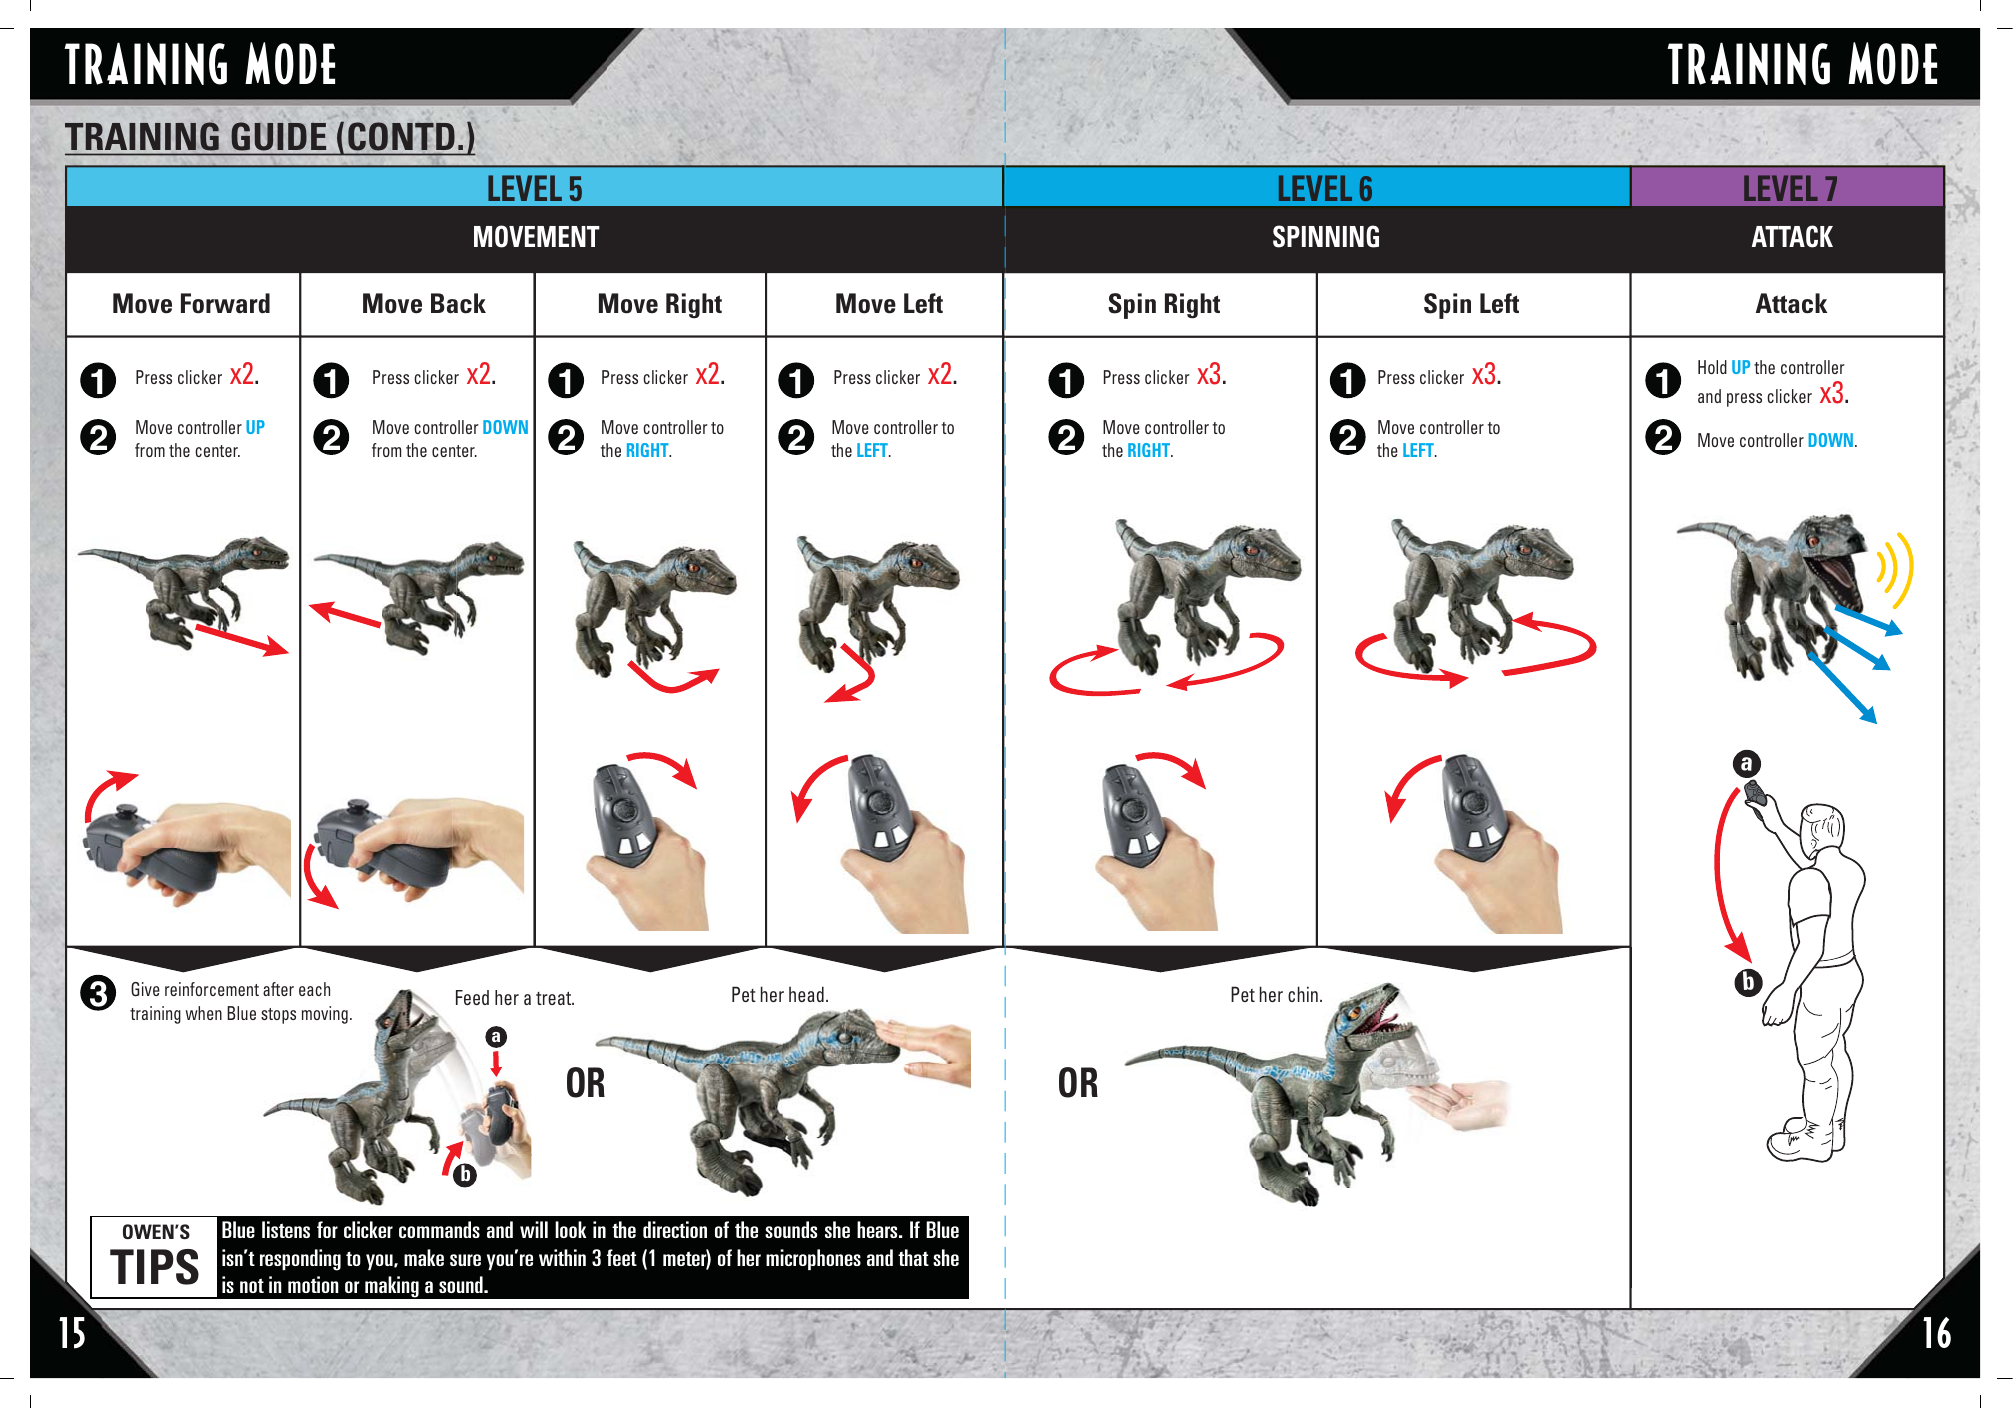
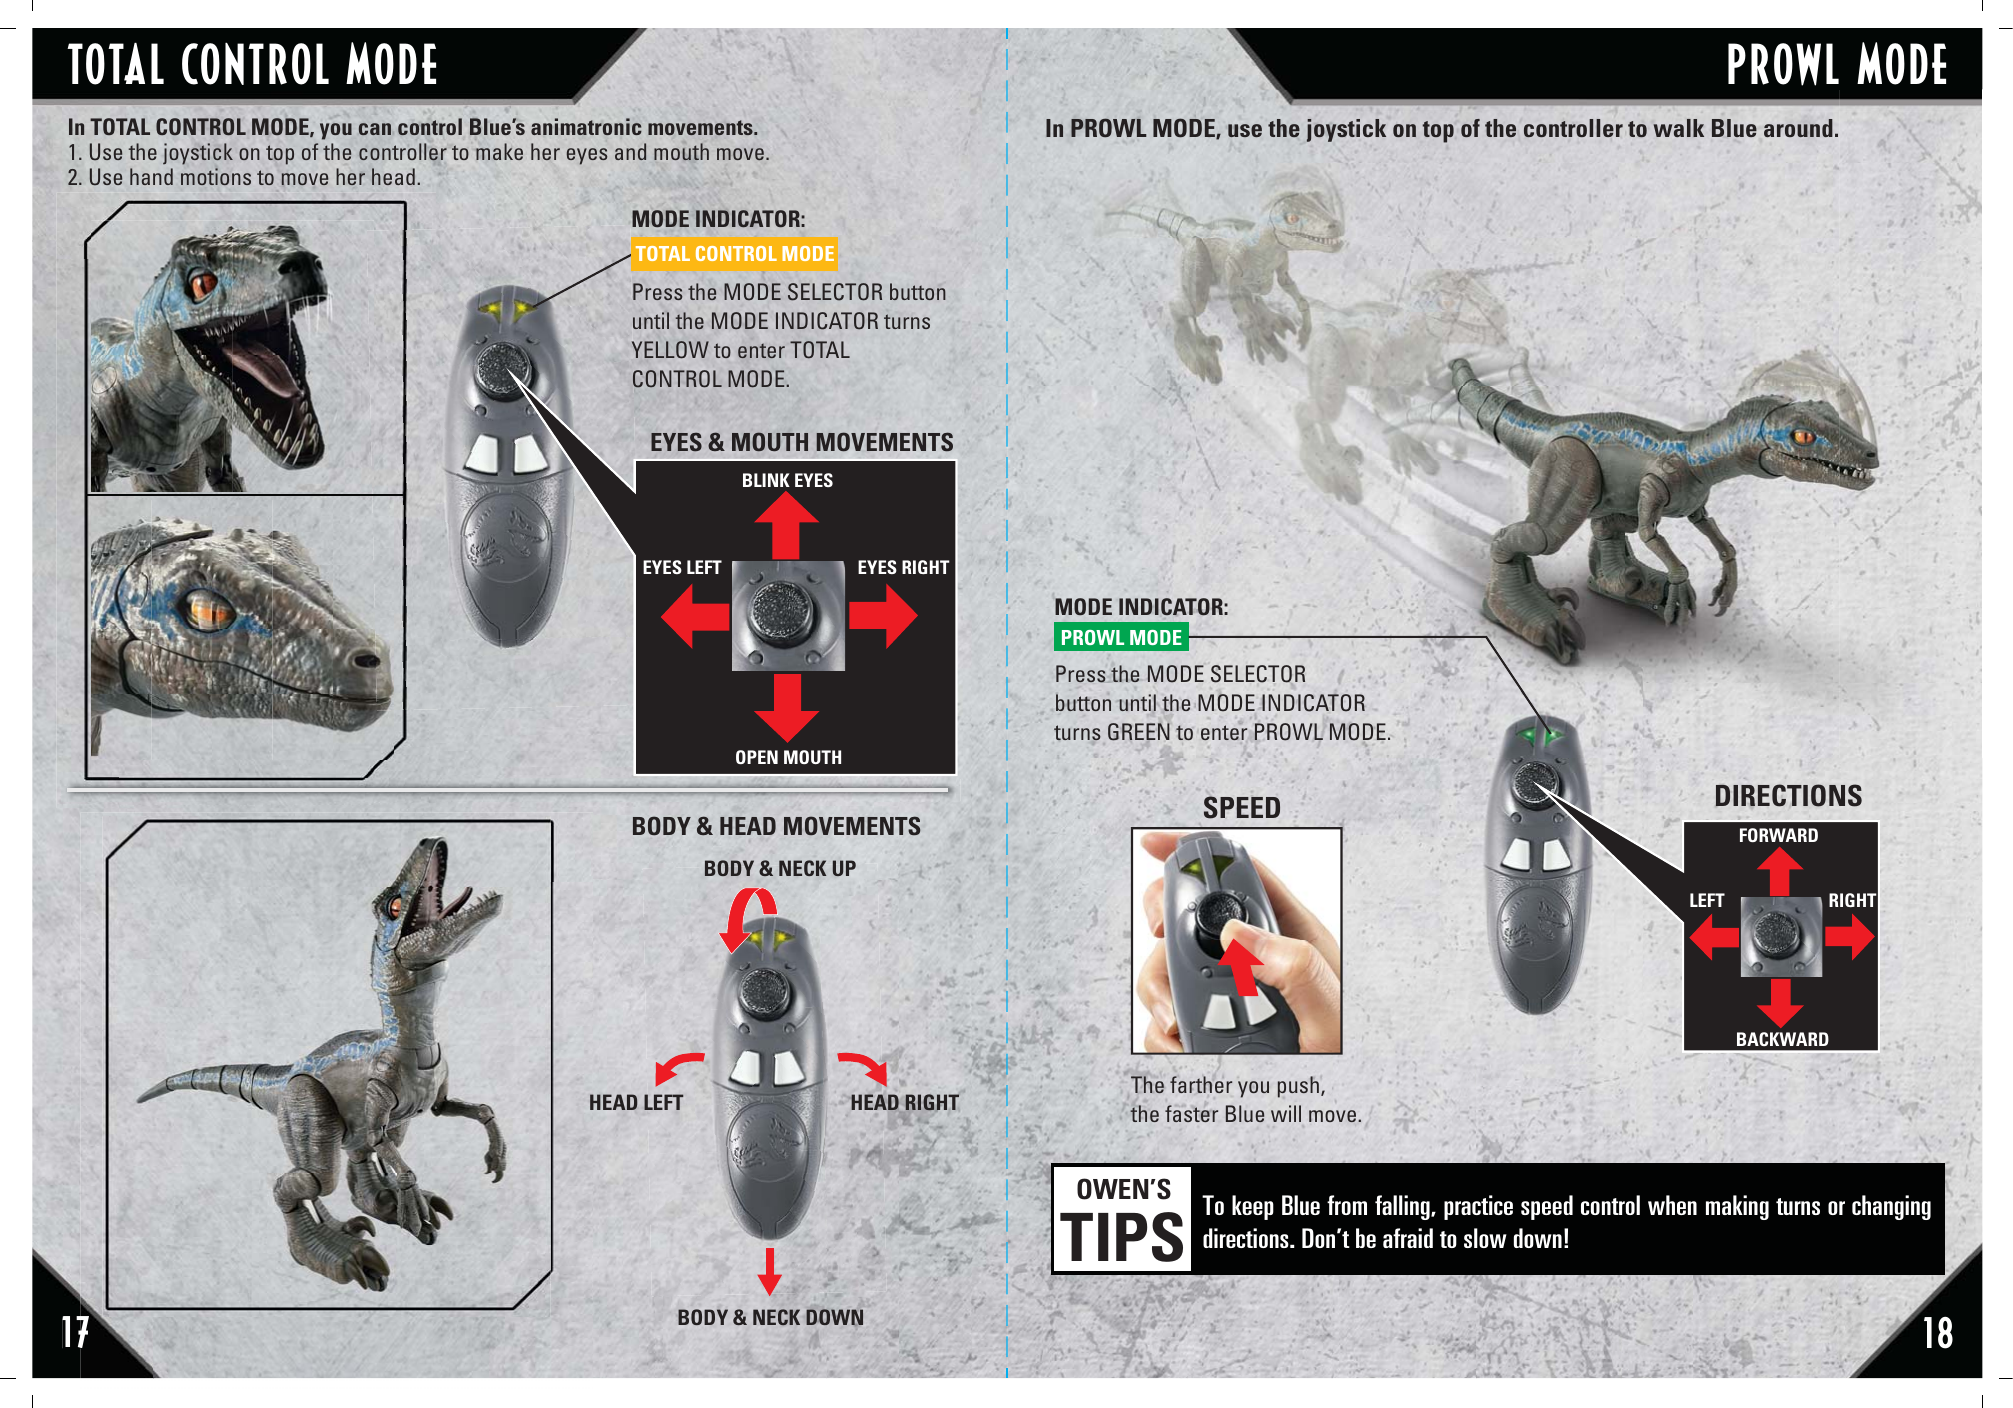
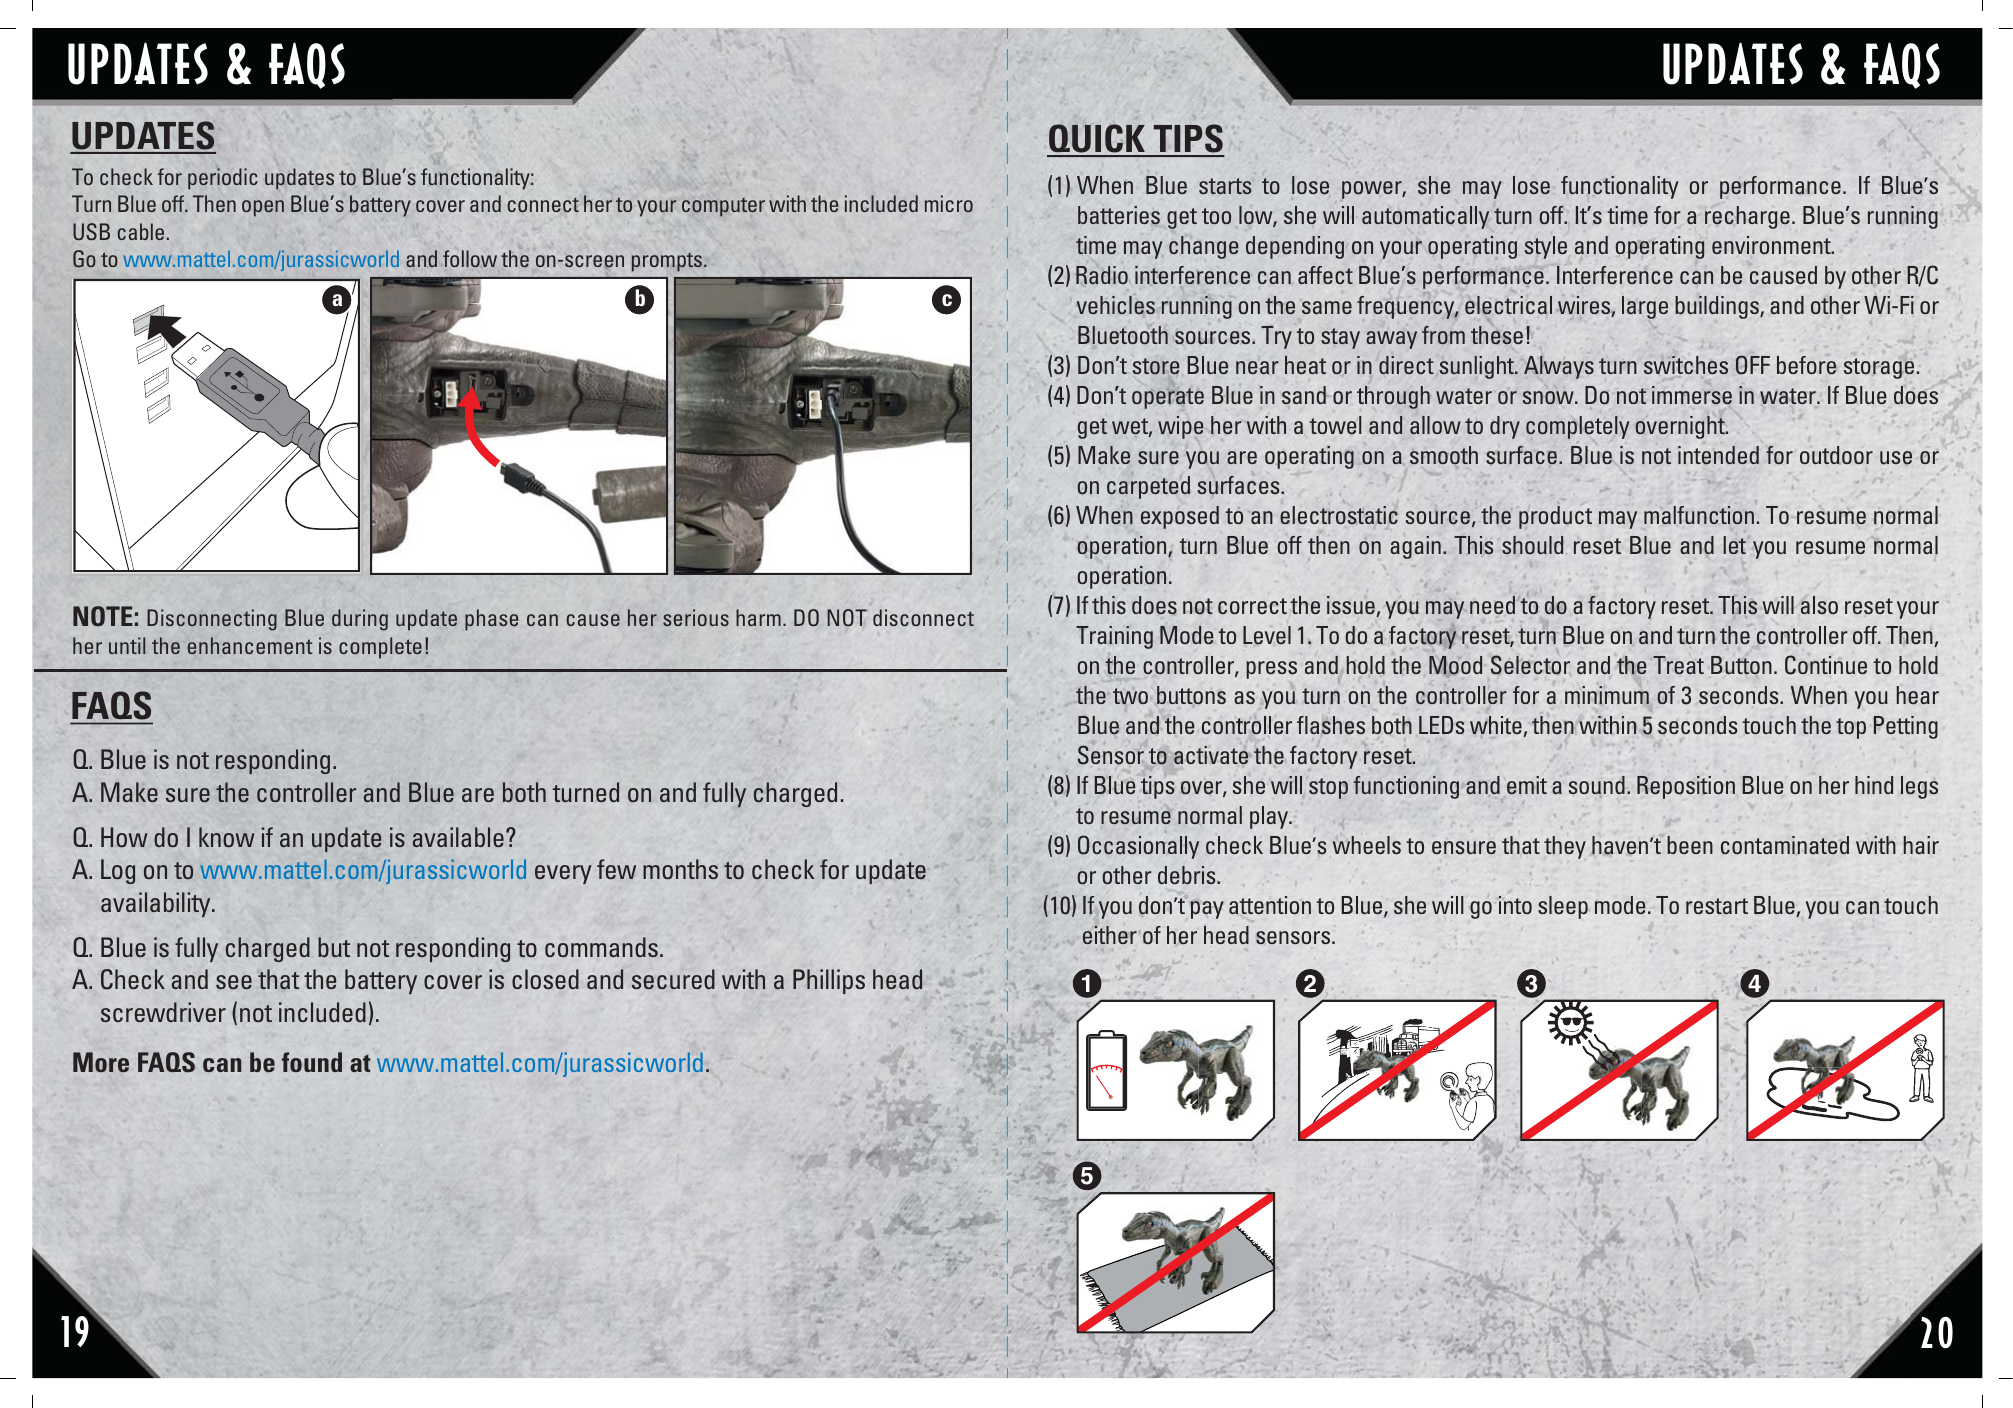
User Manual
2.
Packaging
User Manual
Navigation menu
Upload a User Manual
Namespaces
Wiki Guide
HTML
PDF
Info
Views
User Manual
Discussion / Help
Navigation