Maxon CIC MX-V30 GSM/GPRS Handset User Manual mx v30 0621
Maxon CIC Corp. GSM/GPRS Handset mx v30 0621
UserManual.wiki
>
Maxon CIC
>
MX-V30 User Manual
>
User manual pt1
Contents
1.
User manual pt1
2.
User manual pt2
User manual pt1
Navigation menu
Upload a User Manual
Namespaces
Wiki Guide
HTML
PDF
Info
Views
User Manual
Discussion / Help
Navigation
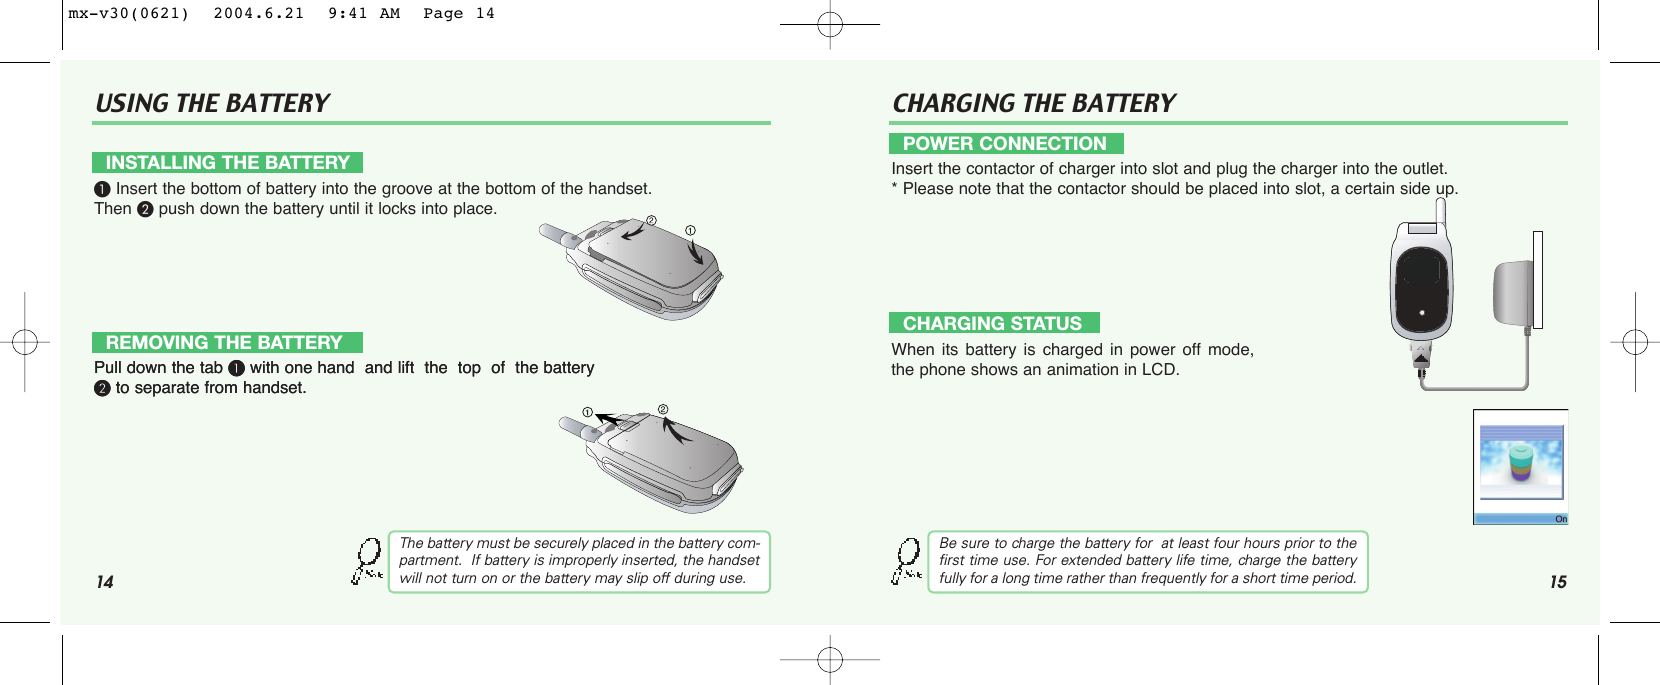
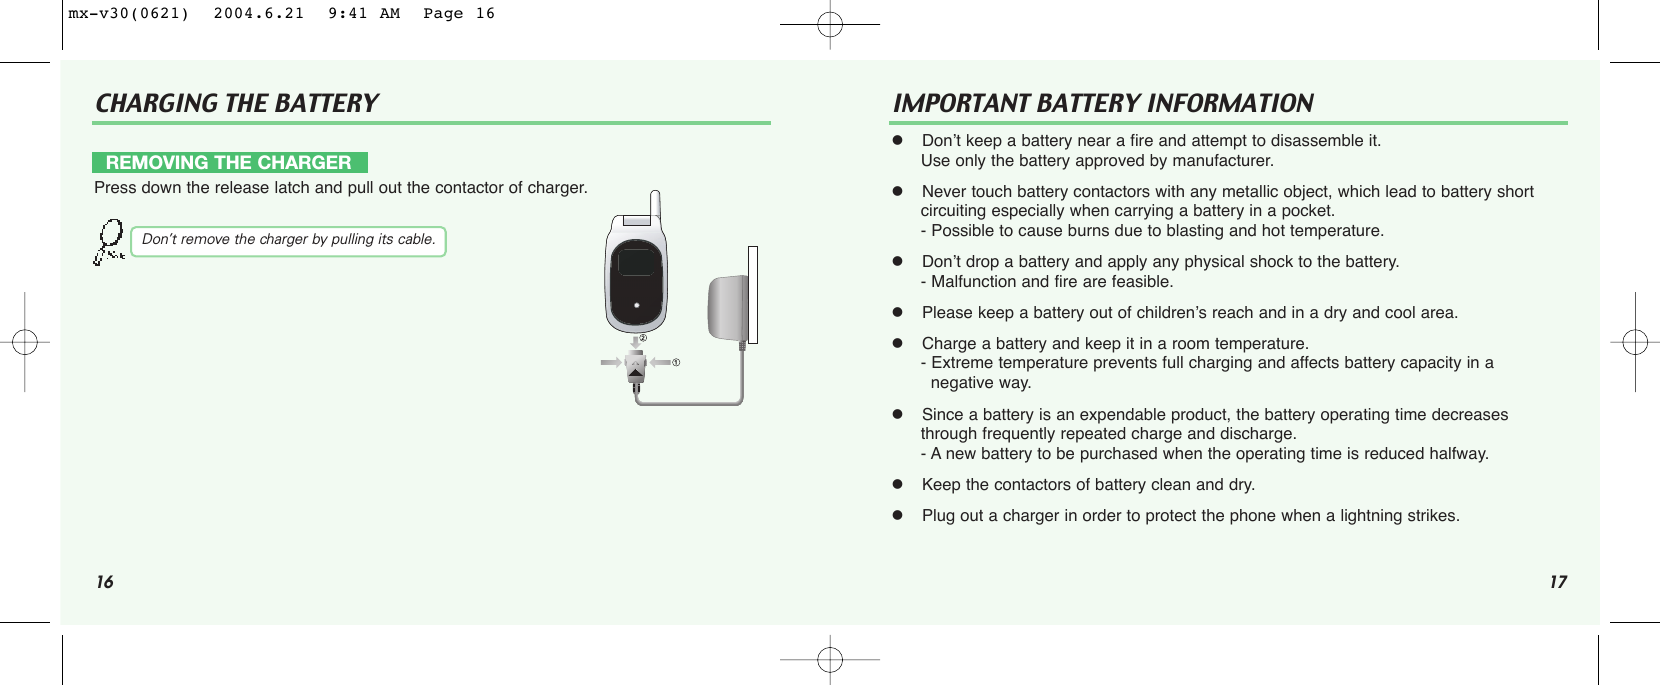
![8 9PACKAGE INCLUDES HANDSET DESCRIPTIONThank you for purchasing this product. Please check the product contents to see if you have all the available items as below.HandsetChargerHands Free KitData Cable (Optional)Standard BatteryHandstrapUser guideDisplayFunction keyKey PadMicrophoneSide KeyAntennaSub LCDSearching.12:364 Jan. [Sat]Displays a icon and a statuswhen you have a call or amessage or when you selectBell/ Vibration/ Mute.256OLED makes the screenturn off.Earphone jackmx-v30(0621) 2004.6.21 9:41 AM Page 8](https://usermanual.wiki/Maxon-CIC/MX-V30.User-manual-pt1/User-Guide-464247-Page-5.png)
![10 11MAIN DISPLAY FUNCTION KEYSMain DisplayIcon display – Shows thecurrent status of phone.Graphic display – Showsphone numbers, text lines,animations, pictures.Function display – Showseach function of [soft1] and[soft2] to help browse throughmain menu.IconsSignal Strength – The number of bars shows signal strength.Battery – Current batterycharging level.Alarm –Appears when analarm is set.Call forwarding – Appearswhen call forwarding is set.Manner mode – Appears whenmanner is set as a ring mode.GPRS Signal – The phoneenters a GPRS service area.Text message – Appears whenyou have a new text message.Vibration Only – Appears whenan vibration only is selected.Call barring – Appears whencall barring is set.Voice message – Appears whenyou have a new voice message.[Soft1] – To place a call or redial a number. Send/Redial Key. [Soft2] – To turn on and off the phone. To end of call.Menu Key – To browse the main menu and view options.Back and Screen turn off key.CLR KEY4-Direction navigation key– To browse the Messages, Phonebook menu, WAP, and Look up menu.OK Key - To select an option.Keypad Keys - To enter letters and numbers.*Key- To place an international call.(+) - To set a manner mode. (press and hold)# Key – Special character key. mx-v30(0621) 2004.6.21 9:41 AM Page 10](https://usermanual.wiki/Maxon-CIC/MX-V30.User-manual-pt1/User-Guide-464247-Page-6.png)


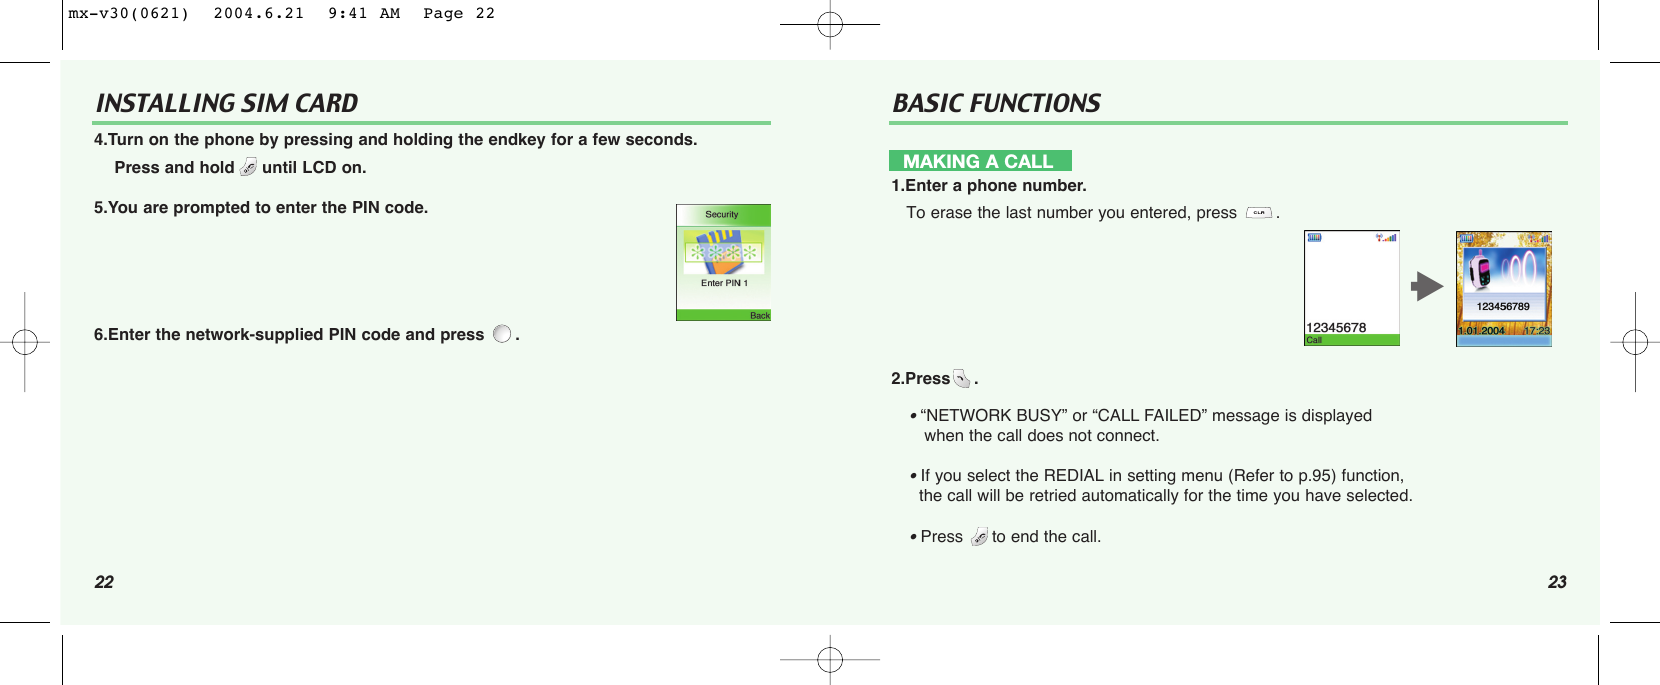
![24BASIC FUNCTIONS BASIC FUNCTIONSRECEIVING CALLS1.The phone ringsTo reject or terminate a call press the .2.Open up folder and talk into phone. When folder is open, press or button.To end a call, close up the folder or press . INTERNATIONAL CALLS, CALL TO AN EXTENSION, EMERGENCY CALLTo make a domestic call, simply enter the desired number and press or key. Acalling or busy tone will sound. To end the call, press .Some countries (e.g. USA) use area codes. In this case you must enter an area code before the a phonenumber (no space between them).1.To make an international call, press until + is displayed. Then enter country code, area code if necessary and finally phone number. (No spaces allowed)2.To make a call to an extension line you may have to go through an automated switchboard. To do so: - Enter a phone number.- Press once.- Enter the extension number. Press .- The call will automatically be routed to the extension line.3.You are able to make emergency calls at all times, even without a SIM card installed. You will be prompted to confirm your call. (To avoid faulty calls)Emergency call number : 112Caller ID FunctionYou can view caller ID.If you send a call, the called number will be stored in the Dial list. To retrieve a number, press to open the list, scroll to anappropriate number and press to place a call.With ear-microphone in use, press and hold [send/end] on the ear-microphone to receive or end a call.25mx-v30(0621) 2004.6.21 9:41 AM Page 24](https://usermanual.wiki/Maxon-CIC/MX-V30.User-manual-pt1/User-Guide-464247-Page-13.png)
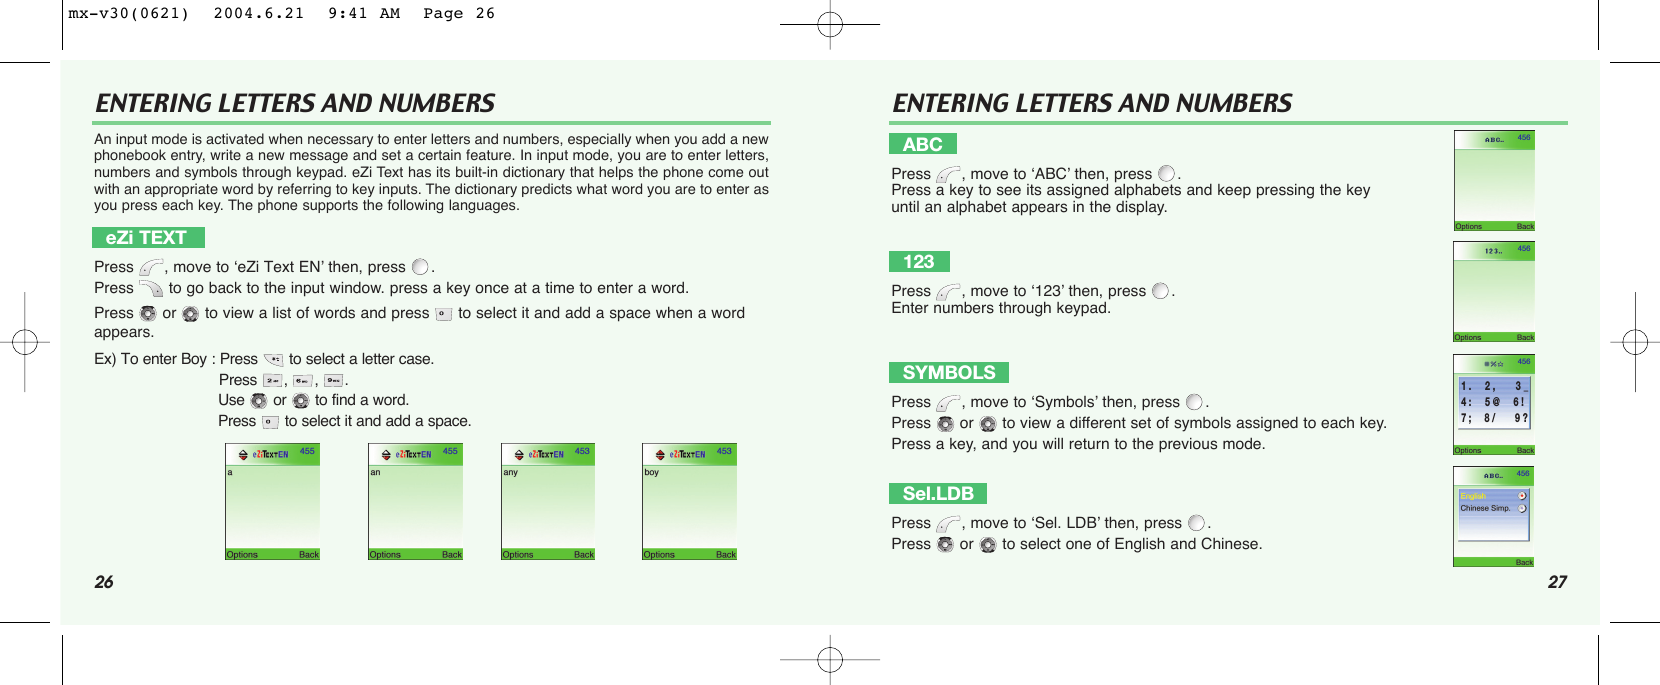
![28ENTERING LETTERS AND NUMBERS29ENTERING LETTERS AND NUMBERSeZiPinYinThis mode allows you to enter Simplified Chinese characters by entering the phonetic spelling of character.Press , move to ‘eZiPinYin’ then, press .Press through to spell a character.If you do not find the desired character even though with the desired spelling, press ,keys for additional character choices. Select the character by press .eZiSTROKEThis mode allows you to enter chinese characters using individual strokes and their stroke order.Press , move to ‘eZiStroke’ then, press .Press through to type strokes - keep typing strokes until the desired component or character is displayed.If you do not find the desired character even though with the desired spelling, press ,keys for additional character choices. Select the character by press .KEY FEATURESIn english and chinese input mode, the following keys help enter letters, numbers and symbols.Press [Soft1] to select an options : ABC, 123, Symbols, eZitext.Press [Soft2] to clear a digit.Press [Navigation key] to move a cursor.Press [*] to select letter case (English mode only), or Press and hold it to change to symbol mode.SpacePress and hold it to change to mode : ABC, 123, eZitext.Press [#] to enter # . , ; : ” ’? !mx-v30(0621) 2004.6.21 9:41 AM Page 28](https://usermanual.wiki/Maxon-CIC/MX-V30.User-manual-pt1/User-Guide-464247-Page-15.png)