Maxon CIC MX-V30 GSM/GPRS Handset User Manual mx v30 0621
Maxon CIC Corp. GSM/GPRS Handset mx v30 0621
Contents
- 1. User manual pt1
- 2. User manual pt2
User manual pt1

1
TABLE OF CONTENTS
WELCOME...............................4
ABOUT THIS USER GUIDE.......5
CHAPTER 1
BEFORE USING YOUR PHONE
Package Includes .......................8
Handset Description...................9
Main Display .............................10
Icons..............................................10
Function keys............................11
Use of sim card .........................12
Navigation key .........................13
Using the battery .....................14
Installing The Battery ..................14
Removing The Battery.................14
Charging The Battery ...............15
Power Connection ....................15
Charging Status........................15
Removing The Charger ...........16
Important Battery Information17
CHAPTER 2
BASIC OPERATION
Turning The Phone On and Off20
Turning The Phone On................20
Turning The Phone Off ...............20
Installing SIM Card...................21
Basic Functions .........................23
Making a Call ...............................23
Receiving Calls .............................24
International Call, Call to an Extension,
Emergency Call ............................25
Entering Letters and Numbers26
Key features .................................29
CHAPTER 3
Menu
Messages...................................32
SMS ...............................................32
MMS..............................................41
CB..................................................49
mx-v30(0621) 2004.6.21 9:41 AM Page 1

2 3
TABLE OF CONTENTS TABLE OF CONTENTS
MOB. Internet ...........................52
WAP ..............................................52
PUSH .............................................63
Organizer...................................64
Calendar .......................................64
Tasks .............................................68
Alarm ............................................69
Calculator .....................................70
GAMES.......................................71
Mini golf.......................................71
Mirror in action............................72
Parking war..................................73
MyPhone ...................................74
Audio ............................................74
Wallpaper.....................................77
Greeting .......................................78
Caller groups................................80
LCD & LED ....................................82
Folder Manager ...........................83
Settings .....................................84
Time & Date .................................84
Language......................................86
Data ..............................................87
Security .........................................88
Network........................................91
Call Settings .................................93
Reset Setting ................................98
CHAPTER 4
PHONEBOOK
Look Up ......................................101
New.............................................102
PB Settings .................................104
Voice Mail no .............................107
CHAPTER 5
MISCELLANEOUS
Menu Summary .........................110
Cellular Phone in Brief ..............115
Abbreviations and Acronyms....116
Questions and Answers .............119
Technical Data ...........................122
CHAPTER 6
SAFETY
Safety Information for Wireless Hand
held Phone .................................124
Cell Phone Care..........................126
Driving Safety ............................128
Electronic Devices ......................129
Other Safety Guidelines ............131
Cautions......................................132
Warning......................................133
FCC RF Exposure.........................134
DECLARATION OF CONFORMITY
Declaration of Conformity .......136
mx-v30(0621) 2004.6.21 9:41 AM Page 2

4 5
WELCOME ABOUT THIS USER GUIDE
Thank you for choosing a cellular phone from Maxon Telecom, Korea’s second-largest
IT company and a manufacturer with more than two decades of experience in the elec-
tronic communication industry.
Your new communication device represents the cutting edge technology of the 21st
century, featuring 64k brilliant color display, enhanced messaging service (EMS),
polyphonic ring tones and stunning games along with extensive Organizer and
Phonebook properties.
Uplink to the Mobile Internet facilitated with WAP 2.0 and GPRS data connection.
The phone size has always been a Maxon focus point, and the MX-V30 have very mod-
est exterior dimensions and will fit into any shirt pocket or purse.
40 different ring signals, SMS alert signals, and wallpapers along with renamed
profiles and caller groups facilitates a high degree of personalization.
You have acquired a phone and a communications companion that will enable you to
stay tuned wherever you go.
This user guide is written only for the MX-V30 cellular handsets.
The contents of the user guide follow the same order as the phone menu system goes.
Please note that some optional functions may not be shared by all models.
Inquiries regarding the user guide or phone handling can be addressed to:
Maxon Technical Marketing
maxontelecom@maxontelecom.com
mx-v30(0621) 2004.6.21 9:41 AM Page 4

6
MEMO
7
CHAPTER 1
Before using your mobile
•Package contents
•Handset description
•Main display
•Function keys
•Use of your SIM card
•Navigation key
•Using the battery
•Charging the battery
•Important battery information
mx-v30(0621) 2004.6.21 9:41 AM Page 6
8 9
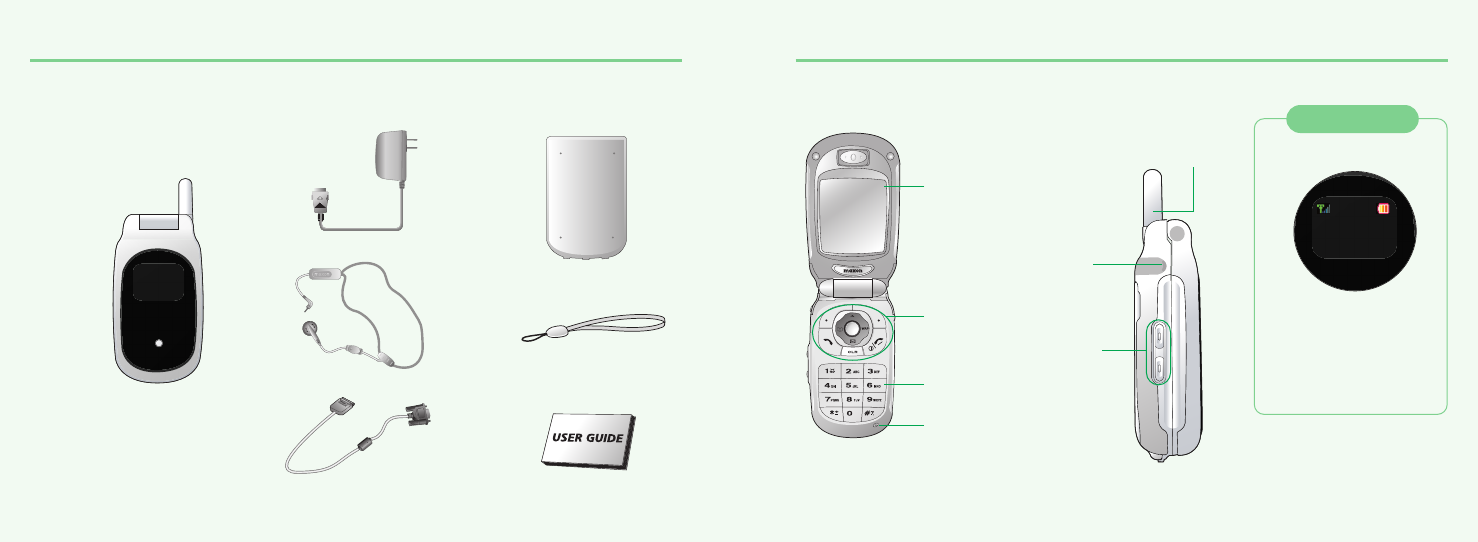
PACKAGE INCLUDES HANDSET DESCRIPTION
Thank you for purchasing this product.
Please check the product contents to see if you have all the available items as below.
Handset
Charger
Hands Free Kit
Data Cable (Optional)
Standard Battery
Handstrap
User guide
Display
Function
key
Key Pad
Microphone
Side
Key
Antenna
Sub LCD
Searching.
12:36
4 Jan. [Sat]
Displays a icon and a status
when you have a call or a
message or when you select
Bell/ Vibration/ Mute.
256OLED makes the screen
turn off.
Earphone
jack
mx-v30(0621) 2004.6.21 9:41 AM Page 8
10 11
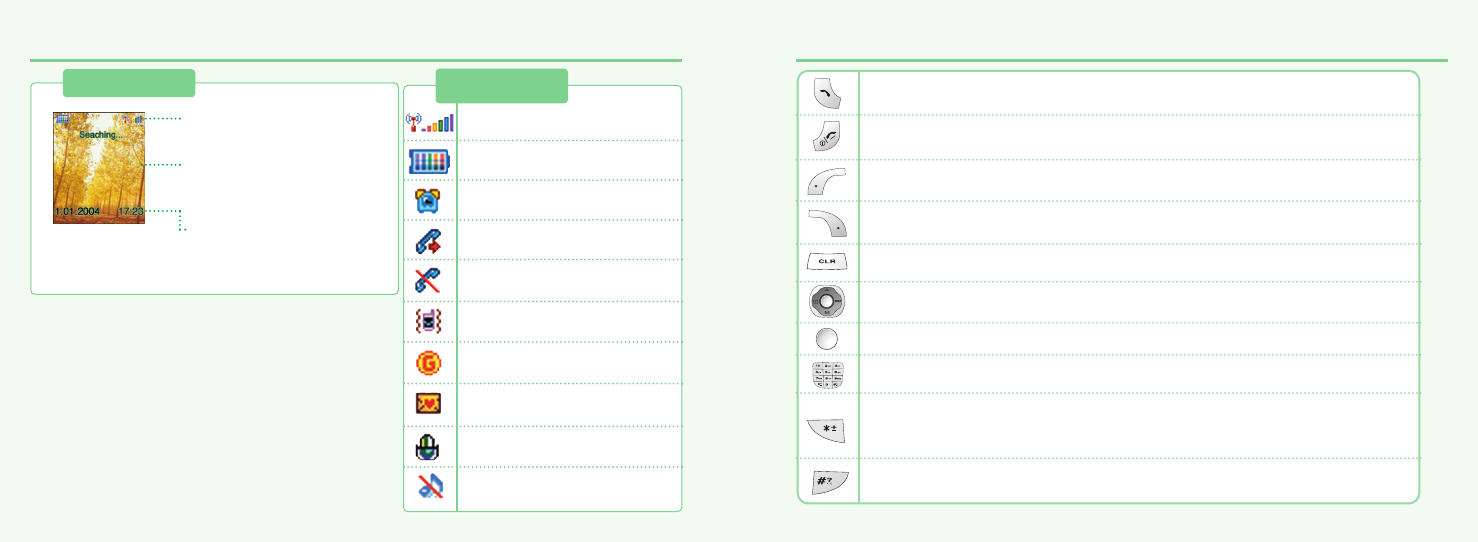
MAIN DISPLAY FUNCTION KEYS
Main Display
Icon display – Shows the
current status of phone.
Graphic display – Shows
phone numbers, text lines,
animations, pictures.
Function display – Shows
each function of [soft1] and
[soft2] to help browse through
main menu.
Icons
Signal Strength – The number
of bars shows signal strength.
Battery – Current battery
charging level.
Alarm –Appears when an
alarm is set.
Call forwarding – Appears
when call forwarding is set.
Manner mode – Appears when
manner is set as a ring mode.
GPRS Signal – The phone
enters a GPRS service area.
Text message – Appears when
you have a new text message.
Vibration Only – Appears when
an vibration only is selected.
Call barring – Appears when
call barring is set.
Voice message – Appears when
you have a new voice message.
[Soft1] – To place a call or redial a number. Send/Redial Key.
[Soft2] – To turn on and off the phone. To end of call.
Menu Key – To browse the main menu and view options.
Back and Screen turn off key.
CLR KEY
4-Direction navigation key
–
To browse the Messages, Phonebook menu, WAP, and Look up menu.
OK Key - To select an option.
Keypad Keys - To enter letters and numbers.
*Key
- To place an international call.(+)
- To set a manner mode. (press and hold)
# Key – Special character key.
mx-v30(0621) 2004.6.21 9:41 AM Page 10

12 13
USE OF SIM CARD NAVIGATION KEY
SIM card is always needed to use the phone. “Please insert SIM card” appears when
the SIM card is not installed since it contains information about phone and network.
Messages and phone numbers stored in the phone can be transferred to other GSM
terminal if both SIM cards are the same size.
Please take note that you don’t lose SIM card and that you don’t keep it near
magnetic and electronic devices to prevent loss of information and hitch in
networking.
When you take SIM card and battery apart, you should always turn off the phone.
The insertion of SIM card while charger is in use can be a contributing factor to the
damage of SIM card.
The navigation key is used to search through the menu.
UP
To scroll up and access the look up directly from the idle mode.
DOWN
To scroll down and access the messages menu directly from idle mode.
LEFT
To access the phonebook directly from idle mode.
RIGHT
To access the WAP menu directly from idle mode.
mx-v30(0621) 2004.6.21 9:41 AM Page 12
14 15
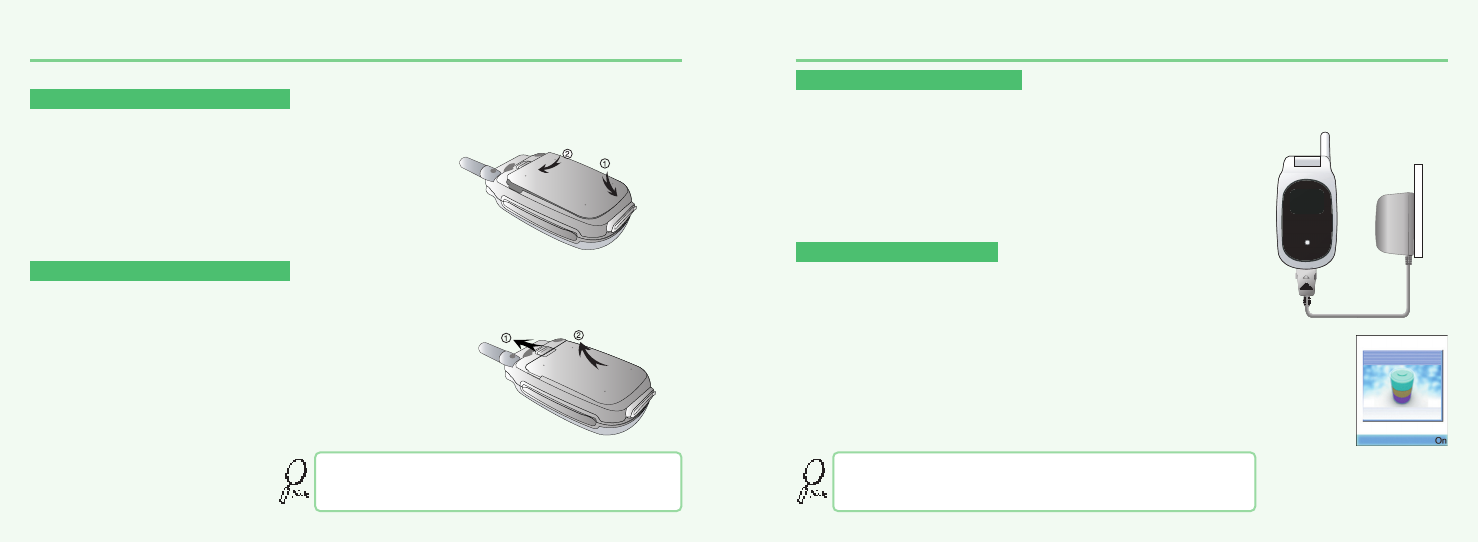
USING THE BATTERY CHARGING THE BATTERY
³Insert the bottom of battery into the groove at the bottom of the handset.
Then ·push down the battery until it locks into place.
Pull down the tab ³with one hand and lift the top of the battery
·to separate from handset.
Pull down the tab ³with one hand and lift the top of the battery
·to separate from handset.
The battery must be securely placed in the battery com-
partment. If battery is improperly inserted, the handset
will not turn on or the battery may slip off during use.
Insert the contactor of charger into slot and plug the charger into the outlet.
* Please note that the contactor should be placed into slot, a certain side up.
When its battery is charged in power off mode,
the phone shows an animation in LCD.
INSTALLING THE BATTERY
REMOVING THE BATTERY
POWER CONNECTION
CHARGING STATUS
Be sure to charge the battery for at least four hours prior to the
first time use. For extended battery life time, charge the battery
fully for a long time rather than frequently for a short time period.
mx-v30(0621) 2004.6.21 9:41 AM Page 14

16
CHARGING THE BATTERY IMPORTANT BATTERY INFORMATION
Don’t keep a battery near a fire and attempt to disassemble it.
Use only the battery approved by manufacturer.
Never touch battery contactors with any metallic object, which lead to battery short
circuiting especially when carrying a battery in a pocket.
- Possible to cause burns due to blasting and hot temperature.
Don’t drop a battery and apply any physical shock to the battery.
- Malfunction and fire are feasible.
Please keep a battery out of children’s reach and in a dry and cool area.
Charge a battery and keep it in a room temperature.
- Extreme temperature prevents full charging and affects battery capacity in a
negative way.
Since a battery is an expendable product, the battery operating time decreases
through frequently repeated charge and discharge.
- A new battery to be purchased when the operating time is reduced halfway.
Keep the contactors of battery clean and dry.
Plug out a charger in order to protect the phone when a lightning strikes.
REMOVING THE CHARGER
Press down the release latch and pull out the contactor of charger.
Don’t remove the charger by pulling its cable.
17
mx-v30(0621) 2004.6.21 9:41 AM Page 16

18
MEMO
CHAPTER 2
Basic operation
•Package contents
•
Turning The Phone On and Off
(With SIM Card Installed.)
•
Installing SIM Card
•
Basic Functions
•
Entering Letters and Numbers
19
mx-v30(0621) 2004.6.21 9:41 AM Page 18
20
TURNING THE PHONE ON AND OFF
21
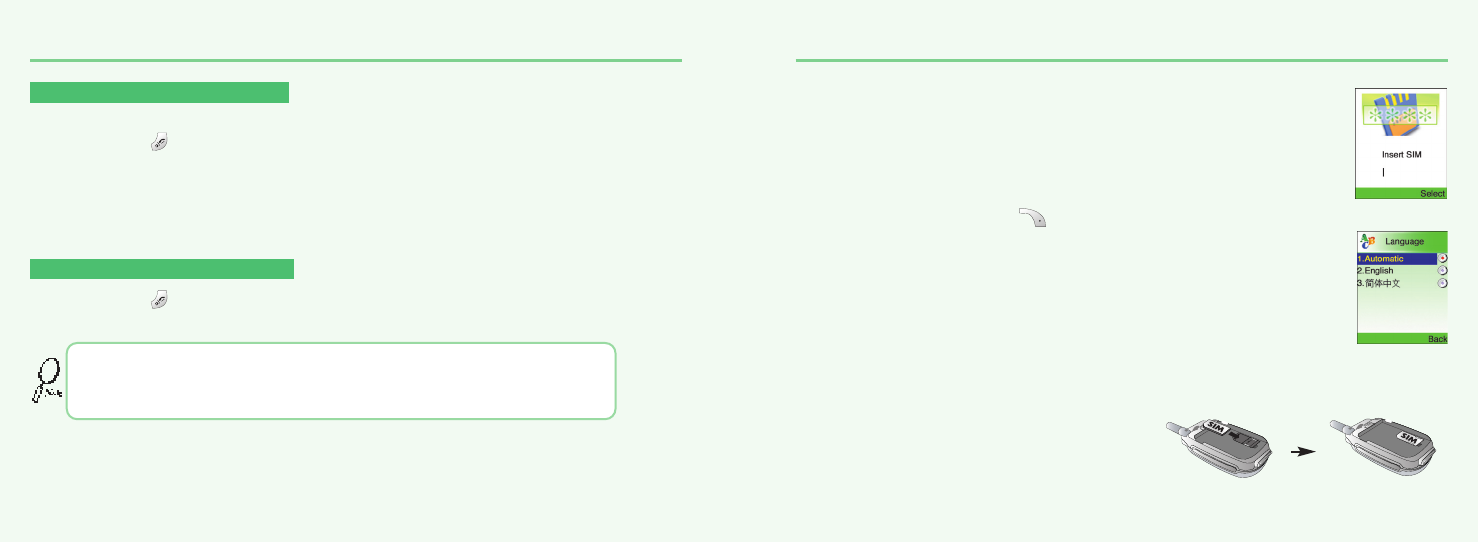
INSTALLING SIM CARD
1.To connect to your network operator your phone must have a SIM CARD installed.
2.You are prompted to press to display a list of available phone languages.
3.The SIM CARD slot is located beneath the battery.
Install the SIM CARD, gold-plated side down and the cut corner fit in the slot.
Never use force.
Avoid touching the gold-plated side of the SIM.
TURNING THE PHONE ON
When SIM CARD is installed.
Press and hold until LCD on.
When The phone is locked “PIN code” is displayed on the screen.
Then, enter the 4-digit password to unlock the phone.
Your default pin code is 1234.
TURNING THE PHONE OFF
Press and hold until LCD off.
• If “LOW BATTERY WARNING POWER OFF” is displayed and the power goes off.
• Change or charge the battery immediately.
• If the battery is removed while the phone is on, any unsaved messages or features
could be lost and a dam age might be caused to memory.
mx-v30(0621) 2004.6.21 9:41 AM Page 20

22 23
INSTALLING SIM CARD BASIC FUNCTIONS
4.Turn on the phone by pressing and holding the endkey for a few seconds.
Press and hold until LCD on.
5.You are prompted to enter the PIN code.
6.Enter the network-supplied PIN code and press .
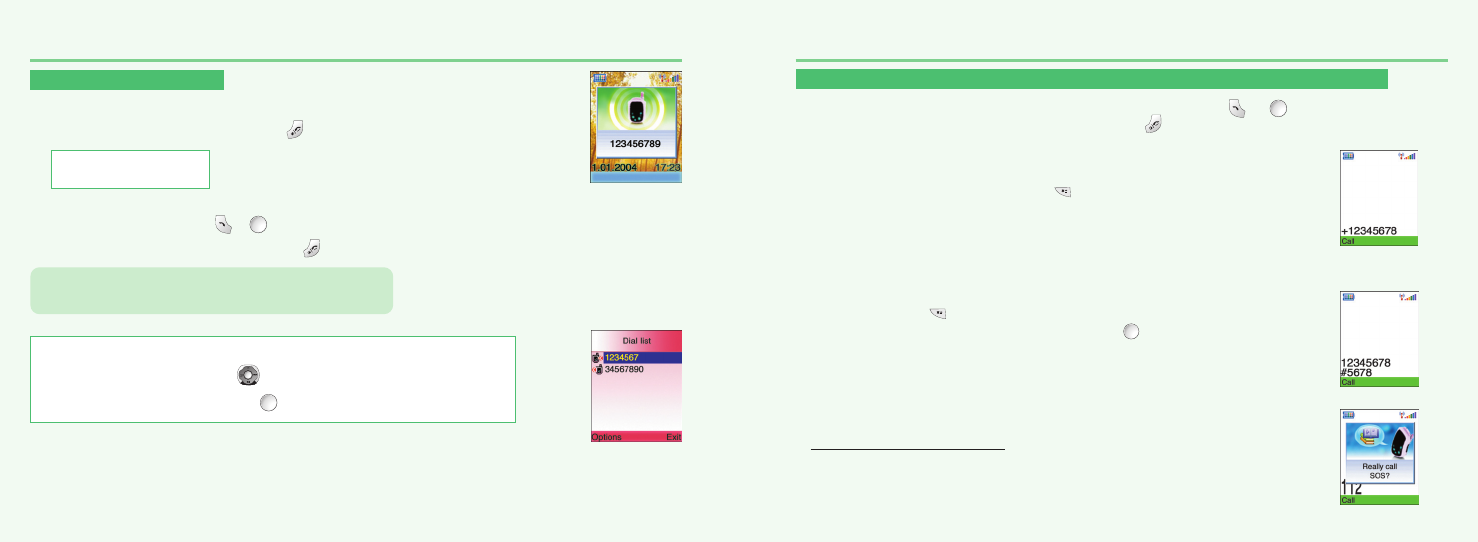
MAKING A CALL
1.Enter a phone number.
To erase the last number you entered, press .
2.Press .
• “NETWORK BUSY” or “CALL FAILED” message is displayed
when the call does not connect.
• If you select the REDIAL in setting menu (Refer to p.95) function,
the call will be retried automatically for the time you have selected.
• Press to end the call.
t
mx-v30(0621) 2004.6.21 9:41 AM Page 22
24
BASIC FUNCTIONS BASIC FUNCTIONS
RECEIVING CALLS
1.The phone rings
To reject or terminate a call press the .
2.
Open up folder and talk into phone.
When folder is open, press or button
.
To end a call, close up the folder or press .
INTERNATIONAL CALLS, CALL TO AN EXTENSION, EMERGENCY CALL
To make a domestic call, simply enter the desired number and press or key.
Acalling or busy tone will sound. To end the call, press .
Some countries (e.g. USA) use area codes. In this case you must enter an area code before the a phone
number (no space between them).
1.To make an international call, press until + is displayed.
Then enter country code, area code if necessary and finally phone number.
(No spaces allowed)
2.To make a call to an extension line you may have to go through an automated switchboard.
To do so: - Enter a phone number.
- Press once.
- Enter the extension number. Press .
- The call will automatically be routed to the extension line.
3.You are able to make emergency calls at all times, even without a
SIM card installed.
You will be prompted to confirm your call. (To avoid faulty calls)
Emergency call number : 112
Caller ID Function
You can view caller ID.
If you send a call, the called number will be stored in the Dial list.
To retrieve a number, press to open the list, scroll to an
appropriate number and press to place a call.
With ear-microphone in use, press and hold [send/end]
on the ear-microphone to receive or end a call.
25
mx-v30(0621) 2004.6.21 9:41 AM Page 24
26 27
ENTERING LETTERS AND NUMBERS ENTERING LETTERS AND NUMBERS
An input mode is activated when necessary to enter letters and numbers, especially when you add a new
phonebook entry, write a new message and set a certain feature. In input mode, you are to enter letters,
numbers and symbols through keypad. eZi Text has its built-in dictionary that helps the phone come out
with an appropriate word by referring to key inputs. The dictionary predicts what word you are to enter as
you press each key. The phone supports the following languages.
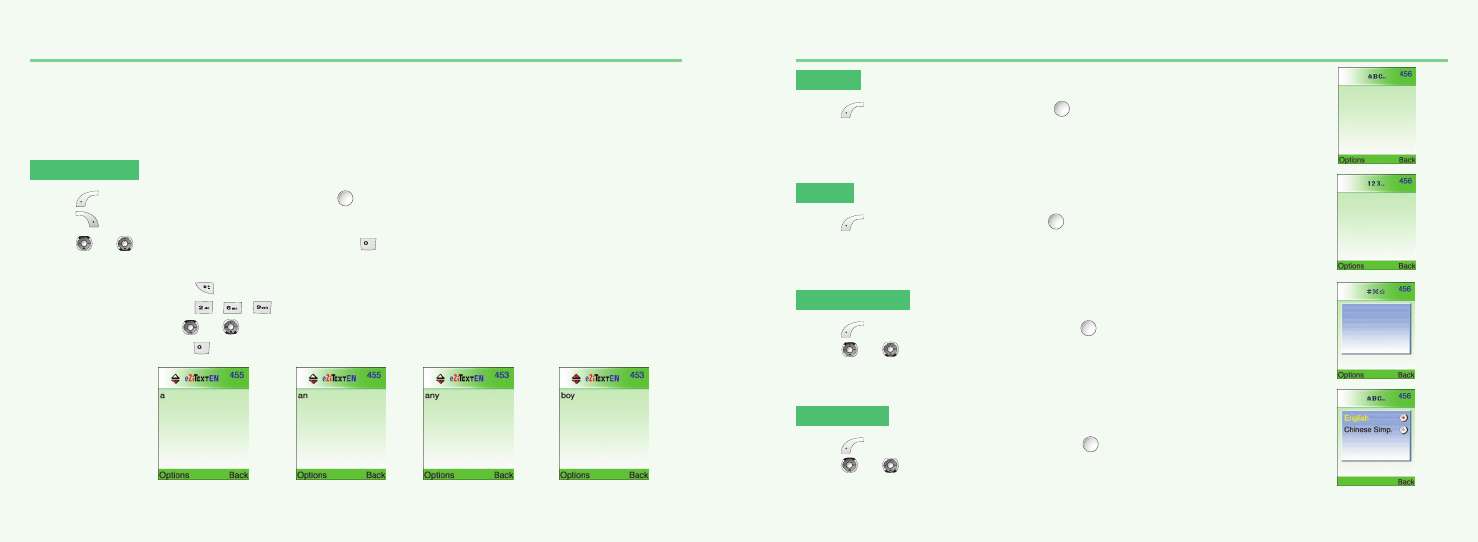
eZi TEXT
Press , move to ‘eZi Text EN’ then, press .
Press to go back to the input window. press a key once at a time to enter a word.
Press or to view a list of words and press to select it and add a space when a word
appears.
Ex) To enter Boy : Press to select a letter case.
Press , , .
Use or to find a word.
Press to select it and add a space.
ABC
Press , move to ‘ABC’ then, press .
Press a key to see its assigned alphabets and keep pressing the key
until an alphabet appears in the display.
123
Press , move to ‘123’ then, press .
Enter numbers through keypad.
SYMBOLS
Press , move to ‘Symbols’ then, press .
Press or to view a different set of symbols assigned to each key.
Press a key, and you will return to the previous mode.
Sel.LDB
Press , move to ‘Sel. LDB’ then, press .
Press or to select one of English and Chinese.
1 . 2 , 3 _
4 : 5 @ 6 !
7 ; 8 / 9 ?
mx-v30(0621) 2004.6.21 9:41 AM Page 26

28
ENTERING LETTERS AND NUMBERS
29
ENTERING LETTERS AND NUMBERS
eZiPinYin
This mode allows you to enter Simplified Chinese characters by entering the
phonetic spelling of character.
Press , move to ‘eZiPinYin’ then, press .
Press through to spell a character.
If you do not find the desired character even though with the desired spelling,
press
,
keys for additional character choices.
Select the character by press .
eZiSTROKE
This mode allows you to enter chinese characters using individual strokes and their stroke order.
Press , move to ‘eZiStroke’ then, press .
Press through to type strokes - keep typing strokes until the desired component or
character is displayed.
If you do not find the desired character even though with the desired spelling,
press
,
keys for additional character choices.
Select the character by press .
KEY FEATURES
In english and chinese input mode, the following keys help enter letters, numbers and symbols.
Press [Soft1] to select an options : ABC, 123, Symbols, eZitext.
Press [Soft2] to clear a digit.
Press [Navigation key] to move a cursor.
Press [*] to select letter case (English mode only), or Press and hold it to
change to symbol mode.
Space
Press and hold it to change to mode : ABC, 123, eZitext.
Press [#] to enter # . , ; : ” ’? !
mx-v30(0621) 2004.6.21 9:41 AM Page 28

30
MEMO
31
CHAPTER 3
Menu
•
Message
•Mobile
Internet
•
Organizer
•
Games
•
Myphone
•
Settings
mx-v30(0621) 2004.6.21 9:41 AM Page 30
32 33
MESSAGEMESSAGE
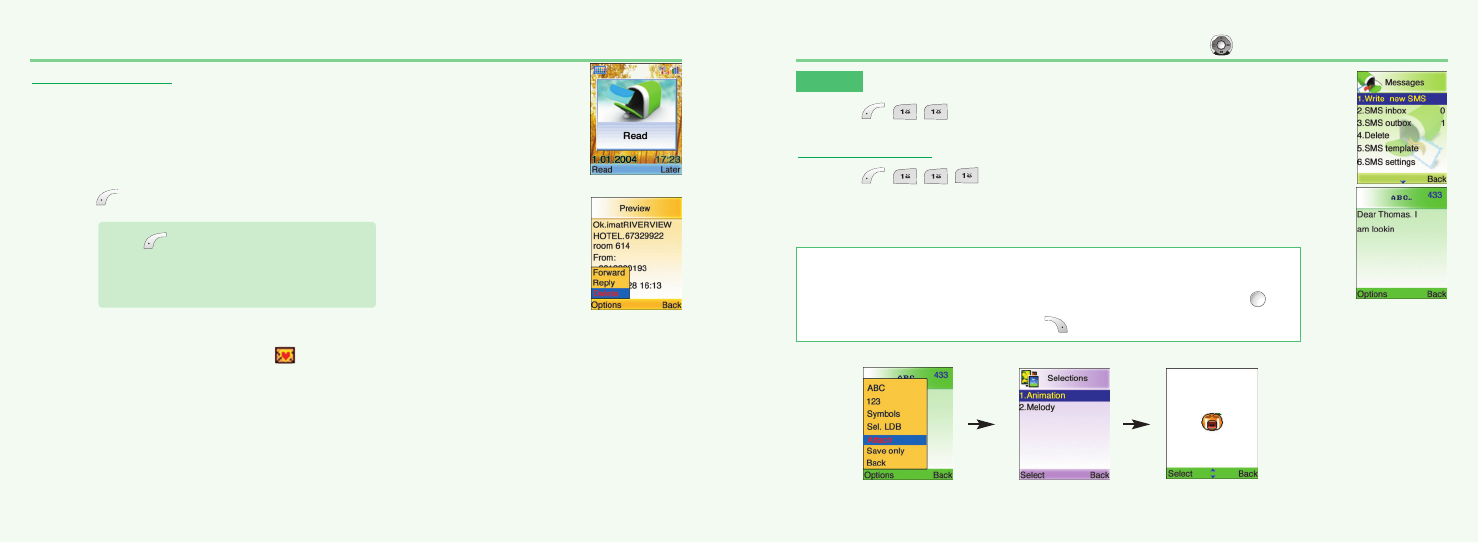
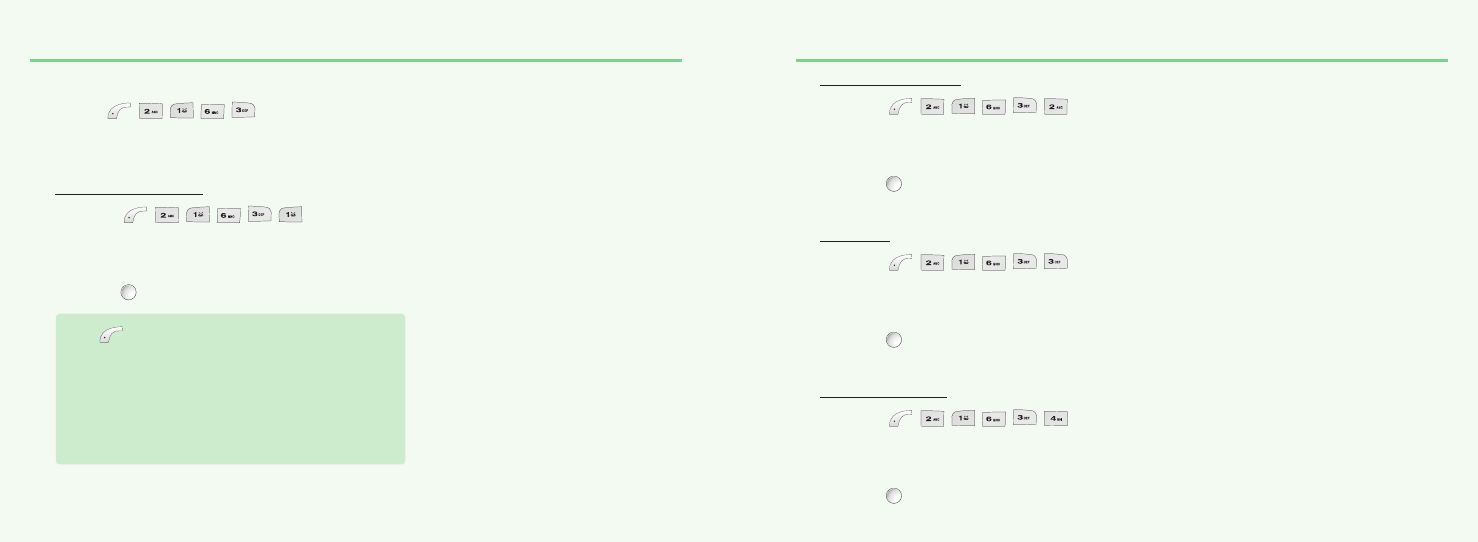
WRITE NEW SMS
1.Press ,,, to select “Write new SMS”.
Write your message using a maximum of 456 Latin characters.
While you type, the remaining free space is stated by a
counter in the top right corner.
To move directly to message menu, press in idle mode.
SMS
1.Press ,, to select “SMS”.
To include a picture or a sound in your SMS, select Attach on left softkey.
The picture & sound Import manager opens.
Select Animation or Melody and scroll to select the desired item-Press .
The item is inserted in the text. Press to back the edit screen.
READ MESSAGES
An incoming message alert will be shown in the start screen.
(and with a tone or vibration if so selected)
1.Press . (Open the Message)
To postpone reading of a new SMS, press Later.
The message is stored and the icon will appear in the start screen.
Press to select “Option”.
-Forward : Forwards amessage to another.
-Reply : Reply a message.
-Delete : Deletes a message.
mx-v30(0621) 2004.6.21 9:41 AM Page 32
34 35
MESSAGE MESSAGE
To read a SMS received earlier, go to the Messages menu:
-In the SMS menu, scroll to SMS Inbox.
indicates a read message, while an unread message.
-Select the desired message and press to read.
To edit a sent or Save Only message: - Scroll to Outbox. Select a message.
indicates a save only message, indicates a sent and save message.
Press to select one of the following options.
-Forward : Forwards a message to another.
-Reply : Reply a message.
-Call: Places a call to a sender.
-Delete : Deletes a message.
-Read : Reads a message.
Press to select one of the following options.
-Forward : Forwards a message to another.
-Edit : Edits a message.
-Send : Sends a message.
-Delete : Deletes a message.
-Read : Reads a message.
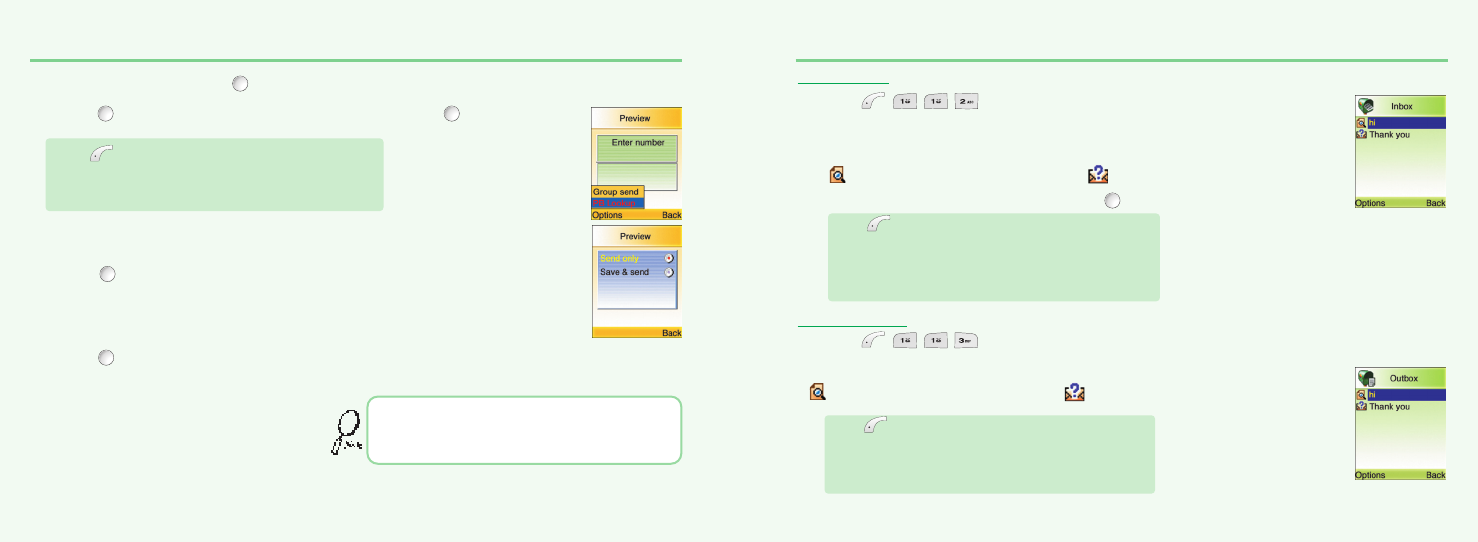
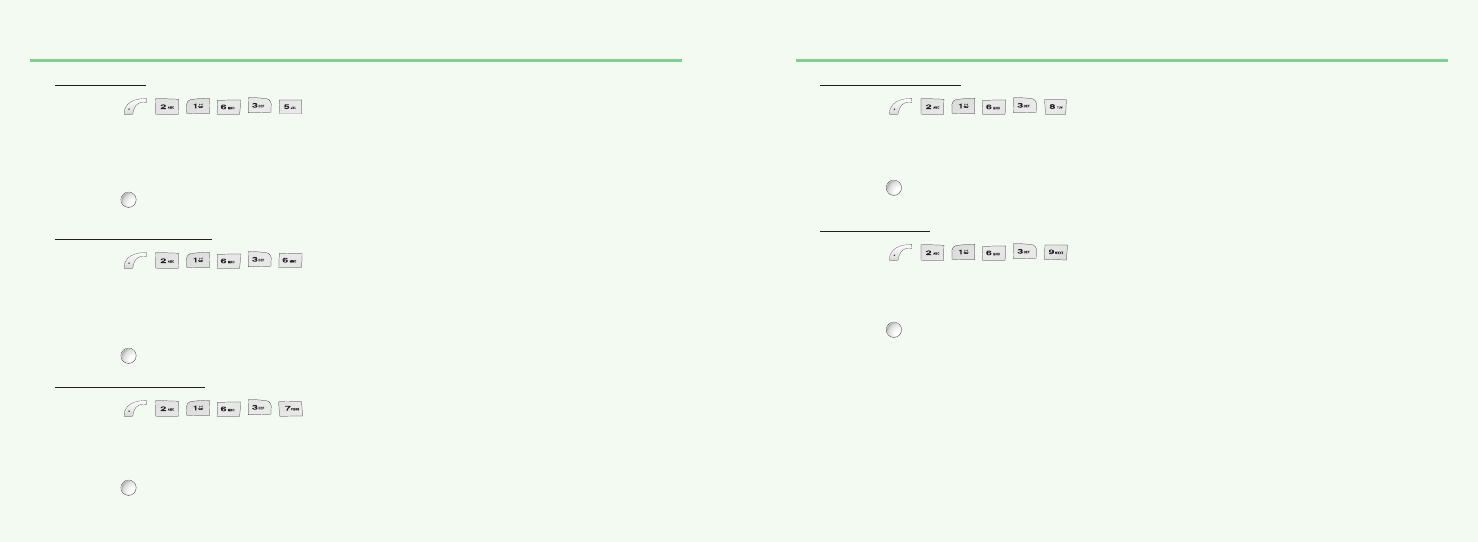
SMS INBOX
1.Press ,,, to select “SMS Inbox”.
SMS OUTBOX
1.Press ,,, to select “SMS Outbox”.
2.Input a message, press and you will see the preview of message.
3.Press again, enter a phone number then, press .
4.Choose Send only or Save &send.
Press .
5.Press to confirm it.
Press to select “Option”.
Group send : To send a message to a group.
Phonebook : To lookup a number from phonebook.
That using more than 153 characters will require an
extra SMS message to be sent, more than 306 will
require three messages some languages may have
characters that will result in up to seven messages.
mx-v30(0621) 2004.6.21 9:41 AM Page 34
36 37
MESSAGE MESSAGE
2.You are to select one of the following options and press to delete messages.
3.Press to confirm it or to return to the previous page.
Write a text template and, press to save it.
You can enable the use of the template in the
‘Selections’ menu in ‘SMS settings’.
F
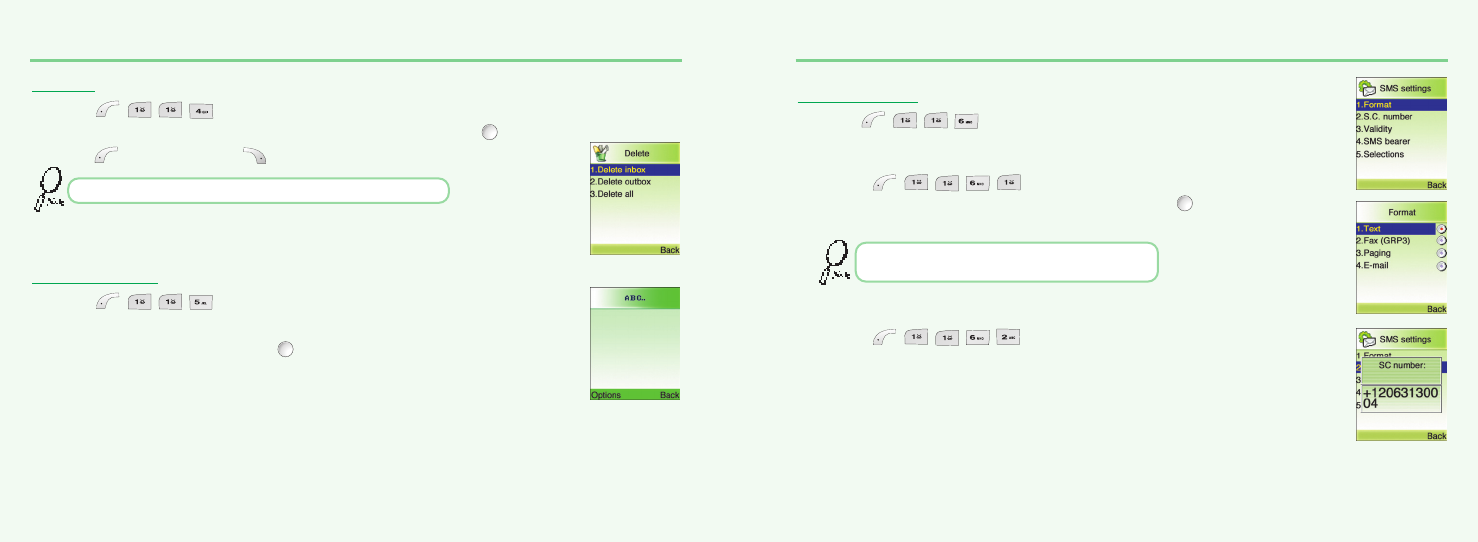
ormat
Text format is default.
1.Press ,,,, to select “Format”.
2.Select one of the available formats and press to save it.
S
ervice Centre Number
1.Press ,,,, to select “Service Center No.”.
2.Enter your operator Service Center number.
Delete messages regularly to avoid unnecessary usage of memory.
You are to select one from four alternative data
formats if made available by network service provider.
DELETE
1.Press ,,, to select “Delete”.
To set SMS features.
SMS SETTINGS
1.Press ,,, to select “SMS settings”.
SMS TEMPLATE
1.Press ,,, to select “SMS template”.
mx-v30(0621) 2004.6.21 9:41 AM Page 36
38 39
MESSAGE MESSAGE
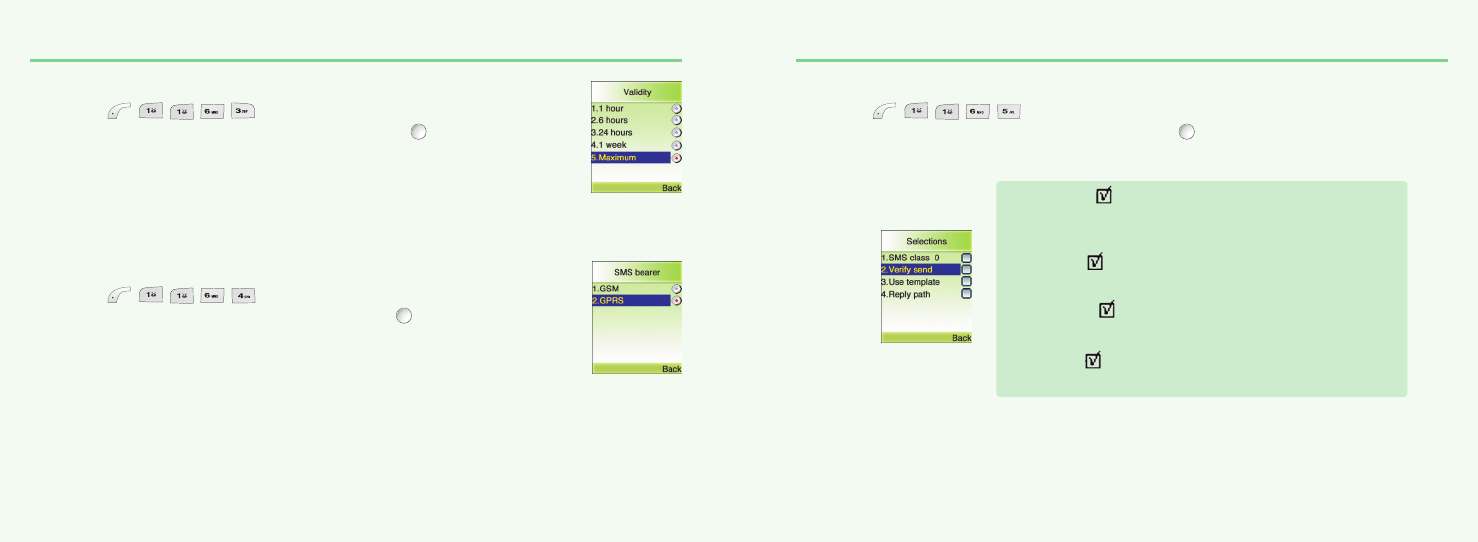
V
alidity This allows you to select a period a sent message will be kept by network.
1.Press ,,,, to select “Validity”.
2.Select one of the available options and press to save it.
SMS B
earer Your network subscription must include GPRS services for you to use this.
1.Press ,,,, to select “SMS bearer”.
2.Select GSM or GPRS connection and press to save it.
S
elections
1.Press ,,,, to select “Selections”.
2.Move to one of the available options and press to enable or disable each option.
SMS Class 0 .
Incoming class 0 messages will not be stored, but only shown in
the display. New messages will thus overwrite previous.
Verify send .
Initiates confirmation request before sending.
Use template .
Input mode starts with template text.
Reply path .
Allows a recipient to use a sender’s service center.
mx-v30(0621) 2004.6.21 9:41 AM Page 38
40 41
MESSAGESMESSAGES
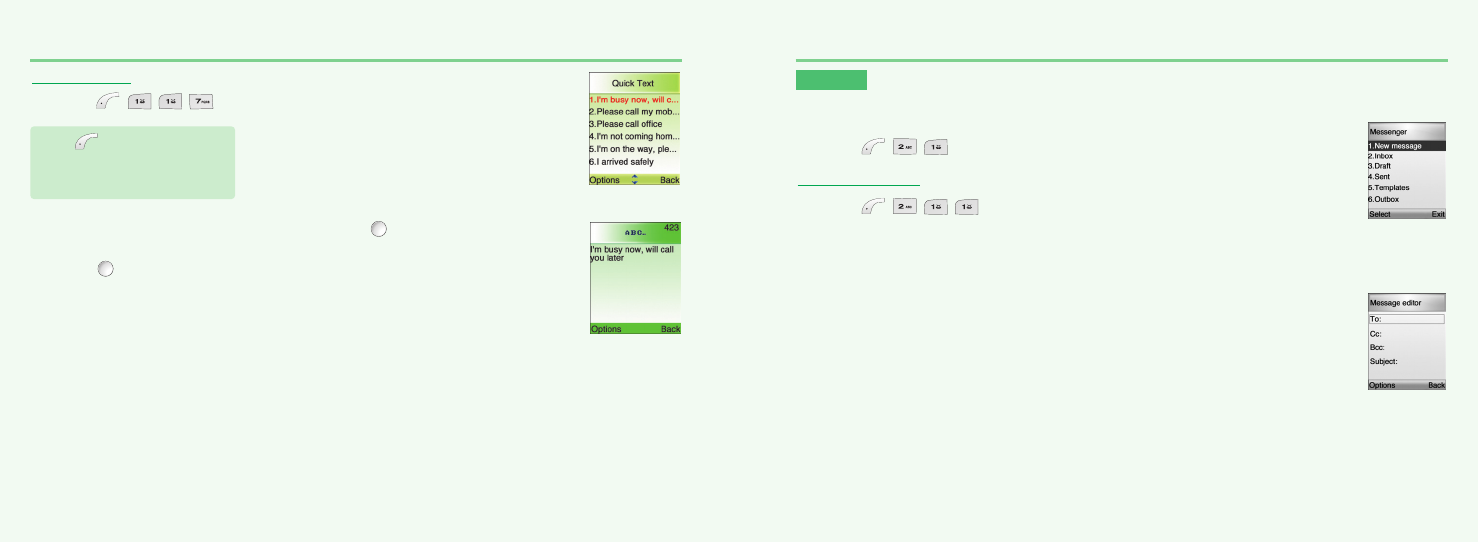
NEW MESSAGE
1.Press ,,, to select “New message”.
To : Phone number or e-mail address to send message
Cc : Reference’s Phone number or e-mail address
Bcc : Secret Reference’s Phone number or e-mail address
Input Phone Number or e-mail address on Edit window or select Receiver by searching Phone book.
Several receivers may be selected at the same time for To. Cc. and Bcc.
Subject : Input Message title
Options : Select Message option
- Validity period : Select one from 1 Hour / 12 Hours / 1 Day / 1 Week / Max
- Read report : Off / On
- Delivery report : Off / On
- Priority : Low / Normal / High
- Reply charging
- Reply charging : Off / On / Text only
- Reply charging deadline : 1 Day / 1 Week / Max
- Reply charging size : 1 KB / 10 KB / Max
- Sender visibility : Show number / Hide number
QUICK TEXT
1.Press ,,, to select “Quick Text”.
2.Select one of the following text and press .
3.Press and you will see the preview of message.
MMS
MMS is creating, editing and sending messages including Multimedia contents, viewing received
messages, saving attached contents and replying/forwarding the received messages.
1.Press ,, to select “MMS”.
Press to select “Option”.
Send : To send a message.
Edit : Edit selected message.
mx-v30(0621) 2004.6.21 9:41 AM Page 40

42
MESSAGES
43
MESSAGES
Edit content: Message editing (When you select “Select” in “Option”.)
Enter Add TEXT, Add image and Add audio in the Editor function.
Edit content: Message editing (When you select “Menu” in “Option”.)
- Add text color : Change the text color
- Remove object : Delete relevant attachment object (text, image, sound)
- Insert new page : Add new SMIL page →Go to Contents Editor
- Send (OK) : Send Message. Message stored in Sent box
- Save : Message save →Message stored in Draft box
- Save as template : Save as Template →Message stored in Templates box
- Preview multimedia : Preview the created SMIL message
- Page timing: Set the page turning interval while playing SMIL message.
- Background color : Change background color
- Back
Prepare a message and press the to select Menu or OK.
- Send (OK) : Send Message. Message stored in Sent box
- Save : Message save →Message stored in Draft box
- Save as template: Save as Template →Message stored in Templates box
- Edit content →Go to message edit window
- Options →Go to message option menu
- Back
INBOX
1.Press ,,, to select “Inbox”.
Received messages are saved in this folder.
Press to select “Menu”.
- View →Read received message
- Reply →Reply to sender (Go to Message editor)
- Reply to all →Reply all users linked on the received message (Go to Message editor).
- Forward →Forward received message to other user (Go to Message editor)
- Delete message →Delete selected message.
- Refresh →Refresh Inbox list.
- Back
DRAFT
1.Press ,,, to select “Draft”.
To send written message later, save it into this folder.
Press to select “Menu”.
- View →Read received message
- Edit message →Edit selected message (Go to Message editor)
- Delete message →Delete selected message
- Send (OK) →Send Message
- Refresh →Refresh Draft box list
- Back
mx-v30(0621) 2004.6.21 9:41 AM Page 42
44
MESSAGES
45
MESSAGES
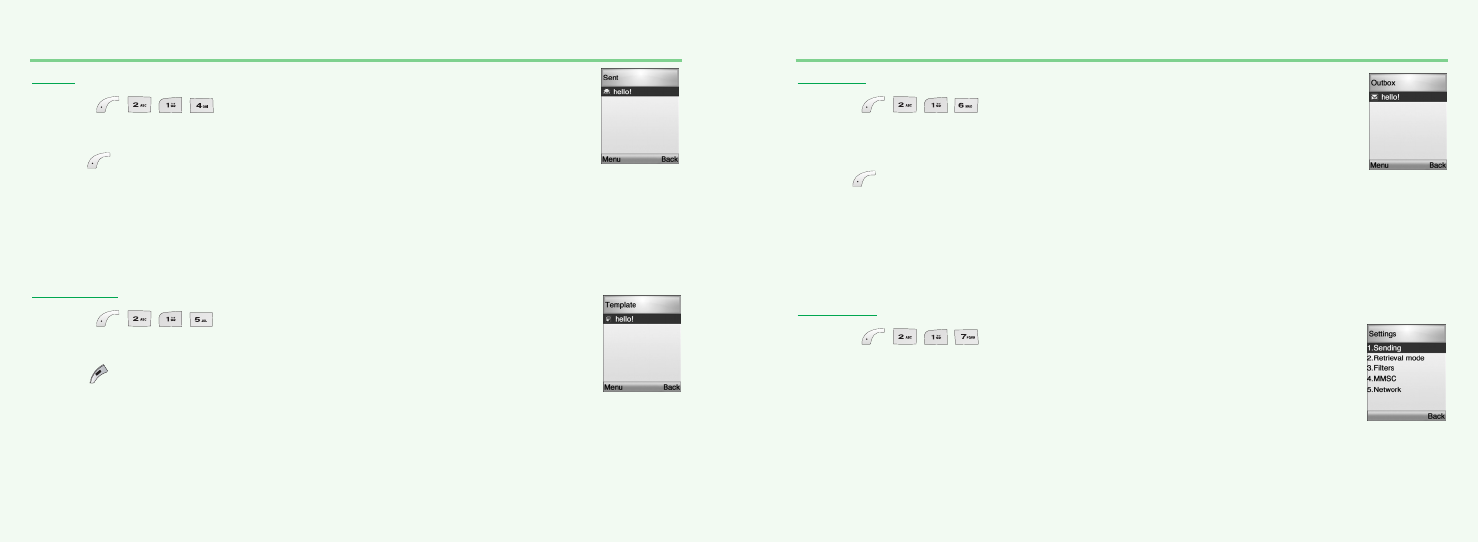
SENT
1.Press ,,, to select “Sent”.
Sent messages are saved in this folder.
Press to select “Menu”.
- View →Read received message
- Edit message →Edit selected message (Go to Message editor)
- Delete message →Delete selected message
- Send (OK) →Send Message
- Refresh →Refresh Draft box list
- Back
TEMPLATE
1.Press ,,, to select “Templates”.
Create and save message template beforehand.
Press to select “Menu”.
- View →Read received message
- Create message →Edit selected message (Go to Message editor)
- Delete message →Delete selected message
- Send (OK) →Send Message
- Refresh →Refresh Draft box list
- Back
OUTBOX
1.Press ,,, to select “Outbox”.
While sending message, if it’s failed or canceled to send,
the messages saved in this folder temporarily.
Press to select “Menu”.
- View →Read received message
- Edit message →Edit selected message (Go to Message editor)
- Delete message →Delete selected message
- Send (OK) →Send Message
- Refresh →Refresh Draft box list
- Back
SETTINGS
1.Press ,,, to select “Settings”.
To select MMS related Options and Network setting options.
mx-v30(0621) 2004.6.21 9:41 AM Page 44
46
MESSAGES
47
MESSAGES
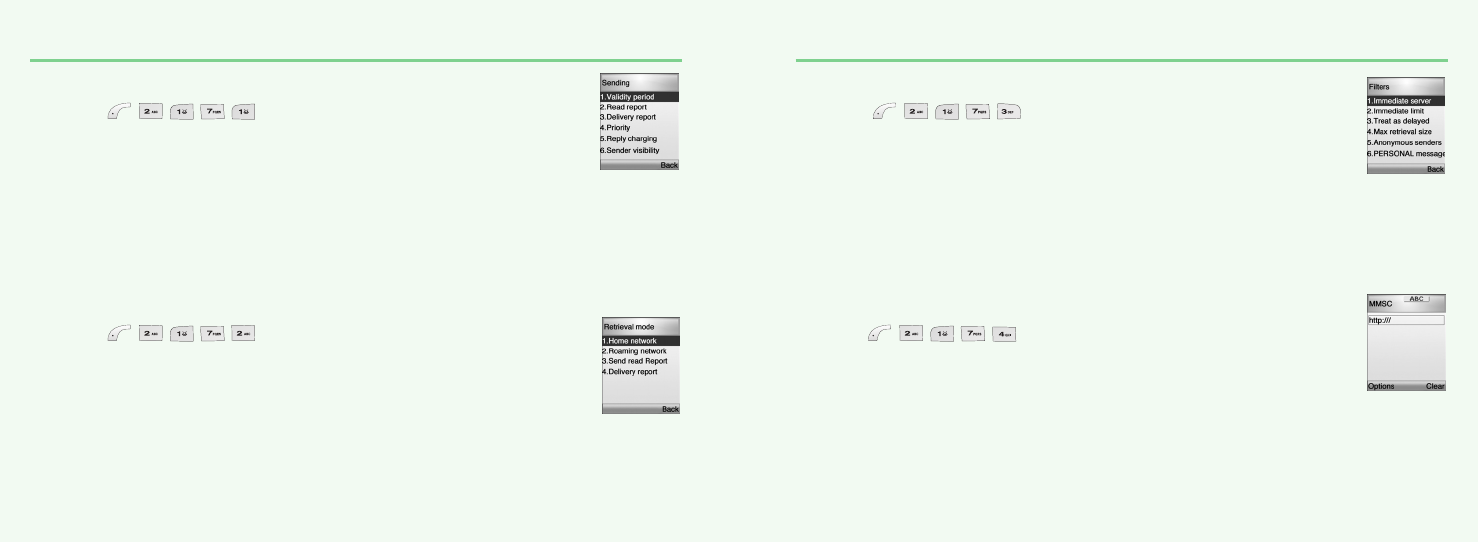
S
ending
1.Press ,,,,to select “Sending”.
- Validity period: 1 Hour / 12 Hours / 1 Day / 1 Week / Max
- Read report: Off / On
- Delivery report: Off / On
- Priority: Low / Normal / High
- Reply charging
· Reply charging: Off / On / Text only
· Reply charging deadline: 1 Day / 1 Week / Max
· Reply charging size: 1 KB / 10 KB / Max
- Sender visibility: Show number / Hide number
- Auto save: Off / On
- Page timing: Set Page timing.
- Delivery time: Immediate / In one hour / In 12 hours / In 24 hours
R
etrieval mode
1.Press ,,,,to select “Retrieval mode”.
- Home network: Immediate / Delayed
- Roaming network: Automatic / Ask / Restricted
- Send Read Report: On request / Always / Never
- Delivery report allowed: Yes / No
F
ilters
1.Press ,,,,to select “Filters”.
- Immediate server: Input Address
- Immediate limit: Set Limit Size
- Treat as delayed: Off / On
- Max retrieval size: Set Size (Byte)
- Anonymous senders: Reject / Allow
- PERSONAL messages: Reject / Allow
- ADVERTISEMENT messages: Reject / Allow
- INFORMATIONAL messages: Reject / Allow
- AUTO messages: Reject / Allow
- STRING messages: Input String message
M
MSC
1.Press ,,,,to select “MMSC”.
1.Input MMSC address.
mx-v30(0621) 2004.6.21 9:41 AM Page 46

48
MESSAGES
49
N
etwork
1.Press ,,,,to select “Network”.
- Connection type: HTTP / WAP WSP CL / WAP WSP CO
- Network account: CSD / GPRS
OPTION →Input the following contents.
CSD
Dial-Up Number
Data Type(Analog,ISDN)
Data Speed(AUtimatic,9600,14400)
UserId
PassWord
GPRS
APN
UserId
PassWord
- WAP gateway: Input IP Address
- Login: Input Login ID
- Password: Input Login password
- Realm
- Secure port
- Http port
EXIT
1.Press ,,,to select “Exit”.
Return to the upper menu.
MESSAGE
READ CB
1.Press ,, , to select “Read CB”.
Messages will be stored in the memory, but new messages will overwrite old
ones received on the same channel.
To read the last messages stored, enter the Messages menu and select CB message
and select read cb, then select the channel you want to read.
READ CB
Cell Broadcast (CB) is a network provided service. Check with your operator about the details.
When you receive a CB, it will appear automatically in the display.
1.Press ,, to select “Read CB”.
mx-v30(0621) 2004.6.21 9:41 AM Page 48
50 51
MESSAGE
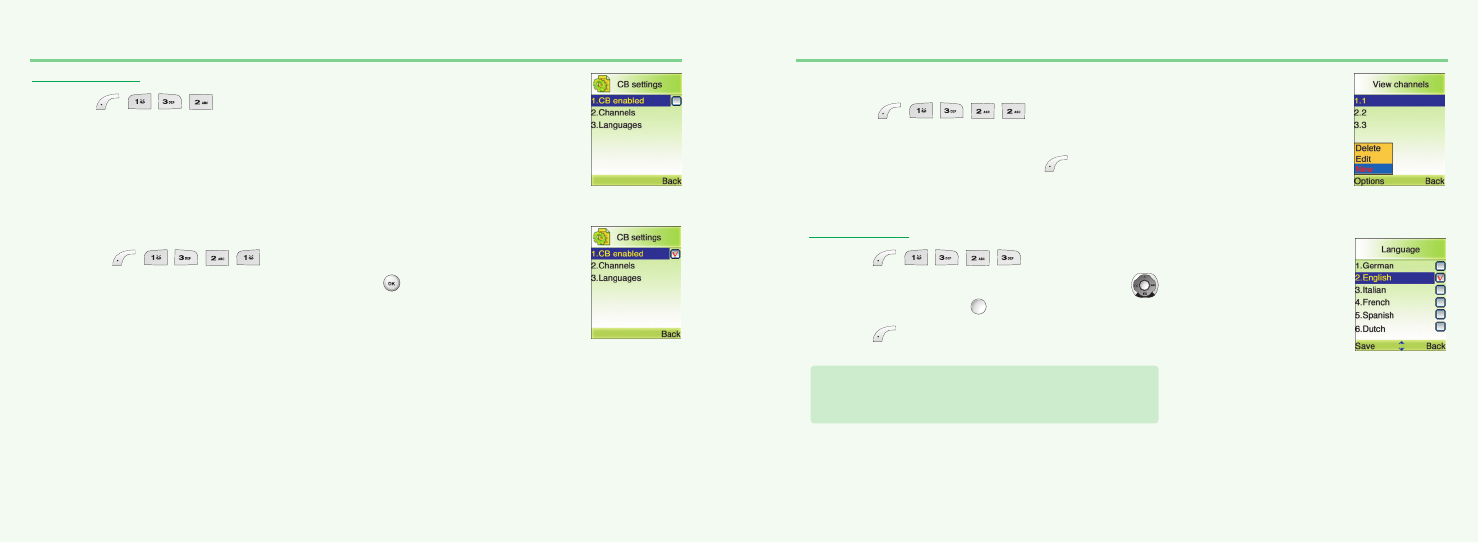
CB SETTINGS
1.Press ,,, to select “CB settings”.
CB E
nabled
1.Press ,,,,to select “CB Enabled”.
2.To enable CB, mark up the checkbox with .
MESSAGE
C
hannels
1.Press ,,,,to select “Channels”.
2.You can now view existing channels and add new ones.
3.To add, edit or delete, press .
LANGUAGES
1.Press ,,,, to select “Languages”.
2.Move to the desired language using the ,
and then press the .
3.Press to save it.
German, English, Italian, French, Spanish, Dutch,
Swedish, Danish, Portuguese, Finnish, Norwegian,
Greek, Turkish, Chinese
mx-v30(0621) 2004.6.21 9:41 AM Page 50
52 53
MOB.INTERNET
The phone has a WAP browser, which enables you to access mobile internet services.
WAP
WAP is a technology that enables you to access the Mobile Internet via your phone.
Depending on your place of purchase, and provided that your network operator supports WAP,
your phone is most likely set with the necessary information. to access the mobile internet for the first time,
please follow the instructions.
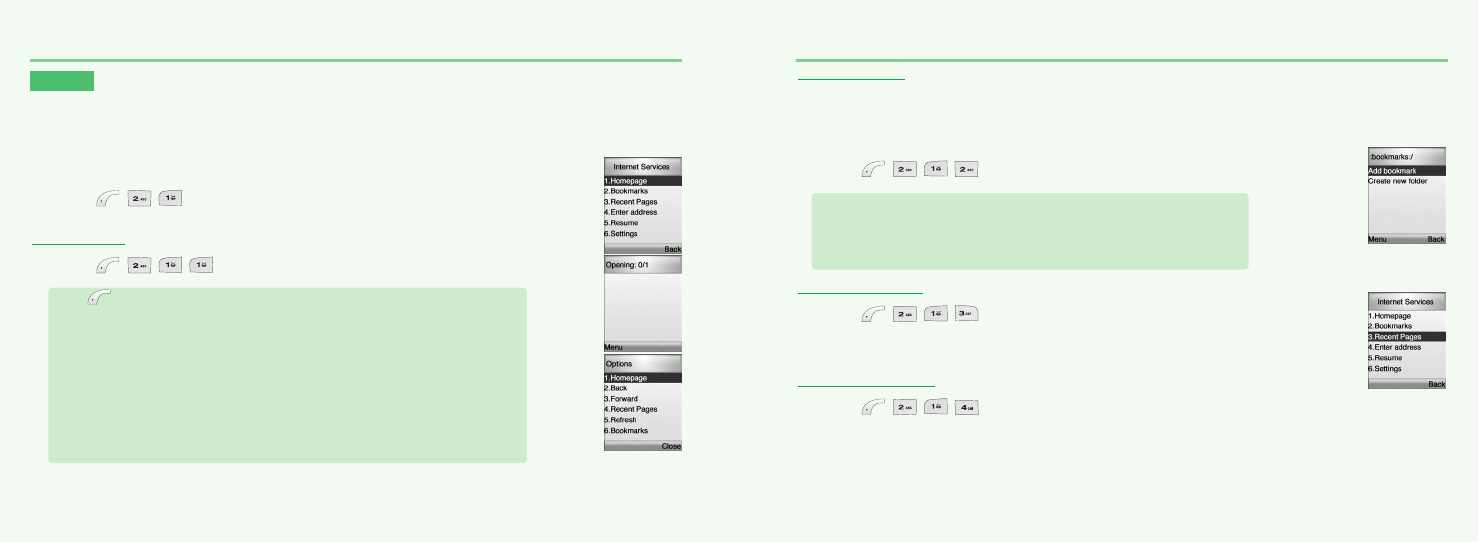
1.Press ,, to select “WAP”.
HOMEPAGE
1.Press ,,, to select “Homepage”.
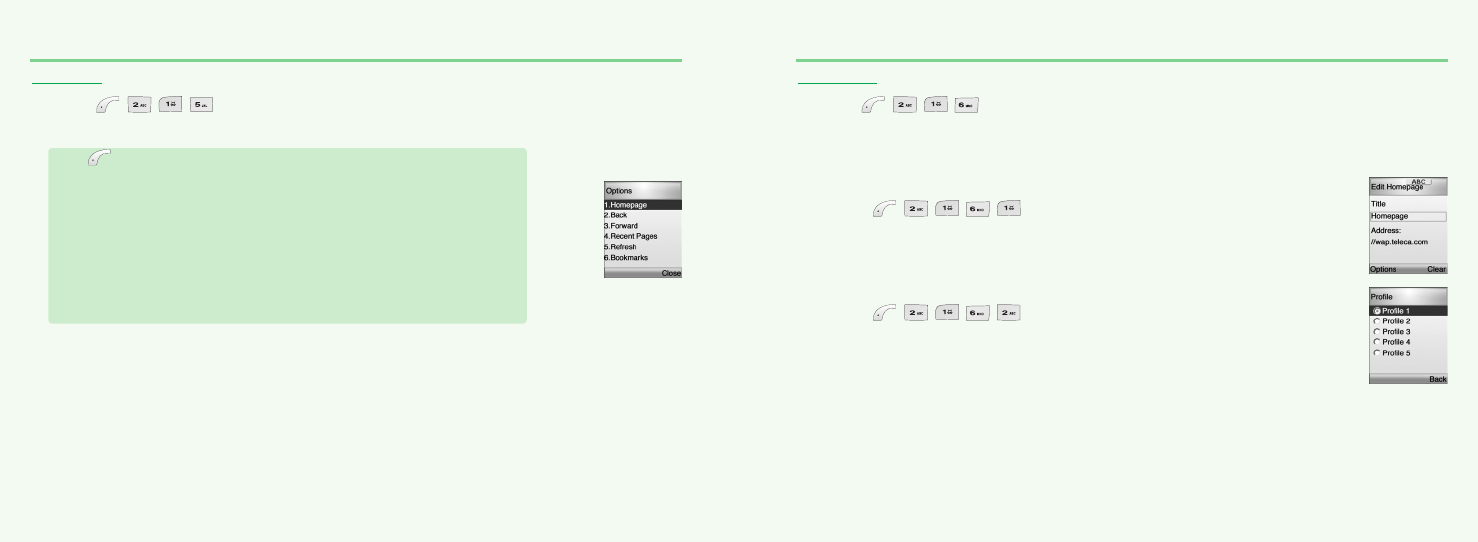
Press to select one of the following options.
-HomePage : To connect WAP Site of selected WAP Profile.
-Back : To connect with previous page.
-Forward : To connect with front page.
-Recent Page : List of currently connected WAP Pages.
-Refresh : View current page again.
-Bookmarks : Add bookmark and Create new folder.
-Enter Address : To input accessible site address to connect with it immediately.
-Save as Home Page : To input site address and title of Home page.
-Enter Select Mode : To select image during connecting WAP to save it.
-Exit : To exit from Mobile Internet Menu.
-Settings : To set up the information of Push and Profile related with WAP.(see page 51)
-Off-LinePage : To save current Page by Off-Line.
MOB.INTERNET
BOOKMARKS
You can access any WAP homepage by entering the relevant URL in the editor. The input must start
with the text string http:// to access the page. Accept the input with OK. Up to 50 URL’s can be stored
and later accessed from the Bookmarks menu, using the commands:
1.Press ,,, to select “Bookmarks”.
RECENT PAGES
1.Press ,,, to select “Recent pages”.
List of currently connected WAP Pages.
ENTER ADDRESS
1.Press ,,, to select “Enter address”.
To input accessible site address to connect with it immediately.
Add bookmarks. To add new URL on URL_LIST.
Create new folder. Add Folder to the relevant List of Bookmarks as
accessible URL-List.
mx-v30(0621) 2004.6.21 9:41 AM Page 52
54 55
MOB.INTERNET
RESUME
1.Press ,,, to select “Resume”.
To resume the current page.
Press to select one of the following options.
-HomePage : To connect WAP Site of selected WAP Profile.
-Back : To connect with previous page.
-Forward : To connect with front page.
-Recent Page : List of currently connected WAP Pages.
-Refresh : View current page again.
-Bookmarks : Add bookmark and Create new folder.
-Enter Address : To input accessible site address to connect with it immediately.
-Save as Home Page : To input site address and title of Home page.
-Enter Select Mode : To select image during connecting WAP to save it.
-Exit : To exit from Mobile Internet Menu.
-Settings : To set up the information of Push and Profile related with WAP.(see page 51)
-Off-LinePage : To save current Page by Off-Line.
MOB.INTERNET
SETTINGS
1.Press ,,, to select “Settings”.
To set up the information of Push and Profile related with WAP.
E
dit Homepage
1.Press ,,,,to select “Edit homepage”.
To input the site address to connect.
P
rofile
1.Press ,,,,to select “Profile”.
To select one from several Profile List.
mx-v30(0621) 2004.6.21 9:41 AM Page 54
56 57
MOB.INTERNET
C
onnection
1.Press ,,,,to select “Connection”.
To input the connection information of selected Profile.
Network Account
1.Press ,,,,,to select “Network Account”.
To select one between GRRS and CSD.
2.Choose One between CSD and GRRS.
3.Press to save it.
Press to select one of the following options.
CSD
Dial-Up Number
Data Type(Analog,ISDN)
Data Speed(AUtimatic,9600,14400)
User ID
PassWord
GPRS
APN
UserId
PassWord
MOB.INTERNET
Connection type
1.Press ,,,,,to select “Connection type”.
To select one among HTTP, WAP WSP CO, and WAP WSP CL.
2.Choose One between HTTP, WAP WSP CO, and WAP WSP CL.
3.Press to save it.
Timeout
1.Press ,,,,,to select “Timeout”.
To set up Timeout while connecting with Home Page.
2.Enter Time-Out Value.
3.Press to save it.
Proxy Address
1.Press ,,,,,to select “PROXY ADDRESS”.
Input Gateway IP address of relevant Profile.
2.Enter Proxy Address
3.Press to save it.
mx-v30(0621) 2004.6.21 9:41 AM Page 56
58 59
MOB.INTERNET
Proxy Port
1.Press ,,,,,to select “Proxy Port”.
If some WAP of HTML requires different Port numbers, you may setup the
Port number by yourself.
2.Enter Proxy Port number.
3.Press to save it.
Proxy Secure Port
1.Press ,,,,,to select “Proxy Secure Port”.
If the existing Proxy Address or WTLS are used,
this function uses it as the Basic Gateway Port.
2.Enter Proxy Secure Port #.
3.Press to save it.
Proxy User Name
1.Press ,,,,,to select “Proxy User Name”.
To setup User Name which necessary to setup Connection with WAP Gateway.
2.Enter Proxy User Name.
3.Press to save it.
MOB.INTERNET
Proxy Password
1.Press ,,,,,to select “Proxy Password”.
To setup Proxy Password, which necessary to setup Connection with WAP Gateway.
2.Enter Proxy Password.
3.Press to save it.
Proxy Realm
1.Press ,,,,,to select “Proxy Realm”.
To setup Proxy Realm, which necessary to setup Connection with WAP Gateway.
2.Enter Realm.
3.Press to save it.
mx-v30(0621) 2004.6.21 9:41 AM Page 58