Maxon CIC SM5402 Private Land Mobile Radio for Vehicle User Manual PM 250 users manual Update
Maxon CIC Corp. Private Land Mobile Radio for Vehicle PM 250 users manual Update
UserManual.wiki
>
Maxon CIC
>
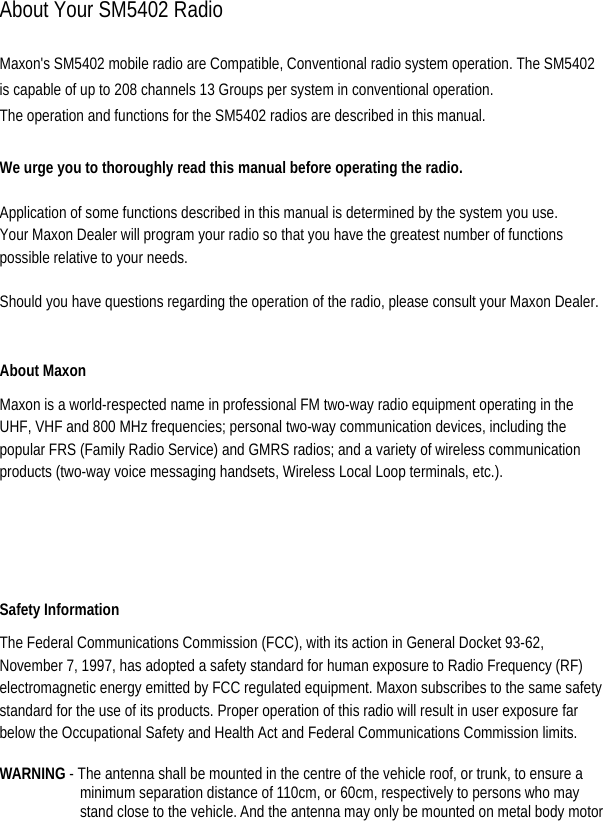
SM5402 User Manual
Users Manual
Navigation menu
Upload a User Manual
Namespaces
Wiki Guide
HTML
PDF
Info
Views
User Manual
Discussion / Help
Navigation