Medic4all AIO67 AIO-67 User Manual 486157
Medic4all AIO-67 486157
Contents
- 1. Product Manual
- 2. User manual renewed
Product Manual

FCC submission
Product Manual
October 21, 2004
Medic4All Ltd.
POB 4222 Petach Tikva,
Israel 49000
Medic4All
Telemedicine Solutions
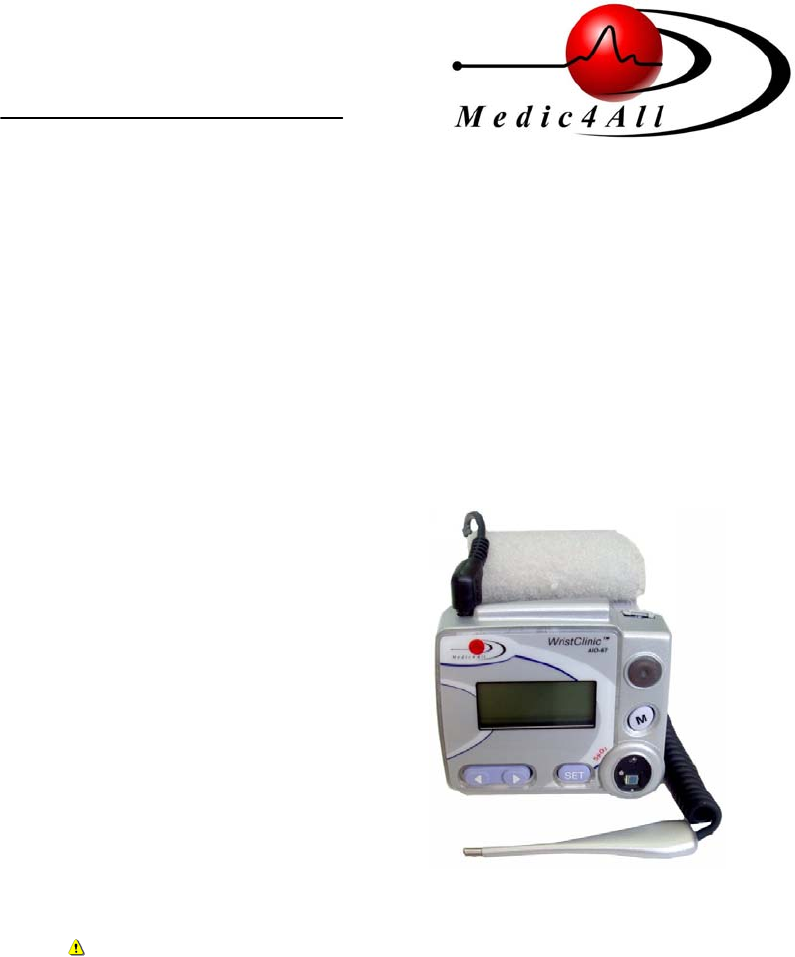
Operation Manual
WristClinic™ - AIO67
The all-in-one wireless remote medical monitoring revolution
August 2004
Caution: Federal law restricts this device to sale by or on the order of a physician.
Ref: OM-110v1
Copyright© 2003-2004, Medic4All AG, all rights reserved. No part of this material may
be copied in any form without the express written approval of Medic4All AG.

User Assistance Information
For assistance, contact Medic4All at:
info@medic4all.com
Local Provider Details:
Table of Contents
User Assistance Information 3
Table of Contents 3
General Warnings and Cautions 5
Conventions 6
Introducing WristClinic™ 6
Description of the WristClinic™ 7
Getting Started 7
Inserting the Batteries 8
Working with the WristClinic™ Display and Buttons 8
Turning on the WristClinic™ 8
Main Menu Options 9
WristClinic™ Buttons 9
Setting Up the WristClinic™ 10
Setting the Temperature Units 11
Setting the Date and Time 11
Setting the User Mode 12
Viewing the WristClinic™ Serial Numbers 12
Setting the Display Language 13
Tech Mode 14
Exiting SETTINGS 14
Selecting and Changing Users 14
Using the Memory Function 14
Browsing Through Current User Measurements 15
Clearing Memory 15
Operating Instructions 15
Wrapping the WristClinic 15
Unwrapping the WristClinic™ Cuff 16
Measuring your Blood Pressure and Heart Rate 17
Obtaining the Correct Posture 17
Taking your Blood Pressure and Heart Rate 17
Measuring your ECG 18
Aborting the Measurement 19
Viewing your ECG Results 19
Measuring your ECG and Breath Rate 19
Aborting the Measurement 21
Viewing your ECG and Breath Rate Results 21
Measuring your SpO2 and Heart Rate 21
Aborting the Measurement 23
Viewing SpO2 and Heart Rate Results 23
Measuring your Temperature 24
Connecting the Thermometer to the WristClinic™ 24
Putting on the Thermal Sheath 24
Placing the Thermometer 24
Taking your Temperature 26
Cleaning the Device 26
Low Battery Indication 27
Maintenance 27
Replacing the Electrodes 27
Disposal of WristClinic™ Accessories 28
Storage 28
Troubleshooting 28
Spare Parts and Accessories 31
Specifications 32
Warranty 36

General Warnings and Cautions
¥
¥
Use of this device is not intended as a substitute for consulting with your
physician. Self-diagnosis can be dangerous, and may worsen the
problem. Always follow your doctor’s instructions.
¥
¥
Do not use the Medic4All WristClinic ™ for an infant or a person who
cannot express their intention.
¥
¥
Do not disassemble or modify the Medic4All WristClinic™. Any
modifications made to the equipment void warranty and service
contract obligations.
¥
¥
Only authorized service personnel can disassemble or modify the
Medic4All WristClinic™ device.
¥
¥
Consult your local provider, concerning any operational problems. Do
not attempt to carry out any repairs by yourself.
¥
¥
Please take the batteries out if the Medic4All WristClinic™ is not used
for a long period (app. 2 months or more)
¥
¥
Do not use the Medic4All WristClinic™ for anything other than the
functions described in this user guide.
¥
¥
The performance of Medic4All WristClinic™ may be degraded should
one of the following occur:
{A.1.1} Operating outside the manufacturer’s stated temperature and humidity
range
{A.1.2} Storage outside the manufacturer’s stated temperature and humidity
range
{A.1.3} Mechanical shock (such as harsh drop)
{A.1.4} Patient temperature below ambient temperature
¥
¥
Set your Medic4All WristClinic™ to work in multi-user mode if the device
is to be used by more than one user. Always use the same user number
when taking measurements. Do not use a user number that is being
used by someone else.
¥
¥
Keep the Medic4All WristClinic™ away from electro-magnetic emitting
devices, such as portable phones.
¥
¥
Do not store the Medic4All WristClinic™ in direct sunlight, at a high
temperature, or at excessive humidity.
¥
¥
To make medical decisions, additional measurements beyond those
supplied by the Medic4All WristClinic™ may be necessary.

1. Make sure to read this entire instruction manual before trying
to operate the WristClinic™.
Disposal of this product and used batteries should be carried out in accordance with
the national regulations for the disposal of electronic product.
Conventions
The following are conventions that are used throughout this guide:
Icon Description
Note. Information that describes important
features or instructions.
Caution. Information that instructs you to be
cautious.
Introducing WristClinic™
Medic4All WristClinic™ is a revolutionary all-in-one wireless remote medical
monitoring device for telemedicine and homecare applications. It enables timely
intervention, disease and chronic care management, improved patient compliance,
and better patient care.
WristClinic™ enables you to perform and transmit a wide range of medical
measurements, including:
¥
¥
Blood pressure
¥
¥
One lead ECG
¥
¥
Heart rate
¥
¥
Respiratory rate
¥
¥
Pulse Oximeter (SpO2)
¥
¥
Heart rhythm regularity
¥
¥
Body temperature
WristClinic™ measures, stores, displays measurement results, and wirelessly
transmits physiological data to a telemedicine call center through MedicGate™ or
MiniGate™.
These gateways forward the data by telephone or the Internet to a telemedicine call
center or to an automated web databank, where the patient’s medical record is
accessible via the Internet. Optionally, measurements can be taken continuously
and recorded on a continuous loop system. If transmission is disrupted,
WristClinic™ stores up to 200 readings for transmission at a later time.
WristClinic™ allows you to maintain your daily routine without disruption, providing
monitoring at home, at the office, or while outdoors.
WristClinic™ works with up to four users. Measurements are stored for each of the
users separately.
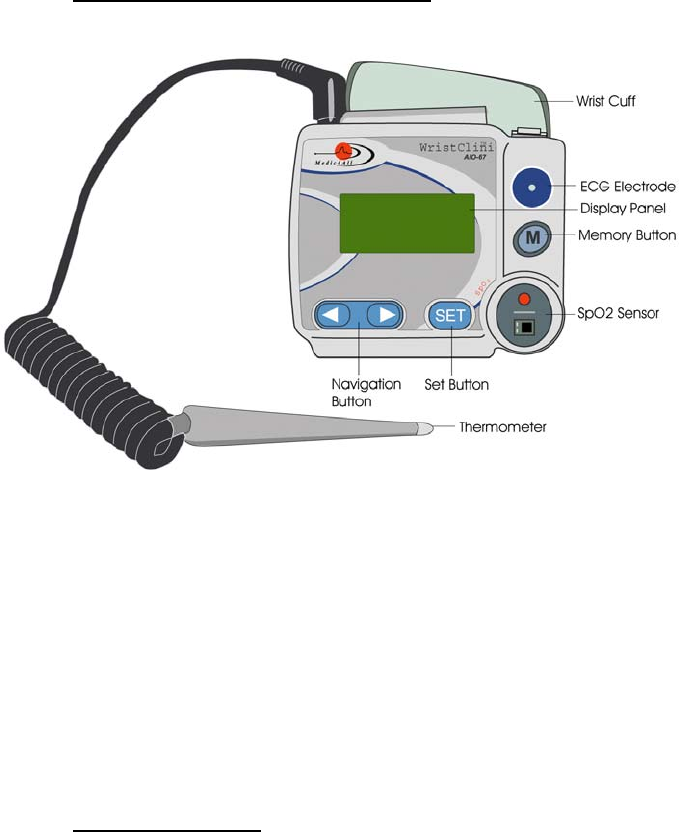
Description of the WristClinic™
The following are the various parts of the WristClinic™.
Following are various accessories included with the WristClinic™:
¥
¥
Thermometer probe
¥
¥
Replaceable ECG electrodes
¥
¥
Two 1.5V AAA Batteries
¥
¥
Storage case
¥
¥
Medic4All WristClinic™ AIO-67 User Guide (this guide)
Getting Started
Before you begin taking measurements using the WristClinic™, do the following:
¥
¥
Insert the batteries in the WristClinic™. For more information, refer to
Inserting the Batteries on page 8.
¥
¥
Familiarize yourself with the various options available. For more
information, refer to
Working with the WristClinic™ Display and Buttons on page 8.
¥
¥
Set the date and time, temperature units, language, and number of
users of the WristClinic™. For more information, refer to Setting Up the
WristClinic on page 10.

Inserting the Batteries
To insert batteries in the WristClinic™ device:
Slide the door of the battery
compartment on the bottom of the
WristClinic™ to the right in order to
open the compartment.
2. Insert two AAA-size batteries (1.5V each), as shown in the figure inside
the battery compartment. The WristClinic™ turns on, SELF TEST appears,
then CHECK MEMORY , then TEST PASSED/ FAILED and then COMM CHECK
appears on the display for a few seconds, after which the WristClinic™
turns off automatically.
3. Ensure that the polarity (+/-) of the batteries is correct.
2. Close the WristClinic™ battery cover.
Under normal conditions, you can perform approximately 200 measurements with
one set of new long life AAA alkaline batteries.
The number of measurements increases dramatically when the number of blood
pressure measurements decreases.
It is preferable to turn off the WristClinic™ after using it.
4. The WristClinic™ automatically turns itself off after 60 seconds
of inactivity.
Remove the batteries from the WristClinic™ if you are not using it for an extended
period of time (two months or more). However, each time you remove the batteries,
the clock inside the WristClinic™ ceases to work, requiring it to be set to the correct
time after the batteries are reinserted. For instructions on how to set the
WristClinic™ clock, refer to Setting the Date and Time on page 11.
Working with the WristClinic™ Display and Buttons
This section describes how to turn on the WristClinic™ and use its display panel
and buttons.
Turning on the WristClinic™
To turn on the WristClinic™:
¥
¥
Press key or the key.
5. The WristClinic™ turns on and COMM CHECK may appear in the display.
This indicates that the communication between the WristClinic™ and the
gateway is being checked. If there is a communication failure, such as
when the gateway is shut down, COMM FAILED appears on the display,
after which the first item in the WristClinic™ main menu, BLOOD PRESS.,
appears.
6. If you are working in multi-user mode, you are first prompted
for the user number. For instructions on how to change users, refer
to Selecting and Changing Users on page 14.
Main Menu Options
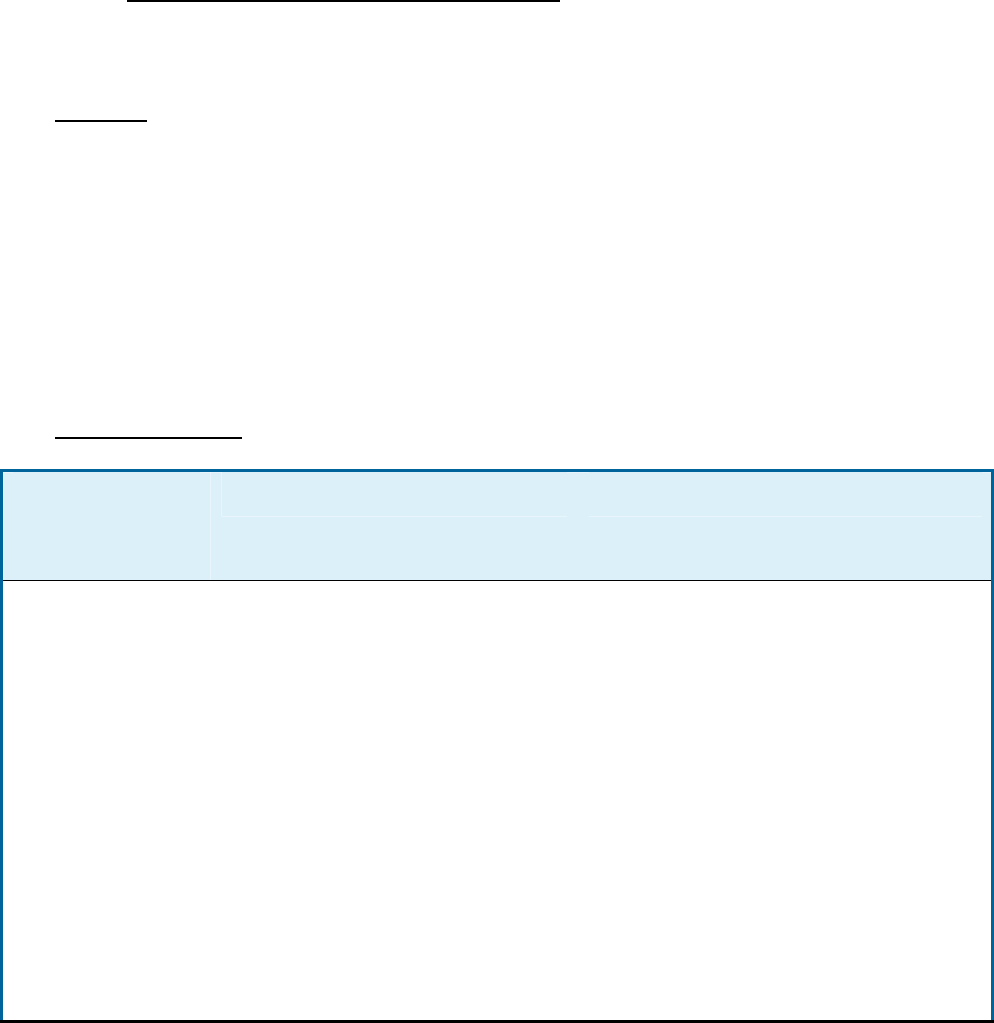
The following options are available in the main menu:
Option Description For more information…
BLOOD PRESS. Enables you to measure
blood pressure and heart
rate.
Measuring your Blood Pressure and
Heart Rate on page 17
ECG Enables you to measure
ECG.
Measuring your ECG on page 18
ECG and BREATH Enables you to measure
ECG and breath rate.
Measuring your ECG and Breath Rate on
page 19
SpO2 Enables you to measure
oxygen saturation in the
blood and heart rate.
Measuring your SpO2 and
Heart Rate on page 21
TEMP Enables you to measure
body temperature.
Measuring your Temperature
on page 24
SETTINGS Enables you to set the
date and time, number of
users, display language,
and other parameters of
your WristClinic™.
Setting Up the WristClinic on
page 10
OFF Turns off your WristClinic™.
WristClinic™ Buttons
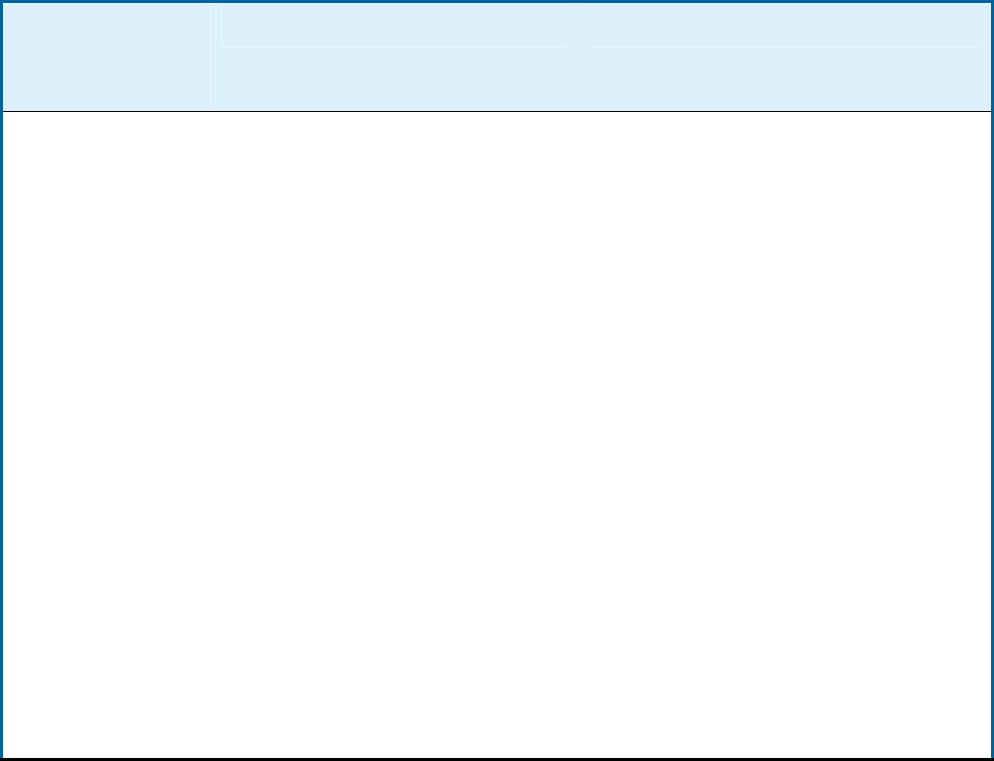
The following buttons are available on your WristClinic™:
Button Description
Press the right and left arrows
to navigate among the
various options in the display.
Button Description
Press to confirm selection of
the current option in the
display, or to abort a
measurement in progress.
Press to access
measurements stored in
memory. For more
information, refer to
Using the Memory Function
on page 14.
Setting Up the WristClinic™
To access the SETTINGS menu:
¥
¥
Press to navigate to SETTINGS and press .
The following options are available in the SETTINGS menu:
Option Description For more information…
LANG-UAGE Enables you to set the
language of the WristClinic™
display.
Setting the Display
Language on page 13
ERASE MEMORY Enables you to erase all the
measurements in memory.
Clearing Memory on page 15
SET DATE & TIME Enables you to set the date
and time of the WristClinic™.
Setting the Date and Time
on page 11
1 OR 4 USERS Enables you to set the
WristClinic™ to handle a
single user or multiple users.
Setting the User Mode on
page 12
SERIAL NUMBER Enables you to view the serial
number and hardware and
software version numbers for
the WristClinic™.
Viewing the WristClinic™
Serial Numbers on
page 12
SET TEMP UNITS Enables you to set the units
used for measuring
temperature.
Setting the Temperature
Units on page 11
TECH MODE Enables a technician to
access the WristClinic™ for
technical purposes.
Tech Mode on page 14

Option Description For more information…
EXIT SETTIN-GS Enables you to exit the
SETTINGS menu and return to
the main menu
Exiting SETTINGS on
page 14
Setting the Temperature Units
WristClinic™ enables you to set the units in which your temperature is measured,
either °C (Celsius) by default or °F (Fahrenheit).
To set the temperature units:
1. From the SETTINGS menu, press to navigate to SET TEMP UNITS and
press .
7. The current temperature units appears.
2. Press to select the temperature units (TEMP IN °C or TEMP IN °F) and
press .
8. The temperature units are set to the selected value.
Setting the Date and Time
In order for your measurements to be recorded in correct chronological order, you
should initially set your WristClinic™ to the correct date and time.
Every time your WristClinic™ communicates with a gateway, it receives the date
and time as it appears on the PC or Call Center clock. No further action is
needed.
9. If a change of location includes a change in date and time,
make sure to set your WristClinic™ to the correct date and time.
Perform the following steps if your WristClinic™ is not communicating with any
gateway:
To set the date and time:
3. From the SETTINGS menu, press to navigate to SET DATE & TIME
and press .
10. The date appears (MMM DD YYYY), with the month flashing.
4. Press to navigate to the correct month and press .
11. The month is set to the selected value and the day flashes.
5. Press to navigate to the correct day and press .
12. The day is set to the selected value and the year flashes.
6. Press to navigate to the correct year and press .
13. The year is set to the selected value and the time appears (hh:mm),
with the hours flashing.
7. Press to navigate to the correct hour and press .
14. The hour is set to the selected value and the minutes flashes.
8. Press to navigate to the correct minute and press .
15. The minutes are set to the selected value and you are returned to the
SET DATE & TIME option in the SETTINGS menu.
Setting the User Mode
WristClinic™ enables you to define if you want to work in single mode or multi-user
mode.
16. When switching from multi-user mode to single mode, all
measurements in memory are erased.
To set the user mode:
9. From the SETTINGS menu, press to navigate to 1 OR 4 USERS and
press .
17. The current user mode appears.
10. Press to select the user mode (SINGLE USER or MULTIPLE USERS) and
press .
18. PUSH SET TO ALTER appears.
11. Press .
19. CHANGING USERS NO appears and the number of users is set according
to the selected mode.
When set to multi-user mode, the user number appears on the lower right of the
display. When the WristClinic™ is turned on, if it is in multi-user mode, you are
prompted to select the user to work with. For more information, refer to Selecting
and Changing Users on page 14.
Viewing the WristClinic™ Serial Numbers
Using the WristClinic™, you can view the serial number of your device and its
hardware and software version numbers.
To view your serial numbers:
12. From the SETTINGS menu, press to navigate to SERIAL NUMBER and
press .
20. The device serial number appears (e.g., SER NO. 000000B7).
13. Press to view the hardware version number (e.g., HW 2003\A1-14-A1)
and software version number (e.g., SW VER. 01.28).
Setting the Display Language
WristClinic™ enables you to set the language in which you view the information
displayed.
To set the display language:
14. From the SETTINGS menu, press to navigate to LANGUAGE and
press .
21. The current language appears.
15. Press to select the desired language for the display and press .
16. Press again to confirm altering the language.
22. The display language is now set to the selected value.
Tech Mode
23. The Tech Mode is for Medic4All technicians only.
Exiting SETTINGS
To exit the SETTINGS menu:
¥
¥
From the SETTINGS menu, press to navigate to EXIT SETTINGS and
press .
24. You are returned to the SETTINGS option in the main menu.
Selecting and Changing Users
When working with multiple users, the measurements you take are automatically
associated with the user that appears on the lower right of the display.
To select a user number:
17. Press to turn on the WristClinic™.
25. SELECT USER X appears, where X is the current user number.
18. Press to change the number to the user for which you want to
perform measurements and press .
26. The user number appears highlighted on the lower right of the display.
To change to a different user:
19. Press to navigate to OFF and press .
27. The WristClinic™ turns itself off.
20. Press any key to turn on the WristClinic™.
28. SELECT USER X appears, where X is the current user number.
21. Press to change the number to the user for which you want to
perform measurements and press .
29. The user number appears highlighted on the lower right of the display.
Using the Memory Function
The memory function enables you to view previous measurements that are stored in
the WristClinic™. In addition, you can clear all previous measurements from
memory when they are not needed.
Browsing Through Current User Measurements
To browse through user measurements:
22. Press .
30. The first measurement in the memory appears, followed by the date
and time for that measurement.
31. If there are no measurements stored in memory, MEMORY
EMPTY appears.
23. Press to navigate through the measurements in the memory for
the current user.
24. Press to exit the memory.
Clearing Memory
To erase all measurements stored in memory:
25. Press to navigate to SETTINGS and press .
26. Press to navigate to ERASE MEMORY and press .
32. PUSH SET TO ERASE appears.
27. Press .
33. ERASE DONE appears and the measurements stored in the memory are
erased.
Operating Instructions
Before you begin using the WristClinic™, you need to position the WristClinic™ cuff
correctly. After the WristClinic™ is positioned correctly on your wrist, you can then
take the following measurements:
¥
¥
Blood pressure and Heart Rate
¥
¥
ECG
¥
¥
ECG and Breath Rate
¥
¥
SpO2 and Heart Rate
¥
¥
Temperature
Wrapping the WristClinic
In order to take accurate measurements using the WristClinic™, it is necessary to
wrap the cuff around your wrist correctly.
34. If you have a very small (circumference of under 13.5 cm) or
large wrist (circumference of over 21 cm), contact your service
representative about obtaining a smaller/larger wrist cuff.

35. Place the WristClinic™ cuff directly on your skin. Make sure
that your clothing is not constricting your blood flow and that the
electrodes on the inside of the cuff are touching your skin.
To place the WristClinic™ on your wrist:
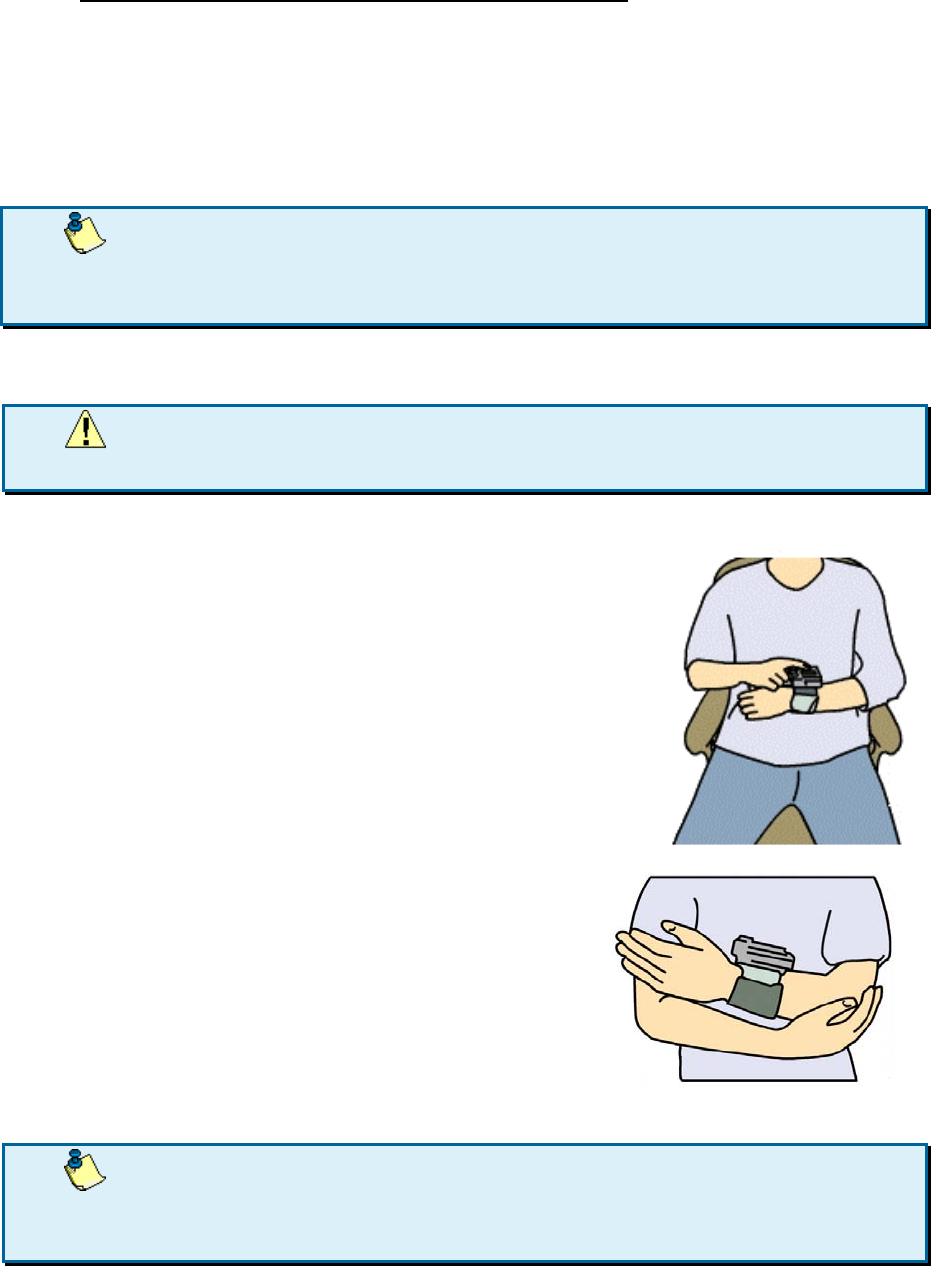
28. Remove all objects around your left wrist, leaving it bare.
29. Place the cuff over your left
wrist with your thumb facing
upwards. Leave
approximately 1-2 cm
between the edge of the
wrist cuff and the bottom of
the palm.
30. Pull the wrist cuff upwards
and fasten the Velcro strap
firmly on your wrist.
36. The display of the WristClinic™ should be facing towards you.
37. Do not fasten the Velcro strap tightly on your wrist as it might
restrict your blood flow.
Unwrapping the WristClinic™ Cuff
To unwrap the WristClinic™ cuff:
¥
¥
Unwrap the Velcro strap
from around your wrist and
remove the WristClinic™
cuff.
Measuring your Blood Pressure and Heart Rate
Before measuring your blood pressure:
¥
¥
Avoid eating, smoking, and exercising 30 minutes before taking your
blood pressure.
¥
¥
Sit in a relaxed position.
¥
¥
Remain still and do not talk while you are taking your blood pressure.
38. To measure your blood pressure correctly, make sure to wrap
the cuff around your wrist correctly (refer to Wrapping the WristClinic on
page 15).
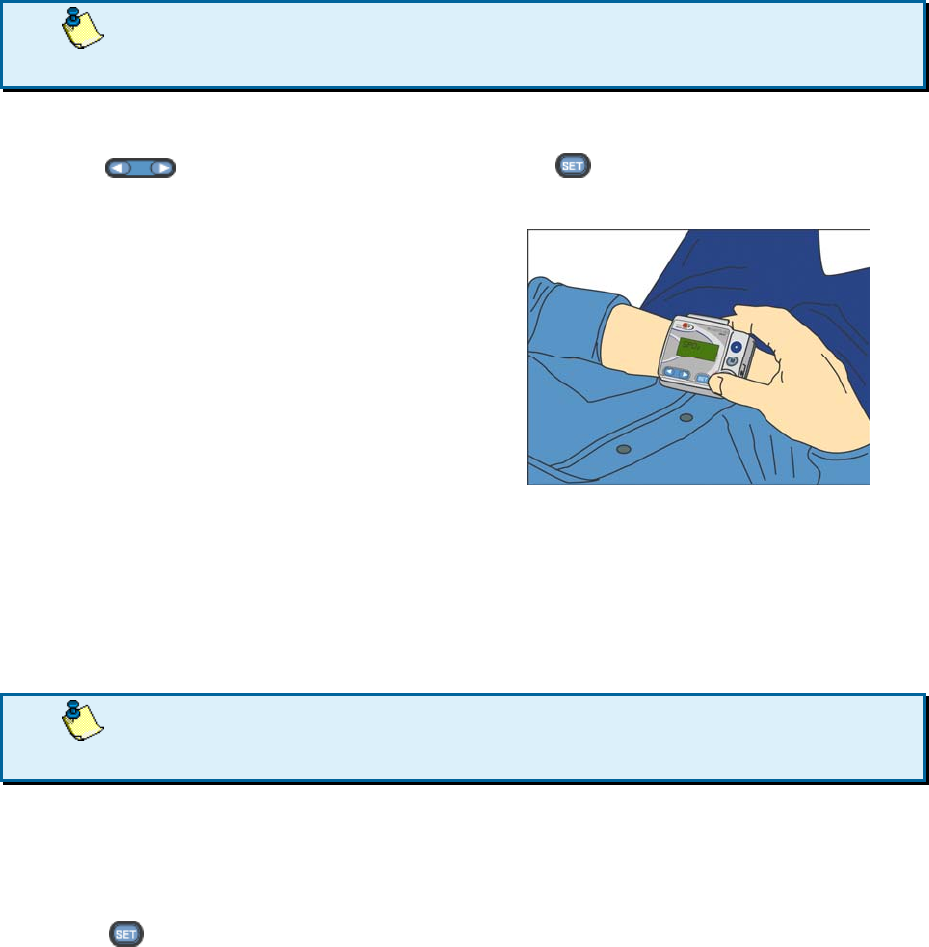
Obtaining the Correct Posture
39. An incorrect posture might cause the WristClinic™ to
measure your blood pressure incorrectly.
To obtain the correct posture:
31. Sit down and stretch your
back.
32. Relax your body by relieving
the stress from your shoulders
and arms.
33. Breathe deeply several times.
34. Make sure the WristClinic™ is in
your heart level, Position your
arms as illustrated in the
picture.
Taking your Blood Pressure and Heart Rate
40. If you are working with more than one user, verify that the
WristClinic™ is set to the correct user before taking a measurement.
The user number appears on the lower right of the display.
To take your blood pressure and heart rate:
¥
¥
Press to navigate to BLOOD PRESS and press .
41. --- /---
HR --- appears on the display and a few seconds later the cuff begins to
inflate. The measurement lasts about 30 seconds, after which the cuff
deflates.
Aborting the Measurement
To abort the measurement:
¥
¥
Press before the measurement is complete.
42. The measurement stops after a few seconds, and CHECK ABORTED
appears on the display.
Viewing your Blood Pressure and Heart Rate Results
To view the results:
After approximately 30 seconds, the cuff deflates, the WristClinic™ transmits the
measurements, and SENDING DATA appears on the display.
If SENDING FAILED appears, refer to
Troubleshooting on page 28.
After sending the measurements, the WristClinic™ beeps three times and the
measurements automatically appear on the WristClinic™ display. The measurement
results (e.g., 129 / 89 HR 65) and CHECK DONE are displayed alternatively.
To return to the main menu:
¥
¥
Press any key to return to the menu.
43. After 60 seconds of inactivity, the WristClinic™ turns itself off.
Measuring your ECG
44. To measure your ECG correctly, make sure to wrap the cuff
around your wrist such that the 4 inner electrodes located on your
inner cuff will firmly touch your bare skin.
45. If you are working with more than one user, verify that the
WristClinic™ is set to the correct user before taking a measurement.
The user number appears on the lower right of the display.
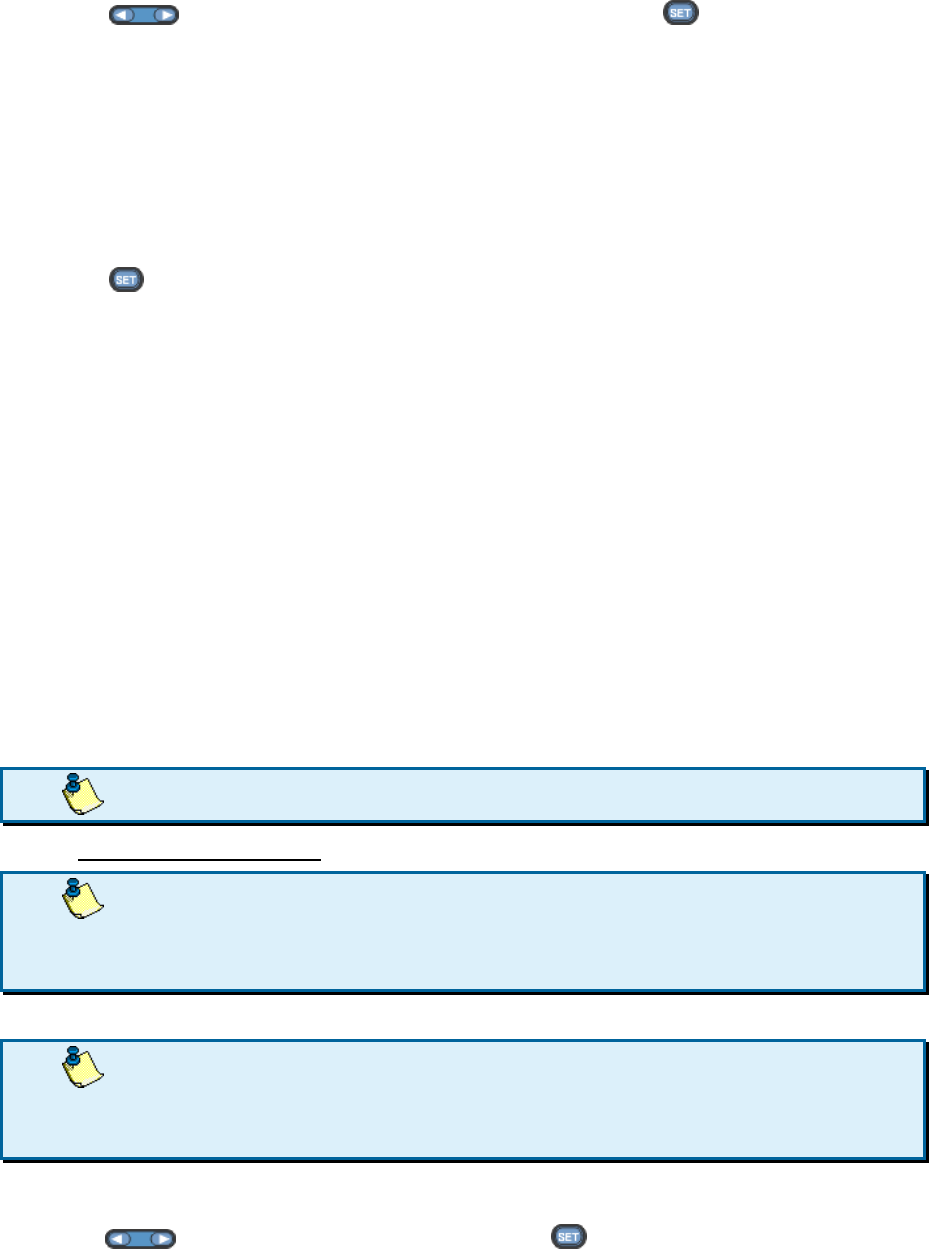
To take your ECG measurement:
35. Press to navigate to ECG and press .
46. PLACE FINGER appears on the display.
36. Place the index finger of your
right hand on the ECG
electrode located above .
47. The WristClinic™ detects your finger and the measurement
begins. The timer counts down from 45 seconds.
48. Avoid moving your finger, and do not use excessive pressure
when placing your finger on the ECG electrode.
Moistening your index finger, which is in contact with the ECG electrode, with a wet
cloth will help to improve the quality of the ECG measurement.
If your finger or your 4 inner electrodes located on your inner cuff are not detected
within 20 seconds, CHECK FAILED appears on the display. Refer to
Troubleshooting on page 28 for instructions.
Aborting the Measurement
To abort the measurement:
¥
¥
Press before the measurement is complete.
49. CHECK ABORTED appears on the display.
Viewing your ECG Results
Your ECG measurement is automatically transmitted to the gateway. The results
are not displayed on the WristClinic™ when the measurement is complete. You can
view your ECG measurement on the MiniGate or Call Center application.
CHECK DONE appears on the display and the WristClinic™ beeps three times.
To return to the main menu:
¥
¥
Press any key to return to the menu.
50. After 60 seconds of inactivity, the WristClinic™ turns itself off.
Measuring your ECG and Breath Rate
51. To measure your ECG correctly, make sure to wrap the cuff
around your wrist such that the 4 inner electrodes located on your
inner cuff will firmly touch your bare skin.
52. If you are working with more than one user, verify that the
WristClinic™ is set to the correct user before taking a measurement.
The user number appears on the lower right of the display.
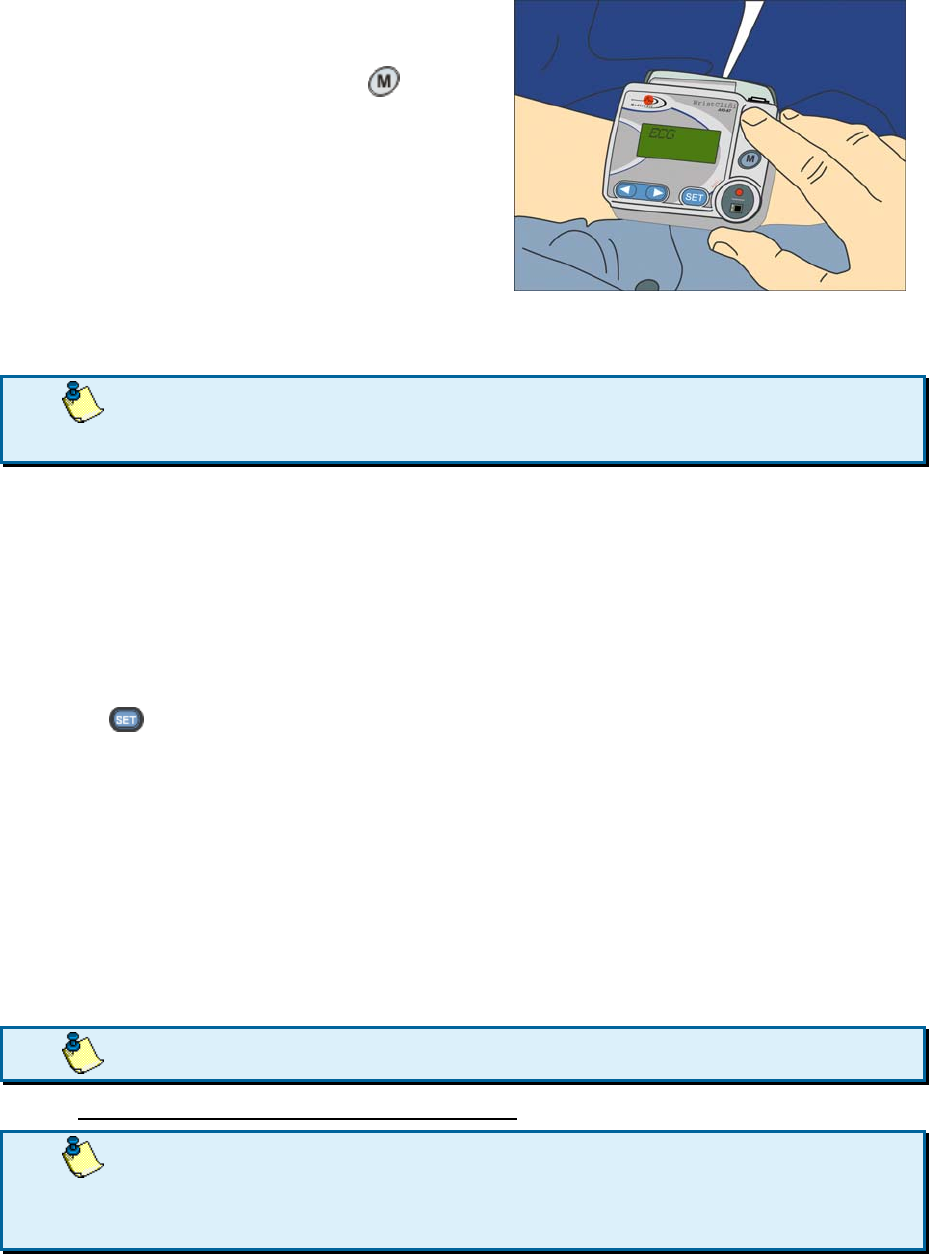
To take your ECG and Breath Rate measurement:
37. Press to navigate to ECG AND BREATH and press .
53. PLACE FINGER appears on the display.
38. Place the WristClinic™ on your
upper abdomen.
39. Place the index finger of your
right hand on the ECG
electrode located above .
54. The WristClinic™ detects your finger and the measurement
begins. The timer counts down from 50 seconds.
55.
Avoid moving your finger, and do not use excessive pressure
when placing your finger on the ECG electrode.
Moistening your index finger, which is in contact with the ECG electrode, with a wet
cloth will help to improve the quality of the ECG measurement.
If your finger or your 4 inner electrodes located on your inner cuff are not detected
within 20 seconds, CHECK FAILED appears on the display. Refer to
Troubleshooting on page 28 for instructions.

Aborting the Measurement
To abort the measurement:
¥
¥
Press before the measurement is complete.
56. CHECK ABORTED appears on the display.
Viewing your ECG and Breath Rate Results
Your ECG and breath rate measurements are automatically transmitted to the
gateway. The results are not displayed on the WristClinic™ when the measurement
is complete. You can view your ECG and breath rate measurement on the MiniGate
or Call Center application.
CHECK DONE appears on the display and the WristClinic™ beeps three times.
To return to the main menu:
¥
¥
Press any key to return to the menu.
57. After 60 seconds of inactivity, the WristClinic™ turns itself off.
Measuring your SpO2 and Heart Rate
There are two options to perform a SpO2 and heart rate measurement:
1. Using the external SpO2 finger clip
2. Using the internal SpO2 sensor
58. Avoid taking your SpO2 measurement when exposed to very
strong ambient light. Avoid motion while performing a SpO2
measurement.
59. If you are working in multi-user mode, verify that the
WristClinic™ is set to the correct user before taking a measurement.
The user number appears on the lower right of the display.
60. Do not immerse the SpO2 finger clip in liquid. Do not use
caustic or abrasive cleaning agents.
61. The SpO2 finger clip is designed for use on the fingers of
patients weighing more than 30 kilograms, where the finger tissue is
between 5 and 21 millimeters.
To take your SpO2 measurement with the finger clip:
40. Attach the external SpO2 finger clip to the connector marked
SpO2 on the side of the WristClinic™.
41. Press to navigate to SpO2 and press .
Insert a finger (preferably the
index, middle, or ring finger) into the
SpO2 finger clip until the end of the
finger reaches the finger stop.
Keep the fingernail facing the
sensor top, and ensure that long
fingernails do not interfere with
proper sensor position.
62. SpO2--- % HR --- appears on the display. After a few seconds,
SpO2 and HR data appear. The measurement data is refreshed
every 5 seconds. The measurements last about 30 seconds. Only
the last measurement is stored and transmitted to the gateway.
63. Avoid moving your finger, and do not use excessive pressure
when placing your finger on the SpO2 sensor.
To clean the SpO2 finger clip:
Clean the SpO2 finger clip with a soft cloth dampened with isopropyl
alcohol. Do not pour or spray any liquids on the SpO2 finger clip, and
allow it to dry thoroughly before reusing. Do not use caustic or abrasive
cleaning agents.
64. The thumb is not recommended for use with the SpO2 finger
clip. The SpO2 finger clip does not contain natural rubber latex.
To take your SpO2 measurement with the internal sensor:
43. Press to navigate to SpO2 and press .
65. PLACE FINGER appears on the display.
Place the index finger of your right
hand on the SpO2 sensor. Make sure
to cover the SpO2 sensor completely
with your finger
66. SpO2--- % HR --- appears on the display. After a few seconds,
SpO2 and HR data appear. The measurement data is refreshed
every 6 seconds. The measurements last about 30 seconds. Only
the last measurement is stored and transmitted to the gateway.
67. Avoid moving your finger, and do not use excessive pressure
when placing your finger on the SpO2 sensor.
If the SpO2 is not detected, SpO2--- % remains on the display until the measurement
ends, after which MEASUREMENT FAILED appears.
Aborting the Measurement
¥
¥
Press before the measurement is complete.
68. CHECK ABORTED appears on the display.
Viewing SpO2 and Heart Rate Results
After 6 seconds, the oxygen saturation percent (SpO2) and heart rate (HR) are
displayed. The display is updated every 6 seconds.
When the measurement is complete, the last successful measurement data is
transmitted and SENDING DATA appears.
After sending the measurements, the WristClinic™ beeps three times and the
measurements automatically appear on the WristClinic™ display. The last
successful measurements results (e.g., SpO2 97% HR 67) and CHECK DONE are
displayed alternatively.
Measuring your Temperature
To measure your temperature, perform the following steps described below:
¥
¥
Connect the thermometer to the WristClinic™.
¥
¥
You may place a thermal sheath on the thermometer.
¥
¥
Position the thermometer.
¥
¥
Take your temperature.
69. You can set the temperature display to Celsius or Fahrenheit (refer to
Setting the Temperature Units on page 11).
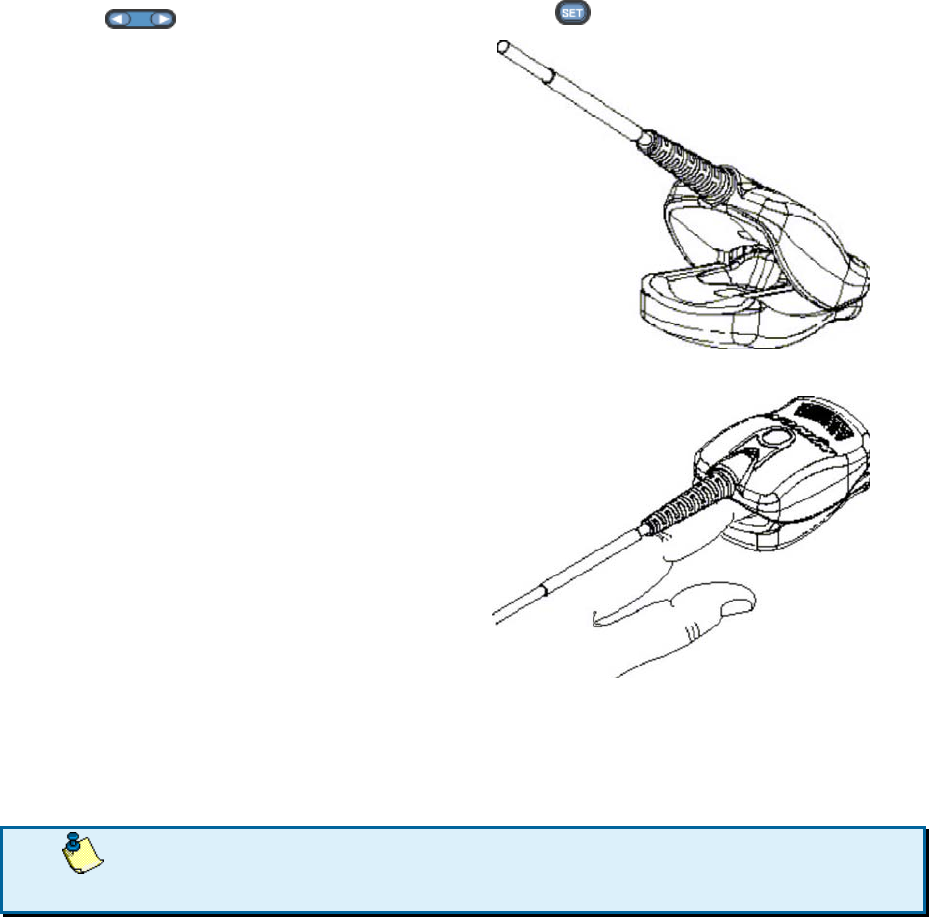
Connecting the Thermometer to the WristClinic™
¥
¥
Plug the thermometer into the
TEMP connector on the top of
the WristClinic™.
70. Make sure the thermometer is firmly plugged into the
connector.
71. The thermometer is suitable exclusively for measurements of
body temperature
72. Never boil the thermometer tip
Putting on the Thermal Sheath
¥
¥
Place the thermal sheath over the thermometer. Put away the
protective plastic that covers of the thermal sheath
¥
¥
When you are done, discard the thermal sheath and the plastic cover.
Placing the Thermometer
You can place the thermometer under your armpit or in your mouth.
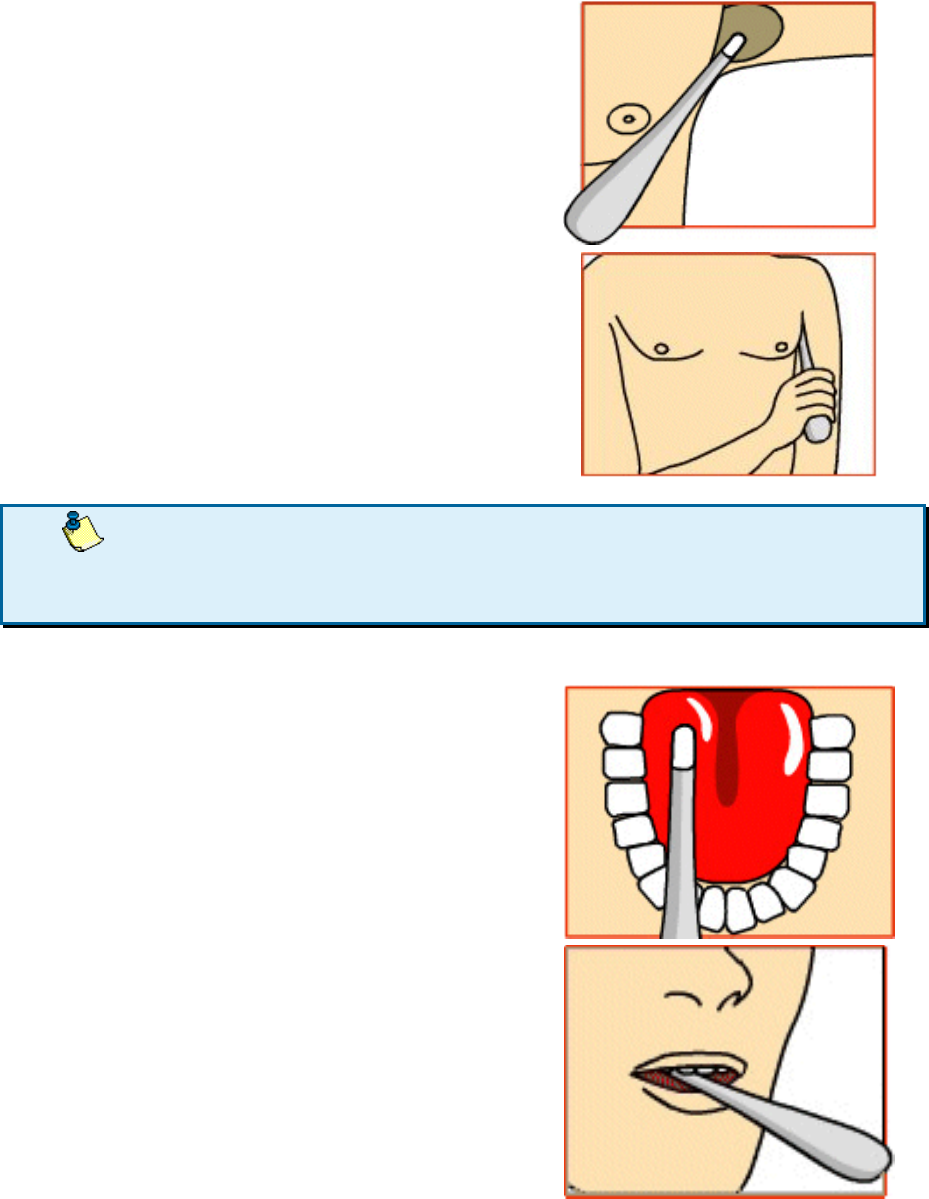
Placing the Thermometer under your Armpit
¥
¥
Place the tip of the
thermometer at the center of
your armpit. The tip of the
thermometer must be parallel
to your body, as much as
possible.
73. For the most accurate measurement, make sure the
temperature tip is in good contact with your armpit. Press the tip
slightly against your armpit to obtain the best results.
Placing the Thermometer in your Mouth
¥
¥
Position the tip of the
thermometer in one of the two
pockets under your tongue. The
tip must be in good contact with
the tissue. Close your mouth and
breath through the nose.
Taking your Temperature
74. If you are working with more than one user, verify that
the WristClinic™ is set to the correct user before taking a
measurement. The user number appears on the lower right of the
display.
¥
¥
Press to navigate to TEMP and press .
75. The initial temperature appears on the display.
Aborting the Measurement
¥
¥
Press before the measurement is complete.
76. CHECK ABORTED appears on the display.
Viewing your Temperature
During a measurement, the current temperature is displayed every second.
77. If the temperature is below 35 °C (95 °F), LOW TEMP appears
on the display. If the temperature is above 43 °C (109.4 °F), HIGH TEMP
appears on the display.
The measurement takes about 60 seconds.
When the measurement is completed, the data is transmitted and SENDING DATA
appears on the display.
After sending the measurements, the WristClinic™ beeps three times and the
temperature automatically appears on the WristClinic™ display. The
temperature and CHECK DONE are displayed alternatively.
Cleaning the Device
To clean the WristClinic™ monitor, use only a soft, lightly moistened cloth.
78. Do not use petroleum spirits, thinners, or other solvents when
cleaning the WristClinic™.
To clean the WristClinic™ thermometer tip wash the area extending about 2"
from the tip of the thermometer with warm (not hot) soapy water before and after
each use; be sure to dry thermometer thoroughly
You may also wipe the area described above with 70% isopropyl alcohol before
and after each use. Even if you use a thermal sheath, follow either of the above
two cleaning procedures as an extra precaution.
To clean any stains on the WristClinic™ cuff, use a moistened cloth and soapy
water.
79. Do not wash the cuff or make it wet. No water should enter
the WristClinic™ main unit.
Low Battery Indication
The REPLACE BATTERY indication appears when the batteries run low. When
REPLACE BATTERY first appears replace the batteries as soon as possible with
two new fresh LR03 (AAA) batteries.
However, you can still run a few full cycle measurements. When REPLACE
BATTERY is followed a BYE , the WristClinic™ will automatically shut down.
80. REPLACE BATTERY usually appears after a Blood Pressure
measurement. However, you can continue taking some
measurements before replacing the batteries.
Refer to Inserting the Batteries on page 8 for instructions on how to change the
WristClinic™ batteries.
Maintenance
81. Do not perform any repairs yourself on the WristClinic™. Only
authorized service personnel should handle the WristClinic™.
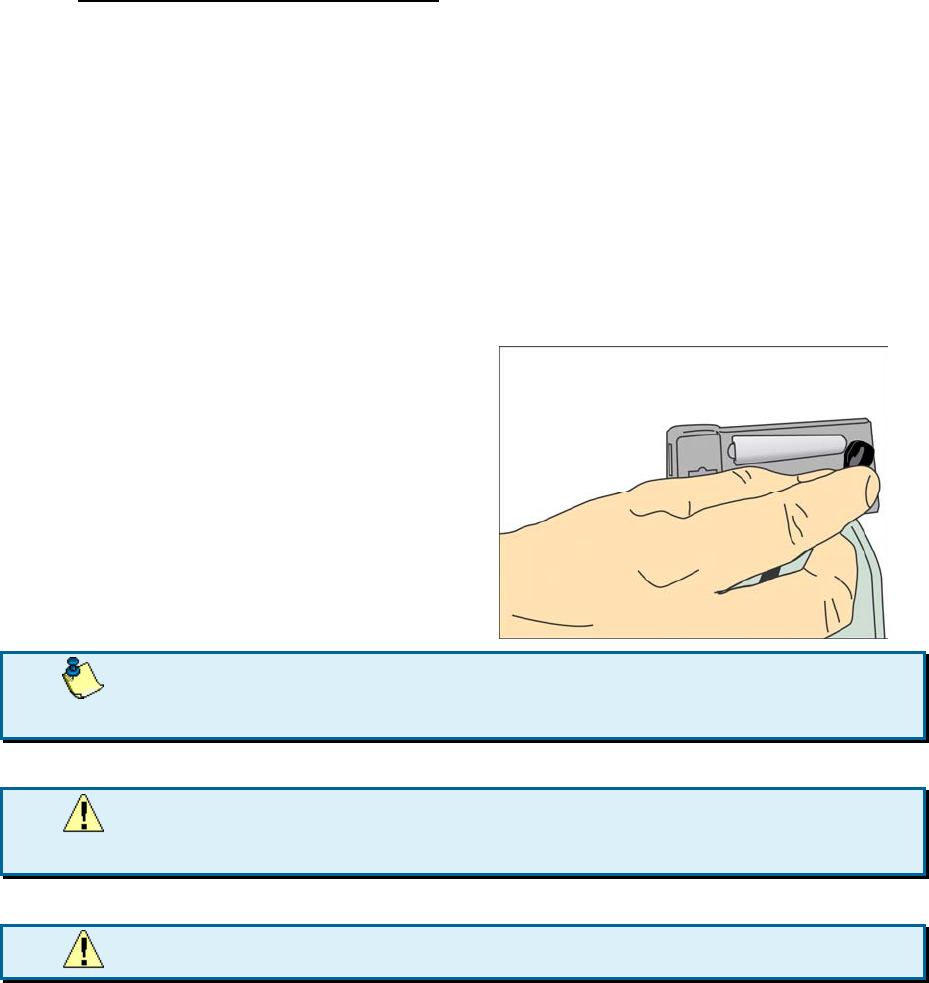
Replacing the Electrodes
The electrodes on the inside of the cuff and the electrode on the front panel of
the WristClinic™ should be changed approximately every one-year. The
replacement frequency depends on your usage of the WristClinic™. The time to
replace the electrodes is either when they appear to be worn out, or when
measurements are not easily obtainable.
82. Note that there are two types of electrodes: one electrode on
the front panel of the WristClinic™ and four electrodes on the cuff’s
inner side. Replace each electrode with the correct electrode type.
83. Replace the electrodes one at a time. Do not remove all the
old electrodes at once.
To replace an electrode on the WristClinic™:
45. Using a flat screwdriver, remove the electrode from the device or cuff.
46. Place the new electrode in the location of the old electrode and press
down until it fits firmly into place.
Disposal of WristClinic™ Accessories
Disposal of the WristClinic™ and any used batteries must be done in
accordance with the national regulations for the disposal of electronic products.
Storage
Follow the guidelines below for storing your WristClinic™:
¥
¥
Keep the WristClinic™ device in the storage case, protected from
extreme temperatures and humidity.
¥
¥
Remove the batteries from the WristClinic™ if you are not using it for
an extended period of time (two months or more).
¥
¥
Keep the WristClinic™ away from electro-magnetic emitting devices,
such as portable phones.
Troubleshooting
The following are possible error indications:
Error
Messag
e
Description What to do
CHECK
ABORTE
D
The check was
aborted in the
middle of the
measurement.
Redo the check to
obtain an accurate
measurement
CHECK
FAILED
The finger was not
detected on the
ECG electrode.
Restart the check and
place your finger firmly
on the ECG electrode.
HIGH
TEMP
The temperature
measurement was
above 43 °C
(109.4 °F).
Take another
temperature reading in
the mouth. If a high
temperature is
indicated again,
contact your physician.
Error
Messag
e
Description What to do
LOW
TEMP
The temperature
measurement was
below 35 °C (95 °F).
Verify that the tip is
inserted fully into its
socket.
Make sure to position
the tip correctly (refer to
Placing the
Thermometer on
page 24.)
NO
FINGER
The finger was not
detected during
ECG and ECG and
breath
measurement
checks.
Verify that the device is
firmly attached to your
wrist. Place your index
finger firmly on the
electrode.
If the error message
keeps reappearing, wet
your finger with tap
water.
REPLACE
BATTERY
Indicates low
battery.
Replace batteries with
new 1.5 V AAA batteries
Error
Messag
e
Description What to do
SENDING
FAILED
The measure-ments
were not sent to the
gateway.
If you are not
connected to a
gateway, ignore this
message.
If you are connected to
a call center, contact
the call center.
If you are connected to
a MiniGate, verify that
your device is allocated
to your gateway, as
described in the
MiniGate User Guide. If
you allocated your
device and you are still
receiving this message,
contact your service
provider.
TEST
FAILED
When powered up,
WristClinic™
performs a self test.
Contact your service
provider.
USER
EMPTY
There are no
measure-ments for
the user in memory.

Spare Parts and Accessories
The following accessories are available for the WristClinic™:
¥
¥
Batteries
¥
¥
Thermometer probe
¥
¥
Hygienic sheaths for use with the thermometer
¥
¥
Electrodes
¥
¥
External finger pulse oximeter

Specifications
Medical Measurements
1 lead ECG Measurement
Pulse 40-200 beat/min
Bandwidth 0.05-40 Hz
Heart rhythm
regularity
detection
Irregular / Regular / Not
available
Measureme
nt time
45 sec.
ECG
Measureme
nt time
30 sec.
Input
dynamic
range
±5 mV
1 lead ECG and Breath Measurement
Breathing 5-35 inhale-exhale/min
Pulse 40-200 beat/min
Heart rhythm
regularity
detection
Irregular / Regular / Not
available
Measureme
nt time
50 sec.
ECG
Bandwidth
0.05-40 Hz
ECG
Measureme
nt time
30 sec. (simultaneous with
breath)
Input
dynamic
range
±5 mV
Measuring
Accuracy
Pulse ±3.5 beats/min for 67%
±7.0 beats/min for 95%

Breathing ±3 cycles/min for 67%
±6 cycles/min for 95%
Thermomete
r
Temperature
range
35.0 °C -43.0 °C, Temp<35.0
°C display “LOW TEMP”
Temp>43.0 °C display “HIGH
TEMP”
Temperature
accuracy
±0.1 °C between 35.5 and
42.0 °C ambient
temperature 18°C to 28°C.
The manufacturer
recommends verifying the
accuracy by an authorized
laboratory every 2 years.
Standard prEN12470-3: 1997, and
ASTM-112E
Measureme
nt time
App. 60 sec.
Blood
Pressure
Measureme
nt method
Fully automatic
Oscillometric measurement
for measurement on the
wrist.
Measureme
nt range
Pressure:
0 – 299 mmHg
Pulse:
40 – 180 /minute
Accuracy Pressure: +/- 3 mmHg or 2%,
whichever is greater
Pulse: +/- 5%
Measurable
circumferen
ce of wrist
13.5 – 21.5 cm

External
Pulse
Oximeter
Measureme
nt range
SpO2: 0 – 100%
Pulse: 18 - 300 pulses/min
Accuracy
(± 1
Standard
Deviation)
SpO2: 70 -100%± 2 digits for
adults
Pulse: ± 3%± 1 digit
Measureme
nt time
30 seconds, reading every 5
second cycles
Internal
Pulse
Oximeter
Measureme
nt range
SpO2: 70 – 99%
Pulse: 40-250 beat/min
Accuracy SpO2: +/- 3 digits
Pulse: +/- 3%
Measureme
nt time
30 seconds, reading every 6
second cycles
Electronics
Processor TI MSP430 micro controller
RF
communicat
ion
Frequency 433.92 MHz/ 868.3 MHz/ 915
MHz
Depends on domestic
regulation

Max
transmission
power
+10 dBm
@ 433.92 MHz (E.R.P)
+8 dBm
@ 868.3 MHz (E.R.P)
-1 dBm
@ 915 MHz (E.I.R.P)
Bandwidth 60 kHz
Transmission
range
App. 200 m (free space)
Mechanical & Environmental
Operating
Temperature
and
humidity
+10°C to +40°C, 30 to 85%
RH
Storage
Temperature
and
humidity
-10°C to +55°C, 10 to 95% RH
Power
Supply/bat
Power Two LR03 batteries (AAA)
Maximum
Internal
Voltage
4.5V

FCC Part 15 Information
This equipment has been tested and found to comply with the limits for a Class B
digital device, pursuant to Part 15 of the Federal Communication Commission
(FCC) Rules. These limits are designed to provide reasonable protection against
harmful interference in a residential installation.
This equipment generates, uses, and can radiate radio frequency energy and if not
installed and used in accordance with the instructions, may cause harmful
interference to radio communications. However, there is no guarantee that
interference will not occur in a particular installation. If this equipment does cause
harmful interference to radio or television reception, which can be determined by
turning the equipment off and on, the user is encouraged to try to correct the
inference by one or more of the following measures:
♦ Reorient or relocate the receiving antenna.
♦ Increase the separation between the equipment and receiver.
♦ Connect the equipment to an outlet on a circuit different from that to which the
receiver is connected.
♦ Consult the dealer or an experienced radio/TV technician for help.
Warranty
This product is warranted against defects in material and workmanship beginning
from the date of shipment for a period of one year (the “Term”).
Under the Term, the obligation of Telcomed Advanced Industries Ltd (the
“Company”) will be limited to repair or replacement of the product (not including
batteries, cables and spendable parts), according to the Company’s discretion.
Such repair or replacement will be made only after the Company’s examination
determines that said product is defective in material and/or workmanship.
This product warranty is void if the product has been repaired or altered in any way
as to affect its use and operation as determined by the Company. This warranty is
also void if the product has been subjected to abuse, misuse, negligence or
accident.
No warranties, whether expressed or implied, shall exist beyond the Term.
WristClinic AIO67
Tested To Comply
With FCC standards
FOR HOME OR OFFICE USE
Under no circumstances shall the Company be responsible for any loss of data or
income or any special, incidental, consequential or indirect damages, arising from
the product or its operation, howsoever caused.
Under no circumstances the Company will be liable for any claim arising from the
product or its operation in excess of the total price paid for this product.
The Company reserves the right to make changes and improvements to the product
without prior notice.