Megaview Digitech MS2 HD Camera Glasses with Bluetooth Headset User Manual MS2 Bluetooth Quick Start Guide
Megaview Digitech Limited HD Camera Glasses with Bluetooth Headset MS2 Bluetooth Quick Start Guide
Users Manual
/
/
/
/
/
/
/
/
/
/
/
/
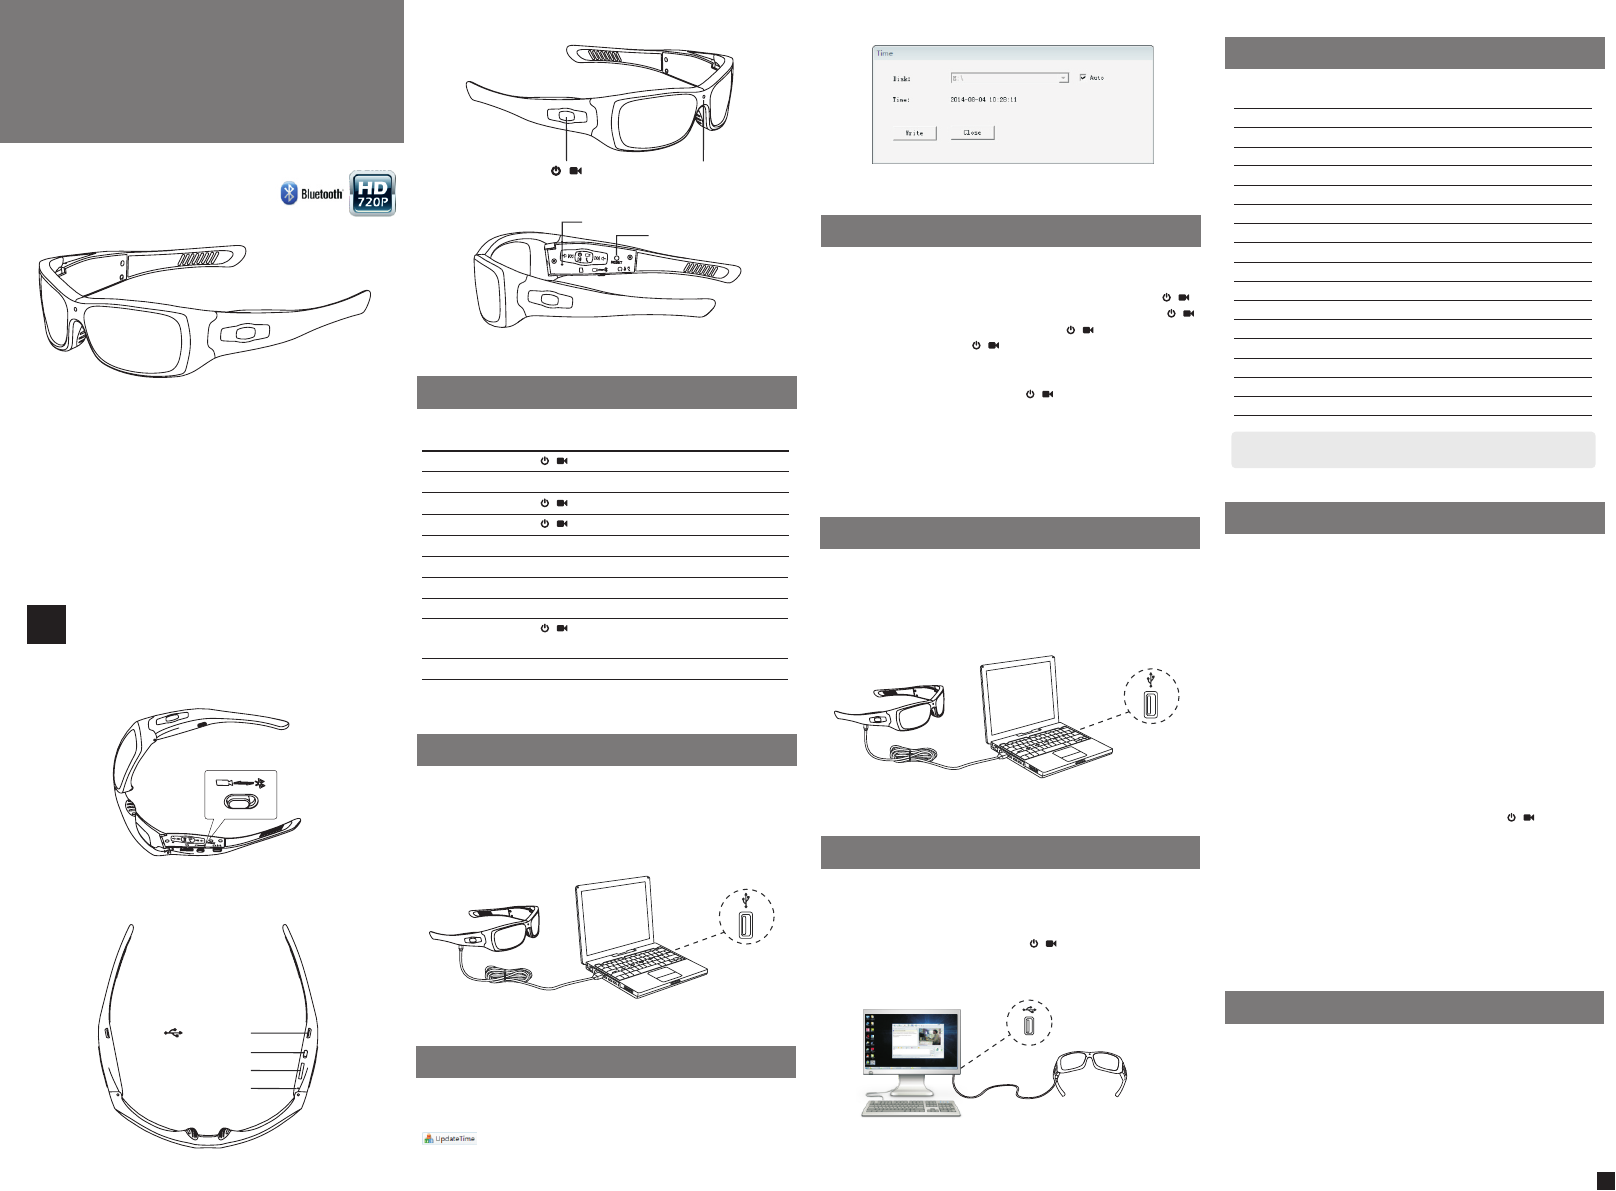
Use the supplied USB cable to connect your glasses to a running
computer and charge the glasses. The indicator shows solid red
during charging.
Allow to charge for a minimum of 2 hours (until the indicator light
turns solid green.)
Connect the Glasses to your computer, find out and open the
“Update time” folder in the glasses memory. Run the “updatetime.exe”
program and click “Write” to updating time on the glasses.
Quick Start Video Recording
The Glasses enable quick start recording, Just press and hold
to turn on the glasses, the recording starts automatically. Press
again to save and entre pause mode, press again to continue
recording. Press and hold to save video and turn off.
Take a Photo
During video recording, double click to take a photo.
User friendly and power saving features:
During 180 seconds pause mode, If no further operation, the Glasses
will automatically turn off for power saving.
Connect MegaSight to your computer. The device appears as a USB
mass storage device in Windows Explorer. Open the VIDEO folder in
the storage device, copy or cut the video files to your local hard disk.
Play the videos with “Windows Media Player” or other supported
media player.
USB PORT
The web camera function of Glasses is plug and play supported.
No need to install any driver manually.
PC Camera is not available for Mac OS.
Connect Glasses to your computer. The USB mass storage device
appears in Windows Explorer. Press then the blue indicator
turns on and enter PC Camera mode.
Press RESET to return USB mass storage device mode.
Lens
Camera
View Angle
Video Format
Audio Recording
Memory
Bettery
Input Power
Charging Time
Optional Charger
Battery Working Time
Interface
Operation System
Operation Temperature
Operation Humidity
Weight
Dimension
Note: Specifications are subject to minor change with upgrade and
update. Please base on real object.
Unable to turn on Glasses
Check the battery power. Recharge the battery if the power
exhausted.
Unable to take video
Please check if the memory is full. Delete or copy the old video files
to your computer hard disk.
Auto shut-off
Check the battery power. Recharge the battery if the power
exhausted.
If auto shut-off on Video Recorder mode, check if the memory is full.
Delete or copy the old video files to your computer hard disk.
USB mass storage device is not found in Windows Explore
Check if the USB connection is fine.
If the blue indicator turns on, You possibly pressed button
and switched Megaight to Web Camera mode. Press RESET button
to return USB mass storage device mode.
Resetting
Most problems can be solved by resetting. Simply press RESET
button on the right arm.
Resetting will not erase the videos or other files stored in memory.
If the reset procedure does not work, charge the battery and try
again.
Status Controls Indicator
Power On
Take Video
Stop Recording
Power Off
Charge
Fully Charged
Memory Full
Low Battery
PC Camera
Reset
Flash Red to solid Blue
Solid Blue
Solid Red
Flash Red/Blue to Off
Solid Blue
Solid Green
Flash Red/Blue to Off
Flash Red/Blue to Off
Solid Blue
Press and hold for 3 sec
Auto Recording after Power on
Press
Press and hold for 3 sec
Connect to a PC or Mac USB port
(Connected with USB)
(Automatically Power Off)
(Automatically Power Off)
Press and hold for 3 sec
(Not available for Mac OS)
Press the RESET button
Camera
Indicator light
Polarized lens, UV400
5.0Mega Pixels color CMOS
64°
AVI (1280x720@30fps)
Stereo Sound
Micro SD Card Max 32GB
350mAh 3.7V Li-ion Polymer Battery
DC 5V, 500mAh
2hrs by computer USB Charge (approx.)
AC Adaptor, Car Charger
2.5 hours recording after fully Charged
USB2.0
Windows XP / Vista / Win 7/ 8 / Mac OS
0~40°C
15~85%RH
53g (without speakers)
W*D*H 161x164x45mm (approx.)
For the first time using, please charge the battery for 3 hours until
the indicator turns solid green.
If the battery is exhausted, please recharge the battery as soon as
possible.
If you don't use the glasses for a long time, please fully charge the
battery to avoid battery damage from over discharge.
USB PORT
USB PORT
Reset
MS2 Bluetooth
Video Recorder & Bluetooth Headset
Quick Start
User Guide
Please switch the function mode into Video Record Mode
before operate.
Video Recorder Mode
1
Micro 5Pin USB
Switch Button
Micro SD Card
MIC
Controls
Update Time
Charge
Take a Video/Photo
Specifications
Download and Play Videos
PC Camera
Trouble Shooting
User the battery properly
Status Controls Indicator
Discover/
Search...
MS2 Bl ue tooth
****
0000
Ready Set Connect
1. Ready
2. Set
3. Connect
First time connection:
Pairing is the set-up process of introducing your headset to your
phone. Before using your headset for the first time, you must pair it
with your Bluetooth-enabled phone.
Press and hold for 3 seconds, RED and BLUE lights flash to
indicate pairing mode.
" "
1
Activate the bluetooth feature on your phone,then use phone menus
to add , search or scan new Bluetooth devices.
For Example:
" " " " " "
iPhone: Setting > General > Bluetooth: On(Start the search for
devices)
Andriod: Setting > Wireless & Networks > Bluetooth: On > Scan for
devices
BlackBerry: Setting/options > Bluetooth: On > Search for devices
Select "MS2 Bluetooth" from the list of Bluetooth devices shown on
you phone.
If phone asks for a passcode, enter four zeros (0000). You may see
**** on screen.
Some phone also ask to confirm headset connection after pairing.
Headset LED will stop flashing red/blue once successfully paired /
connected.
You can now make a call using your phone keypad.
Talk Time
Standby Time
Music Playing Time
Operating Distance
Charge Connector
Battery Type
Charge Time
Power Requirements
Bluetooth Version
Bluetooth Profiles
Operating Temperature
Storage Temperature
Charging Temperature
Lense
Weight
Dimension
Up to 10 hours with 50% Volume
Up to 10 days
Up to 10 hours with 50% Volume
Up to 33 feet (10 meters), Class II
Micro 5Pin USB charging
350mAh 3.7V Lithium-ion Polymer Battery
2 hours for full charging by PC USB port
DC 5V, 500 mAh
Bluetooth V3.0
A2DP V1.2, Hands-free (HFP) V1.6,
Headset (HSP) V1.2, AVRCP V1.4
0 40
Polarized lense, UV400 protection
~C
0~40C
0~40C
53g (without speakers)
W*D*H 161x164x45mm (approx.)
My headset
does not work
with my phone.
My phone did not
locate the headset.
I cannot hear
caller/dial tone.
Callers cannot
hear me.
Make sure the headset is is fully charged.
Make sure you are trying to pair to a Bluetooth
enable phone
Turn both your phone and headset off and on,
and then repeat the pairing process.
The headset is not turned on. Press button
for approximately 3 seconds until you hear the
voice saying "Power On".
Your headset is out of range. Move the headset
closer to the Bluetooth phone.
The listening volume is too low. Increase the
volume by press button.
Your headset is out of range. Move the Headset
closer to the Bluetooth phone.
Check that you have not activated the mute
feature
1
2
Press and hold for 3 seconds
Press and hold for 3 seconds
1 tap
1 tap
2 taps
Short press for play/pause music
Press / for +/- volume
Press and hold / for 2 seconds
Press and hold for 4 seconds
Connect to a PC or Mac USB port
(Connected with USB)
1
1
1
1
1
1
2 3
2 3
1
BLUE TOOTH BLUE TO OTH
PASSK EY
PRINTED IN CHINA
/
1
2
3
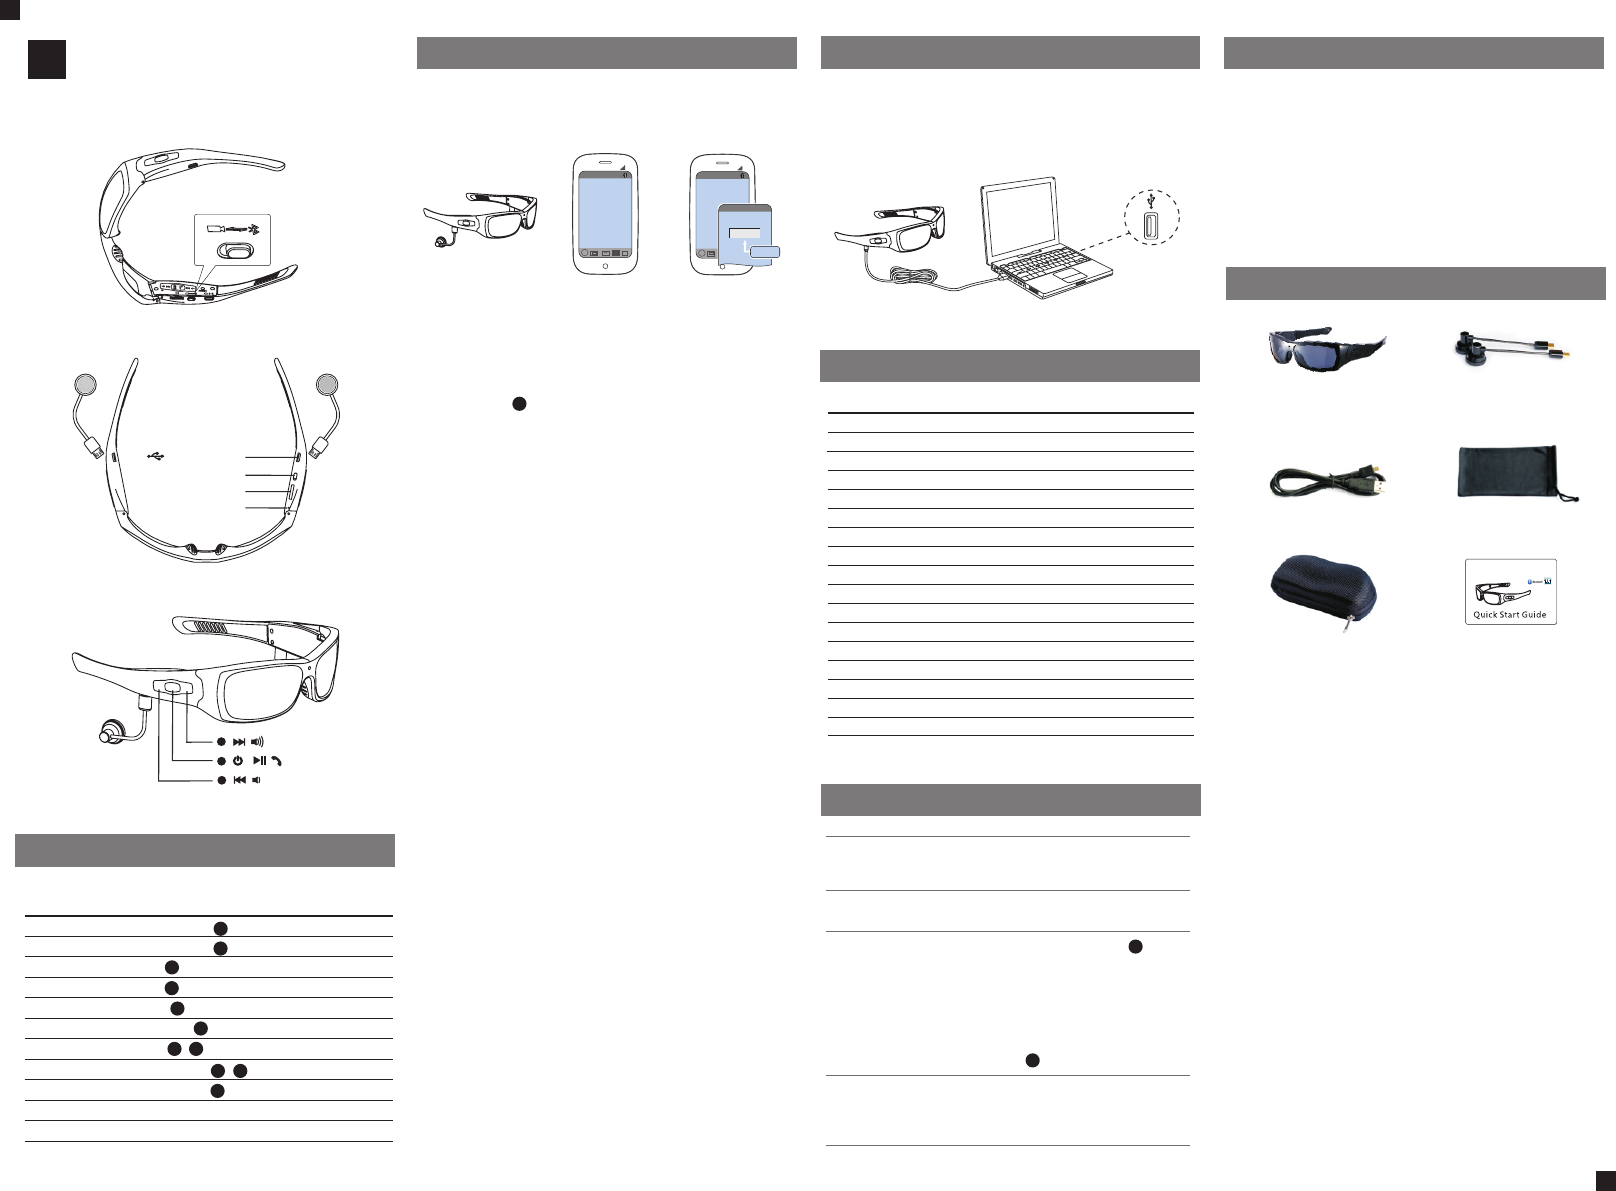
Please plug in the speakers and switch the function mode into
Bluetooth Headset Mode before operate.
Use the supplied USB cable to connect your glasses to a running
computer and charge the glasses. The indicator shows solid red
during charging.
Allow to charge for a minimum of 2 hours (until the indicator light
turns solid green.)
MS 2 Bluet ooth
Vid eo Reco rder & Bl uetoo th Head set Sun glass es
MS2 Bluetooth
Carrying case
Stereo Headset
USB Cable Carrying bag
Quick Star Guide
Bluetooth Headset Mode
1 For the first time using, please charge the battery for 3
hours until the indicator turns solid green.
.
2.If the battery is exhausted, please recharge the battery as
soon as possible.
3.If you don't use the glasses for a long time, please fully
charge the battery to avoid battery damage from over
discharge.
Power on
Ready for Pairing
Take a call
Hung off
Redail
Play / Pause
Volume + / -
Next / Previous song
Turn off
Charge
Fully Charged
2
USB PORT
Micro 5Pin USB
Switch Button
Micro SD Card
MIC
Flash Green
Flash Red&Green
Flash Red to Off
Solid Red
Solid Green
In the box
Use the battery properly
Trouble Shooting
Pairing and Connecting Charge
Specifications
Controls

FCC Information and Copyright
This equipment has been tested and found to comply with the limits for a Class B digital device,
pursuant to part 15 of the FCC Rules.
These limits are designed to provide reasonable protection against harmful interference in a residential
installation. This equipment generates,
uses and can radiate radio frequency energy and, if not installed and used in accordance with the
instructions, may cause harmful interference
to radio communications. However, there is no guarantee that interference will not occur in a particular
installation. If this equipment does
cause harmful interference to radio or television reception, which can be determined by turning the
equipment off and on, the user is
encouraged to try to correct the interference by one or more of the following measures:
—Reorient or relocate the receiving antenna.
—Increase the separation between the equipment and receiver.
—Connect the equipment into an outlet on a circuit different from that to which the receiver is
connected.
—Consult the dealer or an experienced radio/TV technician for help.
15.19 Labelling requirements.
This device complies with part 15 of the FCC Rules. Operation is subject to the
following two conditions:
(1)This device may not cause harmful interference, and
(2) this device must accept any interference received, including interference that may
cause undesired operation.
changes or modifications not expressly approved by the party responsible for compliance could
void the user's authority to operate the equipment.
FCC RF warning statement: the device has been evaluated to meet general RF exposure
requirement , The device can be used in portable exposure condition without restriction.