Megavision MV142AB TFT LCD MONITOR User Manual 0707 MV141 eng
Megavision co., Ltd. TFT LCD MONITOR 0707 MV141 eng
UserManual.wiki
>
Megavision
>
MV142AB User Manual
USERS MANUAL
Navigation menu
Upload a User Manual
Namespaces
Wiki Guide
HTML
PDF
Info
Views
User Manual
Discussion / Help
Navigation

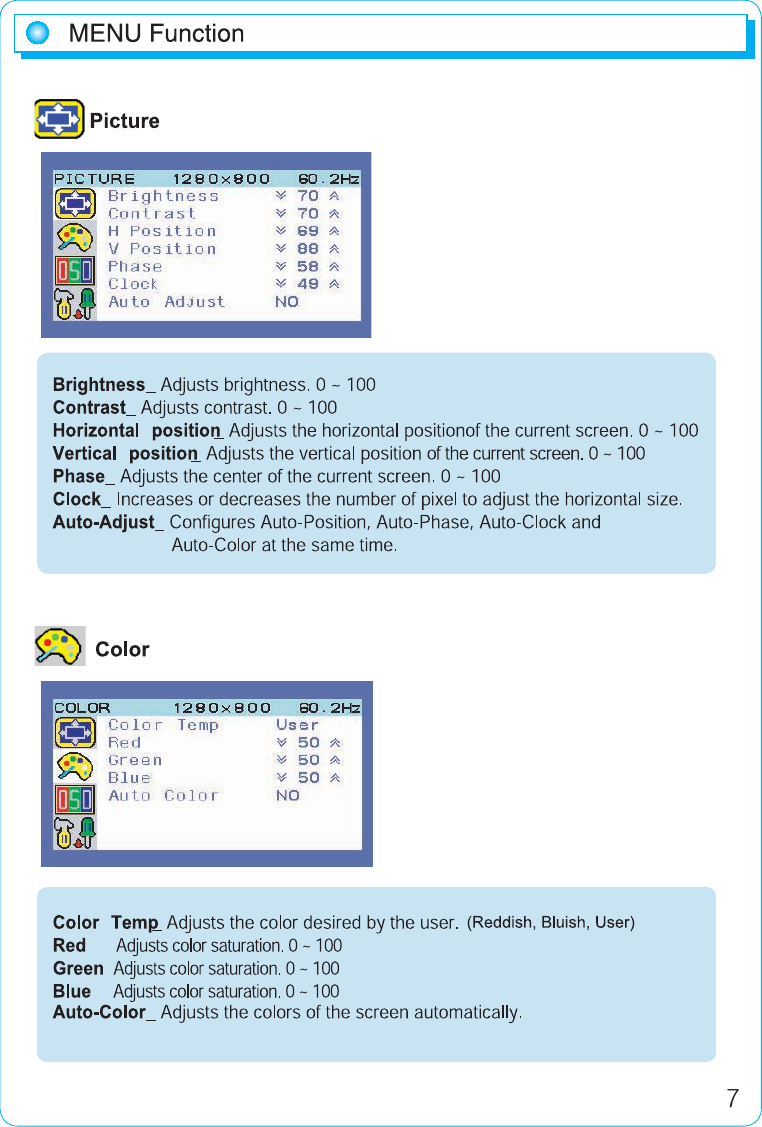
![{G{GGGGTGUpGGG¡GGG ZWo¡GG \`o¡GGGG \]o¡GG^Wo¡UGkGGGGGSGGGGGGG¡GG¡UG{GGGGGXWGGGGGGGGUG{GGGGGUzG{GGGGGGkTz|iGUGjGGGGGGGGGU{GkGGGGGGGGGGGGGUuXWlun¿1SFTFU 3FTPMVUJPO 'SFRVFODZ $MPDL.)[1PMBSJUZ)7)PSJ[POUBM 7FSUJDBM )PSJ[POUBM 7FSUJDBM7(" . L)[ )[ 7&4". L)[ )[ . L)[ )[ . L)[ )[ . L)[ )[ . L)[ )[ . L)[ )[ ."$ . L)[ )[ . L)[ )[ . L)[ )[ ](https://usermanual.wiki/Megavision/MV142AB/User-Guide-815546-Page-11.png)
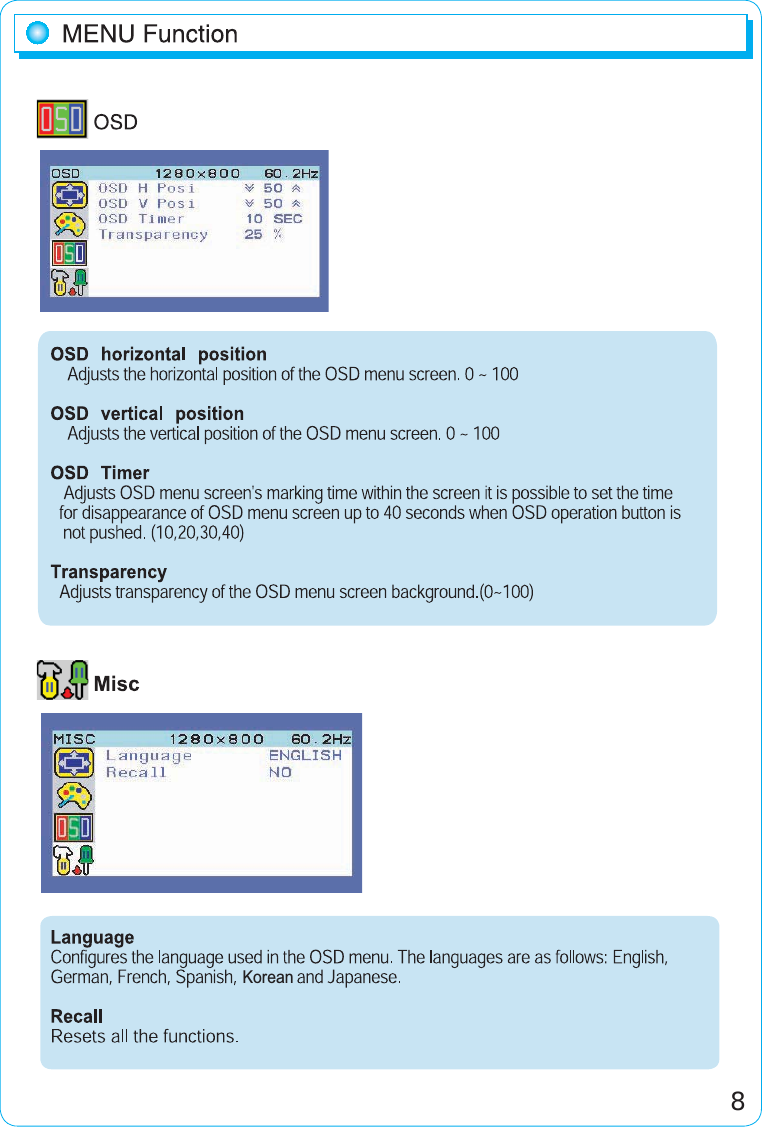
![XXwGwGsjkhGGjGGiyGk~sVy{U{Uwjtpvj{oh{ozGVGwpGzwX\TGkTz|iGqGzmZWZUZGOoPGGX_`U]GO}Ptjj}VwzG¡{{GGGGGGGGGGGGGGGGGGGGUYnGzGhTGjGj`W¶ VG]W¶ZWWGaGXX_\VpitG{SGh{SGZ_]SG[_]SGwGGwzVYGGOG}nhGGGXY_WGG_WWGg^Wo¡PXY_W_WWGgG^Wo¡GO]Wo¡GGGPhjGXWWTY[WG}SG\WT]WGo¡GkjGXYG}GXZ~OthPZY¶mG¥GXW[¶mGOW¶jG¥G[W¶jP{GXWSWWWGT[¶mG¥GX[W¶mGOTYW¶jG¥G]W¶jPZ[ZO~PGGY\YOoPGGX[WOkPXUXGVGYUWX[IGGGG{m{GO{Gm{PGhGtGwWUYZ^OoPGGWUYZ^O}PGGGyniGGGGGY]YSX[[GkjRXY}Gp\LGyoG¥G`WLGyoGOGPYWLGyoG¥G`WLGyoGOGP](https://usermanual.wiki/Megavision/MV142AB/User-Guide-815546-Page-12.png)