Micro Star MS6852 WIRELESS 11g + BLUETOOTH COMBO PCI CARD User Manual 6834
Micro Star International Co Ltd WIRELESS 11g + BLUETOOTH COMBO PCI CARD 6834
UserManual.wiki
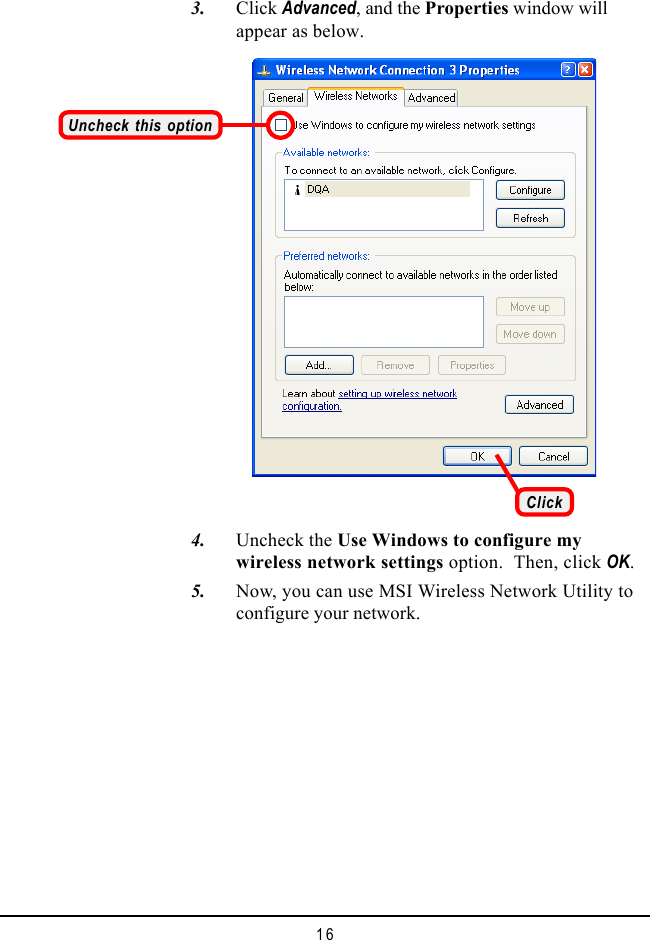
>
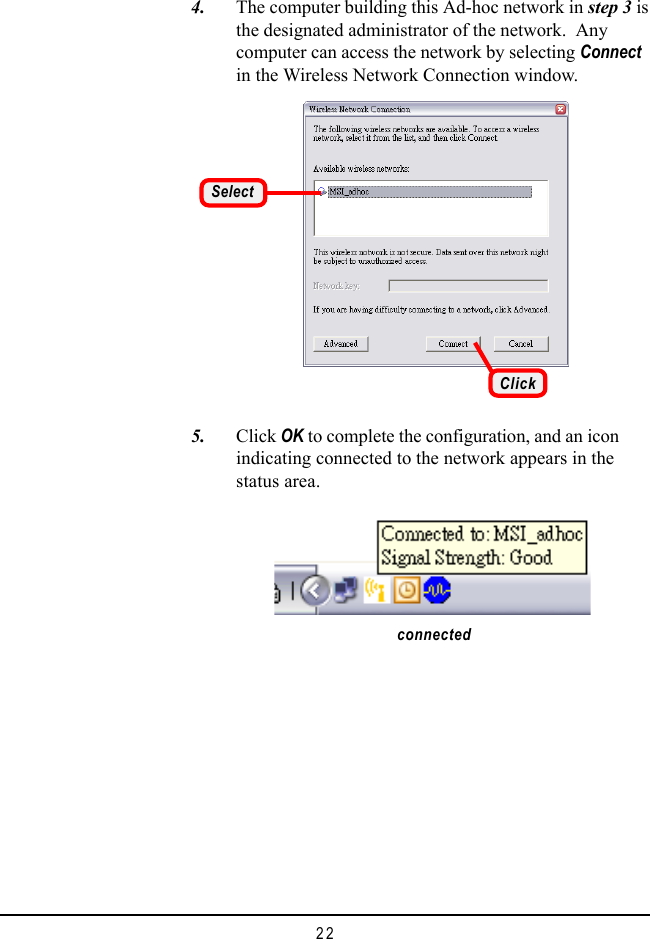
Micro Star
>
MS6852 User Manual
USERS MANUAL
Navigation menu
Upload a User Manual
Namespaces
Wiki Guide
HTML
PDF
Info
Views
User Manual
Discussion / Help
Navigation
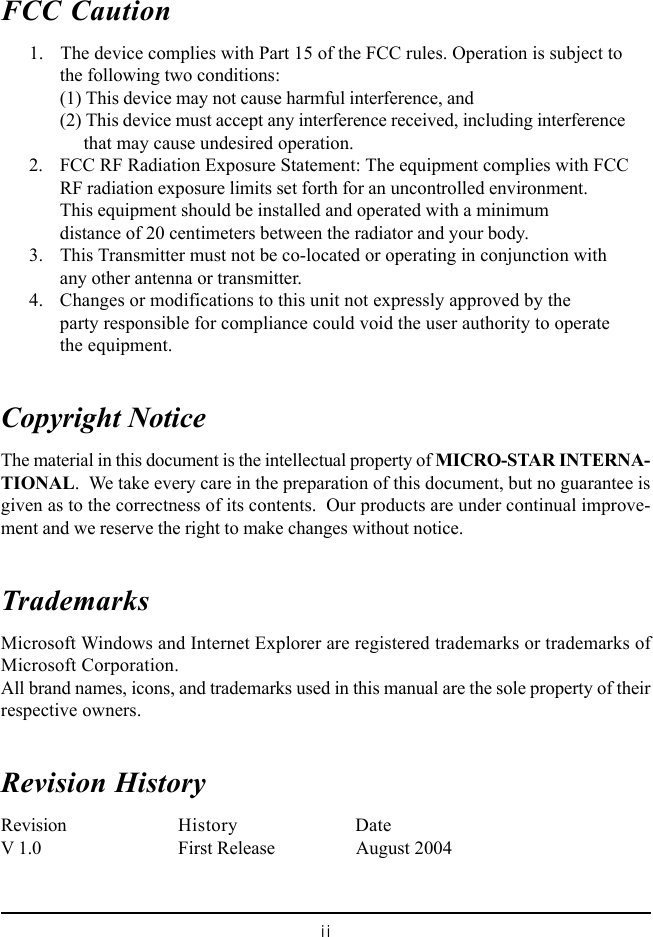


![21 3. Set up the Network Name (SSID) and Network Key(if needed) for the network. Then, check the Thisis a computer-to-computer [ad hoc] network;wireless access points are not used option andclick OK to enable the Ad-hoc mode. 2. You can build up the Ad-hoc network by clickingAdd... in the Preferred Networks field.ClickEnter a NetworkName (SSID).IMPORTANTCheck this to enable Ad-hoc mode.Setup the WEP settingsfor your need.Click](https://usermanual.wiki/Micro-Star/MS6852/User-Guide-471725-Page-25.png)
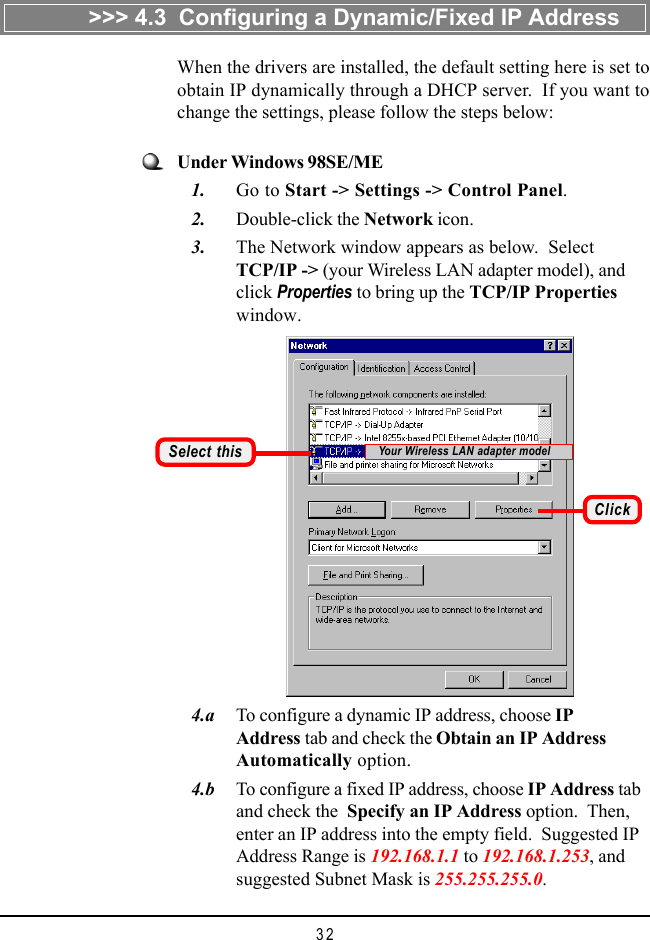
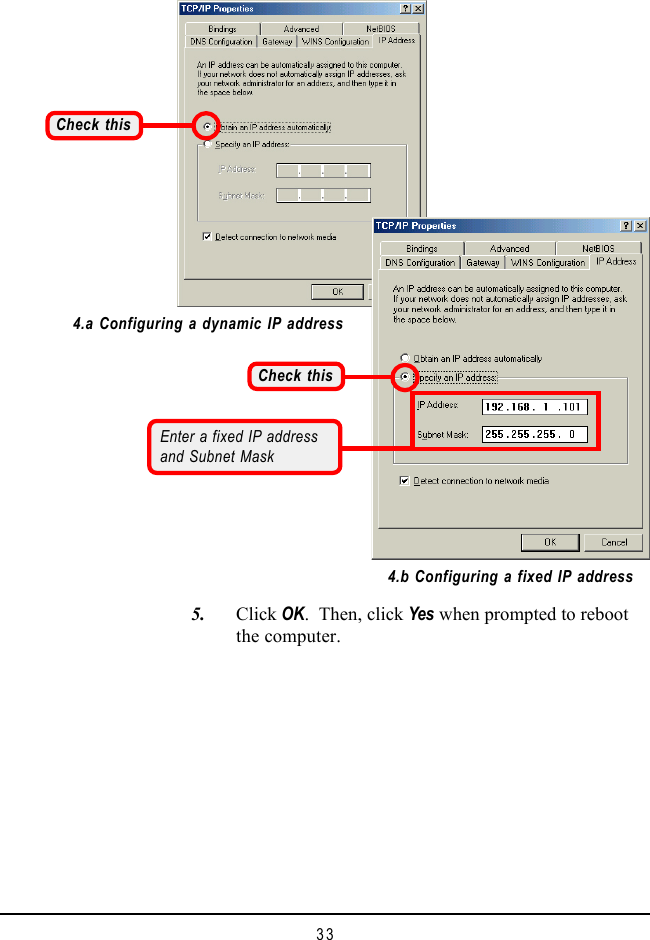
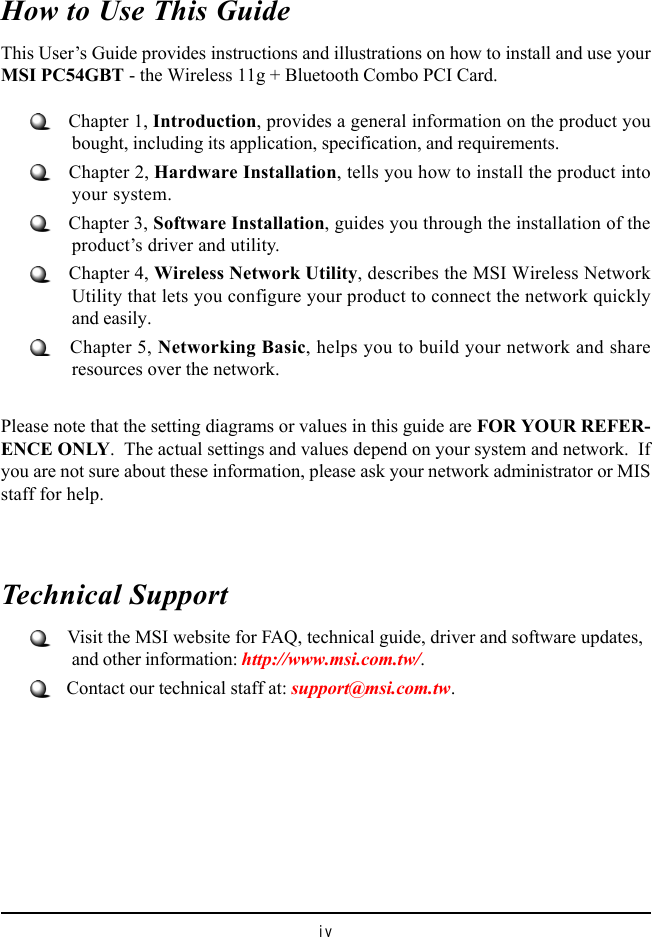
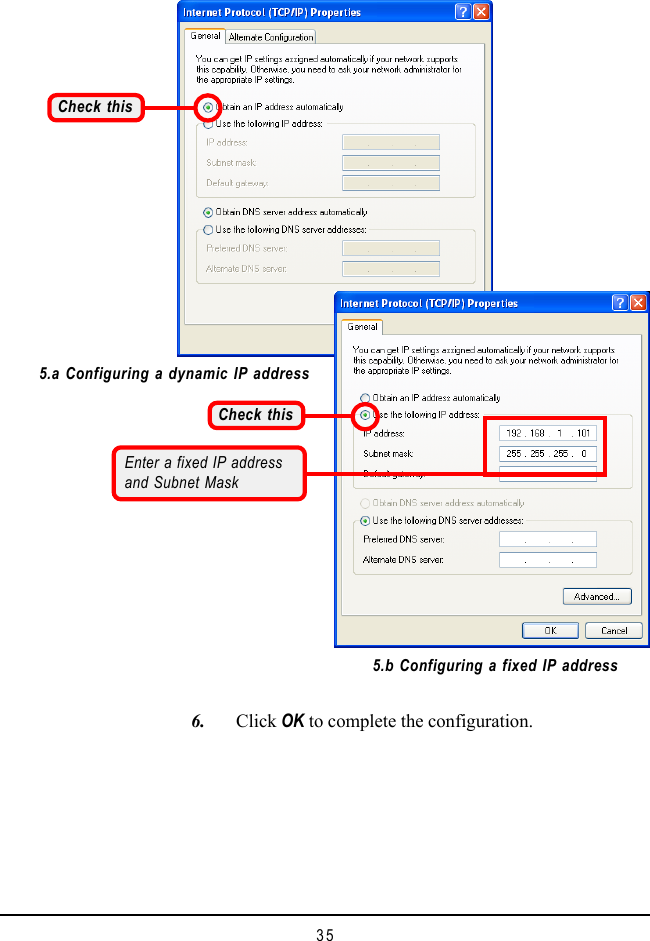
![34 5.a To configure a dynamic IP address, check the Obtainan IP Address Automatically option. 5.b To configure a fixed IP address, check the Use thefollowing IP address option. Then, enter an IPaddress into the empty field. Suggested IP AddressRange is 192.168.1.1 to 192.168.1.253, and suggestedSubnet Mask is 255.255.255.0.Under Windows 2000/XP 1. Click Start and choose Control Panel to open theControl Panel window. 2. Double-click the Network Connection icon to openthe Network Connection window. 3. Right-click the IEEE802.11g Wireless PCI Adaptericon and click Properties from the shortcut menu. 4. When the Wireless Network Connection Proper-ties window appears, choose General tab and selectInternet Protocol [TCP/IP], and click Properties tobring up the Internet Protocol [TCP/IP] Proper-ties window.Select thisClickYour Wireless LAN adapter model](https://usermanual.wiki/Micro-Star/MS6852/User-Guide-471725-Page-38.png)
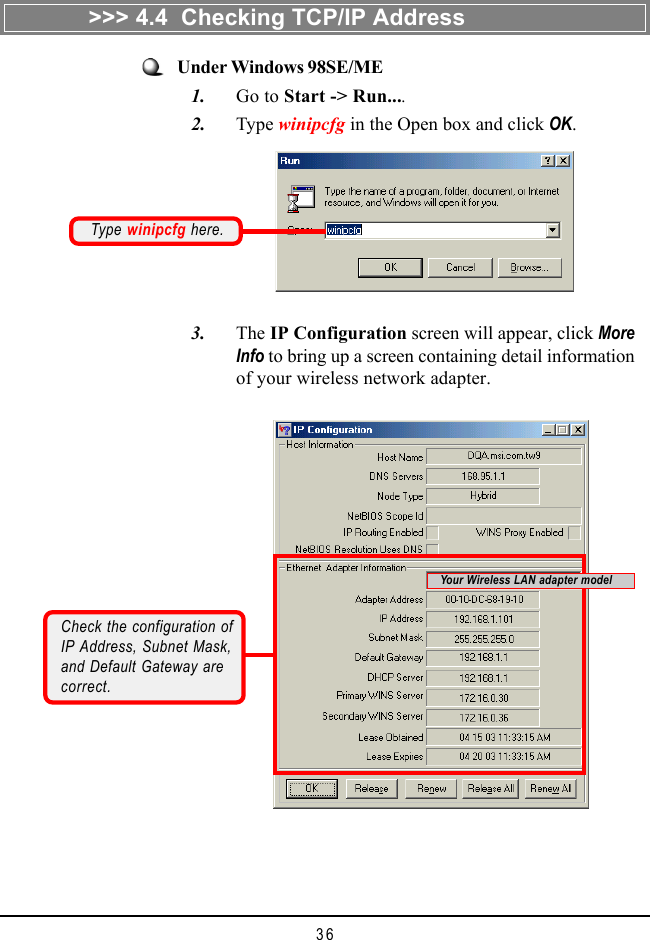
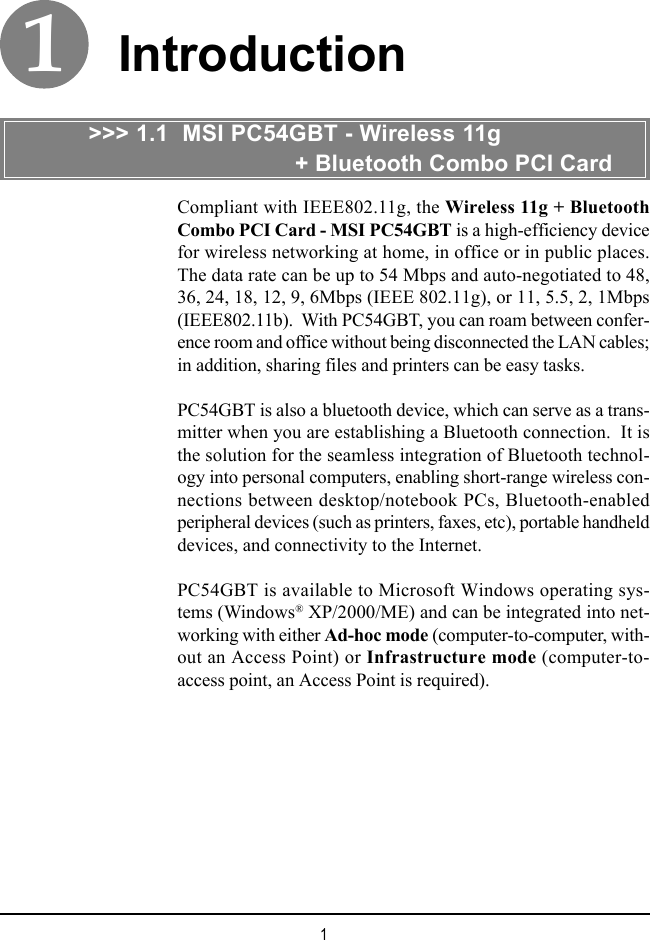
![37Check the configuration ofIP Address, Subnet Mask,and Default Gateway arecorrect.Under Windows 2000/XP 1. Go to Start -> Run.... 2. Type cmd in the Open box and click OK. 3. A DOS prompt window appears. Type ipconfig/alland press [Enter] to display IP information.Type cmd here.Your Wireless LAN adapter model](https://usermanual.wiki/Micro-Star/MS6852/User-Guide-471725-Page-41.png)
![38 1. Go to Start -> Run.... 2. Type command (Windows 98SE/ME) or cmd(Windows 2000/XP) in the Open box and click OK. 3. A DOS prompt window appears. Type ping 210.59.147.160 (or any URL address), which is the IPaddress of the Gateway in this case, and press [Enter].You will get reply if thepinging is successful.>>> 4.5 Checking Connection by Pinging](https://usermanual.wiki/Micro-Star/MS6852/User-Guide-471725-Page-42.png)