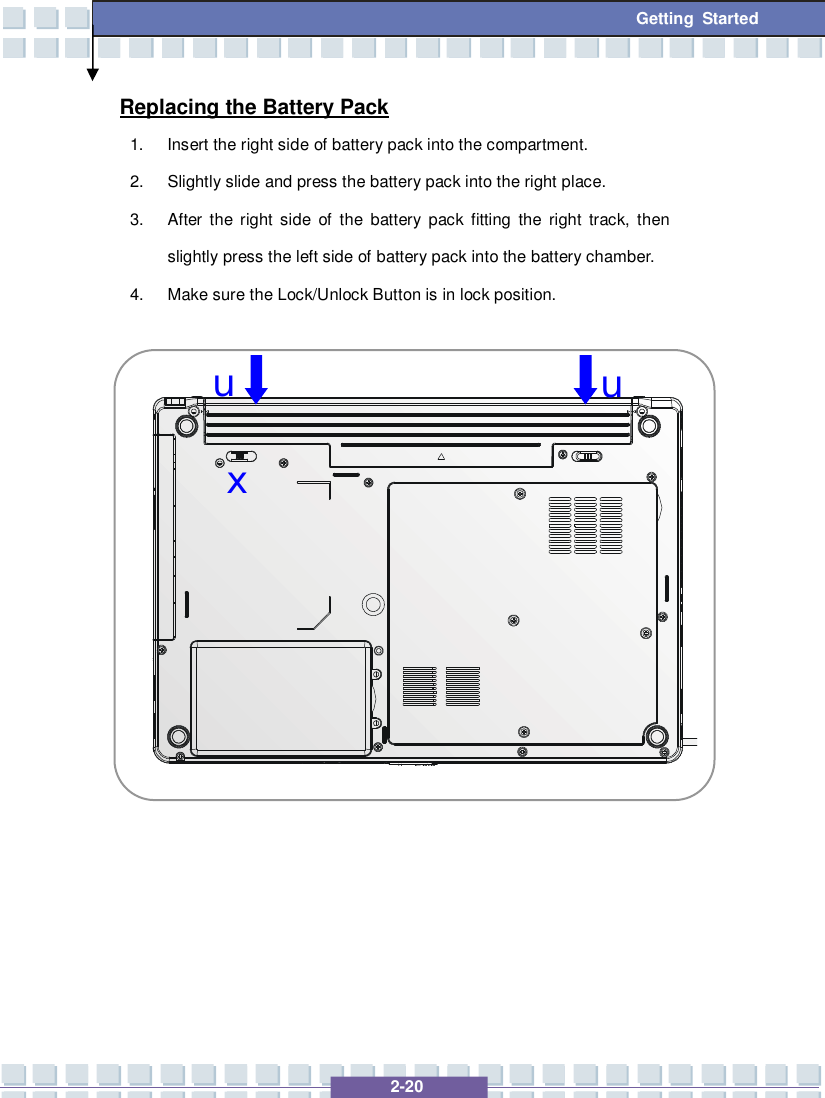
Micro Star MS6855C Notebook User Manual F 2007 Communication 6855C EMI
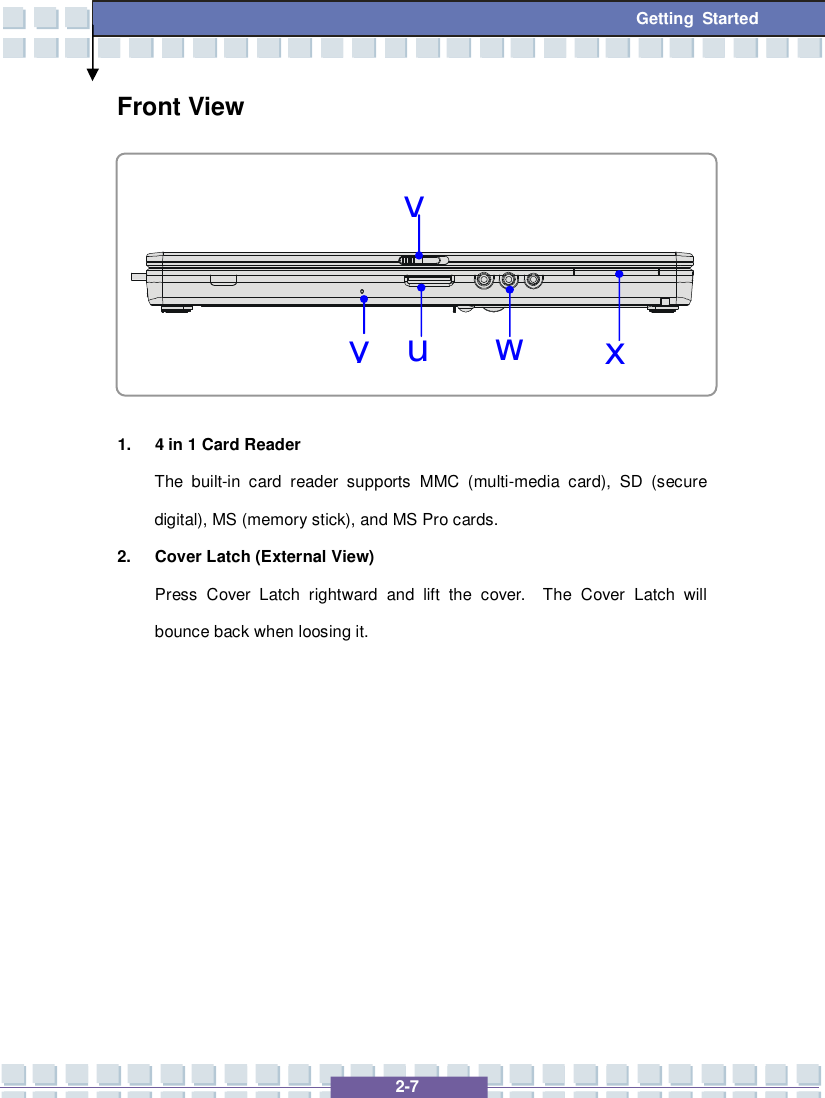
Micro Star International Co Ltd Notebook F 2007 Communication 6855C EMI
UserManual.wiki
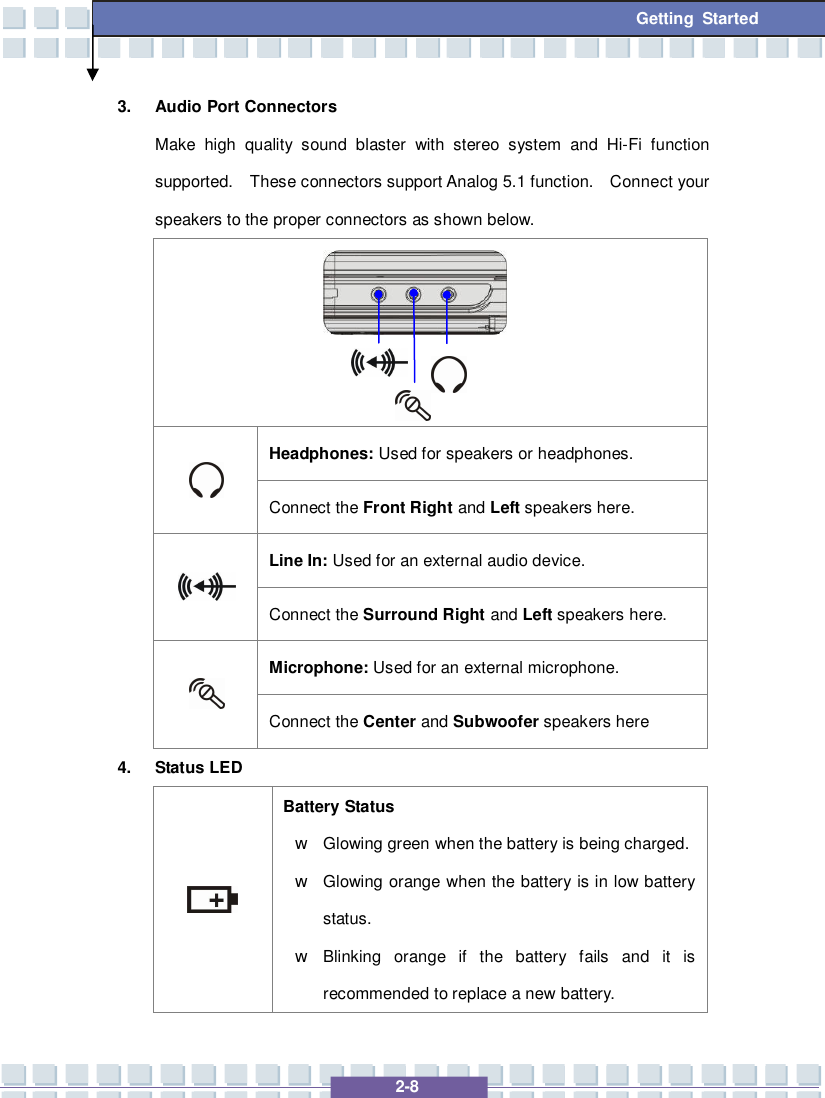
>
Micro Star
>
MS6855C User Manual
>
User Manual 1
Contents
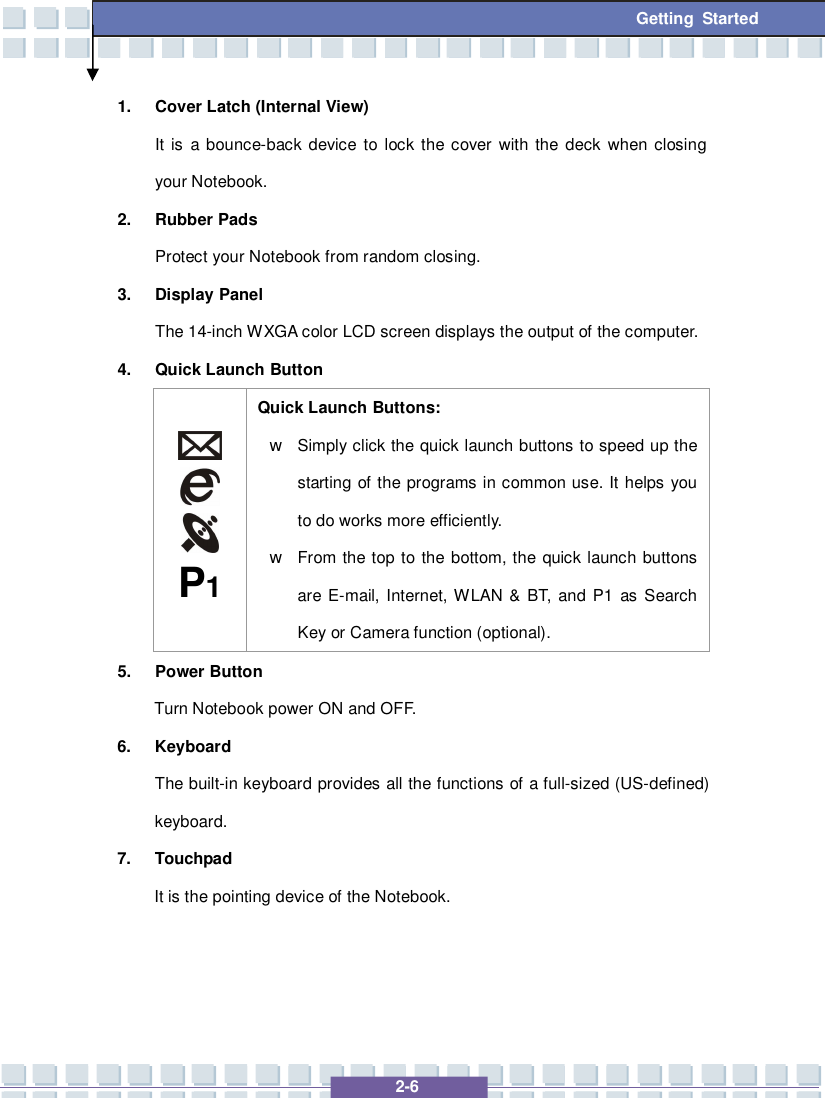
1.
User Manual 1
2.
Users Manual 2
User Manual 1
Navigation menu
Upload a User Manual
Namespaces
Wiki Guide
HTML
PDF
Info
Views
User Manual
Discussion / Help
Navigation


![2-25 Getting Started Knowing the Keyboard The Notebook’s keyboard provides all the functions of a full-sized keyboard and an additional [Fn] key for specific functions on the Notebook. The keyboard can be divided into four categories: Typewriter keys, Cursor keys, Numeric keys and Function keys.](https://usermanual.wiki/Micro-Star/MS6855C.User-Manual-1/User-Guide-779071-Page-59.png)
![2-26 Getting Started Typewriter Keys The function of these Typewriter keys is the major function of the keyboard, which is similar to the keys on a typewriter. It also provides several keys for special purposes, such as the [Ctrl], [Alt] and [Esc] key. When the lock keys are pressed, the corresponding LEDs will light up to indicate their status: n Num Lock: Press and hold the [Fn] key and press this key to toggle the Num Lock on and off. When this function is activated, you can use the numeric keys that are embedded in the typewriter keys. n Caps Lock: Press this key to toggle the Caps Lock on and off. When this function is activated, the letters you type are kept in uppercase. n Scroll Lock: Press and hold the [Fn] key and press this key to toggle the Scroll Lock on and off. This function is defined by individual programs, and it is usually used under DOS.](https://usermanual.wiki/Micro-Star/MS6855C.User-Manual-1/User-Guide-779071-Page-60.png)
![2-27 Getting Started Cursor Keys The keyboard provides four cursor (arrow) keys and [Home], [PgUp], [PgDn], [End] keys at the lower right corner, which are used to control the cursor movement. Move the cursor left for one space. Move the cursor right for one space. Move the cursor up for one line. Move the cursor down for one line.](https://usermanual.wiki/Micro-Star/MS6855C.User-Manual-1/User-Guide-779071-Page-61.png)
![2-28 Getting Started Move to the previous page. Move to the next page. Move to the beginning of the line (or document). Move to the end of the line (or document). The Backspace key, [Ins] and [Del] keys at upper right corner are use for editing purpose. This key is used to switch the typing mode between “insert” and “overtype” modes. Press this key to delete one character to the right of the cursor and move the following text left for one space. Press this key to delete one character to the left of the cursor and move the following text left for one space.](https://usermanual.wiki/Micro-Star/MS6855C.User-Manual-1/User-Guide-779071-Page-62.png)
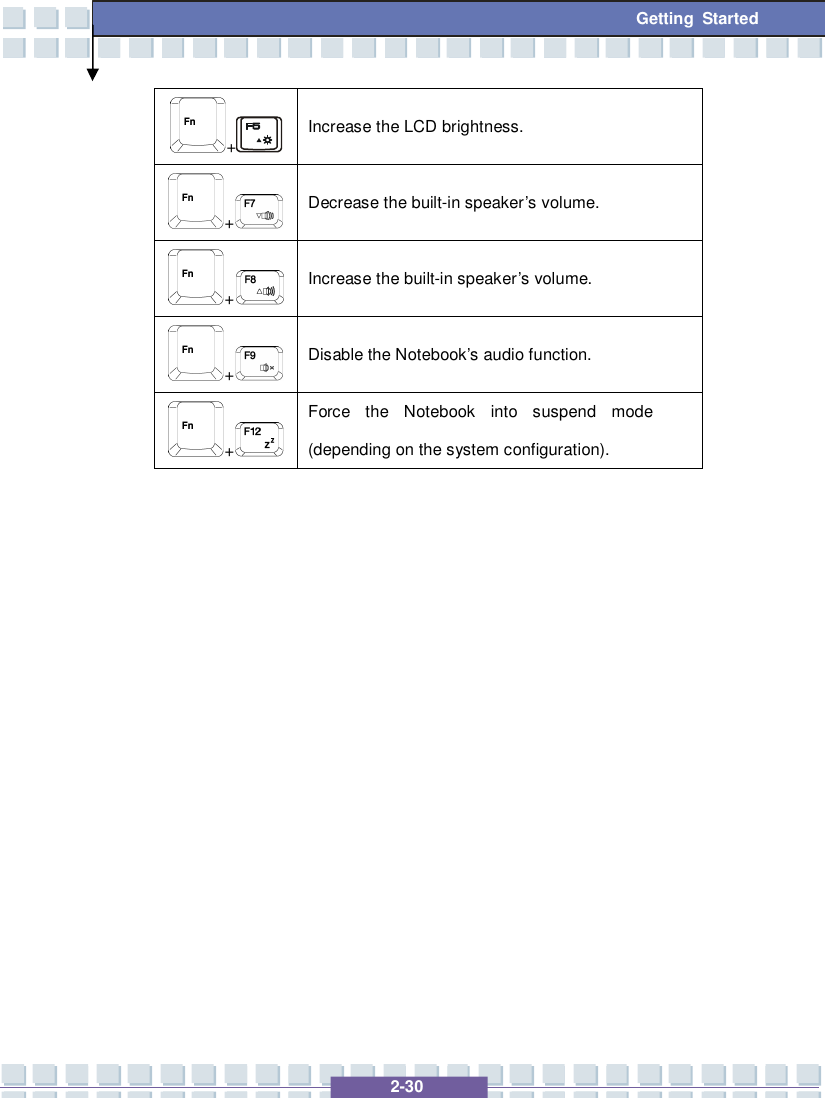
![2-29 Getting Started Numeric Keys The keyboard provides a set of numeric keypad, which is embedded in the typewriter keys. When the Num Lock is activated, you can use these numeric keys to enter numbers and calculations. Function Keys n Windows Keys You can find the Windows Logo key ( ) and one Application Logo key () on the keyboard, which are used to perform Windows-specific functions, such as opening the Start menu and launching the shortcut menu. For more information of the two keys, please refer to your Windows manual or online help. n [Fn] Key + Switch the display output mode between the LCD, external monitor and Both. + Disable/enable Touchpad. + Decrease the LCD brightness.](https://usermanual.wiki/Micro-Star/MS6855C.User-Manual-1/User-Guide-779071-Page-63.png)