Micro Star MS6970A BLUETOOTH USB DONGLE User Manual D Work 2005 1st Communication
Micro Star International Co Ltd BLUETOOTH USB DONGLE D Work 2005 1st Communication
UserManual.wiki
>
Micro Star
>
MS6970A User Manual
USERS MANUAL
Navigation menu
Upload a User Manual
Namespaces
Wiki Guide
HTML
PDF
Info
Views
User Manual
Discussion / Help
Navigation

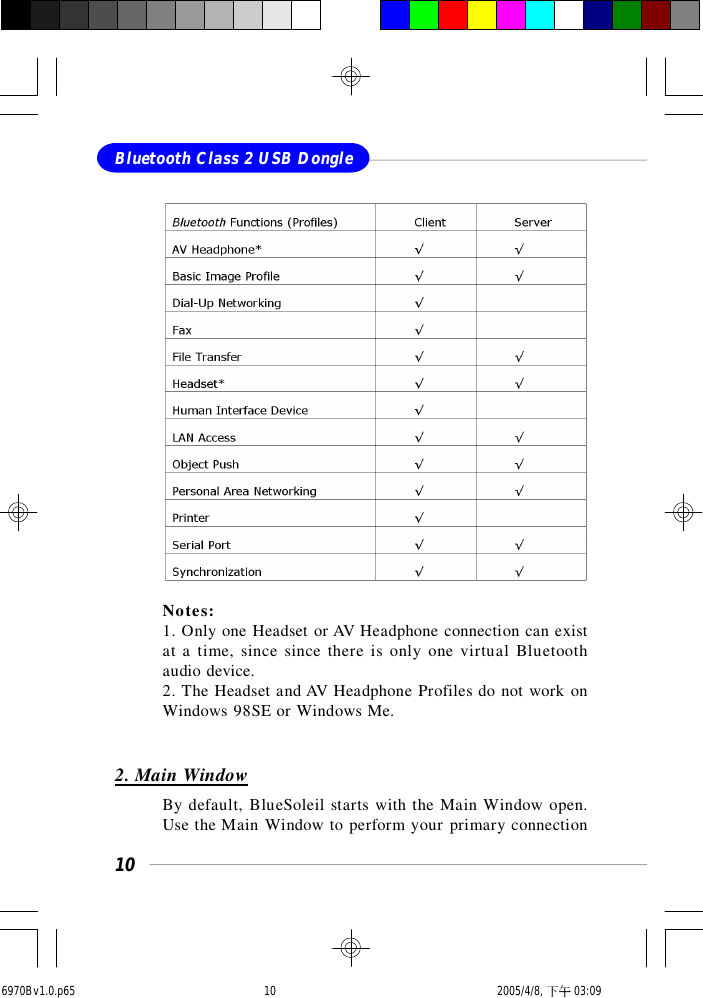
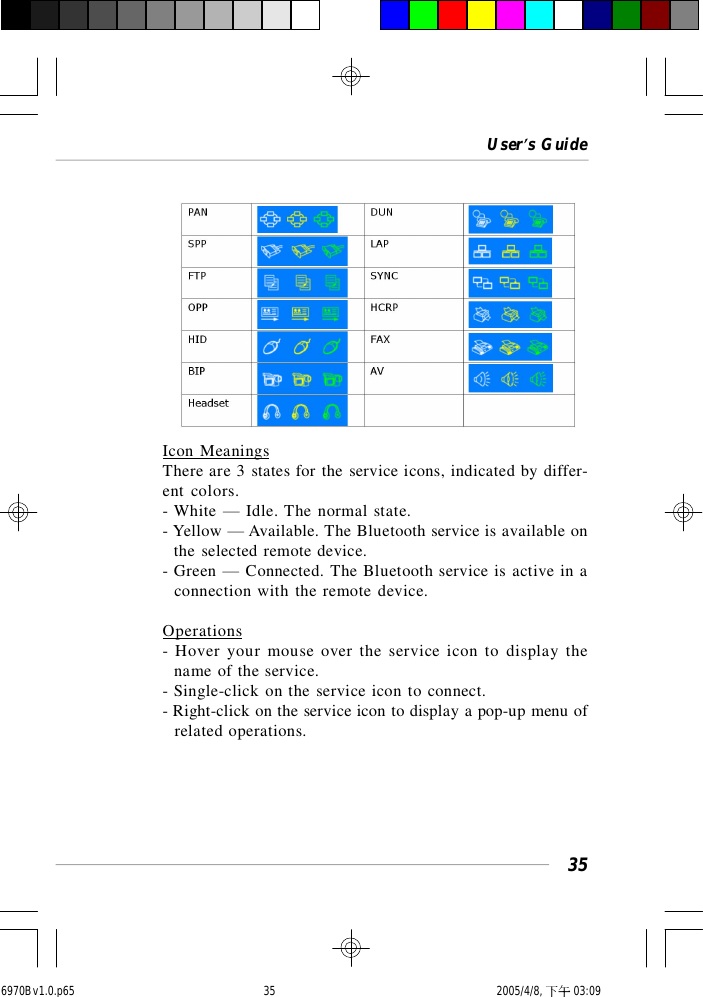
![4Bluetooth Class 2 USB DongleProfileGAP Yes ( Generic Access Profile)SDAP Yes (Service Discovery Profile)SPP Yes (Serial Port Profile)HSP Yes (Headset Profile, including Audio Gateway[AG]and Headset [HS] )DUN Yes (Dial Up Networking Profile)FAX Yes (FAX Profile)LAN Yes (LAN Access Profile)OPP Yes (Object Push Profile)FTP Yes (File Transfer Profile)SYP Yes (Synchronization Profile)PAN Yes (Personal Area Network Profile)HID Yes ( Human Interface Device Profile)GOEP Yes (Generic Object Exchange Profile)HCRP Yes (Hard Copy Cable Replacement Profile)A2DP Yes (Advanced Audio Distribution Profile)BIP Yes (Basic Image Profile)6970Bv1.0.p65 2005/4/8, 下午 03:094](https://usermanual.wiki/Micro-Star/MS6970A/User-Guide-531688-Page-10.png)