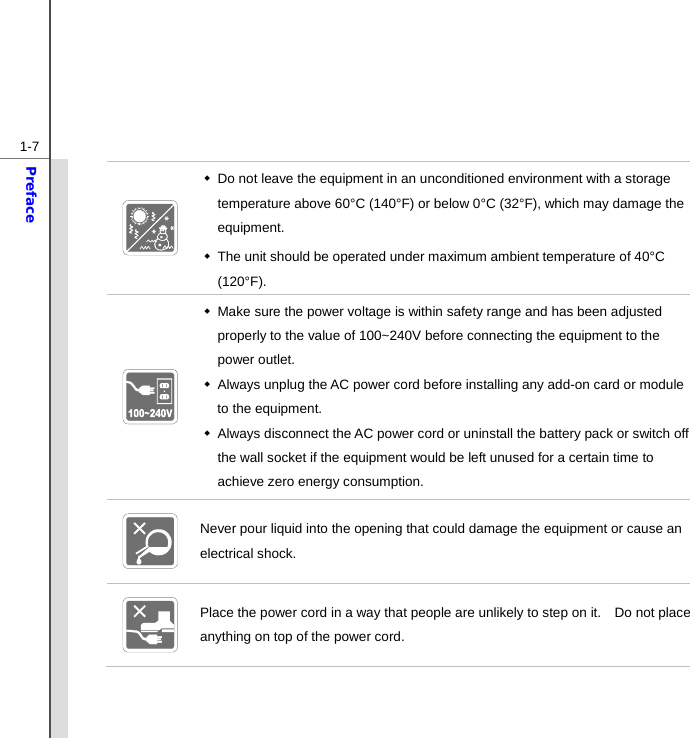
Micro Star MSN0J1 Tablet PC User Manual A1 N0J1 v1 0 English Preface

Micro Star International Co Ltd Tablet PC A1 N0J1 v1 0 English Preface

(MS-N0J1) UserMan

        CHAPTER 1 Preface
 1-2Preface   Preface Table of Content .............................................................................................................................1-2 Regulations Information ................................................................................................................1-4 FCC-B Radio Frequency Interference Statement .....................................................................1-4 FCC Conditions .........................................................................................................................1-5 RF Exposure Warning ...............................................................................................................1-5 CE Conformity ...........................................................................................................................1-6 Safety Instructions .........................................................................................................................1-6 Safety Guideline for Using Battery ..............................................................................................1-9 WEEE Statement ............................................................................................................................1-9 Trademarks .................................................................................................................................. 1-10 Reversion History ....................................................................................................................... 1-10  Introductions Manual Map ....................................................................................................................................2-2 Unpacking .......................................................................................................................................2-3 Specification ...................................................................................................................................2-4 Product Overview ..........................................................................................................................2-7   Table of Content
 1-3Preface Getting Started Power Management .......................................................................................................................3-2 Battery Power ............................................................................................................................3-2 AC Power ..................................................................................................................................3-3 Basic Operations ...........................................................................................................................3-5 Safety and Comfort Tips ............................................................................................................3-5 Having a Good Work Habit ........................................................................................................3-5 Powering On the Tablet PC .......................................................................................................3-6 Unlocking the Tablet PC ............................................................................................................3-7 Muting the Tablet PC .................................................................................................................3-8 Introduction of the Desktop .......................................................................................................3-9 Changing Orientation............................................................................................................... 3-11 Using the Quick Launch Touch Sensors ................................................................................ 3-12 Connecting the Network ......................................................................................................... 3-15 Language & Keyboard Settings .............................................................................................. 3-16 Date & Time Settings .............................................................................................................. 3-19 Inserting a microSD Card to the Tablet PC ............................................................................ 3-20 Connecting the External Devices .............................................................................................. 3-22 Connecting the Communication Devices ............................................................................... 3-22 Connecting the Peripheral Devices ........................................................................................ 3-24 Updating Tablet PC Firmware .................................................................................................... 3-26
 1-4Preface Regulations Information FCC-B Radio Frequency Interference Statement This equipment has been tested and found to comply with the limits for a Class B digital device, pursuant to part 15 of the FCC rules.    These limits are designed to provide reasonable protection against harmful interference in a residential installation.  This equipment generates, uses and radiates radio frequency energy, and, if not installed and used in accordance with the instructions, may cause harmful interference to radio communications.  However, there is no guarantee that interference will not occur in a particular installation.  If this equipment does cause harmful interference to radio or television reception, which can be determined by turning the equipment off and on, the user is encouraged to try to correct the interference by one or more of the following measures:   Reorient or relocate the receiving antenna.   Increase the separation between the equipment and receiver.   Connect the equipment into an outlet on a circuit different from that to which the receiver is connected.   Consult the dealer or an experienced radio TV technician for help. NOTE   The changes or modifications not expressly approved by the party responsible for compliance could void the user’s authority to operate the equipment.
 1-5Preface   Shield interface cables and AC power cord, if any, must be used in order to comply with the emission limits.  FCC Conditions This device complies with part 15 of the FCC Rules.  Operation is subject to the following two conditions:   This device may not cause harmful interference.   This device must accept any interference received, including interference that may cause undesired operation.  RF Exposure Warning  This equipment must be installed and operated in accordance with provided instructions and must not be co-locatedor operating in conjunction with any other antenna or transmitter. End-users and installers must be providing with antenna installation instructions and transmitter operating conditions for satisfying RF exposure compliance. SAR Value:     Max. SAR Measurement (1g)  802.11b(2.4GHz): 0.110 W/kg   BT (1M): 0.021 W/kg
 1-6Preface CE Conformity This device is in compliance with the essential safety requirements and other relevant provisions set out in the European Directive.  Safety Instructions    Read the safety instructions carefully and thoroughly.       All cautions and warnings on the equipment or user’s manual should be noted.  Keep the User’s Guide that comes with the package for future reference.  Keep this equipment away from humidity and high temperature. Lay this equipment on a stable surface before setting it up.  The openings on the enclosure are used for air convection and to prevent the equipment from overheating.    Do not cover the openings.
 1-7Preface    Do not leave the equipment in an unconditioned environment with a storage temperature above 60°C (140°F) or below 0°C (32°F), which may damage the equipment.   The unit should be operated under maximum ambient temperature of 40°C (120°F).    Make sure the power voltage is within safety range and has been adjusted properly to the value of 100~240V before connecting the equipment to the power outlet.   Always unplug the AC power cord before installing any add-on card or module to the equipment.   Always disconnect the AC power cord or uninstall the battery pack or switch off the wall socket if the equipment would be left unused for a certain time to achieve zero energy consumption.  Never pour liquid into the opening that could damage the equipment or cause an electrical shock.  Place the power cord in a way that people are unlikely to step on it.    Do not place anything on top of the power cord.
 1-8Preface  Always keep the strong magnetic or electrical objects away from the equipment.    To prevent explosion caused by improper battery replacement, use the same or equivalent type of battery recommended by the manufacturer only.   Always keep the battery in a safe place.  If any of the following situations arises, get the equipment checked by a service personnel:   The power cord or plug is damaged.   Liquid has penetrated into the equipment.   The equipment has been exposed to moisture.   The equipment has not worked well or you can not get it work according to User’s Manual.   The equipment was dropped and damaged.   The equipment has obvious signs of breakage.  Green Product Features   Reduced energy consumption during use and stand-by   Limited use of substances harmful to the environment and health   Easily dismantled and recycled   Reduced use of natural resources by encouraging recycling   Extended product lifetime through easy upgrades   Reduced solid waste production through take-back policy
 1-9Preface Environmental Policy   The product has been designed to enable proper reuse of parts and recycling and should not be thrown away   Users should contact the local authorized point of collection for recycling and disposing of their end-of-life products.   Safety Guideline for Using Battery CAUTION: Danger of explosion if battery is incorrectly replaced.  Replace only with the same or equivalent type recommended by the equipment manufacturer.    Discard used batteries according to manufacturer’s instructions. WEEE Statement                              Under the European Union ("EU") Directive on Waste Electrical and Electronic Equipment, Directive 2002/96/EC, which takes effect on August 13, 2005, products of "electrical and electronic equipment" cannot be discarded as municipal waste anymore and manufacturers of covered electronic equipment will be obligated to take back such products at the end of their useful life.
 1-10Preface Trademarks   All trademarks are the properties of their respective owners.  Revision History Version Revision History  Date 1.0 First Released  03, 2012
        CHAPTER 2 Introductions
 2-2Introductions Congratulations on becoming an user of this product, the finely designed tablet PC.  This brand-new exquisite tablet PC will give you a delightful and professional experience in using it.    We are proud to tell our users that this product is thoroughly tested and certified by our reputation for unsurpassed dependability and customer satisfaction. Manual Map                                              This User’s Manual provides instructions and illustrations on how to operate this tablet PC.  It is recommended to read this manual carefully before using this tablet PC. Chapter 1, Preface, gives users the basic safety information and caution that is interrelated to using this tablet PC.   It is recommended to read these information or caution when using this tablet PC for the first time.   Chapter 2, Introductions, includes the descriptions of all the accessories of this tablet PC.   It is recommended to check out that if you have all the accessories included when you open the packing box.  If any of these accessories is damaged or missing, please contact the vendor where you purchased this product.  Also, this chapter provides the specification of this tablet PC, and introduces the function buttons, quick launch buttons, connectors, LEDs and externals of this product.   Chapter 3, Getting Started, gives the basic operation instructions on using this tablet PC.    Beside, the steps of connecting the AC power; and the procedures of connecting the various external devices, communication devices, and so on, are also provided to help users getting familiar with this product. It also provides the solutions to teach the users how to update tablet PC firmware.
 2-3Introductions Unpacking First, unpack the shipping carton and check all items carefully.    If any item contained is damaged or missing, please contact your local dealer immediately.    Also, keep the box and packing materials in case you need to ship the unit in the future.    The package should contain the following items:   Tablet PC       Quick Start Manual  AC/DC adapter    USB to mini USB Cable  These accessories listed above may change without notice.
 2-4Introductions Specification Physical Characteristic Dimension  245.9 (W) x 192.7 (D) x 11.2 (H) mm Weight 648g   CPU Processor Type    ARM Cotex A8 / 1GHz  Memory  Memory  1GB DDR3 DRAM  Storage (Items listed here may vary depending on the model users purchased) Storage 8GB  Special Notification The actual storage preinstalled in this product depends on the model you purchased, and may very without notice.  Power AC/DC Adapter    12V, 1.5A   Battery Type  2 cells
 2-5Introductions I/O Port Mini USB Connector  x 2   Headphone out  x 1 Mini HDMI Connector  x 1   Internal Microphone  x 1 Card Reader (microSD)  x 1 (Supports Maximum 32GB)   The supported memory cards may vary without notice.  Communication Port (Items listed here may vary without notice) Wireless LAN  Supported Bluetooth Supported  Audio Internal Speaker  2 speakers with housing Sound Volume  Adjust by volume button  Display  LCD Type  10.0" LED panel LCD Resolution  1024 x 768 Multi Touch  Supported Brightness  Brightness controlled by setting
 2-6Introductions WebCam Front Webcam (optional)  Supported Rear Webcam (optional)  Supported  Others ALS (Amyotrophic lateral sclerosis)  Supported e-Compass Supported G-Sensor Supported Vibration Motor  Supported Special Notification The actual function preinstalled in this product depends on the model you purchased, and may vary without notice.
 2-7Introductions Product Overview      This section provides the description of basic aspects of this tablet PC. It will help you to know more about the appearance of this device before using it. Please be aware that the device shown in this section may vary from the actual one that users purchased.    1 3 2 4 The figures show here are for reference only. 2
 2-8Introductions     8 5 7 9  13 6 10 14 11 12 15  16
 2-9Introductions 1. Rear Webcam This built-in Rear Webcam can be used for picture taking, video recoding or conferencing, and any other interactive applications.  2. Stereo Speakers Give high quality sound blaster with stereo system and Hi-Fi function supported.  3. Reset Hole When your tablet PC is crashed, you can use a straightened paperclip to inset the reset hole to reset the tablet PC.  4. Card Reader The built-in card reader may support microSD card. Contact the local dealer for further and correct information and be noted that the supported memory card may vary without notice.      5. Power Button Press the power button to turn this product ON and OFF.
 2-10Introductions 6.  Volume Up / Volume Down  7. Mini HDMI Connector  HDMI (High Definition Multimedia Interface) is a new interface standard for PCs, displays and consumer electronics devices that supports standard, enhanced and high-definition video, plus multi-channel digital audio on a single cable.  8. Headphone Connector Used for connecting the speakers or headphones.  9. Internal Microphone This is the built-in microphone and its function is the same with microphone.  10. Mini USB Port (Host) Through the USB to mini USB cable, the mini USB port allows the tablet PC to connect USB-interface peripheral devices, such as mouse, keyboard, modem, portable hard disk module, printer and more.  Volume Up  Volume Down  Press the Volume Up or Volume Down button to decrease or increase the sound volume.   Read the icon on behalf of the Sound Level Status appearing on the display to learn the function status.
 2-11Introductions 11. Mini USB Port (Device) The mini USB port allows the peripherals devices to connect to the tablet PC.  12. Power Connector Provided to connect the AC/DC adapter and supply AC power for this tablet PC.  13. Quick Launch Touch Sensors Use the quick launch touch sensors to activate the specific applications or tools. Refer to chapter 3 of this manual for the further information.  Search   This key will launch Search application.  Home   This key will switch to desktop.  Menu   This key will launch Menu function.  Back   This key will switch to the previous page or action .  14. Front Webcam   This built-in Front Webcam can be used for picture taking, video recoding or conferencing, and any other interactive applications.
 2-12Introductions 15. Status LED Battery Status   Glowing green when the battery is being charged.     Battery LED goes out when it is fully charged.   Blinking green if the battery fails or when the AC/DC adapter is disconnected.  16. Multi Touch Display This tablet PC is equipped with a user-friendly multi touch display which lets users use hands or finger gestures to interact with multi-media content, play games, read e-books, access documents, create special effects, manipulate art and photographs, and even surf on the internet, in a truly unique and compelling way.
        CHAPTER 3 Getting Started
 3-2Getting Started Power Management   Battery Power This tablet PC is equipped with a high-capacity Lithium polymer battery pack. The rechargeable Lithium polymer battery pack is an internal power source of this device.     However, the battery equipped is not replaceable by users, and may be damaged if users try to disassemble the product and the battery pack installed inside on their own.     Also, note that the limited warranty to the product may also lose its efficacy when this product is disassembled not by an authorized machinist. Please follow your local laws and regulations to recycle the product. Conserving Battery Power Efficient battery power is critical to maintain a normal operation.  If the battery power is not managed well, the saved data and customized settings may be lost. To optimize battery life and avoid a sudden power loss, read the tips below:   Suspend system operation if the system will be idle for a while or shorten the suspend timer’s time period.   Turn off the system if you won’t be using it for a period of time.   Disable unnecessary settings or remove idle peripherals.   Connect an AC/DC adapter to the system whenever possible.
 3-3Getting Started Charging the Battery Pack The battery pack equipped is rechargeable, however please pay attention to the following tips before recharging the battery:   Plug in an external AC/DC adapter.   You can use the system, suspend system operation or shut down and turn off the system without interrupting the charging process.   The battery pack installed inside the device uses Lithium-ion battery cells that have no “memory effect.”    It is unnecessary to discharge the battery before recharging.    However, to optimize the life of battery, we suggest that consuming the battery power completely once every three months.   The actual charging time will be determined by the applications in use.  AC power It is strongly recommended to connect the AC/DC adapter to the tablet PC and use the AC power while using this tablet PC for the first time.  When the AC power is connected, recharging the battery will start immediately.     Note that the AC/DC adapter included in the package is approved for your tablet PC; using other adapter model may damage either the tablet PC or other devices attached to it. Do not cover the AC/DC adapter since it may produce a certain heat while in use.  Always be aware of heat coming from the AC/DC adapter in use.
 3-4Getting Started Connecting the AC Power 1.  Unpack the package to find the AC/DC adapter. 2.  Plug the DC end of the adapter to the tablet PC, and plug the AC/DC adapter to the electrical outlet. Disconnecting the AC Power When disconnecting the AC/DC adapter, you should: 3.  Unplug the AC/DC adapter from the electrical outlet first. 4.  Unplug the DC end of the adapter from the tablet PC.
 3-5Getting Started Basic Operations If you are a beginner to this tablet PC, please read the following instructions to assure your own safety, and make yourself comfortable during the operations. Safety and Comfort Tips This tablet PC is a portable platform that allows you to work anywhere.    However, choosing a good workspace is important if you are going to use your tablet PC for a long period of time.   Your work area should have enough illumination.   Choose the proper desk and chair and adjust their height to fit your posture when operating.   Avoid using this tablet PC in the space where may cause you discomfort.   Since this is an electrical device, please treat it with great care to avoid personal injury.   The tablet PC should be operate under maximum ambient temperature of 40°C (120°F) Having a Good Work Habit Have a good work habit is important if you are going to use this tablet PC for long periods of time; otherwise, it may cause discomfort or injury to you. Please keep the following tips in mind when operating.   Change your posture frequently.   Stretch and exercise you body regularly.   Remember to take a break after working for a period of time.
 3-6Getting Started Powering On the Tablet PC To power on the tablet PC, follow the steps below: 1.  Connect the AC power to the device first, 2.  Find the location of the power button as shown in the figure, 3.  Press and hold the power button for 3 seconds, the machine starts with a shake.
 3-7Getting Started Unlocking the Tablet PC After power on the tablet PC, you can see the lock screen as below, please refer to the following instruction to unlock the tablet PC. 1.  Tap and drag the lock icon upward as shown on the screen.        2.  Then the unlock screen will show as shown:
 3-8Getting Started Muting the Tablet PC Tap and drag the voice icon downward to mute the tablet PC.           Or press and hold the power button for 3 seconds, and then tap “Silent mode” to mute your tablet PC.
 3-9Getting Started Introduction of the Desktop                       1  3 7 6 2  5 4 10 8 9 11 12  12
 3-10Getting Started 1. Home: Switch to desktop.  7. Menu:  Launch Menu function. 2. Battery Status:  Show current battery status. 8. Brow ser:  Launch the Internet browser. 3. Time: Show current time.  9. Programs:  Activate the programs list. 4. Volume down:  Decrease the sound volume. 10. Settings:   Change the settings of the tablet PC. 5. Volume up:  Increase the sound volume. 11. Programs Shortcuts:   The shortcuts of the default programs. 6. Back: Switch screen to the     previous page or action. 12. Page:  Show the current page location.   Please be noted that the desktop may vary depends on the firmware you use.
 3-11Getting Started Changing Orientation This tablet PC is equipped with G-sensor module which gives users an enjoyable experience in viewing web pages, documents, pictures, videos, etc.    Whenever the display is rotated, the screen will be rotated and expanded to fit the display automatically.
 3-12Getting Started Using the Quick Launch Touch Sensors This tablet PC provides several quick launch touch sensors.  Use these sensors to activate the specific applications or tools.      Search   This key will launch Search application.                  The figures show here are for reference only.
 3-13Getting Started  Home   This key will switch to desktop.            Menu   This key will launch Menu function.
 3-14Getting Started  Back   This key will switch to the previous page.
 3-15Getting Started Connecting the Network           Tap “Setting” button on the main screen Æ Select “ Wireless & networks” Æ Select “Wi-Fi” to turn on WiFi Æ Select “Wi-Fi settings”, then the available wireless LAN list will show on the screen. Choose one network that you would like to use and enter the authorized password you get.
 3-16Getting Started Language & Keyboard Settings Tap “Setting” button on the main screen and follow the steps below to make language & keyboard settings. (1) Select “Language & Keyboard”.
 3-17Getting Started (2) Tap “Select language”.             (3) Choose the language you want to use.
 3-18Getting Started Or (4) select the available keyboard settings
 3-19Getting Started Date & Time Settings Tap “Setting” button on the main screen Æ Select “Date & Time Settings” to make the setting.
 3-20Getting Started Inserting a microSD card to the Tablet PC You may purchase other microSD card to increase the storage capacity of the tablet PC, please follow the steps below to insert or replace it:   1.  Locate the microSD card slot on the tablet PC as shown.        2.  Dig the edge of the microSD card slot cover with your finger tip. Be careful with your finger while trying to take out of the microSD card slot cover.
 3-21Getting Started 3.  Insert or replace the microSD card you purchased into the microSD card slot with correct direction as shown. Then close the microSD card slot cover of the tablet PC.
 3-22Getting Started Connecting the External Devices The I/O (input/output) ports on the tablet PC allow users to connect peripheral devices.    All devices listed here are for reference only. Connecting the Communication Devices Using Wireless LAN Connection This tablet PC is equipped with wireless LAN module which allows users to perform fast data transmission with the standard IEEE 802.11 for wireless LAN.  This gives users the mobility to move around within a broad coverage area and still be connected to the network. By using the 64-bit/128-bit Wired Equivalent Privacy (WEP) encryption technology and Wi-Fi Protected Access feature, the optional built-in wirelesses LAN is capable to achieve a more efficient and a more secure solution to the wireless communication. Using Bluetooth Connection This tablet PC is equipped with Bluetooth module which allows users to connect various Bluetooth-enabled devices to the device.  Bluetooth provides a way to connect and exchange information between devices such as mobile phones, personal computers, printers, GPS receivers, PDAs, digital cameras, and video game consoles through a secure, globally unlicensed Industrial, Scientific and Medical (ISM) 2.4 GHz short-range radio frequency bandwidth.  For more instructions or detailed steps on using the Wireless LAN and Bluetooth functions, please ask your MIS staff or network manager for help. The devices shown in the reference figures here may be different from the devices users have.
 3-23Getting Started
 3-24Getting Started Connecting the Peripheral Devices Connecting the USB devices This tablet PC provides mini USB ports for connecting various USB devices, such as mouse, keyboard, digital camera, webcam, printer, and external optical storage device, etc.    To connect these devices, install the drivers for each device first if necessary, and then connect the device to the tablet PC.    This tablet PC is capable to auto detect the USB devices installed, and if there is no detection of the devices, please manually enable the USB devices by going to Start Menu / Control Panel / Add Hardware to add the new device. Note: Make sure that you have an external power adapter connected to your external optical storage device in addition to the USB cable.
 3-25Getting Started Connecting the External Display Devices to Mini HDMI port Mini HDMI (High Definition Multimedia Interface) is a new interface standard for PCs, displays and consumer electronics devices that supports standard, enhanced and high-definition video, plus multi-channel digital audio on a single cable.     Once the display is connected to the tablet PC, power on the tablet PC and the external display should respond by default. Alternately, you can change the display mode by configuring the settings in Display Properties of operating system.
 3-26Getting Started Updating Tablet PC Firmware You can update the firmware of your tablet PC through another notebook or desktop PC. Please check the latest firmware version of your tablet PC to make sure it is up-to-date. To update the firmware can enhance the performance of your tablet PC, please see the following instruction for more updating instructions.  Before updated the firmware of your tablet PC, you need to:   Backup your personal data on your tablet PC.   Be sure the battery of your tablet PC is fully charged; plug the DC end of the adapter to the tablet PC, and the male end of the power cord to the electrical outlet.   Turn off all idle running programs.   USB cable is required.   Turn on your notebook or desktop PC, be sure it is connected to the internet.
 3-27Getting Started Please follow the steps below to update the latest firmware of your tablet PC. (1) Please download the latest firmware of your tablet PC from the following website location http://www.msi.com Please be noted that if you cannot get the latest firmware from this website, please contact the local dealer for detailed information.  Please go to the above website location and select “Download”, then choose the following zip file to find the latest firmware.
 3-28Getting Started (2) Connect USB to mini USB cable to your notebook (or desktop PC) and tablet PC.           Please be noted that the USB connector may differ from the actual tablet PC you purchase.  (3) Please tap and drag the status bar downward to open the detailed information, and then select “USB Connected”
 3-29Getting Started (4) Please select “Turn on USB storage”.           (5) On the notebook or your desktop PC, an auto-play dialog box with “MSI WINPAD” will pop up on the screen, please select “Open folder to view files”.
 3-30Getting Started (6) Please copy the new firmware to root directory on WINDPAD. Note1: The filename must be “update.img”, if not, please rename the image name. Note2: Remember to copy the firmware file to root directory.             (7) Please select “Turn off USB Storage”.
 3-31Getting Started (8) Please select “Install”. You can select “Cancel” to update the firmware later. Please follow the above instruction to turn on/off USB storage setting and back to this dialog box again.           (9) Please keep your USB cable connected. The system will auto reboot after updating the firmware. Important: Do not touch the screen when the system is updating the firmware.
 3-32Getting Started (10) Please select “Menu” and then select “Settings”, this step is to confirm the firmware version.            (11) Please select “About Device”
 3-33Getting Started (12) The firmware update is completed. Please confirm the “Build number” is the latest and if its date and version is the same with the information on the website.

Navigation menu