Micro Star S260 MEGA BOOK User Manual Part 1
Micro Star International Co Ltd MEGA BOOK Part 1
UserManual.wiki
>
Micro Star
>
S260 User Manual
>
User Manual Part 1
Contents
1.
User Manual Part 1
2.
User Manual Part 2
3.
User Manual Part 3
User Manual Part 1
Navigation menu
Upload a User Manual
Namespaces
Wiki Guide
HTML
PDF
Info
Views
User Manual
Discussion / Help
Navigation


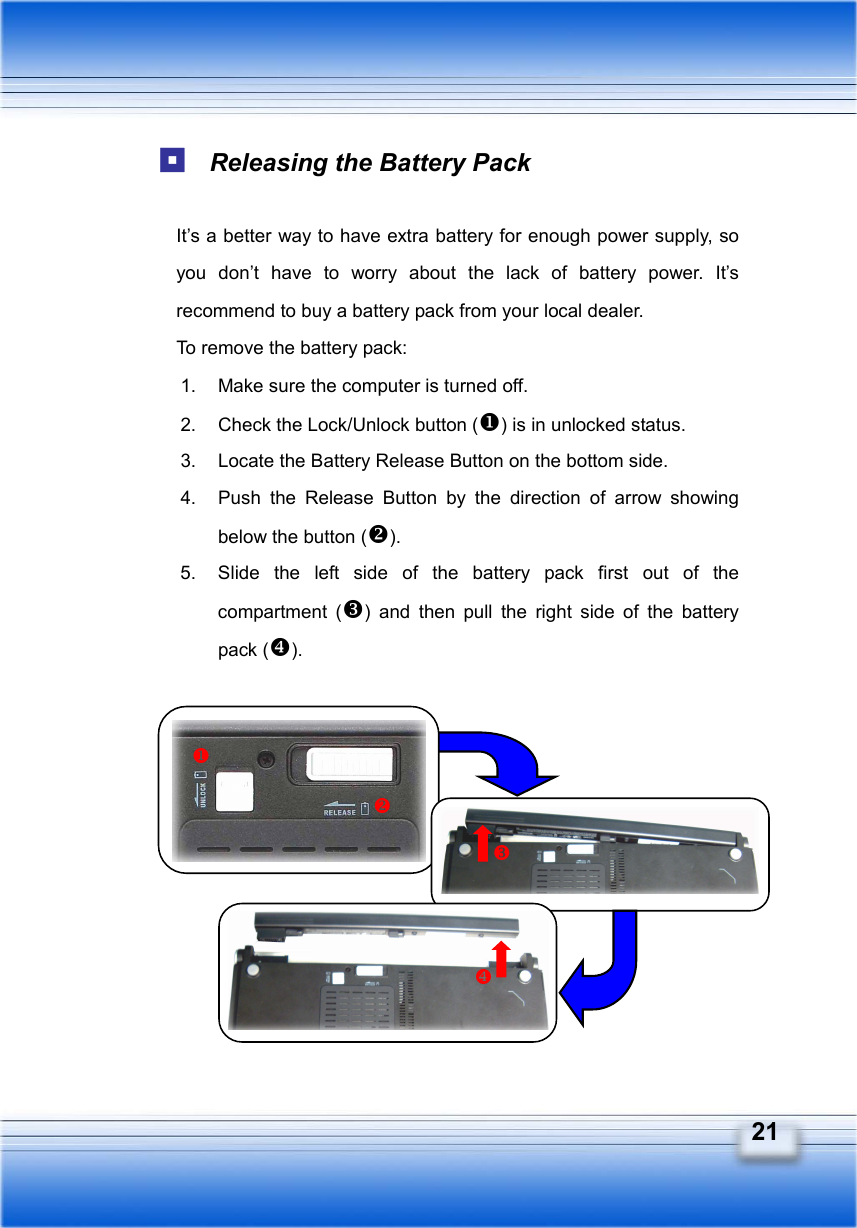
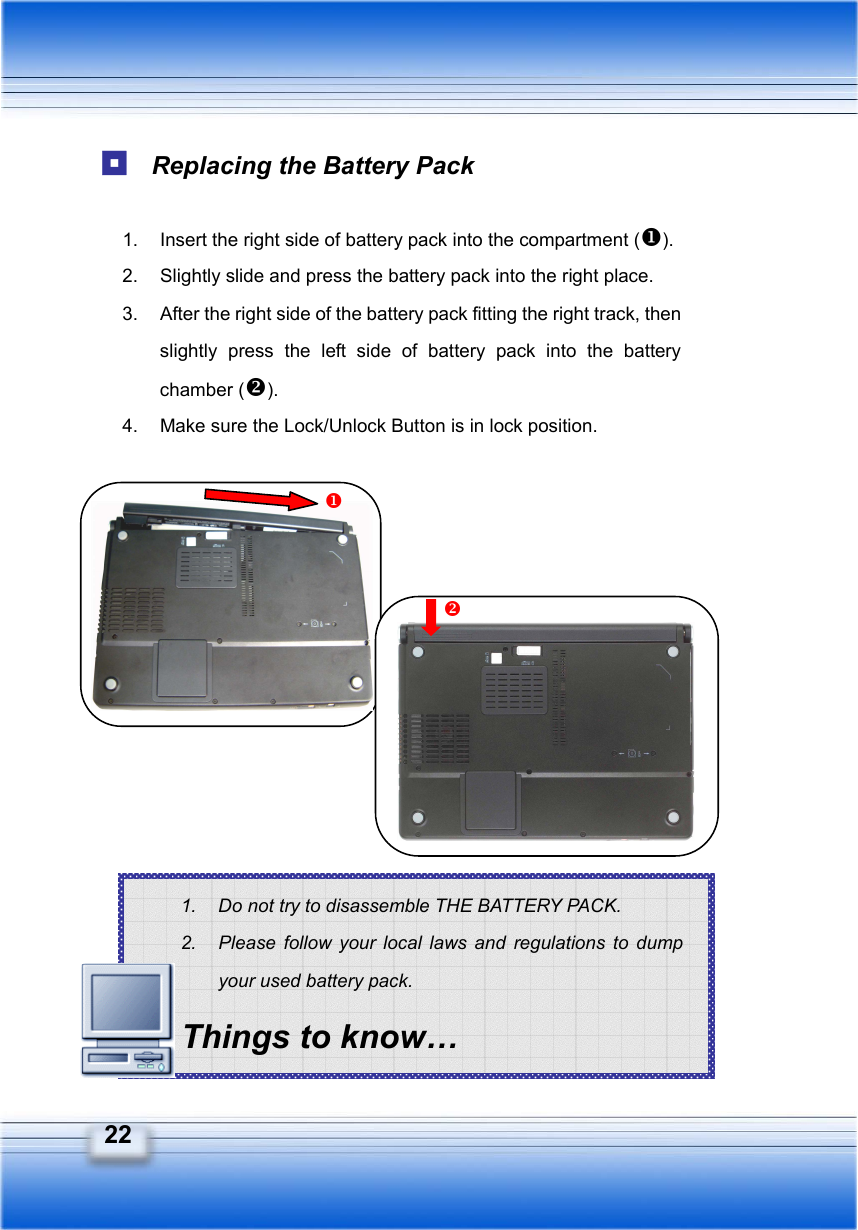
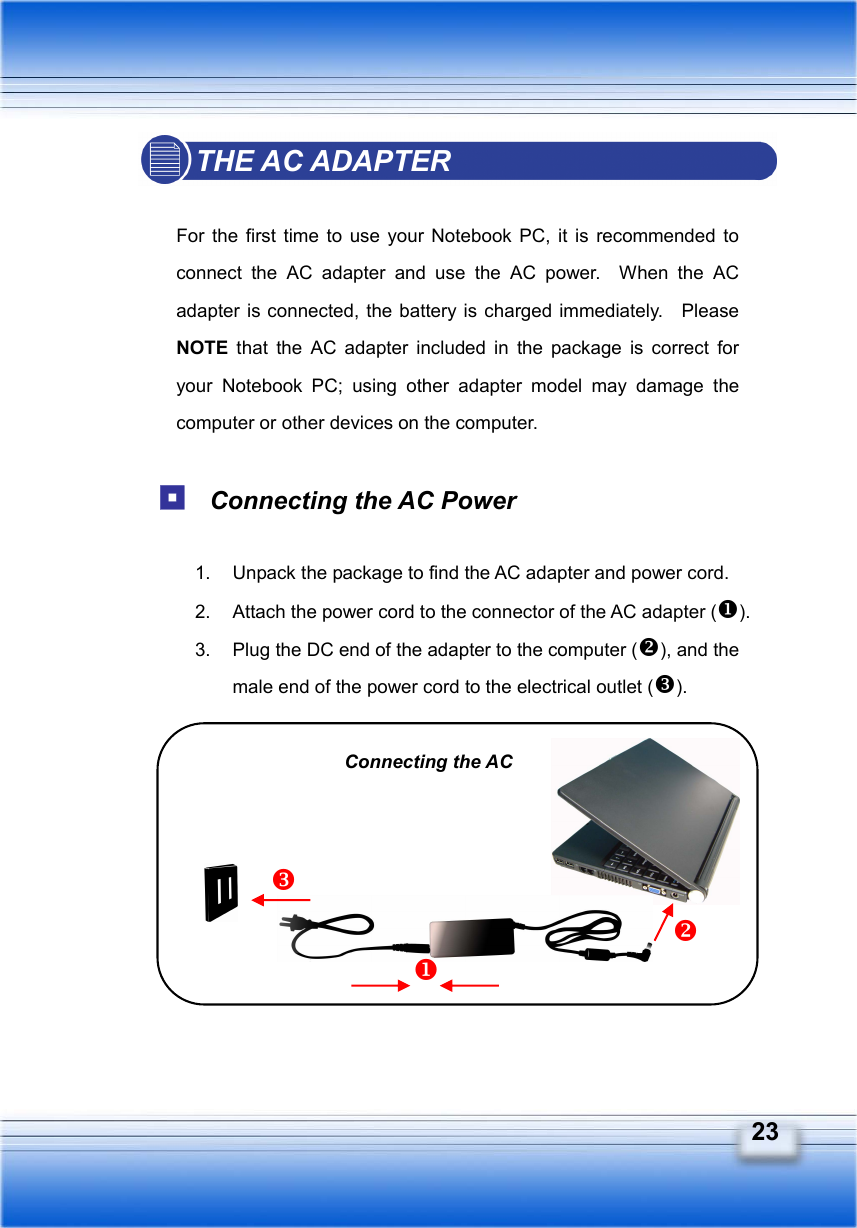
![XII TURNING ON THE NOTEBOOK PC............................ 27 Operating the Top Cover.......................................................................27 Turning On the Computer .....................................................................27 CONFIGURATION WINDOWS SYSTEM ..................... 28 TURNING OFF THE NOTEBOOK PC.......................... 30 BASIC OPERATION Safety and Comfort Tips............................................. 32 Safety Comfort Tips.....................................................................32 Have a Good Work Habit.............................................................33 Knowing the Keyboard ............................................... 34 Typewriter Keys ...........................................................................35 Cursor Keys .................................................................................36 Numeric Keys...............................................................................37 Function Keys..............................................................................38 Windows Keys......................................................................................38 [Fn] Key ................................................................................................38 Knowing the Touchpad............................................... 39 Using the Touchpad ....................................................................40 Positioning and Moving.........................................................................40 Point and Click......................................................................................40 Drag and Drop ...................................................................................... 41 Configuring the Touchpad.....................................................................42](https://usermanual.wiki/Micro-Star/S260.User-Manual-Part-1/User-Guide-535097-Page-12.png)