MicroPower Technologies MPT2500 Wireless Camera User Manual Rugged i installation quickstart guidev2
MicroPower Technologies, Inc. Wireless Camera Rugged i installation quickstart guidev2
user manual

MPT 2500 Rugged-i™ Solar Wireless Video Camera
& MPT2700 MiniHub™ Wireless Video Hub
Quick Start Guide
MicroPower Technologies, Inc.
4225 Executive Square, Suite 430
La Jolla, CA 92037
858-768-5780
www.micropowerapp.com
Installation Guide v1.1 ©2011 MicroPower Technologies, Inc. 1

Before installation, please refer to the Read Me First documentation included with this product
for installation safety information.
Step 1: Setting up the MiniHub Wireless Video Hub
MiniHub Rear View
1.1. Connect the two (2) 2.4 GHz purple antennas and the one (1) 900 MHz yellow antenna
using the corresponding color-coded indicators above each antenna connector on the
MiniHub.
1.2. Connect the AC power cable to the MiniHub and plug into a power source.
1.3. Connect your mouse and keyboard (not included) to the MiniHub using any of the USB
connectors.
1.4. Connect your monitor (not included) to the rear of the MiniHub.
1.5. Power on the MiniHub using the toggle power button on the rear of the unit.
1.6. Proceed to Step 2: Setting up the Rugged-I Camera.
Step 2: Setting up the Rugged-i Camera
WARNING: Do not connect the camera batteries until AFTER the antennas have
been connected.
The Rugged-i camera ships with a fully charged battery pack.
Rugged-i Side View Rugged-i Rear View
2.1. Connect the shorter 2.4 GHz antenna (purple) and the taller 900 MHz antenna
(yellow) using the corresponding color-coded indicators next to each antenna connector
on the top of the camera housing.
2.2. NOTE: The camera ships with a fully charged battery pack, but should the
camera require charging, please follow this step. Open the camera housing using the
safety latch at the rear of the unit. Attach the battery charger cord to the battery
connector. Charge the battery until the charge completion light is illuminated. After
charging, disconnect the battery charger cord and re-connect the battery connector. The
LED indicator light should glow red when the battery is connected. Close the camera
housing then lock the safety latch.
2.3. Attach the mounting arm to the bottom of the Rugged-i camera housing using the
included hardware.
Installation Guide v1.1 ©2011 MicroPower Technologies, Inc. 2
2.4. Mount the camera in the desired surveillance location with the mounting arm,
then point the camera to the desired surveillance position. The camera should be placed
in an area which receives an adequate amount of direct sunlight throughout the day,
however the solar panels do not require alignment with the sun. The locking mounting
bracket will allow the camera to remain in this position after it is installed.
Step 3: Configuring the MiniHub Wireless Video Hub to View
Video
3.1. After the MiniHub is powered on and the Rugged-i camera(s) has been placed in
its desired location, the MiniHub can be configured.
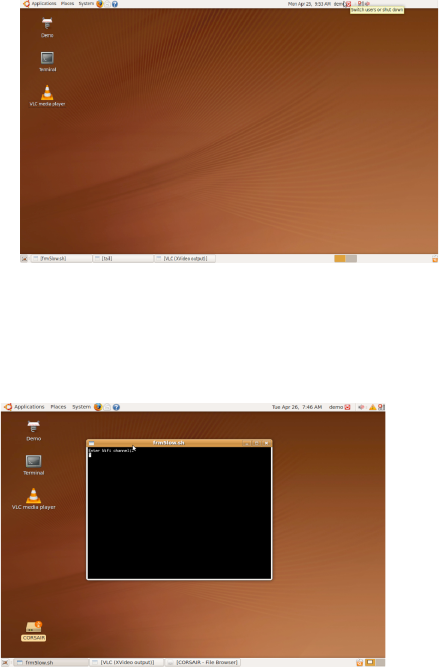
3.2. On the MiniHub computer desktop, launch the Demo icon located in the top left
corner.
MiniHub Computer Desktop
3.3. This will launch the camera association input window. At the “enter
password” prompt, enter the password, demo.
3.4. At the “enter wifi channel” prompt, enter an available wireless channel.
Camera Association Input Window
3.5. The hub will then begin the camera association process and the camera image will
appear on the screen.
Installation Guide v1.1 ©2011 MicroPower Technologies, Inc. 3
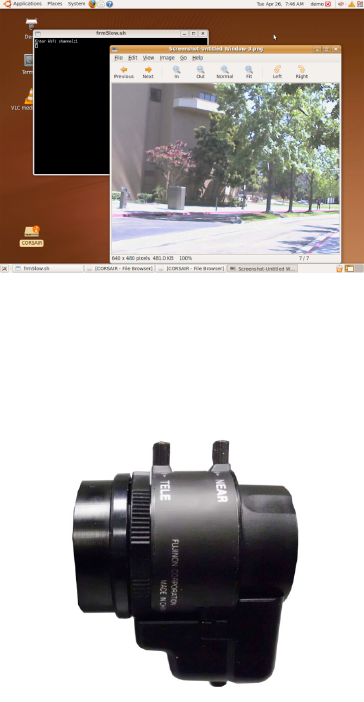
Camera Image Window
Step 4: Adjusting the Camera Image
Camera Lens Close-up View
4.1 While viewing the camera image in the MiniHub camera image window, adjustments can
be made to the camera’s focal length, iris or focus.
4.2. Open the camera housing using the safety latch at the rear of the unit. The camera
imager is located just behind the housing window.
4.2.1. To adjust focal length, turn the focal length locking knob counter-clockwise to
unlock. Rotate the focal length adjustment ring at the rear of the lens to set. Turn
the focal length locking knob clockwise to lock back into place.
4.2.2. To adjust iris, turn the iris locking knob counter-clockwise to unlock. Slide the
iris locking knob to the right or left to set. Turn the iris locking knob clockwise to
lock back into place.
4.2.3. To focus, turn the focus locking knob counter-clockwise to unlock. Rotate the
focus adjustment ring at the front of the lens to set. Turn focus locking knob
clockwise to lock in place.
4.3. After the imager adjustments have been completed, close the camera housing and
lock the latch into place.
4.4. After this step, setup is complete and the Rugged-i camera is ready for use.
Installation Guide v1.1 ©2011 MicroPower Technologies, Inc. 4

INFORMATION TO USER
This device complies with Part 15 of the FCC Rules. Operation is subject to the following two
conditions: (1) This device may not cause harmful interference, and (2) This device must accept
any interference received, including interference that may cause undesired operation.
This equipment has been tested and found to comply with the limits for Class B Digital Device,
pursuant to Part 15 of the FCC Rules. These limits are designed to provide reasonable protection
against harmful interference in a residential installation. This equipment generates and can
radiate radio frequency energy and, if not installed and used in accordance with the instructions,
may cause harmful interference to radio communications. However, there is no guarantee that
interference will not occur in a particular installation. If this equipment does cause harmful
interference to radio or television reception, which can be determined by turning the equipment
off and on, the user is encouraged to try to correct the interference by one or more of the
following measures.
• Reorient or relocate the receiving antenna
• Increase the separation between the equipment and receiver
• Connect the equipment into an outlet on a circuit different from that to which the receiver is
connected
• Consult the dealer or an experienced radio/TV technician for help
Any changes or modifications not expressly approved by the party responsible for compliance
could void the user’s authority to operate the equipment.
Installation Guide v1.1 ©2011 MicroPower Technologies, Inc. 5