Microsoft 1058 Microsoft Wireless Laser Mouse 5000 User Manual X1127312cvr indd
Microsoft Corporation Microsoft Wireless Laser Mouse 5000 X1127312cvr indd
UserManual.wiki
>
Microsoft
>
1058 User Manual
>
Manual Pt 1
Contents
1.
Manual Pt 1
2.
Manual Pt 2
Manual Pt 1
Navigation menu
Upload a User Manual
Namespaces
Wiki Guide
HTML
PDF
Info
Views
User Manual
Discussion / Help
Navigation


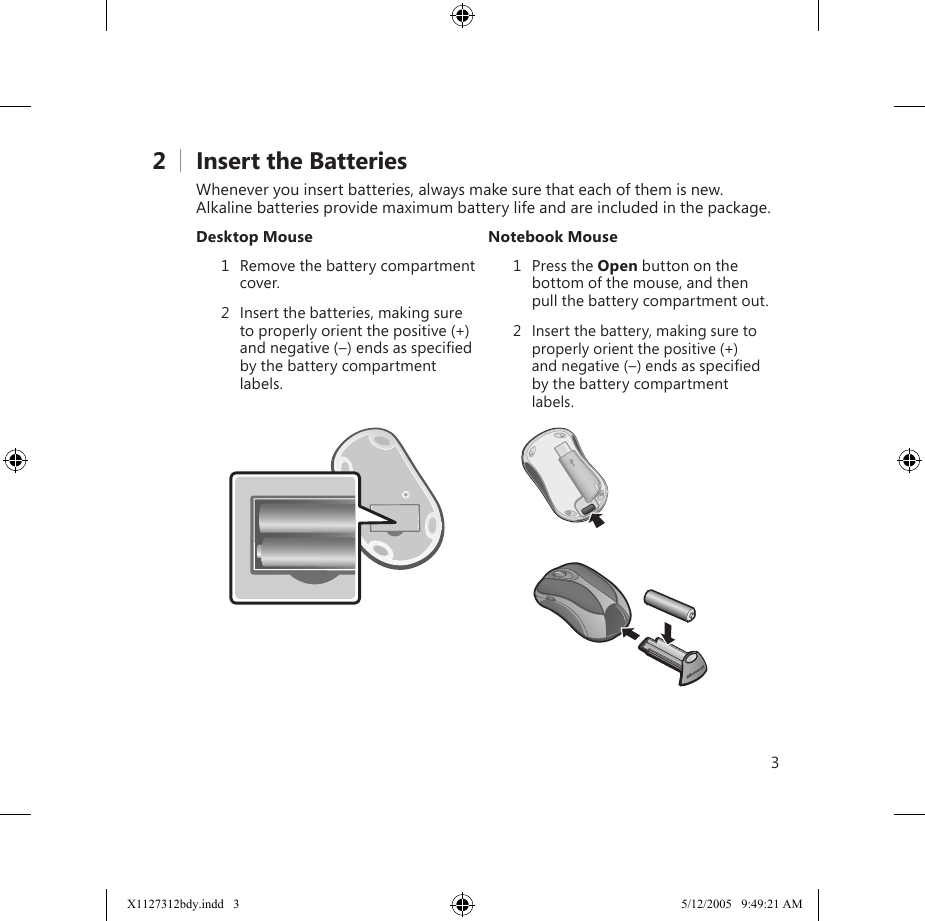
![21 Install IntelliPoint Mouse SoftwareIntelliPoint software enables the unique features of your mouse.To install IntelliPoint software (Microsoft Windows® operating system)1 Insert the software CD into your computer’s CD drive. If the Setup screen doesn’t appear automatically, do the following:● Click Start, and then click Run.● Type [drive]:setup. For example, if your CD drive is drive E, type e:setup2 On the Setup screen, click Install, and then follow the Setup Wizard instructions on the screen. Restart the computer, if prompted to do so. To install IntelliPoint software (Macintosh)1 Insert the software CD into your computer’s CD drive.2 Double-click the Microsoft-Desktop.dmg file.3 Double-click the Microsoft Desktop.mpkg icon, and then follow the on-screen instructions. Restart the computer, if prompted to do so.2 Insert the BatteriesWhenever you insert batteries, always make sure that each of them is new. Alkaline batteries provide maximum battery life and are included in the package.Desktop Mouse Notebook Mouse 1 Remove the battery compartment cover. 2 Insert the batteries, making sure to properly orient the positive (+) and negative (–) ends as specified by the battery compartment labels. 1 Press the Open button on the bottom of the mouse, and then pull the battery compartment out. 2 Insert the battery, making sure to properly orient the positive (+) and negative (–) ends as specified by the battery compartment labels. X1127312bdy.indd 2 5/12/2005 9:49:21 AM](https://usermanual.wiki/Microsoft/1058.Manual-Pt-1/User-Guide-599438-Page-4.png)