Microsoft DTE-3 Dual-Band GPRS/WLAN PCMCIA Card User Manual Exhibit 8 User Guide
Microsoft Mobile Oy Dual-Band GPRS/WLAN PCMCIA Card Exhibit 8 User Guide
UserManual.wiki
>
Microsoft
>
DTE-3 User Manual
>
Exhibit 8 User Guide
Contents
1.
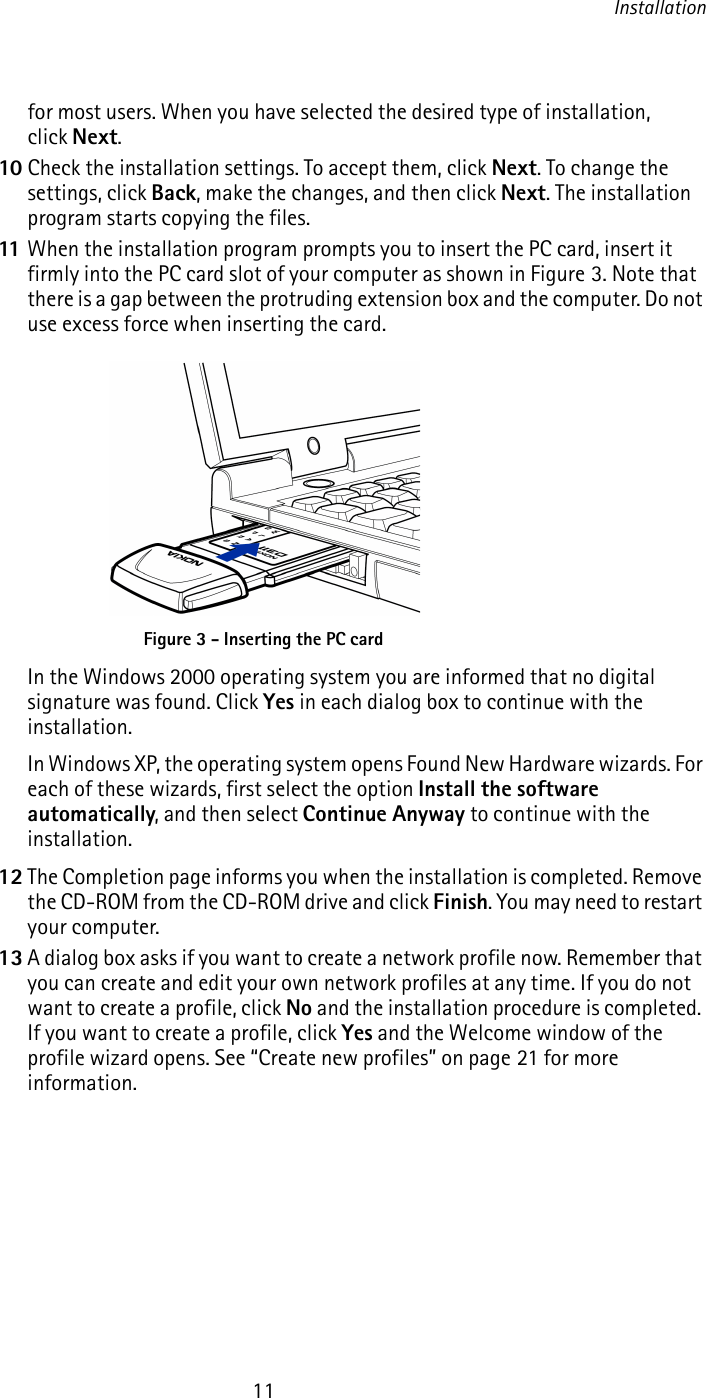
Exhibit 8 User Guide
2.
Revised User Guide
Exhibit 8 User Guide
Navigation menu
Upload a User Manual
Namespaces
Wiki Guide
HTML
PDF
Info
Views
User Manual
Discussion / Help
Navigation
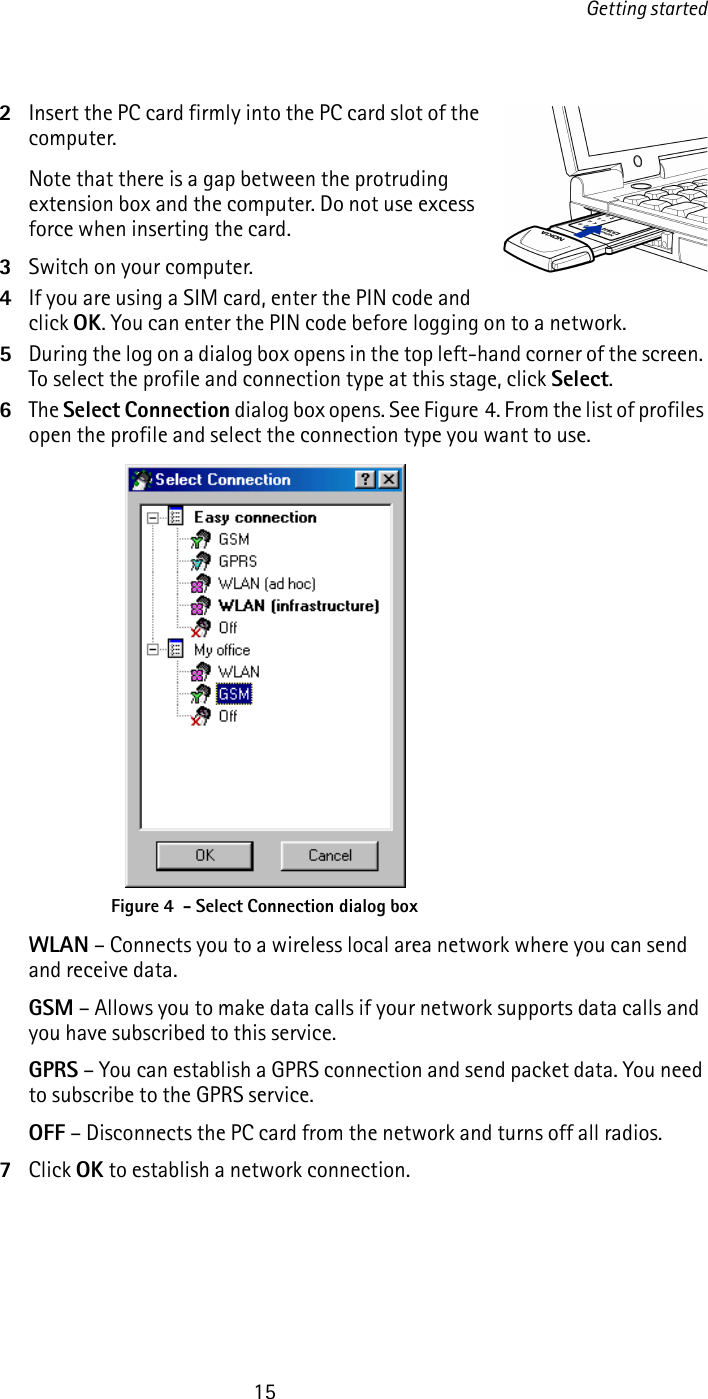
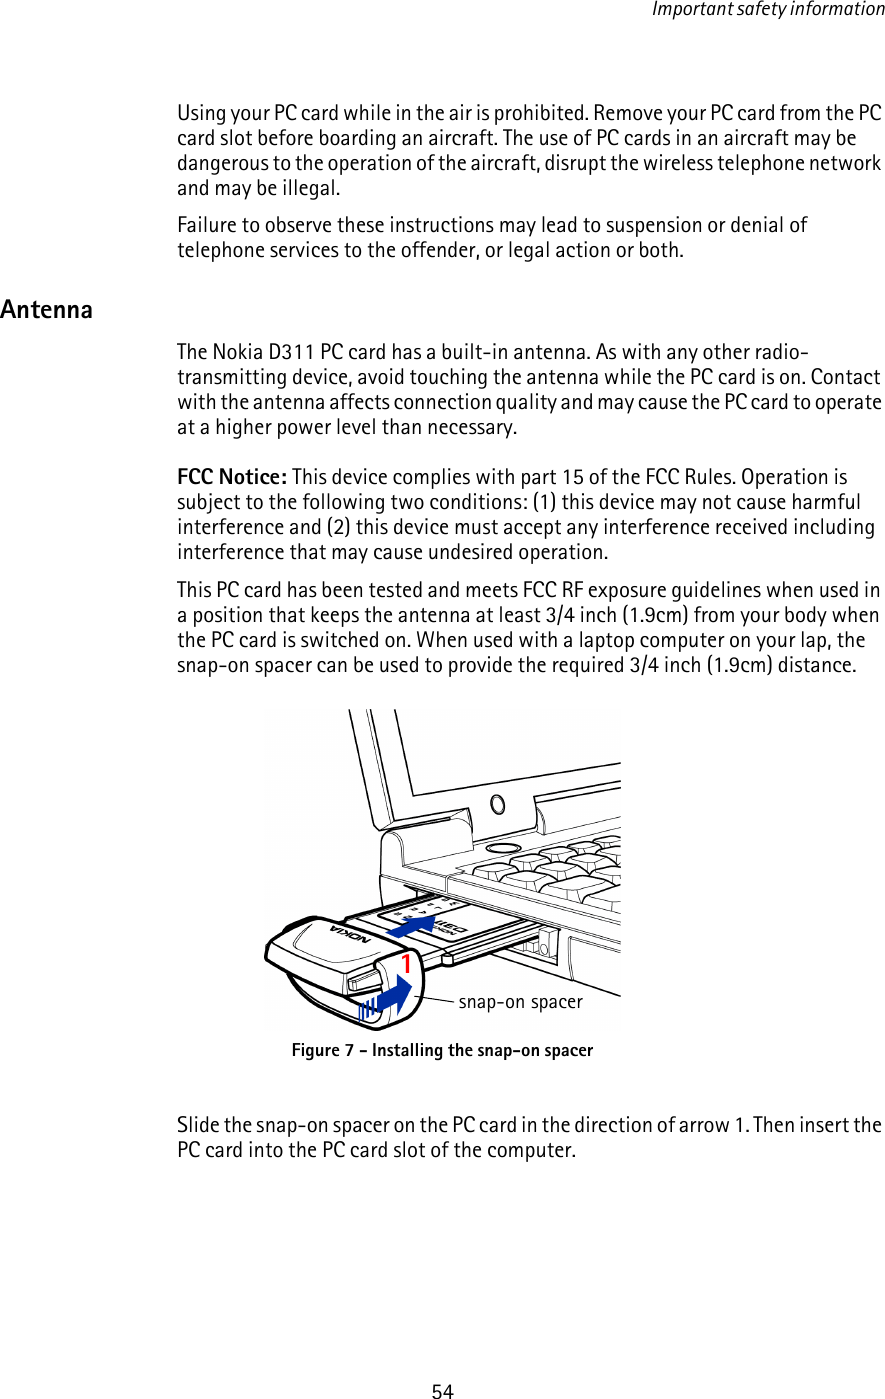
![Getting started16Tip: You can access the Select Connection dialog box also by right-clicking the Nokia D311 PC card icon on the taskbar, or by opening the Profiles page of the Manager window and clicking Select. If the taskbar icon is not visible, see page 28 for more information.Tip: You can manage network connections also by using the Nokia D311 PC card icon on the taskbar. Right-click the icon and click Connect to connect to SIM services. To make a data call, click Dial, and to send packet data, click Activate. See “Connection status indicators” below for more information. If the taskbar icon is not visible, see page 28 for more information.Warning: Do not use the PC card when wireless equipment use is prohibited or when it may cause interference or danger.Connection status indicatorsTaskbar icons and icons on the Profiles page indicate the status of the network connection.Ready for data call – You have established a connection to a GSM network and can send and receive text messages. To access the Internet or your e-mail by using GSM data services, you need to make a data call. Click Dial to make a data call.The use of GSM data services requires that your network supports data calls and that you have subscribed to this service. For more information, contact your wireless provider.Data call to [phone number] – GSM data call is active. To finish the call, click End Call.Ready to activate GPRS – You have established a connection to a GSM network that supports packet data sending (GPRS). You can send and receive text messages. To access the Internet or your e-mail by using GPRS, you need to establish a GPRS connection. Click Activate to establish a GPRS connection.You need to subscribe to the GPRS service. For availability and subscription to packet data services, please contact your wireless provider.GPRS active – GPRS connection is now active. To end the connection, click Deactivate.Linked to (access point name) – You have established a connection to a WLAN access point. To connect to the SIM services, click Connect. The Connect button is activated only when the wireless station has detected a service in the network, otherwise the button remains inactive.](https://usermanual.wiki/Microsoft/DTE-3.Exhibit-8-User-Guide/User-Guide-296604-Page-20.png)