Microsoft HS3W Bluetooth Wireless Headset User Manual
Microsoft Mobile Oy Bluetooth Wireless Headset
users manual
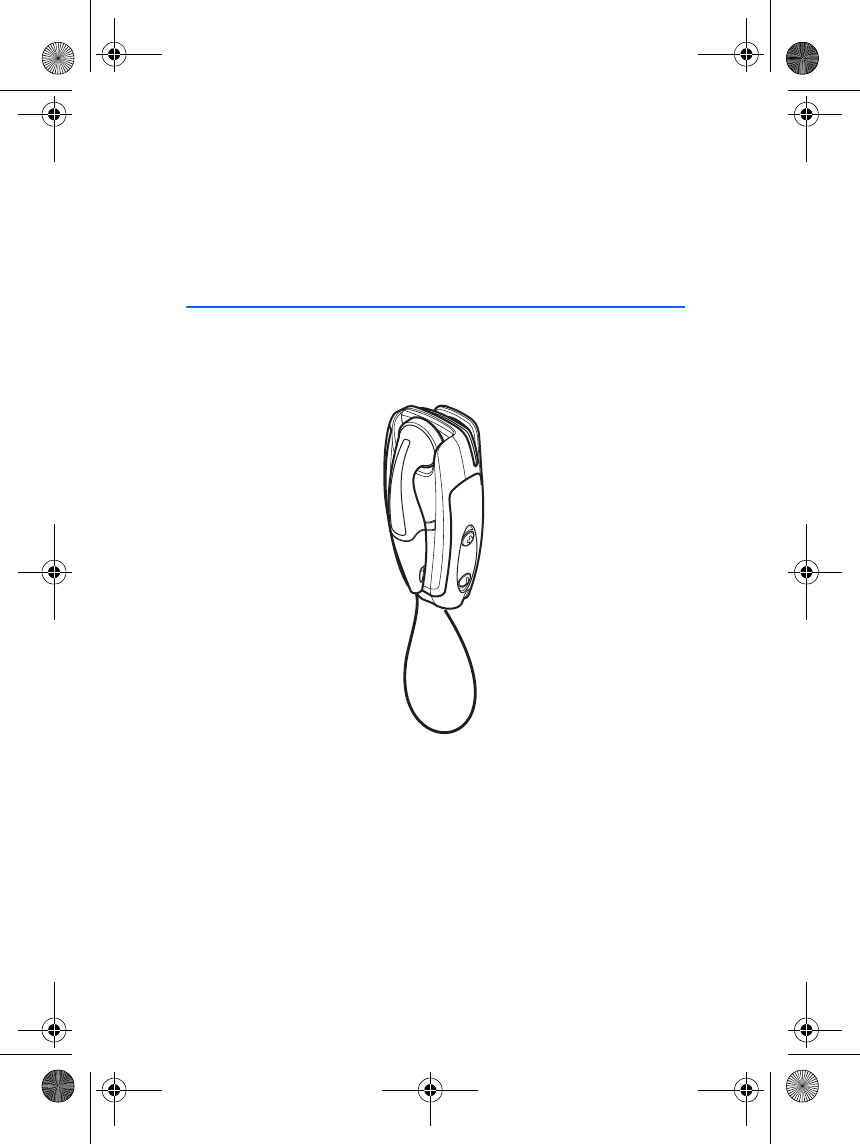
User’s Guide for the Wireless Clip-
on Headset (HS-3W)
9356693
Issue 1
hs-3W_en1TA.fm Page 1 Thursday, June 26, 2003 2:47 PM
DECLARATION OF CONFORMITY
We, NOKIA CORPORATION declare under our sole responsibility that the product
HS-3W is in conformity with the provisions of the following Council Directive:
1999/5/EC. A copy of the Declaration of Conformity can be found at
http://www.nokia.com/phones/declaration_of_conformity/.
Copyright © 2003 Nokia. All rights reserved.
Reproduction, transfer, distribution or storage of part or all of the contents in this document
in any form without the prior written permission of Nokia is prohibited.
Nokia and Nokia Connecting People are registered trademarks of Nokia Corporation. Other
product and company names mentioned herein may be trademarks or tradenames of their
respective owners.
Nokia operates a policy of continuous development. Nokia reserves the right to make
changes and improvements to any of the products described in this document without prior
notice.
Under no circumstances shall Nokia be responsible for any loss of data or income or any
special, incidental, consequential or indirect damages howsoever caused.
The contents of this document are provided "as is". Except as required by applicable law, no
warranties of any kind, either express or implied, including, but not limited to, the implied
warranties of merchantability and fitness for a particular purpose, are made in relation to the
accuracy, reliability or contents of this document. Nokia reserves the right to revise this
document or withdraw it at any time without prior notice.
The availability of particular products may vary by region. Please check with the Nokia dealer
nearest to you.
In some countries there may be restrictions in using Bluetooth devices. Check with your local
authorities.
9356693 / Issue 1
hs-3W_en1TA.fm Page 2 Thursday, June 26, 2003 2:47 PM

3
Contents
1.Introduction ......................... 4
Bluetooth wireless technology.......... 4
The card in the sales package............ 5
2.Getting started..................... 6
Overview.................................................. 6
Chargers and batteries......................... 7
Removing and installing the battery 7
Charging the battery............................ 7
When the battery charge falls low 8
Pairing the headset with a
compatible phone.................................. 8
Disconnecting the headset
from the phone................................... 9
Reconnecting the paired
headset to the compatible phone. 9
Troubleshooting..................................... 9
3.Using the headset.............. 11
Switching the headset on or off..... 11
Using the headset............................ 11
Call functions....................................... 11
Answering and ending a call........ 11
Automatic answer............................ 12
Rejecting a call................................. 12
Redialling the last dialled number 12
Muting an ongoing call.................. 12
Voice dialling..................................... 12
Adjusting the earphone volume...... 12
Switching the call between
phone and headset.............................. 12
Using the headset with several
paired phones....................................... 13
Resetting the headset........................ 13
4.Battery information........... 14
Charging and Discharging................. 14
Care and maintenance........... 15
hs-3W_en1TA.fm Page 3 Thursday, June 26, 2003 2:47 PM
Introduction
4
1. Introduction
The Wireless Clip-on Headset HS-3W can be connected to a compatible
phone that supports Bluetooth technology. This allows you freedom to
make and receive calls while on the move or in the office.
Read this user’s guide carefully before using the headset. Do not use this
Wireless Clip-on Headset HS-3W user’s guide in place of the phone’s
user's guide, which provides important safety and maintenance
information. Keep the headset out of reach of small children.
■Bluetooth wireless technology
The Wireless Clip-on Headset HS-3W is specially designed for
compatible Nokia phones that support Bluetooth technology. The
headset can, however, be used with any compatible Bluetooth devices
that support the Handsfree or Headset profiles. (Profile is a set of
Bluetooth commands that the phone uses to control the headset).
The Bluetooth technology makes it possible to connect compatible
communication devices without using cables. The Bluetooth connection
does not require that the phone and the headset are in line of sight, but
both devices should be within 10 metres of each other, although the
connection can be subject to interference from obstructions, such as
walls, or other electronic devices.
The Wireless Clip-on Headset HS-3W is compliant with and adopts the
Bluetooth Specification 1.1. However, interoperability between the
Wireless Clip-on Headset HS-3W and other Bluetooth-enabled products
is not guaranteed because it depends on compatibility. For more
information on the compatibility between the Wireless Clip-on Headset
HS-3W with other Bluetooth-enabled products, please check with your
dealer.
hs-3W_en1TA.fm Page 4 Thursday, June 26, 2003 2:47 PM

Introduction
5
■The card in the sales package
The card contains the Bluetooth passcode that you need to pair the
phone with the headset. Keep this card in a secure place, see Pairing the
headset with a compatible phone on page 8.
hs-3W_en1TA.fm Page 5 Thursday, June 26, 2003 2:47 PM
Getting started
6
2. Getting started
Note: The use of wireless devices may be restricted in some situations.
Observe any restrictions and obey all signs and instructions concerning
use of wireless devices.
■Overview
The headset contains the following parts, as shown in Figure 1.
Note: Parts of the headset are magnetic. Metallic materials may be
attracted to the headset, and persons with a hearing aid or a
pacemaker should not hold the headset to the ear with the hearing aid
or close to the pacemaker. Always secure the ear piece in its holder,
because materials may be attracted by the earpiece. Do not place credit
cards or other magnetic storage media near the headset, because
information stored on them may be erased.
1 - Power key: Switches the headset on and off, or mutes the ongoing
call.
2 - Answer/end key: Answers or ends the call. This key can also be used
for voice dialling, redialling and switching an active call between the
headset and the compatible phone.
3 - Indicator light: Displays the current status of the headset.
4 - Volume up: Increases the earphone volume during a call.
5 - Volume down: Decreases the earphone volume during a call.
6 - Earphone: Relays the caller’s voice.
7 - Microphone: Picks up your voice.
8 - Charger connector
9 - Battery cover
Before you can start using the headset, you must:
• Install and charge the battery
• Pair a compatible phone with the headset
hs-3W_en1TA.fm Page 6 Thursday, June 26, 2003 2:47 PM
Getting started
7
■Chargers and batteries
Check the model number of any charger before using it with this device. The
Wireless Clip-on Headset HS-3W is intended for use with the following chargers:
ACP-7, ACP-8, ACP-9, ACP-12, and LCH-12
Warning! Use only batteries and chargers approved by Nokia for use
with this particular enhancement. The use of any other types will
invalidate any approval or warranty applying to the enhancement, and
may be dangerous.
For availability of approved batteries and chargers, please check with your local
dealer.
When you disconnect the power cord of any enhancement, grasp and pull the
plug, not the cord.
■Removing and installing the battery
Note: Before changing the cover, always switch off the power and
disconnect the device from the charger. Always store and use the
device with the covers attached.
The headset has a rechargeable LiPo battery.
• Open the battery cover by gently pushing the release button and
sliding the battery cover backwards, see Figure 2.1.
• Remove the battery, see Figure 2.2.
• Detach the connector from its space and detach the battery from the
connector, see Figure 2.3.
• Replace the battery. Place the connector in the space reserved for it
and set the battery in place, see Figure 2.4.
• Close the battery cover, see Figure 2.5.
• Make sure that the cover is properly locked in place, see Figure 2.6.
■Charging the battery
1. Connect the charger cable to the headset as shown in Figure 3.
2. Connect the charger to an AC wall outlet with an easy access. The
red indicator light is displayed during charging. Charging the battery
fully may take up to 2 hours 45 minutes depending on the charger.
hs-3W_en1TA.fm Page 7 Thursday, June 26, 2003 2:47 PM
Getting started
8
3. When the battery is fully charged, the green indicator light is
displayed. Disconnect the charger from the AC wall outlet and the
headset. You can only switch off the charger by unplugging it, so use
an AC wall outlet with an easy access.
When the battery charge falls low
The fully charged battery has power for up to 4 hours of talk-time and
up to 100 hours of standby time. (In standby mode the headset is
switched on but no call is in progress.).
When the battery is running out of power, the headset beeps. Charge
the battery as described above.
■Pairing the headset with a compatible phone
1. Make sure that the compatible phone is switched on.
2. Switch on the headset. Make sure that the headset is charged.
3. Activate the Bluetooth connection from the phone. For more
information, see the user’s guide of the phone.
4. Set the phone to search for Bluetooth devices as instructed in the
user’s guide of the phone.
5. Select the Nokia HS-3W from the list.
6. Enter the passcode to associate ("pair") and connect the headset to
the phone. The passcode is marked on the card that is provided in
the sales package of the headset.
Once you have entered the passcode, the phone becomes the default
phone for the headset, if the headset has not been previously paired
with another phone. See also Using the headset with several paired
phones on page 13.
The headset beeps once and an active Bluetooth connection is
displayed by a blinking white indicator light. The headset should now
appear in the phone menu where you can view the Bluetooth devices
that are currently paired with the compatible phone.
7. Start using the headset (see page 11).
hs-3W_en1TA.fm Page 8 Thursday, June 26, 2003 2:47 PM
Getting started
9
Disconnecting the headset from the phone
The headset can be disconnected from the phone, if, for example, you
want to use another Bluetooth device with it. To disconnect the headset,
do one of the following:
• Switch off the headset.
• Disconnect the headset in the phone’s Bluetooth menu.
• Move the headset more than 10 metres away from the phone.
The headset is also disconnected if the battery becomes flat.
Note that you do not need to delete the pairing with the headset to
disconnect it. When you reconnect a paired headset, you will not be
asked for its passcode.
Reconnecting the paired headset to the compatible
phone
To reconnect the headset to the default phone or the last phone used,
switch on the headset. Otherwise, make the connection in the phone’s
Bluetooth menu as instructed in the user’s guide of the phone.
Note that switching on the headset creates the connection
automatically only if you have set the phone to accept Bluetooth
connection requests without your permission. In compatible Nokia
phones this can be done by changing your paired devices settings in the
Bluetooth menu.
■Troubleshooting
If you cannot connect the headset to the compatible phone, proceed as
follows:
• Make sure that the Bluetooth feature is activated on the compatible
phone.
• Make sure that the headset is switched on and paired with the
compatible phone.
• Make sure that you have disconnected the previous Bluetooth
connection from the phone.
hs-3W_en1TA.fm Page 9 Thursday, June 26, 2003 2:47 PM

Getting started
10
• Check that the headset is within 10 metres of the phone and that
there are no obstructions, such as walls, or other electronic devices
between the headset and the phone.
• The pairing information list of the headset may be full. The headset
can store the information of up to 8 phones at a time. If the list
becomes full, reset the headset to the original settings, see Resetting
the headset on page 13.
• If the headset does not automatically reconnect to the default/last
user, press and hold the answer/end key.
• If you misplace the passcode card provided in the sales package, the
passcode is the four last digits of the serial number, indicated on the
type label.
hs-3W_en1TA.fm Page 10 Thursday, June 26, 2003 2:47 PM
Using the headset
11
3. Using the headset
Note: The use of wireless devices may be restricted in some situations.
Observe any restrictions and obey all signs and instructions concerning
use of wireless devices.
■Switching the headset on or off
To switch on the headset, press and hold the power key for 2 seconds.
The headset beeps and the green indicator light starts blinking. The
blinking continues for approximately 10 minutes or until the headset is
connected to a compatible phone. If the headset cannot be connected to
the phone during this time, the headset is switched off.
To switch off the headset, press and hold the power key for 2 seconds,
when no call is in progress. The headset beeps and the red indicator light
is displayed briefly.
Using the headset
Carry the headset by attaching it to your clothing as shown in Figure 4
or wear it around your neck using the neck strap as shown in Figure 5.
When you don’t use the headset, you can wind the earphone wire
around the headset as shown in Figure 6.
■Call functions
When the headset is connected to the phone, make a call by using the
phone in the normal way. Note that the call functions depend on the
phone that you use.
Answering and ending a call
When you receive a call, you hear a ringing tone through the headset.
Press the answer/end key to answer the call or to end the currently
active call.
You can also answer or end the call using the phone.
hs-3W_en1TA.fm Page 11 Thursday, June 26, 2003 2:47 PM
Using the headset
12
Automatic answer
If, on the phone, the Automatic answer function is set to on, the phone
automatically answers the incoming call after one ring.
Rejecting a call
When you receive an incoming call and you do not want to answer,
briefly press the answer/end key twice.
Redialling the last dialled number
Press the answer/end key twice briefly when no call is in progress.
Muting an ongoing call
You can mute or unmute the ongoing call by pressing the power key
briefly.
Voice dialling
When no call is in progress, press and hold the answer/end key until you
hear a tone that indicates that you can say the desired name ("voice
tag"). Say the voice tag. The phone plays the voice tag and dials the
related phone number.
You can also activate voice dialling with the phone. For details on voice
dialling, see the phone’s user’s guide. Note that this function is only
available if the phone supports voice dialling.
■Adjusting the earphone volume
Press the volume up key to increase or the volume down key to
decrease the volume. To adjust the volume quickly, press and hold either
of these keys.
■Switching the call between phone and headset
You can switch the active call between the headset and all compatible
phones. To switch the call from the headset to the phone and vice versa,
press and hold the answer/end key or use the respective function in your
phone.
hs-3W_en1TA.fm Page 12 Thursday, June 26, 2003 2:47 PM
Using the headset
13
■Using the headset with several paired phones
Before the headset can be used, the compatible phone has to be paired
with the headset. The headset can be paired with up to 8 compatible
phones but connected to only one phone at a time.
The phone that was first paired with the headset is called the "default
phone". The phone that was last used with the headset is called the "last
used phone".
If the headset is switched on within 10 metres of several paired phones,
the headset will try to connect to the "default phone" within a few
seconds.
If the headset cannot connect to the "default phone" (for example, it is
switched off or its user rejects the connection), the headset tries to
connect to the "last used phone" within a few seconds.
If the headset cannot connect to either of the compatible phones, it
remains discoverable for other phones for approximately 10 minutes,
which is displayed by the blinking green indicator light. If you do not
make the connection during this time, the headset is switched off
automatically.
If you want to use the headset with a paired phone that is not a "default
phone" or "last used phone", make the connection in the phone’s
Bluetooth menu.
■Resetting the headset
You can reset the headset to its original settings, for example, to change
the default user of the headset. Resetting the headset clears all of its
settings, including pairing information. To reset the headset:
Press and hold the power key together with the volume up key up for 10
seconds. After the headset has been reset, it beeps twice and the red and
the green indicator lights alternate for several seconds.
hs-3W_en1TA.fm Page 13 Thursday, June 26, 2003 2:47 PM

Battery information
14
4. Battery information
Your headset is powered by a rechargeable battery. Take good care of
the battery and follow the guidelines below.
■Charging and Discharging
The battery can be charged and discharged hundreds of times but it will
eventually wear out. When the operating time (talk time and standby time) is
noticeably shorter than normal, it is time to buy a new battery.
Use only batteries approved by the manufacturer and recharge your battery only
with the chargers approved by the manufacturer. Unplug the charger when not in
use. Do not leave the battery connected to a charger for longer than a week, since
overcharging may shorten its lifetime. If left unused a fully charged battery will
discharge itself over time.
Temperature extremes can affect the ability of your battery to charge.
Use the battery only for its intended purpose.
Never use any charger or battery which is damaged.
Do not short-circuit the battery. Accidental short-circuiting can occur when a
metallic object (coin, clip or pen) causes direct connection of the + and -
terminals of the battery (metal strips on the battery), for example, when you
carry a spare battery in your pocket or purse. Short-circuiting the terminals may
damage the battery or the connecting object.
Leaving the battery in hot or cold places, such as in a closed car in summer or
winter conditions, will reduce the capacity and lifetime of the battery. Always try
to keep the battery between 15°C and 25°C (59° F and 77° F). A headset with a
hot or cold battery may temporarily not work, even when the battery is fully
charged. Batteries' performance is particularly limited in temperatures well
below freezing.
Do not dispose of batteries in a fire !
Dispose of batteries according to local regulations (e.g. recycling). Do not dispose
as household waste.
hs-3W_en1TA.fm Page 14 Thursday, June 26, 2003 2:47 PM
Care and maintenance
15
Care and maintenance
Your headset is a product of superior design and craftsmanship and should be
treated with care. The suggestions below will help you to fulfil any warranty
obligations and to enjoy this product for many years.
• Keep all accessories out of the reach of small children.
• Keep the headset dry. Precipitation, humidity and all types of liquids or
moisture can contain minerals that will corrode electronic circuits.
• Do not use or store the headset in dusty, dirty areas. Its moving parts can be
damaged.
• Do not store the headset in hot areas. High temperatures can shorten the life
of electronic devices, damage batteries, and warp or melt certain plastics.
• Do not store the headset in cold areas. When it warms up (to its normal
temperature), moisture can form inside, which may damage electronic circuit
boards.
• Do not attempt to open the headset. Non-expert handling may damage it.
• Do not drop, knock or shake the headset. Rough handling can break internal
circuit boards.
• Do not use harsh chemicals, cleaning solvents, or strong detergents to clean
the headset.
• Do not paint the headset. Paint can clog the moving parts and prevent proper
operation.
If the headset is not working properly, take it to your nearest qualified service
facility. The personnel there will assist you and, if necessary, arrange for service.
hs-3W_en1TA.fm Page 15 Thursday, June 26, 2003 2:47 PM
FCC Notice - Nokia Wirelesss Clip-on Headset HS-
3W
16
FCC Notice - Nokia Wirelesss Clip-on
Headset HS-3W
This device complies with Part 15 of the FCC Rules. Operation is subject to the
following two conditions: 1. This device may not cause harmful interference; and
2. This device must accept any interference received, including interference that
may cause undesired operation. This equipment has been tested and found to
comply with the limits for a Class B digital device, pursuant to Part 15 of the FCC
Rules. These limits are designed to provide reasonable protection against harmful
interference in a residential installation. This equipment generates, uses and can
radiate radio frequency energy and, if not installed and used in accordance with
the instructions, may cause harmful interference to radio communications.
However, there is no guarantee that interference will not occur in a particular
installation. If this equipment does cause harmful interference to radio or
television reception, which can be determined by turning the equipment off and
on, the user is encouraged to try to correct the interference by one or more of the
following measures: Reorient or relocate the receiving antenna. Increase the
separation between the equipment and receiver. Connect the equipment into an
outlet on a circuit different from that to which the receiver is connected. Consult
the dealer or an experienced radio/TV technician for help. NOTE: Modifications
not expressly approved by Nokia could void the user’s authority to operate the
equipment.
hs-3W_en1TA.fm Page 16 Thursday, June 26, 2003 2:47 PM