Microsoft MN710 Broadband Wireless USB2.0 Adapter User Manual
Microsoft Corporation Broadband Wireless USB2.0 Adapter Users Manual
UserManual.wiki
>
Microsoft
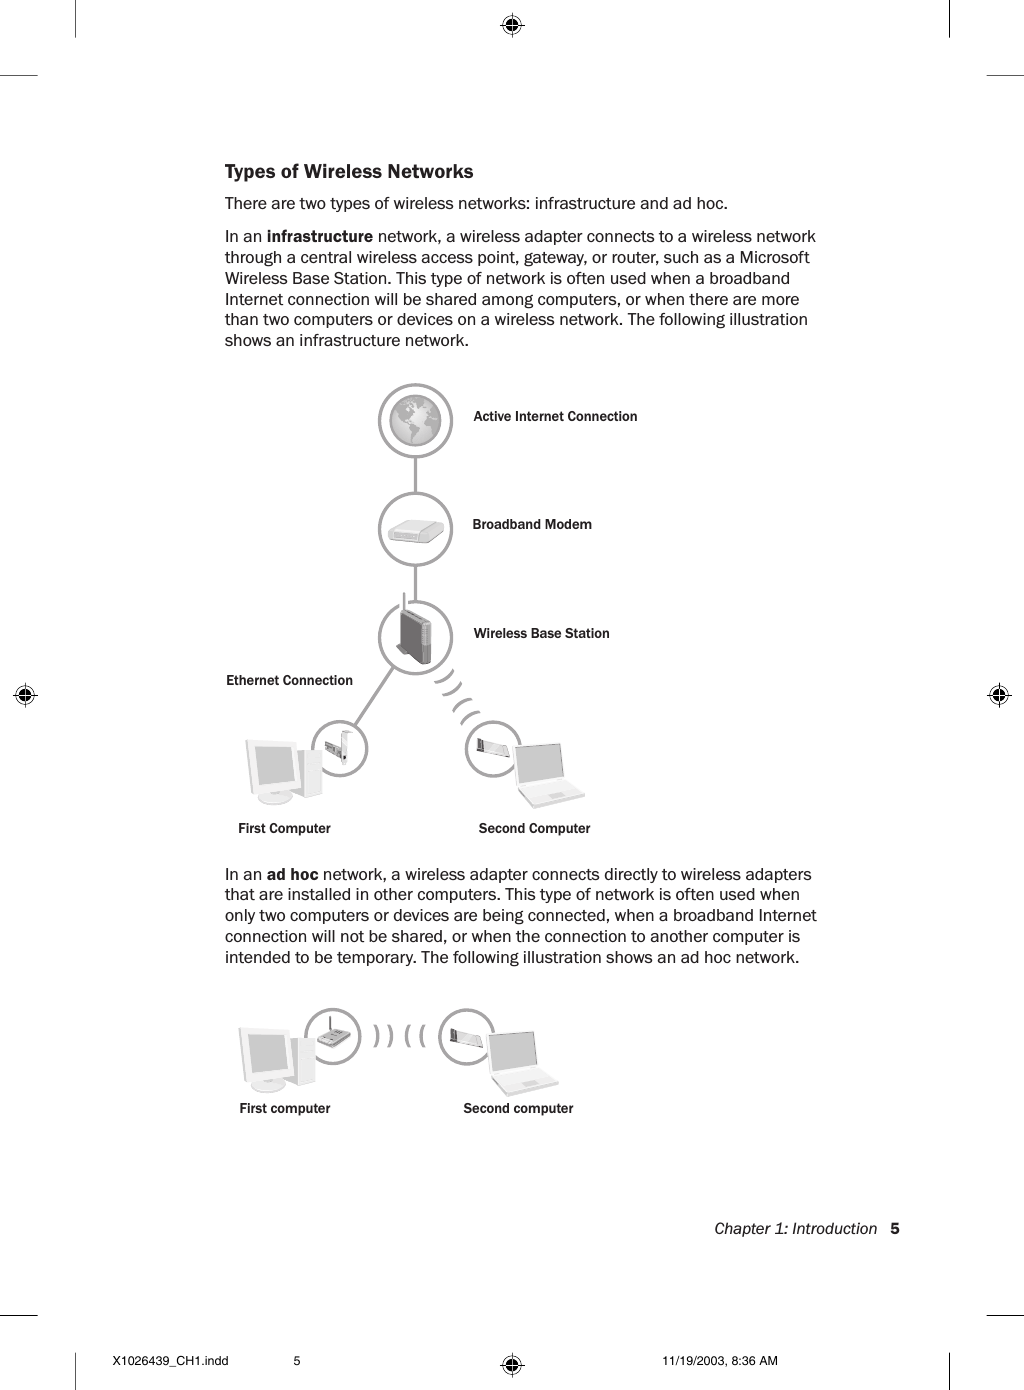
>
MN710 User Manual
>
Users Manual
Contents
1.
Users Manual
2.
Users Manual Cover
Users Manual
Navigation menu
Upload a User Manual
Namespaces
Wiki Guide
HTML
PDF
Info
Views
User Manual
Discussion / Help
Navigation


![32 Microsoft Broadband Networking Wireless Adapter User’s GuideO Verify that you are using the correct wireless settings. You might have incomplete or incorrect wireless settings for your adapter. To connect successfully, the wireless adapter on your computer must have the same network name (SSID), wireless channel, and wireless security (such as Wireless Equivalent Privacy [WEP] key) information as your base station. If you have a Microsoft base station, you can check the wireless settings by opening the Base Station Management Tool from the Broadband Network Utility. You can also access the base station directly through your Internet browser by going to the address http://192.168.2.1. Then you can view and, if necessary, correct your Microsoft wireless adapter settings by opening Adapter Settings from the Tools menu of the Broadband Network Utility.O Reset your broadband modem. Turn off the modem for 5 to 10 seconds. Restart the modem, and wait for it to connect to your ISP. After the status lights on your modem indicate that it is connected, and the status lights on your base station show that you have a working Internet connection, try accessing the Internet from your computer again.O Reset your base station, gateway, or router. Turn off or unplug the base station, wait at least 10 seconds, and turn it back on again. When the status lights indicate that the base station is ready, try accessing the Internet from the wireless computer again.O Update your base station rmware. Firmware is the software that is loaded into your base station to provide network functions. You can update your base station rmware by downloading it from the Internet and installing it on your base station. If you are using a Microsoft base station, make sure that you are using the latest rmware version. To update Microsoft base station rmware 1. Double-click the Broadband Network Utility icon on your taskbar to start the utility.2. On the Help menu, click Check for Updates Online. 3. If there is a newer version of the rmware available, follow the instructions on the Web page to download the new software, rmware, or drivers. My network is slow.If networked programs are running slowly, or you are experiencing large slowdowns in your Internet connection speed, try decreasing the number of computers or programs that are simultaneously accessing your network. Note Programs that do not use network resources, for example Microsoft Word when it is editing a local document, will not interfere with the speed of your network. Only programs which must constantly use your network connection to function will be affected. Examples can include music sharing software and instant messenger programs.X1026439_CH5.indd 11/19/2003, 8:36 AM32](https://usermanual.wiki/Microsoft/MN710.Users-Manual/User-Guide-395560-Page-38.png)