Microsoft RH-36 GSM 850/1900 Cellular Telephone User Manual 1100 EN LTA PTv1 9310129 final
Microsoft Mobile Oy GSM 850/1900 Cellular Telephone 1100 EN LTA PTv1 9310129 final
UserManual.wiki
>
Microsoft
>
RH-36 User Manual
>
Manual
Contents
1.
Manual
2.
User manual
Manual
Navigation menu
Upload a User Manual
Namespaces
Wiki Guide
HTML
PDF
Info
Views
User Manual
Discussion / Help
Navigation
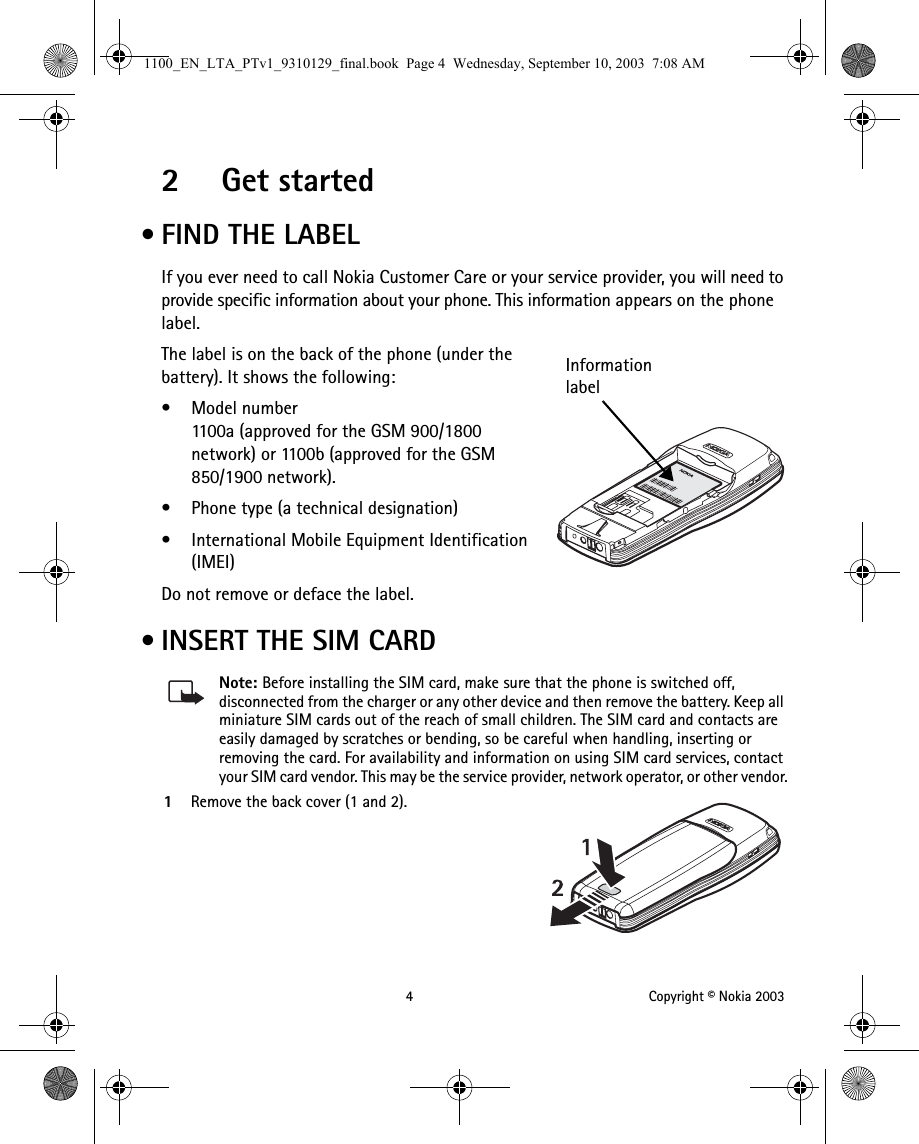
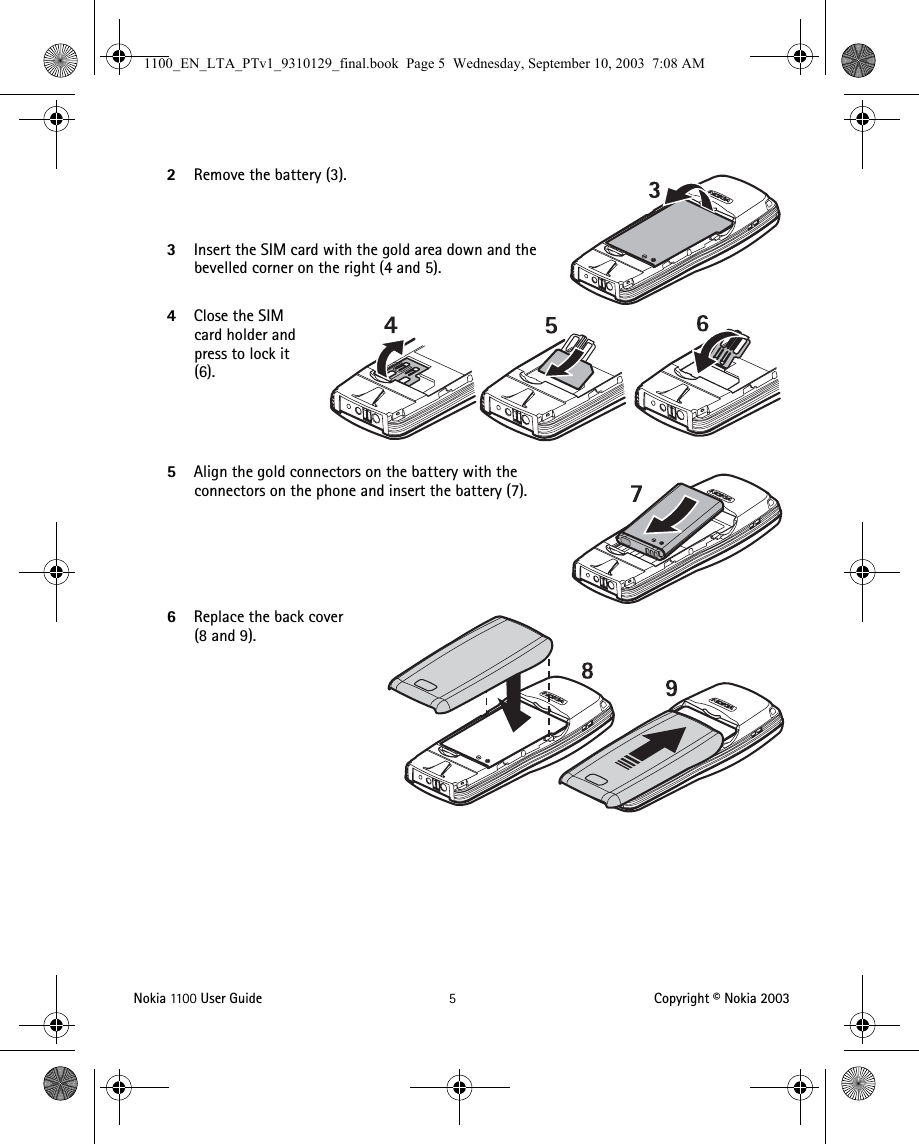
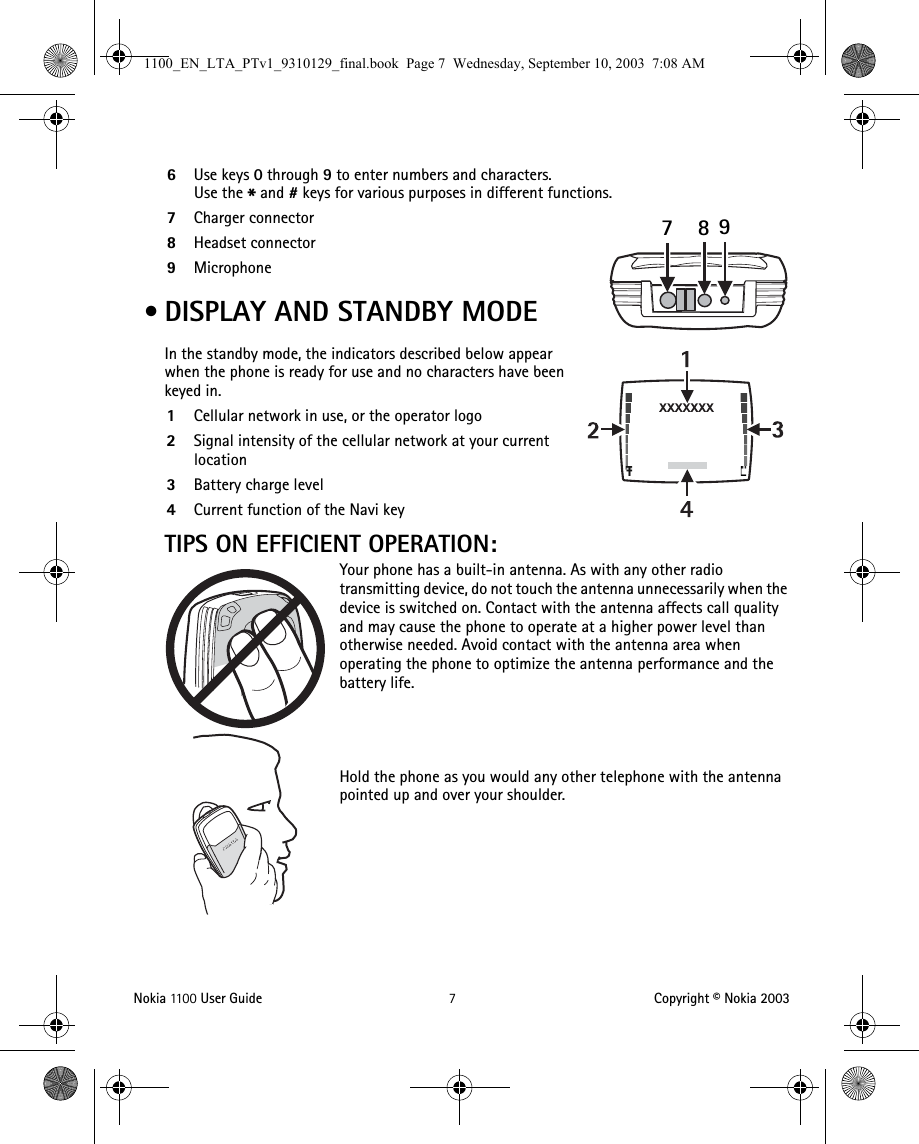
![6 Copyright © Nokia 2003 • CHARGE THE BATTERYDo not charge the battery if the phone covers are removed. 1Connect the charger plug into the connector in the phone.2Connect the charger to an ac wall outlet. The battery indicator bar starts scrolling.• Charging a BL-5C battery with the ACP-7 charger takes up to 3 hours.•If Not charging appears, wait for a while, disconnect the charger, reconnect it, and retry. If charging still fails, contact your dealer.When the battery is fully charged, the bar stops scrolling. Disconnect the charger from the phone and the ac outlet. • KEYS AND CONNECTORS1Flashlight See “Flashlight” on page 26.2Nokia Navi™ key Text above the Navi key shows the current function of the key. In this guide, instructions such as “Press Menu” mean to press the key located beneath the word Menu.3Power key Press and hold to switch the phone on or off. Press and release for quick access to a list of profiles [see “Profiles (Menu 6)” on page 20]. When the keypad is locked, press to turn on the display lights for about 15 seconds.4Scroll keys Scroll through names, phone numbers, menus or settings. Adjusts the earpiece volume during a call. In the standby mode, press to show the list of last dialed numbers and press to show names and phone numbers saved in Contacts.5Clear/Exit, or C keyDeletes characters from the display and exits from different functions.1100_EN_LTA_PTv1_9310129_final.book Page 6 Wednesday, September 10, 2003 7:08 AM](https://usermanual.wiki/Microsoft/RH-36.Manual/User-Guide-368357-Page-10.png)

![Nokia 11 0 0 User Guide 21 Copyright © Nokia 2003AUTO UPDATE OF DATE & TIME This network service updates the date and time according to the current time zone. The automatic update of date and time does not change the time you have set for the alarm clock or the reminder notes. They are in local time. Updating may cause some alarms that you have set to expire without sounding.Call settings •Call forwarding forwards incoming calls to your voice mailbox or to some other phone number (network service).Select the forwarding option you want, for example, select Forward if busy to forward the calls when you are on a call or when you reject a call. Several forwarding options may be active at the same time. When Forward all voice calls is active, appears.Set the selected option on (Activate) or off (Cancel), check whether the option is activated by selecting Check status, or specify a delay for certain diverts in Set delay (not available for all forwarding options).•Automatic redial sets your phone to redial up to ten times after an unsuccessful call attempt.•1-touch dialing lets you press and hold the 1-touch dial keys (2–9) to dial names and phone numbers assigned to the corresponding keys.•Call waiting is a network service that notifies you of a new incoming call while you have a call in progress. Press Answer to answer the waiting call and put the first call on hold. Press End to end the active call.•Send my own caller ID when calling is a network service that lets your phone number appear to (Default or Yes) or be hidden from (No) the person you are calling. When you select Preset, the setting agreed with your service provider is used.Phone settings Language—To select the language for the display texts.Cell info display—To set the phone to indicate when it is used in a cellular network based on Micro Cellular Network (MCN) technology (network service). For more information, contact your service provider.Welcome note—You can key in a message that will be shown briefly on the display when the phone is switched on.Network selection—To set the phone to automatically select a cellular network available in your area, or you can select the network manually. The network you select must have a roaming agreement with your home network.Confirm SIM service actions—To set the phone to show or hide confirmation messages when you use the SIM card services [see “SIM services (Menu 12)” on page 26].1100_EN_LTA_PTv1_9310129_final.book Page 21 Wednesday, September 10, 2003 7:08 AM](https://usermanual.wiki/Microsoft/RH-36.Manual/User-Guide-368357-Page-25.png)