Microsoft RM-128 Quad band GSM, US Dual band WCDMA, BT, Smart phone User Manual R1114 en
Microsoft Mobile Oy Quad band GSM, US Dual band WCDMA, BT, Smart phone R1114 en
UserManual.wiki
>
Microsoft
>
RM-128 User Manual
>
Manual 2
Contents
1.
Manual 1
2.
Manual 2
Manual 2
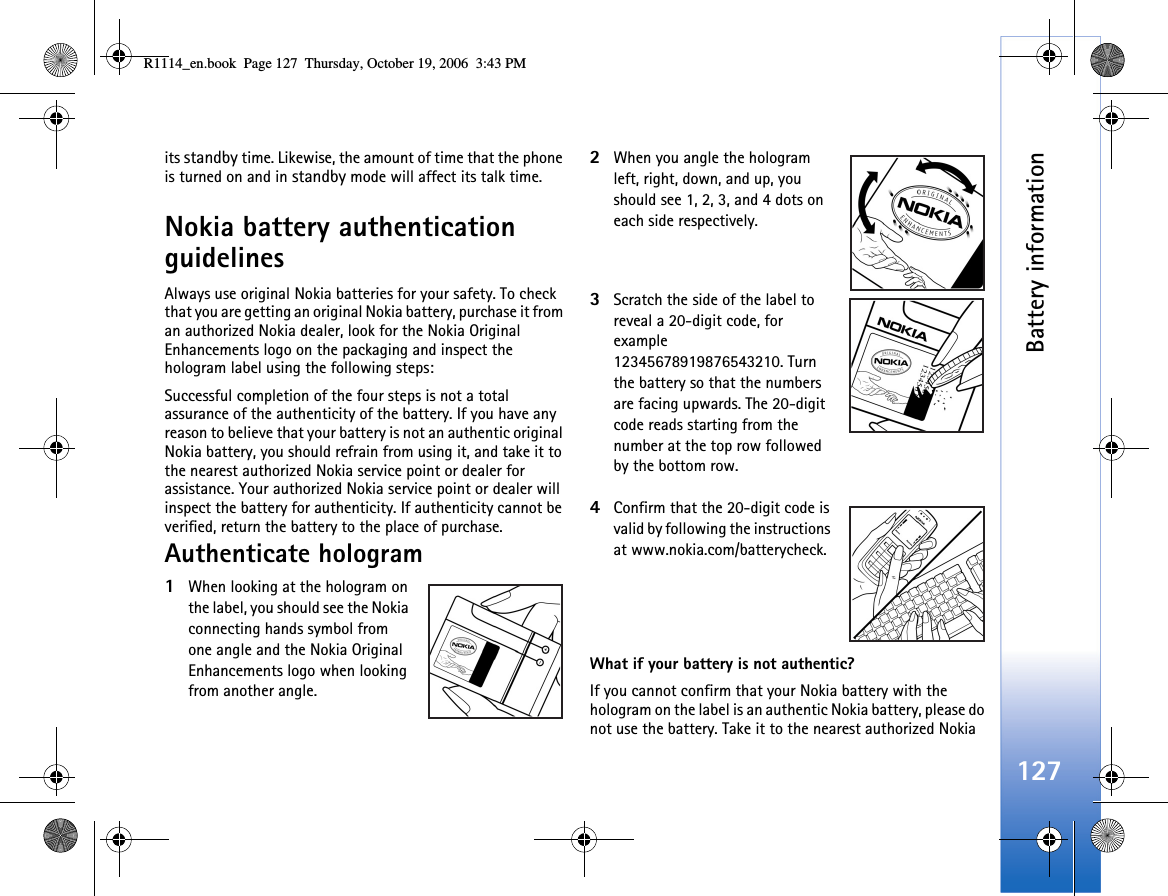
Navigation menu
Upload a User Manual
Namespaces
Wiki Guide
HTML
PDF
Info
Views
User Manual
Discussion / Help
Navigation