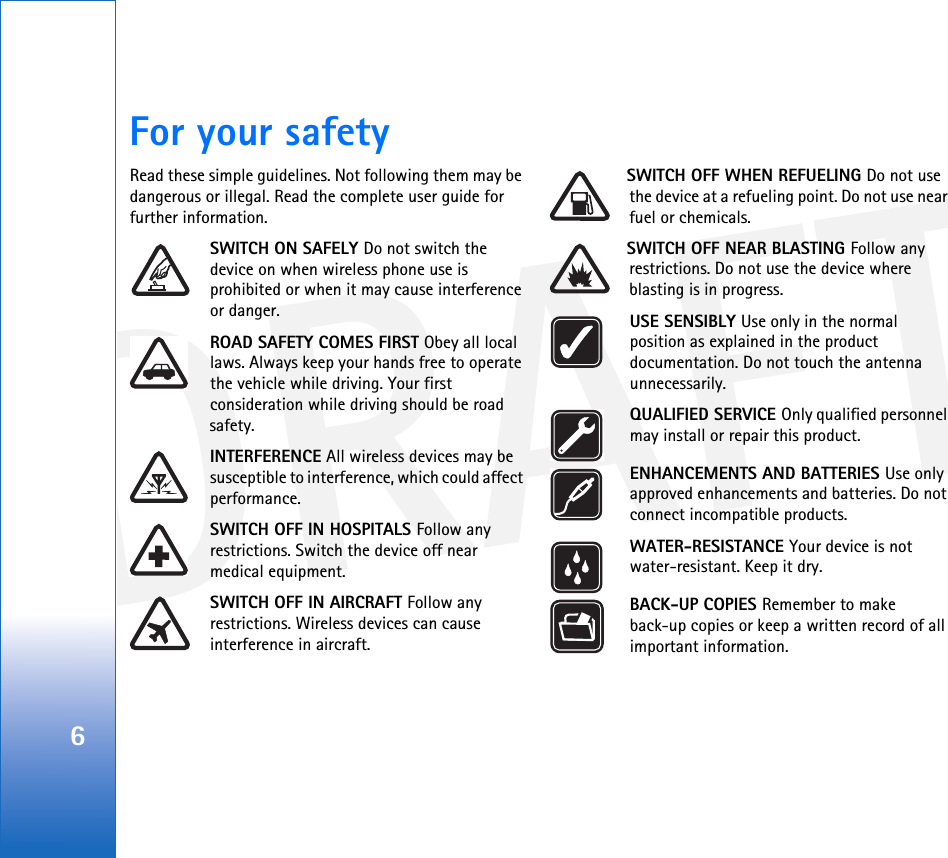
Microsoft RM-156 Triple Band GSM phone with BT and WLAN User Manual R1129 en
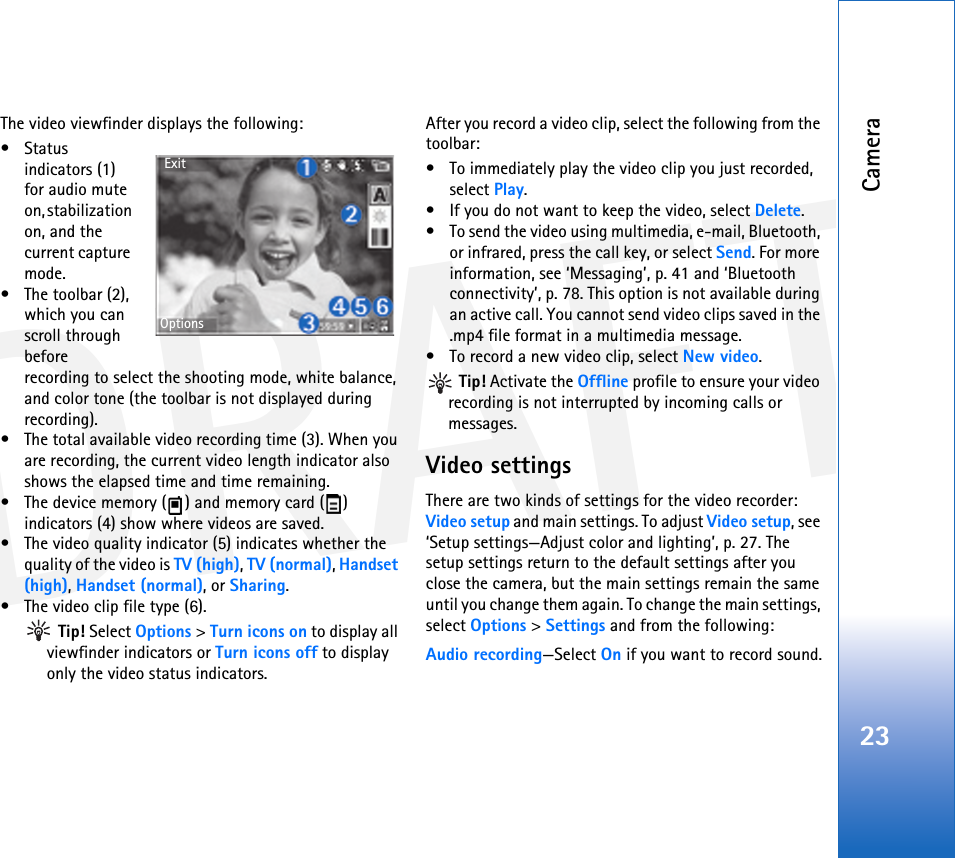
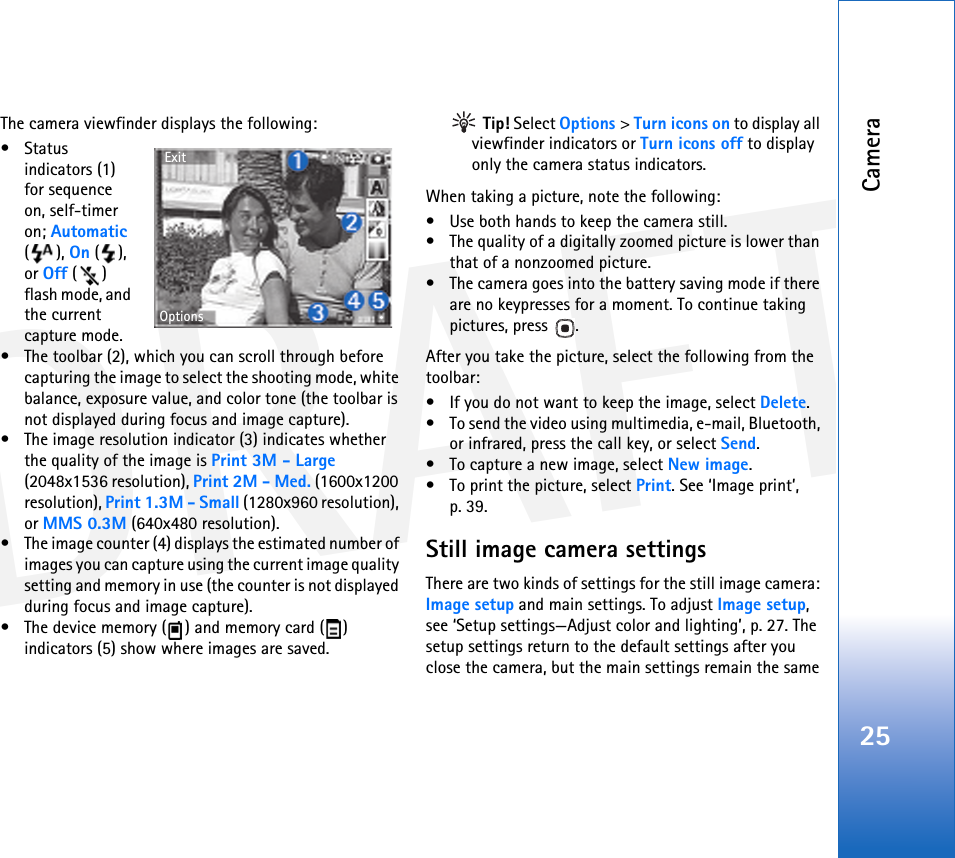
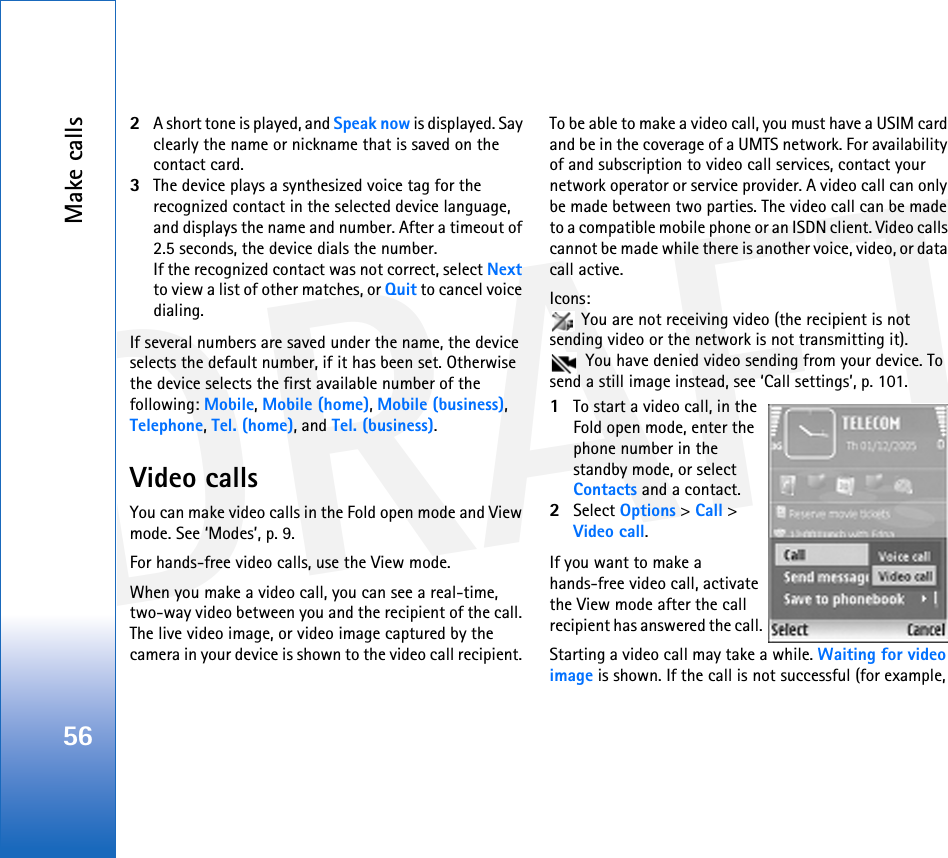
Microsoft Mobile Oy Triple Band GSM phone with BT and WLAN R1129 en
UserManual.wiki
>
Microsoft
>
RM-156 User Manual
>
Users guide
Contents
1.
Users guide
2.
Revised main users guide
3.
Users guide supplement
4.
Updated main users guide
5.
User guide supplement
6.
Manual
7.
Instructions for user
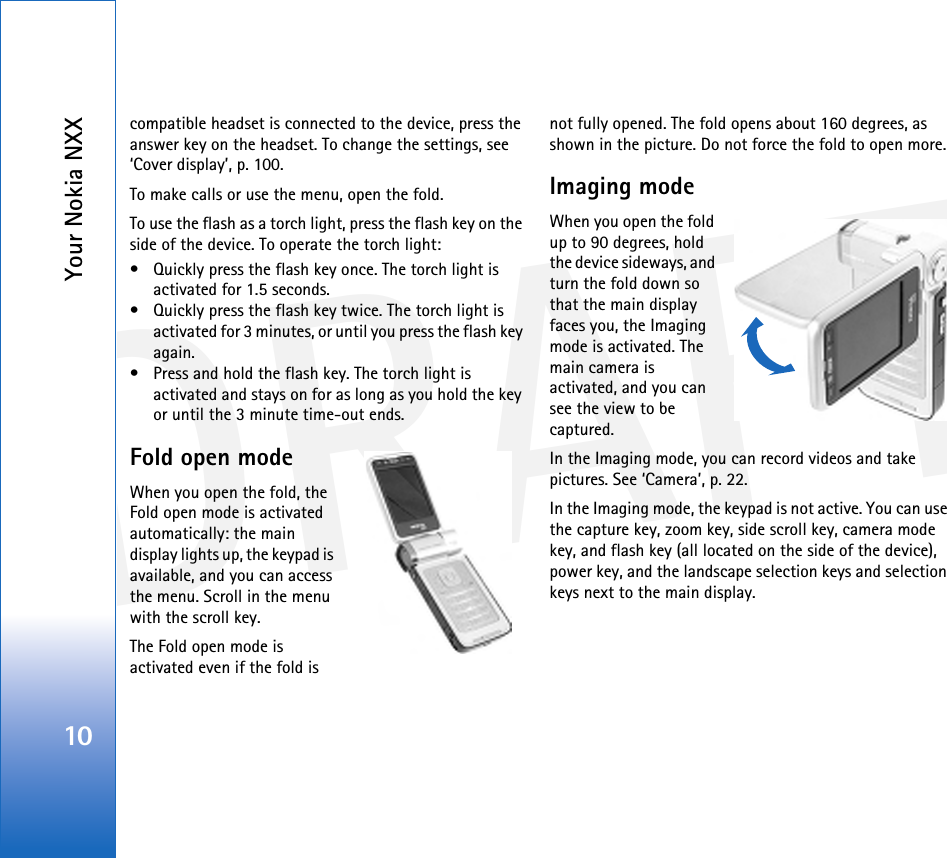
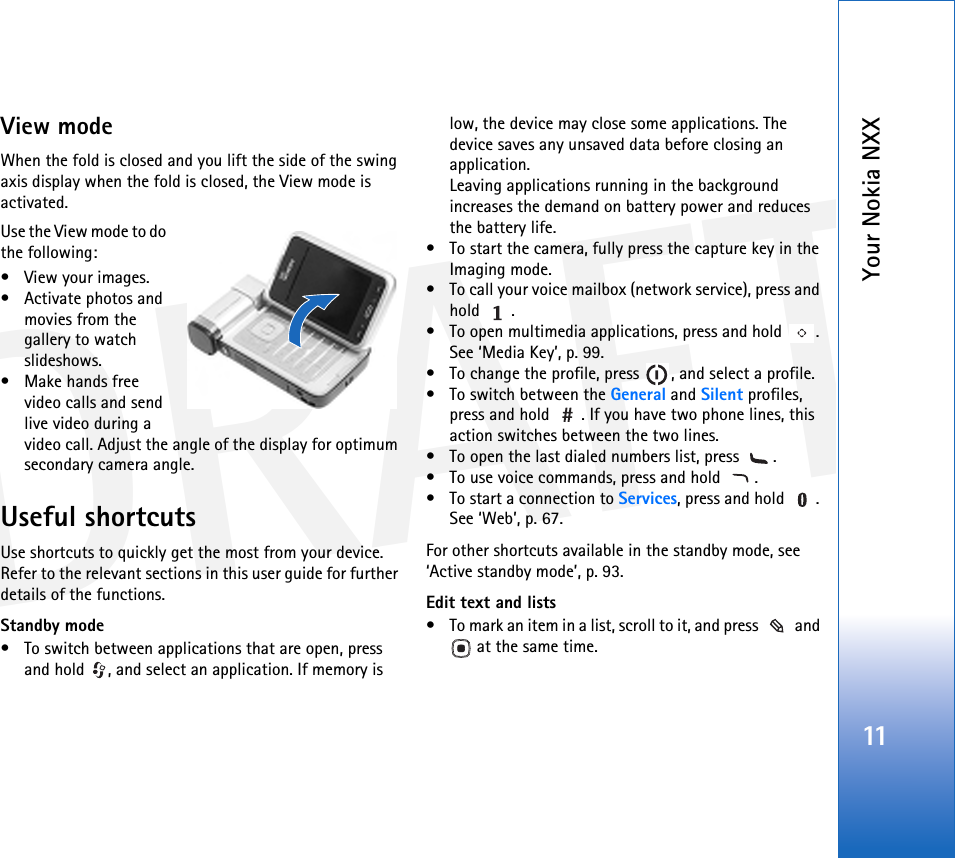
Users guide
Navigation menu
Upload a User Manual
Namespaces
Wiki Guide
HTML
PDF
Info
Views
User Manual
Discussion / Help
Navigation