Microsoft RM-208 Quad GSM/WCDMA band cellular phone User Manual User quide
Microsoft Mobile Oy Quad GSM/WCDMA band cellular phone User quide
UserManual.wiki
>
Microsoft
>
RM-208 User Manual
>
User quide
Contents
1.
User quide
2.
User manual
3.
Manual
User quide
Navigation menu
Upload a User Manual
Namespaces
Wiki Guide
HTML
PDF
Info
Views
User Manual
Discussion / Help
Navigation
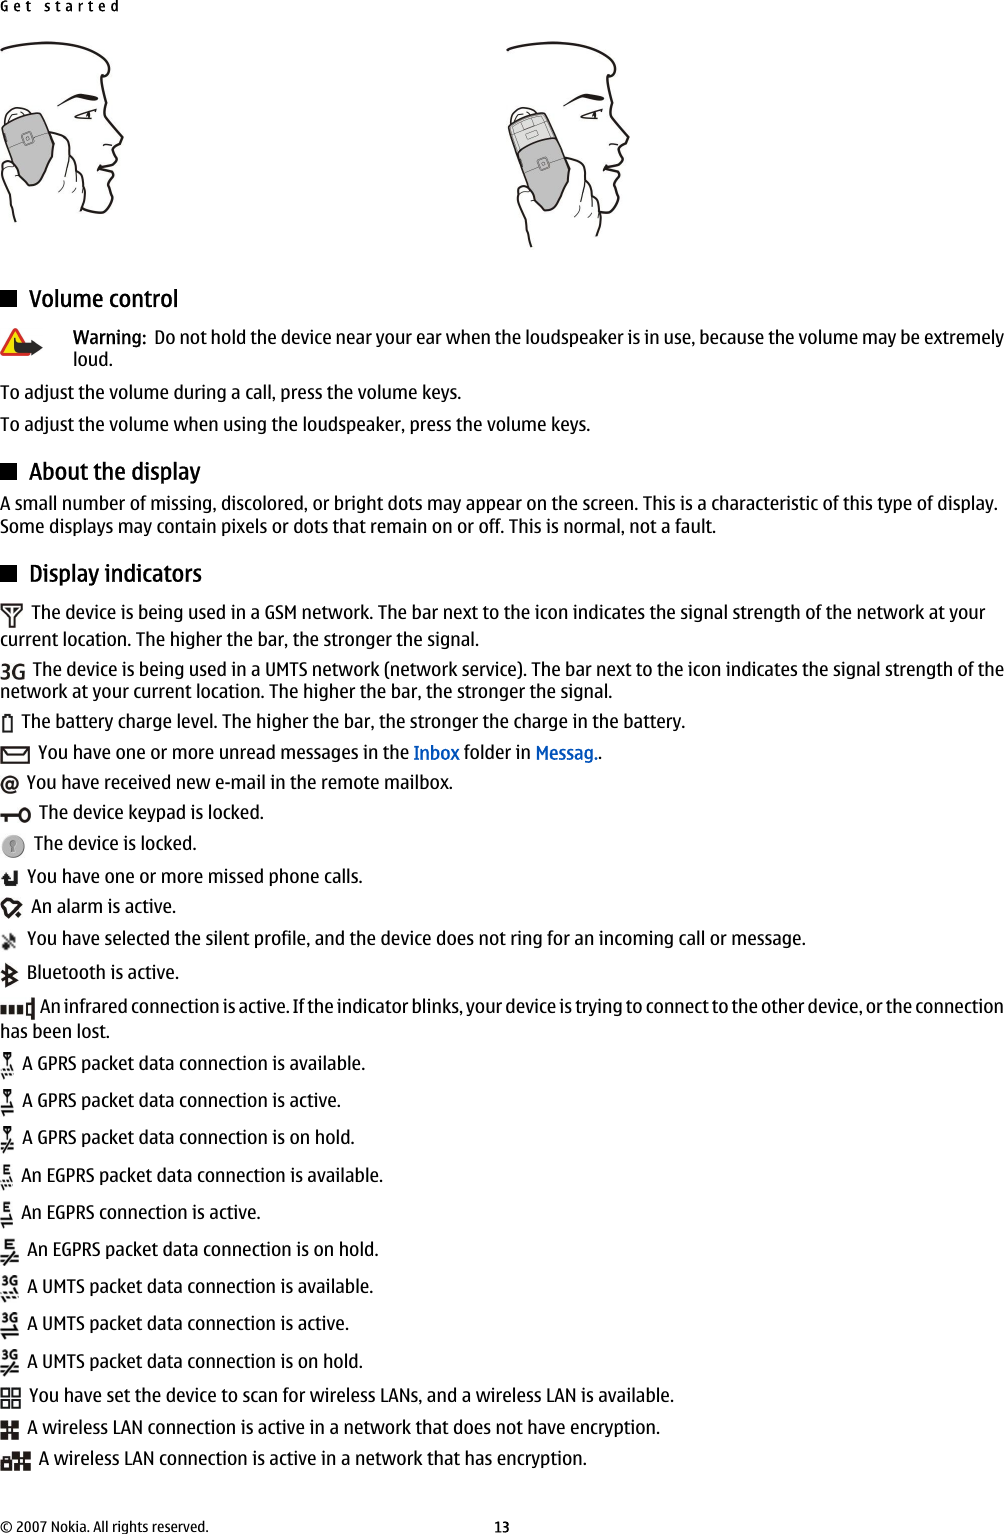

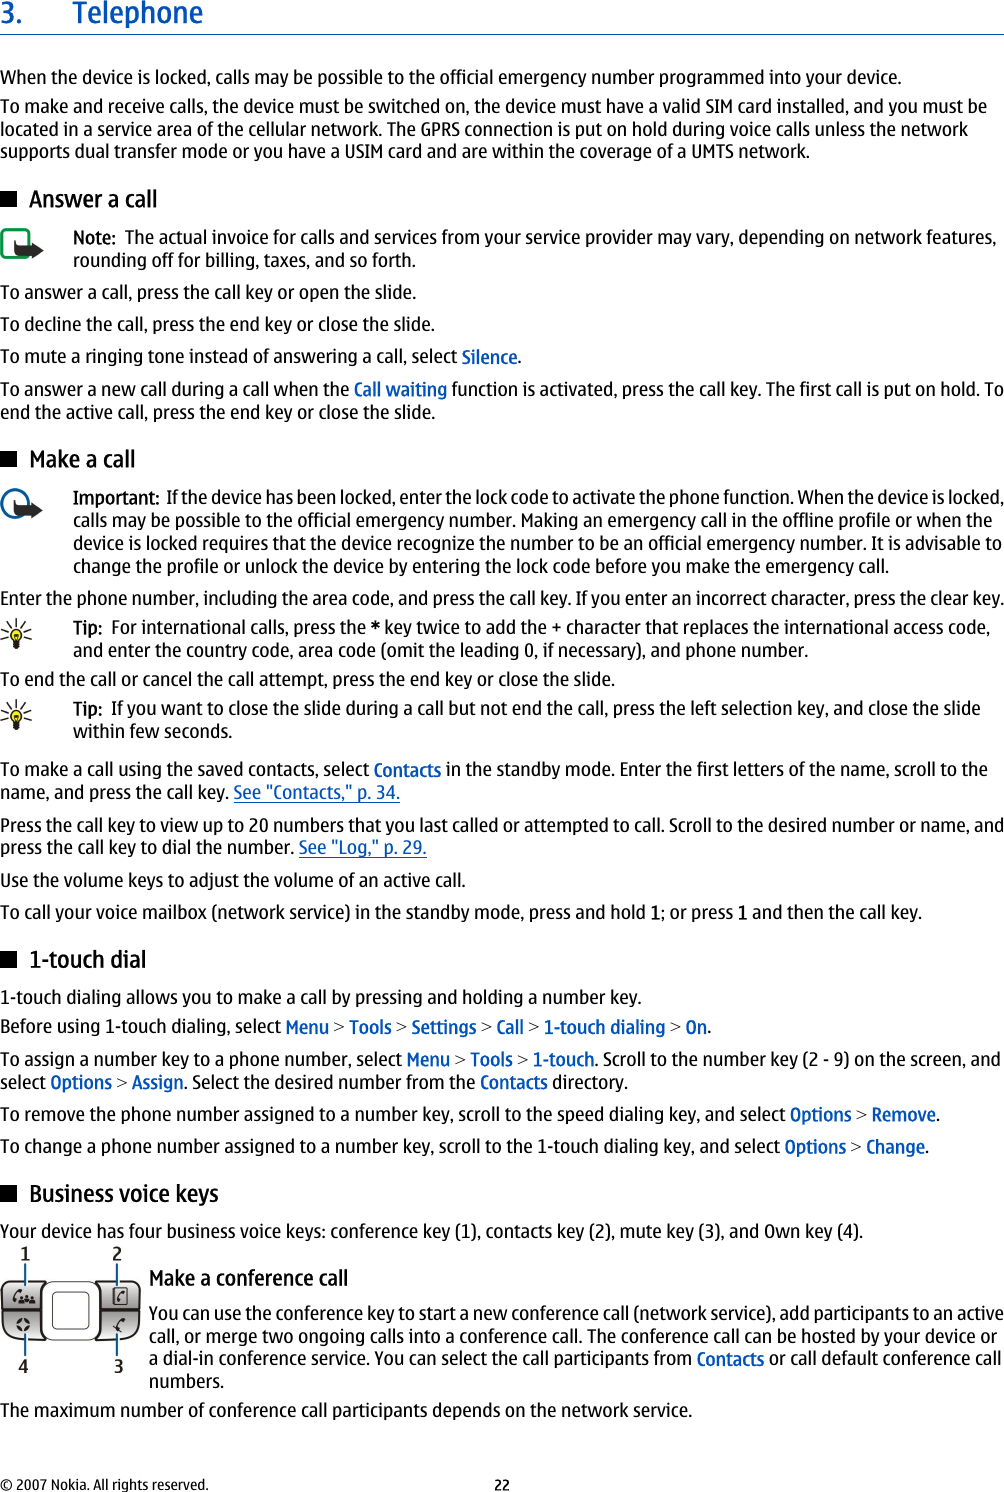


![View certificate detailsYou can only be sure of the correct identity of a server when the signature and the period of validity of a server certificate havebeen checked.To view certificate details, select a certificate and View details.One of the following notes may appear:•Certificate not trusted — You have not set any application to use the certificate. You may want to change the trust settings.•Expired certificate — The period of validity has ended for the selected certificate.•Certificate not valid yet — The period of validity has not yet begun for the selected certificate.•Certificate corrupted — The certificate cannot be used. Contact the certificate issuer.Certificate security settingsSelect from the following:•Software installation — Select to install signed applications only or all applications.•Online certif. check — To check the validity of certificates when an application is installed, select On.•Default web address — The validity of a certificate is checked from the default address if the certificate does not include itsown Web address.Activation keysSelect Menu > Tools > Actv. keys.You can view and manage permission rights on your protected media files using alphanumerical keys. These keys specify rightsthat determine when you can play, display, execute, or print media files. Rights for media files can also restrict the number oftimes the media can be rendered (played, displayed, executed, or printed) or the period of time you are allowed to render theobject before your rights to the media expire.Select either Valid keys, Invalid keys, or Not in use. Scroll to the desired file, and select Options > Key details.The following details are displayed for each media file:•Status — The status is either Activation key is valid, Activation key expired, or Activation key not yet valid.•Content sending — Allowed means that you can send the file to another device. Not allowed means that you cannot sendthe file to another device.•Content in phone — Yes ([14]) means that the file is in the device and the path of the file is displayed. No means that therelated file is not currently in the device.Activate contentFrom the main view of the activation keys, select Invalid keys > Options > Get activation key. Establish a network connection atthe prompt, and you are directed to a Web site where you can purchase rights to the media.Delete file rightsIn the Valid keys or Not in use tabs, scroll to the desired file. Select Options > Delete. If there are several rights related to thesame media file, all the rights are deleted.Work with groupsThe group key view displays all of the files related to a group right. If you have downloaded multiple media files with the samerights, they are all displayed in this view. You can open the group view from either the Valid keys or Invalid keys tabs. To accessthese files, open the group rights folder.To rename a group, select Options > Rename. Enter the new name to change the name of the group rights.Tools© 2007 Nokia. All rights reserved. 85](https://usermanual.wiki/Microsoft/RM-208.User-quide/User-Guide-731927-Page-85.png)