Microsoft RM-24 Triple Band GSM Phone with WLAN & BT User Manual User Guide
Microsoft Mobile Oy Triple Band GSM Phone with WLAN & BT User Guide
UserManual.wiki
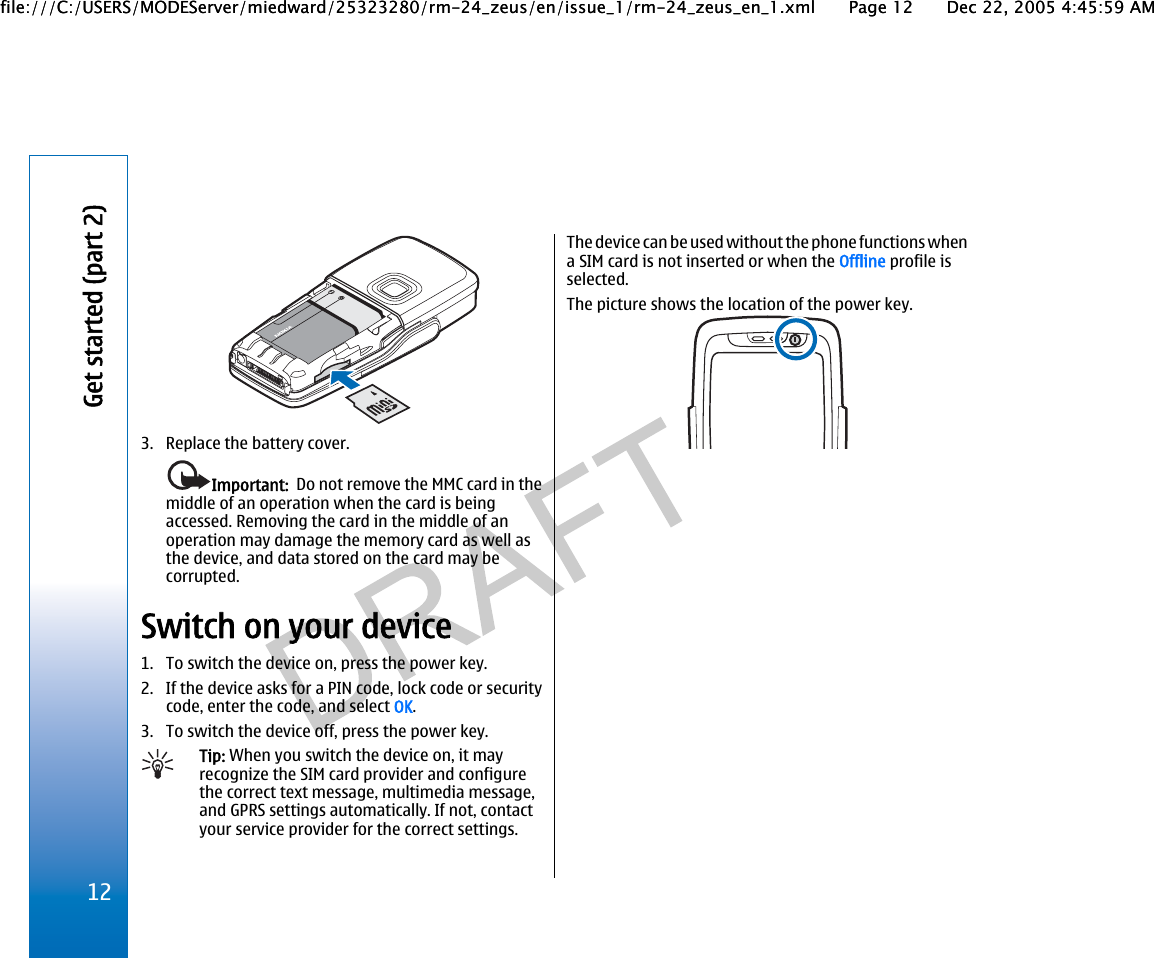
>
Microsoft
>
RM-24 User Manual
>
User Guide
Contents
1.
User Guide
2.
Manual
User Guide
Navigation menu
Upload a User Manual
Namespaces
Wiki Guide
HTML
PDF
Info
Views
User Manual
Discussion / Help
Navigation


![WebSelect Menu > Web. Enter the address of a Web page andselect Go to.When you start to enter the address, addresses of pagesyou have previously visited that match your writingappear. To open a page, scroll up to select to the addressand select Go to.To zoom the page in or out, press * or #.To open a Web link, scroll to it and press the joystick.Keyboard shortcuts:•Press 1 to open your Bookmarks.•Press 3 to return to the previous page.•Press 6 to switch between your open browserwindows.•Press 9 to go to a different Web page.The available options may vary.Set preferences for browsingSelect Menu > Web > Options > Settings.Scroll to the following settings and press the joystick toedit:•Access point — Scroll to the access point to connect toWeb pages and press the joystick.•Show images and objects — To load pages fasterwhen browsing by not loading the images on them,select No. You can still choose to load images whenbrowsing individual pages. Select Options > Showimages.•Font size — Select the font size that you want to usewhen viewing the Web pages.•Default encoding — Select the correct characterencoding for your language.•Auto. bookmarks — To save Web page addresses thatyou visit automatically in the Auto. bookmarks folder,select On. To hide the folder, select Hide folder andpress OK.•Screen size — To use the whole display area forviewing Web pages, select Full screen. You can pressthe left selection key to open Options and use theavailable options while browsing in full screen mode.•Homepage — To select the page that you want toappear as your homepage, scroll to Default to use theaccess point homepage, User defined to enter thehomepage address, or Use current page to use thecurrently open Web page.•[Page overview] — Select whether you want to see anoverview of the page as a miniature on top of the pageyou are viewing.•[Back list] — Select whether you want to seeminiatures of the pages you have visited when youwant to go back in your browsing history.•Volume — Scroll to the volume level for music or othersound in Web pages and select OK.•Cookies — Select to allow or reject the sending andreceiving of cookies. Cookies are info the networkserver collects about your visits to various Web pages.They are necessary if you shop on the Web to retain64Webfile:///C:/USERS/MODEServer/miedward/25323280/rm-24_zeus/en/issue_1/rm-24_zeus_en_1.xml Page 64 Dec 22, 2005 4:45:59 AM](https://usermanual.wiki/Microsoft/RM-24.User-Guide/User-Guide-616100-Page-64.png)
![Voice command settingsTo switch off the synthesizer that plays recognized voicecommands in the selected phone language, selectSettings > Synthesiser > Off.To reset voice recognition learning when the main userof the phone has changed, select Reset voice adapts..Activation KeysSelect Menu > Tools > Actv. keys.You can view and manage permission rights on yourprotected media files using alphanumerical keys. Thesekeys specify rights that determine when you can play,display, execute, or print media files. Rights for media filescan also restrict the number of times the media can berendered (played, displayed, executed, or printed) or theperiod of time you are allowed to render the object beforeyour rights to the media expire.Select either Valid keys, Invalid keys, or Not in use. Scrollto the desired file and select Options > Key details.The following details are displayed for each media file:•Status — The status is either Activation key is valid,Activation key expired, or Activation key not yet valid.•Content sending — Allowed means that you can sendthe file to another device. Not allowed means that youcannot send the file to another device.•Content in phone — Yes (%U[14]) means that the fileis in the device and the path of the file is displayed.No means that the related file is not currently in thedevice.Activate contentFrom the main view of the Activation Keys, select Invalidkeys > Options > Activate content. Establish a networkconnection at the prompt, and you are directed to a Website where you can purchase rights to the media.Delete file rightsIn the Valid keys or Not in use tabs, scroll to the desiredfile and select Options > Delete. If there are several rightsrelated to the same media file, all the rights are deleted.Work with groupsThe group key view displays all of the files related to agroup right. If you have downloaded multiple media fileswith the same rights, they are all displayed in this view.You can open the group view from either the Valid keysor Invalid keys tabs. To access these files, open the grouprights folder.To rename a group, select Options > Rename. Enter thenew name to change the name of the group rights.Application managerSelect Menu > Tools > App. manager.When you open the application manager, you see all thesoftware packages that have been installed, with theirname, version number, type, and size. View the details ofinstalled applications, remove them from your device,and specify installation settings.98Toolsfile:///C:/USERS/MODEServer/miedward/25323280/rm-24_zeus/en/issue_1/rm-24_zeus_en_1.xml Page 98 Dec 22, 2005 4:45:59 AMfile:///C:/USERS/MODEServer/miedward/25323280/rm-24_zeus/en/issue_1/rm-24_zeus_en_1.xml Page 98 Dec 22, 2005 4:45:59 AM](https://usermanual.wiki/Microsoft/RM-24.User-Guide/User-Guide-616100-Page-98.png)