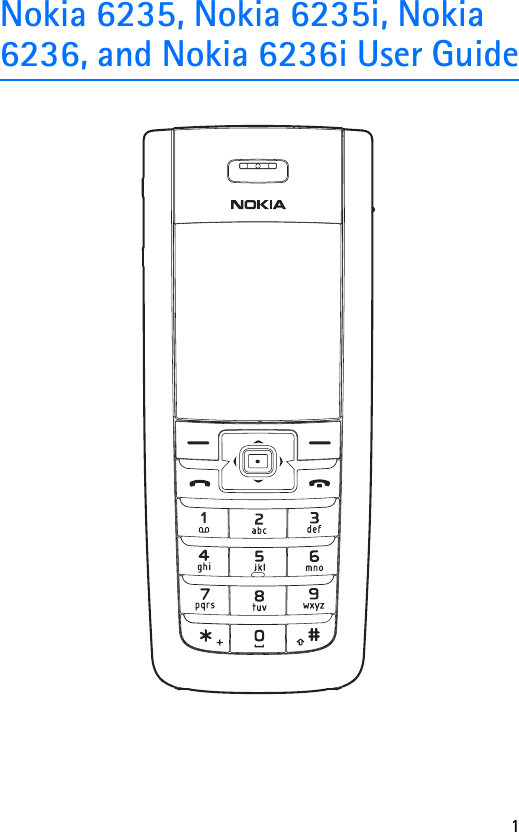
Microsoft RM-60 Dual Band Cellular Phone User Manual Axis 6235 i MTVSN 923598v1 030305x1

Microsoft Mobile Oy Dual Band Cellular Phone Axis 6235 i MTVSN 923598v1 030305x1

Contents

Manual

1Nokia 6235, Nokia 6235i, Nokia 6236, and Nokia 6236i User Guide
2LEGAL INFORMATIONDECLARATION OF CONFORMITYWe, NOKIA CORPORATION declare under our sole responsibility that the products Nokia 6235, Nokia 6235i, Nokia 6236, and Nokia 6236i are in conformity with the provisions of the following Council Directive: 1999/5/EC. A copy of the Declaration of Conformity can be found at http://www.nokiausa.com/phones/declaration_of_conformity/.PART NO. 9235986, ISSUE NO. 1 Copyright ©2005 Nokia. All rights reserved.Nokia, Nokia Connecting People, Nokia 6235, Nokia 6235i, Nokia 6236, Nokia 6236i, Pop-Port™, and the Nokia Original Enhancements logos are trademarks or registered trademarks of Nokia Corporation. Other company and product names mentioned herein may be trademarks or trade names of their respective owners. US Patent No. 5818437 and other pending patents. T9 text input software Copyright ©1999-2003. Tegic Communications, Inc. All rights reserved.Includes RSA BSAFE cryptographic or security protocol software from RSA Security. Java™ is a trademark of Sun Microsystems, Inc.The information contained in this user guide was written for the Nokia 6235, Nokia 6235i, Nokia 6236, and Nokia 6236i products. Nokia operates a policy of ongoing development. Nokia reserves the right to make changes to any of the products described in this document without prior notice.UNDER NO CIRCUMSTANCES SHALL NOKIA BE RESPONSIBLE FOR ANY LOSS OF DATA OR INCOME OR ANY SPECIAL, INCIDENTAL, AND CONSEQUENTIAL OR INDIRECT DAMAGES HOWSOEVER CAUSED. THE CONTENTS OF THIS DOCUMENT ARE PROVIDED “AS IS.” EXCEPT AS REQUIRED BY APPLICABLE LAW, NO WARRANTIES OF ANY KIND, EITHER EXPRESS OR IMPLIED, INCLUDING, BUT NOT LIMITED TO, THE IMPLIED WARRANTIES OF MERCHANTABILITY AND FITNESS FOR A PARTICULAR PURPOSE, ARE MADE IN RELATION TO THE ACCURACY AND RELIABILITY OR CONTENTS OF THIS DOCUMENT. NOKIA RESERVES THE RIGHT TO REVISE THIS DOCUMENT OR WITHDRAW IT AT ANY TIME WITHOUT PRIOR NOTICE.EXPORT CONTROLS This device may contain commodities, technology, or software subject to export laws and regulations from the U.S. and other countries. Diversion contrary to law is prohibited.FCC/INDUSTRY CANADA NOTICE Your device may cause TV or radio interference (for example, when using a telephone in close proximity to receiving equipment). The FCC or Industry Canada can require you to stop using your telephone if such interference cannot be eliminated. If you require assistance, contact your local service facility. This device complies
3with part 15 of the FCC rules. Operation is subject to the condition that this device does not cause harmful interference.
Contents4ContentsFor your safety  51. Phone at a glance....................................................................  102. Set up your phone...................................................................  153. Text entry.................................................................................  224. Messages ..................................................................................  255. Call log .....................................................................................  406. Contacts ...................................................................................  447. Camera .....................................................................................  528. Gallery ......................................................................................  559. Media........................................................................................  5710.Settings...................................................................................  6111.Organizer ................................................................................  8012.Mobile Web ............................................................................  9013.Extras ......................................................................................  9314.PC Connectivity......................................................................  9415.Enhancements ........................................................................  9716.Reference information...........................................................  98Care and maintenance .............................................................. 100Additional safety information.................................................. 101
For your safety5For your safetyRead these simple guidelines. Not following them may be dangerous or illegal. Read the complete user guide for further information. SWITCH ON SAFELYDo not switch the device on when wireless phone use is prohibited or when it may cause interference or danger.ROAD SAFETY COMES FIRSTObey all local laws. Always keep your hands free to operate the vehicle while driving. Your first consideration while driving should be road safety.INTERFERENCEDo not switch the device on when wireless phone use is prohibited or when it may cause interference or danger.SWITCH OFF IN HOSPITALSFollow any restrictions. Switch the device off near medical equipment.SWITCH OFF IN AIRCRAFTFollow any restrictions. Wireless devices can cause interference in aircraft.SWITCH OFF WHEN REFUELINGDon't use the device at a refueling point. Don't use near fuel or chemicals.SWITCH OFF NEAR BLASTINGFollow any restrictions. Don't use the device where blasting is in progress.USE SENSIBLYUse only in the normal position as explained in the product documentation. Don't touch the antenna unnecessarily.QUALIFIED SERVICEOnly qualified personnel may install or repair this product.ENHANCEMENTS AND BATTERIESUse only approved enhancements and batteries. Do not connect incompatible products.
For your safety6WATER-RESISTANCEYour phone is not water-resistant. Keep it dry.BACK-UP COPIESRemember to make back-up copies or keep a written record of all important information.CONNECTING TO OTHER DEVICESWhen connecting to any other device, read its user guide for detailed safety instructions. Do not connect incompatible products.EMERGENCY CALLSEnsure the device is switched on and in service. Press the end key as many times as needed to clear the display and return to the main screen. Enter the emergency number, then press the call key. Give your location. Do not end the call until given permission to do so.■About your deviceThe wireless devices described in this guide are approved for use on the CDMA 800, 1900 and AMPS networks. Contact your service provider for more information about networks. When using the features in this device, obey all laws and respect privacy and the legitimate rights of others.Warning: To use any features in this device, other than the alarm clock, the device must be switched on. Do not switch the device on when wireless phone use may cause interference or danger.■Network ServicesTo use the device you must have service from a wireless service provider. Many of the features in this device depend on features in the wireless network to function. These Network Services may not be available on all networks or you may have to make specific arrangements with your service provider before you can utilize them. Your service provider may need to give you additional instructions for their use and explain what charges will apply. Some networks may have limitations that affect how you can use Network Services. For instance, some networks may not support all language-dependent characters and services.Your service provider may have requested that certain features be disabled or not activated in your device. If so, they will not appear on your device menu. Contact your service provider for more information.
For your safety7■Shared memoryThe following device features may share memory: contacts; text messages; photos, images, and tones in Gallery; calendar notes; games; and applications. Use of one or more of these features may reduce the memory available for the remaining features sharing memory. If your phone displays a message that the memory is full when you try to use a shared memory feature, delete some of the information or entries stored in the shared memory features before continuing. Some of the features, such as photos, images, and tones in Gallery; text messages; and applications may have a certain amount of memory specially allotted to them in addition to the memory shared with other features.
Welcome8WelcomeCongratulations on your purchase of the Nokia 6235, Nokia 6235i, Nokia 6236, or Nokia 6236i mobile phone. Your device provides many functions that are practical for daily use, such as a hands-free loudspeaker, alarm clock, calculator, calendar, camera, FM radio, and more. Your device can also connect to a PC, laptop, or other device using a data cable or infrared. To personalize your device you can set your favorite ringing tones.■Register your deviceMake sure to register your device at www.nokiausa.com/support/warranty/ or call 1-888-NOKIA-2U (1-888-665-4228) so that we can serve your needs better if you should need to call a customer center or to have your device repaired.■Getting helpIf you need help, Nokia Customer Care is available for assistance. Before calling, we recommend that you write down the Electronic serial number (ESN) and your zip code (only in the US) and have it available.Find your device labelThe ESN is found on the type label (1), which is located beneath the battery on the back of the device. See ’Remove the back cover,’ p. 16.Contact NokiaPlease have your product with you when contacting any of these numbers:Nokia Customer Care Center, USANokia Inc.Tel: 1-888-NOKIA-2U (1-888-665-4228)Fax: 1-813-249-9619TTY/TDD users: 1-800-24-NOKIA (1-800-246-6542)Customer Care Center, CanadaNokia Products Ltd.601 Westney Road South
Welcome9Ajax, Ontario L1S 4N7Tel: 1-888-22-NOKIA (1-888-226-6542)Fax: 1-905-619-4360UpdatesFrom time to time, Nokia updates this guide to reflect changes. The latest version and an interactive tutorial for this product may be available at the Web site www.nokiausa.com.Accessibility solutionsNokia is committed to making mobile phones easy to use for all individuals, including those with disabilities. For more information visit the Web site at www.nokiaaccessibility.com.
Phone at a glance101. Phone at a glance1. Power key2. Earpiece3. Headset connector4. Five-way joystick5. Right selection key6. End key7. Pop-Port™ connector8. Microphone9. Charger port10. Keypad11. Call key12. Left selection key13. Display screen14. Volume key■The start screenDepending on your wireless service provider and the model number of your device, some or all of the following selection keys may appear on the start screen.The start screen is home base and indicates your device is in standby mode.Battery level (1)—A higher bar indicates more battery power.Menu (2)—Press the joystick to select this option.
Phone at a glance11Names or network operator menu item (3)—Press the Right selection key to select this option.Go to(4)—Press the Left selection key to select this option.Signal strength (5)—A higher bar indicates a stronger network signal.■Quick keysDepending on your wireless service provider and the model number of your device, some or all of the following joystick shortcuts may be available from the start screen.Scroll up—Activate camera from standby mode.Scroll right—View calendar.Scroll down—Go to contacts list.Scroll left—Create a text message.Press joystick—Select highlighted menus and submenus.■Indicators and iconsDepending on your wireless service provider and the model number of your device, some or all of the following indicators and icons may appear on the start screen. You have new text or picture messages. See ’Text messages,’ p. 26.You have new multimedia messages. See ’Multimedia messages,’ p. 31.   You have a picture message in your inbox. See ’Receive and save a picture message,’ p. 30. You have new voice messages. See ’Voice messages,’ p. 36. Device keypad is locked. See ’Keyguard,’ p. 21. Device is set to the silent profile. See ’Profiles,’ p. 62. Alarm clock is set to on. See ’Alarm clock,’ p. 81. Countdown timer is running. See ’Countdown timer,’ p. 88. Stopwatch timer is running in the background. See ’Stopwatch,’ p. 88. Integrated hands-free is active. See ’Use the loudspeaker,’ p. 19. Timed profile is selected. See ’Profiles,’ p. 62.     or   An enhancement is connected to the device. See ’Enhancements,’ p. 98.
Phone at a glance12Voice privacy encryption is active in the network. or   Location info sharing is set to Emergency or ON. See Location info sharing, 65.You are in a digital network. See ’Network Services,’ p. 6. You are in an analog network. See ’Network Services,’ p. 6. You are in a 1XRTT network. See ’Network Services,’ p. 6. You are roaming outside your home network. See ’Roaming options,’ p. 77.■Get the most out of this guideThe following sections illustrate the various components of your phone. Familiarize yourself with these sections to help you understand the instructions that follow. This guide uses certain terms for the steps that you are asked to perform. • Press means to press and release a key quickly. For example, press 7 means press the key on the keypad that is labeled with the number 7 and letters "pqrs."• Press and hold means to press and hold a key for 2–3 seconds; then release the key.• Selection keys and the joystick are used to select a menu option. To select an option, press the selection key below the menu item on the device screen. • The joystick is used to move up, down, left, or right in the menus.• Call and end keys: Press the call key to place a call or to answer an incoming call. Press the end key to end a call or press and hold to return to the start screen.■Device menusDevice features are grouped according to function and are accessed through the main menus. Each main menu contains submenus and lists from which you can select or view items and customize your device features. You can access these menus and submenus by using the scroll method or by using shortcuts.You can change your menu view from list to grid. See ’Display settings,’ p. 63.Note: Some features may not be available, depending on your network. For more information, contact your wireless provider.
Phone at a glance13Scroll methodYou can use the joystick to move up, down, left and right through the options. Press the joystick to select an item.1. At the start screen, select Menu, and scroll through the main menus using the joystick.As you scroll through the menus, the menu number appears in the upper right corner of the display. On the right side of the display screen is a scroll bar with a tab that moves up or down as you scroll through the menus. This tab provides a visual representation of your current position in the menu structure.2. When you arrive at a menu, press the joystick, Select, to enter submenus. Select Back (the Right selection key) to return to the previous menu. Press the end key to return to the start screen from any menu or submenu.■Go to functionThe Go to menu allows you to change what you can access from the Left selection key on your device. With this function, your most frequently used functions can be quickly accessed from the Go to menu on the start screen.Choose Go to functions1. Go to can be accessed by pressing the Left selection key; or, at the start screen, select Go to > Options > Select options.2. Use the joystick to highlight the desired function.3. Select Mark to add a function. Select Unmark to remove a function.4. Select Done when you have added all desired functions.5. Select Yes to save the changes.6. At the start screen, select Go to to display a list of the functions that you selected in step 3.Organize functions1. At the start screen, select Go to > Options > Organize.
Phone at a glance142. Use the joystick to scroll up or down and highlight the function you wish to rearrange, and select Move > Move up, Move down, Move to top, or Move to bottom.3. Select Done > Yes to save the changes.In-phone helpMany features have brief descriptions (help text) that can be viewed on the display. To activate help text, at the start screen, select Menu >Settings > Phone settings > Help text activation > On or Off.To view these descriptions, scroll to a feature and wait for about 14 seconds. Use the joystick to view all the description or press Back to exit.
Set up your phone152. Set up your phone■AntennaIn the Nokia 6235, Nokia 6235i, Nokia 6236, and Nokia 6236i phones, the antenna is internal and located towards the top of the device. A GPS antenna is activated when you place an emergency call or when you select On from the Location info sharing menu. See ’Location info sharing,’ p. 65.Hold the device as you would any other telephone with the antenna area pointed up and over your shoulder.Note: As with any other radio transmitting device, do not touch the antenna unnecessarily when the device is switched on. Contact with the antenna affects call quality and may cause the device to operate at a higher power level than otherwise needed. Not touching the antenna area during a phone call optimizes the antenna performance and battery life.■Change batteryNote: Before removing the cover, always switch off the power and disconnect the charger and any other device. Avoid touching electronic components while changing the covers. Always store and use the device with the covers attached.
Set up your phone16Remove the back coverWith the back of the device facing you, slide the back cover toward the bottom of the device and remove.Remove the batteryAfter you have removed the back cover, insert your finger into the finger grip, and lift the battery from its compartment.UIM (CDMA SIM) card slotYour device has a UIM card slot built into the mechanics, located under the battery. The UIM is not functional in this model. Do not place any objects in this slot. Replace the battery1. Insert the gold-colored contact end of the battery, into the battery slot.2. Push down on the other end of the battery to snap the battery into place.Replace the back cover1. Set the back cover on the device so that the cover tabs align with the slots in the device. 2. Slide the back cover towards the top of the device until the back cover is securely in place.
Set up your phone17Important: Do not remove the front cover of this device. Attempts to remove the front cover may damage the device. If your device requires service, contact Customer Care. See ’Contact Nokia,’ p. 8.Charge the battery1. Plug the charger transformer into a standard ac outlet.2. Insert the charger output plug into the round jack at the bottom end of the device.After a few seconds, the battery indicator in the display starts to scroll from bottom to top. If the battery is completely discharged, it may take a few minutes before the charging indicator appears on the display or before any calls can be made.■Turn your device on or offTo turn your device on or off, press and hold the Power key on top of the device for at least 3 seconds.■Connect the headsetYou can connect a compatible headset, such as HS-5, to your device. See ’Enhancements,’ p. 98.1. Plug the headset connector into the Pop-Port™ connector at the bottom end of your device. The   icon appears on the start screen.2. Position the headset on your ear.With the headset connected, you can make, answer, and end calls as usual.• Use the keypad to enter numbers.• Press the call key to place a call. See ’Phone at a glance,’ p. 10.
Set up your phone18• Press the end key to end a call.You can also plug a compatible headset, such as the HS-9 Universal Headset, into the 2.5 mm headset jack on your device to allow hands-free operation. See ’Enhancements,’ p. 98.■Change front coverNote: Before removing the cover, always switch off the power and disconnect the charger and any other device. Avoid touching electronic components while changing the covers. Always store and use the device with the covers attached. Remove the back cover and batteryFor instructions to remove back cover and battery, see ’Remove the back cover,’ p. 16.Remove the front coverGently pull the bottom of the front cover away from the rest of the device, and remove the front cover.Install the keymat and front cover1. Remove the keymat from the old front cover.2. Place the keymat into the new front cover.3. Press the front cover and keymat against the phone, and snap the front cover into place.Warning: Always replace the front cover before replacing the battery and the back cover. Replacing the back cover first may cause damage to your phone. Replace the battery and back coverFor instructions to replace back cover and battery, see ’Replace the battery,’ p. 16, and ’Replace the back cover,’ p.16.
Set up your phone19■Answer callsAnswer or silence an incoming call• Press the call key or select Answer to answer the call.• Press the end key to reject the call.• Select Silence to mute the ringing tone then select Dismiss, or do nothing and the call is eventually diverted to voicemail.If your device is set to Silent in the Settings >Profiles menu, select Dismiss, and the call is rejected and diverted to voicemail.Adjust the earpiece volumeWhether in or out of a call, you can scroll the volume key located on the left side of your device up or down to adjust the volume of the earpiece. When you adjust the volume, a bar chart indicates the volume level.Answer a call with the keypad lockedTo answer a call with the keypad locked, press the call key or select Answer. During the call, all features function normally. When you end or reject the call, the keypad automatically relocks. See ’Keyguard,’ p. 21.When the keypad lock is on, calls still may be possible to the official emergency number programmed into your device. Enter the emergency number and press the call key.Use the loudspeakerWarning: Do not hold the device near your ear when the loudspeaker is in use, because the volume may be extremely loud.You can use your device as a loudspeaker:• To activate the loudspeaker while in a call select Loudsp.• To deactivate the loudspeaker during a call, select Normal.The loudspeaker is deactivated automatically when a call (or a call attempt) ends or when certain enhancements are connected.
Set up your phone20Options during a callMany of the options that you can use during a call are network services. Check with your wireless service provider for more information.1. Select Options during a call to display the following:Loudspeaker/Normal—Activate or deactivate the loudspeaker while in a call.New call—Initiate a conference call. See ’Conference calling,’ p. 21.Save—Add a number while in a call to your contact list. This option is available only when entering numbers during a call.Add to contact—Add a contact while in a call to contact list. This option is available only when entering numbers during a call.End all calls—Disconnect from all active calls.Touch tones—Enter the number(s), and select Tones to send the number(s) as tones.Contacts—View the contacts list.Menu—View the phone menu.2. Scroll to an option, and Select to activate the option or enter its submenu.■Make a callTo make a call, at the start screen, enter the number you want to call and press the call key.Use the contacts listTo begin entering names in your contacts list:1. Key in the number at the start screen.2. Select Options > Save.3. Enter a contact name and select OK.To use the contacts list, from the start screen, select Names and scroll to the contact you want to use.
Set up your phone21Use the keypad1. Enter the phone number (including the area code), and press the call key. To delete a character to the left of the cursor, select Clear.2. Press the end key to end the call or select End call to cancel the call attempt.Use the last dialed number1. At the start screen, press the call key to display the last 30 numbers dialed. 2. Select the number (or name) you wish to redial, and press the call key.Conference callingConference calling is a network service that allows you to take part in a conference call with two other participants.1. Make a call to the first participant.2. With the first participant on the line, select Options > New call.3. Enter the phone number of the second participant, or select Search to retrieve a number from the contacts list. 4. Select OK and the first participant is put on hold and a data query appears.5. When the second participant picks up, press the call key to connect the calls.6. To end the conference call, select Options > End all calls or press the end key.■KeyguardWith keyguard, you can lock the keypad to prevent keys from being pressed accidentally. If the keypad is locked, it unlocks when you answer a call. After the call, the lock automatically reactivates.When the keyguard is on, calls still may be possible to the official emergency number programmed into your device. Enter the emergency number and press the call key.Lock the keypadPress the joystick; then press * within two seconds.
Set up your phone22Unlock the keypadSelect Unlock; then press * within two seconds.
Text entry233. Text entryYou can use two methods for entering text and numbers: Standard mode and Predictive text mode.• Select Clear to backspace the cursor and delete a character.• Select and hold Clear to backspace continuously and delete characters.■Standard modeStandard mode is the only way to enter text into the contacts list and to rename caller groups.Text (Abc)• Press a key once to insert the first letter on the key, twice for the second letter, etc. If you pause briefly, the last letter in the display is accepted and your device awaits the next entry.•Press 0 to enter a space, thereby accepting a completed word.•Press 1 to insert a period into your message.•Press and hold * to display a complete list of special characters.•Press and hold # to bring up the Editor settings (Number mode, Dictionary on/Dictionary off, Writing language).Numbers (123)To switch to 123 mode from Abc mode, press and hold # at any message entry screen to bring up the Editor settings menu list of Number mode, Dictionary on/Dictionary off, and Writing language. Select Number mode, and the device will return to the message entry screen and switch the ABC icon in the upper left corner of the display to the 123 icon (or back).Punctuation and special charactersWhile at any text entry screen, press * to display special characters (press and hold * if predictive text is on). Press * again to cycle through all available characters. You can navigate through the list of special characters by using the
Text entry24joystick. Once a character is highlighted, select Insert to insert the character into your message.■Predictive text modePredictive text mode allows you to write messages quickly using your keypad and the built-in dictionary. Predictive mode is much faster than the standard mode method because you only press the corresponding key on your keypad once for each letter.Activate or deactivate1. At any text entry screen, select Options > Dictionary on/Dictionary off.2. If you are turning predictive text on, select the language of your choice.Text entryThe illustration below simulates your display each time a key is pressed. For example, to write Nokia with predictive text on and with the English dictionary selected, press each of the following keys once: the 6 key    the 6 key      the 5 key     the 4 key       the 2 key• Press 0 to enter a space, and begin writing the next word.• If a displayed word is not correct, press * to see other matches. To return to the previous word in the list of matches, select Prev.•If ? appears after a word, select Spell to add the word to the dictionary.• Press 1 to insert a period into your message.• Press and hold * to display special characters. Press * again to cycle through all available characters.■Change case and modePress # to switch between uppercase, lowercase, and sentence case text, and between Standard and Predictive text mode. Case and mode are indicated by the following icons that appear in the upper left of the display screen. Uppercase text: standard mode is on.
Text entry25 Lowercase text: standard mode is on. Sentence case text: standard mode is on. This option is available only at the beginning of a sentence. Uppercase text: predictive text is on. Lowercase text: predictive text is on. Sentence case text: predictive text is on. This option is available only at the beginning of a sentence.
Messages264. MessagesIf you have subscribed to a message network service, you can send and receive messages to compatible phones that also subscribe to a message service. If supported by your service provider, you can also send and receive multimedia messages, and e-mail. See ’Text entry,’ p. 24.When composing text messages, picture messages, or multimedia messages, the number of characters allowed appears in the top right corner of the message. The use of special (Unicode) characters takes up more space. If there are special characters in your message, the indicator may not show the message length correctly. Before the message is sent, the device tells you if the message exceeds the maximum length allowed for one message.Important: Exercise caution opening messages. Messages may contain malicious software or otherwise be harmful to your device or PC.Note: When sending messages, your device may display Message sent. This is an indication that the message has been sent by your device to the message center number programmed into your device. This is not an indication that the message has been received at the intended destination. For more details about messaging services, check with your service provider.■Text messagesWrite and send1. At the start screen, select Menu > Messages > Text messages > Create message. To go quickly to the Create message display, scroll left from the start screen.2. Compose and send a message using the keypad. Some or all of the following Options are available while composing your message:Preview—Preview the message when sending a picture message.Sending options—Mark or Unmark the sending options of a single message as Urgent, Delivery note, Callback no., or Signature. See ’Change sending options,’ p. 29. Clear text—Erase all text from the message editor.
Messages27Insert picture—Insert a picture from Templates folder into your message.Change picture—Change the picture in a picture message.Delete picture—Delete the picture in a picture message.Insert contact—Insert a name from your contacts list into your message.Insert number—Insert a phone number or find a phone number in the contacts list.Save message—Select Drafts to save the message in the Drafts folder; select Templates to save the message as one of your predefined templates in the Templates folder.Exit editor—Exit the message editor.Use template—Insert a predefined template into your message. See ’Templates’ 28.Insert smiley—Insert a smiley into your message.Insert word —Enter a word and insert it into your message. This option is available if predictive text is turned on.Insert symbol—Insert a special character into your message. This option is available if predictive text is turned on.Writing language—Choose the language you want to use.Dictionary on—Turn the predictive text on or off.Matches—View matches in the dictionary for the word you want to use.3. To send the message, select Send > Send to number, Send to e-mail, Send to distrib. list (if a distribution list has been created), or Send to many. Enter the recipient’s phone number or select Search to retrieve a number from Contacts, and select OK.4. To resend, edit or view recipients for the message, select Resend > Send, Edit message or View recipients.Distribution listThe distribution list allows you to send messages to a group of contacts. At the start screen, select Menu > Messages > Distribution lists.To create a distribution list select New list if lists have not been created or Options > Create new list > name your list > OK to create additional lists. To populate your list, select Add new and select a contact from your contacts list.
Messages28To use, rename, or modify a distribution list highlight the distribution list and select Options > Create new list, Send text msg., Send multimedia, Rename list, Clear list, or Delete list.TemplatesTemplates are short, prewritten messages that can be recalled and inserted into new text messages.1. At the start screen, select Menu > Messages > Text messages > Create message > Options > Use template.2. Select one of the available templates.3. Select Send > Send to number, Send to e-mail, Send to many, or Send to distrib. list (if a distribution list has been created) > Select.A distribution list only contains phone numbers of recipients and is selected from a list of predefined groups you create.4. Enter the recipient’s phone number or select Search and select a number from your contacts list. Select Send.Read messageWhen you receive a message, a notification message   displays.1. Select Show to read the message or Exit to dismiss the notification and read the message later.2. Scroll up or down to view the whole message, if necessary.OptionsWhen you read a text message, some or all of the following options are available:Delete—Discard the message.Use number—Use or save the number. Select Options > Add to contact, Send message, or Call.Use web link—Displays if a URL is included in the message.Save address—Lists the e-mail addresses included in the message. Select Save to save the e-mail address as a new phone book entry or select Options > Add to contact or Send e-mail. The Save address option displays only if the message contains an e-mail address. Save picture—Saves a picture to the Templates folder, if you receive a picture in the message. Must be supported by service provider.
Messages29Save—Save the message to Sent items, Archive, Templates, or a folder you have created.Forward—Forward the message to another phone number or e-mail address.Rename—Edit the title of the message.Reply to message1. Select Reply > Empty screen, Original text, Template, or one of the predefined answers, then compose your reply using the keypad.2. Create the reply, and select Send. The sender’s phone number or e-mail is used as the default.Change sending options1. To change sending options for all future text messages, at the start screen, select Menu > Messages > Text messages > Message settings > Sending options.2. Select the setting you wish to change: Priority—Set the priority of the note as Normal or Urgent.Delivery note—A note is sent to you confirming delivery of the message. Select On or Off.Send callback number—A callback number is sent to the recipient. Select Off or your phone number.Signature—Select On to create a signature to send with text messages, or select Off to turn this feature off.Change message settings1. At the start screen, select Menu > Messages > Text messages > Message settings > Other settings.2. Select the setting you wish to change:Message font size—Select Small font or Large font.Message overwriting—Select Sent items only, Inbox only, S. items & Inbox, or Off. When the message memory is full, your device cannot send or receive any
Messages30new messages. However, you can set your device to automatically replace old messages in the Inbox and Outbox folders when new ones arrive.Save sent messages—Select Always save, Always prompt, or Off.Queue msgs. when digital unavailable—Select On, On prompt, or Off. Messages are stored in the Outbox until they can be sent with digital service.■Picture messagesYour device comes with five preloaded pictures. You can save more pictures. If necessary, you can overwrite any of the preloaded pictures. Pictures can be attached to a message and sent using a text message to compatible phones. Picture messages behave the same as text messages, but pictures take up more memory than text message. You cannot send a picture message using e-mail.Pictures are stored in the Images folder in Gallery. See ’Gallery,’ p. 56.Receive and save a picture messageNote: Only compatible devices that offer picture message features can receive and display picture messages.When you receive a picture message, your device beeps, displays 1 message received (or multiple messages received), and displays the messaging icon  in the upper left corner of the start screen as a reminder. When you have unopened picture messages in your inbox displays.Select Show to view the picture message, or Exit to view the picture message in your inbox later. If you have more than one picture message, scroll and select the message you want to view. Use the joystick to view the whole picture if necessary.You can save a received picture in your Templates folder by selecting Options > Save picture. Enter a title and select OK. If your Templates folder is full of pictures, you can scroll to the picture you want to replace and choose Select.Compose and send a picture messageWhen you insert a standard picture into a message, the number of characters that can be added changes. The number of characters is shown in the upper right corner of the display screen.1. From the start screen, select Menu > Messages > Multimedia msgs. > Create message.2. Write the message, and select Options > Insert > Image.
Messages313. Open the folder that contains the picture you want to insert and select Options > Insert.To view another picture, select Back or Options > Insert, scroll to another picture, and select Options > Insert.4. Select Search to retrieve a phone number from your contacts list, Send to enter the phone number, or Options > Send to e-mail, Send to many, or Send to distrib. list (if a distribution list has been created) > Select.To view or change the picture, select or Options > Preview or Delete picture. ■Multimedia messagesA multimedia message can contain text, sound, a picture, and a video clip. Your device supports multimedia messages that are up to 300 KB. If the maximum size is exceeded, the device may not be able to receive the message. Depending upon your network, you may receive a message that includes an Internet address where you can go to view the multimedia message. Pictures are scaled to fit the display area of the device. Your device has a multimedia message viewer for playing messages and a multimedia inbox for storing saved messages. Once you save the multimedia message, you can use the image as a screen saver or the sound as a ringing tone unless protected by copyright.The default setting of the multimedia message service is generally on. The appearance of a multimedia message may vary depending on the receiving device.Important: Exercise caution opening messages. Messages may contain malicious software or otherwise be harmful to your device or PC.Copyright protections may prevent some images, ringing tones, and other content from being copied, modified, transferred, or forwarded. This function can be used only if it is supported by your service provider or network operator. For availability and a subscription to the multimedia messaging service, contact your service provider or network operator.Note: Only devices that offer compatible multimedia message features can receive and display multimedia messages. Multimedia message objects may contain viruses or otherwise be harmful to your device or PC. Do not open any attachment if you are not sure of the trustworthiness of the sender.Multimedia messaging supports the following formats:• Picture: JPEG, GIF, animated GIF, WBMP, BMP, and PNG
Messages32• Sound: SP-MIDI, AMR audio, QCELP, EVRC, and monophonic ringing tones• Video: clips in H.264 (Profile 0, level 10) format with MPEG-4 (SVPO), 3GPP, 3GPP2, with AMR audioIf a received message contains unsupported elements, these elements may be replaced with the text Object format not supported.You cannot receive multimedia messages if you have a call in progress, games or other applications running, or an active browsing session. Because delivery of multimedia messages can fail for a variety of reasons, do not rely solely upon them for essential communications.MMS settingsBefore you can use the multimedia message feature, you must specify whether you want to receive messages at all times or only if you are in the service provider’s home system. This feature is a network service. check with your service provider for more information.The default setting of the multimedia message service is generally on. The default setting to receive a multimedia message is generally on the receiving device.Allow or block multimedia receptionYou can choose to receive all messages, to block all messages, or to receive messages only when you are in the service provider’s home network.From the start screen, select Menu > Messages > Multimedia msgs. > Message settings > Allow multimedia reception and one of the following:Yes—Allow all incoming messages. When new messages arrive, you are notified with Multimedia message received or %N multimedia messages received.In home network—Allow incoming messages only if you are in the service provider’s home system. This is a network service. Check with your service provider for more information.No—Block all incoming messages.Retrieve or reject multimedia messagesFrom the start screen, select Menu > Messages > Multimedia msgs. > Message settings > Incoming multi- media messages > Retrieve to automatically retrieve all messages to your inbox, Retrieve manually to choose which messages you want to retrieve to your inbox, or Reject to reject all incoming multimedia messages.
Messages33When messages are available, you are notified 1 multimedia message available or %N multimedia messages available.Allow or block advertisementsThis setting is not available if multimedia reception is blocked.From the start screen, select Menu > Messages > Multimedia msgs. > Message settings > Allow advertisements > Yes or No.Other MMS settingsOther multimedia settings include saving your messages to the Sent items folder. From the start screen, select Menu > Messages > Multimedia msgs. > Message settings and one of the following:Save sent messages—Select Yes to save sent multimedia messages to the Sent items folder or No to discardDelivery reports—Select On to be informed if the message was delivered or Off to not be informed.Default slide timing—Set the default time in mm:ss format for each slide in an MMS to remain on the screen.FoldersYour device has the following folders under Messages > Multimedia msgs..Inbox—Contains received multimedia messages.Outbox—Contains multimedia messages that you have sent and are still waiting to be transmitted.Sent items—Contains sent multimedia messages.Saved items—Contains saved multimedia messages that you can send later.Write and send multimedia messages1. From the start screen, select Menu > Messages > Multimedia msgs. > Create message. 2. Enter your message text, and select Options > Insert > Image, Sound clip, or Video clip. The list of available folders in the Gallery displays.3. Open the desired folder, scroll to the image, sound clip, or video clip and select Options > Insert.The indicator in the message header means that a picture, sound clip, or video clip has been attached.
Messages34Copyright protections may prevent some images, ringing tones, and other content from being copied, modified, transferred, or forwarded.4. To add a new page or slide to the message, select Options > Insert > Slide. This applies only if there is no video clip in the messageEach slide can contain text, one image, and one sound clip. If the message contains several slides, you can open the desired slide by selecting Previous slide, Next slide, or Slide list.5. To set the time interval between the slides, select Options >Slide timing. Enter the time interval in mm:ss, and select OK.6. To move the text to the top or bottom of the message, select Options > Place text first or Place text last (default).7. To insert a name from contacts, select Options > More options > Insert contact, scroll to the desired name, and choose Select.8. To insert a number, select Options > More options > Insert number. Enter the number or search for it in contacts, and select OK.9. To insert a calendar note that has been created, select Options > Insert > Calendar note.10. To insert a business card, select Options > Insert > Business card.11. To delete an image, slide, video clip, or sound clip from the message, select Options > Delete > Image, Sound clip, Video clip, or Slide.12. To add a subject to the message, select Options > More options > Edit subject, enter a subject, and select OK.13. To view the message or slide presentation before sending it, select Options > Preview.14. To save the message to Saved items, select Options > Save message.15. To send the message, select Send or select Options > Send to e-mail, Send to album, or Send to many. Send to album is an online network service. Check with your service provider for more information.16. Enter the recipient’s number or e-mail address, or search for it in contacts, and select OK. The message is moved to the Outbox folder for sending.It takes more time to send a multimedia message than to send a text message. While the multimedia message is being sent, the animated indicator
Messages35displays and you can use other functions on the device. If there is an interruption while the message is being sent, the device automatically tries to resend it a few times. If this fails, the message remains in the Outbox folder and you can try to manually resend it later. Check your Outbox folder for unsent messages.Note: When sending messages, your device may display the words Multimedia message sent. This is an indication that the message has been sent by your device to the message center number programmed into your device. This is not an indication that the message has been received at the intended destination. For more details about messaging services, check with your service provider.Messages that you have sent are saved in the Sent items folder if the setting Save sent messages is set to Yes. See ’Other MMS settings,’ p. 33. This is not an indication that the message has been received at the intended destination.Read multimedia messagesWhen a multimedia message is being received,   appears (blinking) in the display along with the percentage display indicating the sending progress. Once the message has been fully downloaded,  displays and 1 multimedia message available or %N multimedia messages available displays. %N represents the number of messages.• To view the message immediately, select Show; to save the message to the inbox for later viewing, select Exit; to discard the message, select Discard.• To view a saved message, select Menu > Messages > Multimedia msgs. > Inbox and scroll to view the message.While viewing the message, select Play to view the entire MMS, or select Options and one of the following: View text—View only the text included in the message.Open image, Open sound clip, or Open video clip—View or listen to the corresponding file.Delete message—Delete the message you are viewing.Forward to no., Forward to e-mail, Forward to album (if supported by operator) or Forward to many—Forward the message to a phone number, to an e-mail address, or to multiple recipients.Message details—View the sender’s name and phone number, the message center used, reception date and time, message size and type.
Messages36While viewing the message, select Play to view the entire MMS, or select Options > Save image, Save sound clip, or Save video clip to save the file to the Gallery. Images, sound clips, and video clips must be opened before you can save them.If blinks and Multimedia me-mory full. View waiting msg.displays, memory for multimedia messages is full. To view the waiting message, select Show. Before you can save the message, delete some of your old messages. See ’Delete messages,’ p. 39.Reply to multimedia messageSelect Reply or Reply to all to enter a reply and send it to the original sender and any other message recipients.■Voice messagesIf you subscribe to voice mail, your wireless provider will furnish you with a voice mailbox number. You need to save this number to your device to use voice mail. When you receive a voice message, your device lets you know by beeping, displaying a message, or both. If you receive more than one message, your device shows the number of messages received.Save voice mailbox numberYour wireless provider may have already saved your voice mailbox number to your device. Select OK to leave the number unchanged.1. At the start screen, select Menu > Messages > Voice messages > Voice mailbox number. The Voice mailbox number displays.2. If the box is empty, enter the voice mailbox area code and number and select OK.Call and setup voice mail1. Once you have saved the voice mailbox number, press and hold 1. 2. When you connect to voice mail and the prerecorded greeting begins, follow the automated instructions to setup voice mail.
Messages37Listen to voice messagesOnce you have set up voice mail, press and hold 1 or use the Messages menu to dial the voice mailbox number. Once you connect and the prerecorded greeting begins, follow the automated instructions to listen to your voice messages.Automate voice mailYou can insert special characters called dialing codes into phone numbers such as voice mail, and save the number to a 1-touch dialing location. Dialing codes instruct the receiving system to pause, wait, bypass, or accept the numbers that follow them in the dialing string. See ’Setup phone numbers with dialing codes,’ p. 45.Voice mail services vary by service provider. The following instructions are examples of common operations. Please check with your service provider for specific instructions on using your voice mail service.Write down voice mailbox number and process1. Write down your voice mailbox number.2. Call and check your voice mail as you normally would.3. Write down your interaction with the recorded prompts step-by-step. Keep in mind that each voice mail service may vary. However, it should look something like this:Dial 8585551212, pause 5 seconds, press 1, pause 2 seconds, press 1234, press #.Be precise; you will need this information to Setup phone numbers with dialing codes, 45.Clear voice mail iconTo clear the voice mail icon from the display, at the start screen, select Menu > Messages > Voice messages > Clear voice mail icon.■Web messagingWeb messaging is a network service. See ’Network Services,’ p. 6.If your wireless service provider supports this feature, you can use the Minibrowser to check for e-mail messages. At the start screen, select Menu > Messages > Minibrowser messages > Connect.
Messages38See ’Mobile internet access,’ p. 91, for more information on using the Minibrowser in your device to access Web pages.■Text message foldersSave messagesYou can save drafts of messages or received messages to an existing folder or to a folder that you have created.1. Open the received message or create a new message, and select Options.2. To save a received message, select Save > Sent items, Archive, Templates, or a folder you have created.3. To save the draft of a message you have created, select Save message > Drafts or Templates.View saved messages1. At the start screen, select Menu > Messages > Text messages.2. Select the folder containing the message you wish to view:Inbox—Automatically stores received messages.Outbox—Stores messages that have not been sentSent items—Stores messages that have been sent.Drafts—Stores messages created as drafts.Archive—Store messages that you choose to Archive from other folders.Templates—Stores pictures and prewritten templates. Preloaded templates can be edited and customized.My folders—Allows you to organize your messages by creating custom folders and saving some of your messages here. Select Add folder to add a custom folder, or Options > Add folder, Rename folder, Delete folder if a folder has already been created.3. When the folder opens, scroll to the message you wish to view, and Select.
Messages39■Delete messagesIf your message memory is full and you have more messages waiting at the network, No space for new text messages appears on the start screen. You can do the following:• Read some of the unread messages, and delete them individually.• Delete messages from some of your folders.Delete a single message1. At the start screen, select Menu > Messages > Text messages.2. Select the folder containing the message you wish to delete.3. Select the message you wish to delete. 4. Select Options > Delete5. Select OK to delete the message or Back to exit.Delete all messages in a folder1. At the start screen, select Menu > Messages > Text messages > Delete messages.2. Select the messages you wish to delete: All—Deletes all messages in all of the folders.All read—Deletes any messages that have been read in all of the folders.All unread—Deletes any messages that have not been read in all of the folders.3. Select and Mark the folders that have messages you want to delete:Inbox—Deletes all messages from the Inbox folder.Sent items—Deletes all messages from the Sent items folder.Outbox—Deletes all messages from the Outbox folder.Drafts—Deletes all messages from the Drafts folder.Archive—Deletes all messages from the Archive folder.User defined folders—Deletes all messages from the user defined folder.4. Select Done > Yes to empty the marked folder.
Messages40■Delete foldersOnly folders created in My folders can be deleted. The Inbox, Sent items, Archive and Templates folders are protected. When you delete a folder, all messages in the folder are also deleted.
Call log415. Call logCall log stores information about the last 30 missed, 30 received, and 30 dialed calls. It also adds the total duration of all calls. When the number of calls exceeds the maximum, the most recent call replaces the oldest.Whether viewing missed, received, or dialed calls, the menu options are the same:Time of call—Displays the date and time of the call.Send message—Sends a message to the number.Use number—Edits the number and associates a name with the number.Save—Enters a name for the number and saves it to your contacts list.Add to contact—Adds a number to a contact and saves it in your contacts list.Delete—Clears the number from memory.Call—Calls the number.■View missed callsThe missed calls feature does not function when your device is switched off. Missed calls are calls that were never answered. To view missed calls:1. If the message notification displays, select List.2. When the phone number appears in the display, select Options.3. Select an option to activate.OR1. At the start screen, select Menu > Call log > Missed calls.2. Scroll to a name or number, and select Options. 3. Select an option to view or activate.■View received callsReceived calls are calls that have been answered.1. At the start screen, select Menu > Call log > Received calls.2. Scroll to a name or number, and select Options.
Call log423. Select an option to view or activate.■View dialed numbersDialed calls are previous numbers you have dialed from your device:1. At the start screen, press the call key. ORAt the start screen, select Menu > Call log > Dialed numbers.2. Scroll to a name or number, and select Options.3. Select an option to view or activate.View call timesYou can make or receive calls to or from the same number and view up to five calls with the time each call occurred. Your device clock must be set for this feature to work accurately.1. From the start screen, select Menu > Call log > Missed calls, Received calls, or Dialed numbers > Options.2. While viewing a missed or received call, select Options > Time of call.3. Press the joystick down to view the most recent call times from this number; select Back to return to the options list. ■Delete call logsYou can delete any missed, dialed, or received calls from device memory.1. At the start screen, select Menu > Call log > Clear recent call lists.2. Select the call type you would like to clear: All, Missed, Received or Dialed.■View duration of callsContact your service provider for the actual calls and services invoice, which may depend on network features, rounding off for billing, taxes and so forth. Select Menu > Call log > Call timers > Last call duration, Dialed calls' duration, Received calls' duration, All calls' duration, Life timer, or Clear timers. After selecting Clear timers, enter your lock code, and select OK. See ’Security settings,’ p. 74.
Call log43Note: All call timers, except the life timer, are reset to zero when Clear timers is selected.Note: Some timers, including the life timer, may be reset during service or software upgrades.To activate the call timer on the start screen while in a call, select Details > Show call time on display > On or Off.■View duration of data and fax callsData and fax calls are a network service. See ’Network Services,’ p. 6. If your wireless service provider supports this feature, you can view the size or duration of sent or received data and fax calls.Note: The actual time invoiced for calls and services by your service provider may vary, depending on network features, rounding off for billing, taxes, and so forth.1. At the start screen, select Menu > Call log > Data/fax calls.2. Scroll to one of the following options:Last sent data/fax— View the size (KB) of the last sent data/fax call.Last received data/fax—View the size (KB) of the last received data/fax call.All sent data/fax—View the size (KB) of all sent data and fax calls.All received data/fax—View the size (KB) of all received data and fax calls.Duration of last data/fax call—View the duration time of the last data orfax call.Duration of all data/fax calls—View the duration time of all calls.Clear all data/fax logs—Select OK > Yes to clear all data/fax logs.■View duration of minibrowserMinibrowser is a network service. See ’Network Services,’ p. 6. If your wireless service provider supports this feature, you can view the size or duration of sent or received data from the Minibrowser.Note: The actual time invoiced for calls and services by your service provider may vary, depending on network features, rounding off for billing, taxes, and so forth.1. At the start screen, select Menu > Call log > Minibrowser calls.
Call log442. Scroll to one of the following options:Last sent browser data—View the size (KB) of the last sent browser data.Last received browser data—View the size (KB) of the last received data.All sent browser data—View the size (KB) of all sent browser data.All received browser data—View the size (KB) of all received browser data.Last browser session—View the duration time of the last browser session.All browser sessions—View the duration time of all browser sessions.Clear all browser logs—Select OK > Yes to clear all browser logs.
Contacts456. ContactsThe contacts list can hold up to 500 contacts with multiple numbers and text notes for each contact. The amount of numbers and text entries that you can save may vary, depending on length and the total number of entries in the contacts list.■Add new contactsYou can access the contacts list at the start screen. Press the Right selection key or, if the Right selection key on your device has a network operator menu, select Menu > Contacts. Save contact name and number1. At the start screen, use the keypad to enter the phone number you wish to save.2. Select Options > Save.3. Enter the name, and select OK. Save contact number only1. At the start screen, use the keypad to enter the phone number you wish to save.2. Press and hold Options. Save an entry1. At the start screen, select Menu >Contacts > Add new.2. Enter the name, and select OK.3. Enter the phone number, and select OK > Done.Setup phone numbers with dialing codesDialing codes instruct the receiving system to pause, wait, bypass, or accept the numbers that follow them in the dialing string.1. At the start screen, select Menu > Contacts > 1-touch dialing.
Contacts462. Scroll to an (empty) 1-touch dialing slot and select Assign.3. Enter your mailbox number, including the area code.4. Refer to dialing codes and enter any codes as necessary.For example, if you pause for 5 seconds after connecting to voice mail, enter p twice (two times 2.5 seconds) after the voice mailbox number: 2145551212pp.5. Enter any remaining pauses or other information that allows you to listen to your messages, and select OK.6. Enter a name (such as Voice Mail), and select OK.To dial and listen to your voice mail, press and hold the assigned 1-touch dialing key at the start screen.Insert dialing codesPress * repeatedly to cycle through dialing codes. Once the desired code appears in the display, pause briefly and the code is inserted into the dialing string.The following dialing codes are available: * —Bypasses a set of instructions.p —Pauses for 2.5 seconds before sending any numbers that follow.+ —Replaces the international access code.w —Waits for you to press the call key before sending the numbers or codes that follow.Save multiple numbers and text itemsYou can save different types of phone numbers and short text items per name to the contacts list. The first number you save for any entry is automatically set as the default, or primary number, but the primary number can always be changed.1. At the start screen, scroll to the entry to which you wish to add a phone number or text item.2. Select Options > Add number or Add detail.If you selected Add number, select General, Mobile, Home, Work, or Fax.If you selected Add detail, select E-mail address, Web address, Street address, or Note.
Contacts473. Enter the number or text for the type you have selected, and select OK.4. To change a number type (General, Mobile, Home, Work, or Fax), select Change type in the options list.You can also change which phone number is the default (primary) number for the contact entry.1. At the start screen, use the joystick to scroll down and select the number you wish to change, and select Details. 2. Scroll to the number you wish to set as default, and select Options > Set as default.Set up voice tagsFor information on setting up voice tags and other voice features, see Voice commands, 71.Caller groupsYou can add contacts list entries to any of five caller groups, and then assign a unique ringing tone or graphic to that group. This enables you to identify callers from the group by their unique ringing tone or graphic.1. Scroll to a name in your contacts list you would like to add to a caller group, and select Details.2. Select Options > Caller groups > Family, VIP, Friends, Business, or Other. 3. Select Options to display the following caller group options:Rename group—Rename the group to your preference.Group ringing tone—Set the ringing tone for the group.Group logo—Turn the graphic for the caller group On or Off, or View the graphic.Group members—Add or remove members from the caller group.Set up 1-touch dialingYou can associate any entry in the contacts list with a key from 2–9; then dial those entries by pressing and holding the assigned key. See ’1-touch dialing,’ p. 66, to activate or deactivate 1-touch dialing.
Contacts48Assign a key to 1-touch dialing1. At the start screen, select Menu > Contacts > 1-touch dialing.2. Scroll to an (empty) 1-touch dialing slot, and select Assign.3. Enter the number (including the area code), and select OK; or select Search to retrieve a number from the contacts list.4. Enter a name for the number, and select OK. If 1-touch dialing is off, the device displays a prompt asking if you would like to turn 1-touch dialing on.5. Select Yes to activate 1-touch dialing. Change 1-touch dialing numbers1. At the start screen, select Menu > Contacts > 1-touch dialing.2. Scroll to the 1-touch dialing entry you wish to change, and select Options > Change.3. Enter the new number; or select Search to retrieve a number from the contacts list, and select OK.4. Enter a name for the entry, and select OK. Delete 1-touch dialing numbers1. At the start screen, select Menu > Contacts > 1-touch dialing.2. Scroll to the 1-touch dialing location you wish to delete, and select Options > Delete > Yes.■Voice tagsYou can dial up to 25 stored numbers using voice dialing.Before using voice tags, note that:• Voice tags are not language-dependent. They are dependent on the speaker’s voice.• You must say the name exactly as you said it when you recorded it.• Voice tags are sensitive to background noise. Record voice tags and use them in a quiet environment.• Very short names are not accepted. Use long names and avoid similar names for different numbers.
Contacts49Note: Using voice tags may be difficult in a noisy environment or during an emergency, so you should not rely upon voice dialing in all circumstances.Assign a voice tag to an entryBefore you can use voice dialing, you must first assign a voice tag to the number.1. At the start screen, press the joystick down to view the contacts list.2. Highlight the contact you want to assign a voice tag to. Select Details > Options > Add voice tag > Start.3. Speak clearly into the microphone. Do not select Quit unless you want to cancel the recording. The device automatically stops recording and saves and replays the voice tag.. The   icon appears next to commands that have voice tags assigned.If recording is not successful, your device displays Voice system error. Select Options > Add voice tag, and repeat step 3.Dial a number1. Press and hold the Right selection key.2. When you hear several beeps and Speak now appears, release the key.3. Pronounce the voice tag clearly into the microphone.When the device finds the voice tag, Found: appears, and the device automatically dials the number. If the device does not locate a number or recognize the voice tag, No match found appears.Voice tagsAfter you have associated a voice tag to a contact, you can select Names > Voice tags Options > Playback, Change, or Delete.■Edit contacts list entries1. Scroll through the contacts list to highlight the entry you would like to edit, and select Details > Options. The list of options varies depending on whether you are editing a contact listed by phone number or contact name.2. Some of the following options may be available:
Contacts50Add voice tag—Add a voice tag to the contact.Edit number/Edit detail—Edit an existing phone number or the details attached from the contact.Delete number/Delete detail—Delete a phone number or the details attached from the contact.Use number—Edit the number and associate a name with the number. Available when a contact is selected that is listed with a contact name. Select Options to use the number.Change type—Change the number type to General, Mobile, Home, Work, or Fax or the detail type to E-mail address, Web address, Street address, or Note.Set as default—Change the default number of the contact.Add number—Add a number to the contact.Add detail—Add an address or note to the contact.Add image—Add a photo to the contact.Caller groups—Add the contact to an existing caller group.Custom tone—Set a ringing tone to the contact different than the default.Send bus. card—Send the contact as a business card to another device.Send message—Create and send the contact a text message or multimedia message.1-touch dialing—Add the contact to your 1-touch dialing list.Edit name—Edit the name of the contact.View name—View the name of the contact. Available when a contact is selected that is listed with a contact name.Delete—Delete the entire contact entry from your contacts list.3. Edit the option to your preference, and select OK.■Delete contacts entries1. At the start screen, select Menu > Contacts > Delete.2. To delete individual entries, select One by one. 3. Scroll to the entry you wish to delete, and select Delete > Yes to confirm.
Contacts514. To delete the entire contents of your contacts list, select Delete all > Yes.5. Enter the lock code, and select OK. See ’Security settings,’ p. 74.■View the contacts menu1. At the start screen, select Menu > Contacts and view the following options:Search—Find a name or select from a list.Add new—Add a contact to your contacts list.Edit name—Edit an existing name.Delete—Delete a name and its associated numbers.Add number—Add a number to an existing contact.Settings—Change the contacts list view or check the memory status of your device.1-touch dialing—View or modify the list of 1-touch dialing numbers.Voice tags—Attach, listen to, or modify a voice tag to a contact in thecontacts list.My number—View your own phone number.Caller groups—View and edit the properties of any of the caller groups, including Family, VIP, Friends, Business, or Other.2. Select an item to activate the feature or enter its submenu.Search for a name1. At the start screen, press the joystick down to display the contents of your contacts list.2. Press the key that corresponds to the first letter of the name for which you are searching.3. Scroll to select a contact, and select Details to view the details.Configure settingsYou can select how the contacts appear in your contacts list and view the amount of memory used or available in your device.
Contacts52At the start screen, select Menu > Contacts > Settings >Scrolling view to change view of name list, or Memory status to view the device memory used and remaining.■Send and receive contacts (business cards)You can send and receive an entry in your contacts list using text messaging, if supported by your wireless provider.Send a business cardYou can send a business card as a text message to a compatible phone or other handheld device.1. Highlight the entry from the contacts list that you wish to send, and select Details > Options > Send bus. card > Via infrared, Via text message, or Via multimedia. Primary number or All details options appear only if you have more than one number or detail saved to the contact entry.2. Enter the number for your recipient, or select Search to retrieve a number from your contacts list.3. Select OK and the business card is sent.
Camera537. CameraYou can take photos and record video clips with the built-in camera. The camera lens is on the back of the device. The camera produces photos in JPEG format and video clips in H.263 (SubQCIF) format. After you take a picture or video, you can attach it to a multimedia message, send it with MMS, save it as a wallpaper, save it on a compatible PC using Nokia PC Suite software, and upload it to a Web address with the content image uploader. When you attach a picture to an entry in your list of contacts, the picture is displayed when the contact calls you.The Nokia 6235, Nokia 6235i, Nokia 6236, and Nokia 6236i devices support an image capture resolution of 640 x 480 pixels. The image resolution in these materials may appear different.If there is not enough memory to take a new photo, delete old photos or other files in the Gallery.■Take a photo1. At the start screen, press the joystick up to activate the camera or select Menu > Camera.2. Select Capture to take the photo. When taking a photo, a shutter sound is heard, the photo displays on the screen, and either a blinking icon or scrolling indicator displays as the photo is saved to the Images folder of Gallery.To change the camera mode to standard, portrait, night or video, see Change mode, 54.3. Select Back to take another photo or Options and choose from one of the following:Zoom—Zoom in closer before capturing a photo or get a closer look at the captured photo; use the joystick to navigate around the photo.Send—Select Via multimedia or Via infrared to send a photo to a compatible device or PC.Attach to contact—Attach photo to contact from contact list.Rename—Enter or edit the name of the captured photo and select OK.Open Gallery —Open the Gallery to view saved images, videos, and recordings.
Camera54Set contrast—Use the joystick to adjust the contrast of the captured photo.Set as wallpaper—Use a captured photo for wallpaper.Details—View the Name, Size, Created, Format, Resolution, or Copyright of a captured photo.Change modeAt the start screen, select Menu > Camera >Options > Change mode or, from the viewfinder mode, hold and press the right or left joystick position to switch between the following modes:Standard photo—Take normal landscape photos.Portrait photo—Take a smaller icon-sized, vertical photo, which can be added to an entry in your contacts list.Night mode—Take a photo when the lighting is dim and the camera needs a longer exposure time for the photo to be of good quality.Video—Record a video. See ’Record a video clip,’ p. 55.Self-timerAt the start screen, select Menu > Camera >Options > Self-timer to set a timer and delay capturing a photo for 10 seconds. Select Start a beep sounds while the self-timer runs and beeps faster when the camera is about to capture the photo. After the timeout, the camera takes the photo and saves the photo in the Images folder of the Gallery menu.SettingsAt the start screen, select Menu > Camera > Options >Settings to change the settings in the camera mode. Select one of the following options:Default mode—Select Standard photo, Portrait photo, Night mode or Video as the default.Image quality—Define file compression when saving the image. Select High, Normal, or Basic. High uses the least file compression and provides the best image quality but takes more memory.Video clip length—Select Default or Maximum. The maximum is approximately 15 seconds depending on conditions. Only video clips that are default length or shorter can be sent in a multimedia message.
Camera55Camera sounds—Select On or Off.Default title—Select Automatic to use a predefined title or My title to key in or edit a new title.Image and video storage—Select the folder for image storage.Other optionsZoom—Zoom in closer to your image before capturing a photo or get a closer look at the captured photo. Use the joystick to navigate around the photo.Flash on or Flash off—Select to capture a photo with or without the flash.View previous—View the previously captured photo.Open Gallery—Open the Images folder of the Gallery menu.Record a video clip1. From the start screen, select Menu > Camera > Options > Change mode > Video > Record. While you are recording, the recording indicator and the remaining recording time display.2. Select Pause to pause the recording, Continue to resume the recording, or Stop to stop the recording. The device saves the recording in the Video clip folder of the Gallery menu.3. Select Back to record another video or select Options and one of the following:Delete—Delete the video clip.Send—Send the video clip to another device as a multimedia message or by using IR connectivity.Rename—Rename the video clip.Open Gallery—Go to the Video clip folder of the Gallery menu.Mute audio or Unmute audio—Turn the sound on or off.Set contrast—Increase or decrease contrast of the selected video using the joystick.Details—View details of the selected video, such as name, size, time and date created, length, file format, and copyright information.
Gallery568. GalleryYou can save pictures, video clips, recordings, and ringing tones to folders in the gallery and add new folders to the ones already there. Images and tones can be downloaded using MMS, SMS, mobile Internet sites, or Nokia PC Suite.Note: Only compatible devices that offer compatible multimedia message features can receive and display multimedia messages.Your device supports a digital rights management system to protect content that you have acquired. Content such as a ringing tone, can be protected and associated with certain usage rules, for example, the number of usage times or a certain usage period. Usage rules are defined in the content activation key that can be delivered with the content or delivered separately, depending on the service provider. You may be able to update the activation key. Always check the delivery terms of any content and activation key before acquiring them, as they may be subject to a fee.Copyright protection may prevent some images, ringing tones, and other content from being copied, modified, transferred, or forwarded.Your device has about 10 MB of memory for storing files in the gallery. This memory is not shared with other functions, such as contacts. If the device displays a message that the memory is full, delete some existing files before proceeding.■Folders1. At the start screen, select Menu > Gallery > Images, Video clips, Music files, Graphics, Tones, or Recordings folder.2. Select Open to view a list of the files in the folder or select Options to access the following:Delete folder —Delete a folder you have created. You cannot delete a preset folder.Move—Move the selected folder into another folder. After selecting Move, scroll to another folder, and select Options > Move. You cannot move a preset folder.
Gallery57Rename folder—Rename a folder you have created. You cannot rename a preset folder.Details—Show the name, size, and date of creation of the selected folder.Type of view—Select List or Grid to determine how the folders and the files within folders are displayed.Sort—Sort the contents of the selected folder by name, date, format, or size.Add folder—Create a new folder.Memory status—Check the available memory for the device handset.Activation key list—View the list of available activation keys. You can delete activation keys if desired.
Media589. Media■Media playerWith the media player you can download, view, and play compatible images, audio and video files, and animated images from a variety of sources. The media player allows you to play streaming videos and streaming audio from a network server. Streaming functionality is a network service and requires network support. Check the availability of these services, pricing, and tariffs with your network operator or the service provider whose service you wish to use. Service providers will also give you instructions on how to use their services.From the start screen, select Menu > Media > Media player and one of the following:Online media—Connect to the operator’s network. This is a network service. Check with your service provider for pricing and information.Open Gallery—Open the Gallery. From Gallery, you can play stored audio and video files. See ’Gallery,’ p. 56.Go to address—Enter the address of a mobile Internet service, and select OK.■RadioYour phone has an FM radio that also functions as an alarm clock radio. To listen to the FM radio on your phone, connect a compatible music stand or stereo headset to the connector on the bottom of the phone. The FM radio uses the wire of the headset as an antenna. A compatible headset needs to be attached to the device for the FM radio to function properly.The quality of a radio broadcast depends on coverage of the radio station in that particular area.Warning: Listen to music at a moderate level. Continuous exposure to high volume may damage your hearing.Turn the radio on and off1. Connect the phone to a compatible headset or music stand.2. From the start screen, select Menu > Media > Radio. 3. To turn off the radio, press and hold the end key.
Media59Use the radioWith the radio on, select Options and one of the following:Turn off—Turn off the radio.Save channel—Save the current station to one of 20 locations.Automatic tuning—Press the joystick up or down to start the channel search. Select OK when a channel is found.Manual tuning—Press the joystick up or down to search in increments of 0.05 MHz.Set frequency—Manually enter the frequency of a known radio station.Delete channel—Delete a saved channel.Rename—Rename a saved channel and select OK.Loudspeaker/Headset—Listen to the radio through the speakerphone or through the headset.Mono output/Stereo output—Listen to the radio in monaural mode (default) or in stereo. Stereo output is available through a stereo enhancement.To set the radio frequency, press * and use the keypad to enter the frequency of a known radio station. To tune the radio manually, press #; then press the joystick up or down to search in increments of 0.05 MHz.To adjust the radio volume, press the Volume up and Volume down keys.When an application using a browser connection is sending or receiving data, it may interfere with the radio.When you place or receive a call, the radio automatically mutes. Once the call is ended, the radio switches back on.Save a radio channelYou can save a preset station to any one of 20 locations in memory, and then tune to that station by using the joystick with the radio on.1. With the radio on, press and hold the joystick up or down to start the channel search. Searching stops when a channel is found.2. To save the channel, select Options > Save channel.3. Enter a name for the channel, and select OK. 4. Select an (empty) location to save the channel.
Media60To save an FM station quickly to 1–9 memory locations, press and hold the corresponding number key while the radio is playing. Then, enter the name of the channel, and select OK.■Voice recorderThis feature allows you to record pieces of speech or sound with your device and listen to them later. The total available time is 3 minutes if no memos have been stored. The maximum length of a recording depends on how much memory remains available.From the start screen, select Menu > Media >Voice recorder > Record to start the recording, Select memory to define a storage folder, or Recordings list to manage the folder you have defined for recording storage. Save recordings to the Recordings folder or to another folder in the Gallery. Record speech or sound1. At the start screen, select Menu > Media > Voice recorder > Record.2. After the recorder start tone is heard, begin recording speech or sound.3. When you are finished recording, select Stop and your recording is saved to the Recordings folder in the Gallery.4. Select Recordings list, open the Recordings folder in the Gallery and scroll to the recording you created. Select Options to OK.OptionsAfter you have saved the recording to the Recordings folder, highlight the recording, and select Play to listen to the recording using the earpiece, or Options to:Delete—Erase the recording.Rename—Change the name of the recording.Set as ring tone—Use your recording as a ringtone.■Media equalizerThe equalizer enhances the sound quality when using the music player by amplifying or attenuating frequency bands. There are five preset equalizer settings (Normal, Pop, Rock, Jazz, and Classical) and two customizable settings.
Media61Activate an equalizer setFrom the start screen, select Menu > Media > Media equalizer, scroll to the desired setting, and select Activate.Create a custom equalizer set1. From the start screen, select Menu > Media > Media equalizer.2. Scroll to Set 1 or Set 2, and select Options > Edit.The selected set appears in the display with the bar on the far left highlighted.The bars adjust frequencies, from the lowest (the leftmost bar) to the highest (the rightmost bar). The higher the indicator on a particular bar, the more that frequency is amplified.3. To adjust the lowest frequency, use the joystick to move the indicator up and down on the bar.4. To adjust other frequencies, use the joystick to move left or right to the other bars.5. Repeat steps 3 and 4 to adjust the setting for each frequency. 6. When you are finished, select Save.7. To rename the setting, select Options > Rename, enter a new name, and select OK.8. To activate the setting, select Activate.
Settings6210. SettingsUse this menu to change profiles, tone settings, time and date settings, call settings, phone settings, voice commands, enhancement settings, security settings, application settings, network settings, network services, and restore factory settings.■ProfilesProfiles define how your device reacts when you receive a call or message, how your keypad sounds when you press a key, and more. Ringing options, keypad tones, and other settings for each of the available profiles can be left at their default setting, or customized to suit your needs. The following profiles are available: Normal, Silent, Meeting, Outdoor, and Pager.Profiles are also available for enhancements such as headset and car kit. See ’Enhancements,’ p. 98.1. At the start screen, select Menu >Settings > Profiles.2. Select the profile of your choice and Activate.Customize a profileYou can customize any of the profiles a variety of ways.1. At the start screen, select Menu >Settings > Profiles.2. Select the profile you wish to customize.3. Select Customize.4. Select the option you want to customize: Incoming call alert, Ringing tone, Ringing volume, Vibrating alert, Message alert tone, Keypad tones, Warning tones, Alert for, or Profile name. You cannot rename the Normal profileSet a timed profileTimed profiles can be used to prevent missed calls. For example, suppose you attend an event that requires your device be set to Silent before the event starts, but you forget to return it to Normal until long after the event. A timed profile can prevent missed calls by returning your device to the default profile at a time you specify. Timed profiles can be set up to 24 hours in advance.
Settings631. At the start screen, select Menu >Settings > Profiles.2. Select the profile you wish to activate and select Timed for timed expiration.3. Enter the time in mm:ss for the profile to expire, and select OK. ■Display settingsWallpaperYou can set your device to display a background picture (wallpaper) on the start screen. 1. At the start screen, select Menu >Settings > Display settings > Wallpaper > Select wallpaper > Graphics > Open. 2. Browse the Graphics folder. 3. When you arrive at the image of your choice, select Options > Set as wallpaper.4. To activate/deactivate wallpaper, at the start screen, select Menu >Settings > Display settings > Wallpaper > On or Off.Color schemesYou can change the color of some display components in your device, such as indicators and signal bars.1. At the start screen, select Menu >Settings > Display settings > Color schemes.2. Select the color scheme of your choice.Menu viewYou can change the view of the main menu. The grid view shows menu icons only in grid format, and the list view shows the icon and menu name in menu order.At the start screen, select Menu >Settings > Display settings > Menu view > List or Grid.BacklightYou can choose whether the backlights will be always on, off, or on for a selected time.
Settings64At the start screen, select Menu >Settings > Display settings > Backlight time-out > 15 seconds or Customize.■Screen saverFrom the start screen, select Menu >Settings > Display settings >Screen saver > On, Off, Select s. saver, or Time-out (10 seconds, 30 seconds, or Other).■Tone settingsYou can adjust the ringing volume, keypad tones, and more for the active profile. See ’Customize a profile,’ p. 62, for more information on profile settings. Select Menu > Settings > Tone settings and one of the following: Incoming call alert—Select how the device notifies you of an incoming call.Ringing tone—Select the ringing tone for incoming calls.Ringing volume—Set the volume of your ringing tone.Vibrating alert—Turn the vibrating alert On or Off.Message alert tone—Select the tone for received messages.Keypad tones—Set the volume of your keypad tones (or turn them off).Warning tones—Turn warning and confirmation tones On or Off.Alert for—Define which caller groups the selected profile will accept or decline. See ’Caller groups,’ p. 47.■Time and date settingsClockAt the start screen, select Menu >Settings > Time and date settings > Clock > Show clock or Hide clock, Set the time, Time zone or Time format.DateAt the start screen, select Menu >Settings > Time and date settings > Date > Show date or Hide date, Set the date, Date format, or Date separator.
Settings65Set the auto-update of date and timeAuto-update is a network service. See ’Network Services,’ p. 6. If your wireless service provider supports this feature, you can allow the digital network to set the clock, which is useful when you are out of your home area, for instance when you have traveled to another network or time zone.At the start screen, select Menu >Settings > Time and date settings > Auto-update of date & time > On, Confirm first, or Off.If you use the Auto-update of date & time option while outside your digital network, you may be prompted to enter the time manually. Network time will replace the time and date when you re-enter your digital network.If your battery has been removed or has discharged outside the digital network, you may be prompted to enter the time manually (once the battery is replaced or recharged, and you are still outside of the digital network).■Call settingsLocation info sharingLocation info sharing is only available for the Nokia 6235i device. Location info sharing is a network service. See ’Network Services,’ p. 6.If your wireless service provider supports this feature, then location info sharing allows the device to share position information over the network. For calls to emergency numbers, this position information may be used by the emergency operator to determine the position of the device. The functionality and accuracy of this feature are dependent on the network, satellite systems, and the agency receiving the information. This feature may not function in all areas or at all times. At the start screen, select Menu >Settings > Call settings > Location info sharing > Emergency or On > OK or No. Emergency—This is the default profile. The device location information is shared only during an emergency call to the official emergency number programmed into your device. The screen displays   in the upper left hand corner of the start screen. On—The device location information is shared with the network whenever the device is powered on and activated. The screen displays   in the upper left hand corner of the start screen.
Settings66Note: Location information will always be shared with the network during emergency calls to the official emergency number programmed into the device, regardless of which setting is selected. After placing an emergency call the device remains in emergency mode for five minutes. During this time, the location information will be shared with the network. See ’Emergency calls,’ p. 104.Anykey answerAnykey answer allows you to answer an incoming call by briefly pressing any key except the Power key, Right selection key, or end key.At the start screen, select Menu >Settings > Call settings > Anykey answer >On or Off.Automatic redialOccasionally, your network may experience heavy traffic, resulting in a fast busy signal when you dial. With automatic redial activated, your device redials the number (number of times is specified by the network), and notifies you once the network is available.At the start screen, select Menu >Settings > Call settings > Automatic redial > On or Off.1-touch dialingYou can activate or deactivate 1-touch dialing. At the start screen, select Menu >Settings > Call settings > 1-touch dialing > On or Off. See ’Set up 1-touch dialing,’ p. 47.Automatic update of serviceYour device is capable of receiving updates to wireless services sent to your device by your service provider. At the start screen, select Menu >Settings > Call settings > Automatic update of service > On or Off.Calling cardIf you use a calling card for long distance calls, you can save the calling card numbers in your device. Your device can store up to four calling cards. Contact your calling card company for more information.
Settings67Save information1. At the start screen, select Menu >Settings > Call settings > Calling card.2. Enter your lock code, and select OK. See ’Change lock code,’ p. 75.3. Scroll to one of the four card memory locations, and select Options > Edit > OK > Dialing sequence.4. Select one of the following sequence types:Access no.+ phone no.+ card no.—Dial 1-800 access number, phone number, then card number (+ PIN, if required).Access no.+ card no.+ phone no.—Dial 1-800 access number, card number (+ PIN, if required), then phone number.Prefix+ phone no.+ card no.—Dial the prefix (numbers that must precede the phone number) and phone number you want to dial, then card number (+ PIN, if required).5. Enter the required information (access number or prefix and card number), and select OK to confirm your entries.6. Select Card name, enter the card name, and select OK. Make callsAfter you have saved your calling card information in your device, you can make a call using your calling card.1. At the start screen, select Menu >Settings > Call settings > Calling card. 2. Enter your lock code, and select OK. See ’Change lock code,’ p. 75.3. Scroll to the calling card of your choice, select Options > Select > OK.4. Press the end key to return to the start screen; then enter the phone number, including any prefix (such as 0 or 1) that your calling card may require when you make a calling card call. See your calling card for instructions5. Press and hold the call key for a few seconds until Card call is displayed.6. When you hear the tone or system message, select OK.
Settings68International prefixYou can store an international dialing prefix into your device. When you enter + at the beginning of a phone number, your device automatically inserts the international dialing prefix that you have stored after you press the call key. See ’Insert dialing codes,’ p. 46.Data or fax callsData or fax calling is a network service. See ’Network Services,’ p. 6. If your wireless service provider supports this feature, you can set up the device to send or receive data or fax calls when a terminal, such as a PDA or PC, is connected.For better performance during data calls, place the device on a stationary surface with the keypad facing downward. Do not move the device by holding it in your hand during a data call.For more information on connectivity, refer to the PC/PDA Connectivity Guide which can be downloaded from the Nokia website at http://www.nokiausa.com.1. At the start screen, select Menu >Settings > Call settings > Data/fax calls > Incoming data/fax call.2. Select one of the following options:Normal—The device receives incoming calls as usual.Data calls only—The device receives only data calls.Fax calls only—The device receives only fax calls.3. When you are finished receiving the fax or data call, repeat steps 1 and 2 and select Normal.Data transferYou can view the transmission speed when sending or receiving data or fax calls.At the start screen, select Menu >Settings > Call settings > Data/fax calls > Data rate display > Graphic or Off.Call summaryYour device can display the time spent on a call when you hang up. At the start screen, select Menu >Settings > Call settings > Call summary > On or Off.
Settings69Ringing tone for no caller IDYou can select a different ringing tone for calls received with no caller ID. From the start screen, select Menu >Settings > Call settings > Ringing tone for no caller ID > On or Off. See ’Customize a profile,’ p. 62, for more information on selecting a ringing tone.■Phone settingsPhone language1. At the start screen, select Menu >Settings > Phone settings > Phone language.2. Scroll to the language of your choice and press Select. The phone language affects the time and date formats of the clock, alarm clock, and calendar.Touch tonesTouch tones, or DTMF tones, are the tones that sound when you press the keys on your device keypad. You can use touch tones for many automated dial-up services such as banking and airlines, or for entering your voice mailbox number and password. Touch tones are sent during an active call. You can send them manually from your device keypad, or send them automatically by saving them in your device.Set type1. At the start screen, select Menu >Settings > Phone settings > Touch tones > Manual touch tones.2. Select one of the following options:Continuous—The tone sounds for as long as you press and hold a key.Fixed—Used to send tones of the duration you specify in the Touch tone length option.Off—Used to turn off tones. No tones are sent when you press a key.
Settings70Set length You can specify touch-tone length for the Fixed option. At the start screen, select Menu >Settings > Phone settings > Touch tones > Touch tone length > Short (0.1 seconds) or Long (0.5 seconds).Memory statusYou can view the size of memory available on your device. At the start screen, select Menu > Settings > Phone settings > Memory status > Size, Free memory, Used memory, Contacts, Gallery, Organizer, or Multimedia msgs..You can view the size of memory available for application installations. At the start screen, select Menu > Extras > Memory.Start-up toneYou can select to have a start-up tone when you first turn on your device. At the start screen, select Menu >Settings > Phone settings > Start-up tone > On or Off.Create a welcome noteYou can write a welcome note which briefly appears on the display screen whenever you switch your device on. Dictionary mode is not available for entering welcome note text.1. At the start screen, select Menu > Settings > Phone settings > Welcome note.2. Enter a note (up to 44 characters). Select Delete if you want to delete the previous text.3. When you are finished, select Options > Save. Create a bannerIf your wireless service provider supports this feature, you can choose whether the display shows the operator logo or customized text when the device is in the idle state. At the start screen, select Menu >Settings > Phone settings >Banner> Default or Customize.Help text activationYour device displays brief descriptions for most menu items. When you arrive at a feature or menu, pause for about 10 seconds and wait for the help text to display. If necessary, use the joystick to page through the full help text.
Settings71The default setting for help text is On. However, you can turn help text on or off. At the start screen, select Menu >Settings > Phone settings > Help text activation > On or Off.■Infrared activationIf supported by your wireless provider, you can send and receive contacts (business card) as a text message to a compatible phone or other handheld device using the infrared port. See ’Infrared,’ p. 79.Send a business card1. At the start screen, select Menu >Settings > Infrared.2. Highlight the entry from the contacts list that you wish to send.3. Select Details > Options > Send bus. card > Via infrared > Primary number to send primary number only or All details to send all contact information for the contact.4. Align the IR port to the other activated device IR port. Select OK and your device will start sending the business card with IR.Receive a business card1. At the start screen, select Menu >Settings > Infrared > Select. Infrared reception activated displays.2. Align the IR port with the activated device port that is sending the business card.3. Select Show > Save to save the business card in phone book memory, or select Exit > OK to discard the business card.■Voice commandsYou can dial up to 25 stored numbers using voice command dialing. See ’Voice tags,’ p. 48.Before using voice tags, note that:• Voice tags are not language-dependent. They are dependent on the speaker’s voice.• You must say the name exactly as you said it when you recorded it.
Settings72• Voice tags are sensitive to background noise. Record voice tags and use them in a quiet environment.• Very short names are not accepted. Use long names and avoid similar names for different numbers.Note: Using voice tags may be difficult in a noisy environment or during an emergency, so you should not rely upon voice dialing in all circumstances.Handsfree operation with voice commandsYou can set as many as five voice commands, which allow handsfree operation of certain features in your device. Assign a voice tag to a commandBefore using voice commands, you must first add a voice tag to the device function. 1. At the start screen, select Menu > Settings > Voice commands.2. Select the device function you wish to tag: Profiles, Voice mailbox, Radio, Infrared, Voice recorder or Call log > Add.3. Select Start, and speak the voice tag clearly into the microphone. Do not select Quit unless you want to cancel the recordingThe device replays and saves the recorded tag. The   icon appears next to commands that have voice tags assigned.Activate a voice commandAfter you have associated a voice tag with a function in your device, you can issue a command by speaking the voice tag.1. From the start screen, press and hold the Right selection key.2. When Speak now displays, pronounce the voice tag clearly into the microphone. Select Playback to listen to the voice command tag.When the device finds the voice tag, Found: displays, and the device plays the recognized voice tag through the earpiece. The function you requested is activated.
Settings73OptionsAfter you have associated a voice tag to a command, you can select one of the following options:Change—Change the voice command.Delete—Erase the voice command tag.■Enhancement settingsThe enhancement settings menu is shown only if the device has been connected to a compatible enhancement. At the start screen, select Menu > Settings > Enhancement settings > Headset, Handsfree, Loopset, TTY/TDD, or Charger.HeadsetImportant: The headset may affect your ability to hear sounds around you. Do not use the headset in situations that may endanger your safety.Select the option of your choice to enter the submenu and modify its settings. Default profile—Choose the profile you wish to be automatically activated when a headset is connected.Automatic answer—Calls are answered automatically after one ring when a headset is connected. Select On or Off.HandsfreeSelect the option of your choice to enter the submenu and modify its settings. Default profile—Choose the profile you wish to be automatically activated when your device is connected to a car kit.Automatic answer—Answer calls automatically after one ring when a car kit is connected. Select On or Off.Lights—Choose to keep the device lights always on, or to shut off automatically after several seconds. Select On or Automatic.LoopsetThe LPS-4 Loopset is recommended for use with your device. Select the option of your choice to enter the submenu and modify its settings. Default profile—Choose the profile you wish to be automatically activated when your device is connected to a loopset.
Settings74Automatic answer—Answer calls automatically after one ring when a loopset is connected. Select On or Off.TTY/TDDCheck with the manufacturer of the TTY/TDD device for a connecting cable that is compatible with the Nokia device. TTY/TDD communications depend on network availability. Check with your service provider for availability and description of services.ChargerSelect the option of your choice to enter the submenu and modify its settings.Default profile—Choose the profile you wish to be automatically activated when your device is connected to the charger.Lights—Choose to keep the device lights always on, or to shut off automatically after several seconds. Select On or Automatic.■Security settingsActivate or deactivate phone lockThe phone lock feature protects your device from unauthorized outgoing calls or unauthorized access to information stored in the device. To activate or deactivate the phone lock setting on your device: 1. At the start screen, select Menu > Settings > Security settings.2. Enter the lock code, and select OK. See ’Change lock code,’ p. 75.3. Select Phone lock and one of the following options:Off—Immediately turns off the device lock feature.Lock now—Immediately turns on the device lock feature.On power-up—Turns on the device lock feature the next time you turn the device on.If you selected Lock now, you will be prompted to enter your lock code when you press Menu, the right softkey, or the left softkey. When the lock code has been entered, phone lock deactivates and your device functions normally.When phone lock is activated, Phone locked is displayed each time you turn your device on or off.
Settings75When the device is locked, calls still may be possible to the official emergency number programmed into your device.Call not allowed is displayed if you attempt to place a call while your device is locked. To answer a call with phone lock on, select Answer or press the call keyAllow numbers when phone lockedWhen phone lock is on, the only outgoing calls that can be made are to the emergency number programmed into your device (for example, 911) or the number stored in the Allowed no. when phone locked location:1. At the start screen, select Menu > Settings > Security settings.2. Enter the lock code, and select OK. See ’Change lock code,’ p. 75.3. Select Allowed no. when phone locked. Highlight an empty folder and select Assign and enter the phone number; or select Assign > Search to recall the number from Contacts. Select OK.Call the allowed phone number1. At the start screen, press the joystick down and highlight the contact you wish to call.2. Press the call key to place the call.Change lock codeAvoid using codes similar to emergency numbers such as 911 to prevent accidental dialing of the emergency number.The preset lock code is 1234 or the last four digits of your phone number. If you enter an incorrect lock code five times in a row, your device will prompt you for the lock code.If you enter the wrong lock code 5 times in succession, you will not be able to enter a code for 5 minutes, even if you power off the device between incorrect entries.1. At the start screen, select Menu > Settings > Security settings > Change lock code.2. Enter the new lock code (must be 4 characters in length), re-enter the new lock code for verification, and select OK.3. Reenter the new lock code for verification, and select OK.
Settings76When you change your lock code, make sure you store it in a safe place, away from your device. Avoid entering access codes similar to emergency numbers to prevent accidental emergency calls.Call restrictionsCall restrictions is a network service. See ’Network Services,’ p. 6.If your wireless service provider supports this feature, you can restrict the calls your device makes and receives. When calls are restricted, calls still may be possible to the official emergency number programmed into your device. Contact your service provider for the restriction password.1. At the start screen, select Menu > Settings > Security settings > Call restrictions. 2. Enter the lock code, and select OK. See ’Change lock code,’ p. 75.3. Select the types of calls you wish to restrict:Restrict outgoing calls - Calls cannot be made.Restrict incoming calls - Calls cannot be received.4. Select an option: Select, Add restriction.Note: When calls are restricted, calls still may be possible to the official emergency number programmed into your device.Voice privacyVoice privacy is a network service. See ’Network Services,’ p. 6. If your wireless service provider supports this feature, the voice privacy feature protects the privacy of your current phone conversation from other callers placing phone calls on your same network. At the start screen, select Menu > Settings > Security settings > Voice privacy > On or Off.■NetworkThe menu options you see in your device are based on your service provider’s network. The network determines which options actually appear in the device menu. Check with your service provider for more information.The Network menu allows you to customize the way your device chooses a network in which to operate while you are within or outside of your primary or home system. Your device is set to search for the most cost-effective network. If
Settings77your device cannot find a preferred network, it selects a network automatically based on the option you choose in the Network menu.Roaming optionsYou can set your device to roam or search for another network when you are not in your home area.1. At the start screen, select Menu > Settings > Network > Roaming options.2. Select one of the following options:Home only—You can make and receive calls in your home area only.Automatic—The device automatically searches for service in another digital network. If one is not found, the device uses analog service. The roaming rate applies when not in the home service area.3. Select OK, if necessary, to confirm the activation.ModeYou can choose whether your device uses digital or analog service.1. At the start screen, select Menu > Settings > Network > Mode.2. Select one of the following service options:Digital preferred—The device works in digital mode but will also work in analog mode when digital mode is unavailable.Digital only—The device only works in digital mode.Analog only—The device only works in analog mode.■Network servicesThe following features are network services. See ’Network Services,’ p. 6.Store a feature code1. At the start screen, select Menu > Settings > Network services > Network feature setting. 2. Enter the feature code from your service provider (for example, *633), and select OK.
Settings783. Select the type of service that matches the feature code you entered (for example, Call forwarding).The activated feature code is now stored in your device, and you are returned to the Feature code: field. Continue entering other feature codes (for example, *633), or press the end key to return to the start screen. Once you enter a network feature code successfully the feature becomes visible in the Network services menu. Call forwardingCall forwarding tells your network to redirect incoming calls to another number. Call forwarding is a network service and may not work the same in all networks, so contact your wireless provider for availability.ActivateAll options listed may not appear in the display. Contact your wireless provider for more information.1. At the start screen, select Menu > Settings > Network services > Call forwarding.2. Select one of the following options:Forward all calls—Forward all calls to the number you specify.Forward if busy—Forward incoming calls when you are in a call.Forward if not answered—Forward incoming calls to another number if you are unable to answer. You can set a delay before forwarding takes place.Forward if out of reach—Forward incoming calls when your device is off.Cancel all call forwarding—Cancel any call forwarding options you have set.3. Select Activate.4. Select the destination to which your calls will be forwarded.5. Enter the number to which your calls, data, or other information will be forwarded, and select OK.CancelAt the start screen, select Menu > Settings > Network services > Call forwarding > Cancel all call forwarding. Cancel all call forwarding may affect your ability to receive voice mail messages. Contact your wireless provider for specific details.
Settings79Call waitingIf your wireless provider supports this feature, call waiting notifies you of an incoming call even while you are in a call. You can then accept, reject, or ignore the incoming call.1. At the start screen, select Menu > Settings > Network services > Call waiting > Activate or Cancel.2. During a call, select Answer or press the call key to answer the waiting call. The first call is put on hold.3. Press the end key to end the active call.Send own caller ID when callingIf your wireless service provider supports this feature, then you can allow or prevent your number from appearing on the receiving caller ID.At the start screen, select Menu > Settings > Network services > Send my caller ID >Yes or No.View your own phone numberAt the start screen, select Menu > Settings > Network services > My number selection.■Restore factory settingsYou can reset some of the menu settings to their original values. Data that you have entered or downloaded is not deleted, for example, entries in your contacts list are not affected.1. At the start screen, select Menu > Settings > Restore factory settings.2. Enter the lock code, and select OK. See ’Security settings,’ p. 74.■InfraredYou can set up the device to receive data through its IR port. To use an IR connection, transmission and reception must be to or from an IR compatible phone or device. You can send or receive data such as business cards, graphics, images, sound clips, music files, videos, and calendar notes to or from a compatible phone or data device (such as a computer) using the IR port of your device.
Settings80Do not point the IR (infrared) beam at anyone’s eye or allow it to interfere with other IR devices. This device is a Class 1 laser product.Send and receive data1. Ensure that the IR ports of the sending and receiving devices are pointing at each other and that there are no obstructions between the devices.The preferable distance between the two devices in an IR connection is from 3 inches to 3 feet.2. Activate IR in your device by selecting Menu > Settings > Infrared.3. The user of the other device should activate IR as well.If data transfer is not started within two minutes after the activation of the IR port, the connection is cancelled and must be restarted.Connection indicator• When   shows continuously, the IR connection is activated and your device is ready to send or receive data using its IR port.• When   blinks, your device is either trying to connect to the other device or a connection has been lost.
Organizer8111. Orga n i z e rYour device contains features to help organize your everyday life, including an alarm clock, calendar, calculator, countdown timer, and stopwatch.■Alarm clockIf the alarm time is reached while the device is switched off, the device switches itself on and starts sounding the alarm tone. If you select Stop, the device asks whether you want to activate the device for calls. Select No to switch off the device or Yes to make and receive calls. Do not select Yes when wireless phone use may cause interference or danger.Set or change an alarm settingThe alarm clock is based on the device clock. It sounds an alert any time you specify and even works if the device is turned off.1. At the start screen, select Menu > Organizer > Alarm clock > Alarm time > On.2. Enter the time for the alarm in hh:mm format, and select OK. 3. Select am or pm (if 12-hour format is selected). Alarm on appears briefly in the display and   appears on the start screen.Repeat alarmYou can set the alarm to repeat. At the start screen, select Menu > Organizer > Alarm clock > Repeat alarm. Set the alarm toneYou can set which tone is played when the alarm sounds.1. At the start screen, select Menu > Organizer > Alarm clock > Alarm tone.2. Select Standard, Radio, Ringing tone, Open Gallery or Tone downloads to choose the tone you want to use.If you set your alarm to Radio, use an accessory that supports FM Stereo.
Organizer82Alarm conditionsWhen the alarm sounds, your device beeps, vibrates (if vibrating alert is on for currently active profile), and the display lights up.With the device on, select OK to shut the alarm off, or select Snooze. The alarm stops for 10 minutes and Snooze on appears in the display.If you do not press a key, the alarms stops (snoozes) for 10 minutes, then sounds again.If the alarm time is reached while the device is switched off, the device switches itself on and starts sounding the alarm tone. If you select Stop, the device asks whether you want to activate the device for calls. Select No to switch off the device or Yes to make and receive calls. Do not select Yes when wireless device use may cause interference or danger.Turn an alarm offAt the start screen, select Menu > Organizer > Alarm clock > Alarm time > Off.■CalendarThe calendar keeps track of reminders, calls you need to make, meetings, and birthdays. It can even sound an alarm for any of these events.Monthly view provides an overview of the selected month and weeks. It also allows you to jump to a specific date. Any days or dates that appear in bold font contain calendar notes such as a meeting or reminder.OpenAt the start screen, select Menu > Organizer > Calendar. You can move the cursor in some calendar views by using the joystick.Go to a date1. At the start screen, select Menu > Organizer > Calendar > Options > Go to date.2. Enter the date (for example, mm/dd/yyyy), and select OK.
Organizer83Note a specific dateYou can apply five types of notes to your calendar. Your device asks for further information depending on which note you choose. You also have the option to set an alarm for any note that you select.1. Go to the date for which you want to set a reminder. See ’Go to a date,’ p. 82.2. From the monthly view (with the go-to date highlighted), select Options > Make a note.3. Select one of the following note types and proceed accordingly:Meeting—Enter a subject, location, and a start/end time.Call—Enter a phone number, a name and the time.Birthday—Enter the person’s name and year of birth.Memo—Enter a subject and an end date.Reminder—Enter the subject you wish to be reminded about. You are given the option to set an alarm.4. Enter your note and select Options > Save.View notes (day view)After you have created calendar notes, you can view them.1. At the start screen, select Menu > Organizer > Calendar.2. Scroll to the date containing the note, that appears in bold type and select View.Options while viewing a list of notes1. Select Options while viewing a day’s note to display the following:The options listed below are available either while viewing the body of a note or viewing the header of a note. Make a note—Create a new note for the selected date.Delete—Delete the note.Edit—Edit the note.Move—Move the note to another date on your calendar.
Organizer84Repeat—Set the note to recur on a regular basis (daily, weekly, biweekly, monthly, and yearly).Go to date—Jump to another date on your calendar.Send note—Send the note to another device as a text message or in calendar-to-calendar (vCal) format by way of multimedia messages, SMS, or IR.Copy—Copy the note, which you can then paste to another date.Settings—Set the date and time, date and time format, the day each week starts and whether you want your notes to auto-delete after a specified time.Go to to-do list—Jump to the to-do list on your calendar.2. Select an option to activate it or enter its submenu.Send a note1. At the start screen, select Menu > Organizer > Calendar.2. Scroll to the date containing the note you wish to send, which appears in bold type, and select View.3. Scroll to the note you wish to send, and select Options > Send note > Via calendar, Via multimedia (see Multimedia messages, 31), Via text message, or Via infrared (see Infrared activation, 71).4. If you selected Via calendar, enter the number for the recipient, or select Search to retrieve a number from the contacts list, and select OK. 5. If you selected Via text message, the note appears as a text message in the display. • Select Send > Send to number, Send to e-mail, Send to many or Send to distrib. list. Highlight the contact you wish to send your note to and select Send.• Enter the number for the recipient, or select Search to retrieve a number from the contacts list, and select Send.Receive notesWhen you receive a calendar note in calendar-to-calendar (vCal) format, your device displays Calendar note received.• To view calendar notes, select Show and, if necessary, scroll to view the entire message.
Organizer85• To save calendar notes after viewing, select Options > Save.• To discard calendar notes after viewing, select Options > Discard or select Exit.When you receive a calendar note or text message, a message notification appears on the start screen. You can save the note in your calendar and set an alarm for any date and time.■NotesYou can write and save information in Notes, and send notes via multimedia, text message, or infrared. From the start screen, select Menu > Organizer > Notes. If there are no notes created, select Add note, create your note and select Save when done. If notes have already been created, highlight the note you wish to use and select View to read, or select Options to perform one of the following:Make a note—Create additional notes.Delete—Discard a note.Edit—Change or add information to a note.Send note—Send a note Via multimedia, Via text message, or Via infrared.Delete all notes—Delete all notes created.■To-do listUse the to-do list feature to keep track of your tasks. You can save a note for a task, select a priority level for the note and mark it as done when you have completed it. You can sort the notes by priority or by date. Add a To-do note1. From the start screen, select Menu > Organizer > To-do list.2. If there are no notes, select Add note.3. Enter the subject of the to-do note, and select Save.4. Select either High, Medium, or Low priority. The to-do note is saved. The device automatically sets the deadline.View a To-do note1. From the start screen, select Menu > Organizer > To-do list.
Organizer862. Highlight a to-do note, and select Options to select from the following:Add—Add another note (available only in header view).Delete—Delete the note.Mark note as done—Mark a note or task as complete; no more reminders will follow.Sort by deadline—Sort the notes according to their deadline.Send—Send the note to another device using IR, as a text or multimedia message, or as a calendar note to another compatible device.Go to calendar—Leave the to-do list, and go to the calendar.Save to calendar—Save the to-do note to a date on your calendar.Delete all notes—Delete all the to-do notes in the list (available only in header view).3. View the to-do note and select Edit to edit the note or Options to select from the following:Deadline—Set a deadline for the note (available only in body view).Mark note as done—Mark a note or task as complete; no more reminders will follow.Delete—Delete the note.Edit priority—Change the priority to high, medium, or low (available only in body view).Send—Send the note to another device using IR, as a text or multimedia message, or as a calendar note to another compatible device.Go to calendar—Leave the to-do list, and go to the calendar.Save to calendar—Save the to-do note to a date on your calendar.■CalculatorThe calculator in your device adds, subtracts, multiplies, divides, calculates the square and the square root, changes the sign of the number entered, and converts currency values.Note: This calculator has a limited accuracy and is designed for simple calculations.
Organizer871. At the start screen, select Menu > Organizer > Calculator.2. Enter the first number in the calculation. Press # for a decimal point if necessary.To perform a square or square root calculation, select Options > Square or Square root. To cycle through the add (+), subtract (-), multiply (*), and divide (/) characters, press *. Pause briefly to select the displayed character.To change the sign, select Options > Change sign, or scroll up or down.3. Enter the second number in your calculation.4. Select Equals if calculation is complete or Options if more functions are required. Currency converterYou can convert foreign currency to domestic, or vice versa, directly from the start screen or from the Calculator menu.Note: When you change base currency, you must key in the new rates because all previously set exchange rates are set to zero.1. At the start screen, select Menu > Organizer > Calculator > Options > Exchange rate > Foreign units in home units or Home units in foreign units.Foreign units in home units—The number of home units it takes to make one unit of foreign currency.Home units in foreign units—The number of foreign units it takes to make one unit of your home currency.2. Enter the exchange rate (press # to insert a decimal), and select OK.3. At the start screen, select Back to return to Calculator screen and enter currency amount to convert.4. Select Options > To home or To foreign.To home—converts foreign currency to domestic currency.To foreign—converts domestic currency to foreign currency.5. If you haven’t already entered an exchange rate, the device will prompt you to enter it now. Select OK. You can edit the exchange rate at any time.
Organizer88■Countdown timerYou can enter a specified time (up to 99 hours and 59 minutes). When the time runs out, your device sounds an alarm.Note: The countdown timer only works when the device is on. Once you turn off your device, the timer is no longer active.Set the countdown timer1. At the start screen, select Menu > Organizer > Countdown timer.2. Enter the time (in hh:mm format), and select OK.3. Enter a note for the timer, and select OK. The   icon appears on the start screen when the countdown timer is set. When the time runs out, your device sounds an alarm, displays the timer note, and flashes its lights.Press any key during the alarm to stop the alarm. After 3 minutes the timer alert expires automatically.Change the timeAfter you have set the timer, you can change the time. 1. At the start screen, select Menu > Organizer > Countdown timer > Change time.2. Enter the new time, and select OK.3. Leave the note as it was, or enter a new note, and select OK. Stop the timer before the alarm soundsAfter you have set the timer, you can stop the timer. At the start screen, select Menu > Organizer > Countdown timer > Stop timer.■StopwatchYour device has a stopwatch that can be used to track time. The stopwatch displays time in hours, minutes, seconds and fractions of a second in hh:mm:ss:s format.Using the stopwatch or allowing it to run in the background when using other features increases the demand on battery power and reduces the battery life.
Organizer89Measure time1. At the start screen, select Menu > Organizer > Stopwatch > Split timing or Lap timing > Start. The running time displays.Split timing—You can use the split time function for such things as a long distance race when you need to pace yourself. Select Split to note the lapsed time. The timer continues to run and the split time appears below the running time. Each time you select Split, the new measured time appears at the beginning of the list.Lap timing—You can use the lap time function when you want to track how long it takes to complete each cycle or lap. Select Lap to note the lap time. The clock stops, then starts immediately from zero. The lap time appears below the running time. Each time you select Lap, the new measured time appears at the beginning of the list.2. Select Stop to end the timing and display the total time or select Stop > Options > Start or Reset to continue or reset timing.Save, view or delete lap and split times• To save a time while the clock is running select Stop > Save, enter a name for the measurement, and select OK. If you do not enter a name, the total time is used as the default title for the lap or split time.• To view a saved time, from the start screen, select Menu > Organizer > Stopwatch > Show last time or View times.• To delete a saved time, from Stopwatch, select View times > enter the time to delete > Delete > Yes or select Delete times > One by one or Delete all.Operation noteIf you press the end key and return to the start screen, the clock continues to run in the background and the   icon appears in the upper left corner of the screen.To return to the stopwatch screens, at the start screen, select Menu > Organizer > Stopwatch >Continue. To stop the clock, select Stop.OptionsYou can choose the following options when using the stopwatch:
Organizer90Continue—Appears when the stopwatch is working in the background.Show last time— Appears when you have saved a split or lap time. Displays the last time saved.Split timing—Asks if you want to discontinue previous timing.Lap timing—Asks if you want to discontinue previous timing.View times—Allows you to browse the saved times.Delete times—Allows you to delete any saved times. You can delete the saved times one by one or all at once.
Mobile Web9112. Mobile WebMinibrowser is a network service. See ’Network Services,’ p. 6.Your device has a built-in browser you can use to connect to selected services on the mobile internet. If your wireless service provider supports this feature, then you can view weather reports, check news or flight times, view financial information, and much more. The Web browser on your device can display WAP-based content.Your device may have some bookmarks loaded for sites not affiliated with Nokia. Nokia does not warrant or endorse these sites. If you choose to access them, you should take the same precautions, for security or content, as you would with any internet site.The security icon does not indicate that the data transmission between the gateway and the content server (or place where the requested resource is stored) is secure. The service provider secures the data transmission between the gateway and the content server.■Mobile internet accessBecause mobile Internet content is designed to be viewed from your device, your wireless provider is now your mobile Internet service provider as well.It is likely that your wireless provider has created a home page and set up your browser to go to this page when you log on to the mobile Internet. Once at your service provider’s home page, you may find links to a number of other sites.It should not be necessary to manually configure the browser on your device. Normally this is done by your wireless provider once you have subscribed to the feature. Contact your wireless provider if you have problems using the browser.■Sign on to the mobile internetAt the start screen, select Menu > Mobile web > Minibrowser > Connect or the operator provided menu item.After a brief pause, your device attempts to connect to your wireless provider’s home page. If you receive an error message, your device may not be set up for browsing. Contact your wireless provider to make sure that your device is configured properly.
Mobile Web92■Navigate the mobile InternetSince your device screen is much smaller than a computer screen, mobile Internet content is displayed differently than you may be accustomed to seeing. This section contains guidelines for using the keys to navigate a WAP site.Phone keys• Press the Power key to display the Minibrowser home screen.• Scroll up or down to browse the WAP site.• Select an item.• To enter letters and numbers, press a key from 0–9.• To enter special characters, press *.Receive a call while onlineDepending on your wireless service provider, you may still be able to receive a voice call while using the WAP browser.• To answer the incoming call, press the call key. • To reject the incoming call, press the end key. After you end your voice call, the mobile Internet connection automatically resumes.Note: If your wireless service provider does not support incoming calls while browsing, then the incoming calls are automatically diverted to voice mail.Make an emergency call while onlineYou can end your data connection then make an emergency call. 1. To close your mobile Internet connection, press the end key.2. Press the end key as many times as needed to clear the display and ready the device for calls. 3. Enter the emergency number for your present location (for example, 911). Emergency numbers vary by location.4. Press the call key.
Mobile Web93Clear the cache and disconnectA cache is a memory location that is used to store data temporarily. If you have tried to access or have accessed confidential information requiring passwords, empty the cache after each use. The information or services you have accessed are stored in the cache. To empty the cache while in the browser menu, select Navigate > Advanced > Clear > Cache from the home page. You can also clear the cache by pressing and holding the Power key to power off your device.To close your mobile internet connection while browsing, press the end key.
Extras9413. ExtrasChallenge yourself or a friend to one of the fun games in your device. Some menus listed are network services. Contact your wireless provider for more information. When you download games or applications, they may be saved in either the Games or the Collection folders.■GamesAt the start screen, select Menu > Extras >Games to display the games on your device: 3D Snow Boarding, Nokia Puzzle, Club Pinball, and Bounce.■CollectionsCollections is a network service. See ’Network Services,’ p. 6. If your wireless service provider supports this feature, you will find useful applications pre-installed on your device. Also, you can manage and download new Java applications that may be offered by your wireless provider.An application may require a few seconds to load. When you open an application, wait for the launch screen to disappear. At that point, the application is ready.1. At the start screen, select Menu > Extras > Collection.2. Select an application: World Clock, Translator, Lunar Calendar, or Converter.Note: Only install applications from sources that offer adequate protection against harmful software.■MemoryYou can view the size of memory available for games or application installations. At the start screen, select Menu > Extras > Memory.Note: Only install applications from sources that offer adequate protection against harmful software.
PC Connectivity9514. PC Connectivity■USB data transferYou can transfer data such as music, photos, and videos from your device to a compatible PC, or from a compatible PC to your device using a DKU-2 USB data cable. The cable is connected to your device correctly when the arrowhead points toward the display screen. Disconnect the USB data cable from the device to make a call.Use the Nokia Audio Manager software to handle your music files and transfer them from the PC to the memory card in your device. See ’Nokia PC Suite,’ p. 96.Transfer files using Windows ExplorerAfter you have installed the Nokia Audio Manager, it is possible to use Windows Explorer to transfer music, photo, and video files to your device and from your device to your PC.1. Connect your PC and your device with a DKU-2 USB cable. Data enhancement connected displays on your device.2. Open Windows Explorer. Your device will appear as a local drive (named by Nokia 6235, Nokia 6235i, Nokia 6236, and Nokia 6236i), and with a drive letter assigned to it.3. Click on the folders to display a window that shows the contents of the folder on the device memory card.4. Open a second instance of Windows Explorer and display the contents of the folder on your PC where you have MP3 files, photo files, or video files stored.5. Select the files on your PC that you wish to transfer to the device.6. Drag and drop the files from the second window into the first window and place them in a folder. 7. The files are transferred to the device and can be played by the Music player, or accessed by the Media player.If you selected files that require more memory than the device memory has, an error note displays. Deselect some of your files until the selections fit the memory.
PC Connectivity968. Disconnect the USB cable by double-clicking the green arrow on the taskbar at the bottom of your PC screen. A window pops up that shows Unplug or Eject Hardware. 9. Click on USB device in the hardware devices window. A popup window shows Stop a Hardware device.10. Highlight USB device and click OK. The popup window Safe to Remove Hardware is shown with the message The ‘USB Device’ device can now be safely removed from the system. Select OK.Important: To ensure that all memory card operations are completed in a controlled way, do not unplug the connectivity cable until Windows notifies you that it is safe to do so. Uncontrolled completion of the memory card operations may cause the memory card and the information stored on it to become corrupted. A corrupted memory card may have to be formatted before it can be used again. When a memory card is formatted, all information on the card is permanently lost.■Nokia PC SuiteNokia PC Suite software is available for the Nokia 6235, Nokia 6235i, Nokia 6236, and 6236i phones. Nokia PC Suite is a collection of powerful tools that you can use to manage your device features and data. Each component is a separate program that includes online helps. Nokia PC Suite software, installation instructions, and other documentation, which are provided free of charge and can be downloaded from the software downloads of the Nokia Web site: www.nokiausa.com/pcsuite.Some of the features in your device require network support. Contact your service provider for availability and configuration instructions.• Nokia Image Converter makes images usable for multimedia messages or wallpapers and transfers them to your device.• Nokia Sound Converter edits polyphonic ringing tones to be compatible with your device and transfers them to your device.• Nokia Content Copier copies information or backs up information from your device to the PC or to another compatible Nokia device.• Nokia Phone Editor sends text messages and edits the contact directory and message settings of your device.
PC Connectivity97• Nokia PC Sync synchronizes the contacts directory and calendar between your device and a compatible PC.• Nokia Connection Manager selects the connection type between the PC and the device.• Nokia Phone Browser copies images and tones from your device to your PC and vice versa.Copyright protection may prevent some images, ring tones, and other content from being copied, modified, transferred or forwarded.
Enhancements9815. EnhancementsCheck the model number of any charger before use with this device. This device is intended for use when supplied with power from ACP-7 or ACP-12.Warning: Use only batteries, chargers and enhancements approved by Nokia for use with this particular model. The use of any other types may invalidate any approval or warranty, and may be dangerous. For availability of approved enhancements, please check with your dealer. A few practical rules about accessories and enhancements:• Keep all accessories and enhancements out of the reach of small children.• When you disconnect the power cord of any accessory or enhancement, grasp and pull the plug, not the cord.• Check regularly that enhancements installed in a vehicle are mounted and are operating properly.• Installation of any complex car enhancements must be made by qualified personnel only.Power• Standard 1070 mAh Li-Ion Battery (BL-6C, BL-5C)• Standard Travel Charger (ACP-7)• Travel Charger (ACP-12)• Retractable Charger (AC-1)Go to www.nokiausa.com/phones for more information about enhancements.
Reference information9916. Reference information■Battery informationYour device is powered by a rechargeable battery. The full performance of a new battery is achieved only after two or three complete charge and discharge cycles. The battery can be charged and discharged hundreds of times but it will eventually wear out. When the talk and standby times are noticeably shorter than normal, buy a new battery. Use only Nokia approved batteries, and recharge your battery only with Nokia approved chargers designated for this device.Unplug the charger from the electrical plug and the device when not in use. Do not leave the battery connected to a charger. Overcharging may shorten its lifetime. If left unused, a fully charged battery will lose its charge over time. Temperature extremes can affect the ability of your battery to charge.Use the battery only for its intended purpose. Never use any charger or battery that is damaged.Do not short-circuit the battery. Accidental short-circuitring can occur when a metallic object such as a coin, clip, or pen causes direct connection of the positive (+) and negative (-) terminals of the battery. (These look like metal strips on the battery.) This might happen, for example, when you carry a spare battery in your pocket or purse. Short-circuitring the terminals may damage the battery or the connecting object.Leaving the battery in hot or cold places, such as in a closed car in summer or winter conditions, will reduce the capacity and lifetime of the battery. Always try to keep the battery between 59°F and 77°F (15°C and 25°C). A device with a hot or cold battery may not work temporarily, even when the battery is fully charged. Battery performance is particularly limited in temperatures well below freezing.Do not dispose of batteries in a fire! Dispose of batteries according to local regulations. Please recycle when possible. Do not dispose as household waste.■Nokia battery authentication guidelinesAlways use original Nokia batteries for your safety. To check that you are getting an original Nokia battery, purchase it from an authorized Nokia dealer, look for the Nokia Original Enhancements logo on the packaging, and inspect the hologram label using the following steps:
Reference information100Successful completion of the four steps is not a total assurance of the authenticity of the battery. If you have any reason to believe that your battery is not an authentic original Nokia battery, you should refrain from using it and take it to the nearest authorized Nokia service point or dealer for assistance. Your authorized Nokia service point or dealer will inspect the battery for authenticity. If authenticity cannot be verified, return the battery to the place of purchase. Authenticate hologram1.When looking at the hologram label, you should see the Nokia connecting hands symbol from one angle and the Nokia Original Enhancements logo when looking from another angle.2.When you angle the hologram. to the left, right, down, and up sides of the logo, you should see 1, 2, 3, and 4 dots on each side respectively.3.Scratch the side of the label to reveal a 20-digit code, for example, 12345678919876543210. Turn the battery so that the numbers are facing upwards. The 20-digit code reads starting from the number at the top row followed by the bottom row.4.Confirm that the 20-digit code is valid by following the instructions at www.nokiausa.com/batterycheck.What if your battery is not authentic?If you cannot confirm that your Nokia battery with the hologram label is an authentic Nokia battery, please do not use the battery. Take it to the nearest authorized Nokia service point or dealer for assistance. The use of a battery that is not approved by the manufacturer may be dangerous and may result in poor performance and damage to your device and its enhancements. It may also invalidate any approval or warranty applying to the device.To find out more about original Nokia batteries visit www.nokiausa.com/battery.
Care and maintenance101Care and maintenanceYour device is a product of superior design and craftsmanship and should be treated with care. The suggestions below will help you protect your warranty coverage and enjoy your device for many years.• Keep the device and all of its parts and accessories out of the reach of small children.• Keep the device dry. Precipitation, humidity and all types of liquids or moisture can contain minerals that will corrode electronic circuits. If your device does get wet, remove the battery and allow the device to dry completely before replacing it.• Do not use or store the device in dusty, dirty areas. Its moving parts and electronic components can be damaged.• Do not store the device in hot areas. High temperatures can shorten the life of electronic devices, damage batteries, and warp or melt certain plastics.• Do not store the device in cold areas. When the device returns to its normal temperature, moisture can form inside the device and damage electronic circuit boards.• Do not attempt to open the device other than as instructed in this guide.• Do not drop, knock, or shake the device. Rough handling can break internal circuit boards and fine mechanics. • Do not use harsh chemicals, cleaning solvents, or strong detergents to clean the device. • Do not paint the device. Paint can clog the moving parts and prevent proper operation.• Use a soft, clean, dry cloth to clean any lenses (such as camera, proximity sensor, and light sensor lenses).• Use only the supplied or an approved replacement antenna. Unauthorized antennas, modifications, or attachments could damage the device and may violate regulations governing radio devices.• Use chargers indoors.All of the above suggestions apply equally to your device, battery, charger, or any enhancement. If any device is not working properly, take it to the nearest authorized service facility for service.
Additional safety information102Additional safety information■Operating environmentYour device and its enhancements may contain small parts. Keep them out of the reach of small children.Remember to follow any special regulations in force in any area and always switch off your device when its use is prohibited or when it may cause interference or danger. Use the device only in its normal operating positions. This device meets RF exposure guidelines when used either in the normal use position against the ear of when positioned at least 7/8 inch (2.2 cm) away from the body. When a carry case, belt clip, or holder is used for body-worn operation, it should not contain metal and should position the device at least 7/8 inch (2.2 cm) away from your body.In order to transmit data files or messages, this device requires a quality connection to the network. In some cases, transmission of data files or messages may be delayed until such a connection is available. Ensure the above separation distance instructions are followed until the transmission is completed.■Medical devicesOperation of any radio transmitting equipment, including wireless phones, may interfere with the functionality of inadequately protected medical devices. Consult a physician or the manufacturer of the medical device to determine if they are adequately shielded from external RF energy or if you have any questions. Switch off your device in health care facilities when any regulations posted in these areas instruct you to do so. Hospitals or health care facilities may be using equipment that could be sensitive to external RF energy.PACEMAKERSPacemaker manufacturers recommend that a minimum separation of 6 in (15.3 cm) be maintained between a wireless device or phone and a pacemaker to avoid potential interference with the pacemaker. These recommendations are consistent with the independent research by and recommendations of Wireless Technology Research. To minimize the potential for interference, persons with pacemakers should• Always keep the device more than 6 inches (15.3 cm) from their pacemaker when the device is switched on• Not carry the device in a breast pocket
Additional safety information103• Hold the device to the ear opposite the pacemaker to minimize the potential for interference.If you have any reason to suspect that interference is taking place, switch off your device immediately.HEARING AIDSSome digital wireless devices may interfere with some hearing aids. If interference occurs, consult your service provider.■VehiclesRF signals may affect improperly installed or inadequately shielded electronic systems in motor vehicles such as electronic fuel injection systems, electronic antiskid (antilock) braking systems, electronic speed control systems, air bag systems. For more information, check with the manufacturer or its representative of your vehicle or any equipment that has been added.Only qualified personnel should service the device, or install the device in a vehicle. Faulty installation or service may be dangerous and may invalidate any warranty that may apply to the device. Check regularly that all wireless device equipment in your vehicle is mounted and operating properly. Do not store or carry flammable liquids, gases, or explosive materials in the same compartment as the device, its parts, or enhancements. For vehicles equipped with an air bag, remember that an air bags inflate with great force. Do not place objects, including installed or portable wireless equipment in the area over the air bag or in the air bag deployment area. If in-vehicle wireless equipment is improperly installed and the air bag inflates, serious injury could result.FCC regulations prohibit using your wireless device while in the air. The use of wireless telephones in an aircraft may be dangerous to the operation of the aircraft, disrupt the wireless telephone network, and may be illegal.■Potentially explosive environmentsSwitch off your device when in any area with a potentially explosive atmosphere and obey all signs and instructions. Potentially explosive atmospheres include areas where you would normally be advised to turn off your vehicle engine. Sparks in such areas could cause an explosion or fire resulting in bodily injury or even death. Switch off the device at refuelling points such as near gas pumps at service stations. Observe restrictions on the use of radio equipment in fuel depots, storage, and distribution areas, chemical plants or where blasting operations are in progress. Areas with a potentially explosive atmosphere are often but not always clearly marked. They include below deck on boats, chemical
Additional safety information104transfer or storage facilities, vehicles using liquefied petroleum gas (such as propane or butane), and areas where the air contains chemicals or particles such as grain, dust or metal powders.Failure to observe these instructions may lead to suspension or denial of telephone services to the offender, legal action, or both.■Emergency callsImportant: Wireless phones, including this device, operate using radio signals, wireless networks, landline networks, and user-programmed functions. Because of this, connections in all conditions cannot be guaranteed. You should never rely solely on any wireless device for essential communications like medical emergencies.To make an emergency call, make sure your device is properly charged before attempting any emergency calls. If your battery becomes empty, you cannot receive or make calls, including emergency calls and must wait a few minutes after the charging begins to place your call.1. If the device is not on, switch it on. Check for adequate signal strength. Some networks may require that a valid UIM (CDMA SIM) card is properly inserted in the device.2. Press the end key as many times as needed to clear the display and ready the device for calls. 3. Key in the official emergency number for your present location and press the call key. Emergency numbers vary by locationIf certain features are in use, you may first need to turn those features off before you can make an emergency call. If the device is in an offline or flight mode you must change the profile to activate the device function before you can make an emergency call. Consult this guide or your service provider. When making an emergency call, give all the necessary information as accurately as possible. Your wireless device may be the only means of communication at the scene of an accident. Do not end the call until given permission to do so.■Certification Information (SAR)THIS MODEL PHONE MEETS THE GOVERNMENT'S REQUIREMENTS FOR EXPOSURE TO RADIO WAVES.Your mobile device is a radio transmitter and receiver. It is designed and manufactured not to exceed the limits for exposure to radio frequency (RF) energy set by the Federal Communications Commission (FCC) of the U.S. Government. These limits are part of comprehensive guidelines and establish
Additional safety information105permitted levels of RF energy for the general population. The guidelines are based on standards that were developed by independent scientific organizations through periodic and thorough evaluation of scientific studies. The standards include a substantial safety margin designed to assure the safety of all persons, regardless of age and health.The exposure standards for wireless mobile devices employ a unit of measurement known as the Specific Absorption Rate, or SAR. The SAR limit set by the FCC is 1.6 watts/kilogram (W/kg).* Tests for SAR are conducted using standard operating positions accepted by the RCC with the phone transmitting at its highest certified power level in all tested frequency bands. Although the SAR is determined at the highest certified power level, the actual SAR level of an operating device can be well below the maximum value. This is because the device is designed to operate at multiple power levels so as to use only the power required to reach the network. In general, the closer you are to a wireless base station antenna, the lower the power output.Before a device model is available for sale to the public, it must be tested and certified to the FCC that it does not exceed the limit established by the government-adopted requirement for safe exposure. The tests are performed in positions and locations (e.g., at the ear and worn on the body) as required by the FCC for each model.The highest SAR value reported to the FCC when tested for use at the ear is 1.24 W/kg, and when worn on the body, as described in this user guide, is 1.26 W/kg. (Body-worn measurements differ among phone models, depending upon available enhancements and FCC requirements.) While there may be differences between the SAR levels of various phones and at various positions, they all meet the government requirement. The FCC has granted an Equipment Authorization for this model phone with all reported SAR levels evaluated as in compliance with the FCC RF exposure guidelines. SAR information on this model device is on file with the FCC and can be found under the Display Grant section of http://www.fcc.gov/oet/fccid after searching on FCC ID QMNRM-60. For body-worn operations, this phone has been tested and meets the FCC RF exposure guidelines for use with a carry case, belt clip or holder that contains no metal and that positions the handset a minimum of 7/8 inch (2.2 cm) away from the body. Use of other carry cases, belt clips or holders may not ensure compliance with the FCC RF exposure guidelines. If you do not use a body-worn enhancement and are not holding the phone at the ear, positions the handset a minimum of 7/8 inch (2.2 cm) away from your body when the phone is switched on.
Additional safety information106*In the United States and Canada, the SAR limit for mobile phone used by the public is 1.6 watts/kilogram (W/kg) averaged over one gram of tissue. The standard incorporates a substantial margin of safety to give additional protection for the public and to account for any variations in measurements. SAR values may vary depending on national reporting requirements and the network band. For SAR information in other regions, please look under product information at www.nokiausa.com.■Technical informationType designation—RM-60Dimensions—Width 42.3 mm; length 105.5 mm; depth 18 mmWeight—98 g with BL-6C Li-Ion BatteryVolume—69 cu cmWireless networks—CDMA 800 MHz, CDMA 1900 MHz, and AMPS 800Frequency range (Tx)—AMPS: 824.04-848.97 MHz, PCS: 1851.25-1908.75 MHz, Cellular: 824.70-848.37 MHzFrequency range (Rx)—AMPS: 869.04-893.97 MHz, PCS: 1931.25-1988.75 MHz, Cellular: 869.70-893.37 MHzGPS frequency—1575.42 MHz■Battery informationThis section provides information about battery charging times with the Travel Charger (ACP-12) and the Standard Travel Charger (ACP-7), talk-times, and standby times. Be aware that the information in this section is subject to change. For more information, contact your service provider.Charging timesThe following charging times are approximate with the BL-6C 1070 mAh Li-Ion battery:Travel Charger (ACP-12): Up to 1 hour 35 minutesStandard Travel Charger (ACP-7): Up to 3 hours 45 minutesTalk and standby timesOperation times are estimates only and depend on signal strength, phone use, network conditions, features used, battery age and condition (including charging habits), temperatures to which the battery is exposed, and many other factors.
Additional safety information107Talk time: 3 to 3.5 hours (digital)Standby time: 8 to 12 days■Patent informationManufactured or sold under one or more of the following US patents:58897706148209607278758024655596571612832259916275699482496919257549765701392585984360785705924026651014860093285930233579374465568246775548
Additional safety information108■Nokia one-year limited warrantyNokia Inc. (“Nokia”) warrants that this cellular phone (“Product”) is free from defects in material and workmanship that result in Product failure during normal usage, according to the following terms and conditions:1. The limited warranty for the Product extends for ONE (1) year beginning on the date of the purchase of the Product. This one year period is extended by each whole day that the Product is out of your possession for repair under this warranty.2. The limited warranty extends only to the original purchaser (“Consumer”) of the Product and is not assignable or transferable to any subsequent purchaser/end-user.3. The limited warranty extends only to Consumers who purchase the Product in the United States of America.4. During the limited warranty period, Nokia will repair, or replace, at Nokia’s sole option, any defective parts, or any parts that will not properly operate for their intended use with new or refurbished replacement items if such repair or replacement is needed because of product malfunction or failure during normal usage. No charge will be made to the Consumer for any such parts. Nokia will also pay for the labor charges incurred by Nokia in repairing or replacing the defective parts. The limited warranty does not cover defects in appearance, cosmetic, decorative or structural items, including framing, and any non-operative parts. Nokia’s limit of liability under the limited warranty shall be the actual cash value of the Product at the time the Consumer returns the Product for repair, determined by the price paid by the Consumer for the Product less a reasonable amount for usage. Nokia shall not be liable for any other losses or damages. These remedies are the Consumer’s exclusive remedies for breach of warranty.5. Upon request from Nokia, the Consumer must prove the date of the original purchase of the Product by a dated bill of sale or dated itemized receipt.6. The Consumer shall bear the cost of shipping the Product to Nokia in Melbourne, Florida. Nokia shall bear the cost of shipping the Product back to the Consumer after the completion of service under this limited warranty.
Additional safety information1097. The Consumer shall have no coverage or benefits under this limited warranty if any of the following conditions are applicable:a) The Product has been subjected to abnormal use, abnormal conditions, improper storage, exposure to moisture or dampness, unauthorized modifications, unauthorized connections, unauthorized repair, misuse, neglect, abuse, accident, alteration, improper installation, or other acts which are not the fault of Nokia, including damage caused by shipping.b) The Product has been damaged from external causes such as collision with an object, or from fire, flooding, sand, dirt, windstorm, lightning, earthquake or damage from exposure to weather conditions, an Act of God, or battery leakage, theft, blown fuse, or improper use of any electrical source, damage caused by computer or internet viruses, bugs, worms, Trojan Horses, cancelbots or damage caused by the connection to other products not recommended for interconnection by Nokia.c) Nokia was not advised in writing by the Consumer of the alleged defect or malfunction of the Product within fourteen (14) days after the expiration of the applicable limited warranty period.d) The Product serial number plate or the enhancement data code has been removed, defaced or altered.e) The defect or damage was caused by the defective function of the cellular system or by inadequate signal reception by the external antenna, or viruses or other software problems introduced into the Product.8. Nokia does not warrant uninterrupted or error-free operation of the Product. If a problem develops during the limited warranty period, the Consumer shall take the following step-by-step procedure:a) The Consumer shall return the Product to the place of purchase for repair or replacement processing.b) If “a” is not convenient because of distance (more than 50 miles) or for other good cause, the Consumer shall ship the Product prepaid and insured to:Nokia Inc., Attn: Repair Department795 West Nasa Blvd. Melbourne, FL 32901
Additional safety information110c) The Consumer shall include a return address, daytime phone number and/or fax number, complete description of the problem, proof of purchase and service agreement (if applicable). Expenses related to removing the Product from an installation are not covered under this limited warranty.d) The Consumer will be billed for any parts or labor charges not covered by this limited warranty. The Consumer will be responsible for any expenses related to reinstallation of the Product.e) Nokia will repair the Product under the limited warranty within 30 days after receipt of the Product. If Nokia cannot perform repairs covered under this limited warranty within 30 days, or after a reasonable number of attempts to repair the same defect, Nokia at its option, will provide a replacement Product or refund the purchase price of the Product less a reasonable amount for usage. In some states the Consumer may have the right to a loaner if the repair of the Product takes more than ten (10) days. Please contact the Customer Service Center at Nokia at the telephone number listed at the end of this warranty if you need a loaner and the repair of the Product has taken or is estimated to take more than ten (10) days.f) If the Product is returned during the limited warranty period, but the problem with the Product is not covered under the terms and conditions of this limited warranty, the Consumer will be notified and given an estimate of the charges the Consumer must pay to have the Product repaired, with all shipping charges billed to the Consumer. If the estimate is refused, the Product will be returned freight collect. If the Product is returned after the expiration of the limited warranty period, Nokia’s normal service policies shall apply and the Consumer will be responsible for all shipping charges.9. You (the Consumer) understand that the product may consist of refurbished equipment that contains used components, some of which have been reprocessed. The used components comply with Product performance and reliability specifications.10. ANY IMPLIED WARRANTY OF MERCHANTABILITY, OR FITNESS FOR A PARTICULAR PURPOSE OR USE, SHALL BE LIMITED TO THE DURATION OF THE FOREGOING LIMITED WRITTEN WARRANTY. OTHERWISE, THE FOREGOING LIMITED WARRANTY IS THE CONSUMER’S SOLE AND EXCLUSIVE REMEDY
Additional safety information111AND IS IN LIEU OF ALL OTHER WARRANTIES, EXPRESS OR IMPLIED. NOKIA SHALL NOT BE LIABLE FOR SPECIAL, INCIDENTAL, PUNITIVE OR CONSEQUENTIAL DAMAGES, INCLUDING BUT NOT LIMITED TO LOSS OF ANTICIPATED BENEFITS OR PROFITS, LOSS OF SAVINGS OR REVENUE, LOSS OF DATA, PUNITIVE DAMAGES, LOSS OF USE OF THE PRODUCT OR ANY ASSOCIATED EQUIPMENT, COST OF CAPITAL, COST OF ANY SUBSTITUTE EQUIPMENT OR FACILITIES, DOWNTIME, THE CLAIMS OF ANY THIRD PARTIES, INCLUDING CUSTOMERS, AND INJURY TO PROPERTY, RESULTING FROM THE PURCHASE OR USE OF THE PRODUCT OR ARISING FROM BREACH OF THE WARRANTY, BREACH OF CONTRACT, NEGLIGENCE, STRICT TORT, OR ANY OTHER LEGAL OR EQUITABLE THEORY, EVEN IF NOKIA KNEW OF THE LIKELIHOOD OF SUCH DAMAGES. NOKIA SHALL NOT BE LIABLE FOR DELAY IN RENDERING SERVICE UNDER THE LIMITED WARRANTY, OR LOSS OF USE DURING THE PERIOD THAT THE PRODUCT IS BEING REPAIRED.11. Some states do not allow limitation of how long an implied warranty lasts, so the one year warranty limitation may not apply to you (the Consumer). Some states do not allow the exclusion or limitation of incidental and consequential damages, so certain of the above limitations or exclusions may not apply to you (the Consumer). This limited warranty gives the Consumer specific legal rights and the Consumer may also have other rights which vary from state to state.12. Nokia neither assumes nor authorizes any authorized service center or any other person or entity to assume for it any other obligation or liability beyond that which is expressly provided for in this limited warranty including the provider or seller of any extended warranty or service agreement.13. This is the entire warranty between Nokia and the Consumer, and supersedes all prior and contemporaneous agreements or understandings, oral or written, relating to the Product, and no representation, promise or condition not contained herein shall modify these terms.14. This limited warranty allocates the risk of failure of the Product between the Consumer and Nokia. The allocation is recognized by the Consumer and is reflected in the purchase price.15. Any action or lawsuit for breach of warranty must be commenced within eighteen (18) months following purchase of the Product.
Additional safety information11216. Questions concerning this limited warranty may be directed to: Nokia Inc. Attn: Customer Service7725 Woodland Center Blvd., Ste. 150Tampa, FL 33614Telephone: 1-888-NOKIA-2U (1-888-665-4228)Facsimile: (813) 249-9619TTY/TDD Users Only: 1-800-24-NOKIA (1-800-246-6542)17. The limited warranty period for Nokia supplied attachments and accessories is specifically defined within their own warranty cards and packaging.
Additional safety information113Appendix A Message from the CTIA(Cellular Telecommunications & Internet Association)to all users of mobile phones© 2001 Cellular Telecommunications & Internet Association. All Rights Reserved.1250 Connecticut Avenue, NW Suite 800, Washington, DC 20036. Phone: (202) 785-0081
Additional safety information114Safety is the most important call you will ever make.A Guide to Safe and Responsible Wireless Phone UseTens of millions of people in the U.S. today take advantage of the unique combination of convenience, safety and value delivered by the wireless telephone. Quite simply, the wireless phone gives people the powerful ability to communicate by voice—almost anywhere, anytime—with the boss, with a client, with the kids, with emergency personnel or even with the police. Each year, Americans make billions of calls from their wireless phones, and the numbers are rapidly growing.But an important responsibility accompanies those benefits, one that every wireless phone user must uphold. When driving a car, driving is your first responsibility. A wireless phone can be an invaluable tool, but good judgment must be exercised at all times while driving a motor vehicle—whether on the device or not.The basic lessons are ones we all learned as teenagers. Driving requires alertness, caution and courtesy. It requires a heavy dose of basic common sense—keep your head up, keep your eyes on the road, check your mirrors frequently and watch out for other drivers. It requires obeying all traffic signs and signals and staying within the speed limit. It means using seatbelts and requiring other passengers to do the same. But with wireless phone use, driving safely means a little more. This brochure is a call to wireless phone users everywhere to make safety their first priority when behind the wheel of a car. Wireless telecommunications is keeping us in touch, simplifying our lives, protecting us in emergencies and providing opportunities to help others in need. When it comes to the use of wireless phones, safety is your most important call. Wireless Phone Safety TipsBelow are safety tips to follow while driving and using a wireless phone which should be easy to remember. 1. Get to know your wireless phone and its features such as speed dial and redial. Carefully read your instruction manual and learn to take advantage of valuable features most phones offer, including automatic redial and memory. Also, work to memorize the device keypad so you can use the speed dial function without taking your attention off the road.2. When available, use a hands-free device. A number of hands-free wireless phone accessories are readily available today. Whether you choose an installed mounted device for your wireless phone or a speaker phone accessory, take advantage of these devices if available to you.
Additional safety information1153. Position your wireless phone within easy reach. Make sure you place your wireless phone within easy reach and where you can grab it without removing your eyes from the road. If you get an incoming call at an inconvenient time, if possible, let your voice mail answer it for you.4. Suspend conversations during hazardous driving conditions or situations. Let the person you are speaking with know you are driving; if necessary, suspend the call in heavy traffic or hazardous weather conditions. Rain, sleet, snow and ice can be hazardous, but so is heavy traffic. As a driver, your first responsibility is to pay attention to the road.5. Do not take notes or look up phone numbers while driving. If you are reading an address book or business card, or writing a "to do" list while driving a car, you are not watching where you are going. It’s common sense. Don’t get caught in a dangerous situation because you are reading or writing and not paying attention to the road or nearby vehicles.6. Dial sensibly and assess the traffic; if possible, place calls when you are not moving or before pulling into traffic. Try to plan your calls before you begin your trip or attempt to coincide your calls with times you may be stopped at a stop sign, red light or otherwise stationary. But if you need to dial while driving, follow this simple tip—dial only a few numbers, check the road and your mirrors, then continue.7. Do not engage in stressful or emotional conversations that may be distracting. Stressful or emotional conversations and driving do not mix—they are distracting and even dangerous when you are behind the wheel of a car. Make people you are talking with aware you are driving and if necessary, suspend conversations which have the potential to divert your attention from the road.8. Use your wireless phone to call for help. Your wireless phone is one of the greatest tools you can own to protect yourself and your family in dangerous situations—with your phone at your side, help is only three numbers away. Dial 9-1-1 or other local emergency number in the case of fire, traffic accident, road hazard or medical emergency. Remember, it is a free call on your wireless phone!9. Use your wireless phone to help others in emergencies. Your wireless phone provides you a perfect opportunity to be a "Good Samaritan" in your community. If you see an auto accident, crime in progress or other serious
Additional safety information116emergency where lives are in danger, call 9-1-1 or other local emergency number, as you would want others to do for you.10. Call roadside assistance or a special wireless nonemergency assistance number when necessary. Certain situations you encounter while driving may require attention, but are not urgent enough to merit a call for emergency services. But you still can use your wireless phone to lend a hand. If you see a broken-down vehicle posing no serious hazard, a broken traffic signal, a minor traffic accident where no one appears injured or a vehicle you know to be stolen, call roadside assistance or other special non-emergency wireless number.Careless, distracted individuals and people driving irresponsibly represent a hazard to everyone on the road. Since 1984, the Cellular Telecommunications Industry Association and the wireless industry have conducted educational outreach to inform wireless phone users of their responsibilities as safe drivers and good citizens. As we approach a new century, more and more of us will take advantage of the benefits of wireless telephones. And, as we take to the roads, we all have a responsibility to drive safely.The wireless industry reminds you to use your phone safely when driving.For more information, please call 1-888-901-SAFE.For updates: http://www.wow-com.com/consumer/issues/driving/articles.cfm?ID=85
Additional safety information117Appendix B Message from the FDA(U.S. Food and Drug Administration)to all users of mobile phones.©July 18, 2001For updates: http://www.fda.gov/cdrh/phones
Additional safety information118Consumer Update on Wireless PhonesU.S. Food and Drug Administration1. Do wireless phones pose a health hazard?The available scientific evidence does not show that any health problems are associated with using wireless phones. There is no proof, however, that wireless phones are absolutely safe. Wireless phones emit low levels of radiofrequency energy (RF) in the microwave range while being used. They also emit very low levels of RF when in the stand-by mode. Whereas high levels of RF can produce health effects (by heating tissue), exposure to low level RF that does not produce heating effects causes no known adverse health effects. Many studies of low level RF exposures have not found any biological effects. Some studies have suggested that some biological effects may occur, but such findings have not been confirmed by additional research. In some cases, other researchers have had difficulty in reproducing those studies, or in determining the reasons for inconsistent results.2. What is FDA's role concerning the safety of wireless phones?Under the law, FDA does not review the safety of radiation-emitting consumer products such as wireless phones before they can be sold, as it does with new drugs or medical devices. However, the agency has authority to take action if wireless phones are shown to emit radio frequency energy (RF) at a level that is hazardous to the user. In such a case, FDA could require the manufacturers of wireless phones to notify users of the health hazard and to repair, replace or recall the phones so that the hazard no longer exists.Although the existing scientific data do not justify FDA regulatory actions, FDA has urged the wireless phone industry to take a number of steps, including the following:• Support needed research into possible biological effects of RF of the type emitted by wireless phones;• Design wireless phones in a way that minimizes any RF exposure to the user that is not necessary for device function; and
Additional safety information119• Cooperate in providing users of wireless phones with the best possible information on possible effects of wireless phone use on human health.FDA belongs to an interagency working group of the federal agencies that have responsibility for different aspects of RF safety to ensure coordinated efforts at the federal level. The following agencies belong to this working group:• National Institute for Occupational Safety and Health• Environmental Protection Agency• Federal Communications Commission• Occupational Safety and Health Administration• National Telecommunications and Information AdministrationThe National Institutes of Health participates in some interagency working group activities, as well.FDA shares regulatory responsibilities for wireless phones with the Federal Communications Commission (FCC). All phones that are sold in the United States must comply with FCC safety guidelines that limit RF exposure. FCC relies on FDA and other health agencies for safety questions about wireless phones. FCC also regulates the base stations that the wireless phone networks rely upon. While these base stations operate at higher power than do the wireless phones themselves, the RF exposures that people get from these base stations are typically thousands of times lower than those they can get from wireless phones. Base stations are thus not the subject of the safety questions discussed in this document.3. What kinds of phones are the subject of this update?The term wireless phone refers here to hand-held wireless phones with built-in antennas, often called cell mobile or PCS phones. These types of wireless phones can expose the user to measurable radio frequency energy (RF) because of the short distance between the device and the user’s head. These RF exposures are limited by Federal Communications Commission safety guidelines that were developed with the advice of FDA and other federal health and safety agencies. When the device is located at greater distances from the user, the exposure to RF is drastically lower because a person's RF exposure decreases rapidly with increasing distance from the source. The so-
Additional safety information120called cordless phones; which have a base unit connected to the telephone wiring in a house, typically operate at far lower power levels, and thus produce RF exposures far below the FCC safety limits.4. What are the results of the research done already?The research done thus far has produced conflicting results, and many studies have suffered from flaws in their research methods. Animal experiments investigating the effects of radio frequency energy (RF) exposures characteristic of wireless phones have yielded conflicting results that often cannot be repeated in other laboratories. A few animal studies, however, have suggested that low levels of RF could accelerate the development of cancer in laboratory animals. However, many of the studies that showed increased tumor development used animals that had been genetically engineered or treated with cancer-causing chemicals so as to be pre-disposed to develop cancer in the absence of RF exposure. Other studies exposed the animals to RF for up to 22 hours per day. These conditions are not similar to the conditions under which people use wireless phones, so we don’t know with certainty what the results of such studies mean for human health.Three large epidemiology studies have been published since December 2000. Between them, the studies investigated any possible association between the use of wireless phones and primary brain cancer, glioma, meningioma, or acoustic neuroma, tumors of the brain or salivary gland, leukemia, or other cancers. None of the studies demonstrated the existence of any harmful health effects from wireless phone RF exposures. However, none of the studies can answer questions about long-term exposures, since the average period of phone use in these studies was around three years.5. What research is needed to decide whether RF exposure from wireless phones poses a health risk?A combination of laboratory studies and epidemiological studies of people actually using wireless phones would provide some of the data that are needed. Lifetime animal exposure studies could be completed in a few years. However, very large numbers of animals would be needed to provide reliable proof of a cancer promoting effect if one exists. Epidemiological studies can provide data that is directly applicable to human populations, but 10 or more
Additional safety information121years follow-up may be needed to provide answers about some health effects, such as cancer. This is because the interval between the time of exposure to a cancer-causing agent and the time tumors develop - if they do - may be many, many years. The interpretation of epidemiological studies is hampered by difficulties in measuring actual RF exposure during day-to-day use of wireless phones. Many factors affect this measurement, such as the angle at which the device is held, or which model of phone is used.6. What is FDA doing to find out more about the possible health effects of wireless phone RF?FDA is working with the U.S. National Toxicology Program and with groups of investigators around the world to ensure that high priority animal studies are conducted to address important questions about the effects of exposure to radiofrequency energy (RF).FDA has been a leading participant in the World Health Organization International Electromagnetic Fields (EMF) Project since its inception in 1996. An influential result of this work has been the development of a detailed agenda of research needs that has driven the establishment of new research programs around the world. The Project has also helped develop a series of public information documents on EMF issues.FDA and the Cellular Telecommunications & Internet Association (CTIA) have a formal Cooperative Research and Development Agreement (CRADA) to do research on wireless phone safety. FDA provides the scientific oversight, obtaining input from experts in government, industry, and academic organizations. CTIA-funded research is conducted through contracts to independent investigators. The initial research will include both laboratory studies and studies of wireless phone users. The CRADA will also include a broad assessment of additional research needs in the context of the latest research developments around the world.7. How can I find out how much radiofrequency energy exposure I can get by using my wireless phone?All phones sold in the United States must comply with Federal Communications Commission (FCC) guidelines that limit radiofrequency
Additional safety information122energy (RF) exposures. FCC established these guidelines in consultation with FDA and the other federal health and safety agencies. The FCC limit for RF exposure from wireless telephones is set at a Specific Absorption Rate (SAR) of 1.6 watts per kilogram (1.6 W/kg). The FCC limit is consistent with the safety standards developed by the Institute of Electrical and Electronic Engineering (IEEE) and the National Council on Radiation Protection and Measurement. The exposure limit takes into consideration the body’s ability to remove heat from the tissues that absorb energy from the wireless phone and is set well below levels known to have effects.Manufacturers of wireless phones must report the RF exposure level for each model of phone to the FCC. The FCC website (http://www.fcc.gov/oet/rfsafety) gives directions for locating the FCC identification number on your phone so you can find your phone’s RF exposure level in the online listing.8. What has FDA done to measure the radiofrequency energy coming from wireless phones?The Institute of Electrical and Electronic Engineers (IEEE) is developing a technical standard for measuring the radiofrequency energy (RF) exposure from wireless phones and other wireless handsets with the participation and leadership of FDA scientists and engineers. The standard, Recommended Practice for Determining the Spatial-Peak Specific Absorption Rate (SAR) in the Human Body Due to Wireless Communications Devices: Experimental Techniques, sets forth the first consistent test methodology for measuring the rate at which RF is deposited in the heads of wireless phone users. The test method uses a tissue-simulating model of the human head. Standardized SAR test methodology is expected to greatly improve the consistency of measurements made at different laboratories on the same phone. SAR is the measurement of the amount of energy absorbed in tissue, either by the whole body or a small part of the body. It is measured in watts/kg (or milliwatts/g) of matter. This measurement is used to determine whether a wireless phone complies with safety guidelines.
Additional safety information1239. What steps can I take to reduce my exposure to radiofrequency energy from my wireless phone?If there is a risk from these products—and at this point we do not know that there is—it is probably very small. But if you are concerned about avoiding even potential risks, you can take a few simple steps to minimize your exposure to radiofrequency energy (RF). Since time is a key factor in how much exposure a person receives, reducing the amount of time spent using a wireless phone will reduce RF exposure.If you must conduct extended conversations by wireless phone every day, you could place more distance between your body and the source of the RF, since the exposure level drops off dramatically with distance. For example, you could use a headset and carry the wireless phone away from your body or use a wireless phone connected to a remote antenna.Again, the scientific data do not demonstrate that wireless phones are harmful. But if you are concerned about the RF exposure from these products, you can use measures like those described above to reduce your RF exposure from wireless phone use.10.What about children using wireless phones?The scientific evidence does not show a danger to users of wireless phones, including children and teenagers. If you want to take steps to lower exposure to radiofrequency energy (RF), the measures described above would apply to children and teenagers using wireless phones. Reducing the time of wireless phone use and increasing the distance between the user and the RF source will reduce RF exposure.Some groups sponsored by other national governments have advised that children be discouraged from using wireless phones at all. For example, the government in the United Kingdom distributed leaflets containing such a recommendation in December 2000. They noted that no evidence exists that using a wireless phone causes brain tumors or other ill effects. Their recommendation to limit wireless phone use by children was strictly precautionary; it was not based on scientific evidence that any health hazard exists.
Additional safety information12411.What about wireless phone interference with medical equipment?Radiofrequency energy (RF) from wireless phones can interact with some electronic devices. For this reason, FDA helped develop a detailed test method to measure electromagnetic interference (EMI) of implanted cardiac pacemakers and defibrillators from wireless telephones. This test method is now part of a standard sponsored by the Association for the Advancement of Medical instrumentation (AAMI). The final draft, a joint effort by FDA, medical device manufacturers, and many other groups, was completed in late 2000. This standard will allow manufacturers to ensure that cardiac pacemakers and defibrillators are safe from wireless phone EMI. FDA has tested hearing aids for interference from handheld wireless phones and helped develop a voluntary standard sponsored by the Institute of Electrical and Electronic Engineers (IEEE). This standard specifies test methods and performance requirements for hearing aids and wireless phones so that no interference occurs when a person uses a compatible phone and a accompanied hearing aid at the same time. This standard was approved by the IEEE in 2000.FDA continues to monitor the use of wireless phones for possible interactions with other medical devices. Should harmful interference be found to occur, FDA will conduct testing to assess the interference and work to resolve the problem.12.Where can I find additional information?For additional information, please refer to the following resources:• FDA Web page on wireless phoneshttp://www.fda.gov/cdrh/phones/index.html• Federal Communications Commission (FCC) RF Safety Program http://www.fcc.gov/oet/rfsafety• International Commission on Non-Ionizing Radiation Protectionhttp://www.icnirp.de• World Health Organization (WHO) International EMF Projecthttp://www.who.int/emf• National Radiological Protection Board (UK)http://www.nrpb.org.uk/
Additional safety information125July 18, 2001For updates: http://www.fda.gov/cdrh/phones

Navigation menu