Microsoft RM-82 GSM900/1800/1900 Phone w/BT User Manual 6111 en 1 FCC final
Microsoft Mobile Oy GSM900/1800/1900 Phone w/BT 6111 en 1 FCC final
UserManual.wiki
>
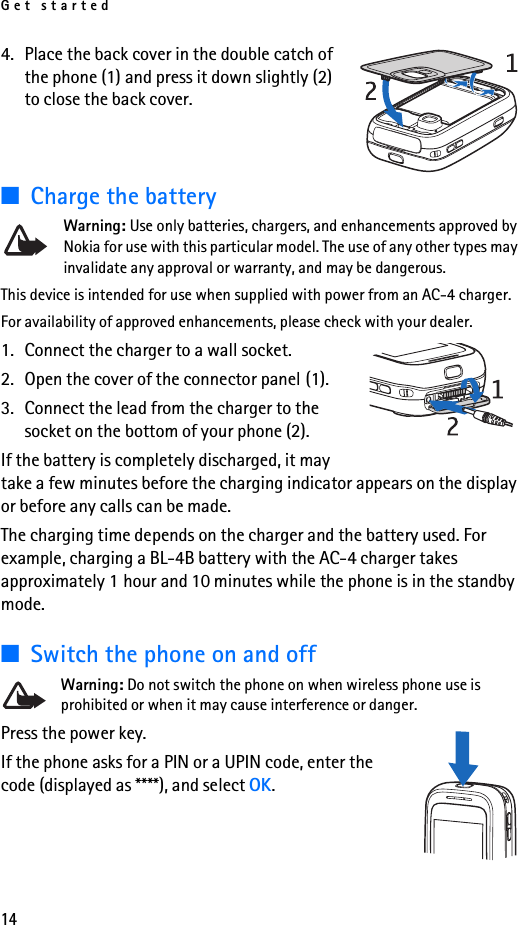
Microsoft
>
RM 82 User Manual
Manual
Navigation menu
Upload a User Manual
Namespaces
Wiki Guide
HTML
PDF
Info
Views
User Manual
Discussion / Help
Navigation