Midea Kitchen Appliances XM131AYY Microwave Oven User Manual VG8XM131AYYZ
Guangdong Midea Kitchen Appliances Manufacturing Co.,Ltd Microwave Oven VG8XM131AYYZ
Contents
- 1. VG8XM131AYYZ_user manual
- 2. VG8XM131AYY_User manual
- 3. VG8XM131AYY_User Manual
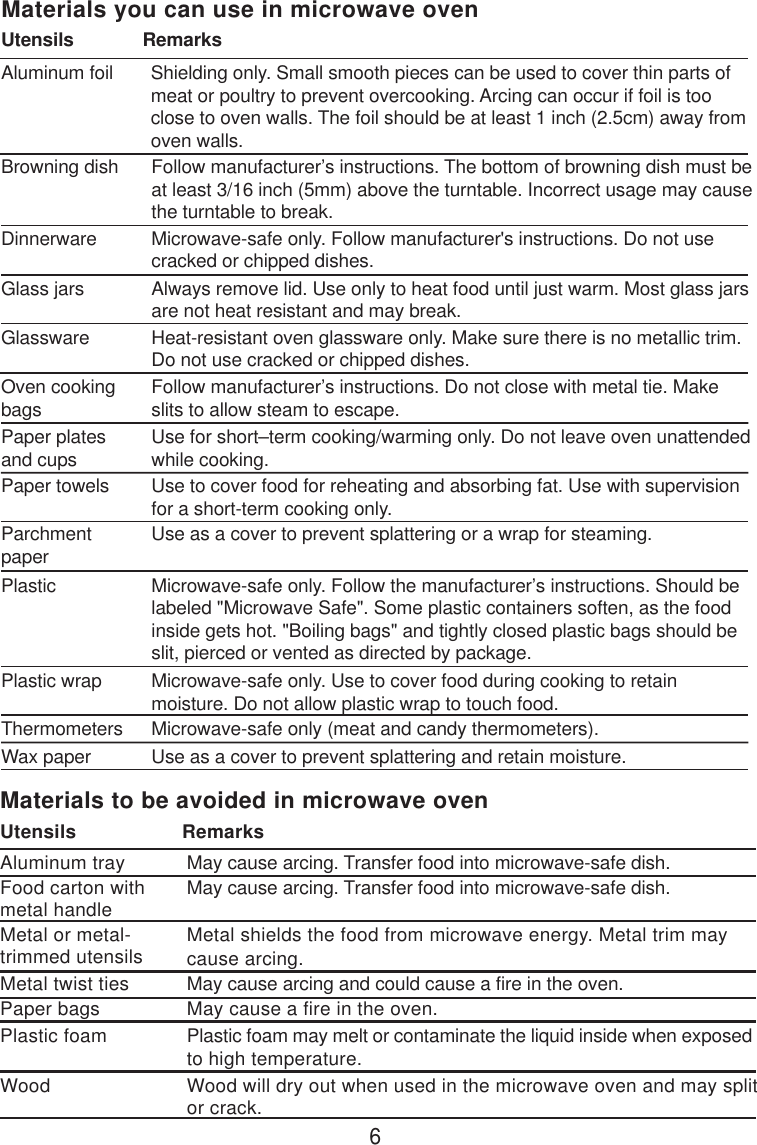
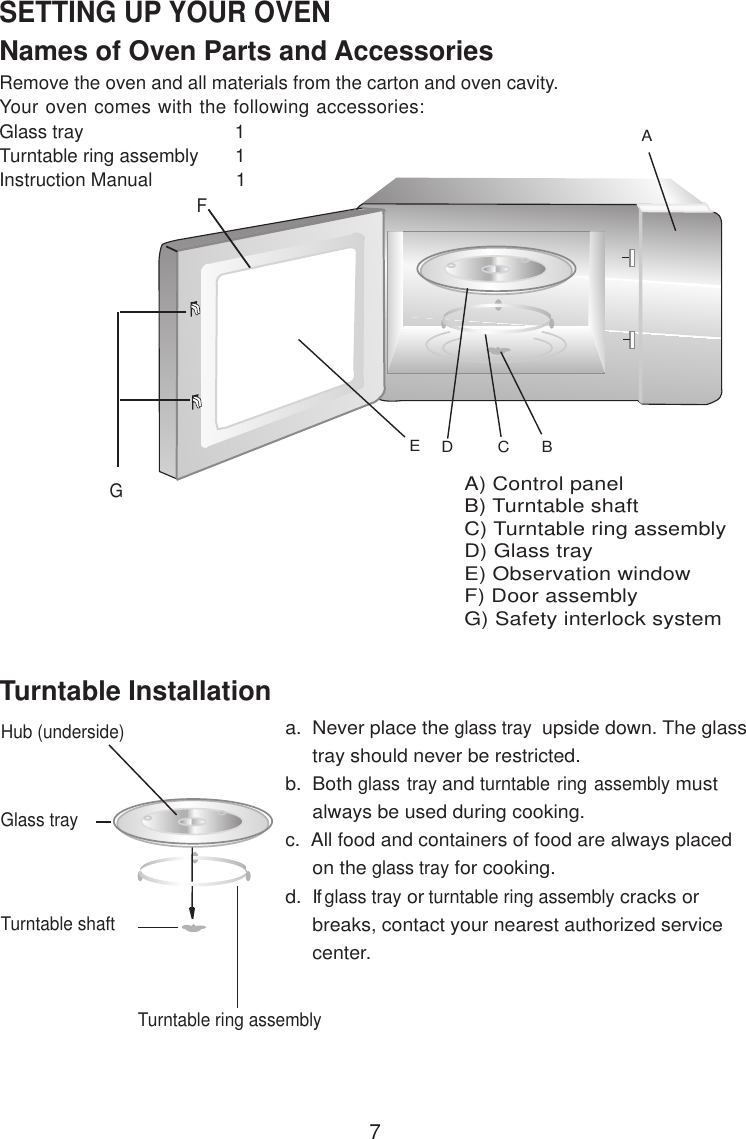
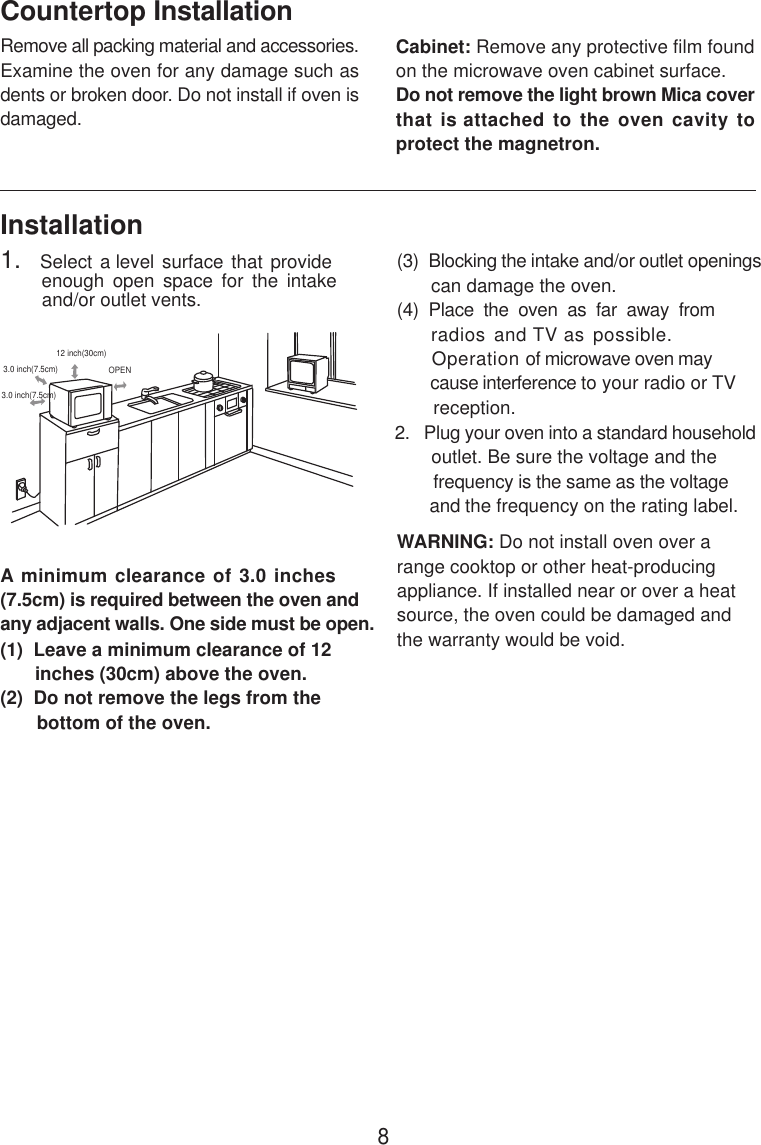
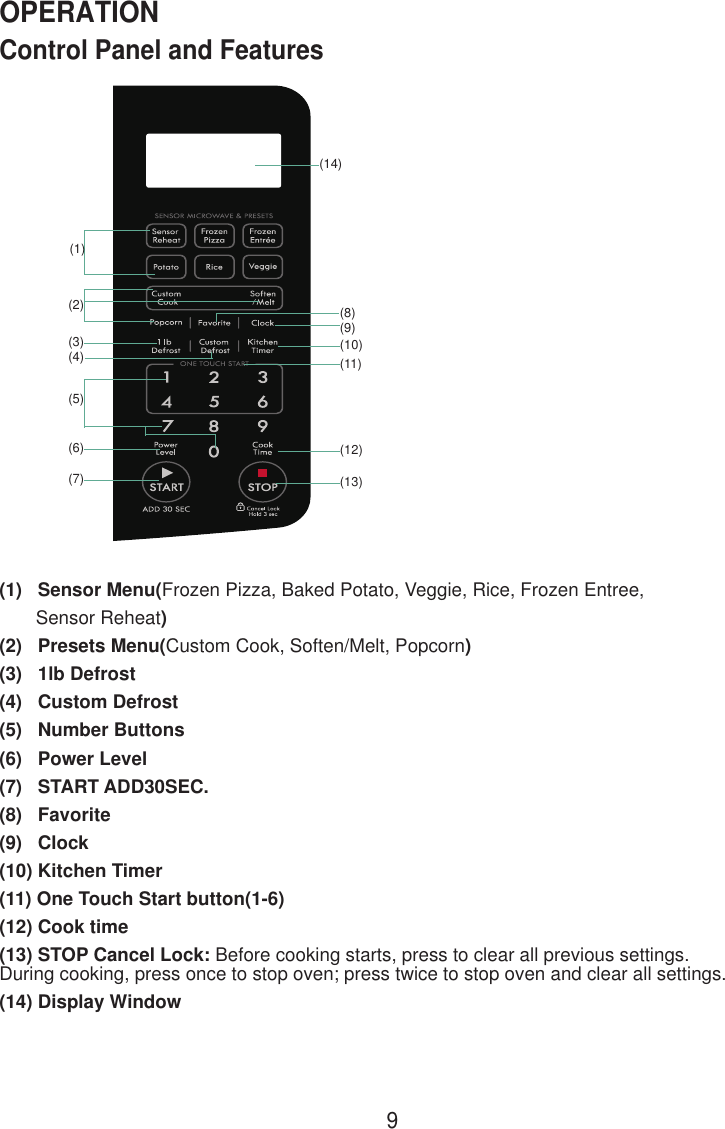
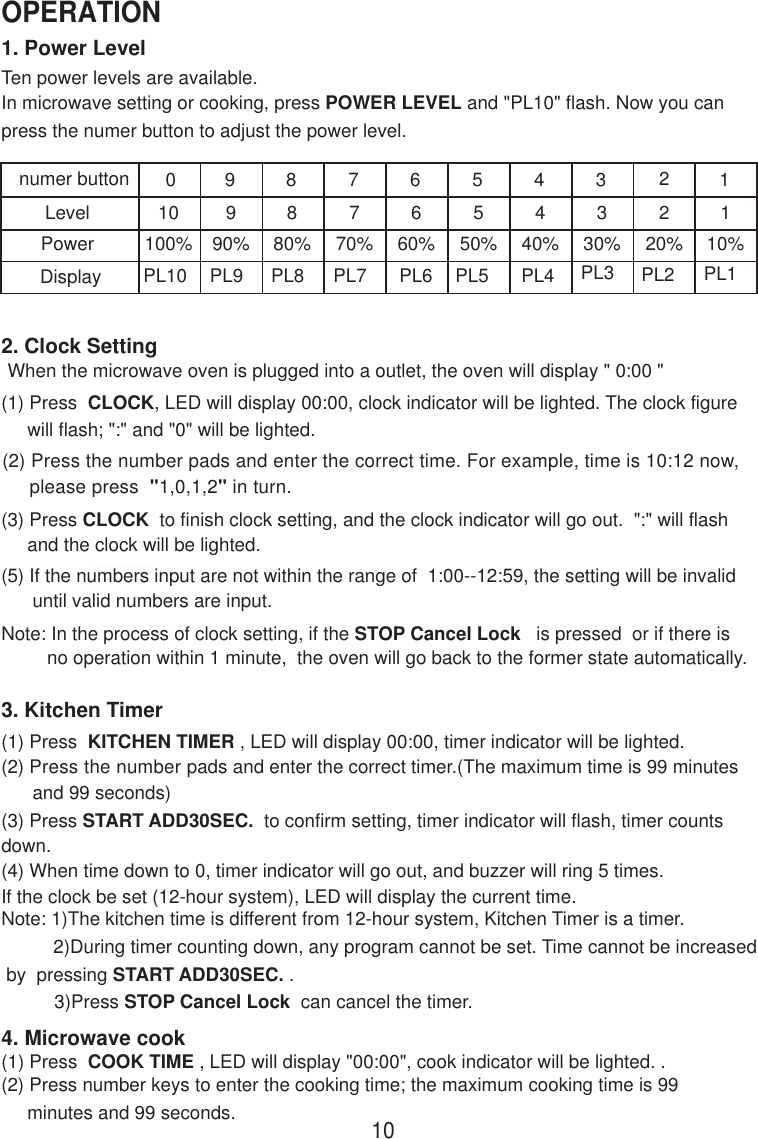
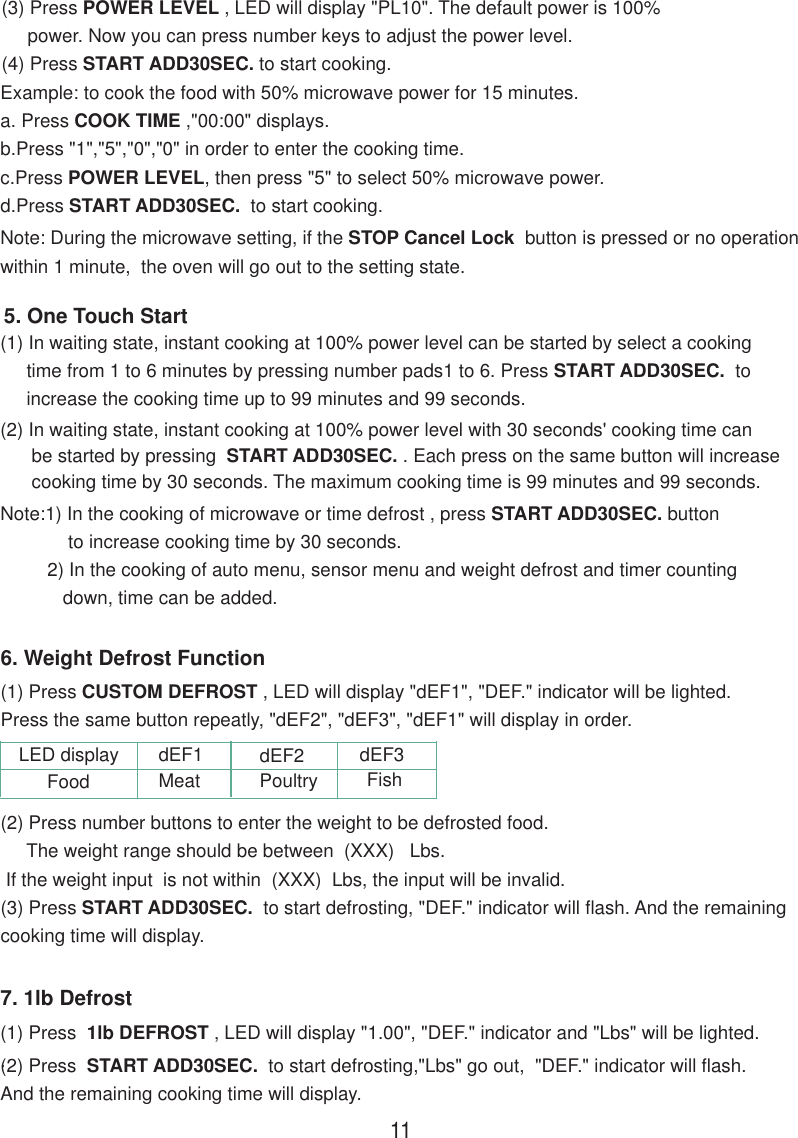
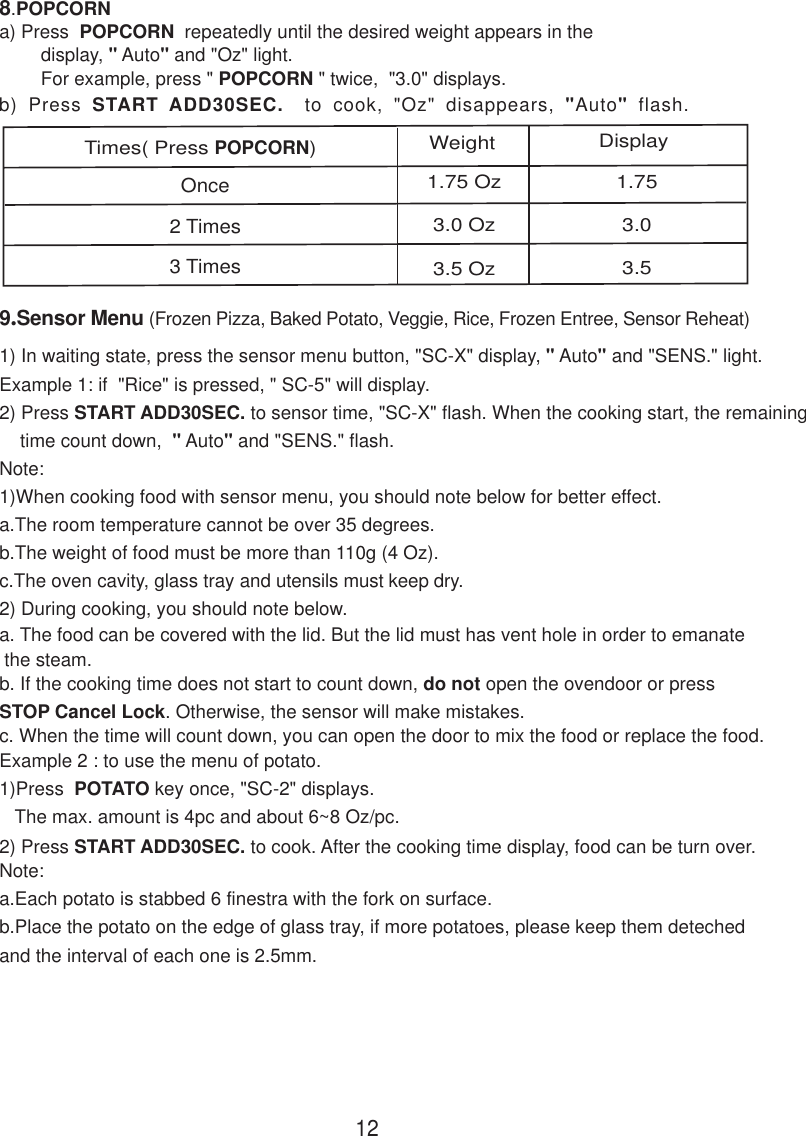
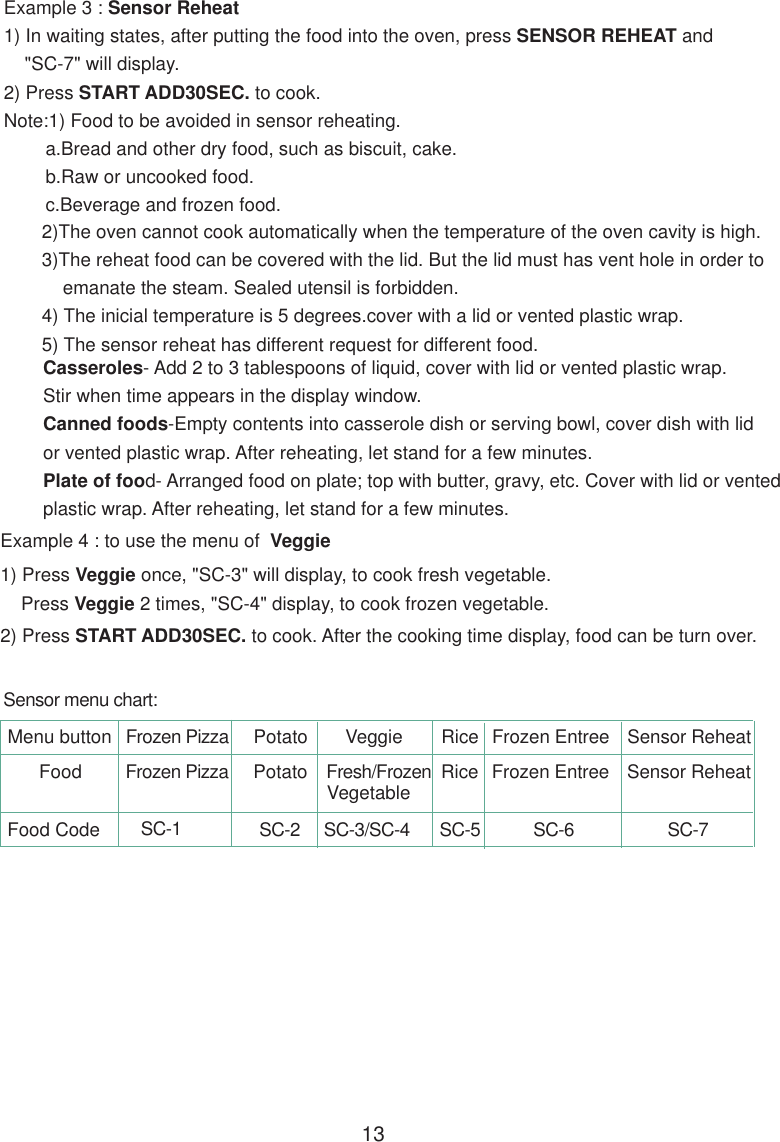
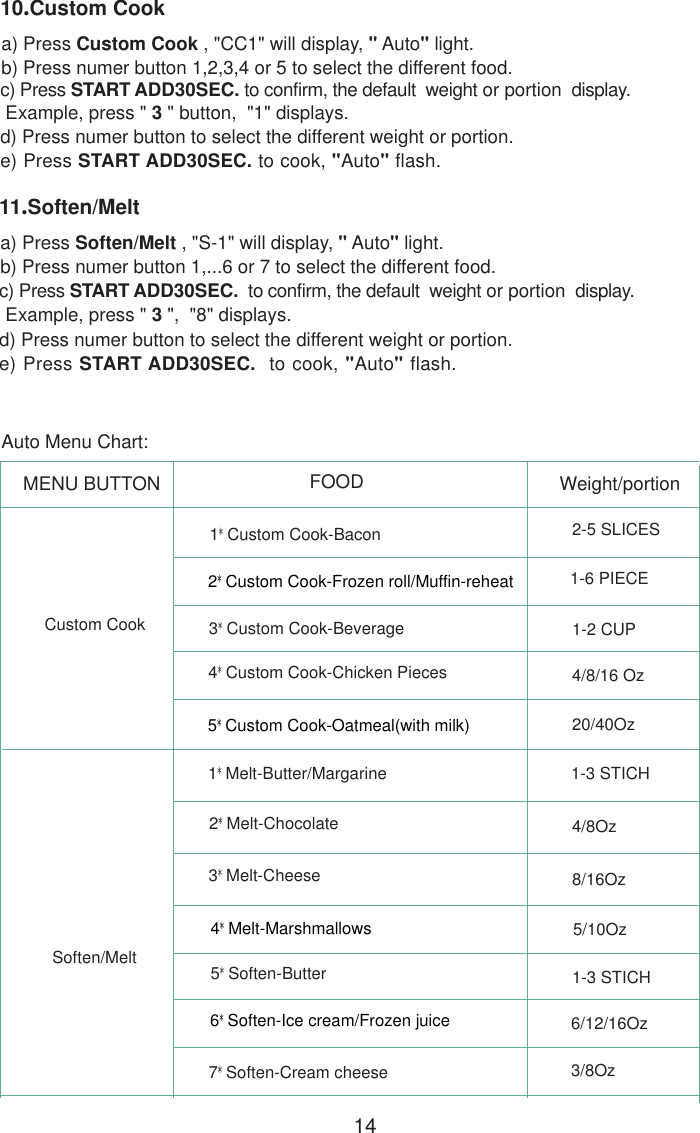
VG8XM131AYYZ_user manual