User Manaul
NEXTERM LGESP use preparations
User’s Manual
NEXTERM LGESP
2001.11.20
Minet INC.
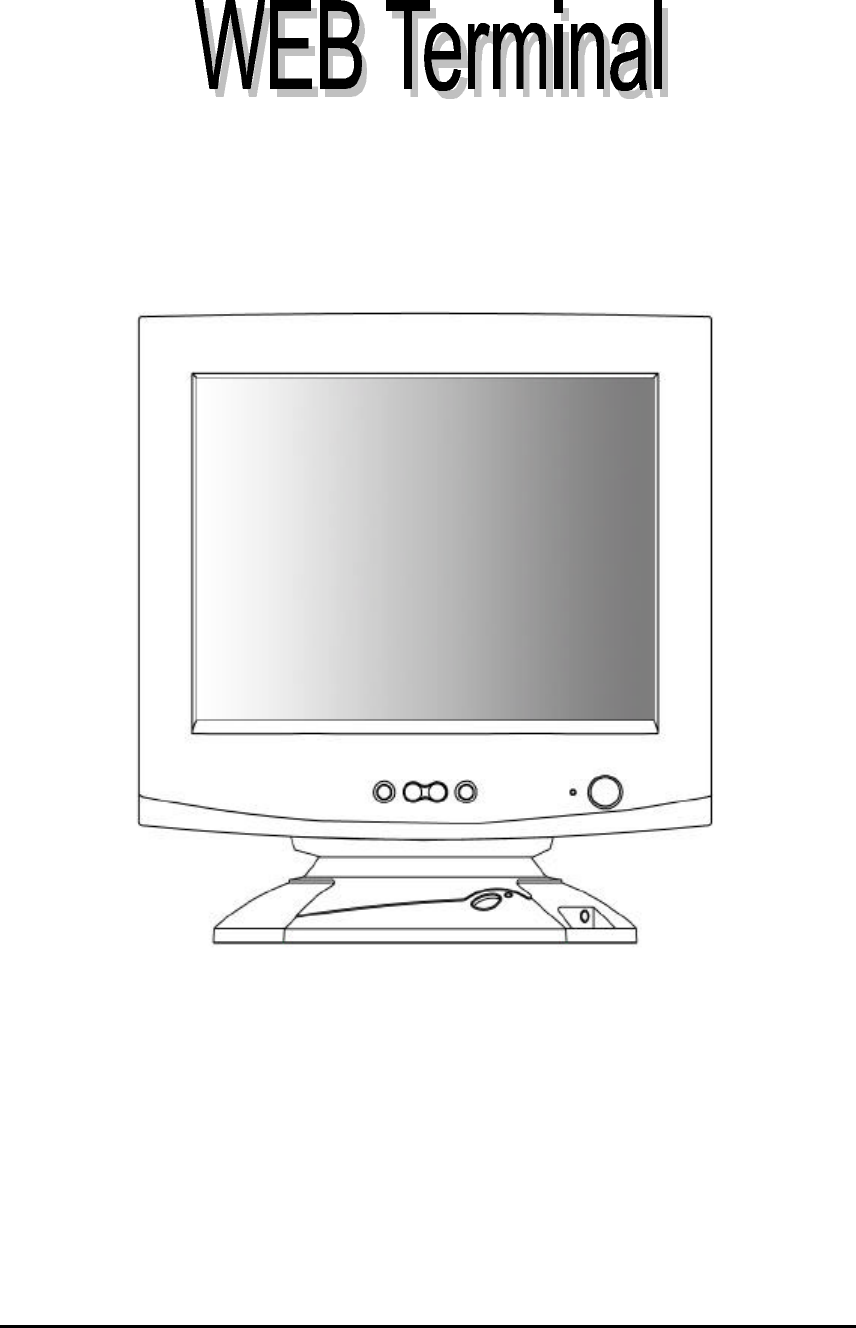
WEB Terminal
NEXTERM LGESP use preparations
1. NEXTERM LGESP Overview
1.1 Introduction
“ Easy Installation, Optimized Functions and The Lowest Price”
It is this web terminal’ s strong points that you can expect when you utilize it in your
environments.
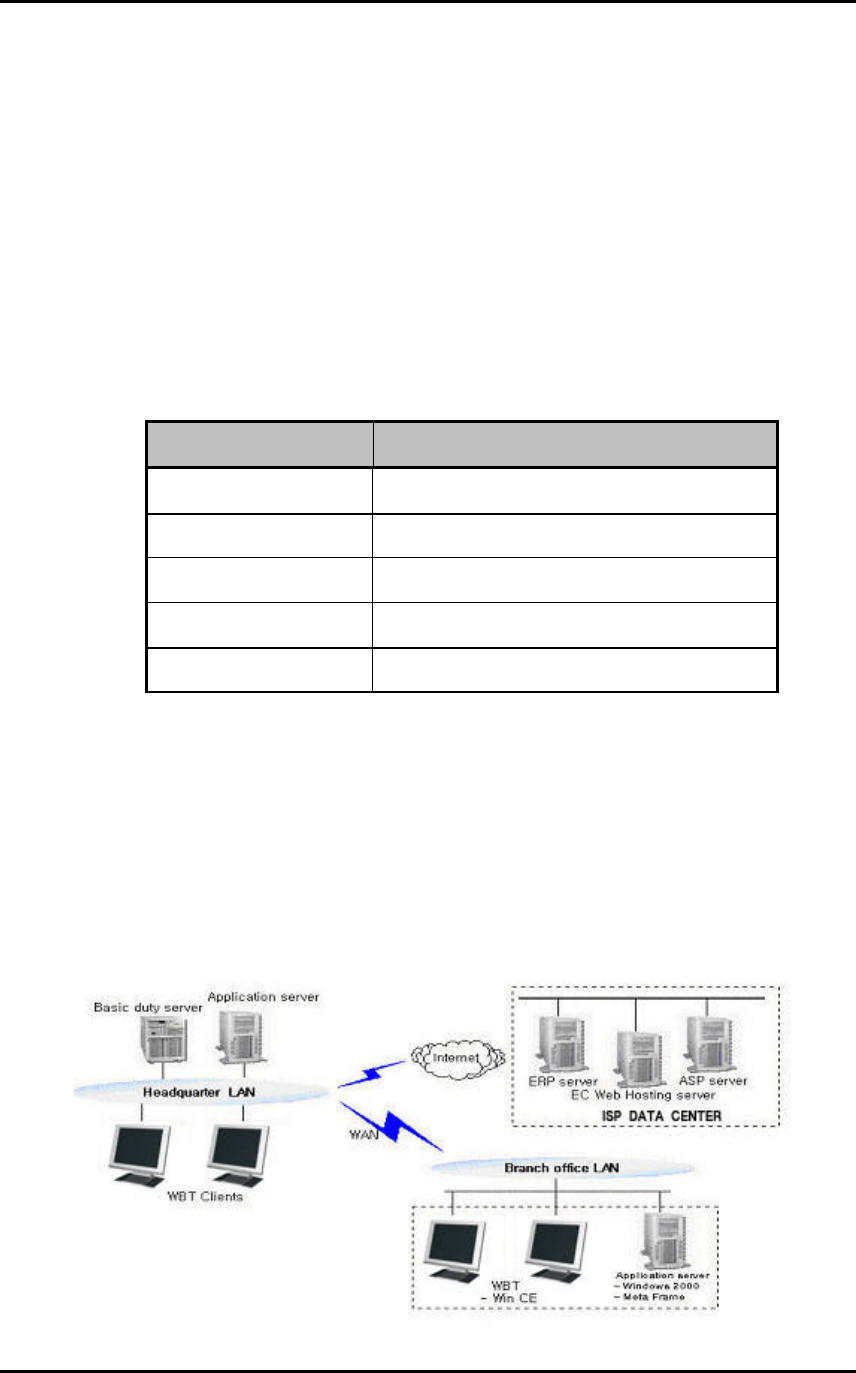
Under the basic environment of server based computing and internet connection speed of
56Kbps, you can use various applications on the high performance servers running
Windows 2000 Server OS as well as internet connection.
CLASSIFICATION
NEXTERM LGESP
Operating Mode WBT (Windows Based Terminal)
CPU Intel StrongArm 206MHZ(235MIPS)
SDRAM 16M
Flash 8M
Operating System Windows CE 3.0
1.2 Functions
All application programs are operated in a server. NEXTERM LGESP as a client transfers
only the inputs of mouse or keyboard to sever and the result of application programs,
which operates on the server to the client using protocol (RDP or ICA). Therefore the
traffic that causes problems in the existing network will be reduced and the client
specification does not require high performance.
1.3 Features
For the convenience of its use and maintenance as well as improvement of its performance,

NEXTERM LGESP use preparations
NEXTERM LGESP provides you the following features:
As Operating System, Windows CE is utilized
NEXTERM LGESP has an open architecture and uses 32-bit multitasking and multi-
thread operating system that support various functions:
l Utilizes a kernel based on the architecture of Windows NT
l Supports pre-occupied multitasking and multi-thread
l Provides users with friendly GUI environment
l Booting process is not necessary since the operation system is stored on ROM
StrongARM CPU of Intel utilized
l Low power (4W) Operating available
l Size and weight reduced
l Low noise (Cooling fan unnecessary)
Quick Booting Circuit Design (Compared to personal computer)
When powering system on, system booting is performed in the last task
environment
Minimized Size
Unnecessary elements such as HDD, FDD, CD-ROM and cooling fan are not required.
Server Environment Available
l Programs are executed in servers and the results of the execution are displayed on
the client
l Multi-user can connect to the server simultaneously and execute each different
program independently.
WEB Terminal
NEXTERM LGESP use preparations
2. NEXTERM LGESP Use Preparations
This chapter provides the structure and setting method of NEXTERM LGESP.
2.1 System Structure
You must be familiar with the system structure for the proper connection of peripheral
devices.
l Basic supplied parts are: Mount (main frame), Adapter(5V)
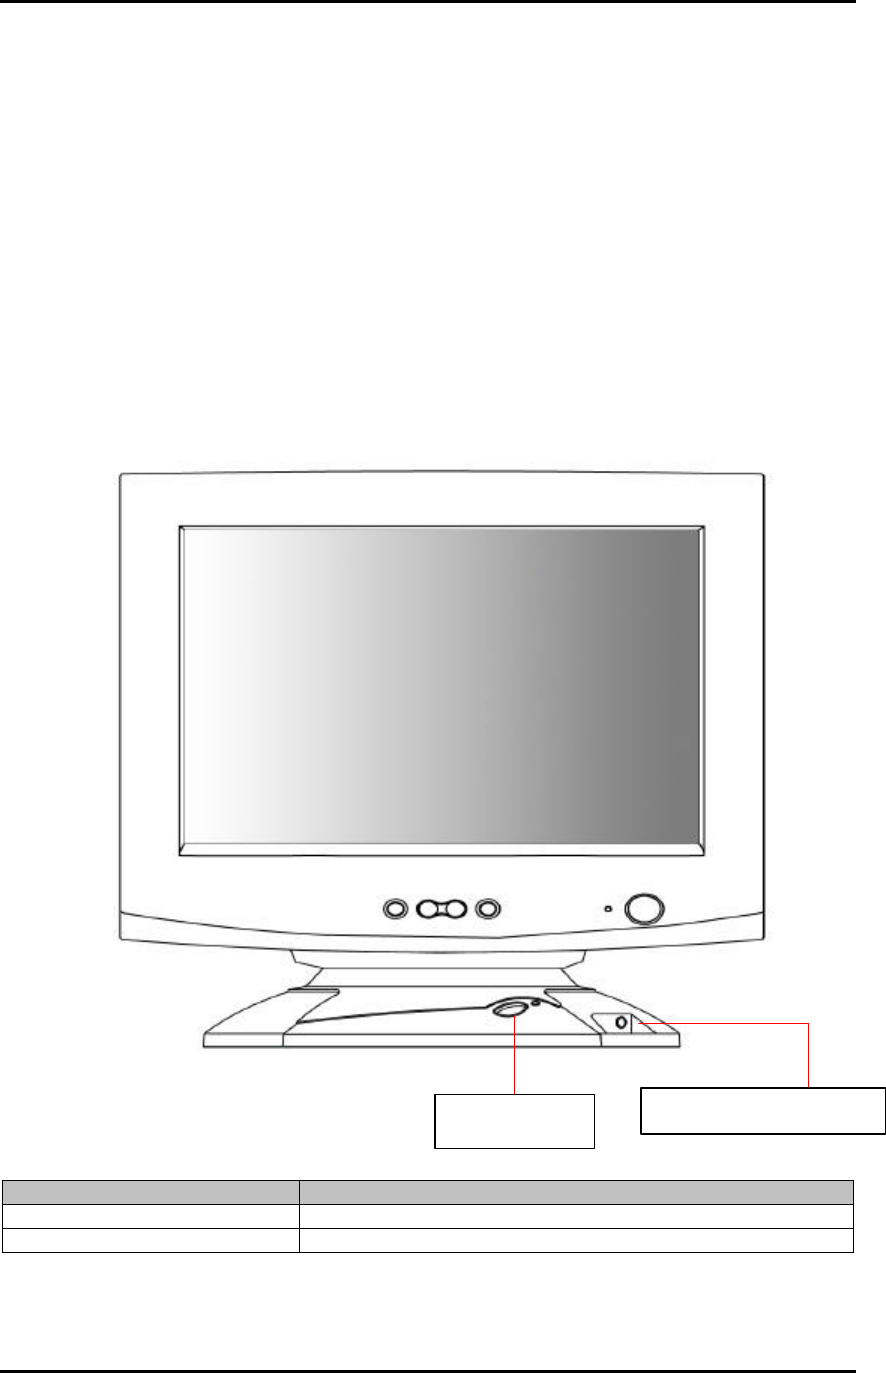
NEXTERM LGESP Front
NAME FUNCTIONS DESCRIPTION
Power Button Monitor OFF, SUSPEND MODE, RESET function
Microphone and Headphone Input terminal of microphone and headphone
Microphone/Headphone
Power Button
NEXTERM LGESP use preparations
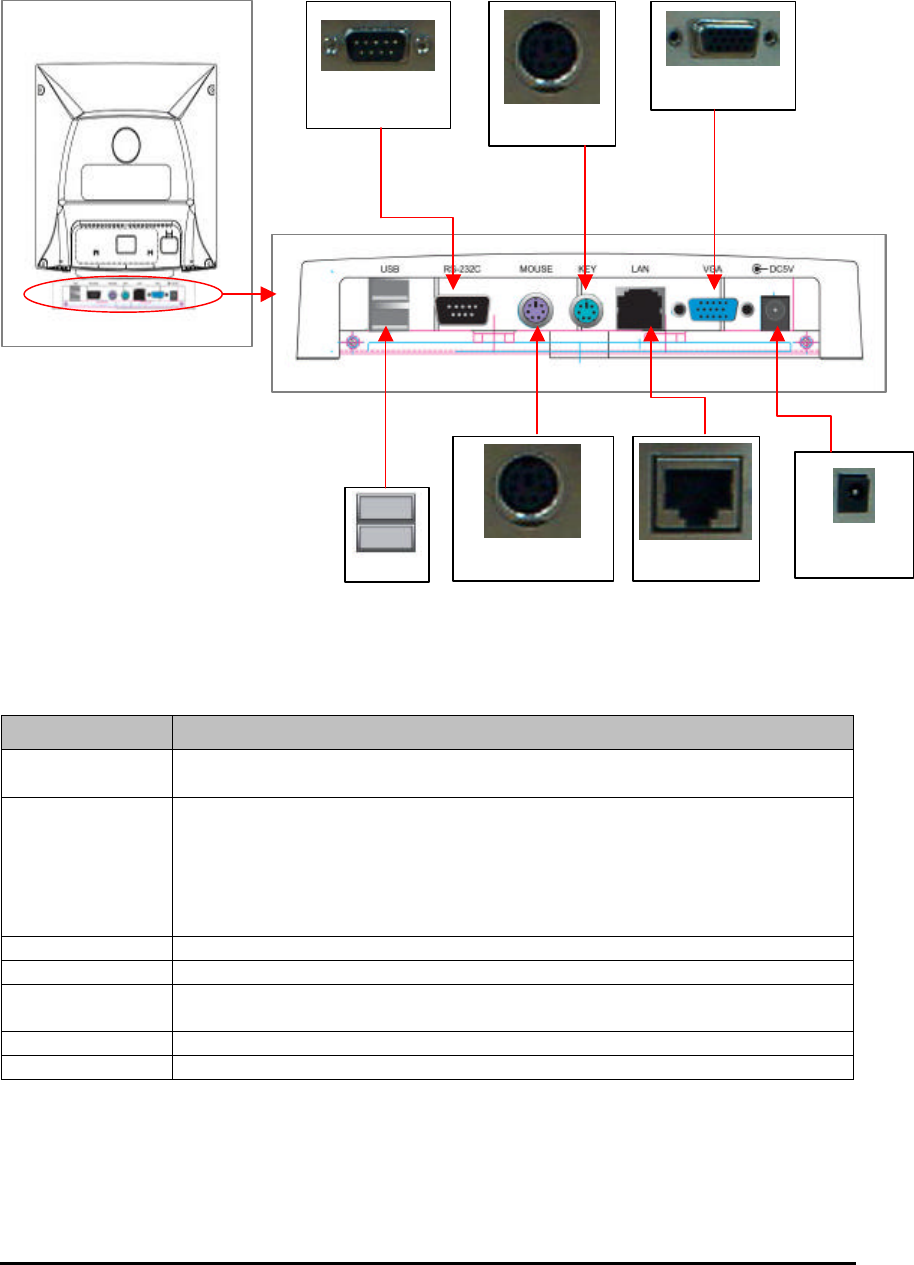
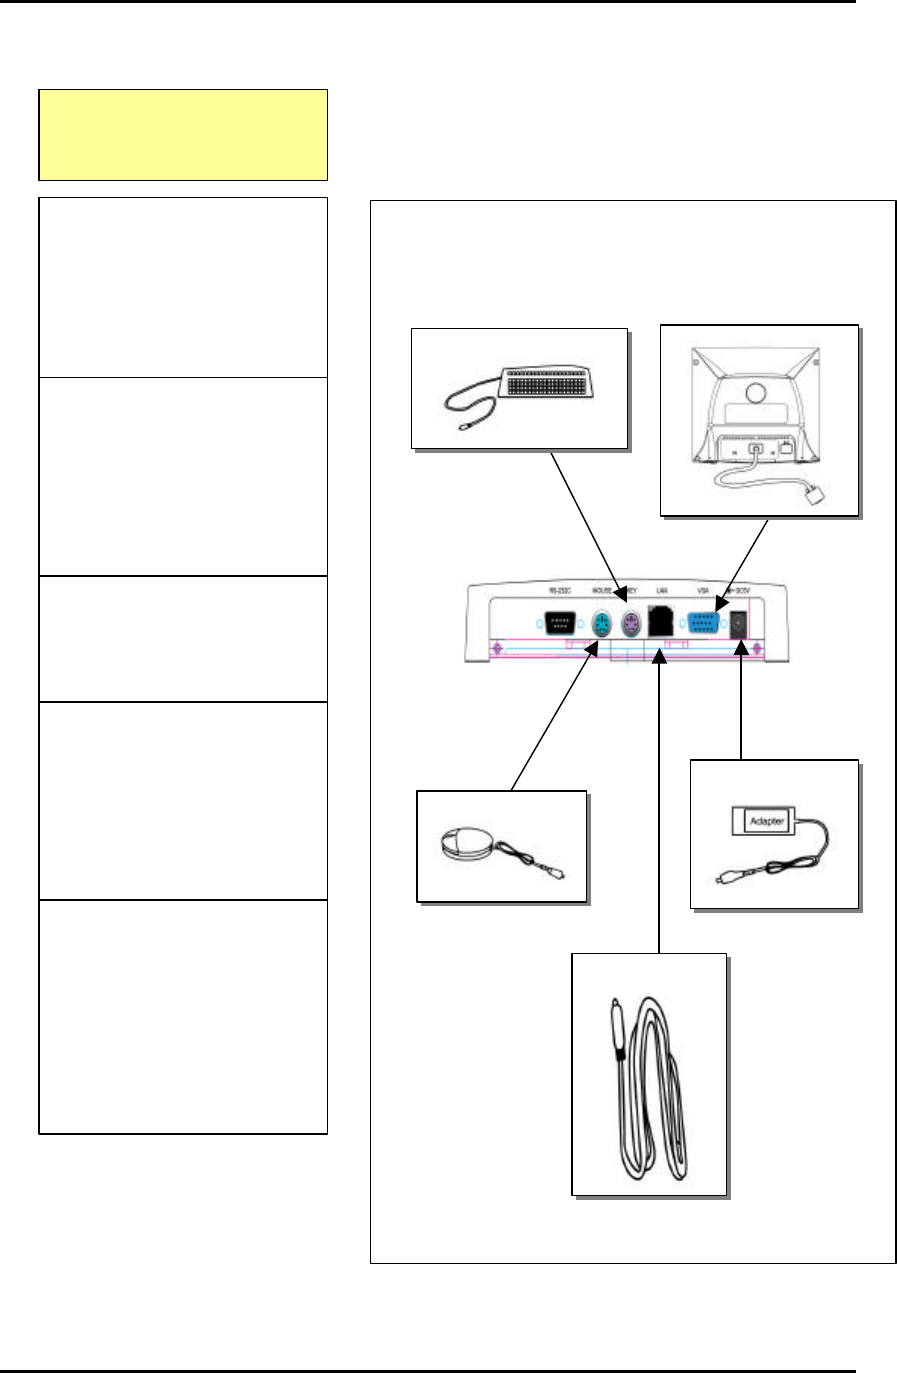
NEXTERM LGESP Rear
NAME FUNCTIONS DESCRIPTION
RS-232C This is connected to D-type connector that consists of 9 pins and
interfaces with other serial devices for transmitting/receiving data
USB This is a typical serial bus and connects external device that supports
USB. It is faster than a serial port and easy to connect.
Since USB supports 12Mbps data transmission rate, its rate is enough for
any types of peripheral devices to be connected. In addition, it can connect
as much as 127 devices and connecting devices is possible during
working the PC. Powers of peripheral devices are unnecessary.
MOUSE PS/2 Port, connected to MINI-DIN connector made up of 6 pins
KEY PS/2 Port, connected to MINI-DIN connector made up of 6 pins
LAN Single line for digital transmission.
This interface is connected to a RJ-45 Jack made up of 8 pins.
VGA This is a parallel port for monitor screen output.
Power This is connected to an adapter that supplies power to the system.
COM
MOUSE (PS/2)
KEY(PS/2)
LAN
VGA(Monitor)
POWER
USB
NEXTERM LGESP use preparations
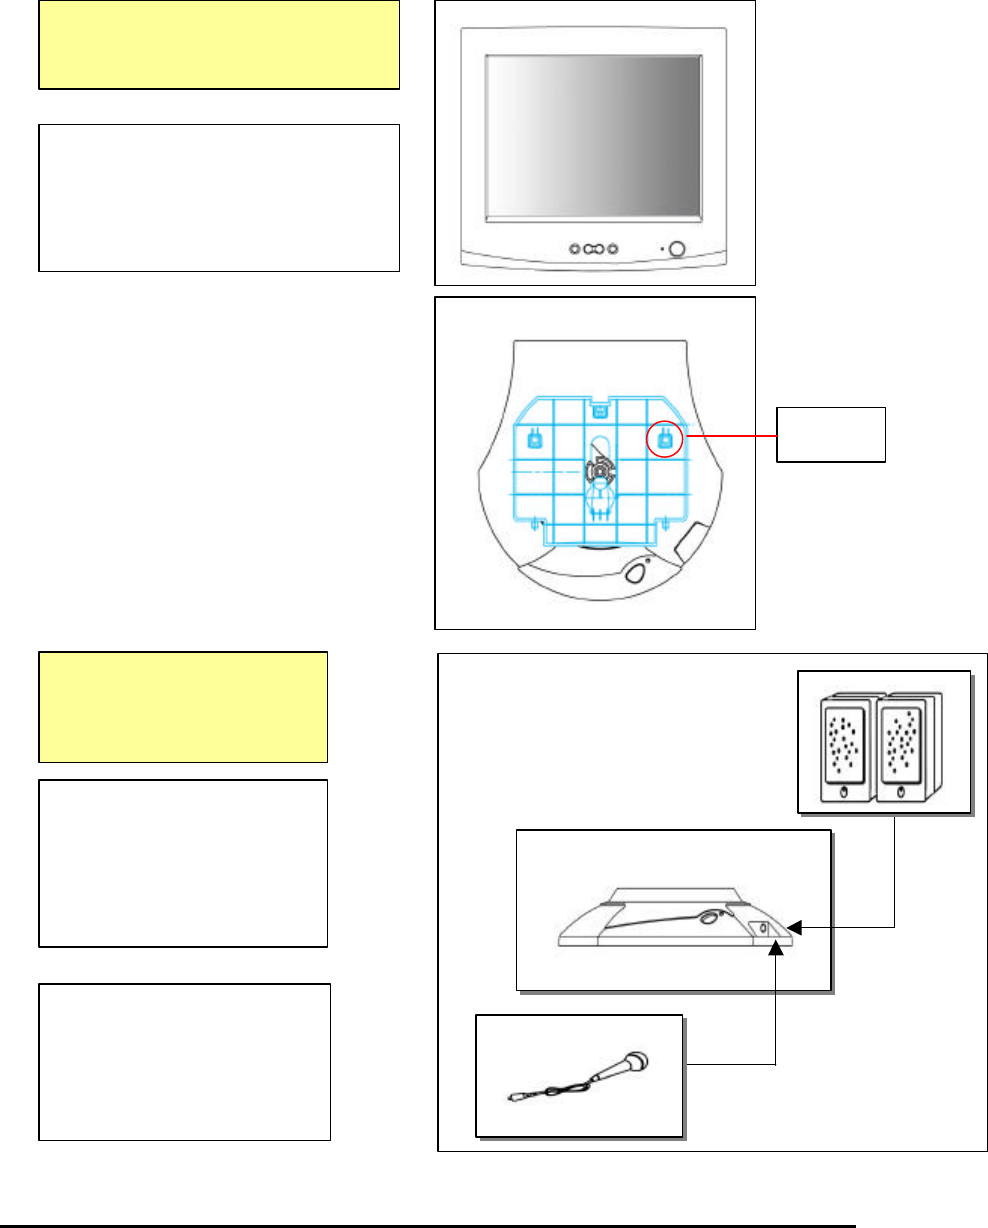
2.2 Connecting the Components
This section shows how to install the components.
Note: the power should be off during the system connection.
Align the monitor with
the latches of
the mount properly, and then slide it
forward until it is secured.
Latch
2. Connecting Microphone
Connect the microphone
to the MIC port.
1. Connecting Speaker
Connect the speaker or
headphone to the
AUDIO port.
Connecting monitor and
mount (main frame)
Connecting Speaker
and Microphone
1
2
WEB Terminal
NEXTERM LGESP use preparations
1 Connecting Keyboard
Connect the keyboard to
its
port after checking
whether the port is PS/2.
2 Connecting Mouse
Connect the mouse to its
port after checking
whether the port is PS/2.
4 Connecting Monitor
Connect the monitor
signal cable, which is
attached to the monitor
with the VGA port
3 Connecting LAN
Connect the RJ-
45 jack to
the LAN port.
5 Connecting Power
Connect the adapter to
the POWER port and
outlet. Be sure that you
must use a
supplied
adapter
Connecting other
connection devices
1
2
3
5
4
System Specifications
2.3 Connecting External Devices
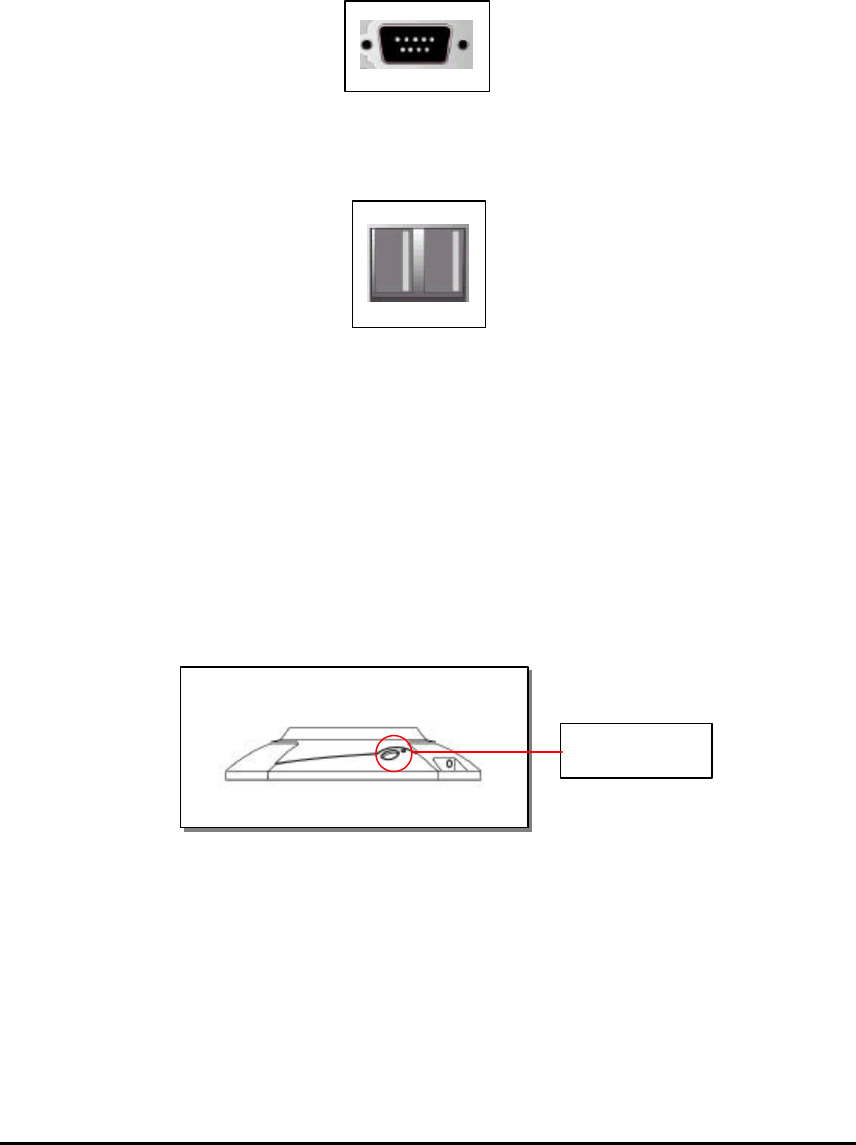
NEXTERM LE has COM port and USB port that can connect additional external devices.
COM Port
COM port can be connected to an external modem or other devices that support
serial devices.
USB Port
USB Port can be connected to a peripheral that supports USB
2.4 Power Button
This section explains the power button on the front panel of the mount (main frame).
If you press this button within 0.5 second during system on after adapter connected, the
screen will be ON/OFF. The mode will change into the Suspend mode (CPU is resting) if
you press it for 0.5 ∼ 3 seconds. And the system will be reset if you press it for 3 seconds
or longer. You can press it again in order to return to the normal operation mode from the
screen off or suspend mode.
Power Button

WEB Terminal
NEXTERM LGESP use preparations
FCC Information
This equipment has been tested and found to comply with the limits for a Class B digital device,
pursuant to part 15 of the FCC Rules. These limits are designed to provide reasonable
protection against harmful interference in a residential installation.
This equipment generates, uses and can radiate radio frequency energy and, if not installed and
used in accordance with the instructions, may cause harmful interference to radio
communications. However, there is no guarantee that interference will not occur in a particular
installation.
If this equipment does cause harmful interference to radio or television reception, which can be
determined by turning the equipment off and on, the user is encouraged to try to correct the
interference by one or more of the following measures :
- Reorient of relocate the receiving antenna.
- Increase the separation between the equipment and receiver.
- Connect the equipment into an outlet on a circuit different from that to which the
receiver is connected.
- Consult the dealer or an experienced radio/TV technician for help.
CAUTION : Changes or modifications not expressly approved by the manufacturer
responsible for compliance could void the user’s authority to operate the equipment.