Mitac Digital Technology MRM6000T Portable Navigator User Manual 631361 01A
Mitac International Corporation Portable Navigator 631361 01A
UserManual.wiki
>
Mitac Digital Technology
>
MRM6000T User Manual
>
Manual 1
Contents
1.
Manual 1
2.
Manual 2
Manual 1
Navigation menu
Upload a User Manual
Namespaces
Wiki Guide
HTML
PDF
Info
Views
User Manual
Discussion / Help
Navigation
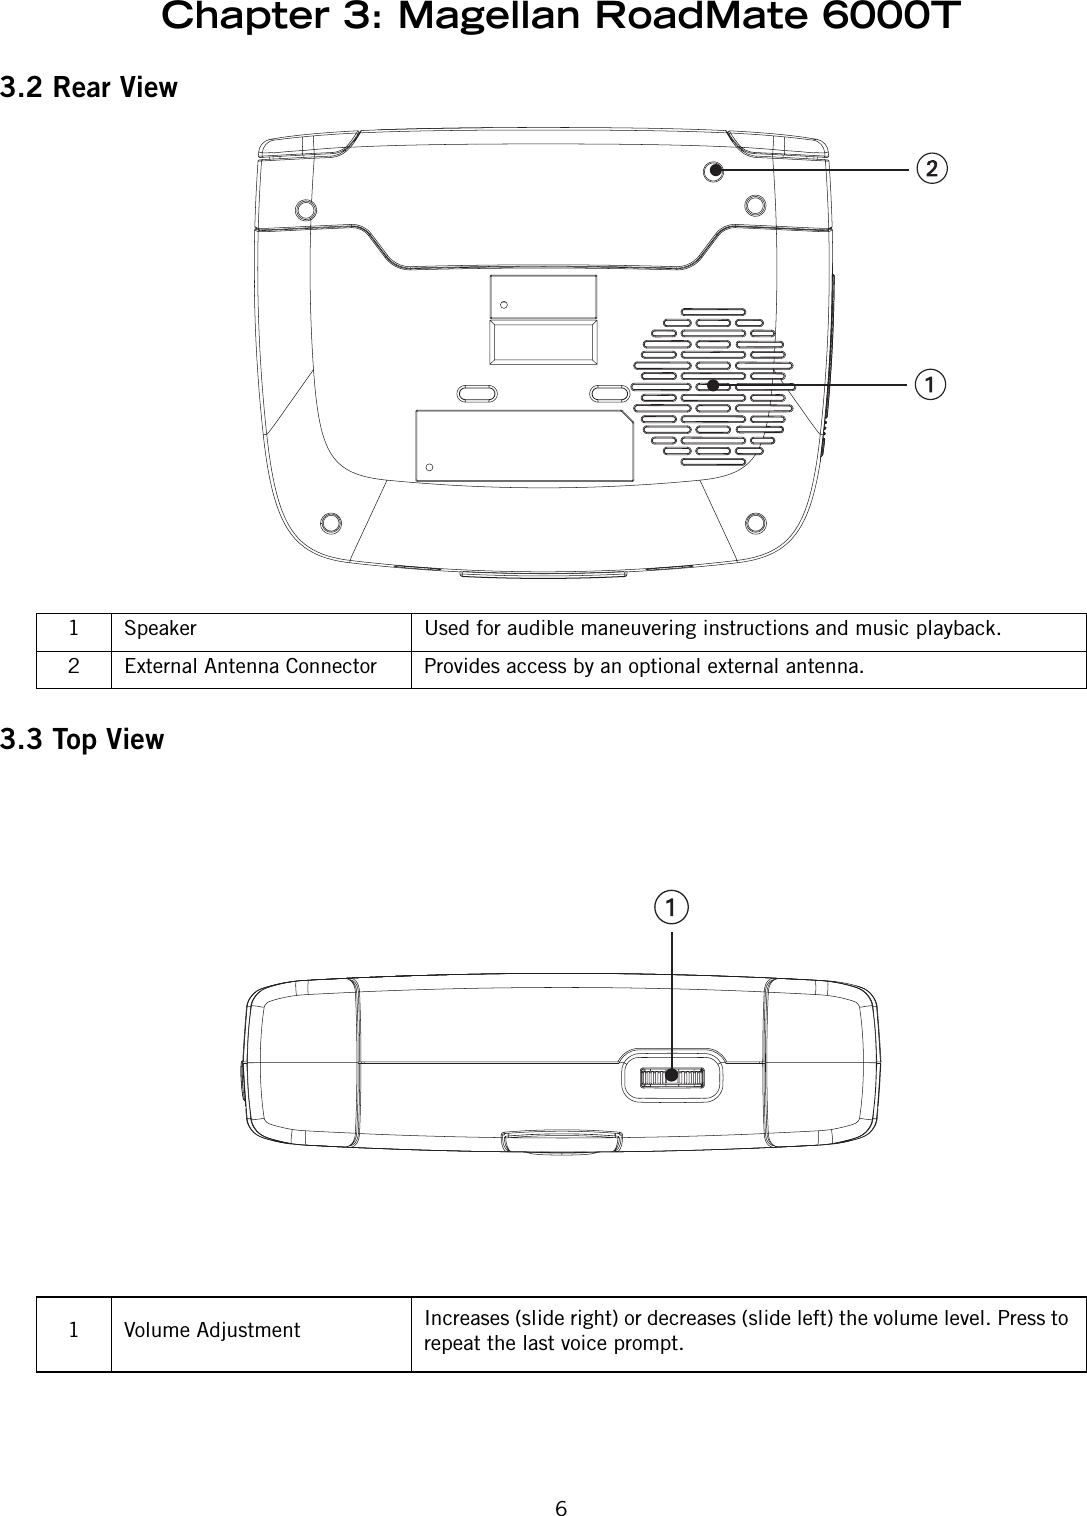
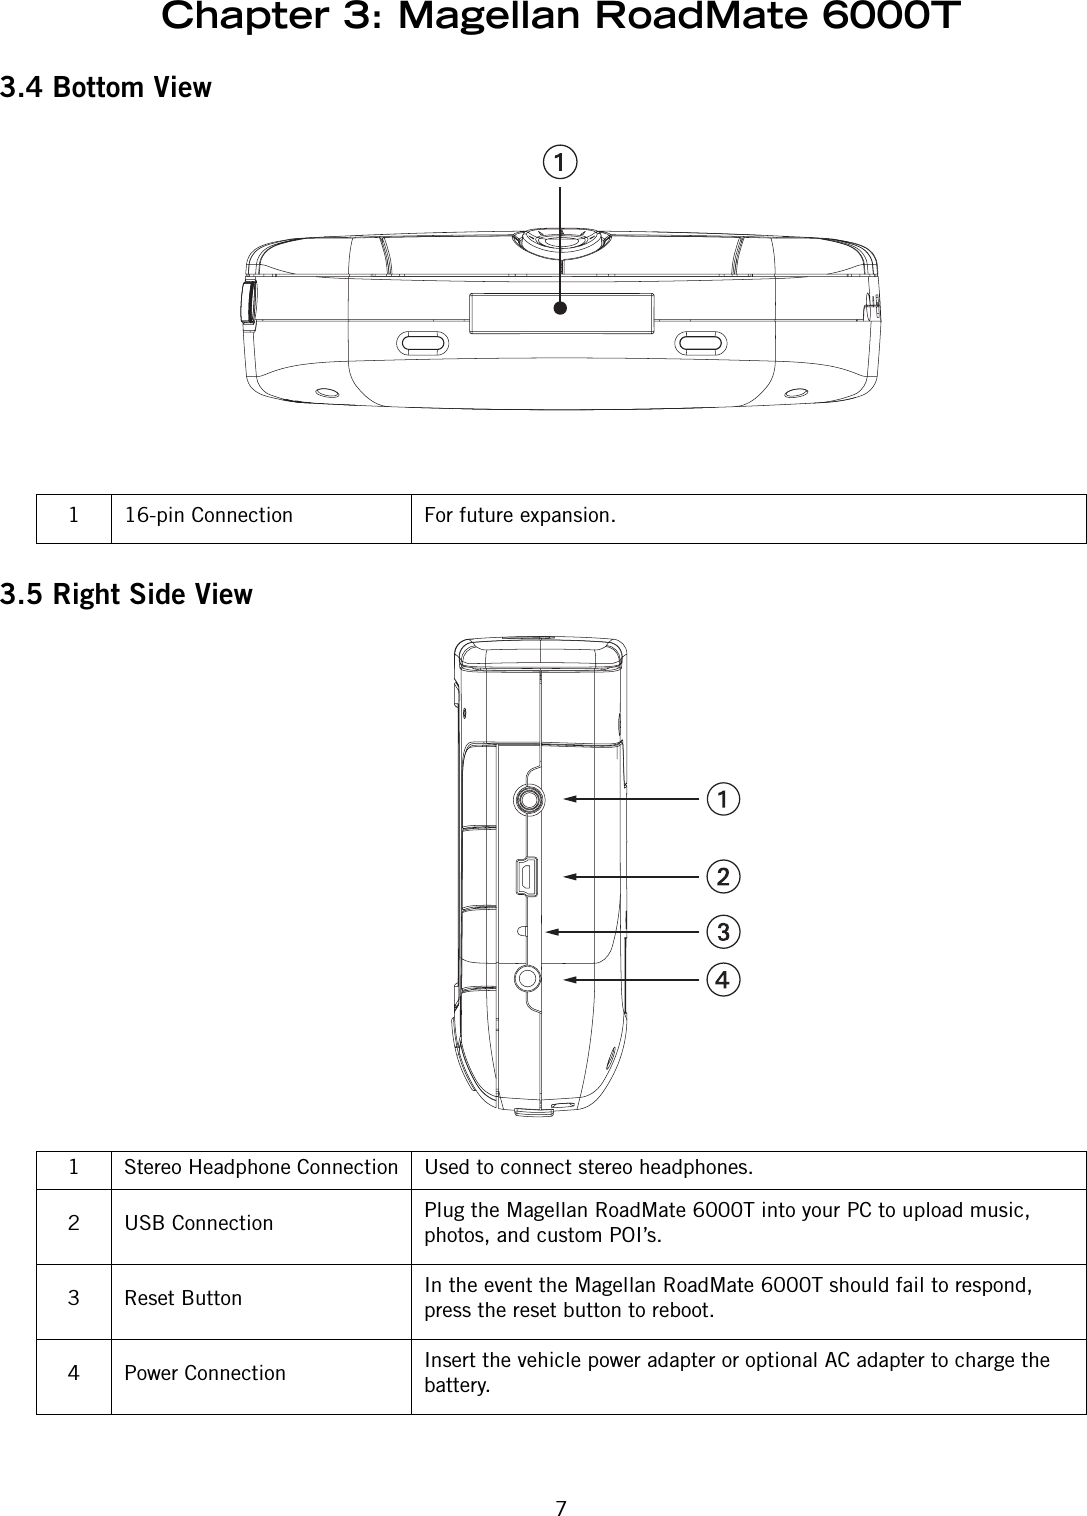
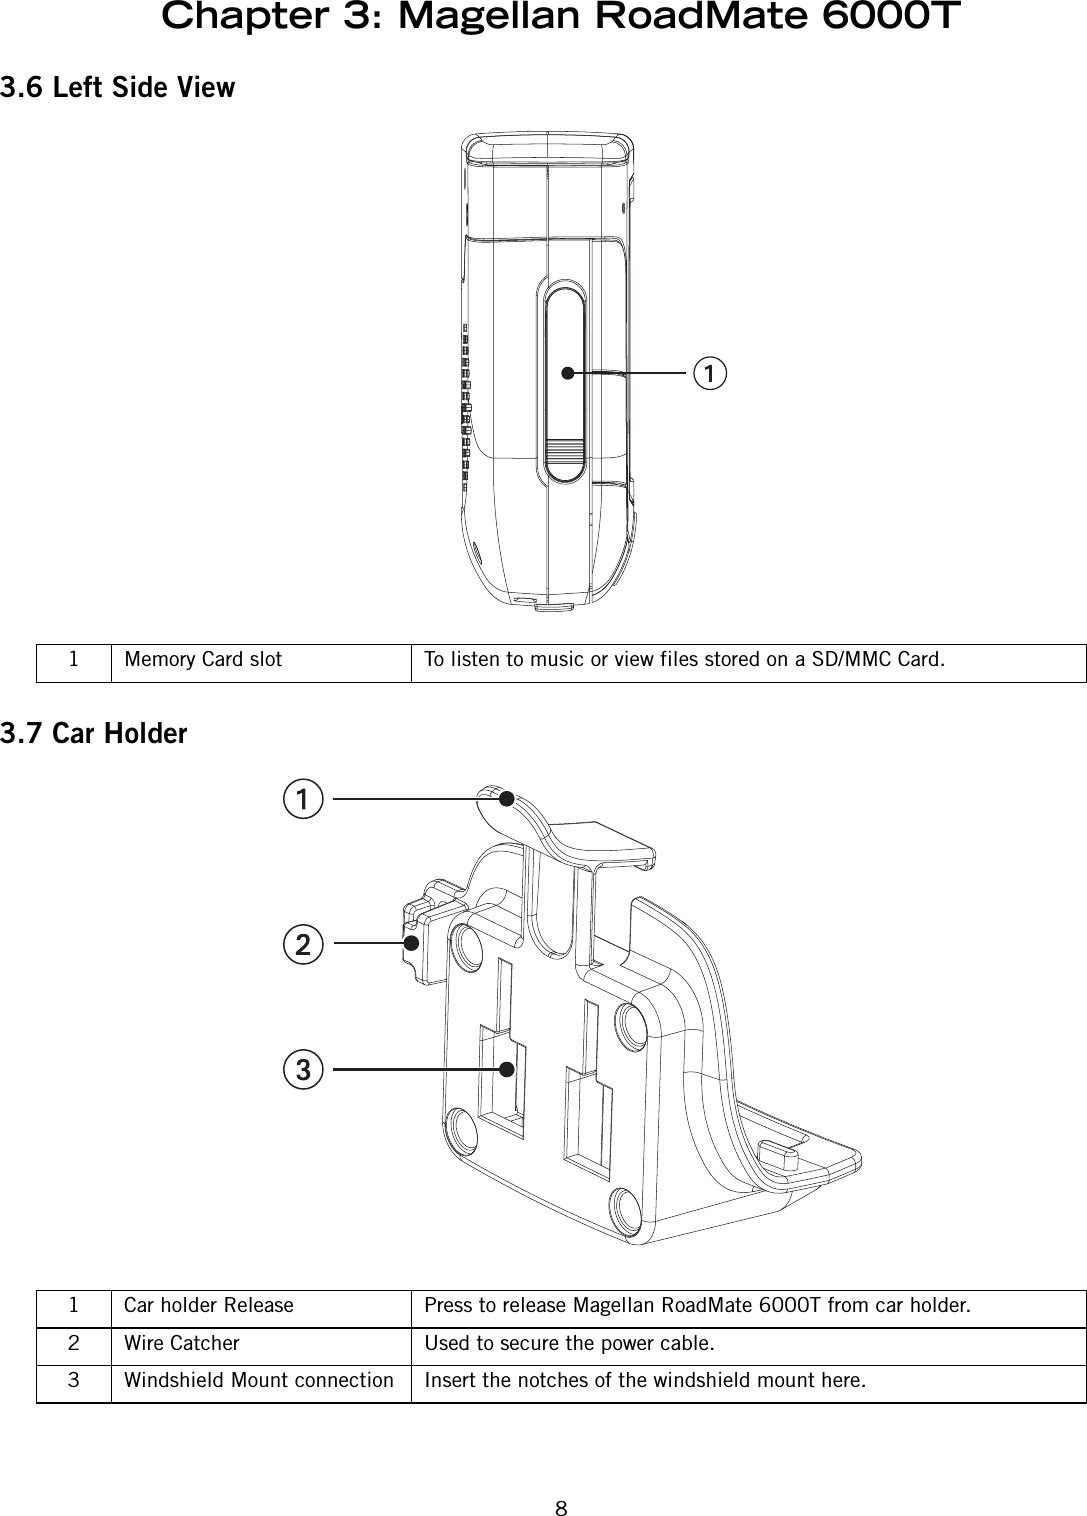
![1Chapter 1: Contact InformationIf you need support for your Magellan RoadMate 6000T and you wish to contact Thales, please use the following information to direct your questions/comments to the proper person. 1.1 Technical Support If you need technical assistance or “how-to” help, or if you have a technical question about the functionality of your Magellan product, please contact us on the Internet at www.magellangps.com or reach us by fax or by phone. Our Technical Support phone representatives are available Monday through Friday, 6:00 a.m. to 5:00 p.m. PST/PDT. After hours, you may leave a detailed voice mail message that will be returned within the next business day.Telephone: (866) 868-2259 or (909) 394-5000 (outside the United States) You may also reach Technical Support by Fax: (909) 494-7777 [Attn: Tech. Support]; or E-Mail: magellansupport@thalesnavigation.com 1.2 Warranty Service To obtain warranty service on your Magellan RoadMate 6000T, you must contact us for a return authorization (RA) before you ship the product. Packages arriving at our dock without an RA will be refused.To obtain an RA, simply contact our Technical Support group at: Telephone: (866) 868-2259 or (909) 394-5000 (outside the United States); Fax: (909) 394-7050 [Attn: Tech. Support]; or E-Mail: magellansupport@thalesnavigation.com 1.3 Customer ServiceIf you need to order accessories or obtain unlock codes, you can call our Customer Service Department Monday through Friday, 6:00 a.m. to 5:00 p.m. PST/PDT, or visit our Web site at www.magellangps.com.Telephone: (866) 339-0488 or (909) 394-5000 (outside the United States); Fax: (909) 394-7078.1.4 RegistrationPlease make sure to register your Magellan RoadMate 6000T at www.magellangps.com. By registering, you will be informed of the latest product updates.](https://usermanual.wiki/Mitac-Digital-Technology/MRM6000T.Manual-1/User-Guide-668804-Page-11.png)