Mitac Digital Technology N193 Portable Navigator User Manual 4430 English draft
Mitac International Corporation Portable Navigator 4430 English draft
UserManual.wiki
>
Mitac Digital Technology
>
N193 User Manual
User Manual
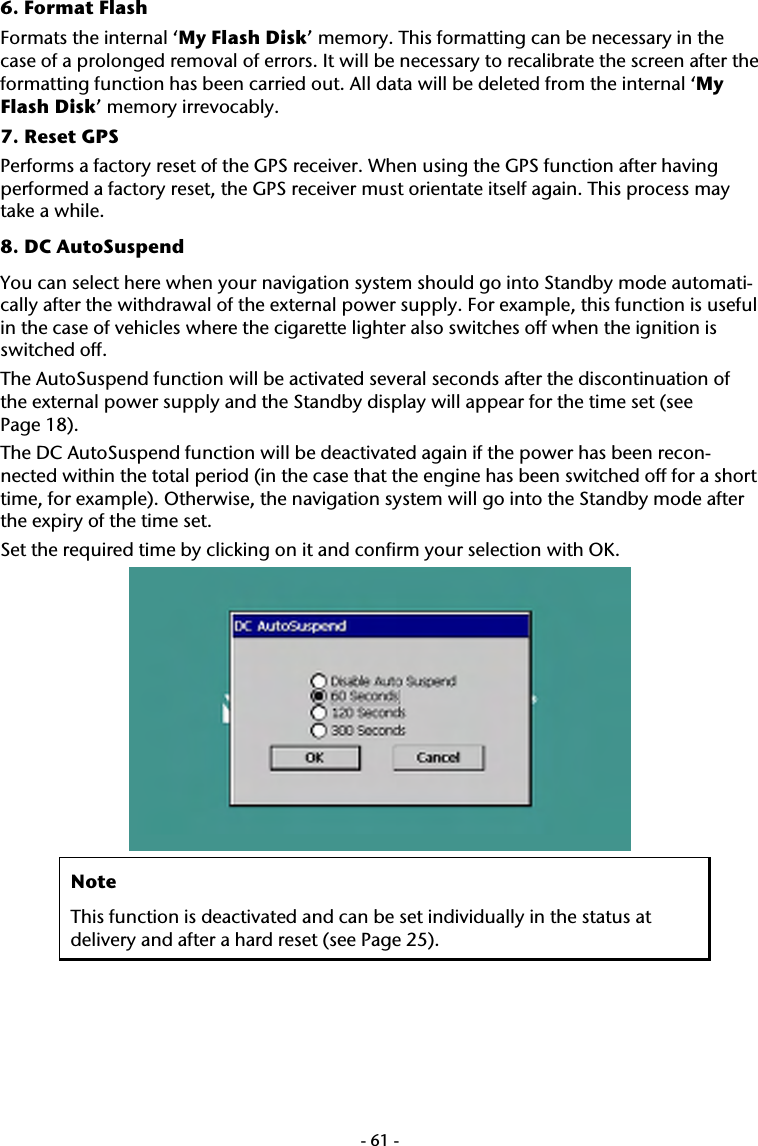
Navigation menu
Upload a User Manual
Namespaces
Wiki Guide
HTML
PDF
Info
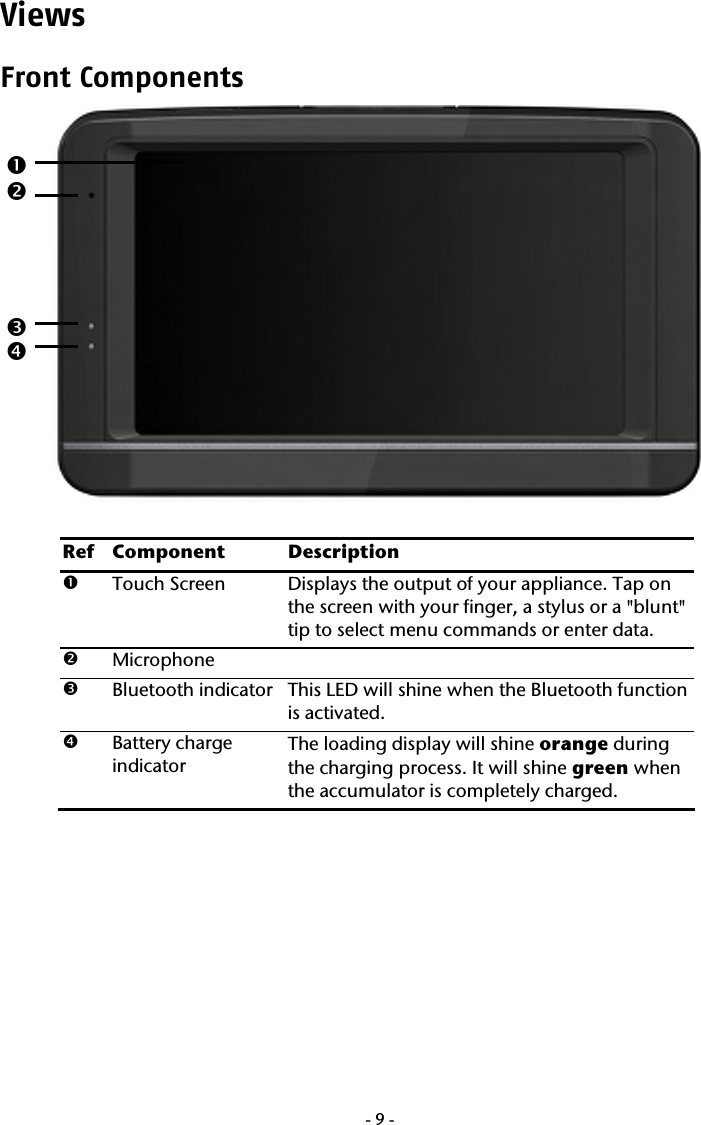
Views
User Manual
Discussion / Help
Navigation


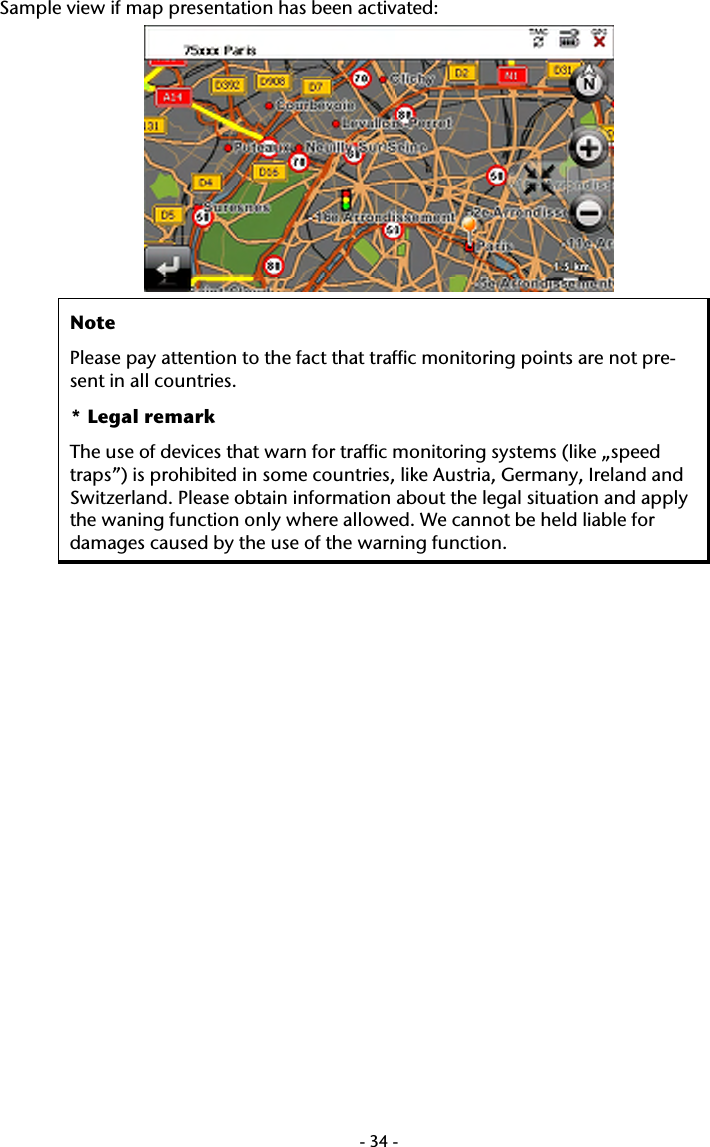

![-60-Appendix Special CleanUp Function The CleanUp function serves the targeted deletion of data, without using a PC. Note Please use this function very carefully, because it is possible for data to be deleted that can only be entered again manually afterwards. The CleanUp function is activated when the ‘o’ is pressed in the Gopal lettering of the Main Menu, immediately after the start tone following a reset. The CleanUp function offers 8 options: 1. Remove Installation Only Removes the software installed from the ‘My Flash Disk’ memory [= part of the permanent memory in which the executable parts of the navigation software will be located following the initial alignment (\My Flash Disk\Navigation)]. 2. Remove MAP Only Removes the digital maps from the ‘My Flash Disk’ memory (\My Flash Disk\MapRegions). 3. Remove Preload Only Removes the data needed for the installation of the navigation software from the perma-nent memory (\My Flash Disk\Install). 4. Remove All Deletes the whole contents of the ‘My Flash Disk’ memory. It will not be necessary to recalibrate the screen after this function has been carried out. 5. Factoryreset Sets the device back to the delivery status in the case of an intact main installation.](https://usermanual.wiki/Mitac-Digital-Technology/N193/User-Guide-955791-Page-66.png)