Mobile Action Technology IGT1800 GPS Tracker User Manual GPS Tracker
Mobile Action Technology Inc. GPS Tracker GPS Tracker
UserManual.wiki
>
Mobile Action Technology
>
IGT1800 User Manual
>
user manual
Contents
1.
user manual
2.
User Manual
user manual
Navigation menu
Upload a User Manual
Namespaces
Wiki Guide
HTML
PDF
Info
Views
User Manual
Discussion / Help
Navigation

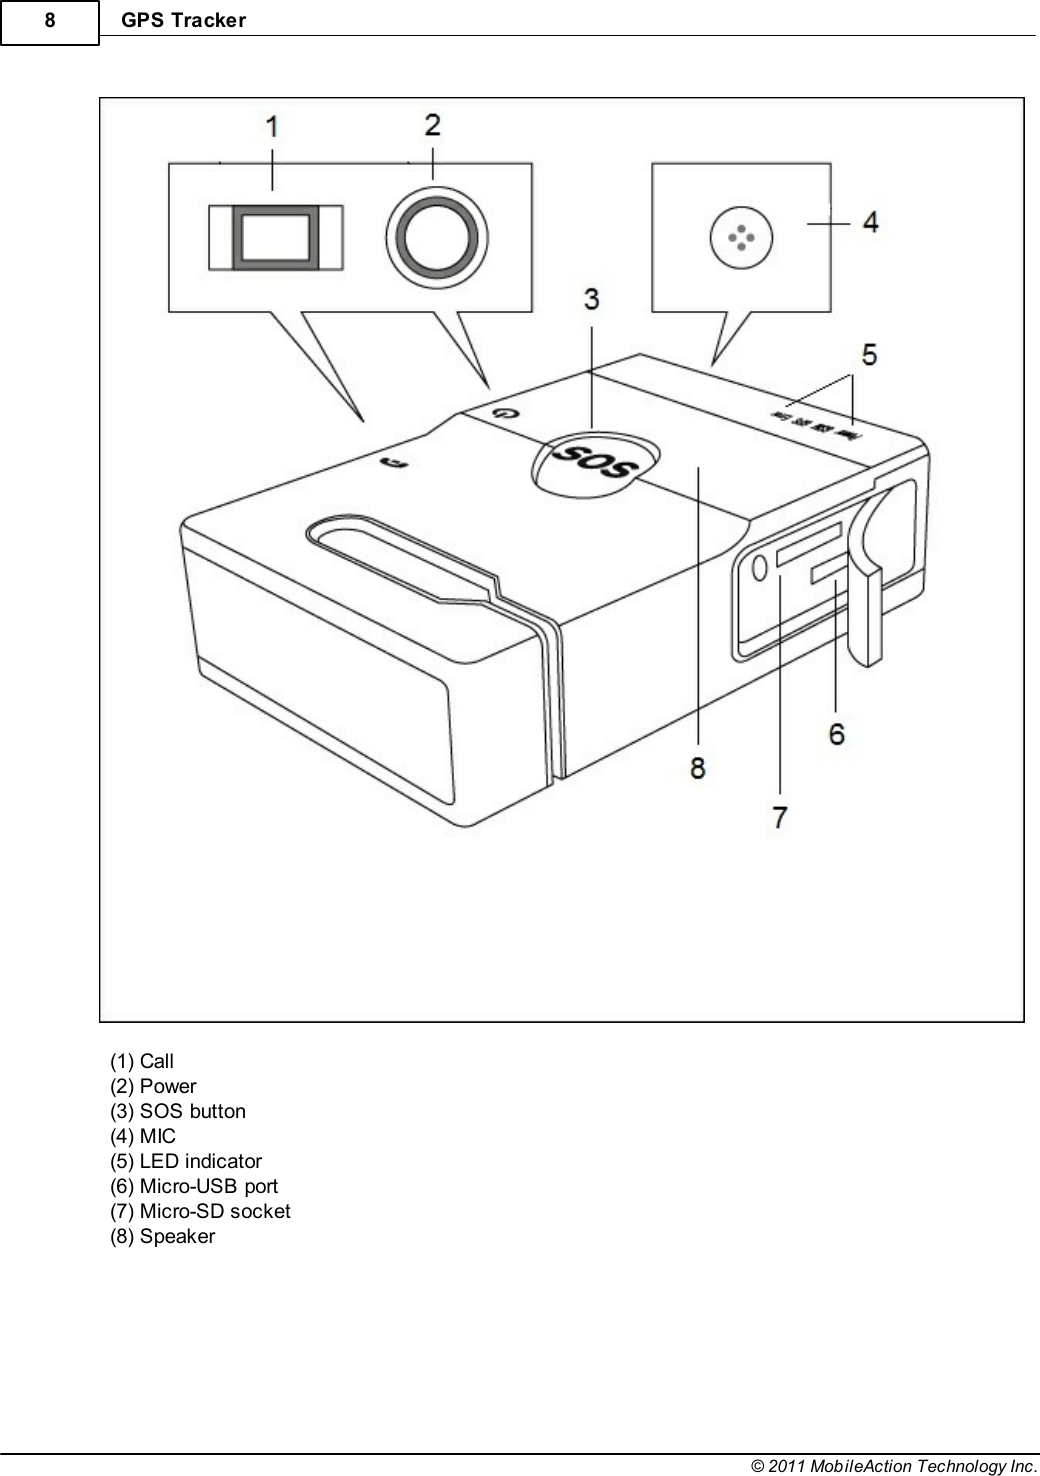
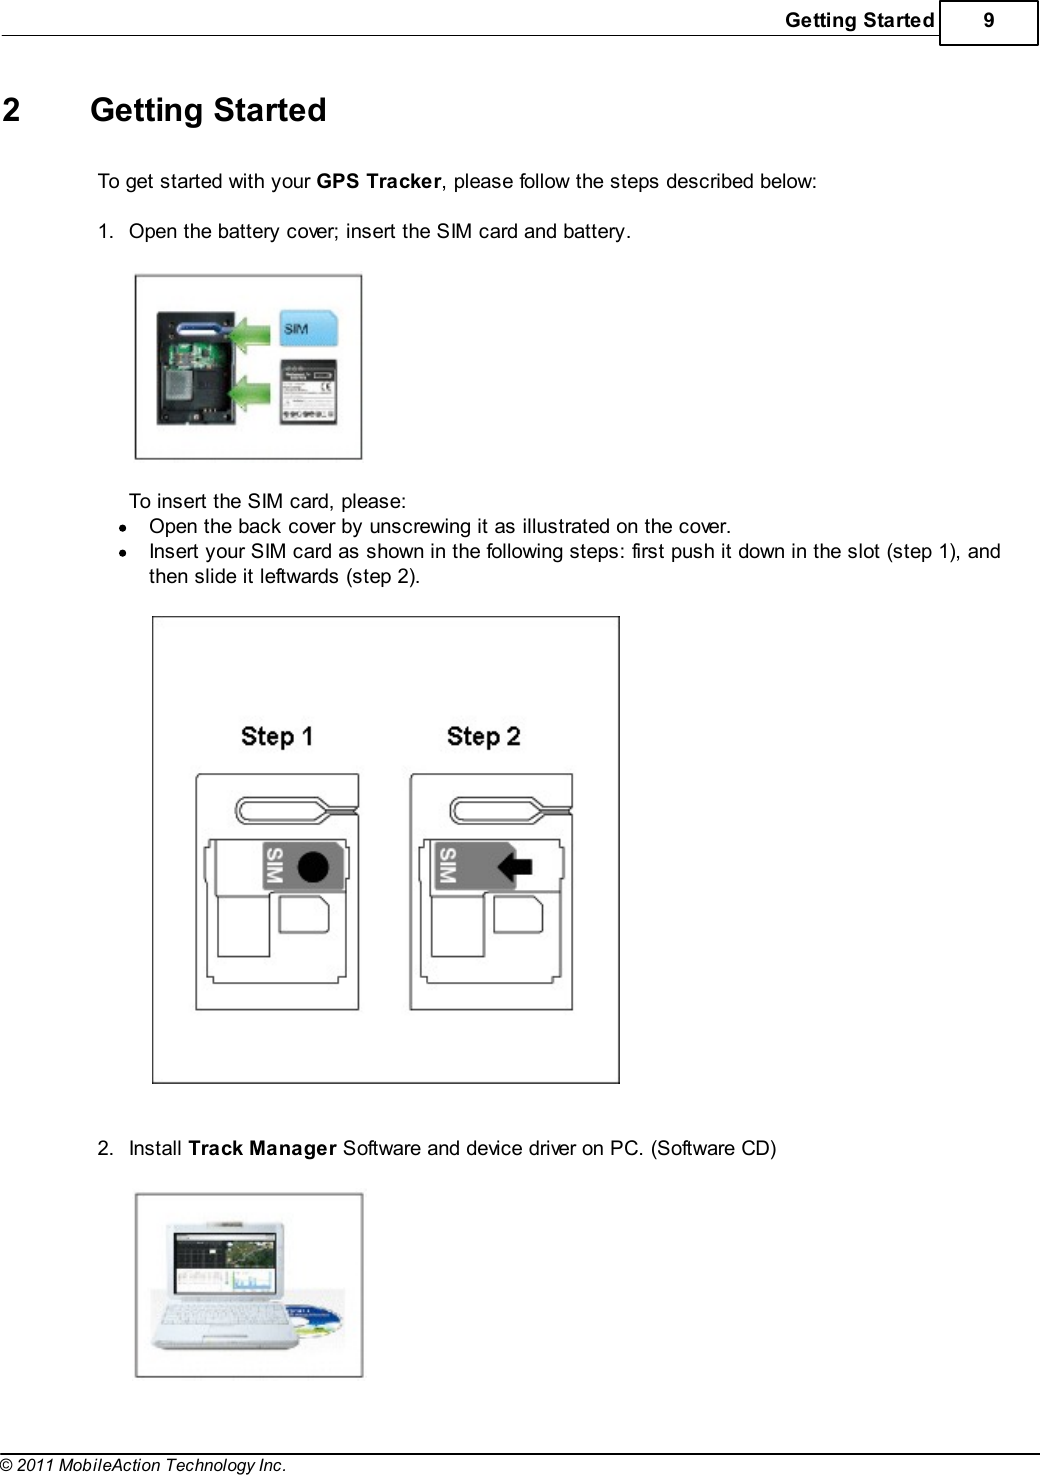
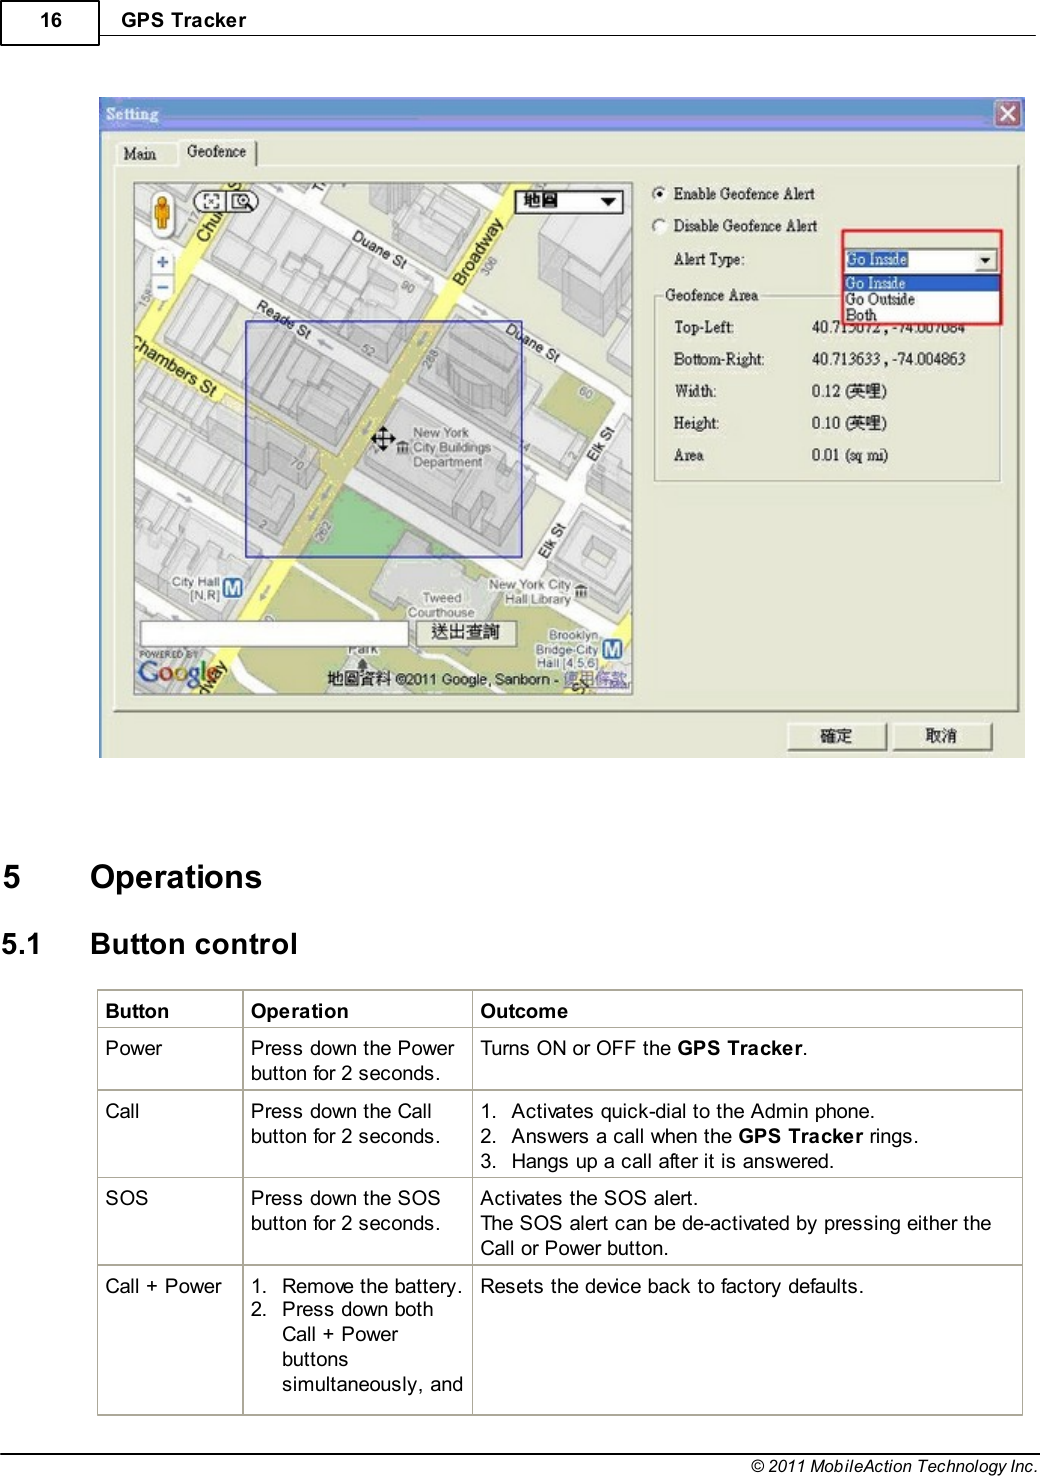
![GPS Tracker10© 2011 MobileAction Technology Inc. 3.On Track Manager, click [Manual] for a detailed on-line help. 4.Launch Track Manager to complete hardware settings by setting up a tracking profile and SOSnumbers for the GPS Tracker.Make sure the PIN Code of the SIM card is entered when required.(See more information about hardware settings in Device Configuration.) 5.Charge the GPS Tracker via USB for at least 4 hours prior to first use. 6.Once the GPS Tracker is fully charged, have it unplugged from PC, and it will power onautomatically with a Green LED flashing once every 5 seconds. 7.The device is now ready to use. Please send a [Position] message to the GPS Tracker via admin'sphone as instructed in the online help to see how it works. Once you're ready to track, send a test message to the tracker to get started:Send a text message including "Position" as the message content to the tracker from the Adminphone.You should then receive a reply message including an URL to the map where you're currentlylocated. Click on the URL, and you'll see a map indicating your current position.](https://usermanual.wiki/Mobile-Action-Technology/IGT1800.user-manual/User-Guide-1528452-Page-10.png)