Model Rectifier 02400 Light Genie User Manual
Model Rectifier Corporation Light Genie
User Manual

80 Neweld Avenue
Edison, NJ 08837-3817
www.modelrecer.com
No. 025000Patent Pending
Before Starng
Do not tamper or modify any of the Light Genie™ components. Keep
instrucons for later use.
Get Started
Light Genie™ includes the following; Genie Receiver Board, Lighng Plugs,
Power Plug, and Wireless Transmier. Combined with any light on your
project, wireless radio control and lighng eects are easily commanded.
Connect Lights to the Genie Receiver
Before starng, make sure all power is o to your project and the Genie
receiver is unplugged.
Use the Light Genie™ plugs provided and connect with any desired LED/Bulb
xture you wish to use with your project.
LED’s are direconal. Please be sure the posive leg is connected to the blue
wire (common wire).
Simply take the lead wires from the Light Genie™ plug and leads from your
lighted accessory, twist the leads together. Make sure the copper strands
have a solid interlocking twist. Wrap the connecon in electrical tape for
insulaon & to prevent a short circuit. Soldering may be used for a more
permanent connecon.
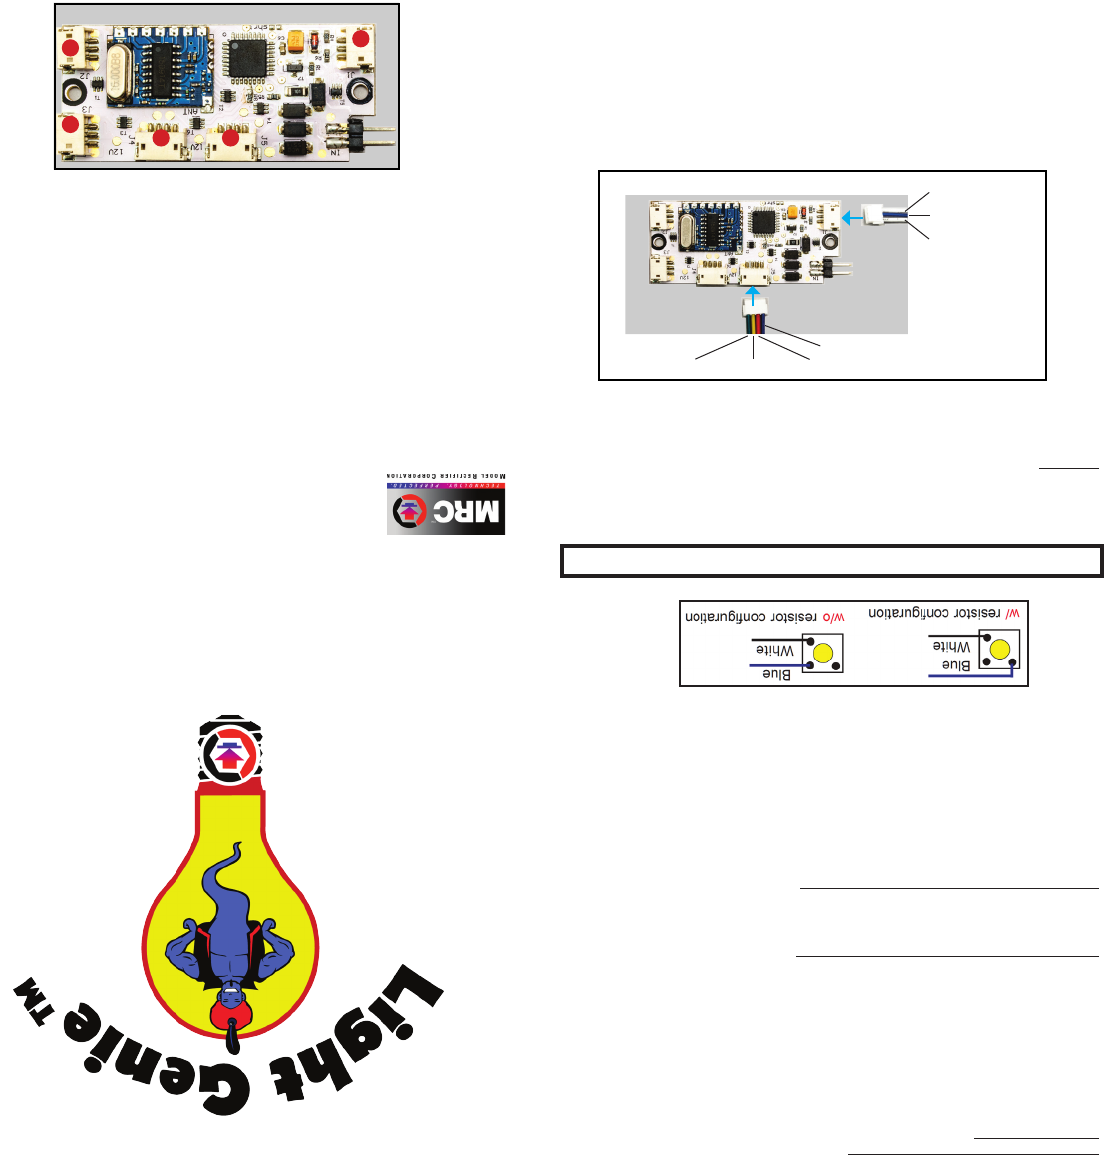
Plug the Light Genie™ Plugs into the Genie Receiver. (Fig 2)
Shared Common Wire
Shared Common Wire
To Lighng Output To Lighng Output To Lighng Output
To Lighng Output
To Lighng Output
(Fig 2)
How it works
Light Genie™ Includes a Transmier and 12 output Receiver.
The Receiver operates with 5 zones of control.
Each Zone has the ability to be remotely turned on or o, adjusted for brightness,
and set to one of over 20 dierent lighng eects. (Fig 1.)
Lighng eects to select from: Constant on, ashing, strobe eect, sequenal
lighng, ickering, and more.. There are more than 20 lighng eects to choose
from. See enclosed chart.
ZONES
Zone 1 controls outputs 1 and 2 - (2 Outputs)
Zone 2 controls outputs 3 and 4 - (2 Outputs)
Zone 3 controls outputs 5 and 6 - (2 Outputs)
Zone 4 controls outputs 7, 8 and 9 - (3 Outputs)
Zone 5 controls outputs 10, 11 and 12 - (3 Outputs)
Light Genie™ Contents
1 – Genie Receiver
1 – Genie Transmier Remote
1 – 2-Pin Power Connector w/Leads
3 – 3-Pin Connectors w/Leads
2 – 4-Pin Connectors w/Leads
2 – Mounng Screws
1 – Velcro Strip
2 – AAA Baeries
12 – Resistors for LEDs and 3.5v Bulbs
(Fig 1)
1
2
3
54
Technical Specicaons/Notes
Light Genie™ Receiver
Maximum Output = 1 Amp/Light Genie™ Receiver
Input = 12v/Maximum = 18v
Maximum 100mA per Output Channel/12v per Output
WARNING: Only Use 12-16V (30mA) Incandescent Bulbs
Supplied Resistors = 470 ohm each
* Light Genie™ is equipped with a power regulator to protect your lights. Using a higher voltage power
supply (beyond 13v), will NOT increase the brightness of any lights.
Remote Transmier = 90' Operaonal Range
Incandescent Bulb Specicaons & LED Specicaons
Up to 24 Bulbs with Series wiring (12-14v – 30 mA)
Up to 48 LEDs/3.5v Bulbs with Series wiring (20 mA)
Resistor Usage for LED’s and 3.5v Incandescent Bulbs
One to Three LEDs/3.5v Bulb in a Series (per Output) – One Resistor Required
Four LEDs/3.5v Bulb in a Series (per Output) – NO Resistor Required
A combinaon of bulbs and LED’s may be used. Performance may vary based on project
conguraons.
Some LED’s come with a resistor pre-wired. Using mulple LEDs in a series will result in
dimmer lighng. To increase brightness, remove their respecve resistor(s) to make them
brighter. Keep in mind, one is sll required as menoned previously.
Light Genie™ surfaced mounted LED’s come with a built in resistor, but can easily be
congured to operate without, so that they may be used in a series.
DCC Notes
Light Genie™ is DCC equipped, and does not need an addional decoder purchase. See our
website for more informaon about DCC usage and addional features.
PLEASE READ INSTRUCTIONS IN THEIR ENTIRETY PRIOR TO USE
Light Genie™ Supplemental Products
No. 025001 – Mul-Acon Transmier w/LCD (Control 4 Receivers)
No. 025201 – 1 Amp AC Power Supply
No. 025300 – LED Red (4 Pack)
No. 025301 – LED Bright White (4 Pack)
No. 025302 – LED Golden White (4 Pack)
No. 025303 – LED Amber (4 Pack)
No. 025320 – LED Mini White (4 Pack)
No. 025321 – LED Mini Red (4 Pack)
No. 025322 – LED Mini Amber (4 Pack)
No. 025323 – LED Mini Green (4 Pack)
No. 025100 – 3 Pin Connectors w/ 10” Leads (6 Pack)
No. 025101 – 4 Pin Connectors w/ 10” Leads (2 Pack)
WARNING: PARALLEL WIRING SHOULD NOT BE ATTEMPTED.
If your project requires parallel wiring, visit our website or contact MRC for more informaon.

Command Light Genie™ Wireless Transmier
Time for Light Genie™ to grant your wishes. Use the 2.4ghz remote to control
each of the 5 zones on a single Light Genie™. Turn each lighng output On/O,
Brighten/Dim, Flash, Strobe…whatever lighng eect you can think, Light Genie
can grant. Follow the chart provided in this instrucon booklet.
Operaon
To turn on or o a zone, simply press the desired zone #.
To control dimming/brightness of the last used zone. Press ▼ to dim the zone.
Press ▲ to brighten the zone.
Powering Light Genie™ Wireless Receiver & Control Set
Aer connecng all the desired lighted accessories to the Light Genie™ receiver, supplying power
to the receiver and project lights is easy.
Check to make sure all the power is o on your project
Using the supplied Genie 2-Pin Power Plug (note larger plug size), connect the lead wires to the
oponal Light Genie™ 1-amp AC Wall Adaptor (#025201); exisng DC power terminals, AC power
terminals, or DCC power source. (Fig 3).
Plug the terminal into the power plug port.
Make sure to use proper connecon technique to avoid accidental electrical shorts from cross
wiring.
Mounng Light Genie™ Wireless Receiver
Aer all connecons are complete. Select the desired mounng locaon for the Genie Receiver.
Apply the VELCRO® strip to the at side of the board. Ax to mounng area. Use the two
screws provided to secure the receiver. Be careful not to ghten the screws all the way.
Power Up Light Genie™ Receiver and Transmier
Aer all plugs are connected, and the receiver is properly mounted. It is safe to power on the
Light Genie™ receiver by connecng the power source to an outlet. All lights will turn on once
the receiver is powered.
Binding The Light Genie™ Receiver & Transmier
The Light Genie™ receiver and transmier must bind prior to operaon.
1. Install two AAA baeries into the transmier. If baeries are already installed, remove
and re-install. The LED on the transmier will begin to ash.
2. Plug the 12v power supply into Light Genie to ensure power is on.
3. Binding is complete when the LED light has stopped ashing (o). If binding fails, repeat
the above procedure.
4. Press any of the zones (ulized). The lighng feature should turn on/o.
Light Genie™ is now operaonal. The receiver and transmier will remained bonded unl the
baeries are removed. If you have mulple Light Genie™ sets, repeat the above steps.
Changing Light Eects and Light Rates
1. Press buons ▲ and ▼ at the same me. All zones will shut o (lights will be
out). This indicates you are in light eect mode.
2. Press the zone # once to set its lighng eect. The zone will light up.
3. Cycle through the lighng eects, by pressing the zone # repeatedly. Observe
each light eect aer pressing the zone number.
4. To change the light rate speed, press ▼ to slow the light rate or press ▲
increase the light rate.
5. To set other zones, simply repeat step 2 and step 3.
6. Once all zones are set. Press buons ▲ and ▼ at the same me. All zones will
light up. This indicates you are out of light eect mode.
Series Wiring Instrucons
Using Mulple LEDs/Bulbs per Output
Lights may be congured individually or in a series. Most LED’s are low voltage (3v), which
require a resistor to be installed with typical 12v power supplies. Depending on the LED
product used for your project, there may be pre-installed resistors. If not, Light Genie™
comes with resistors to install with your LED’s.
Adding resistors to an LED/3.5v Bulb, protects the lights and receiver. This will properly
match the voltage for each Light Genie™ output. 12v - 14v bulbs do not require a resistor
when used individually. Please see Fig.4
Parallel Wiring w/12v Bulbs
EXAMPLE: Paired Trac Lights
Series Wiring w/LEDs
EXAMPLE: A Row of Houses
Standard Wiring w/12v Bulbs
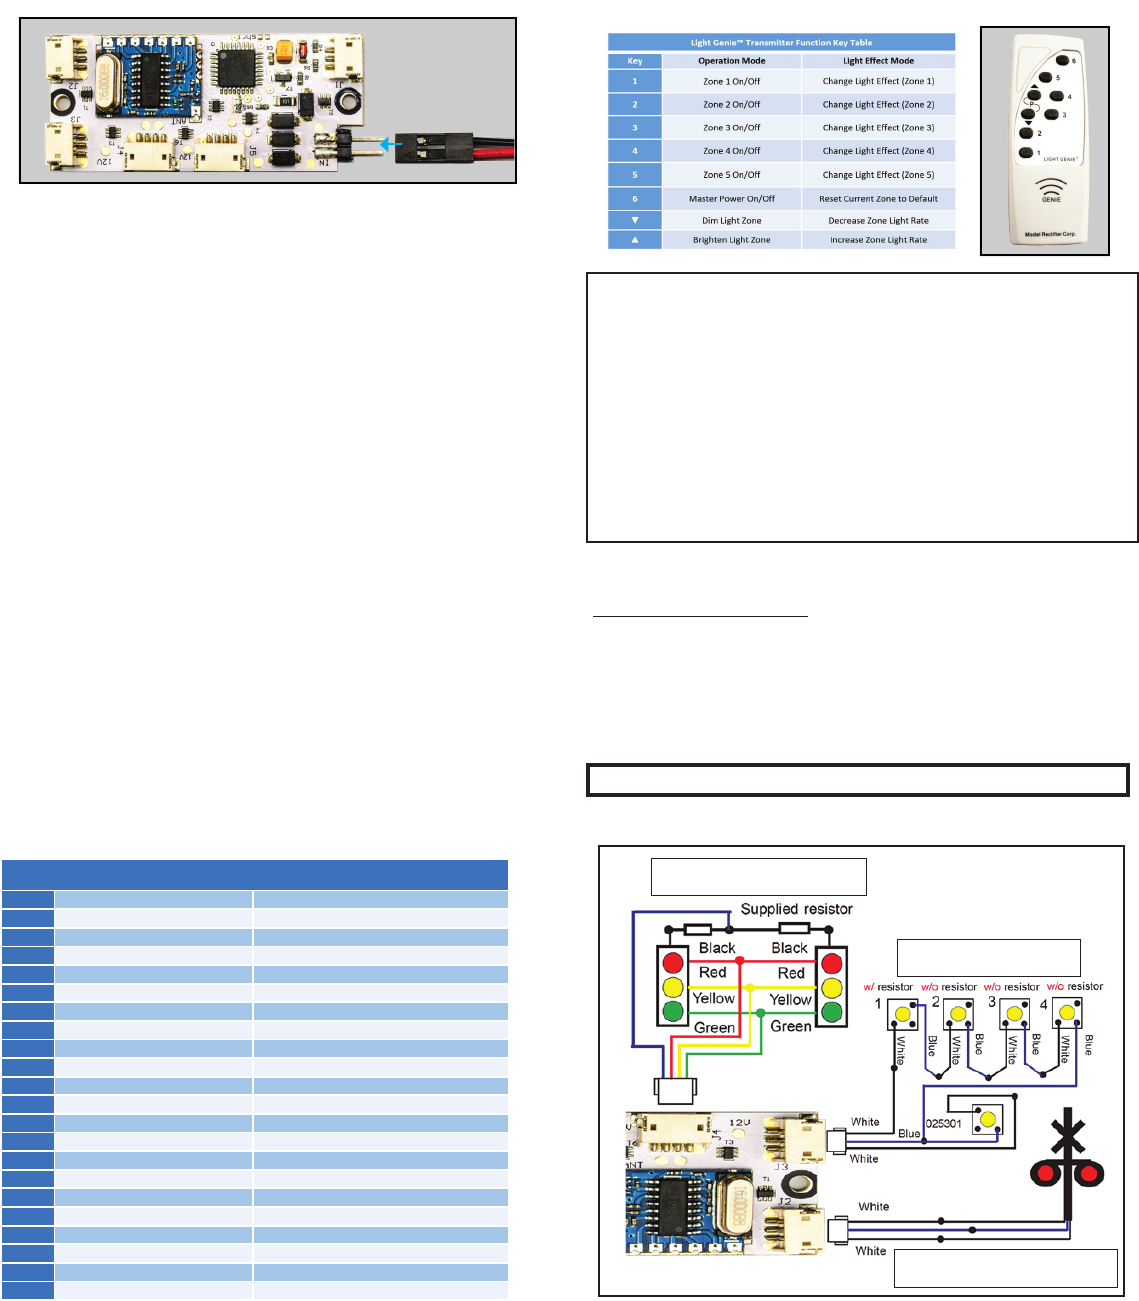
EXAMPLE: Railroad Crossing Signal
Light Effect Chart
Effect #
Light Effect Applications
0
On/Off
1
Sequential Flash w/Pause
Arrow Lighting
2
Crossing Signal/Traffic Street Light*
Railroad Crossing Signal/Street Traffic Lights
3
Alternating Flash
-Always On
Police Car
–Head/Tail Lights
4
Simultaneous
Flash
Warning Lights, Towers, Runway Lights
5
Sequential Flash
Roadside Flashers
6
Gyra light
7
Gyra
light on at the same time
8
Oscillation
Cell Phone Towers/Airplanes
9
Oscillation
(Simultaneous)
10
Stepped Lighting
Dim
-Medium-Bright Lighting Cycle
11
Stepped Lighting (Parralled)
12
Single Strobe (Varied/Alternating)
13
Single Strobe (Simultaneous)
14
Double Strobe (Varied/Alternating)
15
Double Strobe (Simultaneous)
16
Rotating Beacon
17
Rotating Beacon (Simultaneous)
18
Flicker (Pattern 1)
Camp Fire/Fire Place/Furnace/Foundry
19
Flicker (Pattern 2)
Gas Lamp/TV
20
Varied Intensity
Arc Welding
WARNING: PARALLEL WIRING SHOULD NOT BE ATTEMPTED.
(Fig.4)
For more zone applicaon examples using Light Genie™ visit www.modelrecer.com
The diagram below (Fig 4.) is an example of various Light Genie™ applicaons and wiring.
If your project requires parallel wiring, visit our website or contact MRC for more informaon.
(Fig 3)
This device complies with Part 15 of the FCC Rules. Operaon is subject to the following two condions:
(1) This device may not cause harmful interference, and (2) This device must accept any interference received, including
interference that may cause undesired operaon.
WARNING: Changes or modicaons not expressly approved by the party responsible for compliance could void the user's
authority to operate the equipment.
NOTE: This equipment has been tested and found to comply with the limits for a Class B digital device, pursuant to Part 15 of the
FCC Rules. These limits are designed to provide reasonable protecon against harmful interference in a residenal installaon.
This equipment generates uses and can radiate radio frequency energy and, if not installed and used in accordance with the
instrucons, may cause harmful interference to radio communicaons. However, there is no guarantee that interference will not
occur in a parcular installaon. If this equipment does cause harmful interference to radio or television recepon, which can be
determined by turning the equipment o and on, the user is encouraged to try to correct the interference by one or more of the
following measures:
Reorient or relocate the receiving antenna.
Increase the separaon between the equipment and receiver.
Connect the equipment into an outlet on a circuit dierent from that to which the receiver is connected.
Consult the dealer or an experienced radio/TV technician for help.
RF WARNING STATEMENT:
The device has been evaluated to meet general RF exposure requirement. The device can be used in portable exposure condion
without restricon.